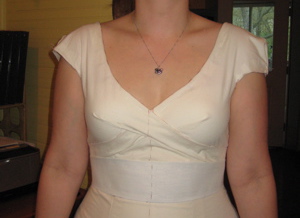
Normally muslin fittings involve a lot of cutting, slashing, marking, pinning etc, while adjusting the muslin to flatter the bride and achieve that perfect fit as well as keep the integrity of the design and aesthetics. I am always cautious when I have a bride put on a muslin for the first time, warning them that this is NOT what their dress is going to look like, but just a guide to get us to what the dress will become.
Leah’s fitting went extremely well. We definitely had some adjustments to make, but the silhouette, even in this early stage, looked really beautiful and flattering on her. We were both pretty impressed at the work we had done together to come up with this design!
So I notated, marked and pinned up the muslin corrections for our next fitting. After correcting the patterns, it not unusual to then have to make an entirely new muslin for the second fitting. In Leah’s case, I would be able just to do alterations to the existing muslin, replacing only a few pieces for our second muslin fitting. We decided that we would also try a new option for the sleeve as well as the old one, to see which was more flattering.
You can see them in the pic above. (spoiler alert: we chose the one on the left.)
Two days later, we had our second fitting and with only very minor adjustments left to be made this time, we both felt confident enough to move onto the real fabric!


