Duplicating the Vintage Dress’s Pattern (without taking it apart)
In my previous post, I introduced Jenn and the custom bridal wear project(s) for her wedding weekend. Check out the full story for all the deets, but to catch you up quickly: I’ll be transforming her mom’s 1970 polyester wedding dress (sewn by Jenn’s mom’s mom) into a special top for Jenn’s rehearsal dinner outfit.
When the story picks up (in June 2019) after her wedding date announcement, I hadn’t seen Jenn in nearly 2 years and would only have a few chances to see her before the wedding. Pretty much nothingabout this commission is how I work with my clients, but Jenn is an old friend so I did what I could to “make it work”!
I had no measurements and no sketch (we had not even brainstormed the new design!), but I did have the vintage dress. So I decided to get started by duplicating its pattern, without taking it apart. Then I’d use the pattern to make a mockup for Jenn to try on, which could be ripped and pinned and drawn all over the next time we meet!
A little tour on the table
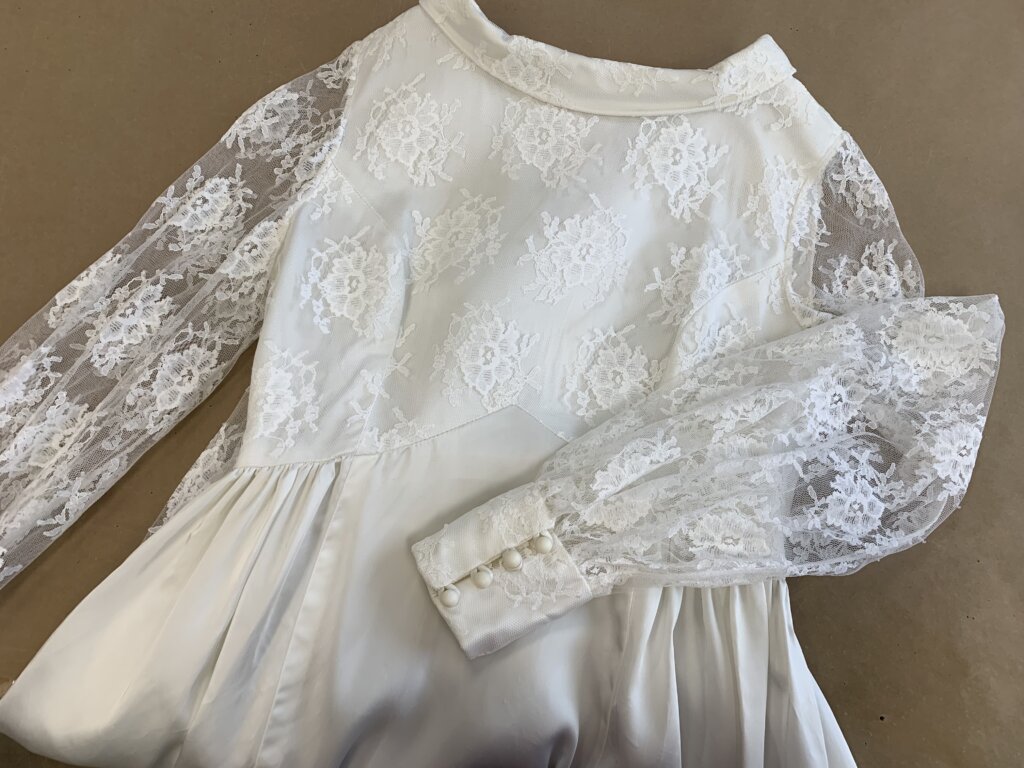
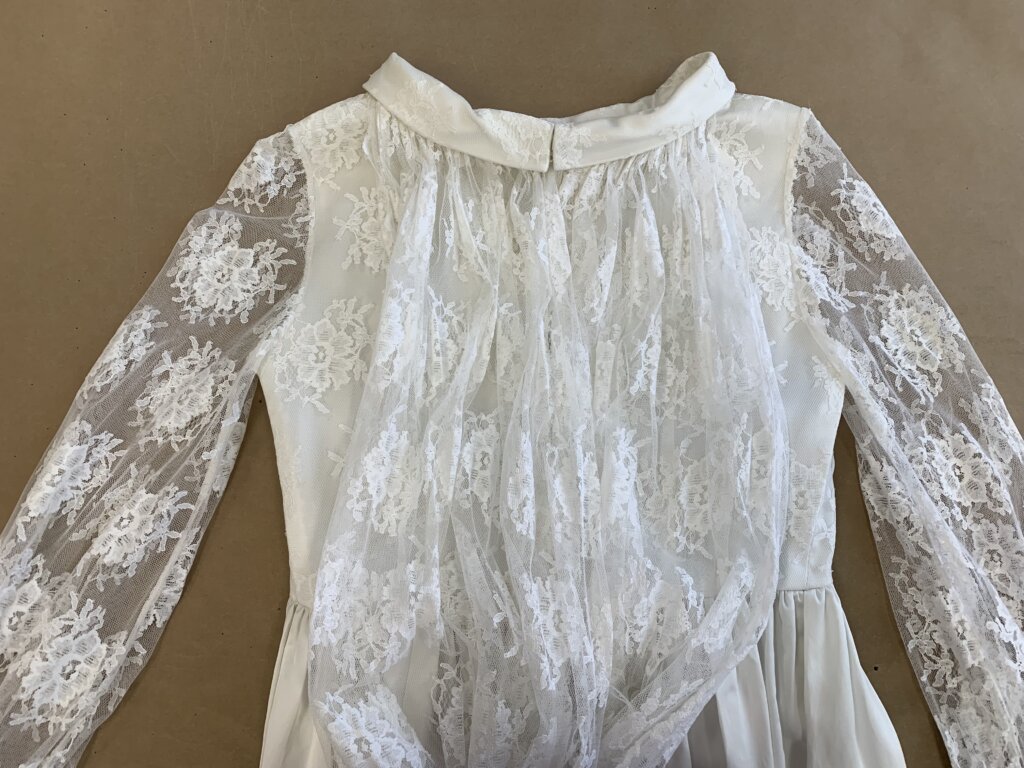
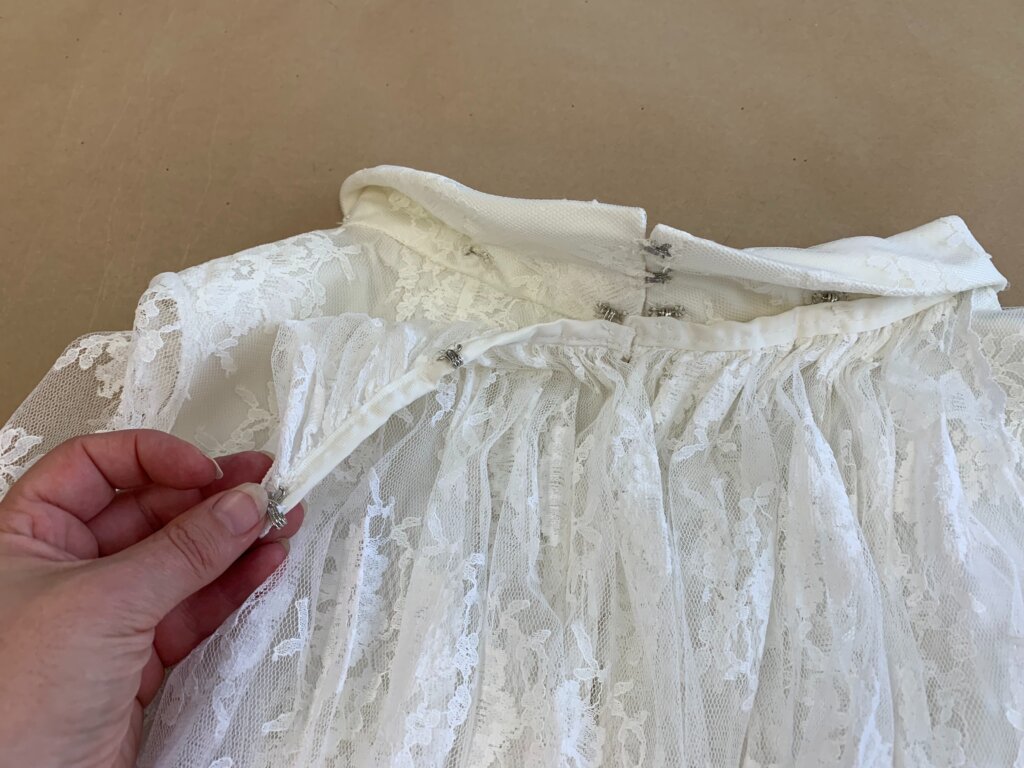
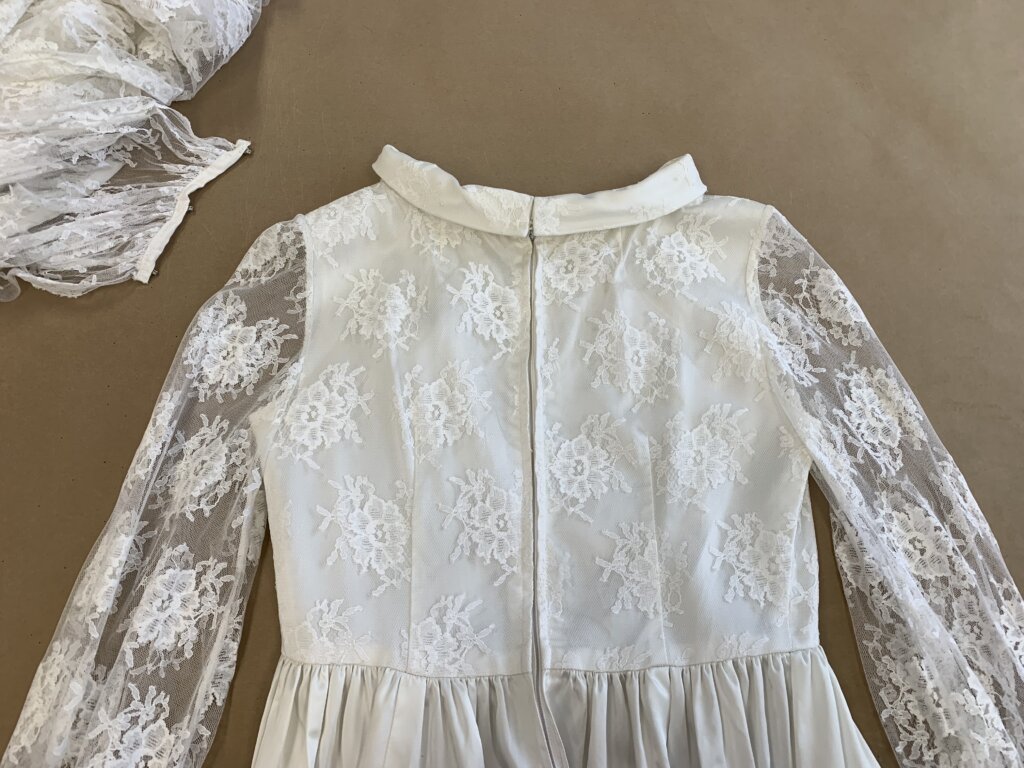
But first, here’s a little closer look at the dress and its details!
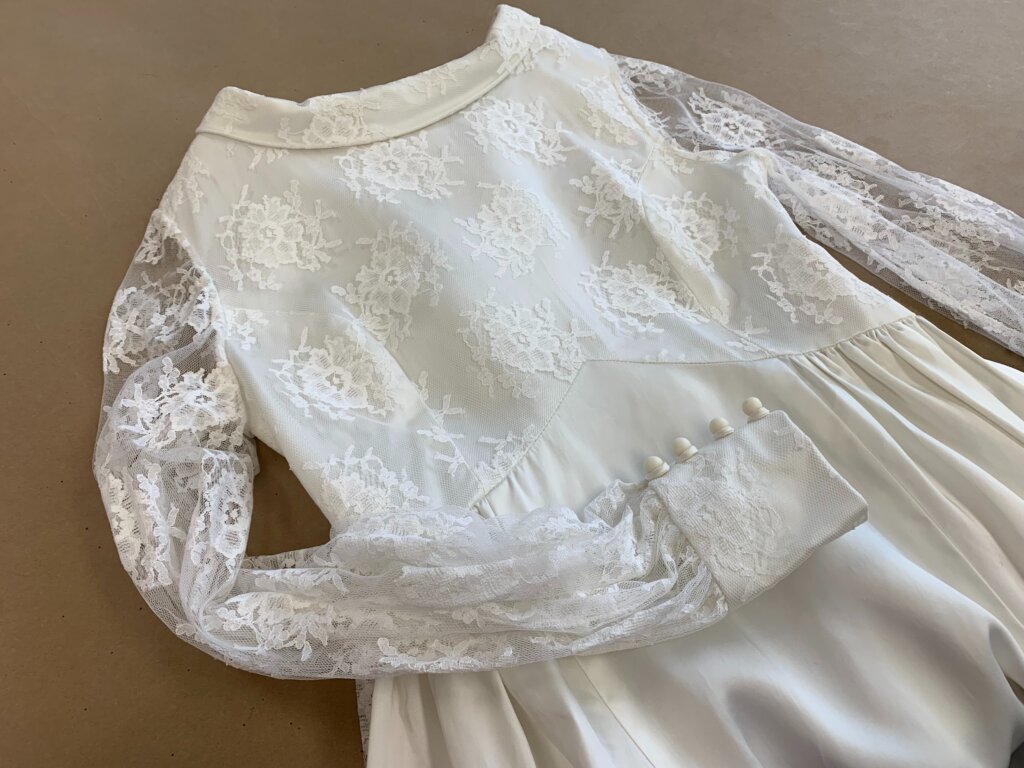
The front of the dress was really cute with a rolled collar, peaked empire waist, sheer lace sleeves, and button cuffs.
There was a lace train (about twice as long as the dress itself!) attached along the back neckline…
…that was removable via little hidden hooks and bars (lovingly hand sewn by grandma)…
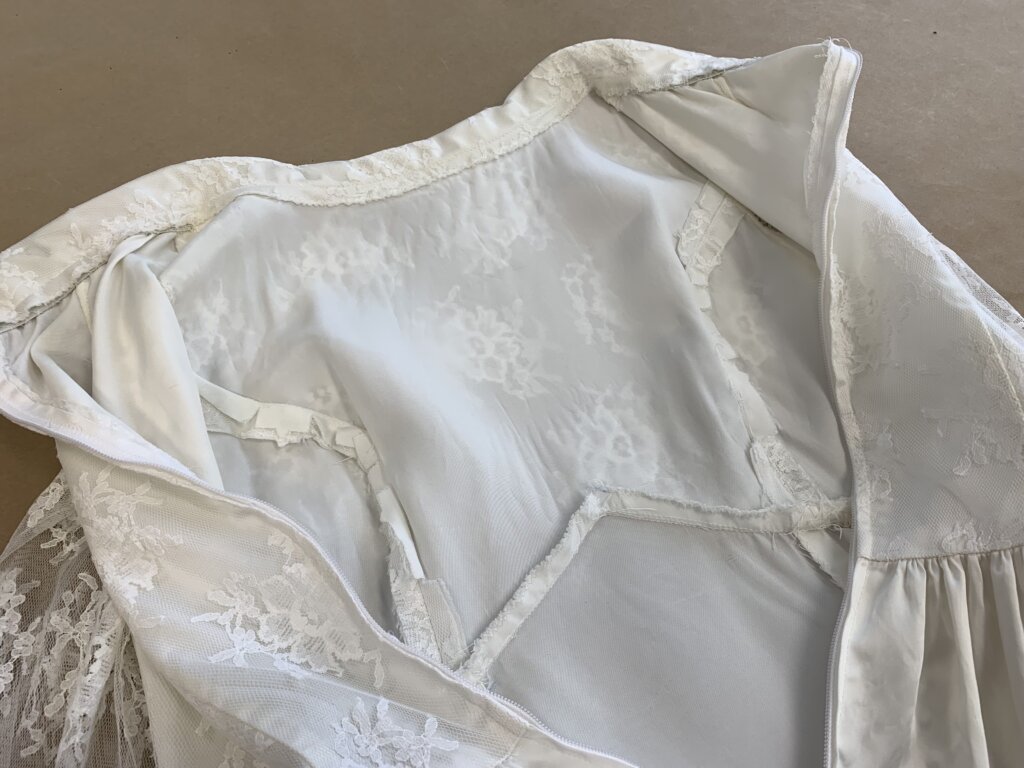
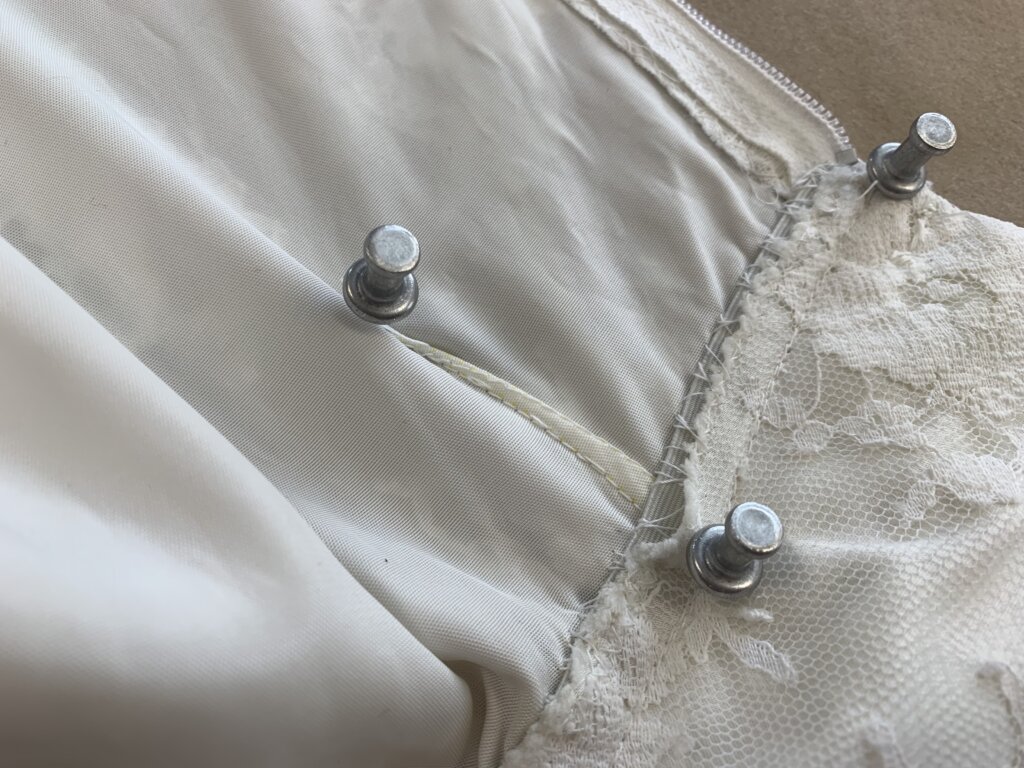
…to reveal a metal zipper down the back (lovingly machine stitched by grandma).
And if you’ve been following my blog for the last decade+, you’ll know that I love the insides as much as the outside and that I love seeing the “mark of the maker” in handcrafted garments.
Peeking inside, all the clips and unfinished edges makes my heart flutter almost as much as the seams with the zig-zagged and/or pinked finishes! The bits that were obviously hand stitched, were of course my favorite to peep. It’s so fun to think about Jenn’s grandmom stitching this up for her daughter’s wedding day!
This process has lots of names- all of them kinda awkward. The most common is: “Rubbing off a pattern” or the “Rub-off method” etc. (Sounds kinda gross! And I don’t do any rubbing… so maybe that’s not the name for what I do?) It can also be called “Cloning”, “Duplicating a Pattern”, “Recreating a Pattern”, “Taking a Pattern” from an existing garment… There’s gotta be something better…. I learned the techniques while earning my MFA in Costume Production (Class of 2001) but I can’t remember what we called it. I think I’ve hesitated to share this method in the past, simply because it doesn’t have a good name (and the most popular name is both gross and makes no sense to me)!
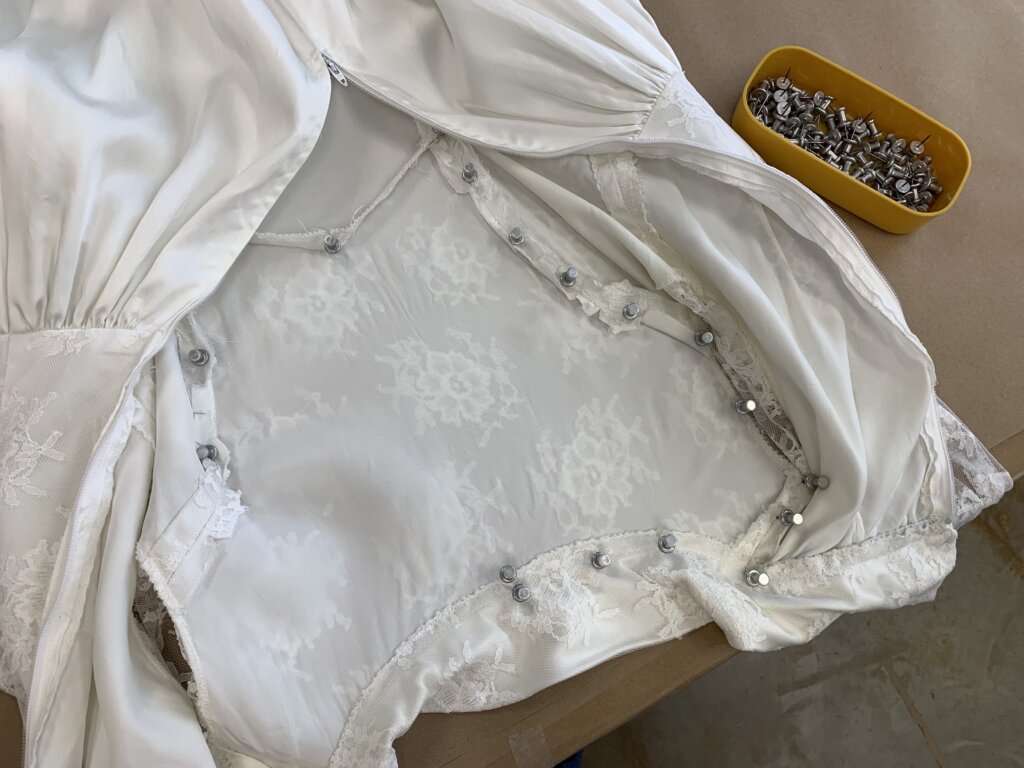
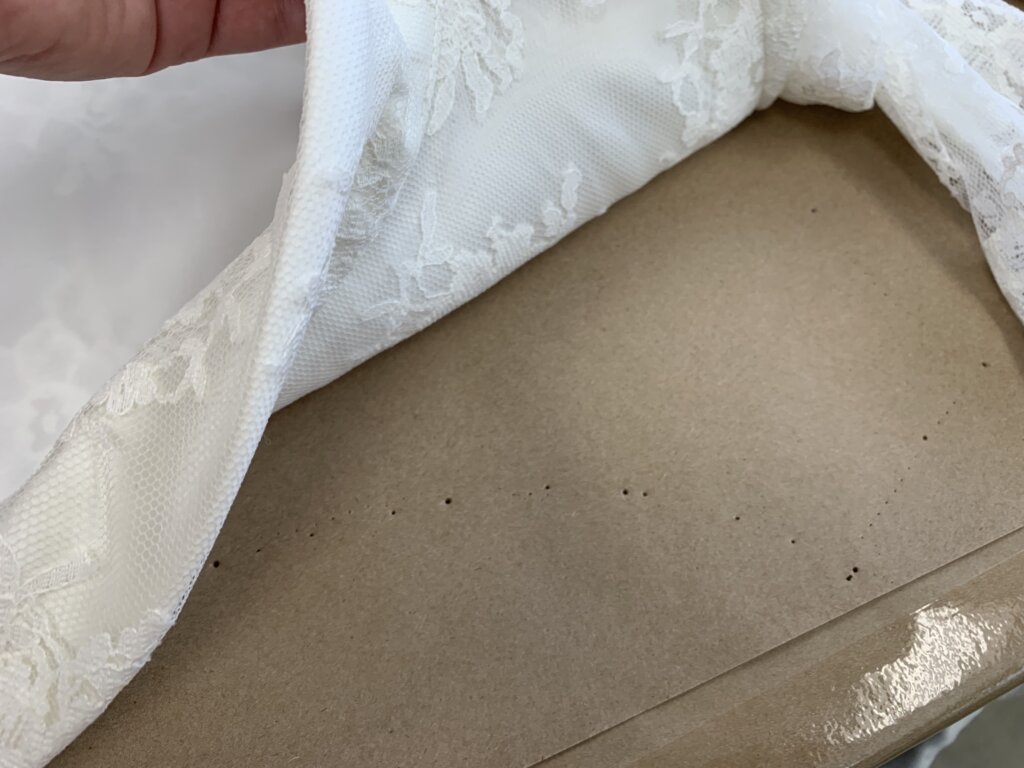
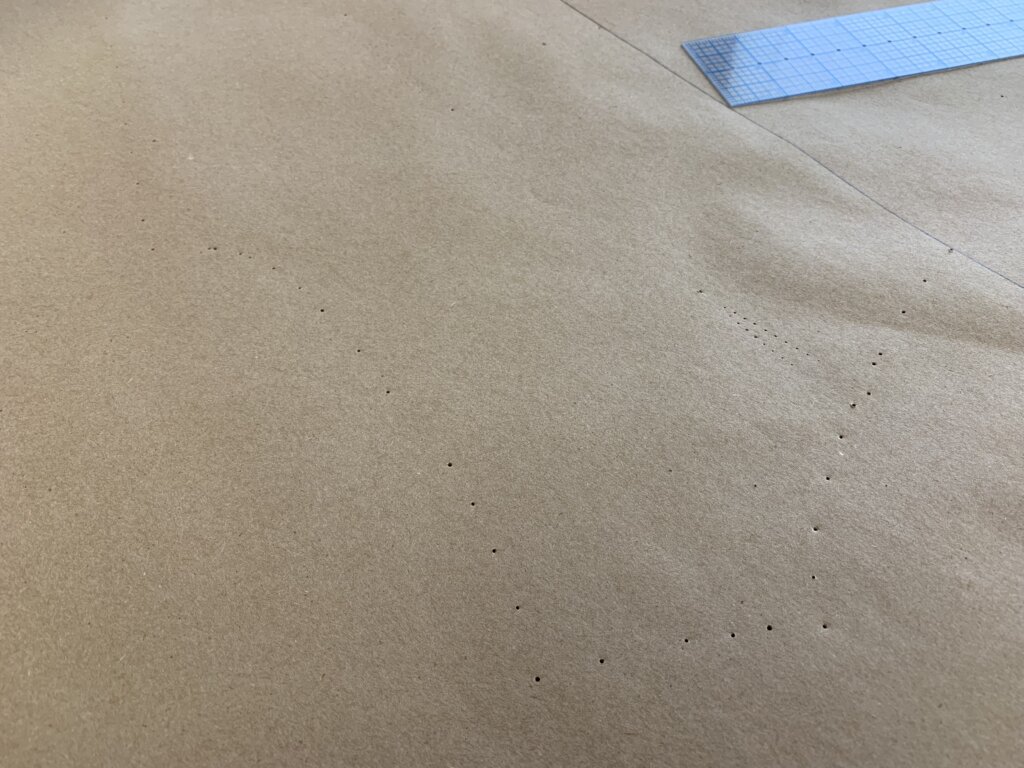
Anyway, what you do in a nutshell is: Flatten the piece of clothing as much as possible without distorting the fabric’s grid and grain. Then carefully pin the pattern piece’s edges onto some paper underneath it (which is easy if you have a pinnable topped table like mine) to trace the shape. Since the piece I started with mirrors itself on the center. I only needed to secure half.
Next, I took my needlepoint spiky wheel and traced along the edges…
…and along the seamlines…
…to reveal a ghost pattern of dotted lines on the paper. Hey, maybe that’s what I’ll call it: “GHOST PATTERNING”!
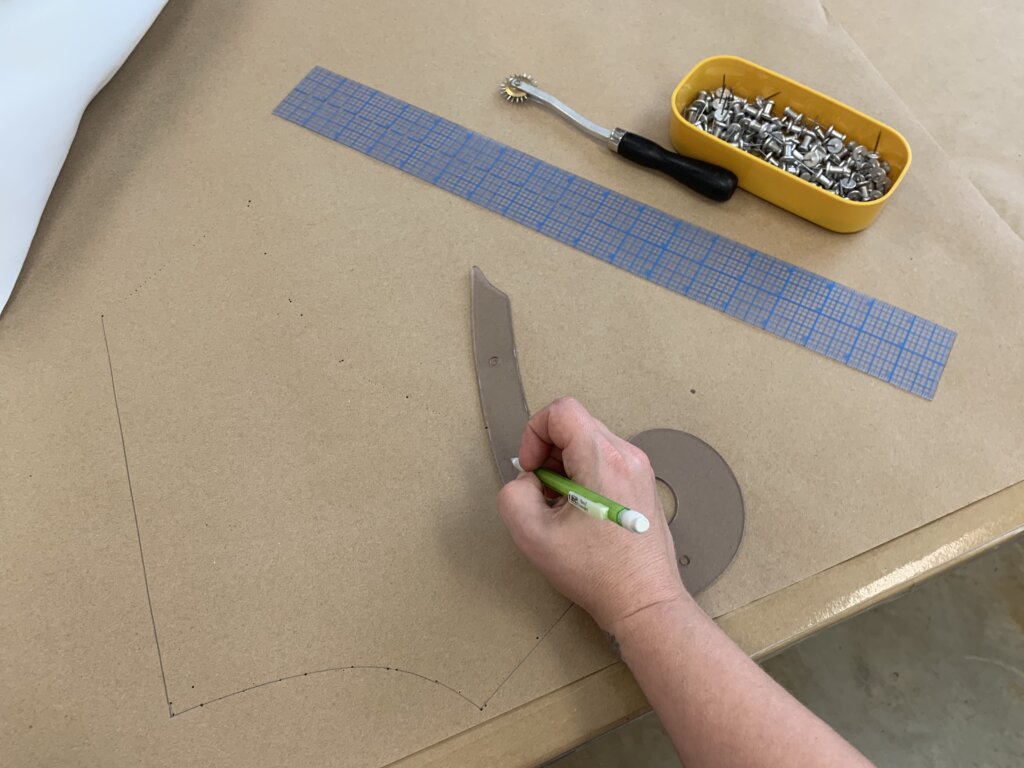
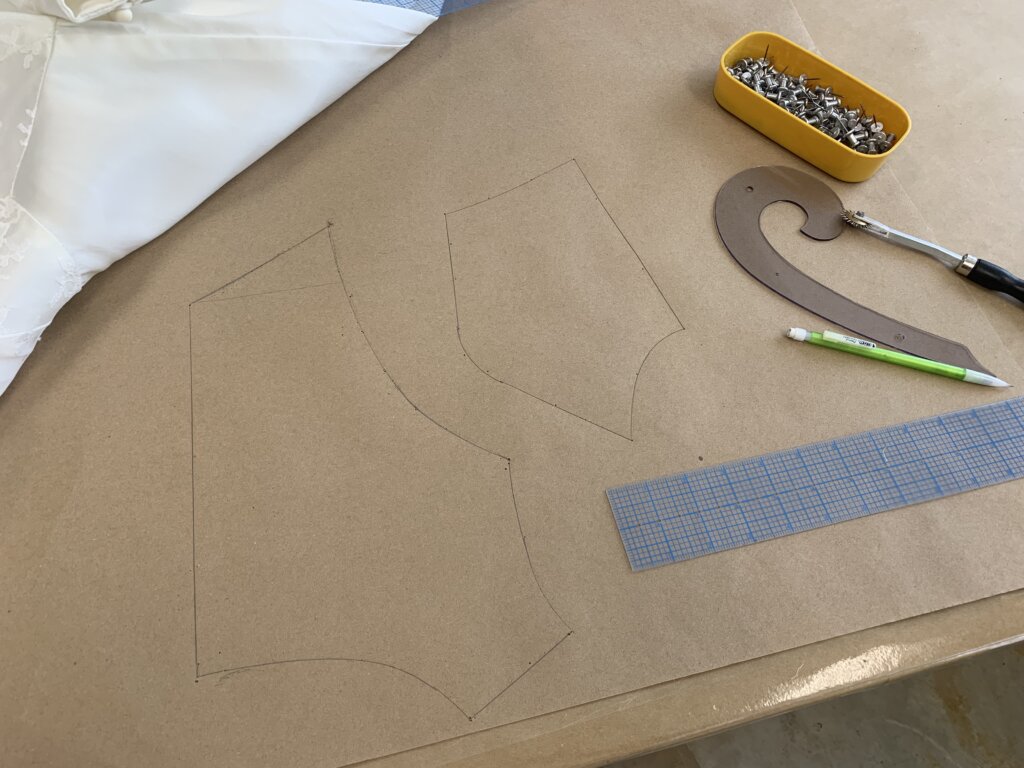
Next, I used my pencil, ruler, and curve to connect the dots and recreate the pattern piece on the paper…
…and repeated this process for the adjoining piece.
Ghosty!
Connect the Dots!
With a little truing and cleaning up still to do, the front bodice was now rubbed off ghost patterned!
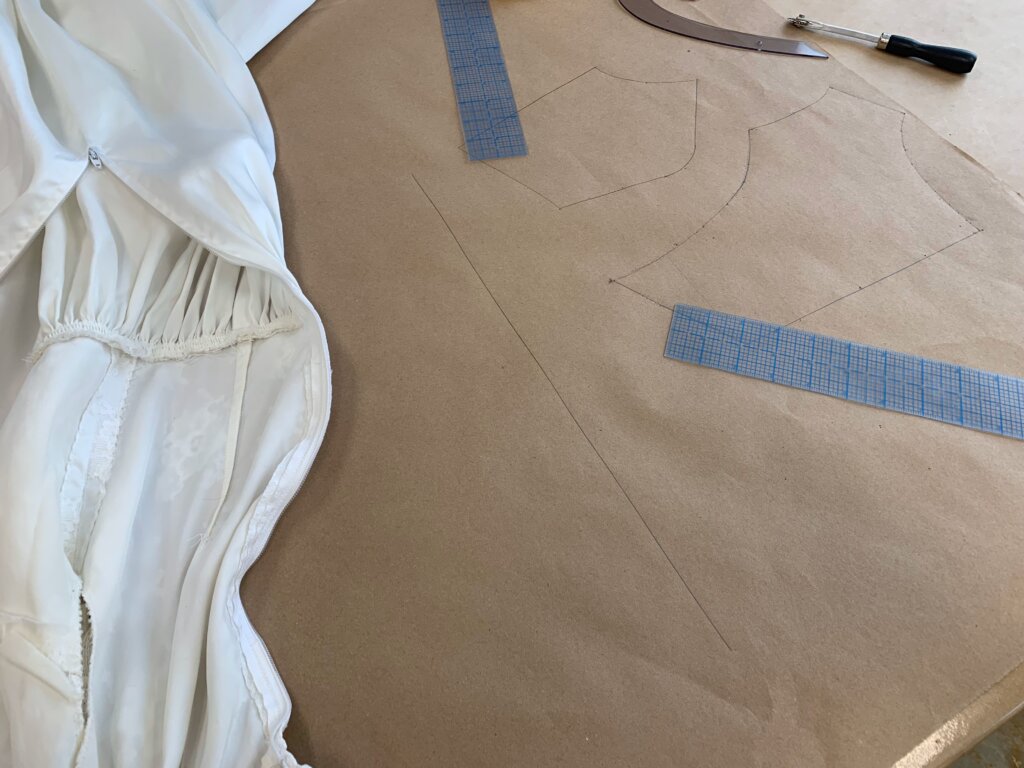
Ghosting the back
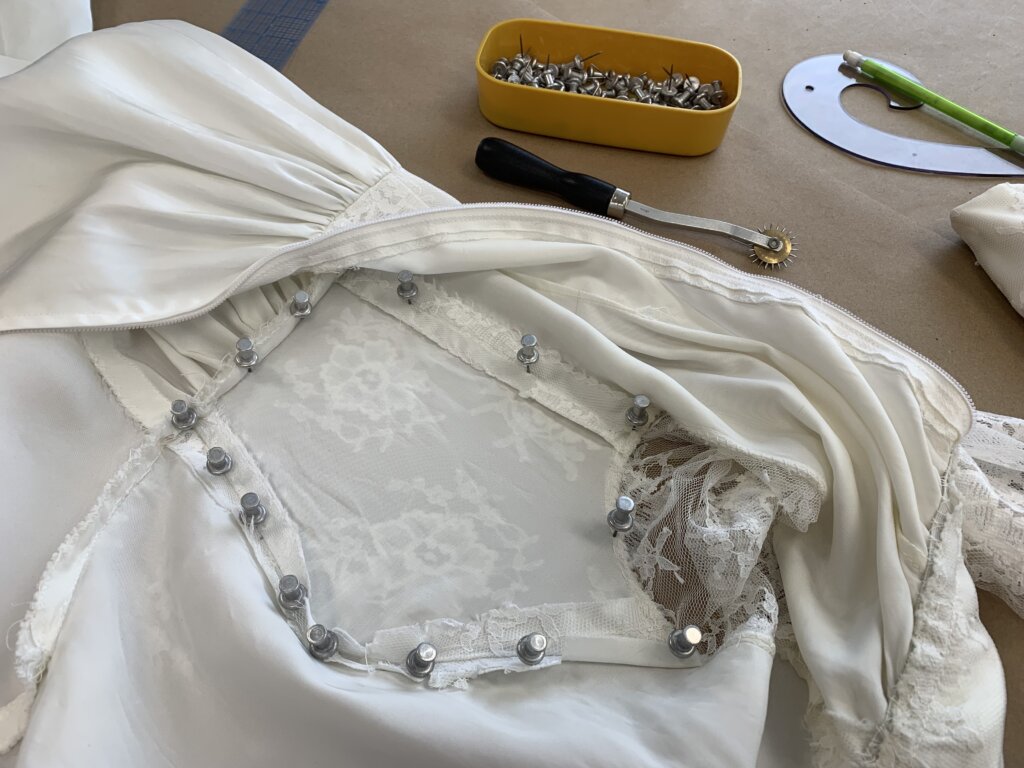
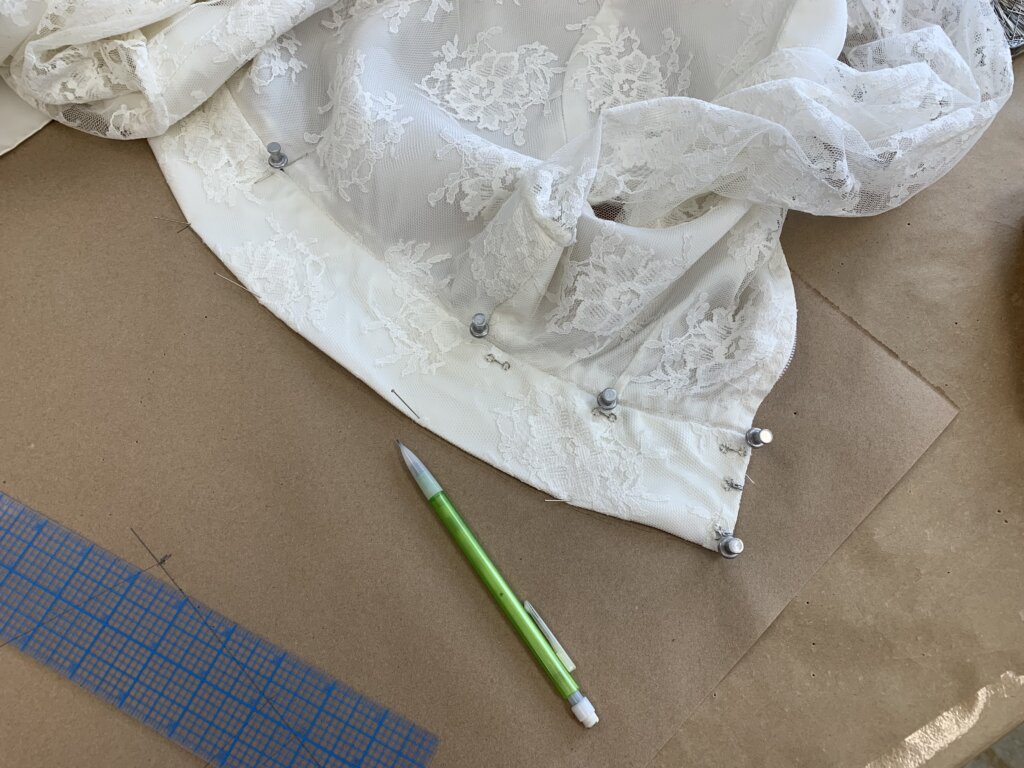
The back was a little more complicated to “ghost” because it has darts, but the process is essentially the same: Flatten the piece of clothing as much as possible without distortion and then carefully pin the pattern piece’s edges onto some paper underneath it.
Here’s how I did it: Since the back seam/zipper was straight and on-grain, I started by drafting a straight line…
… then I pinned the garment edge to this straight line.
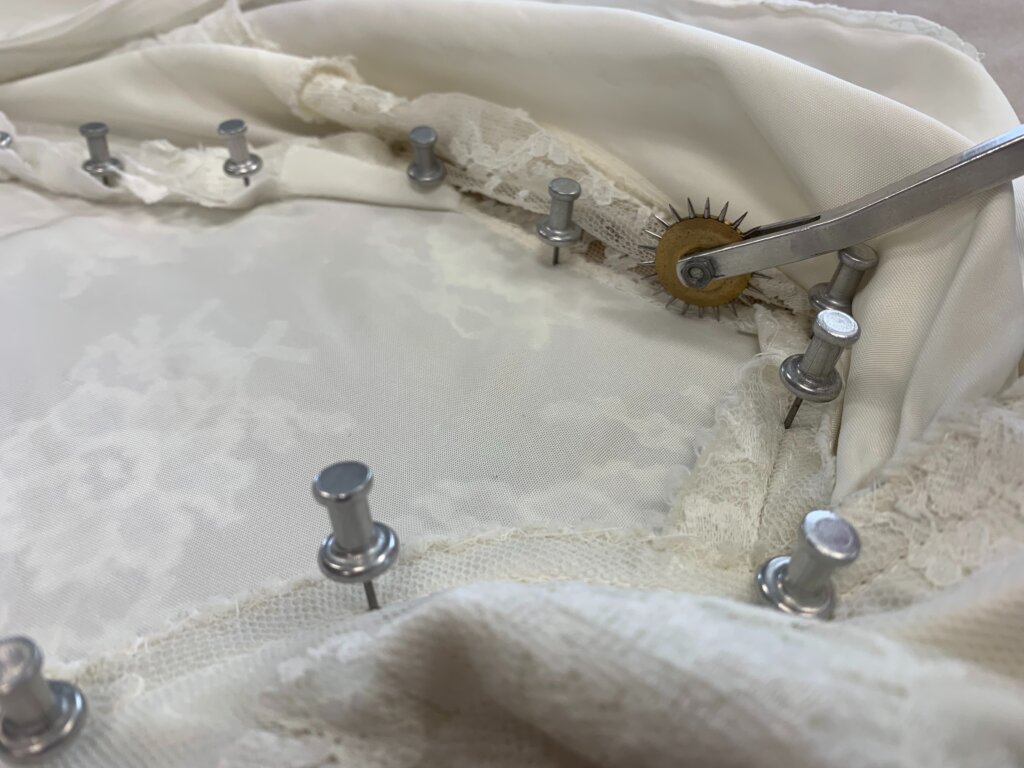
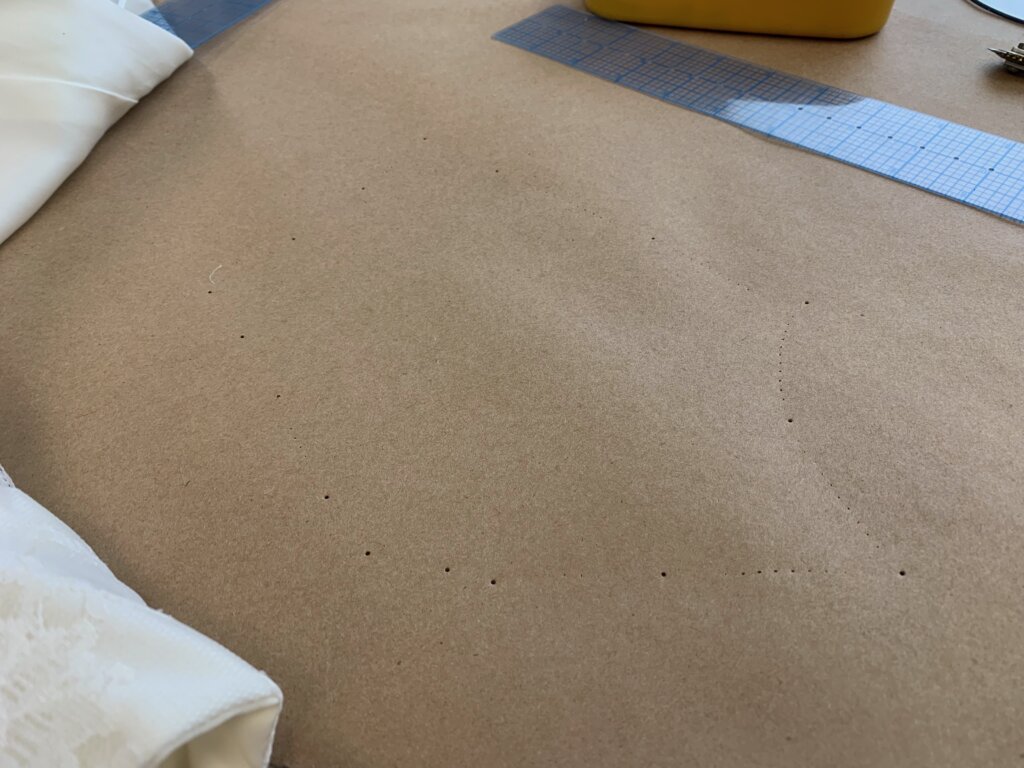
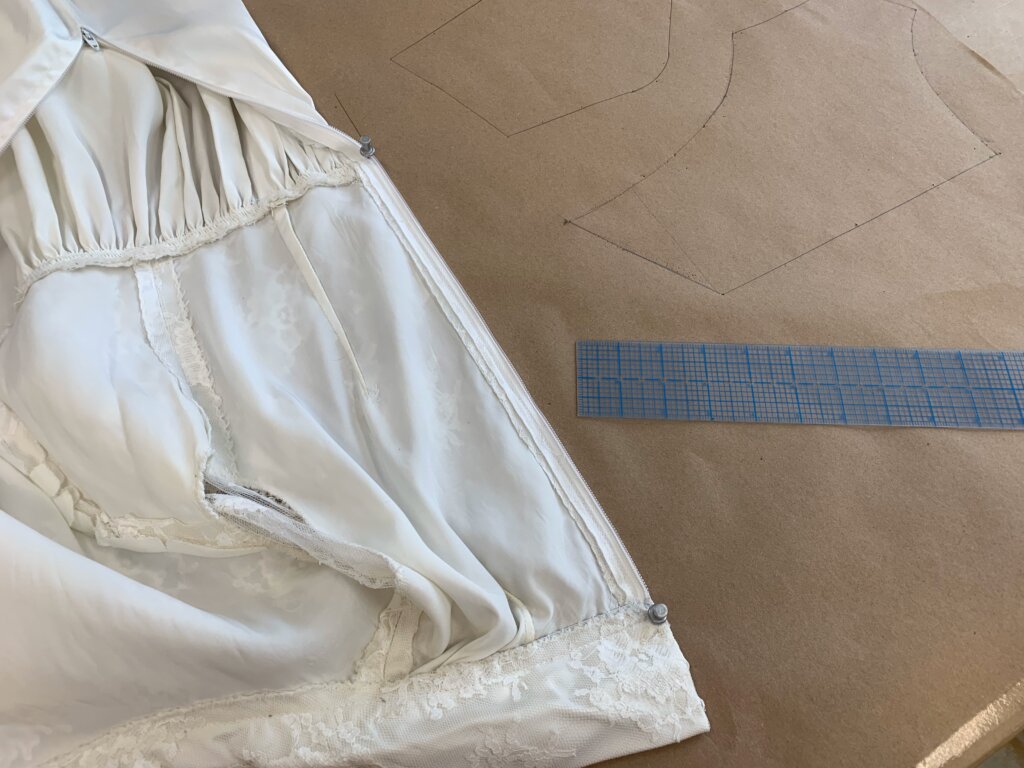
Next, I flattened the garment as much as possible while attached to this line. So this meant I could smooth and secure my way to one leg of each dart and across the middle of the back (but the rest of the neck, waistline and side, would have to wait). I traced only this portion with my spiky wheel.
(OMG- the imperfect little hand stitches and the evidence that she hand basted the darts before sewing them by machine melts me!)
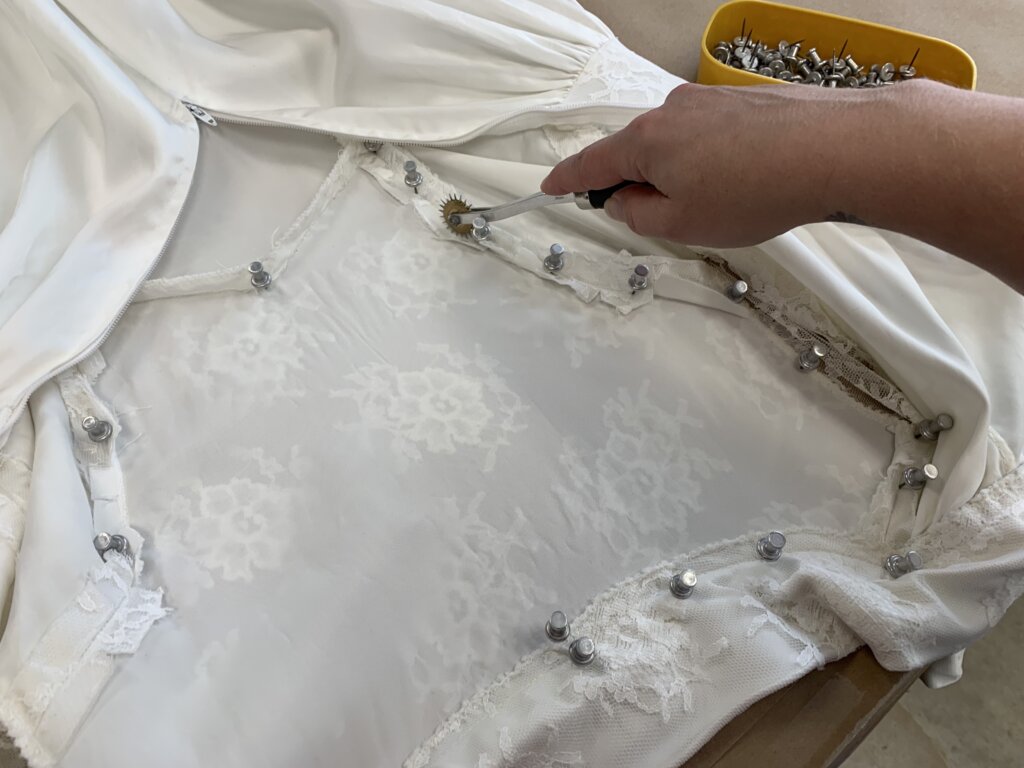
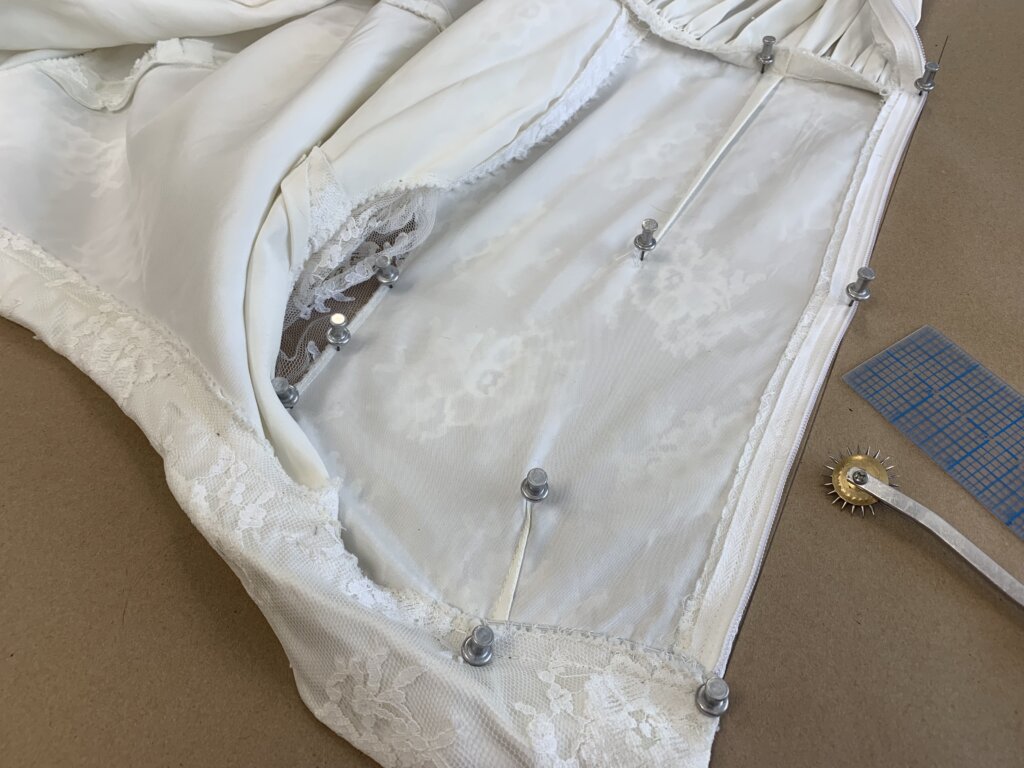
Next, I kept the pins in place at the center armhole edge and the ends of each dart, but released the rest. This allowed me to get the next section flattened and traced. I continued to work around the piece, leaving some pins in and releasing/relocating others, as I traced around the flattened bits with my spiky wheel…
…revealing a ghostly dotted line- including ghost dart intakes!
The collar and skirt
The easiest piece to duplicate was the collar, though it had a different shape than I was expecting. I love learning about vintage garments and how they were patterned.
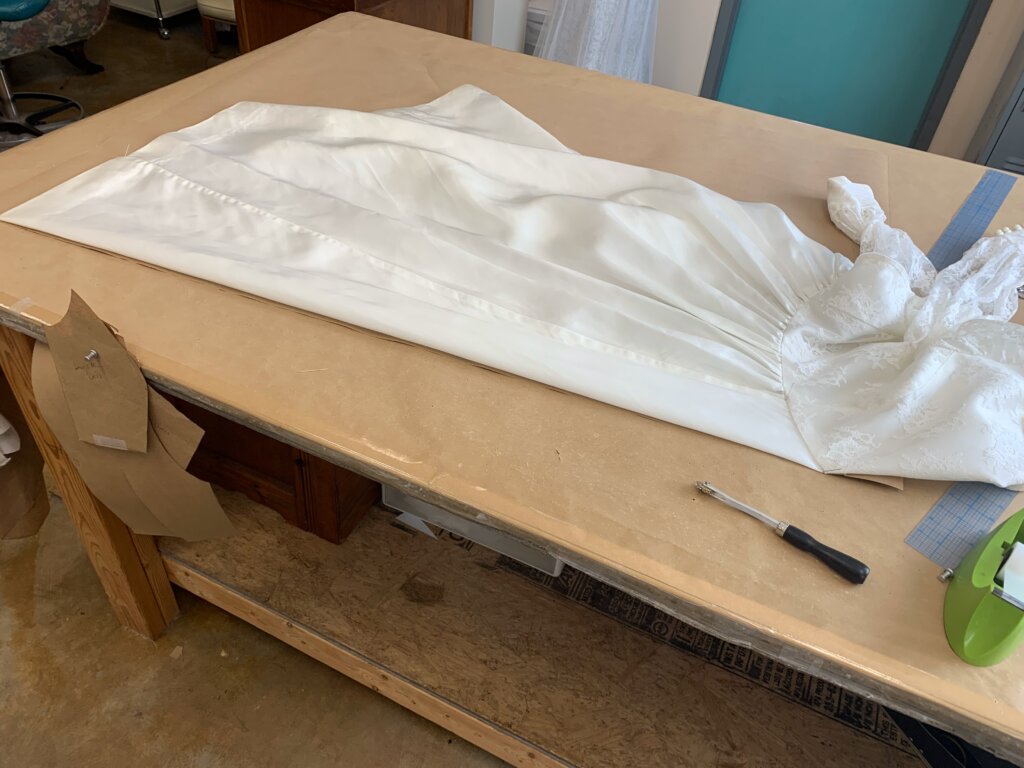
And though I wouldn’t really need it for the top mockup experiment that I was working toward, I did “ghost” a full pattern of the skirt. I thought the data might be useful and that having paper pattern pieces would help me know exactly how much fabric I have to work with. For Jenn’s new top, I wouldn’t be altering the fit of this vintage dress, I’d be crafting something new- using these limited materials.
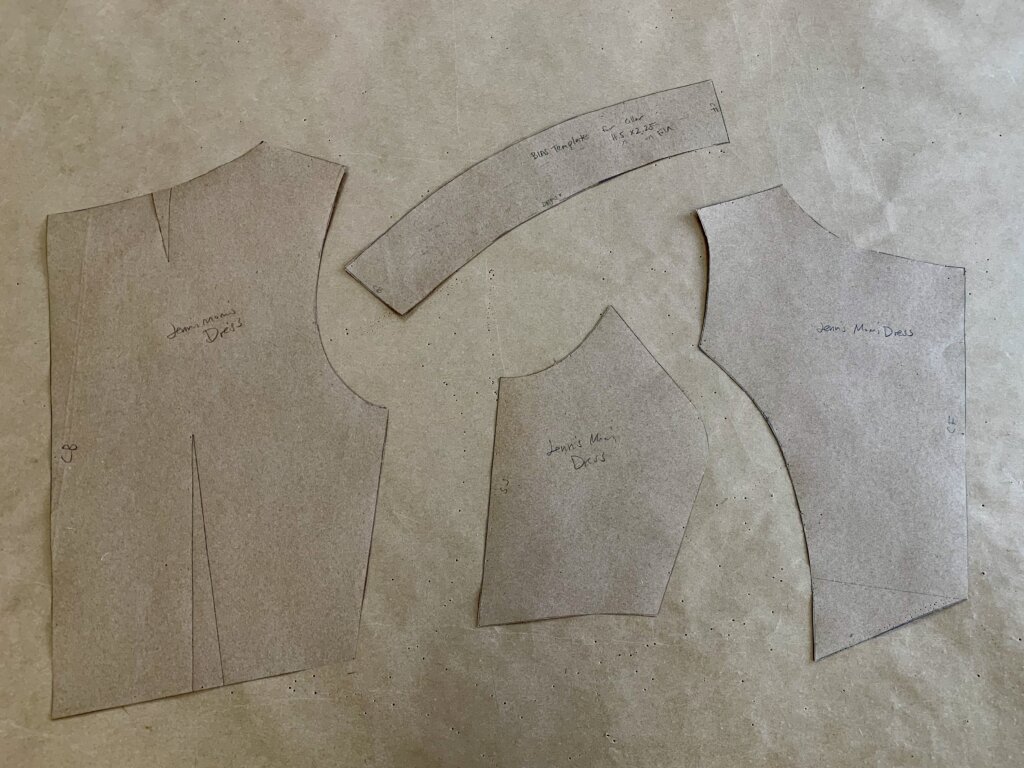
The pattern pieces!
After cutting them out and truing the edges, I now had a pretty close replica of the pattern Jenn’s grandmother used- even though I’ve never seen the pattern before…
…and the dress was undamaged and left fully intact (for now…)
I would use these paper pattern pieces to make a muslin mockup of the top part. Even though I know it won’t fit Jenn or stay this style, I had to start somewhere!
Do you have a vintage or ready-to-wear garment that you love wearing so much it is worn out? And/or a garment that you don’t love as-is, but have ideas for how you’d change it up into something you would love? You might try cloning/ taking/ duplicating/ rubbing off/ ghosting a pattern!
NEXT POST: Follow along as I make the mockup + Jenn comes to try it on and discuss design!
I’m a former professional costumer and couture dressmaker for one-of-a-kind bridalwear located in rural North Carolina, who teaches custom garment sewing to sew-curious solo-sewists online.
My blog mostly follows along with the couture process of how each heirloom-quality custom wedding dress was made from idea to wedding day, as well as personal sewing projects and other couture curiosities.
Welcome to my (temporary) Sewing Studio! Come on in! I love seeing other people’s workspaces and tools, so I thought I’d show you mine. I cleaned up after a big...
Duplicating the Vintage Dress’s Pattern (without taking it apart)
In my previous post, I introduced Jenn and the custom bridal wear project(s) for her wedding weekend. Check out the full story for all the deets, but to catch you...
I Made Myself the Coolest Dress pt. 1 – Pattern Design & Mockup
Though my personal wardrobe is mostly “the dressmaker has no clothes”, when I do make something for myself, it’s usually an epic project. I’m so excited to finally share this...
I’ve been blogging for TEN YEARS now, ya’ll! In “My 10 Year Blogiversary pt. 1”, I share links to each bridal blog series that I’ve created over the past decade....
It’s finally time to share about Deborah’s wedding day! HOORAY! Deborah and Blake were married in November 2017 at a church in Greensboro, NC with the reception at a nearby...
New Bridal Blog Series: My (kinda famous) friend Jenn!
Brooks Ann, Jenn, & Charles January 2017 Going Way Back… To begin my next bridal blog series, let’s head into the Way-Back Machine. And we’ll head farther back than this...
The bridal blog series is back! In each bridal blog series, you meet a new bride and I slowly post-by-post recount the process and share the behind-the-seams story of creating...
The bridal blog series is back! In each bridal blog series, you meet a new bride and I slowly post-by-post recount the process and share the behind-the-seams story of creating...
The bridal blog series is back! In each bridal blog series, I recount the process and share the behind-the-seams story of creating a one-of-a-kind custom couture wedding dress from start...
Sally is someone special. Back in December, I got an email from a dear friend named Sally that I had lost touch with. The subject line: “dear lord i’m getting...
As it starts to get cold, it sure is nice to think about summer! Gin and tonics… BLTs… beach trips… seersucker… Earlier this year, I worked with a bride who...
They say documenting the process triples the production time. (And I work more slowly than most.) My Nimbus was cold.She needed a new coat, sooner than later.
Welcome to Part Two! I’m back to share the nerdy behind-the-seams details of creating my Vanishing Tie Top for the Precious Fabric Challenge. But this photo-filled blog post doesn’t feature...
Do you have a fabric that you’ve been SAVING instead of SEWING? Yeah. Me too. So when Whitney Luckenbill of TomKat Stitchery asked me to be a part of her...
Welcome to my (temporary) Sewing Studio! Come on in! I love seeing other people’s workspaces and tools, so I thought I’d show you mine. I cleaned up after a big...
Welcome back! It’s the series finale! In this third and final post of My Warmup Jacket series, I share the behind-the-seams details of my jacket’s construction and finishing stories!
In this second post of My Warmup Jacket series, I share the behind-the-seams details of my jacket’s patternmaking and mockup stories! And after putting this patterning post together (which was...


4 Responses
This was so helpful. Thank you for sharing.
My pleasure! It was fun.
Thank you that was very helpful Enid
Thanks for following along!