


Welcome to Part Two! I’m back to share the nerdy behind-the-seams details of creating my Vanishing Tie Top for the Precious Fabric Challenge.
But this photo-filled blog post doesn’t feature the Precious Fabric at all!
Before I roll my matelassé, I need to draft (and test) my pattern.
One of the things I love most about custom sewing is that I don’t need to have everything figured out. I’ll learn how it goes together by trying to put it together.
Whereas most home sewing methods start with finishing, custom sewing is a slow progression through a series of reversible adjustable processes. There are lots of opportunities for experimenting and answering all of your questions before employing any permanent stitches.
I also find it super-fun.
Quality over Quickness.
Enjoyability over Efficiency.
Catch up here with Part One: Inspiration & Sketching.
After sketching, my next no-risk, reversible, adjustable step forward revealed itself: Use my sketch to rough out a first draft of (the main bits of) my Vanishing Tie Top’s pattern.
Patternmaking (instead of Fitting)
Patternmaking, especially when it is for yourself, only involves a few simple principles. It’s not a big scary thing full of rules and math. Or at least not the way I do it.
If you were making a pattern that needs to work for lots of people and/or for someone else to follow, you’d have to take a lot of extra stuff into careful consideration. You’d need to follow certain rules so that everyone involved (which may include a factory) (or a home sewist you’ll never meet) can create the garment from your pattern successfully.
But if it is just you sewing for you, there are very few rules. Patternmaking for yourself is mostly about your preferences. It’s really fun and freeing.
And Bonus: You are your own “fit model”. You start with you, instead of a size. Averages and standards have zero importance, when you are sewing for one specific person. I love that I never have to figure out what “size” I am!
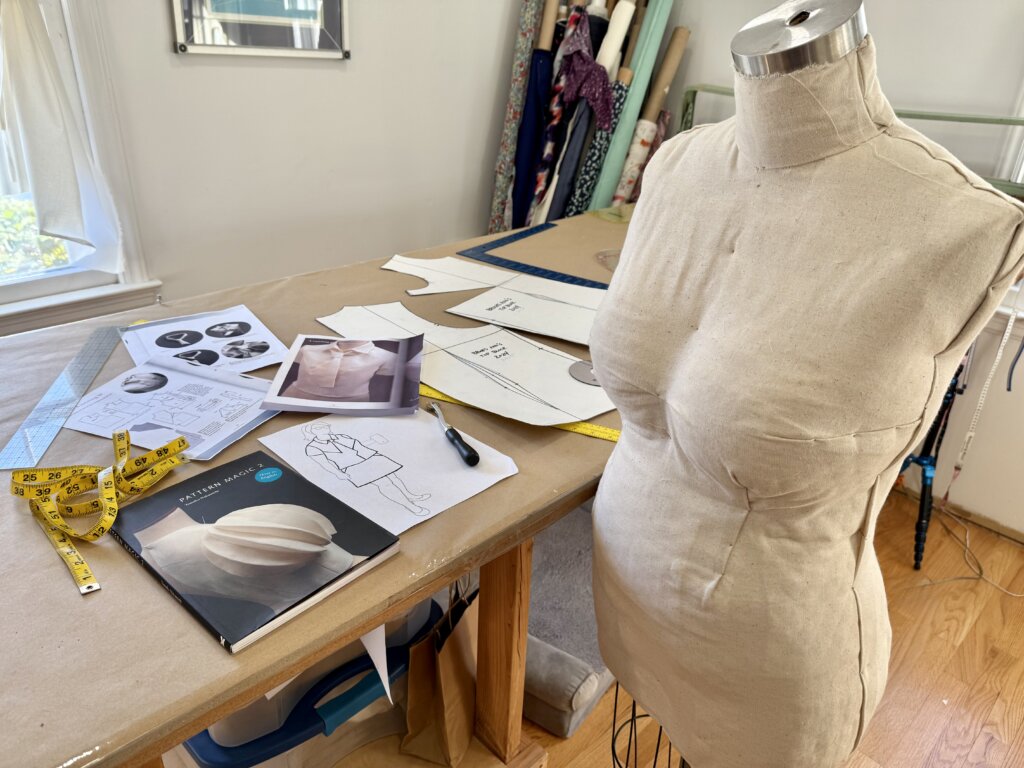
My Custom Tools
I have invested the time to make myself three reusable updatable custom tools that take all of the fitting out of fitting. That way I can focus on the fun stuff.
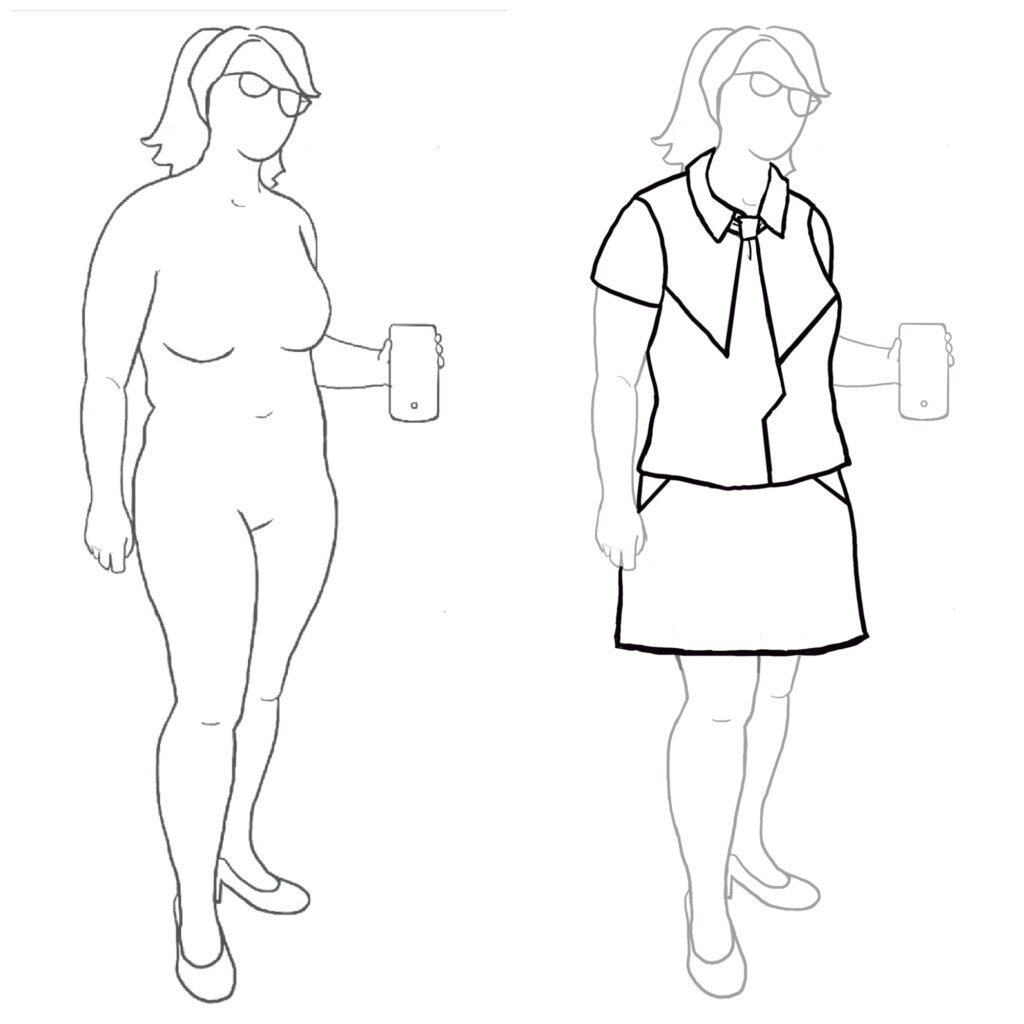
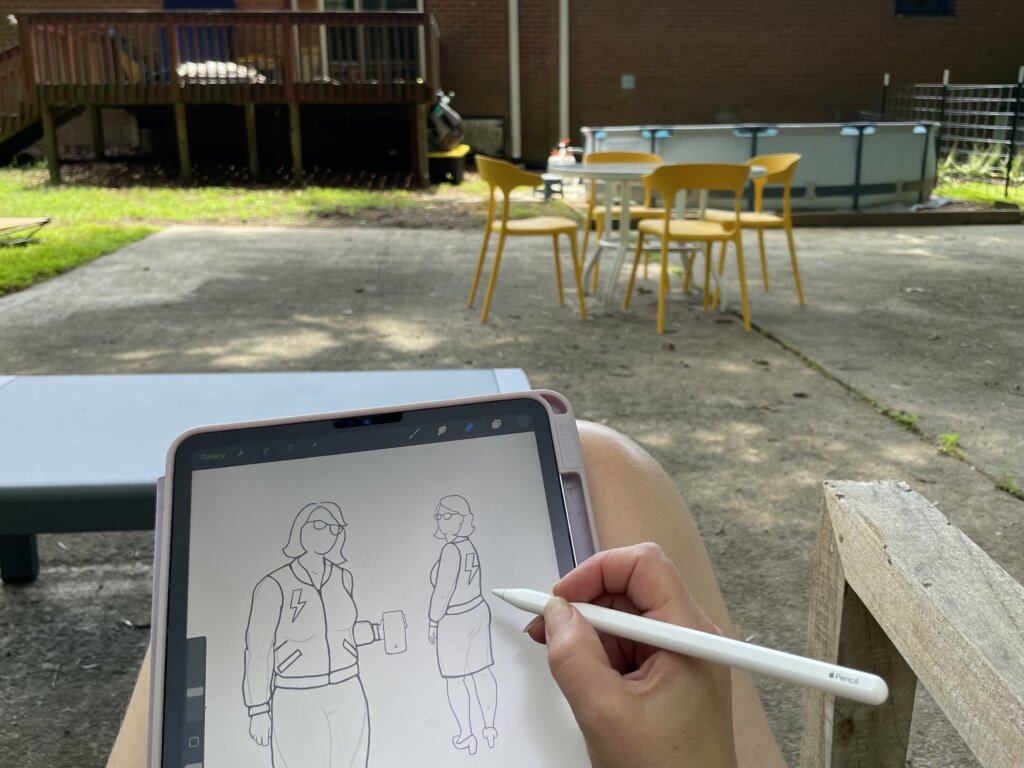
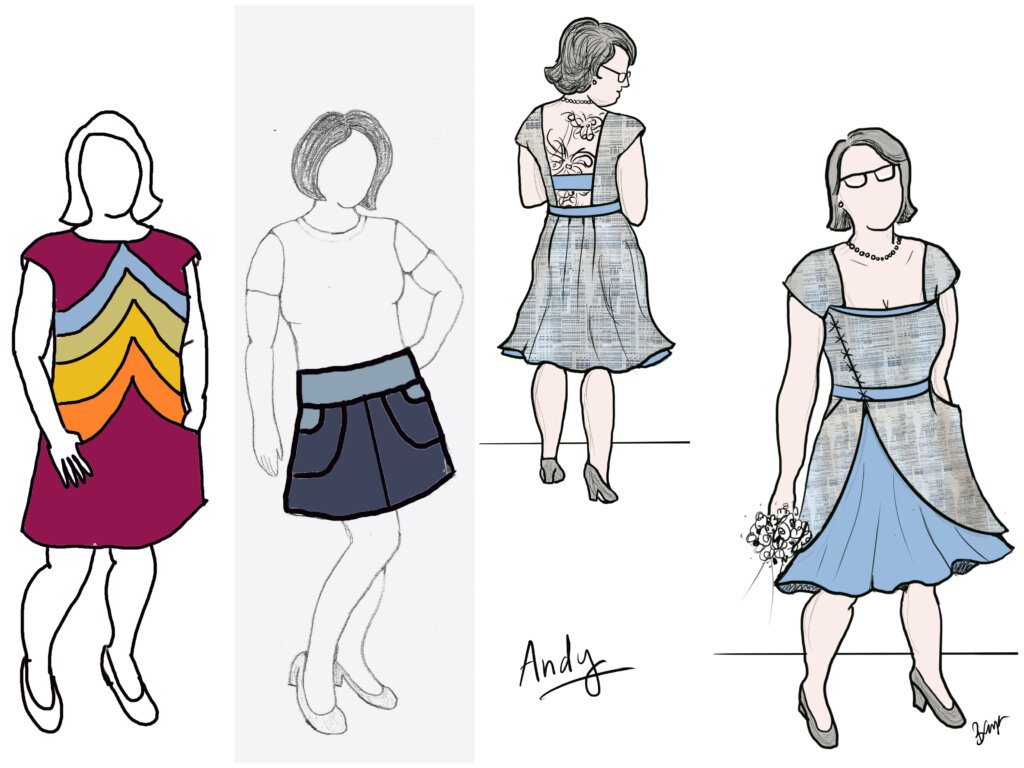
Tool 1: My Custom Croquis / Sketching Silhouette
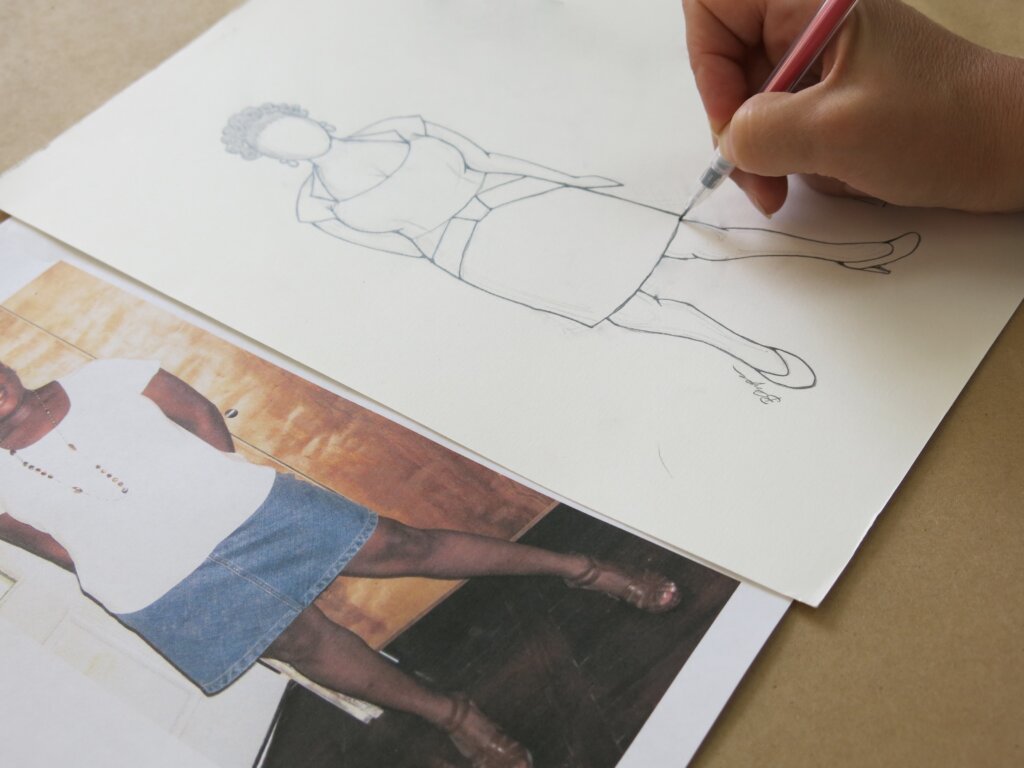
An outline of my body (traced from a photo) is often the starting point for each new design. Learn to make your own here.
Sketching onto my actual silhouette allows me to see how the garment is going to look. It helps me decide where I want my design lines to correspond with my body. It may even help me decide that I don’t want to wear what I thought I did. (Good catch!)
You can skip this sketching step, but you’ll have less answers to your questions. It’s a really helpful guide and a great warmup for the steps ahead!
Tool 2: My Custom Patternmaking Block
I made this in my own eCourse Top Class! A custom block (also known as a sloper) is a blank no-style template that represents my unique personal anatomical characteristics. This is a flat representation of my “size”– with a couple of different fit preferences.
Bonus: I used no standard measurements or confusing fashion formulas to create this incredible reusable tool. I’ve developed a block creation method designed specifically for those who are sewing for themselves. When you skip the fashion formulas, I think making your own block is the key to mastering patternmaking and fitting yourself. It’s really fun and so so helpful. Take my classes!

Tool 3: My Custom Padded Dress Form
It’s me in 3D! Learn to make your own here.
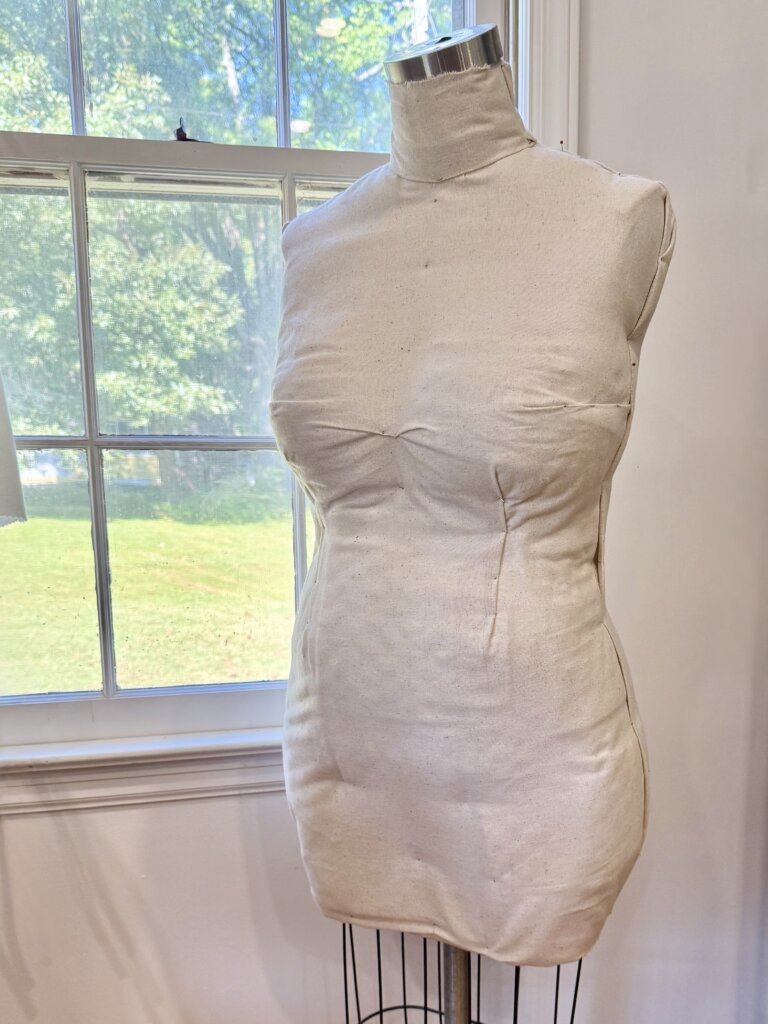
Since I have a custom block, I don’t need the custom dress form as much (and vice versa). These two tools offer the same information. A block is a 2D version of the 3D form, but it sure is helpful to have them both!
Having these custom tools means that, no matter what garment I’m making, my patterns all start with me. There’s no size chart, or size ranges, (there’s not even much need for numbers or math). There are no Adjustments with names that describe my non-standard body parts… I don’t need to measure myself. I really don’t have to think much at all about fit!
I don’t know my measurements. I don’t know if my shoulders are slopey-er than an average shoulder, I don’t know if I’ve got a bigger or smaller bust or belly or bootie than the standard fit model. These are tasks I don’t want to do and don’t want to learn. Good thing I don’t have to!
BONUS! Tool 4: The book
My inspiration image is from a patternmaking book! So I’ll even have a “cheat sheet”…
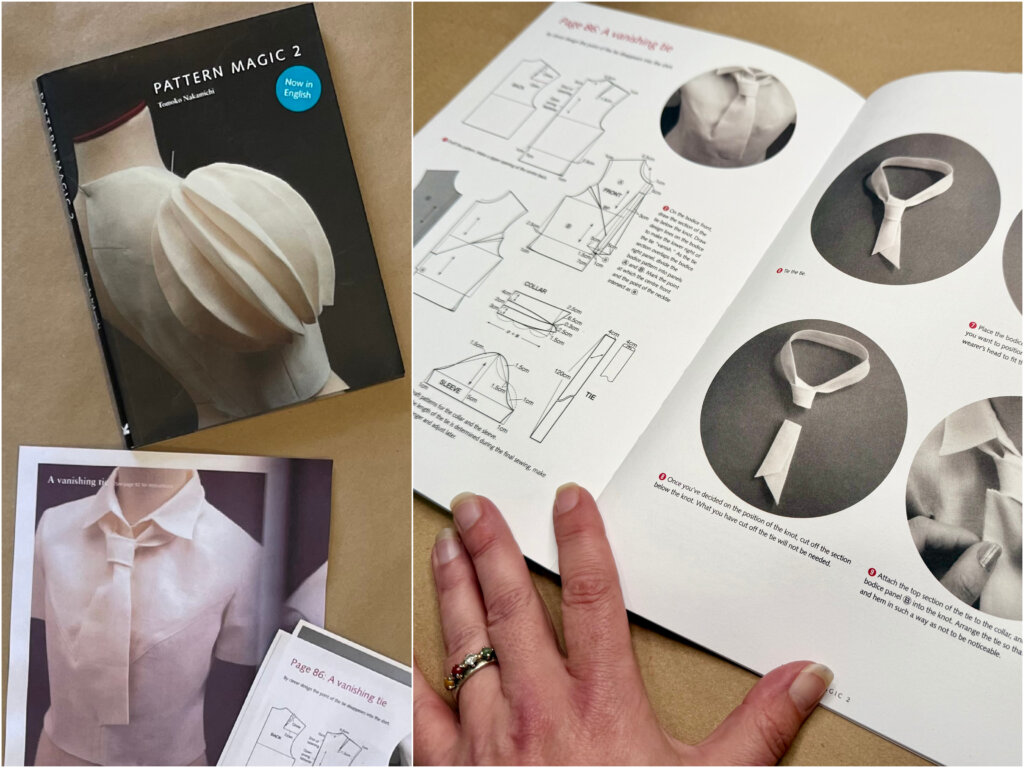
While this book does share patternmaking diagrams, they were created for “a size 9 Japanese adult female”. And I learned in Part One of this series that the construction steps listed in the book really only work on a dress form (like the half half-scale version in the book). I needed to come up with a new construction plan, since I (thankfully) have a head.
No worries. Any resource is only ever a starting point. Custom sewing is sewing from a sketch, image, or inspiration. The book is a bonus, with inspiring general info. I know to skip the specifics, and make everything my own.
The First Draft
In Part One of this blog series, I used Tool 1 (my custom croquis) to sketch my Vanishing Tie Top’s design lines onto my body’s silhouette. The sketch has become my next helpful tool.
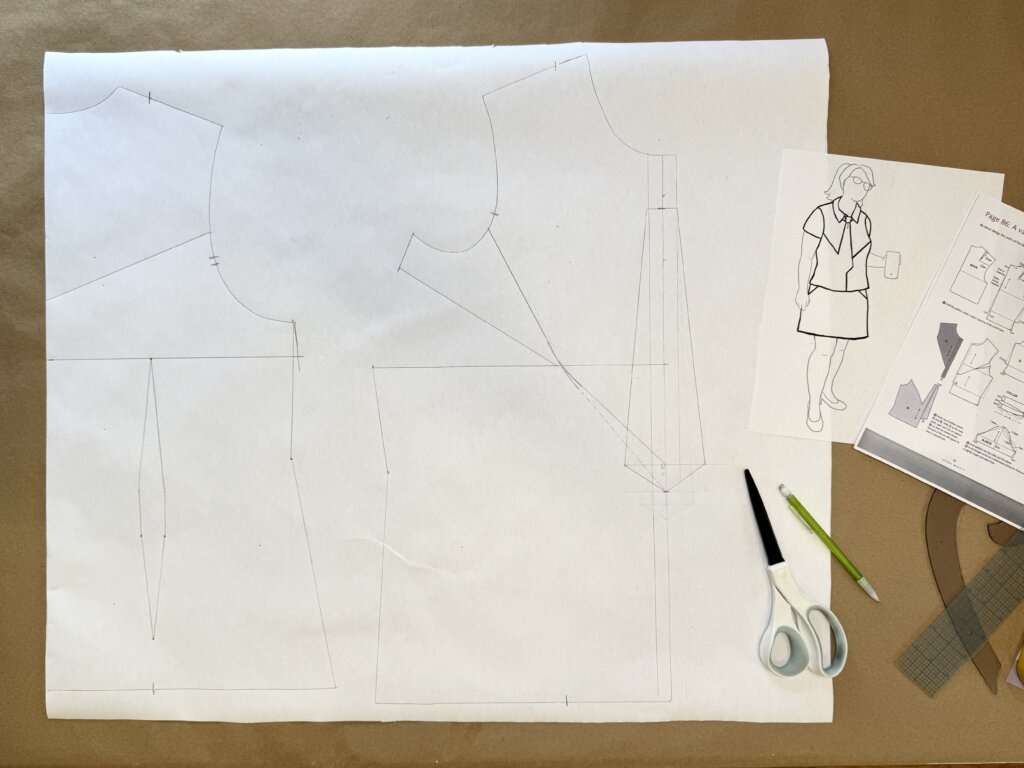
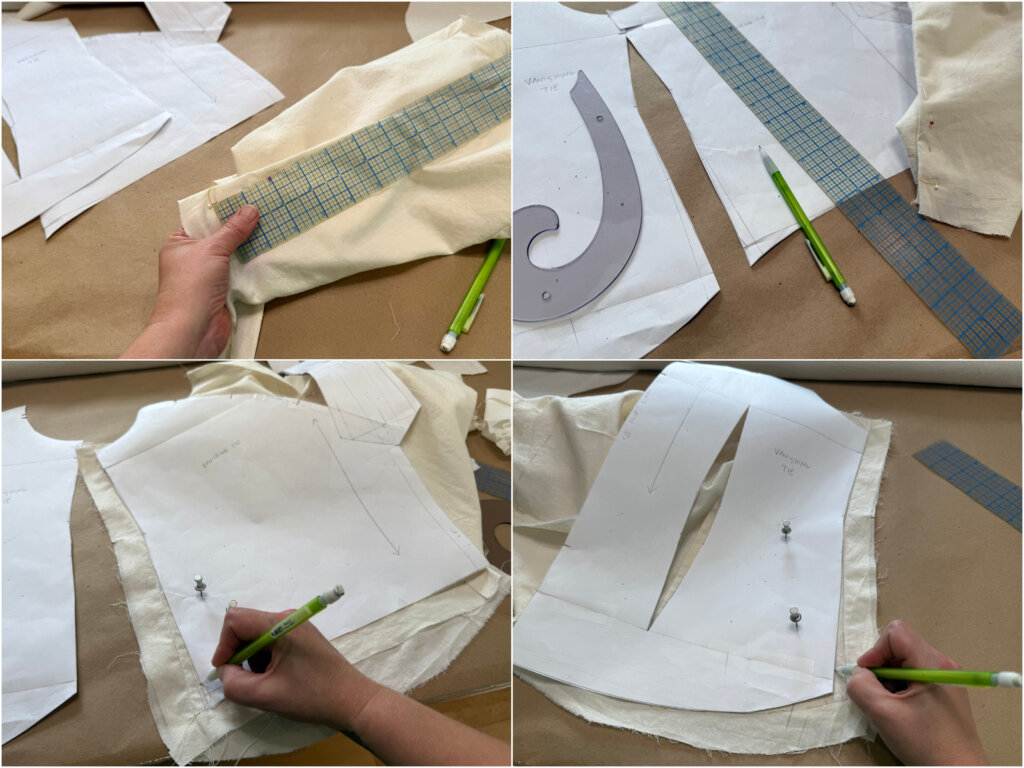
To begin drafting a pattern of my sketched design, I started by tracing a copy of Tool 2 (my block) onto a fresh sheet of paper. I already know exactly how the lines and shapes of the block correspond to my anatomy, which helps me make all of my design decisions.
I look at the sketch, and investigate where the lines that I drew correspond to the different areas of my body. Then I find those same anatomical spots on my block, to help me draw the lines of the top pattern. It’s a rough draft, so no precision necessary. A first draft is always a series of “educated guesses”. There’s no expectation to get anything “right” on the first try, so it’s really fun to just play around and think about how to create the seams and the features through simple patternmaking principles.
I gave it a go, and noodled around for approximately 30 minutes- shown here in approximately 30 seconds!
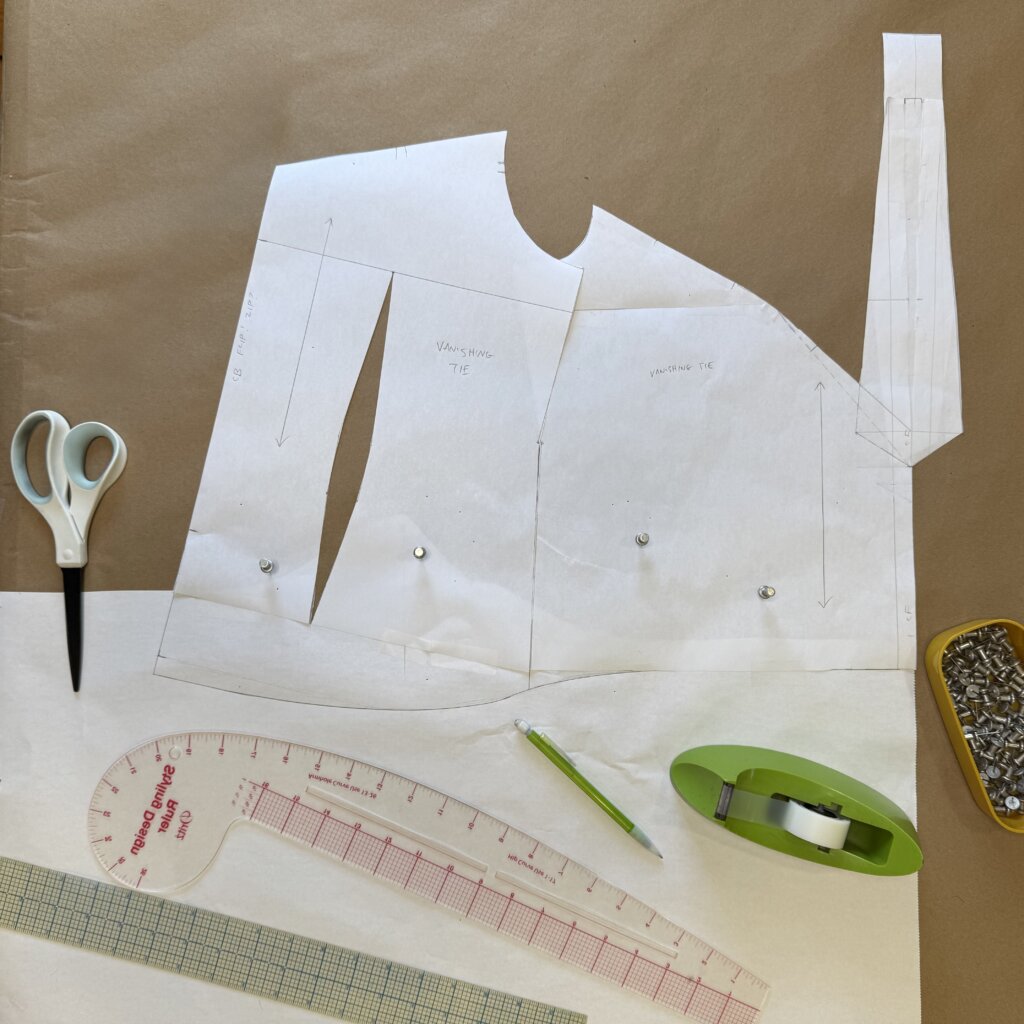
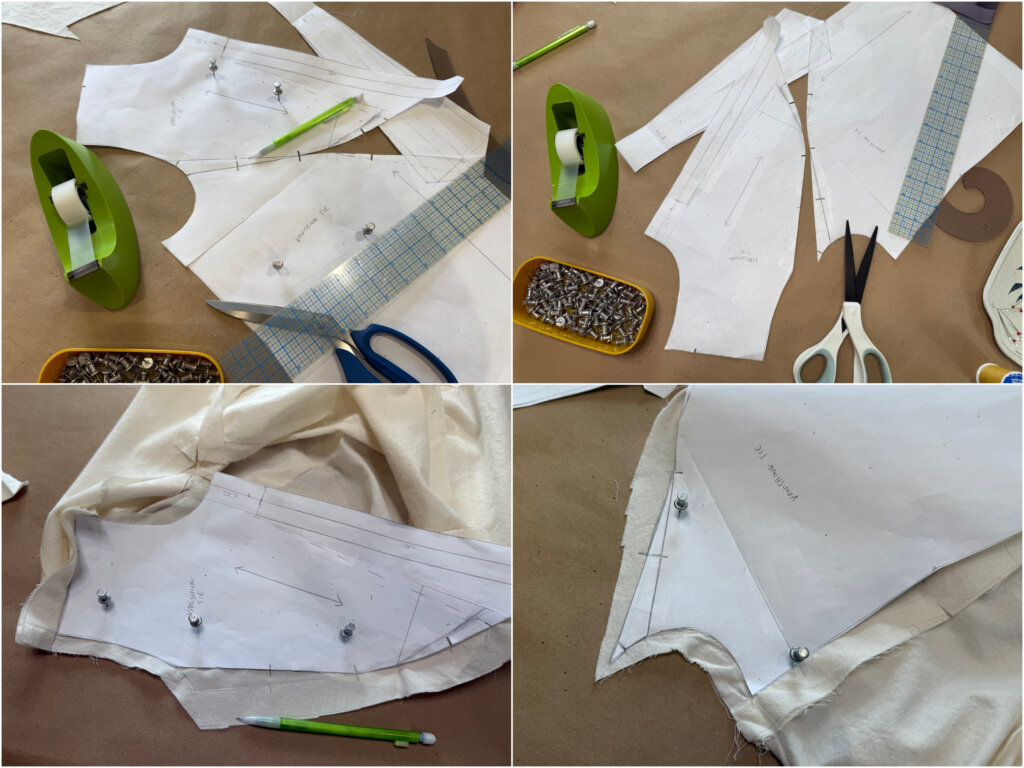
And here are some pics I took during those 30 minutes:
The draft before I started cutting:
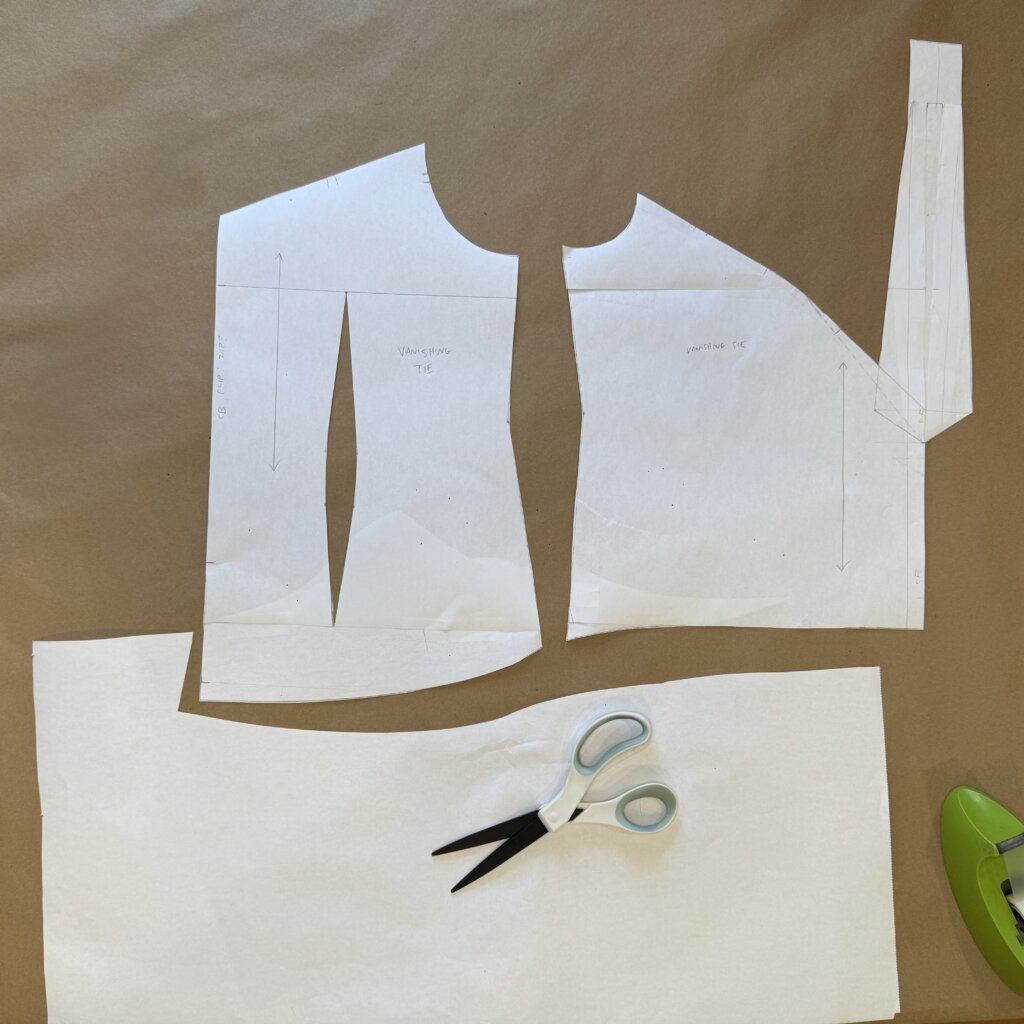
The bust dart rotated into the seam line I created:
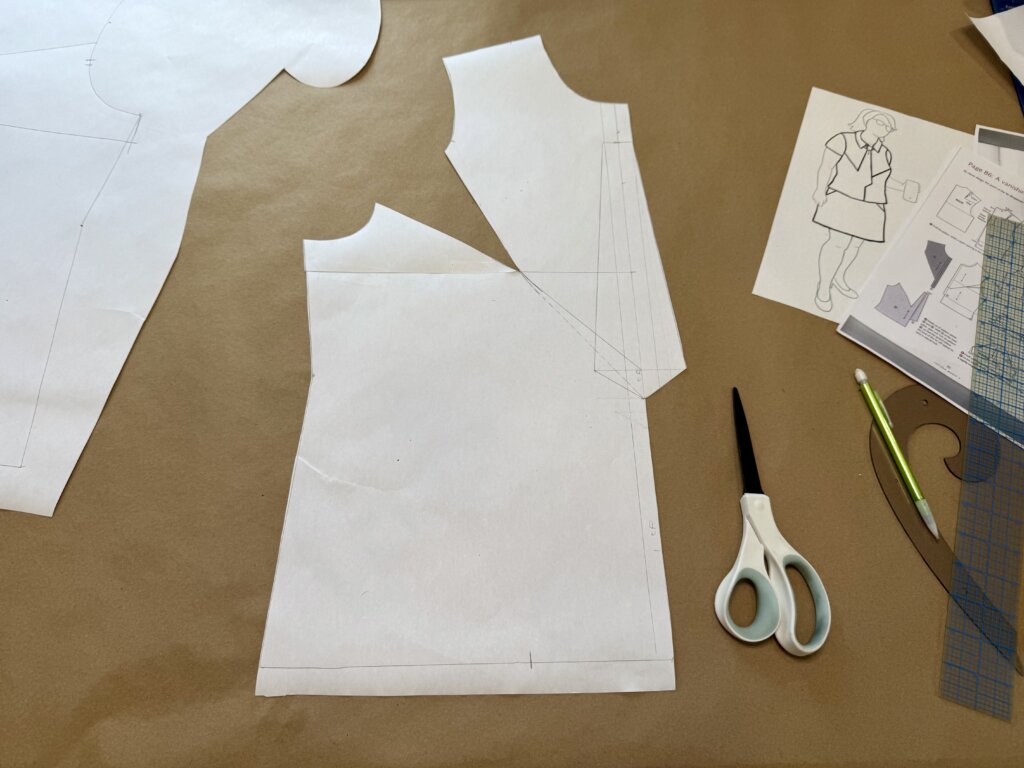
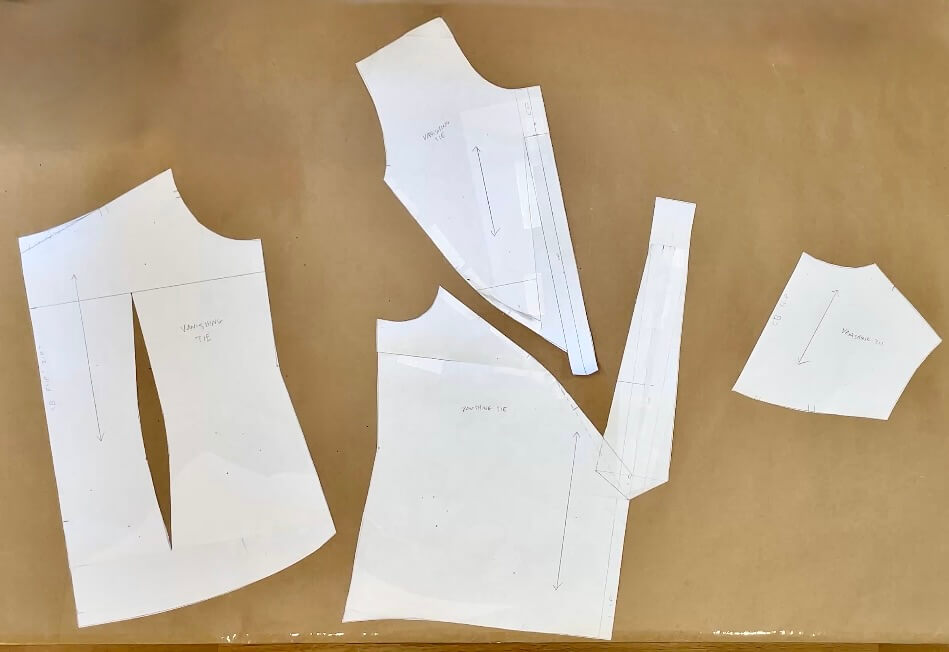
The first draft of the top’s main bits!

A Quick Try-On
One of the (many) things I love about sewing from patterns without seam allowances included, is that you can try on your paper patterns. All I do is tape together the edges (which are the stitching lines), as they will be when stitched.
I can try it on my dress form and my body to help me visualize where my design lines are placed!
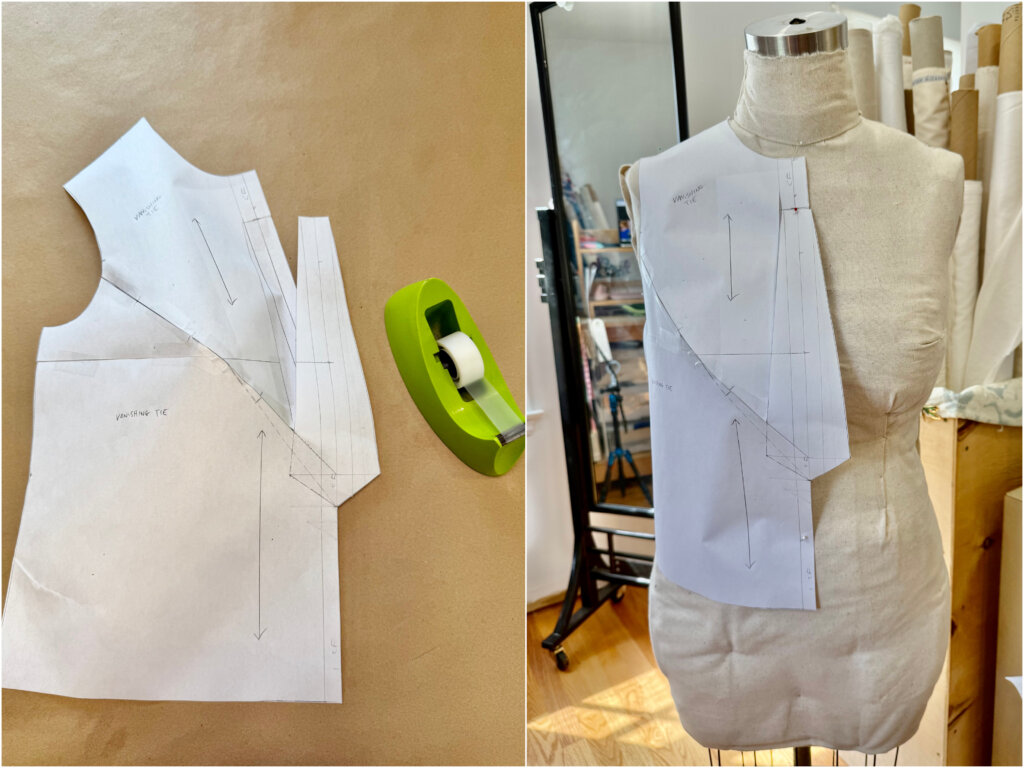

I liked it!
Everything is still fully editable, and I took this opportunity to scribble some new lines that I might want to test, but this draft seemed like it was on the right track. Yay!
Adding some new Details
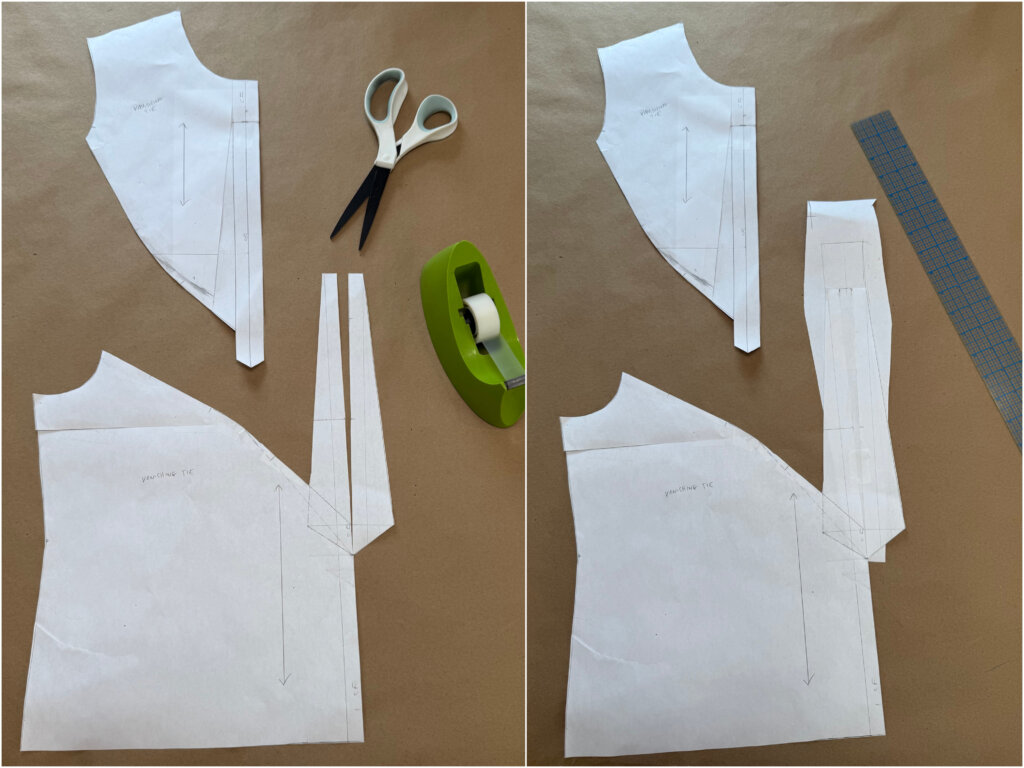
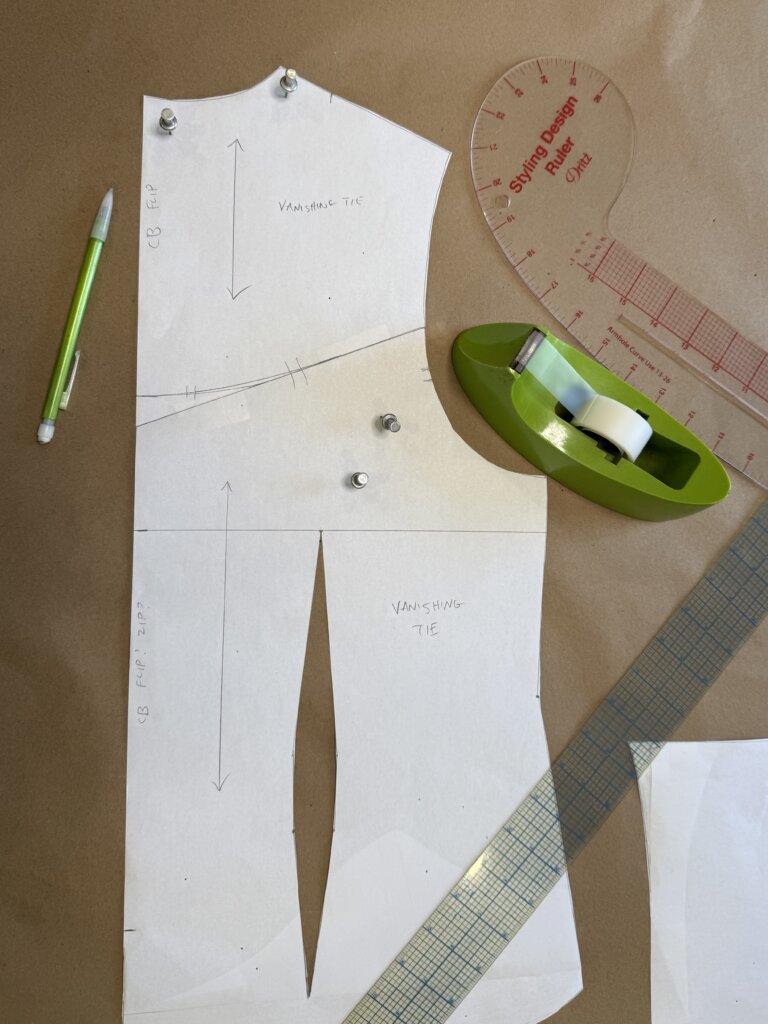
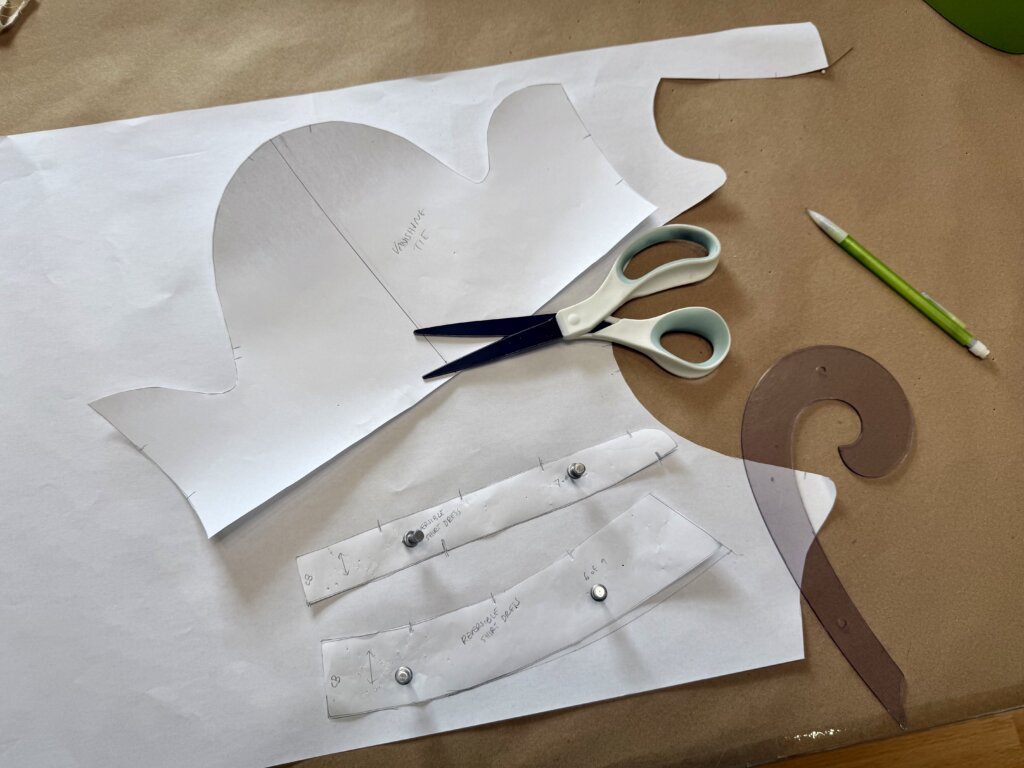
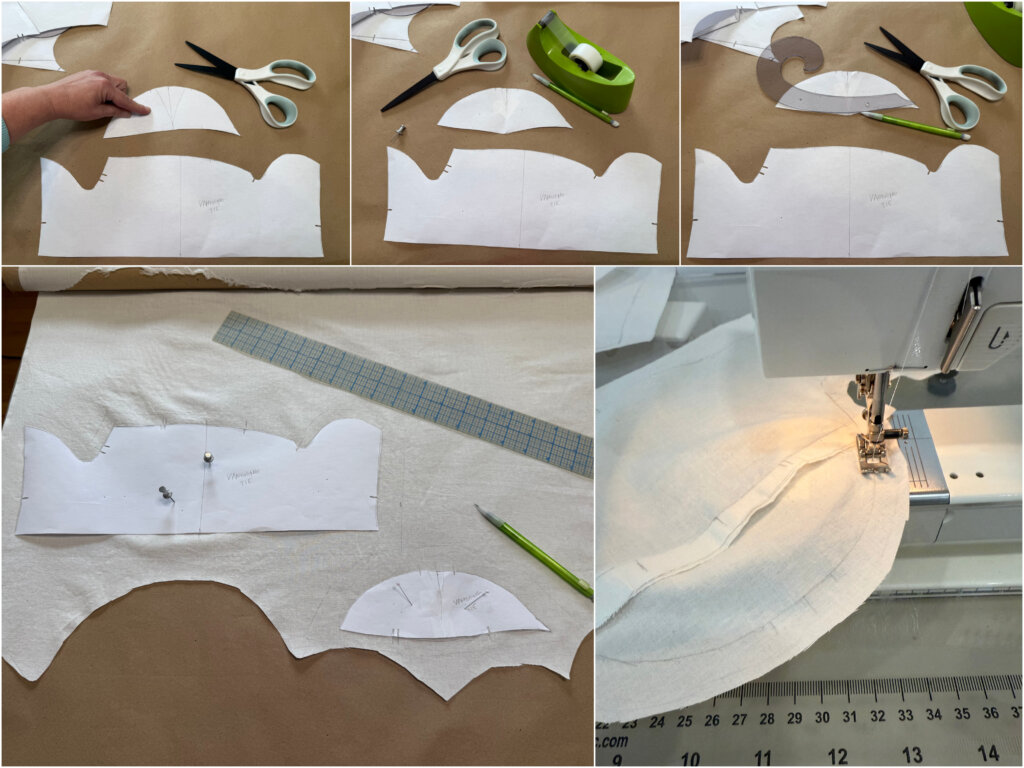
Next, inspired by the book’s diagrams, I used the patternmaking technique of “slash and spread” to add an extra bit of fullness to the center of the tie, so that it will (evenually) create a nice tuck under the knot.
Then I filled my slash/tuck in with paper and added a little knot extension (before trimming away the excess paper).
I was also inspired to try a new rounded hem, that’s a little lower in the back than the front.
I joined my pattern’s lower side seam, taped on some extra paper, roughed in a new shape, then cut away the excess.
The rounded hem design also inspired me to round the point I originally drafted for the back yoke. I’m the designer, so I can do whatever I want!
And that’s it for now on paper! I felt ready to start the mockup. There’s no advantage to patterning the sleeves and collar (and certainly not facings) this early in the process.
The Mockup: My Next Tool
The mockup is my next helpful tool. And since I already know this pattern will fit me, my mockup fittings are mostly about assessing and adjusting the design to match my personal preferences.
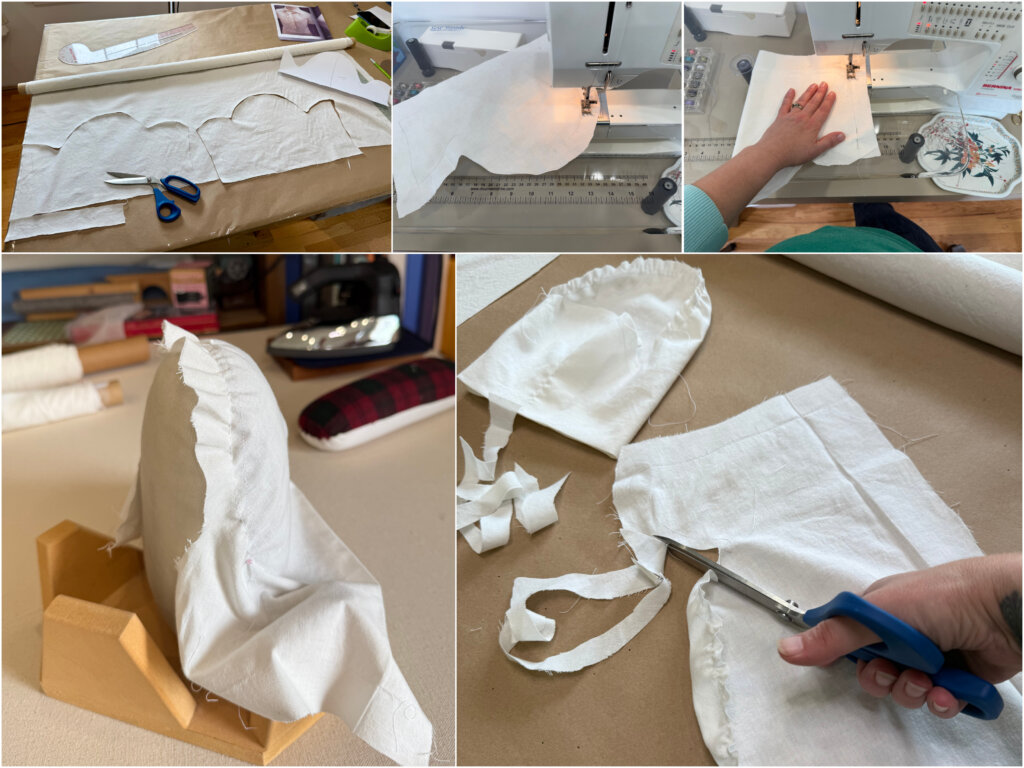
Marking the stitch lines and cut lines on the muslin took about 20 minutes (I love Tetris-ing the pieces together for minimum waste):
Cutting from patterns without seam allowances is also a joy. No precision necessary! The cutting part took about 7 minutes.
Next up, stay stitching (by machine)…
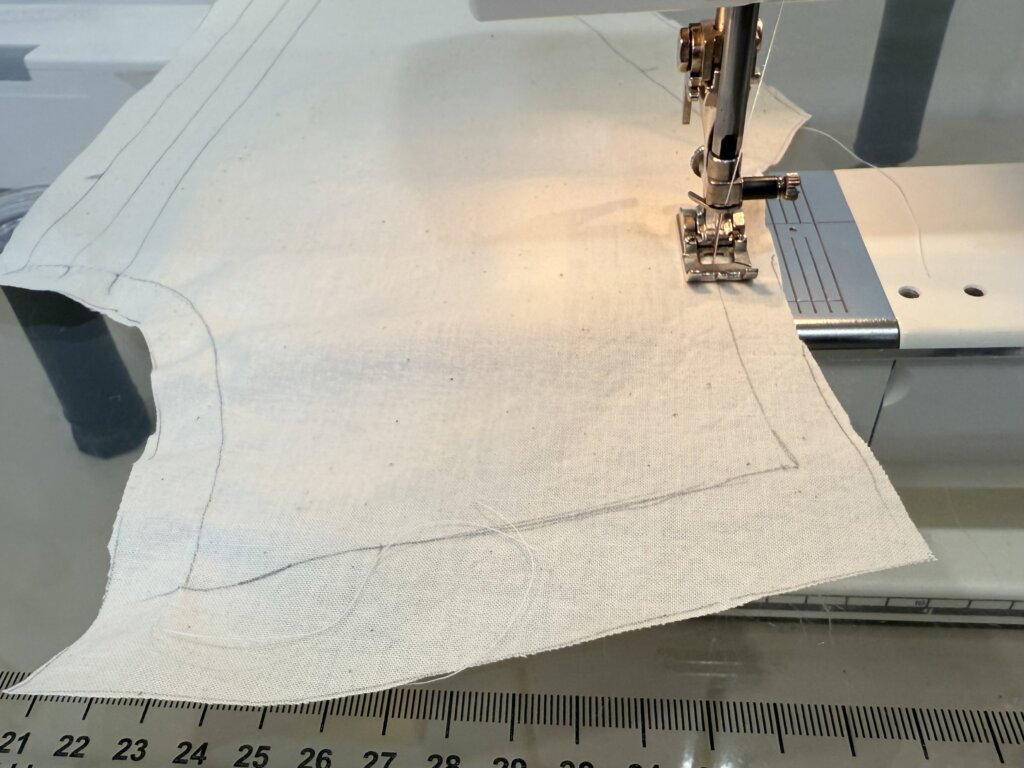
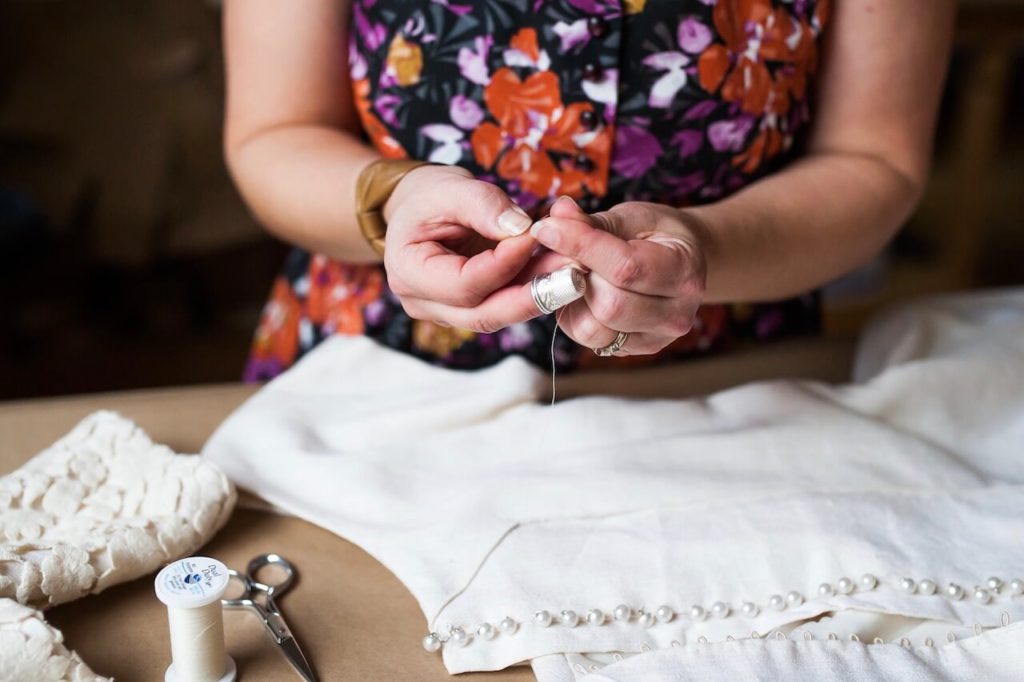
…and threadmarking (by hand).
Then I machine basted and pressed my darts and seams…
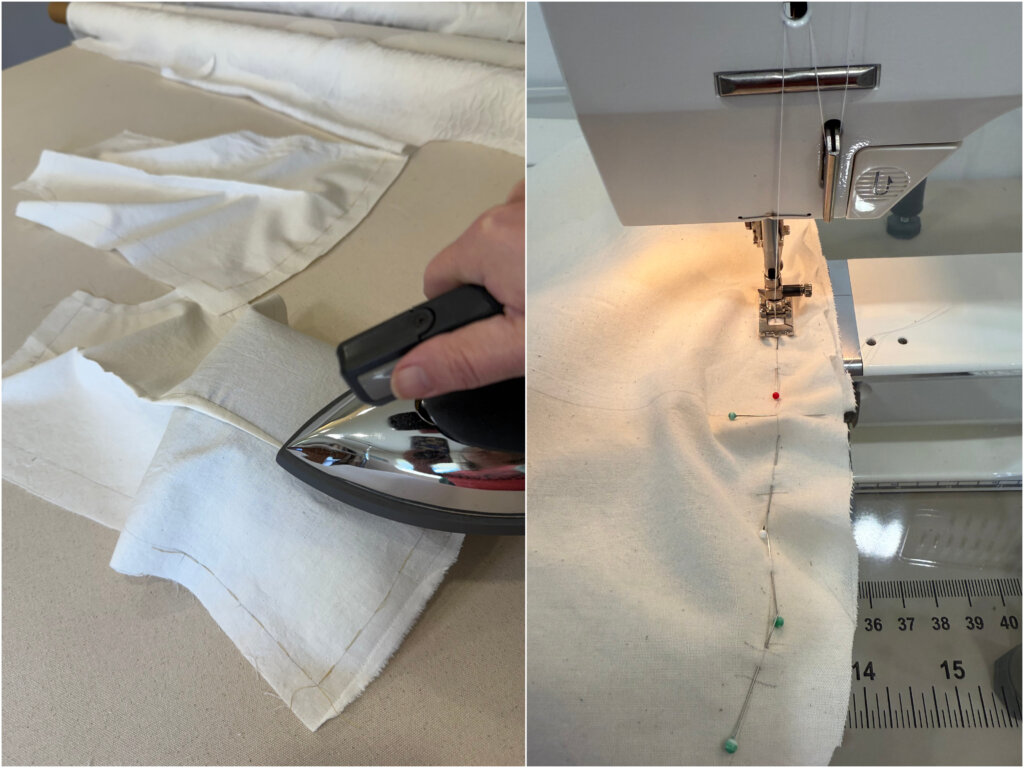
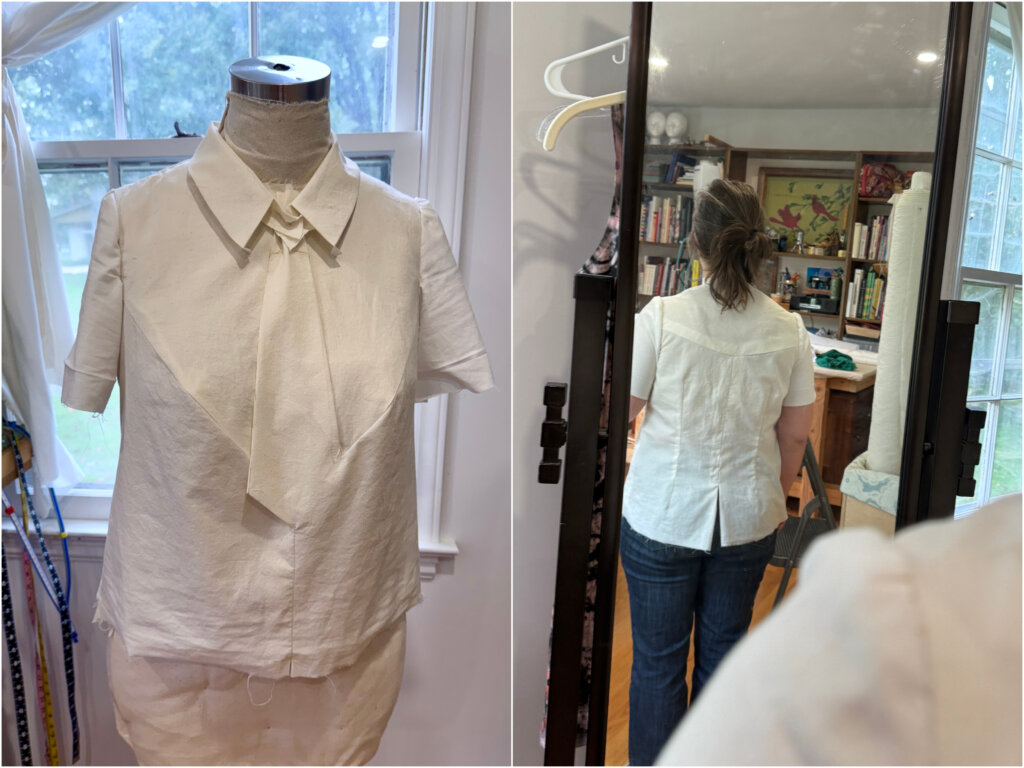
…before a Quick try on (with 1″ allowances and unclipped edges), both tucked and untucked.

Love it!
And as I looked in the mirror, I took the opportunity to ask myself: “Is there anything I could change that would make me love this even more?”
Testing Some Changes
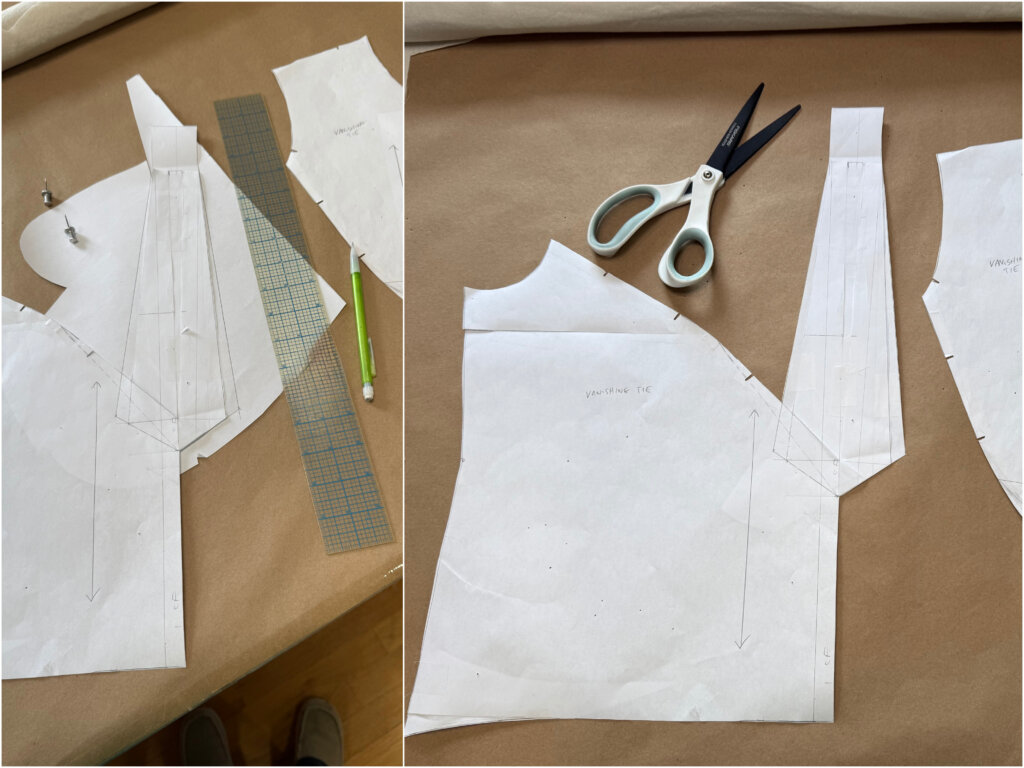
During my quick try-on, I decided to try the tie a little wider, and take in the side seams at the hips just a smidge.
I added (and then trimmed away) a scrap to draft the Tie a bit wider on paper:
Transferring those pattern changes back to the mockup involved repairing a clipped area, then re-clipping to a slightly different spot:
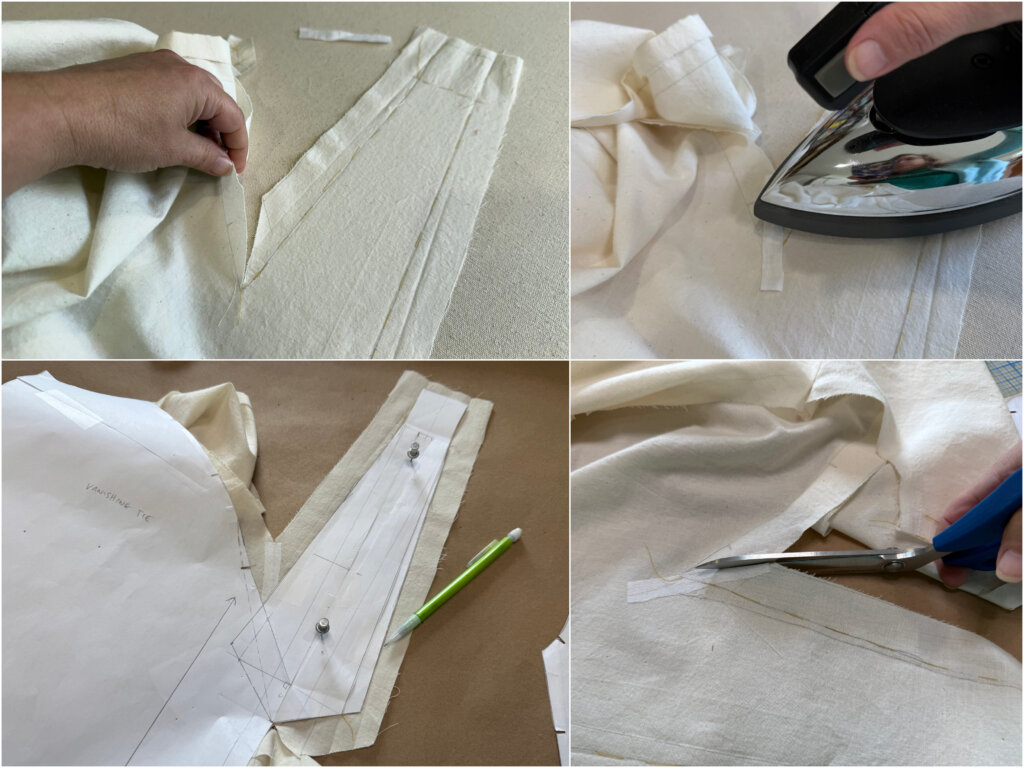
To reduce the lower side seams, I measured what I had pinned, transferred that to the paper (and removed the excess), then used the new lines to re-mark the muslin (before basting along the new lines.)
Adding the Collar and Sleeves
Happy with the core pattern’s neckline edge and armholes, I used my custom gusset sleeve block to create the first draft of my Vanishing Tie Top’s sleeve pattern. The first draft of my collar pattern was copied from a dress I’ve made in the past.
My custom sleeve block is my newest tool, which I’m still perfecting. I made two slightly different options for each armhole of my mockup.
While I do most mockup basting by machine, I like to baste the sleeves into the armholes by hand. And yes, I’m listening to the Great British Sewing Bee…
I also cut one layer of the collar to help me see the “big picture”.
Almost immediately after trying on the mockup with two slightly different sleeve options, a new sleeve idea sparked.
What if I made the design a little more interesting by creating 2-piece sleeves, carrying the design line from the front of the top across the sleeve to match the yoke in the back?
This new sleeve idea also inspired me to move the design line on the front of the top just a smidge…
On my pattern pieces, I taped the top of the seam closed and drew a new design line, cut it apart, and transferred the new lines back to the mockup.
I drafted my sleeve idea, before using the new pattern pieces to and cut and stitch up (two different versions) for my next mockup try-on.
Figuring Out theTie
With the mockup mostly ready to try on again, I had one main puzzle still to solve: The Tie. How will I get in and out of this Vanishing Tie Top (since the directions in the book did not take this into account)?
I started my first experiment by creating a long bias strip of muslin, and tracing (most of) an actual tie. Just something to play with…
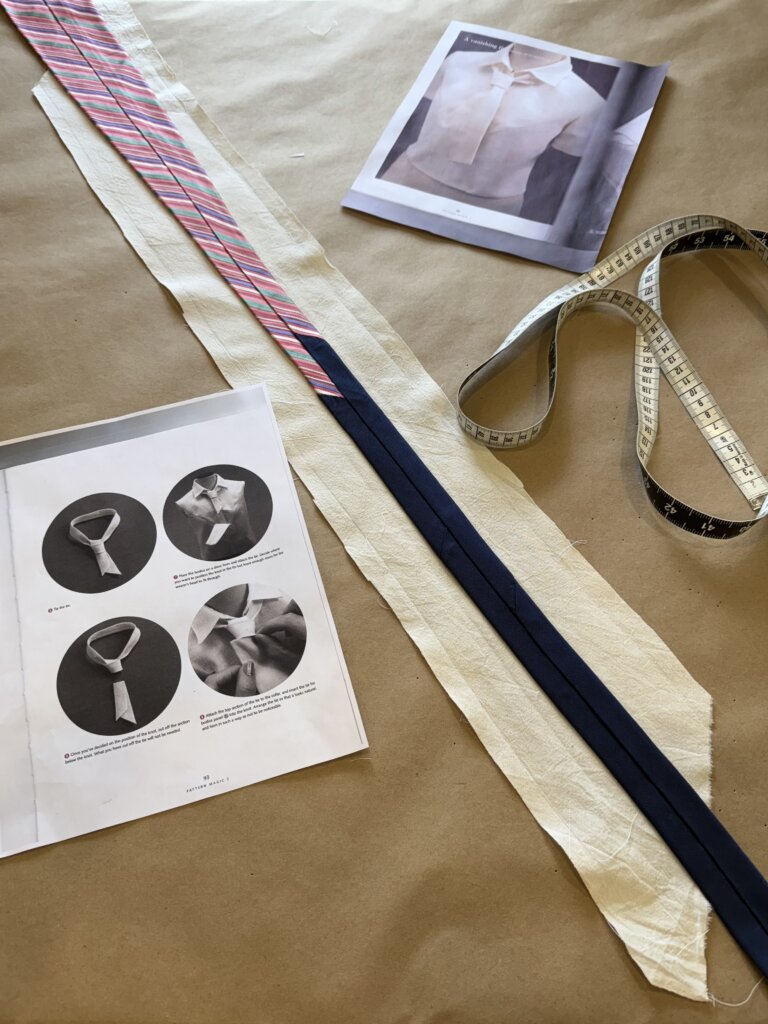
Then I watched a couple of YouTube videos to learn how to tie it.
After tying, my plan was to abandon the directions from the book and cut through the tied tie at the center back neck to add a hidden clasp (an idea from Part One). But it seemed like that might not be necessary. I now had another idea!
While playing around, I discovered that if I made the “tail” of the tie long enough, and employed careful hand stitching when permanently anchoring the knot, I could loosen and tighten the tie (like an actual tie!) and get it around my head. That seemed even better than cutting the back. Thanks, Mockup Experiments!
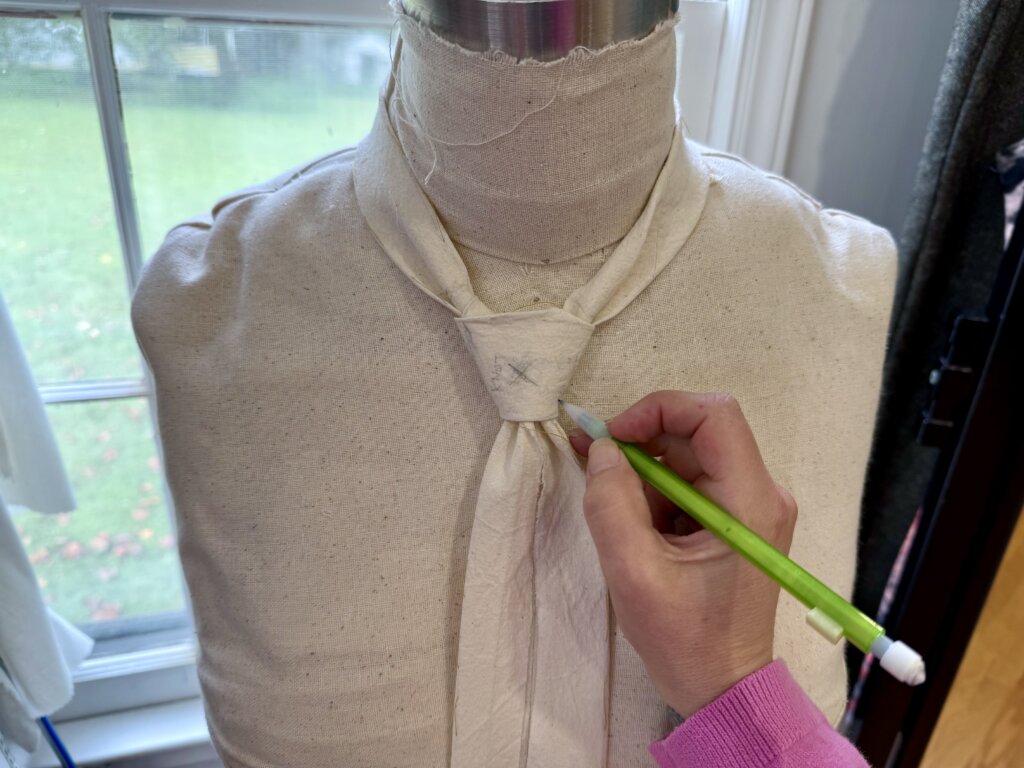
And I realized that this bias tie piece could also double as the facing for the underside of the Vanishing Tie. Win-win!
I didn’t totally finish the final pattern piece for the tie at this time. This test piece was enough to get me moving forward for now. This will be the last piece that I add to the actual top, so I can put it off for now.
I’ll let these new ideas simmer as I sew…
Pattern Drafting & Testing Complete
Here’s the final mockup try-on!
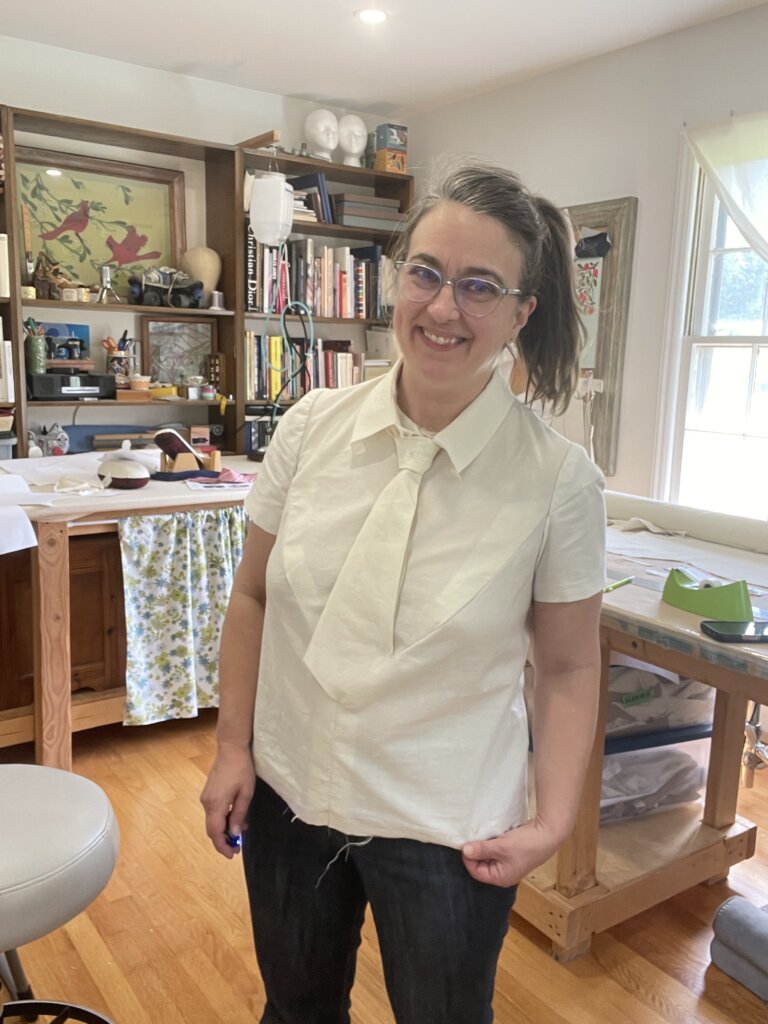
It’s a wrap! Nearly all of my questions had answers and I couldn’t think of any other changes I’d want to make. I was in love with this top!
This mockup was so incredibly helpful for testing my ideas without any risk to my Precious Fabric. And I didn’t need to do any “fitting” in my fitting, because my pattern was made for me by me!
Bonus: That’s not the end of the story for this muslin mockup! Keep following along to see how I re-use it inside the actual garment!
NEXT POST: In Part Three, I’ll cut my Precious matelaseé and construct my Vanishing Tie top! Thanks for following along!
Want to learn more about the way I sew?
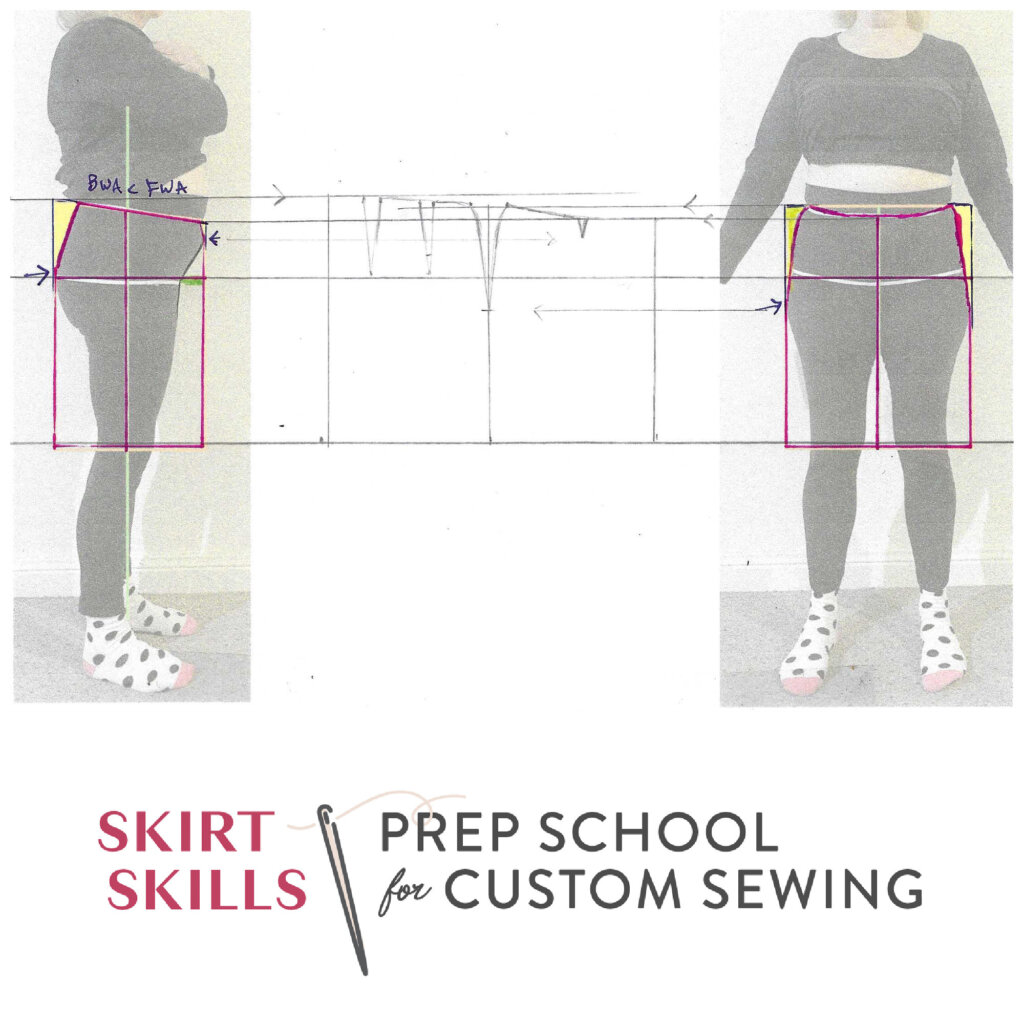
My Intro to Custom Sewing eCourse Skirt Skills starts January 7. Enrollment opens December 30!
“Brooks Ann is an amazing teacher with a great knack for approaching sewing/fitting concepts in a unique, naturally curious way.” -Preet


4 Responses
I love your version of this! It looks great—better than the book!
Thanks!
Genius, inspiring, fearless. Thank you for this.
Thanks for following along!