

A version of this blog post was published in Threads Magazine Issue #228 Winter 2024.
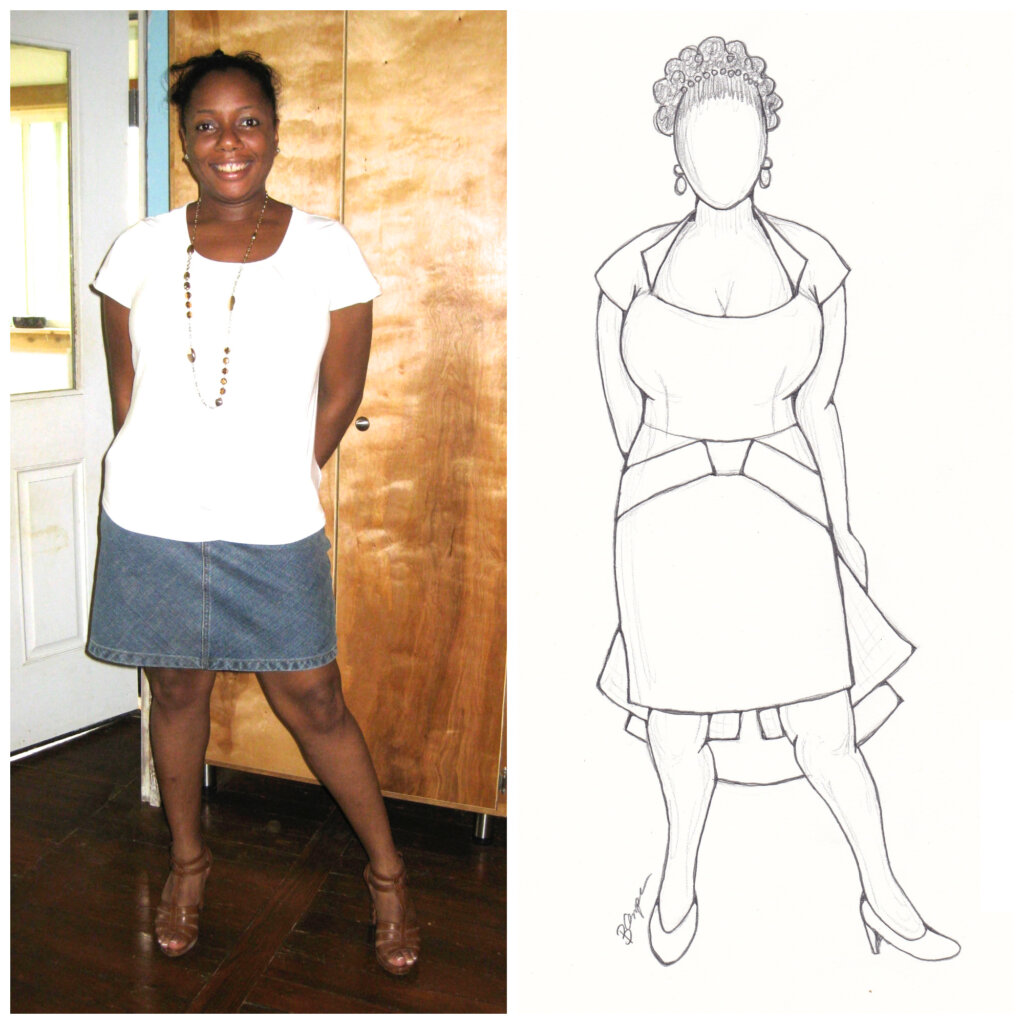
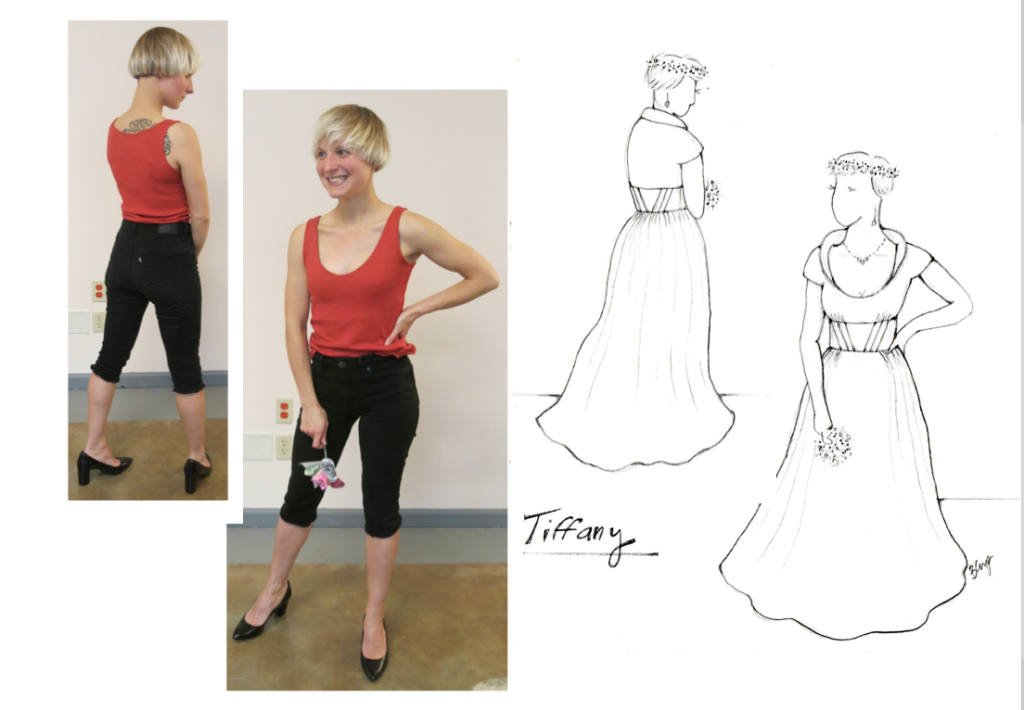
It’s early 2010. Michelle, my very first custom bridalwear client, is leaving my home studio after our Design Consultation. I snap a photo of her on her way out the door.
My mind is buzzing with ideas. My table is scattered with images and inspirations.
I pull out a blank piece of paper. I’m ready to start sketching.
I stare at the inspiration images. I stare at the blank piece of paper…
I print out the photo of Michelle.
I stare at the photo. I stare at the blank piece of paper…
Oh no.
What the heck have I gotten myself into?! I’m a maker, not a sketch artist!
And I can’t get to the making part, if I don’t book the dress… And I can’t book the dress, if I can’t communicate my design ideas…
And what a great photo…
Taking it was a last-minute thought- and when I grabbed my camera, Michelle struck this cool pose uninstructed. She was bringing it! How could I give that back to her in my sketch
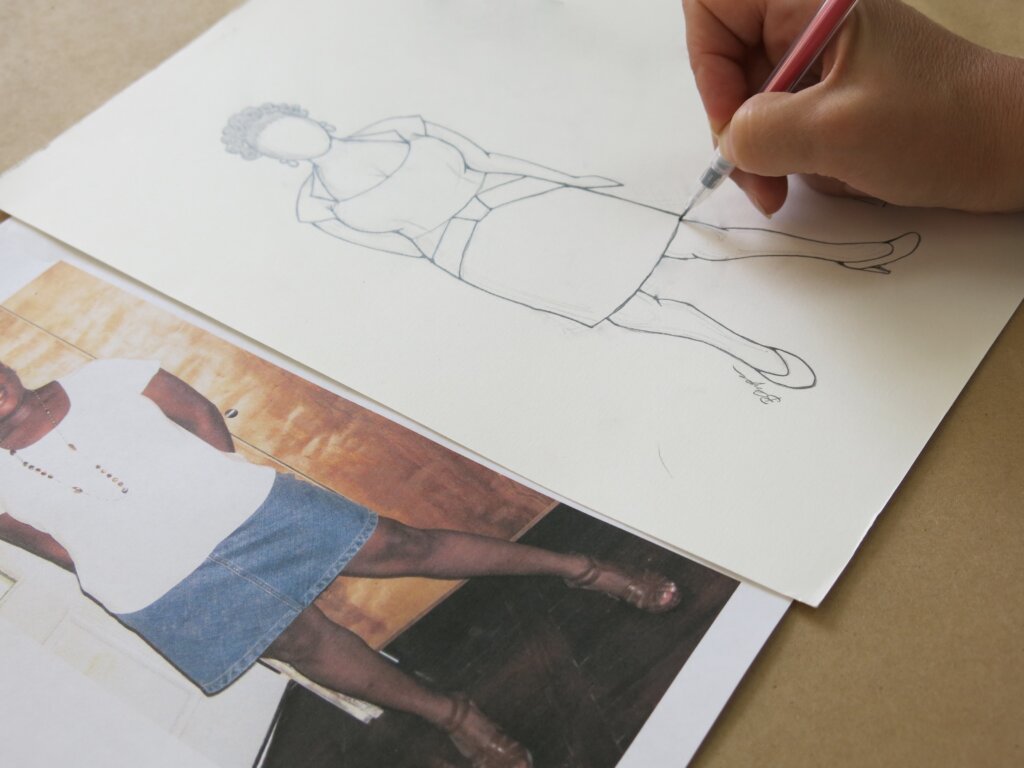
Well, duh?! Instead of staring at the photo, I could literally use the photo! I’m not a sketch artist, but I can copy and trace!
Because Michelle unexpectedly gave me 🔥 fi-yah 🔥 in this photo, I developed some easy custom croqui-making methods that I LOVE. I’ve used this same process for almost everything I’ve designed ever since- and I’m thrilled to share my techniques with you!
How can I “try on” clothing that doesn’t exist yet?
If you’ve ever wondered how to start with an idea or an image of a garment and play around to predict how it could look on you– this post is for you!
At a store, many (but not all) of us can try on heaps of options, look in a mirror, and evaluate how they look. Not necessarily fun, but effective.
But before something is sewn up, there’s nothing to try on. How can I “try on” something that doesn’t exist yet?
Well, sketching is kinda magical, ya’ll.
The goal of a sketch is communication between the maker, the wearer, and the designer.
When you are all three of these: As long as you understand what you are trying to communicate, then you’ve reached your goal.
“But I can’t draw!”, I can hear you saying.
Spoiler Alert: Custom sketching can be easier than you think.
After a few students start sharing their great sketches in my Intro to Custom Sewing eCourse, there’s always someone working slower who says “Oh no! I didn’t know we were going to have to draw in this class! I can’t draw!!!!!”…
…But after they actually give the process a try, it’s “Oh okay. Now I understand.” and they are surprised by how nice their sketches look.
Ya’ll, I have worked with Broadway designers who have shared scribbles on napkins as sketches. It’s not about the drawing– it’s about the information it offers.
Creating a Custom Croqui
Fashion designers use generic and often very unrealistic bodies, called croquis, as the basis for sketching their designs. Since their designs aren’t for a specific person, it’s more about the fantasy and allure of the clothing itself and less about the human being inside the clothes.
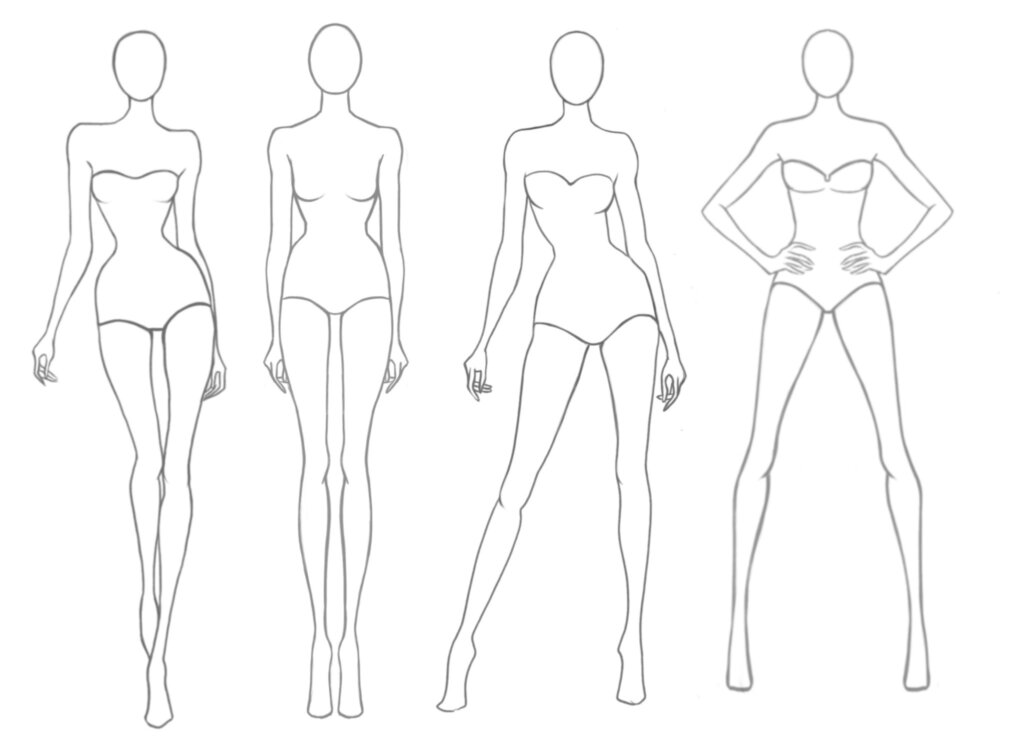
But my design practice is never about designing fashion… It’s about exploring and expressing the spirit of a specific person through clothing. It’s about framing one unique human being in something that allows them to look and feel how they want to look and feel. My background in costuming (instead of fashion) taught me to employ the parameters and the preferences of one individual as my guide for every design.
The clothes showcase the person- rather than the other way around.
And when you sew for yourself- that person is you!
Sketching onto the silhouette of your body is such an excellent way to begin your personal sewing projects! It allows you to visualize and experiment and answer lots of questions before any pattern piece or fabric is cut. A custom sketch is a super helpful tool (and a great warm-up) for confidently moving forward through all the steps ahead.
Let's do this!
In this post, I’ll share some options, tips, and techniques for how to use a photo as a reusable custom croqui-making tool. Take it, or leave it! And feel free to throw your own spin on my ideas! All you really need to make your own reusable tool is a photo of yourself!
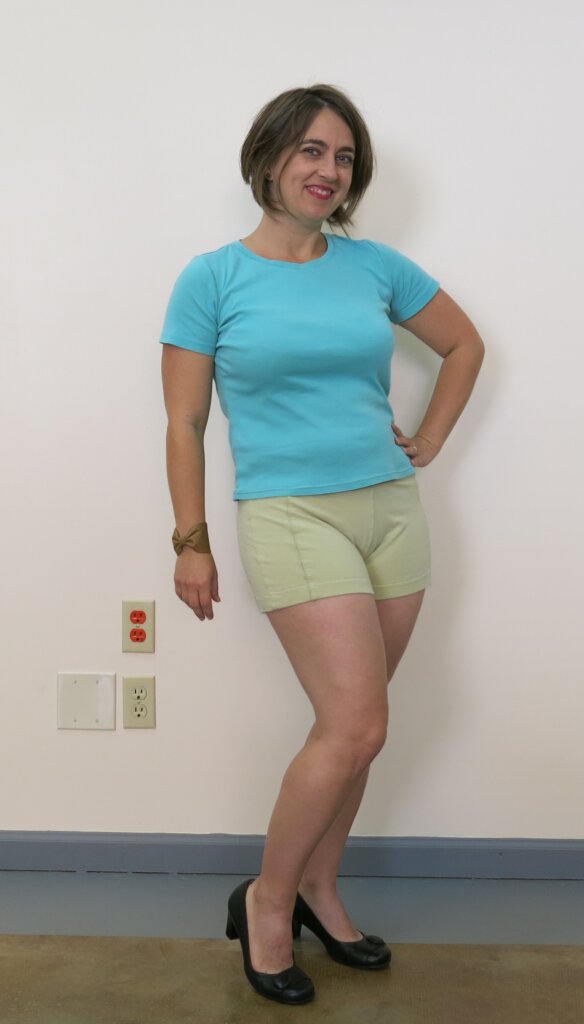
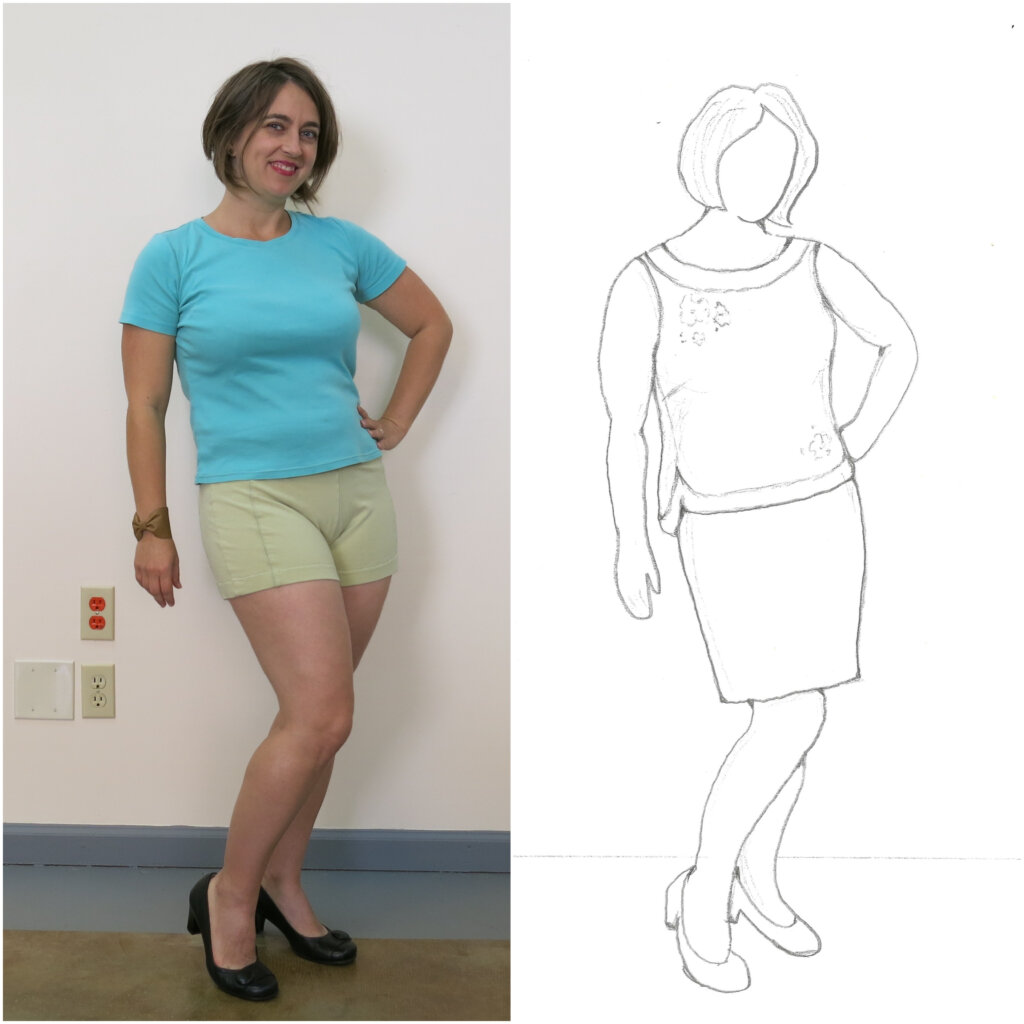
Here is the full length photo that I took of myself for my custom croqui- way back when I made the first edition of Skirt Skills. I’m still using it today- years later! I could update it, but I’ve been happy with it- so I’m sticking with it.
To reach your goal of creating a custom croqui, you don’t need to get fancy- and the photo doesn’t even need to be a good one!
Try out whatever seems doable for you now and feel totally free to improve and revise the tool over time.
Photo Taking Options
- Find someone to be your photographer
- Use a timer
- Use a camera remote
- Take a mirror selfie
You can often get a friend to be your photographer, but I really like the ease and privacy of taking my own photos of myself.
If your camera has a timer, find a way to securely set up your camera across from you. Set the timer and dash across the room to strike a pose, hands-free.
Or- Get yourself a camera remote. It’s a teeny and fairly inexpensive tool, that you can fit in your hand. You pair it with your phone or camera, and give it a click to take as many pictures as you want- without having to dash back and forth.
You can also take your own full-length photo via a selfie in the mirror. Sketching clothes isn’t about your hands so if your pose includes holding your camera, no worries. Leave it, or get creative!
For example, my Skirt Skills student Virginia redrew her selfie phone as an ice cream cone in her custom sketch! So fun!
"I've never really tried to sketch myself before, but I'm having a lot of fun using my custom croqui!
At least I can draw something that actually resembles me, and it really helps with the creative process, what a great tool!"- Virginia
Photo Taking Tips
- Keep the camera near the body’s center
- Contrast between yourself and your background
- Close-fitting clothes (or just your undies)
- Think about your shoes and hair
I suggest that you keep the camera level and near the center of your body. This will give the best straight-on perspective for sketching clothes above and below the waist. If you have a taller photographer, ask them to sit down so the shot is taken from a neutral right-in-front-of-you perspective, instead of your looking-downward-from-above tall photographer’s perspective.
It can be easiest to trace the outline of your body when there is a nice contrast between yourself and your background.
I recommend wearing clothes that fit close to your body without obscuring your silhouette. An only-in-your-undies shot can offer some helpful references (you don’t have to show this tool to anyone ever), but wearing something non-baggy (like leggings and a tank top) in your photo will do the trick.
Shoes and hair can be kinda tough to trace- and are not super important for your garment sketching experiments. Consider keeping them both neutral and simple. Or take extra photos with different shoes and hair styles! You do you!
Posing Tips
- Strike a cute pose (or don’t!)
- Consider hiding your hands
- Consider shooting a back view
- Take a bazillion shots!
For my croquis, I like to strike a cute pose. Play around! Maybe a hand on one hip, maybe a bend in one leg… Or try a straight-on neutral no-style pose, if you prefer.
Hands can be tough to trace and you may not want your arms to cover your garment. I recommend keeping your arms simple and out of the way. The easiest choice could be to hide your hands behind you.
Garments often have design features in the back, so you might want to go ahead make a front and a back custom croqui of yourself.
The key to getting good photos is to take a lot of photos. Keep the best and delete the inevitable duds.
Alternate Options
You may already have a photo you can use! I found this photo of my adorable mom and dad and used it to draw this sketch for making my mom a dress for their 50th wedding anniversary.
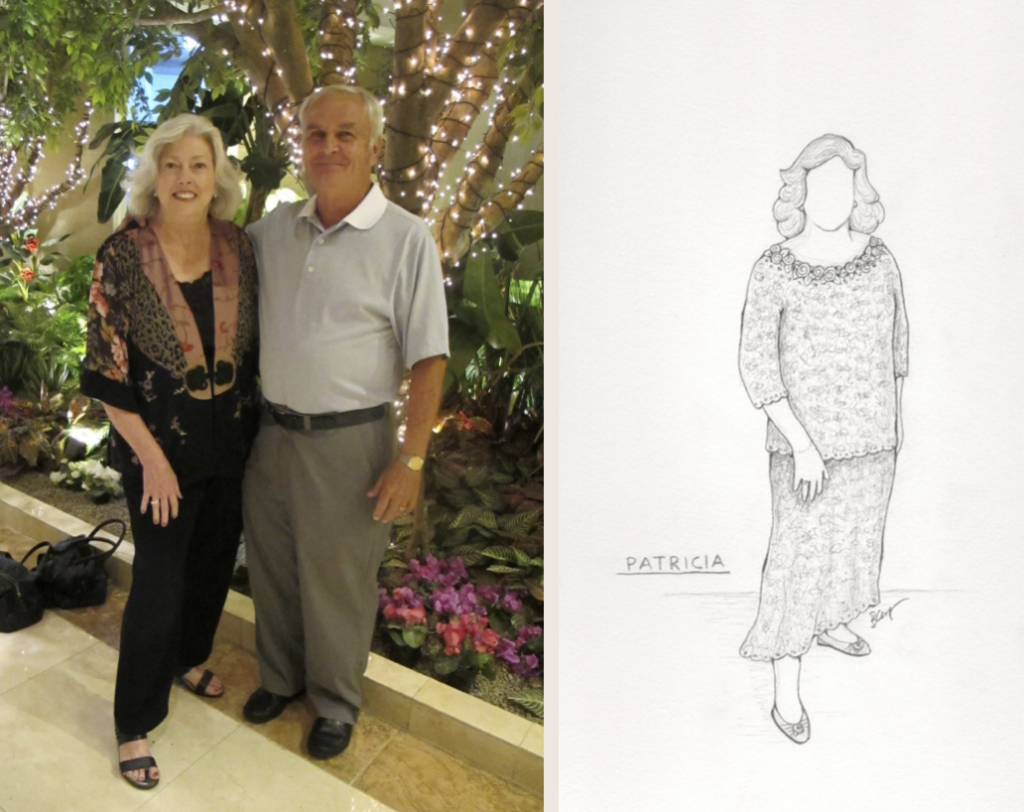
Though not as ideal as using your actual silhouette, you could use a photo of someone else that has a shape similar to yours, there are also some sketch books with generic yet realistic bodies available and even online services for custom croquis out there.
The important thing is that you get started by giving something a try that looks something like you.
How to Use the Photo for your Croqui
Though I am learning to use digital software for sketching on my silhouette (more in my next post!), personally, I am a pencil and paper girl at heart.
Here’s my favorite way to use your photo as your Custom Croqui-Maker Tool:
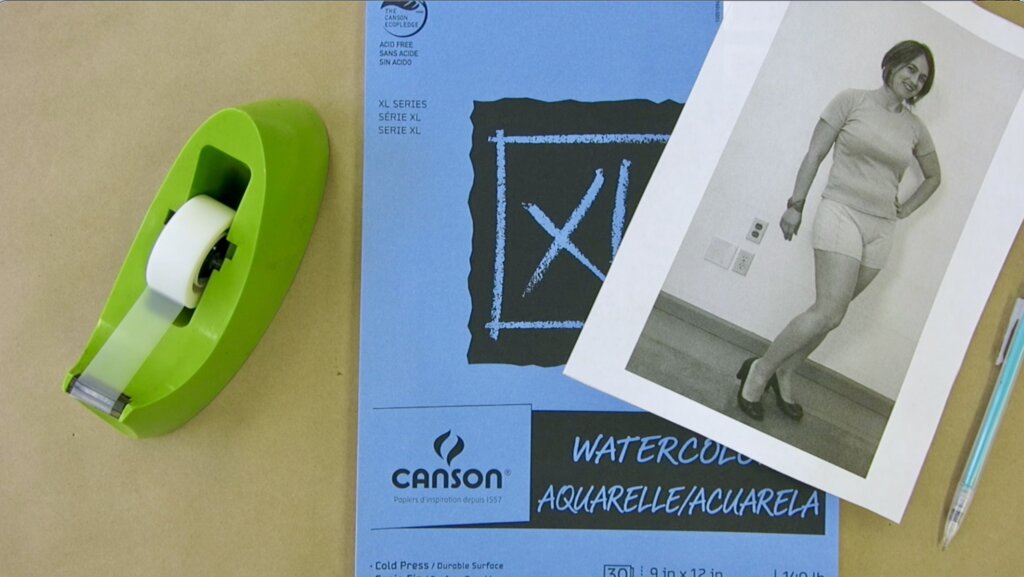
First, print out the photo, on regular printer paper, as large as as you want it to be for sketching.

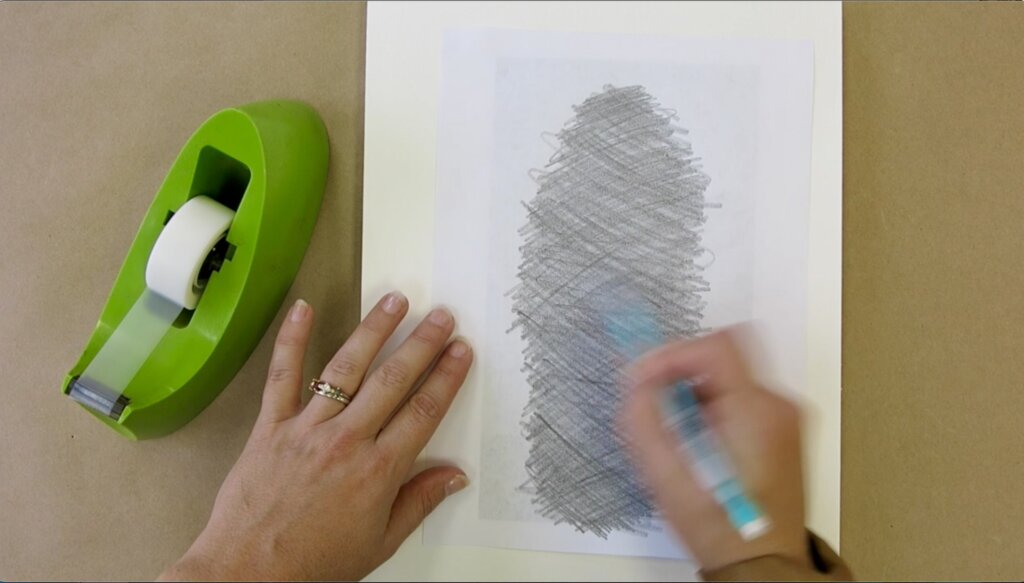
Next, flip over the printed image and scribble on the back with a regular pencil (I like the mechanical kind.). Mark all over the parts of the photo that has you in it.
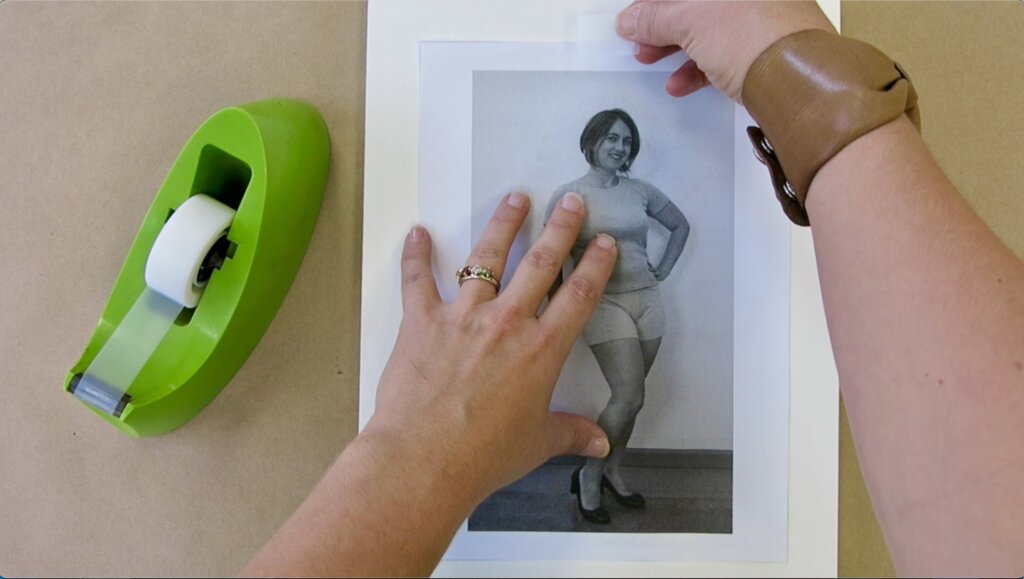
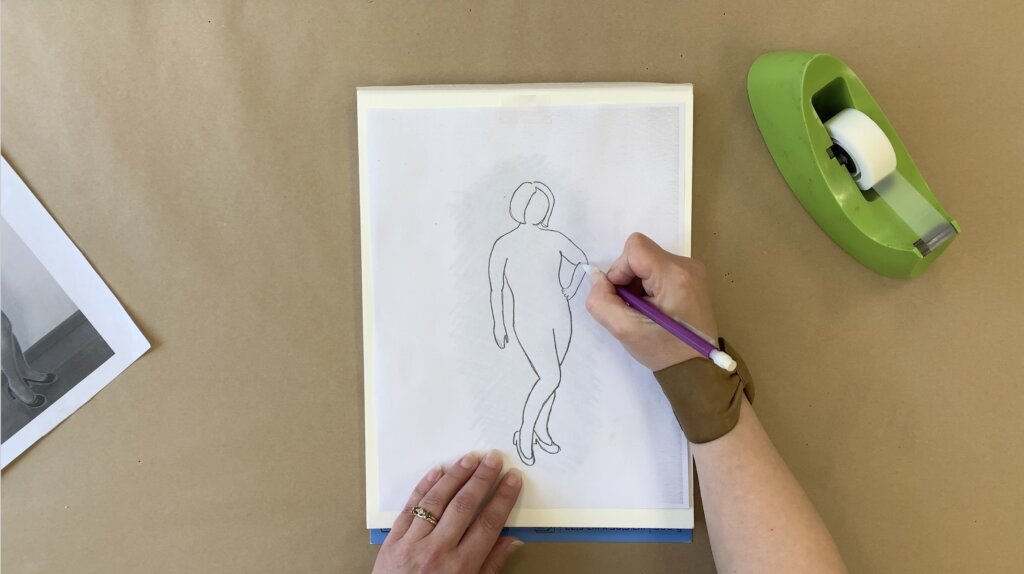
Then, lightly tape your photo to your sketch paper scribble-side-down.
I prefer drawing on thick watercolor paper (even though I don’t think I own any watercolors). Watercolor paper allows me to mark lightly and stands up to lots of erasing. This allows me lots of freedom to test lots of ideas- without the whole thing getting messy and overworked. Win-win!
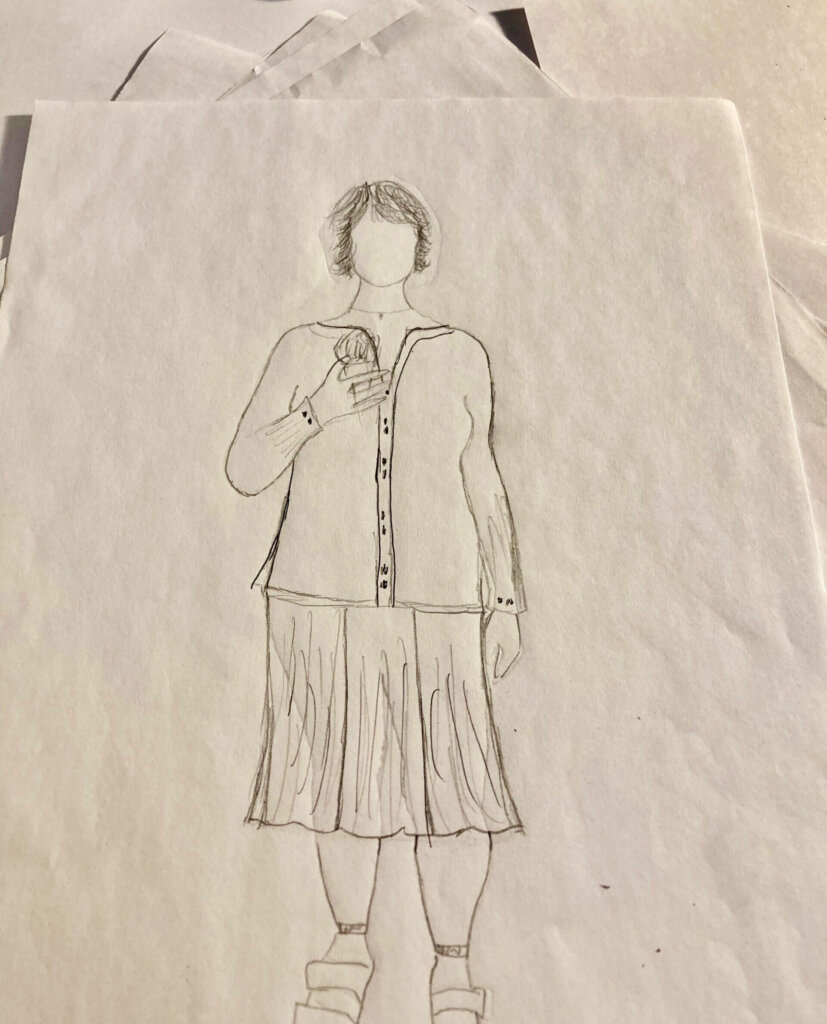
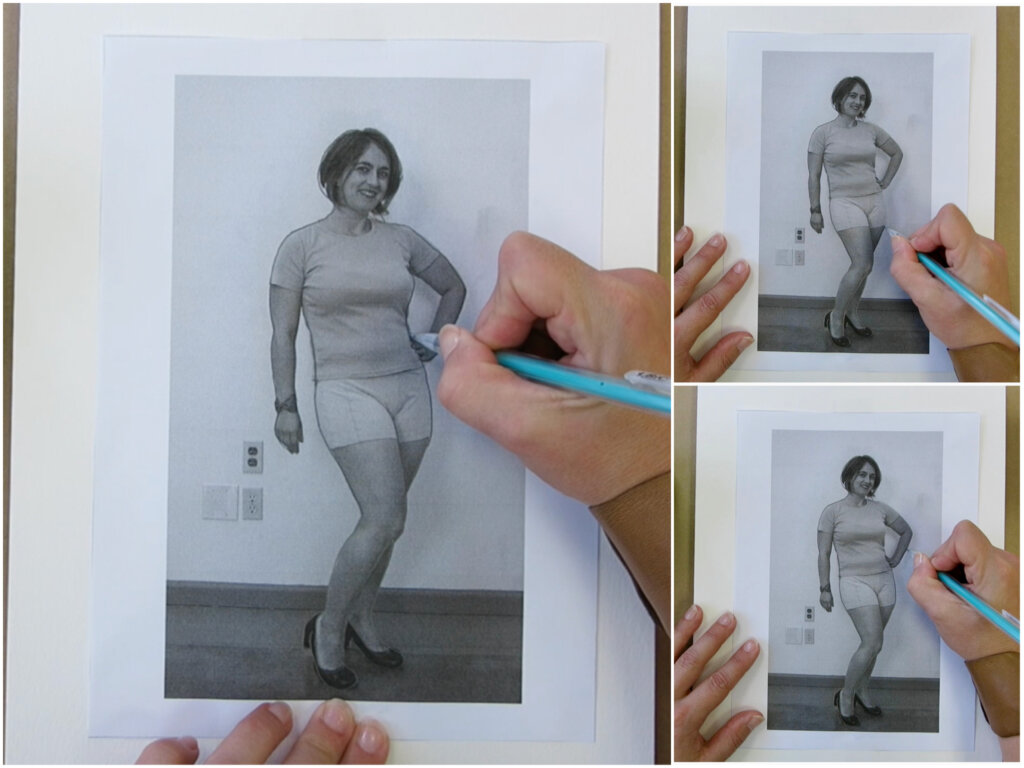
Then, with your pencil, you’ll now trace around your silhouette. Roughly follow along the outline of your head, your hair, (you can even draw yourself a new hairdo, if you’d like), and all of your shape.
I recommend leaving the face blank. Drawing facial features is not easy and not necessary. This croqui tool is going to be about trying on clothes, not about how well the face you drew looks like your face.
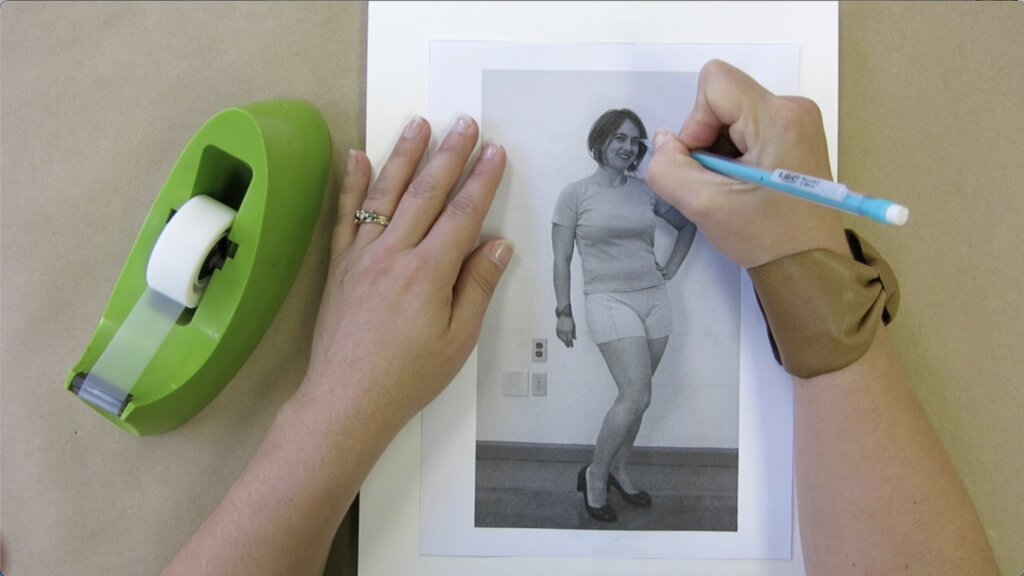
Trace around your neck, your shoulders, trace around your arms, your legs…. trace around the outline of your shoes…
What is happening underneath is that your pencil pressure on the front is transferring the pencil scribbles on the back very lightly onto the paper below.
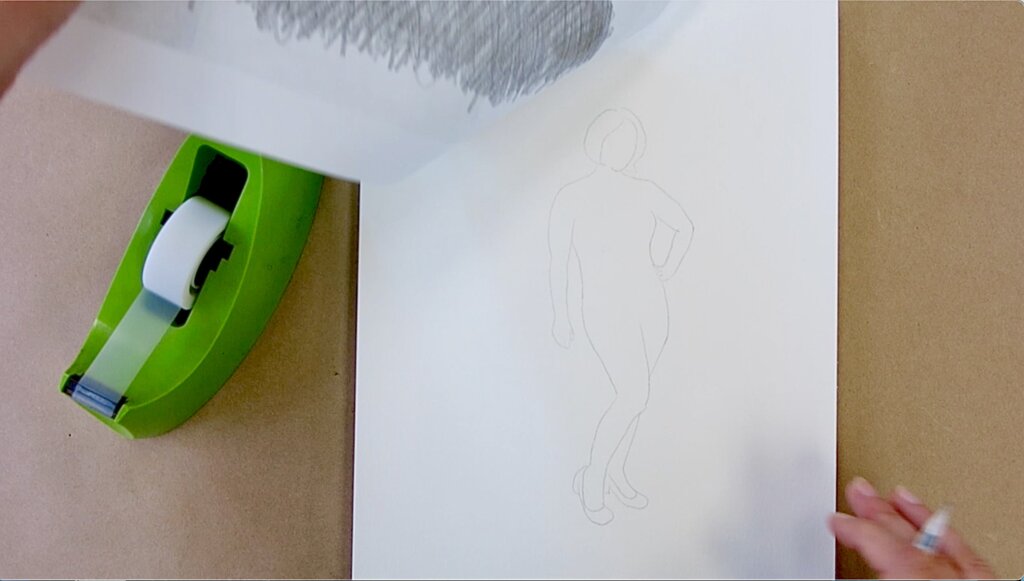
One of the most important parts of sketching is erasing. This croqui transfer method starts so lightly that it allows for really easy erasing. There’s no need to get anything right on the first (or fifth) try. You’ll have lots of opportunity for building and revising. You can also quickly and invisibly remove any body lines behind your sketched clothing.
After you’ve got your silhouette outlined, hinge the photo at the tape to reveal your faint outline. Observe the drawing and make sure you didn’t miss anything. If you did, just tape it back down and add the missing bit or bits.
And that’s it! Your full silhouette will be faintly traced and ready to rock some design ideas!
Once you’ve got all the basic info and have traced and transferred your full silhouette onto your sketching paper below, you are done with your photo.
For this sketch, that is…
Save your Photo (or Illustration) for Future Sketches!
Bonus: Your Custom Croqui-Maker Tool is reusable! Keep your scribble-backed tool and pull it out again each time you are ready for your next sketch. The pencil outlines on the front will already be there as guides for your next sketch (and your next and your next…) The original scribbles on the back can even be reused for many new transfers before needing to quickly add more scribbling. So cool!
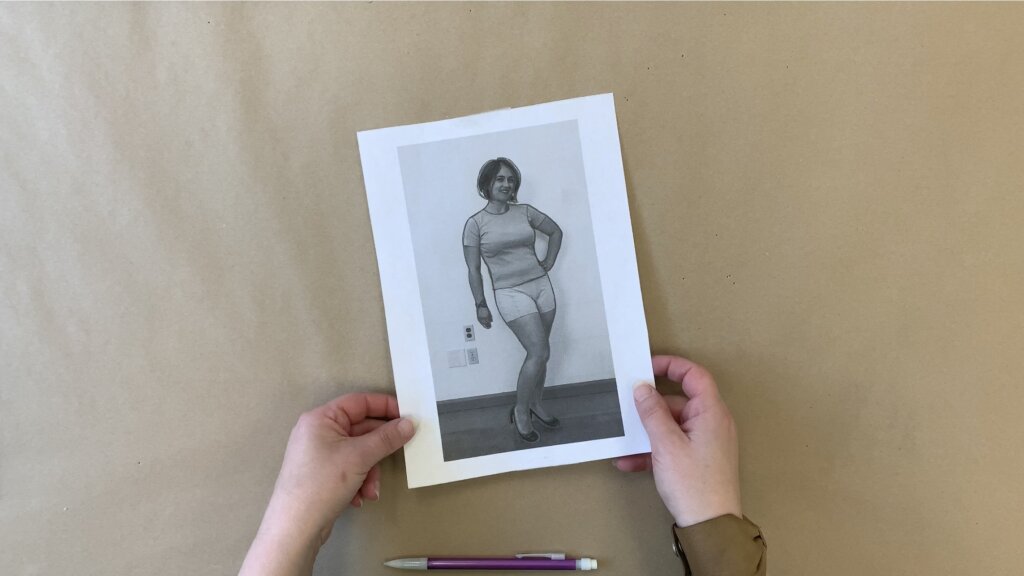
Photo or Illustration? If you don’t really want to look at that photo every time you sketch, you can use this toolmaking time to take your tool one step further.
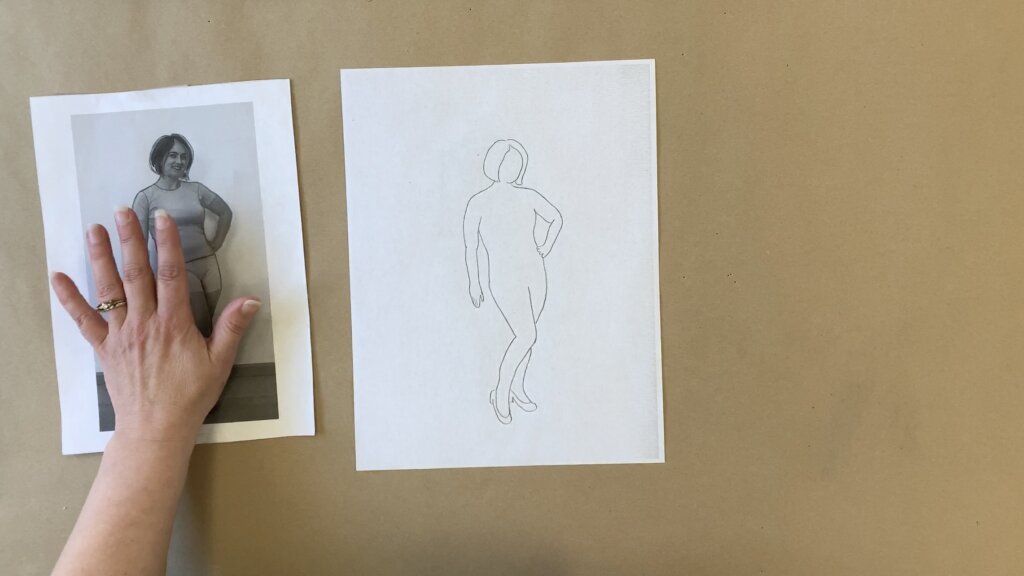
Consider tracing the faint silhouette onto regular paper and darkening the outline with your pencil (and/or punching up the contrast on your printer for a new printout). From now on, instead of continuing to use your photo printout over and over, you can use the blank silhouetted printout as your reusable scribble-backed croqui-maker sketching tool. Whatever works for you!
In Action!
Watch the whole process of using my Reusable Custom Croqui-Maker to sketch myself an outfit. Enjoy 11 minutes of sketching condensed to 30 seconds!
What I love about transferring the faint penciled outline onto a fresh sheet of paper each time, (instead of sketching directly onto a printed croqui), is that it gives you an excellent starting point for adding and for subtracting. I start by roughly sketching my clothing ideas very lightly. Then, I gradually darken the lines I like and erase the lines I don’t like.
But also- Those minutes it takes to faintly retrace the body before adding the clothes is an excellent warm-up to slowly get into the creative mindset of the designing and sketching tasks ahead. Every time you trace around your body, you’ll be gaining important physical and mental practice– and you’ll naturally become better and more comfortable with each new sketch. I just love it!
More about this croqui-making technique (and what to do with it):
Prep School for Custom Sewing: You’ve now read though the quick version of one lesson shared during “Warmup Week” of my Intro to Custom Sewing eCourse Skirt Skills. To learn so much more, including my favorite techniques for designing, sketching, patternmaking, fitting, and sewing the custom garments you sketch, join the next session!
Kinship Handwork: My friend Tina VanDenburg also shares this custom coqui-making and sketching technique as part of her online course “Sew Clothes You Love”. Check it out!
Select blog posts about sketching:
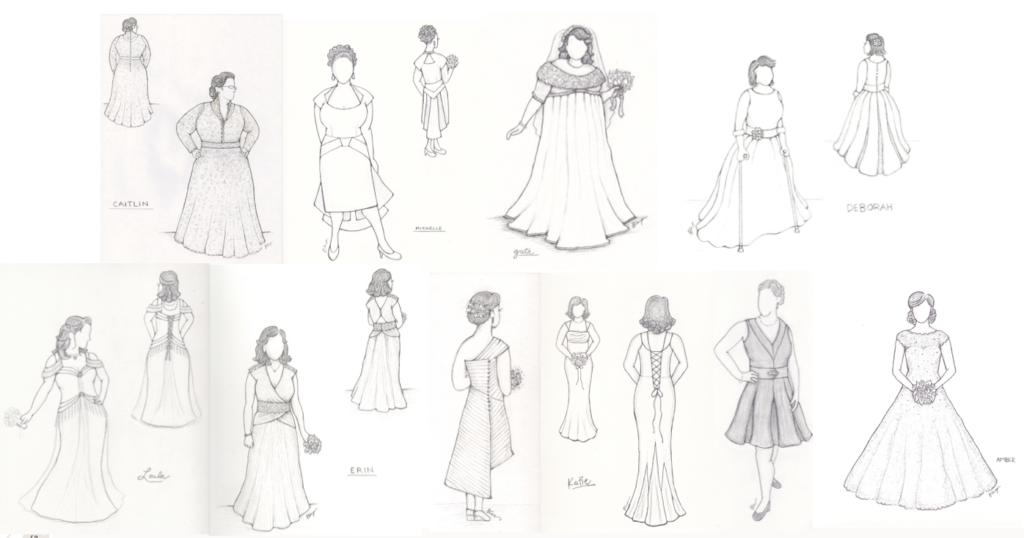
Deborah’s Design Consultation & Wedding Dress Sketches
New Bridal Blog Series: Tiffany!
Inspirations & Sketches for Diane’s Bridal Ensemble
Back the the Drawing Board with Sally
Caitlin’s Custom Wedding Dress Sketch and Inspirations
All of my blog posts about sketching & inspirations (30+ posts!) can be found here.
Go Make Your Tool!
Ok! Get started! Take what you learned, and in whatever way works for you, get a representation of your body ready to start trying some clothes onto it!
Like most skills, sketching takes practice, but using this custom tool is so extremely helpful, and also kinda fun, that I often can’t imagine sewing without it. I love being able to visualize the project on the body before making any commitments. I’m excited that you are about to have this super cool tool in your custom sewing toolbox and to experience the power of custom sketching!
Is sketching part of your personal sewing practice? Let me know wha you think!
NEXT POST: I’ll share some of my recent experiments using my custom croqui to test design and fabric choices digitally! Thanks for following along!
A version of this blog post was published in Threads Magazine Issue #228 Winter 2024.


2 Responses
Loved this when I first saw it on your blog – one tip I have for taking fitting photos solo is to use the Voice Command on your smartphone. I wrote up instructions for an iPhone on Pattern Review Tips and a comment their talks about an Android version. easy, free, and makes the photo taking process so much easier! https://sewing.patternreview.com/review/review/5052 You can find it by searching “Fitting Photos Using Voice Command on iPhone”.
Thanks for all the valuable info you share!
Yay!Thanks so much for sharing. I’ve never used the Voice Command feature before. Your instructions seem great. Hopefully it will help me and others add this cool tool into our practice. Love it! I’ll share this as a bonus link in my eCourse lesson as well. Thanks again for putting these instructions together and linking them here.