


Welcome to the 3rd and final post about my Vanishing Tie Top- and it’s a DOOZY! Follow along as I share 50+ photos and over a dozen video clips of constructing this couture top from start-to-finish.
As I’m writing this post (not as I was making this top), I am getting over the flu. I currently have the brain capacity to share and explain my process photos and videos, but not much in the way of writing witty words. So feast your eyes on the visuals, and I’ll catch you some other time for interesting philosophies and detailed directions. I want to get to the end of this blog post just as much as you do!
Before the Precious Fabric
Part of the Precious Fabric Challenge was to make a “wearable muslin”.
I most often make my mockups (or “muslins”) “wearable” by reusing its fabric as a backing layer for the actual garment fabric. It’s a technique called Underlining (or Flat Lining). Learn more about it in this blog series!
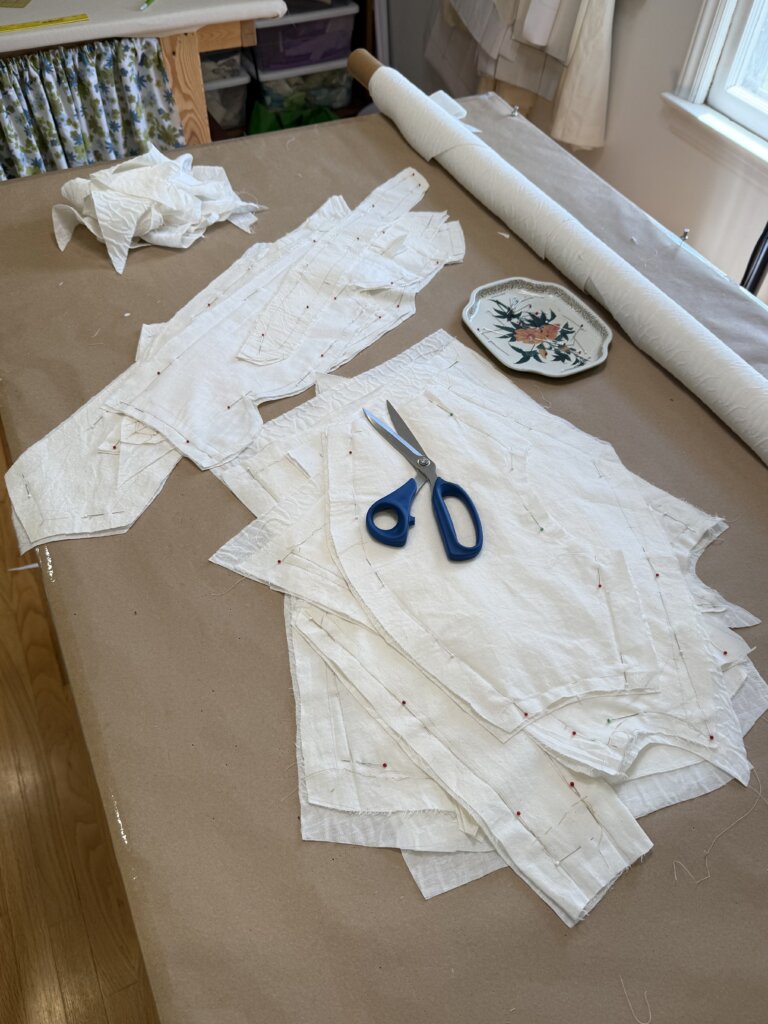
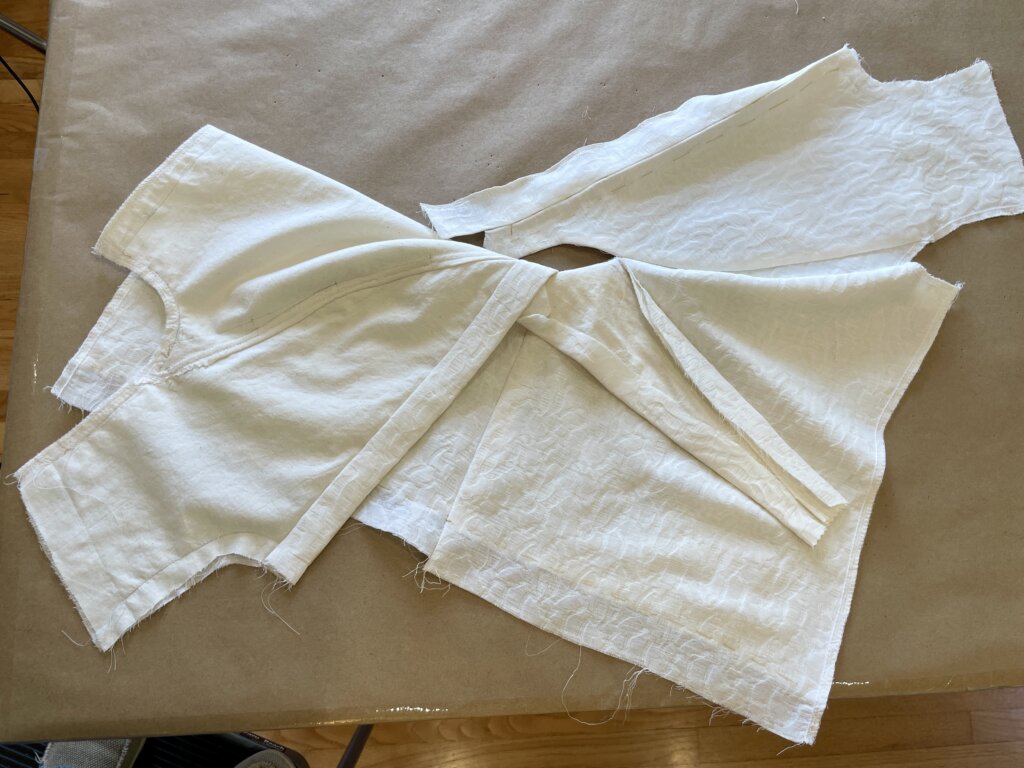
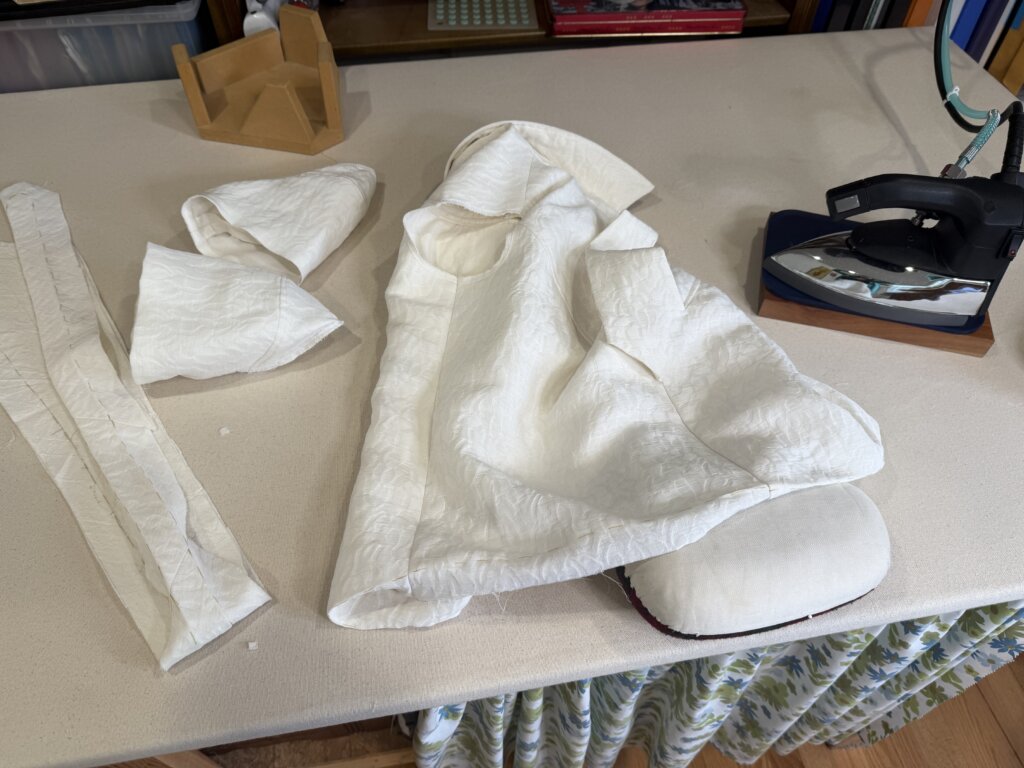
It starts by quickly taking apart the basted mockup and returning all of the pieces to their original flattened state.
Since everything was merely basted together (no permanent stitches), disassembly only took me about 5 minutes! I love ripping through seams like I’m a Hulk!
Next, I pressed everything flat again.
I spent about 15 minutes using the edges and markings of my corrected paper pattern pieces to press my mockup pieces back to match their original shapes, while making sure all of my markings are correct and that I’m set up for success.
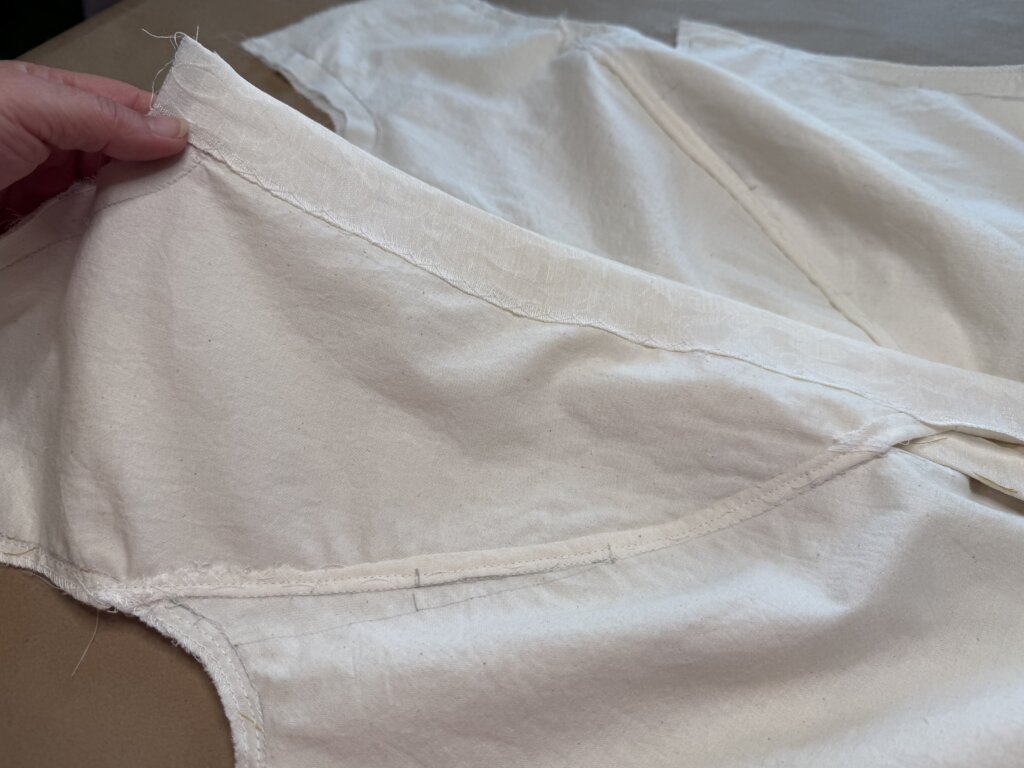
While pressing the pieces, I remembered that I tested two different sleeve options in my mockup. Good catch!
I needed to cut another one of my preferred sleeves out of muslin, and toss the one that didn’t make the cut.
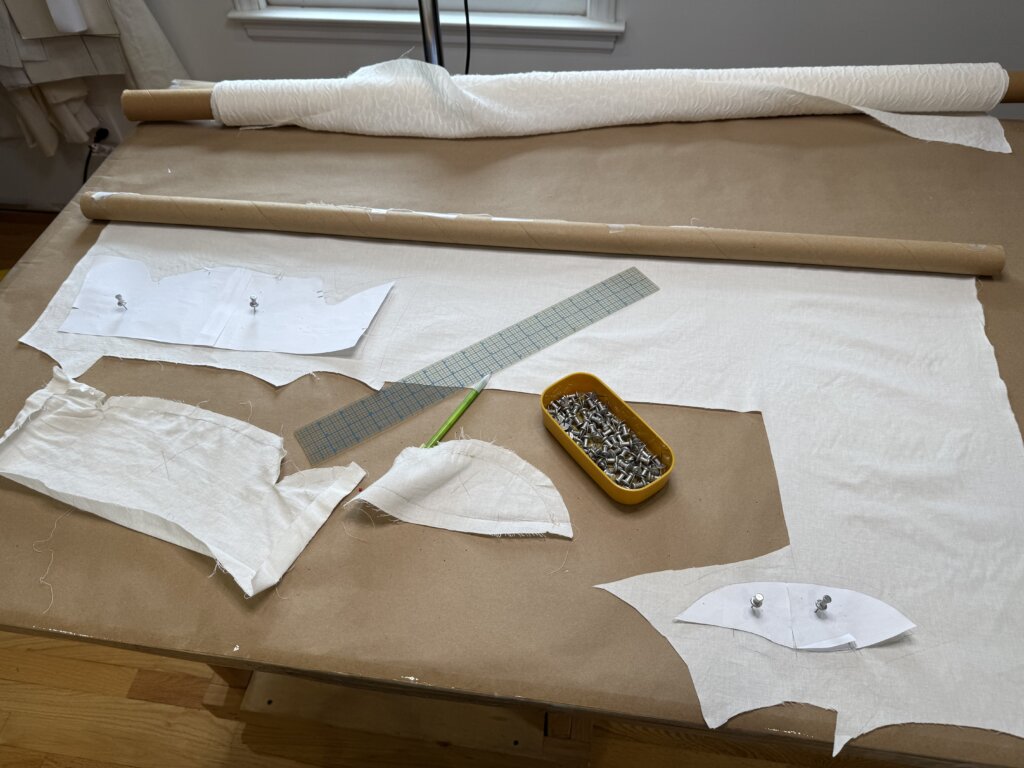
I also needed to cut a second version of the collar from my muslin, for my facings.
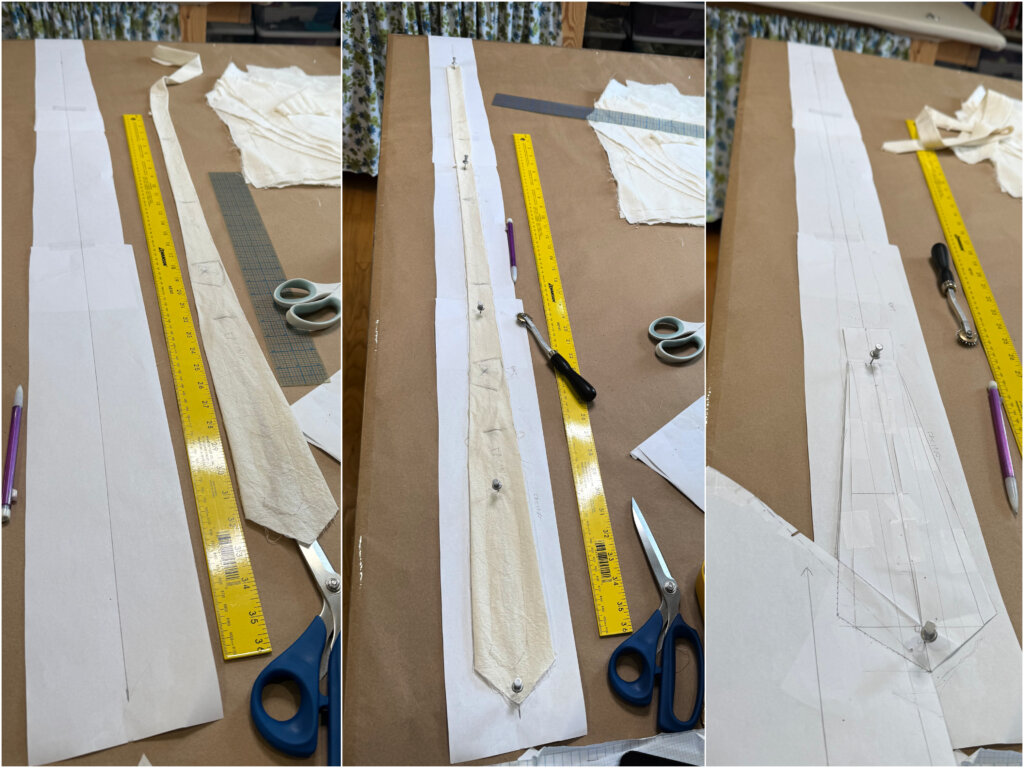
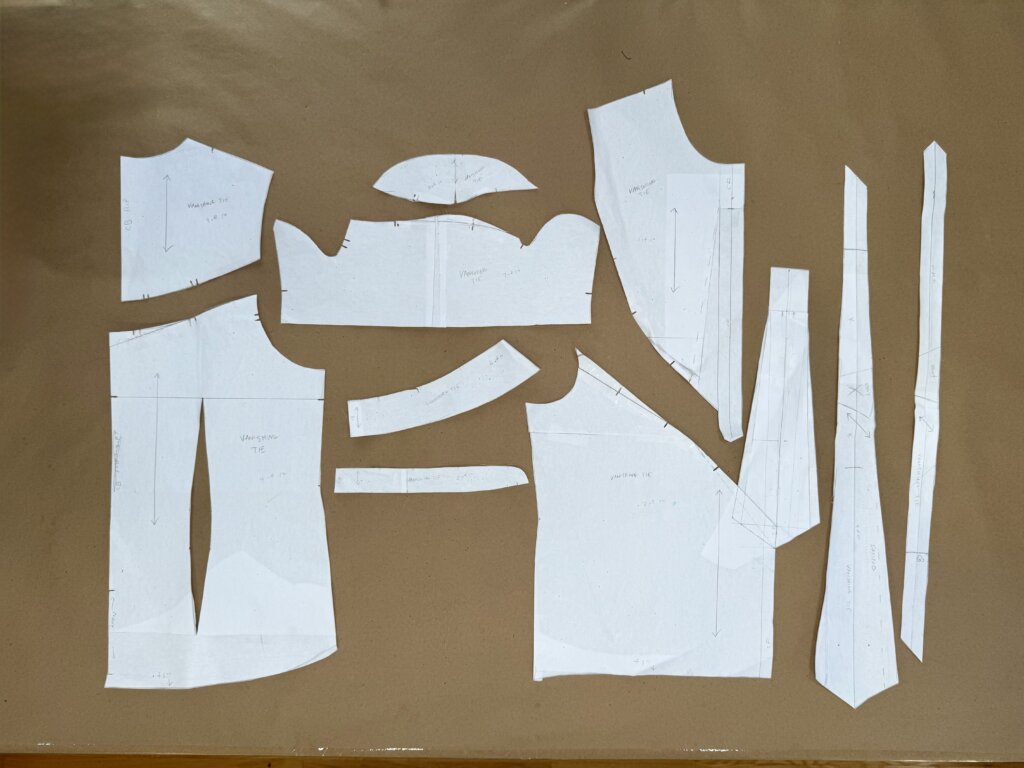
To complete the pattern before cutting my fancy fabric, I still needed to figure out the Vanishing Tie.
This is where I needed to abandon the Pattern Magic book (see Pt 1). The instructions in the book create an unwearable garment. I discovered that an additional pattern piece would make my top wearable: a creative tie facing.
When testing my mockup (in Part 2), I skipped finishing the tie facing pattern. After all of that experimenting, I was ready to move on from patternmaking, and knew I could let any tie ideas simmer during the steps shown above.
To get started, I used a mashup of my mockup piece and the pattern for the top’s front to create a tie + facing pattern I thought would work in my design.
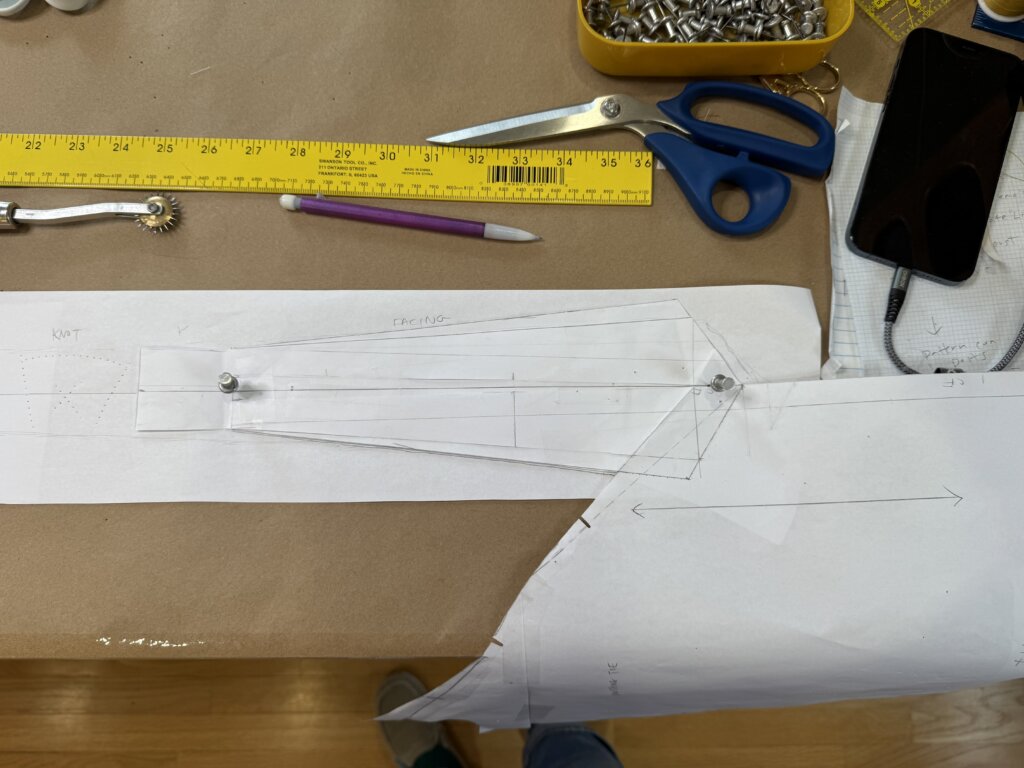
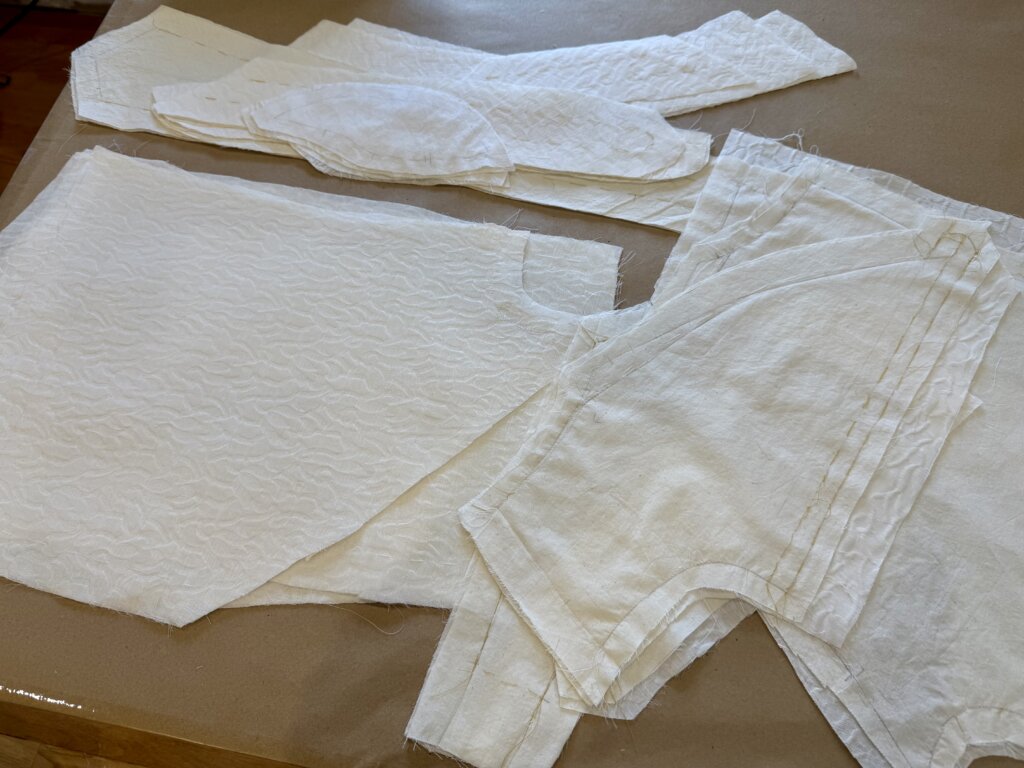
The finalized pattern pieces!
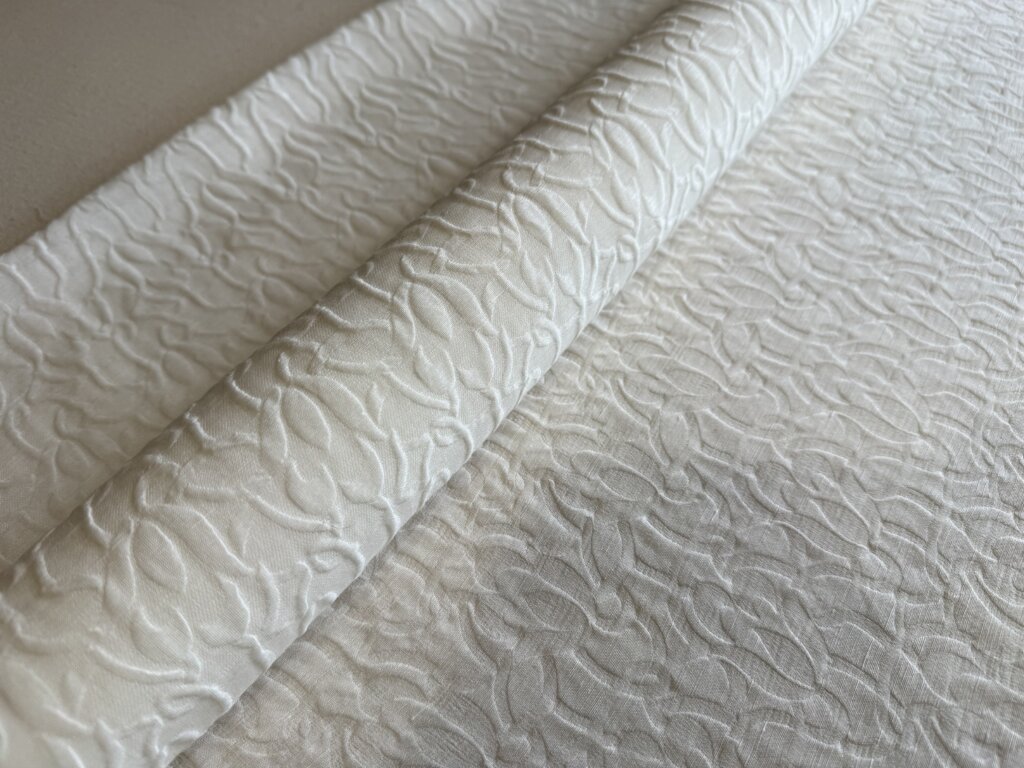
The Precious Fabric!
It was finally time to roll out the Precious Fabric and get started on the actual top!
Which means it was time to decide which side of the fabric to feature.
The raised side (seen below on the upper and rolled part) is the “right” side of the fabric, and the side of the fabric I chose to feature in Diane’s wedding blouse. This the side that really shows off the raised designs that are the epitome of matelassé.
But, ya’ll… I also loved the look of the opposite side (shown on the right of the photo below). It was a little sleeker, a little less “floral”, and I ultimately decided that it might offer crisper edges for the geometric shapes that I’d be creating in this Vanishing Tie Top.
I’m the designer, and I can do what I want. So I chose the back side of the fabric as the “right side” for my top! (I plan to use the opposite side for a “matching” skirt, but that’s a future project…)
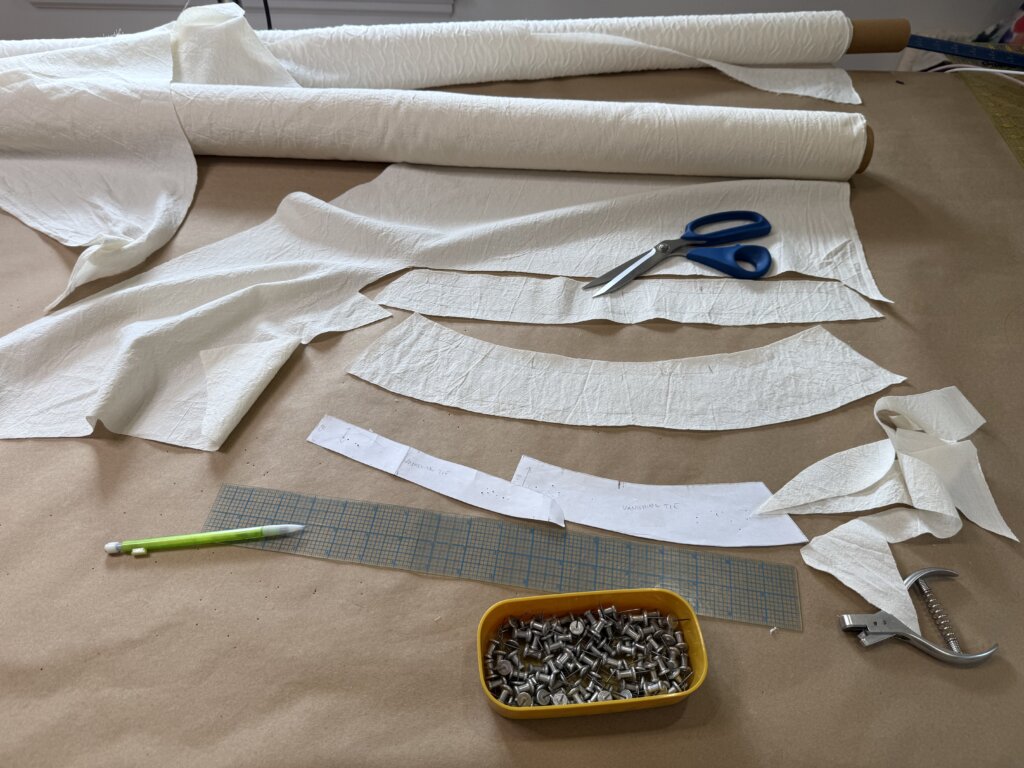
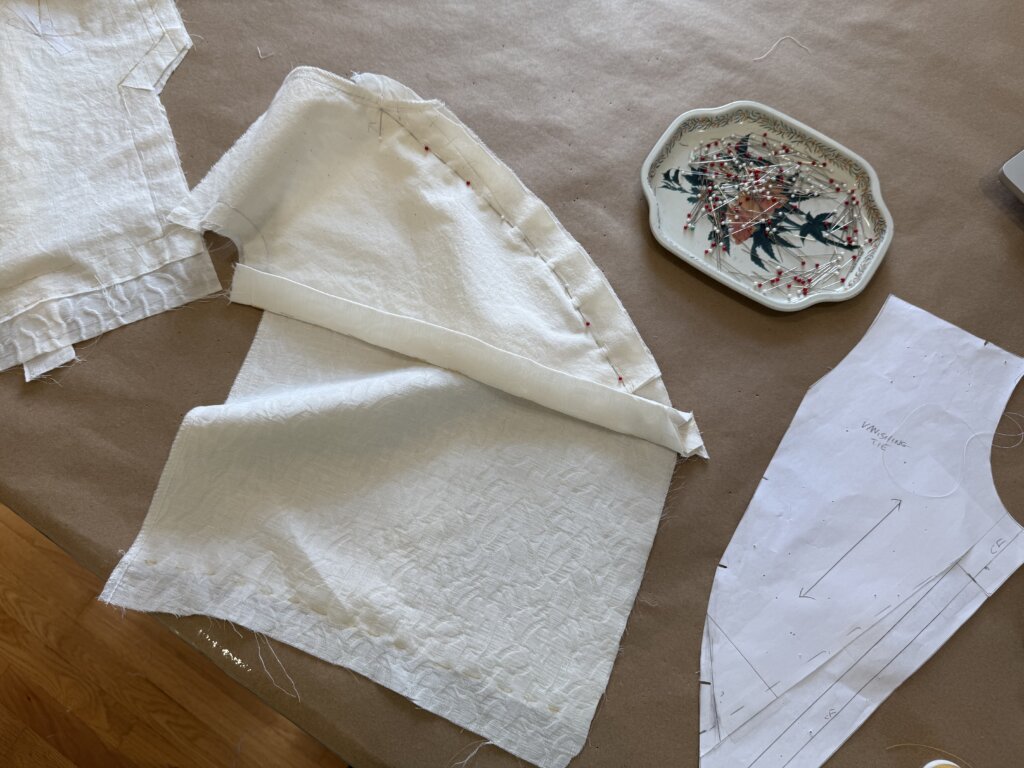
Let the Underlining / Flat Lining begin!
To get started, I carefully laid out each flattened muslin piece onto a single layer of my silk/linen fabric, with the mockup markings facing me and my preferred “public side” of the fabric against the table.
Matching my grainlines and maximizing my layout for the least amount of fabric waste, I then connect the two layers with pins, along the stitching lines.
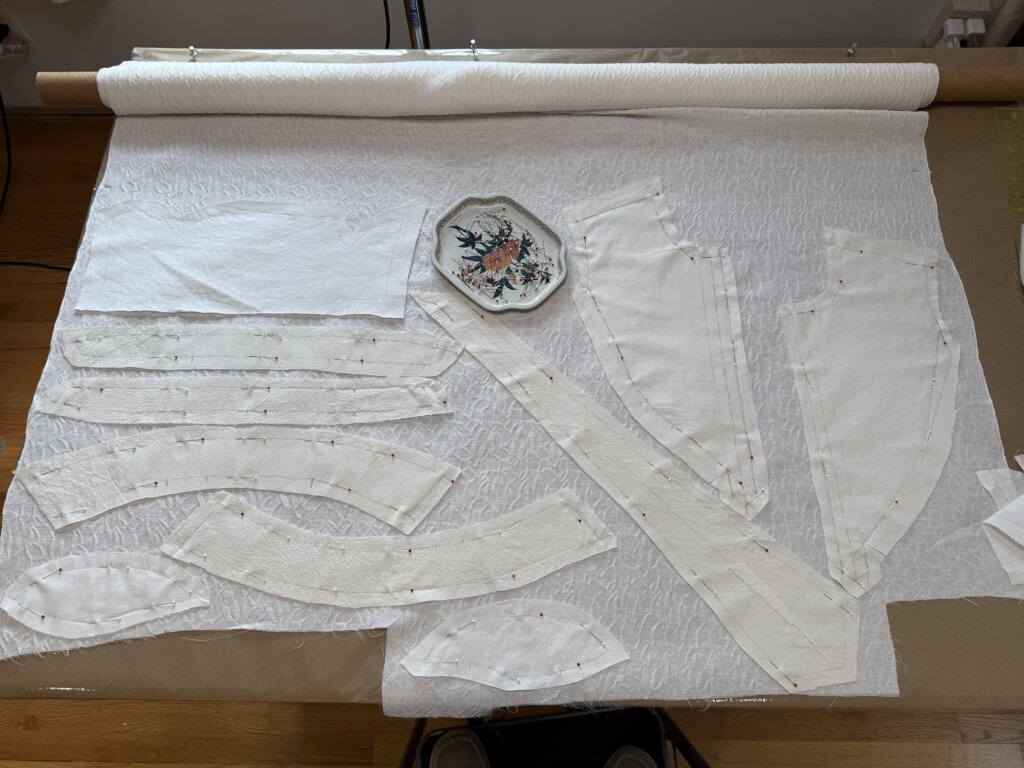
I like to get the whole project laid out before I start cutting.
Here’s where I put each piece.
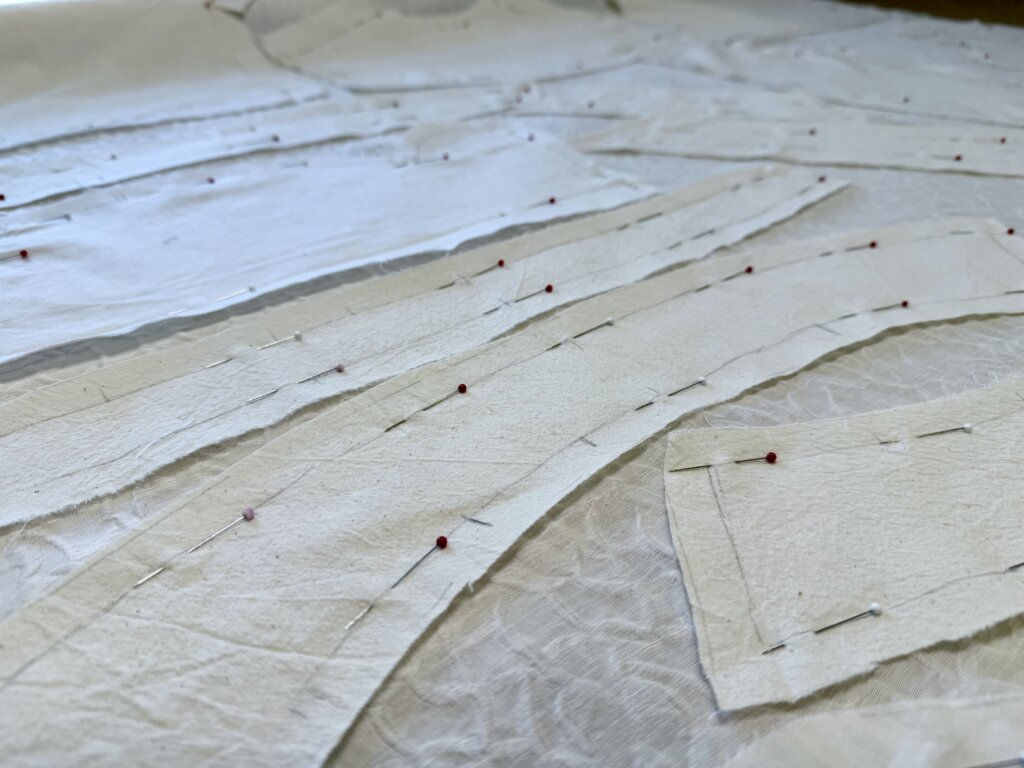
Then I cut the matelassé around each muslin piece.
Though cutting carefully is not necessary (the way I sew makes the cut edges unimportant), I could have done a better job filming! Oops! Shout out to Freeman’s Creative…
One of the (many) advantages of sewing with stitching lines (instead of a certain amount in from the cut edge) is that cutting requires no precision. I had a lot of fun quickly hacking at it.
Here’s my pile of pieces, ready for underlining stitches! A lot of pieces, and not a lot of scraps!
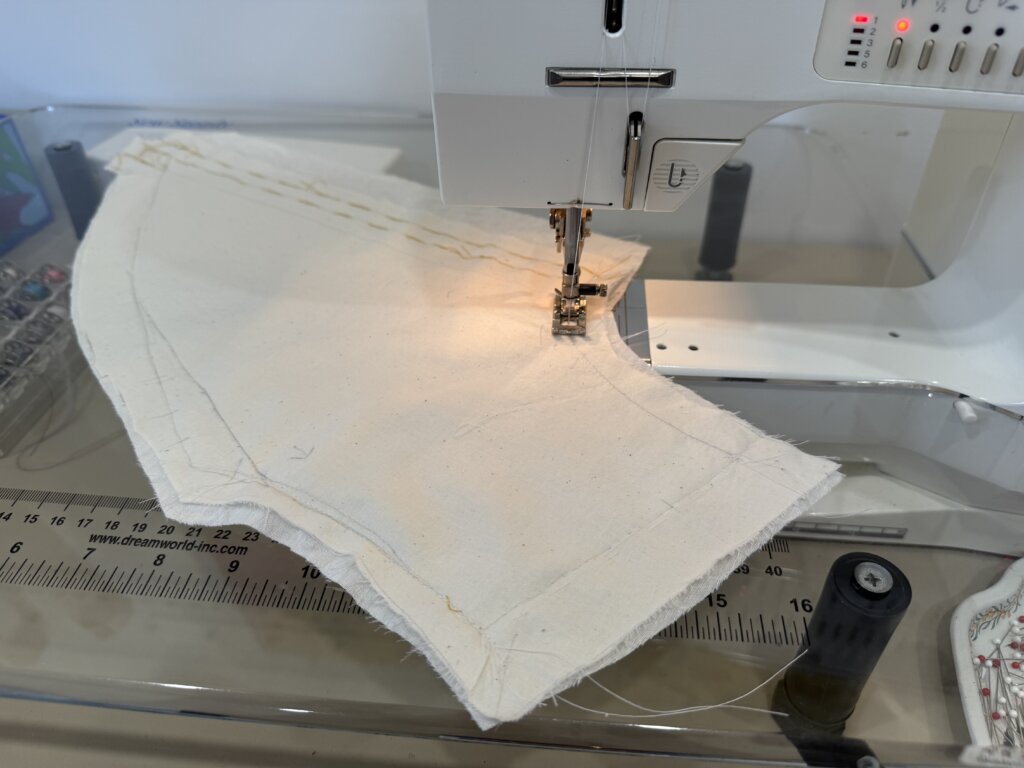
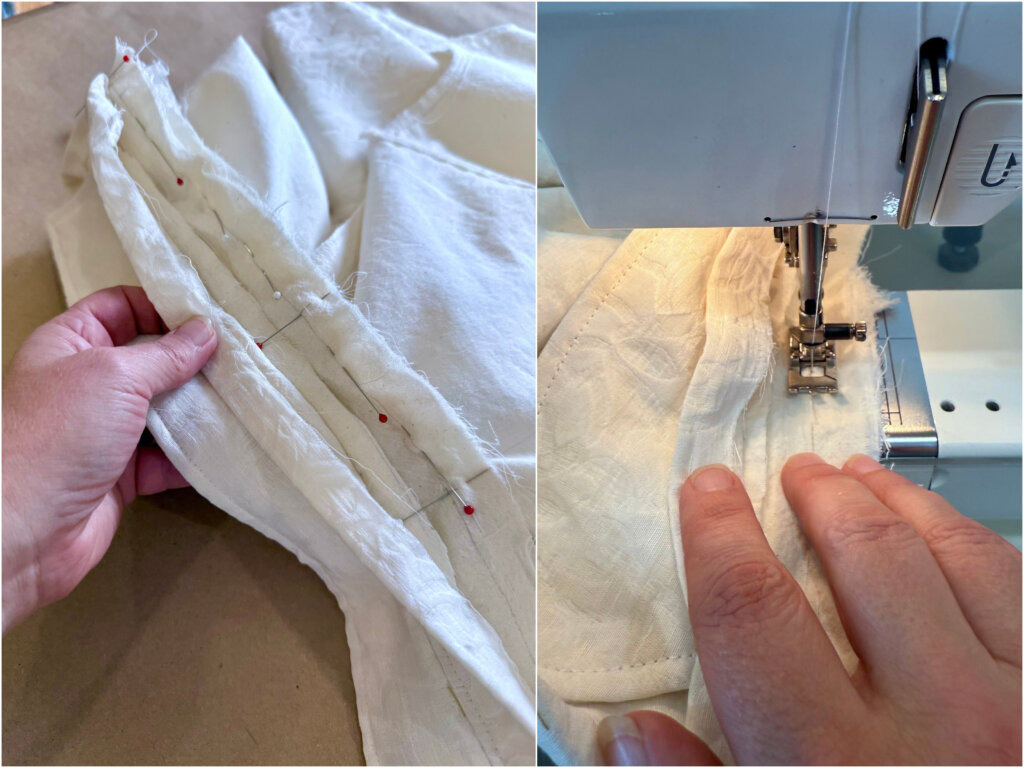
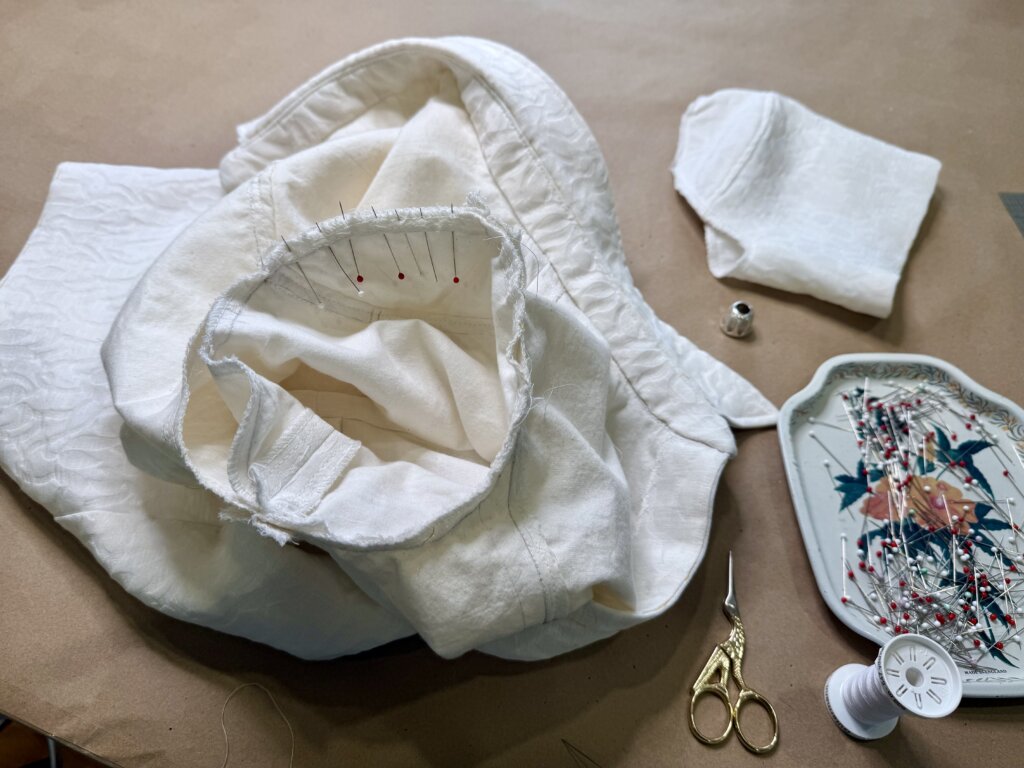
Next, I replaced the pins with hand basting stitches (just outside of the stitching line, so that I never need to remove them).
I love this part.
I turned on a movie and happily hand stitched using my Atlas Thimble for about an hour and a half, until each piece of matelassé was permanently backed with my marked mockup fabric.
Then, I pressed all of the pieces to make sure the two layers were acting as one. If I found a bubble, I removed the basting in that area and redid the stitching. I also added pins to areas where I didn’t add basting…
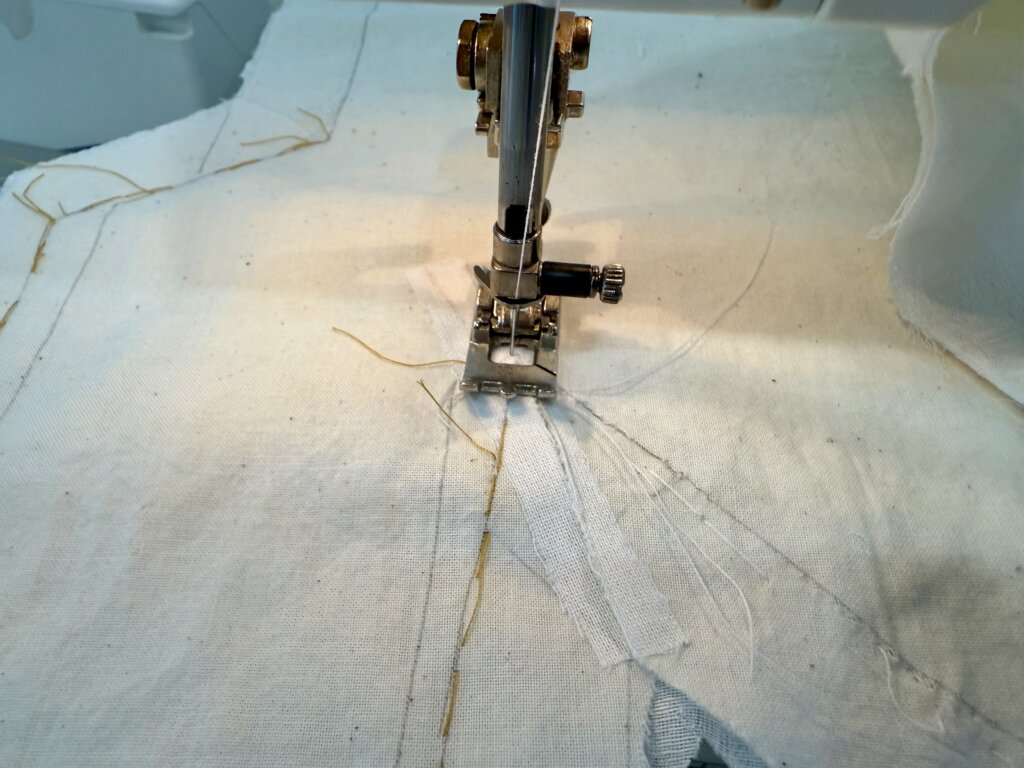
…opting to “stay stitch” along those lines by machine.
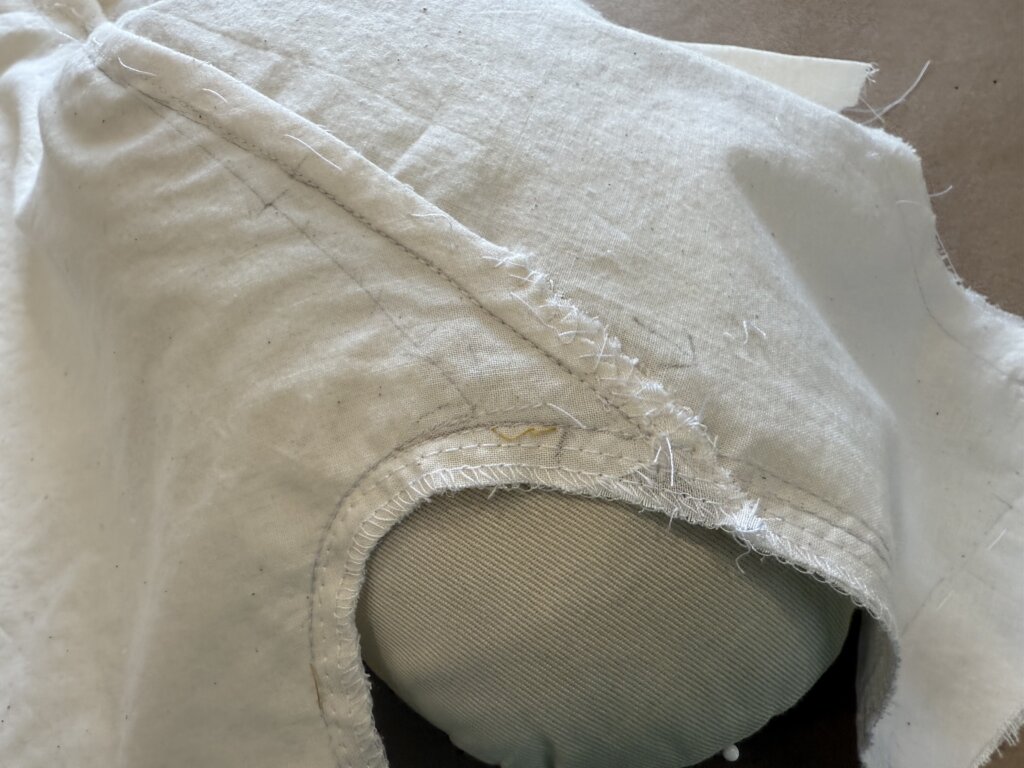
There were a few areas of this design where the allowance must be clipped close to the stitching line to create the desired points and turns. At these spots, I added a teeny bit of fusible interfacing to the “wrong” side of the fashion fabric, between the layers, to reduce fraying.
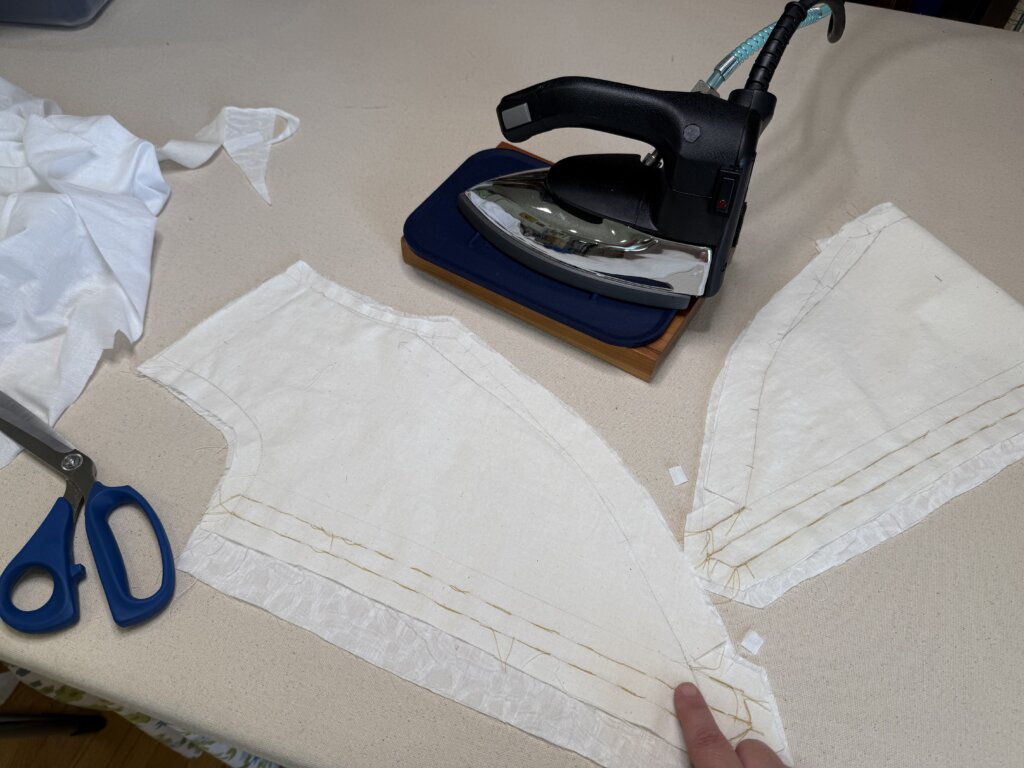
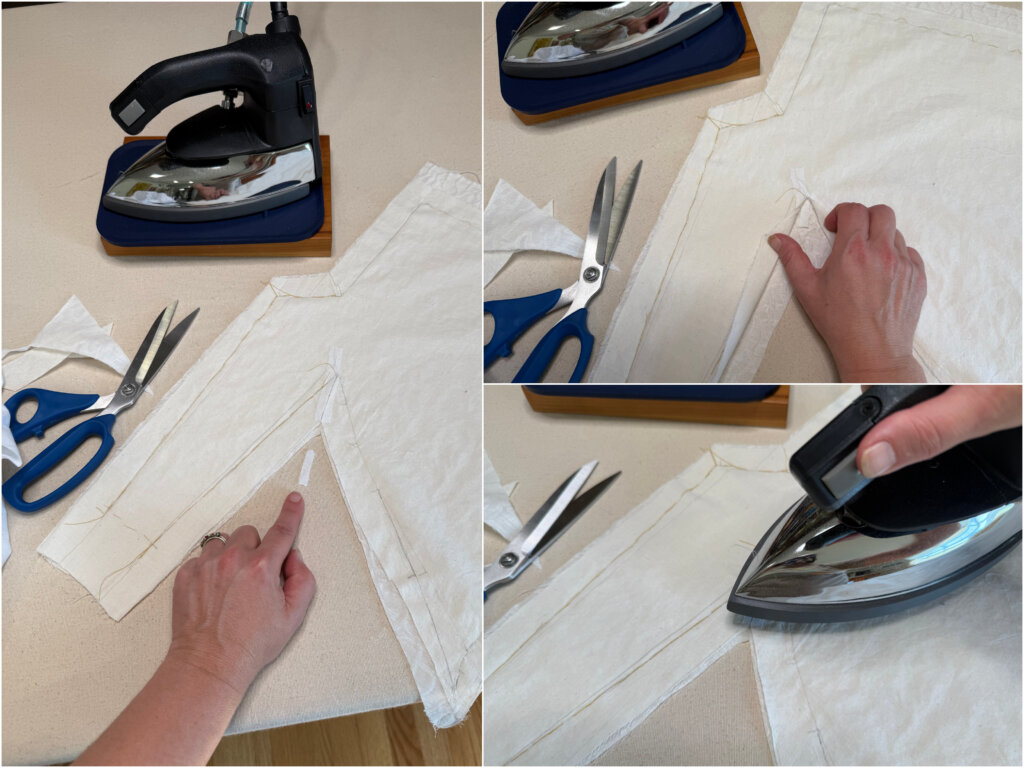
I also added stay stitching, through all the layers, in those potentially vulnerable areas.
I love how these early steps really allow me to get to know my fabric, and how they offer time to think about my upcoming construction plan.
These pieces are now magic – filled with benefits for sewing and wearing!
Questions? Check out my 3-part blog series (with a video!) all about the “couture technique” of Underlining/ Flat Lining!
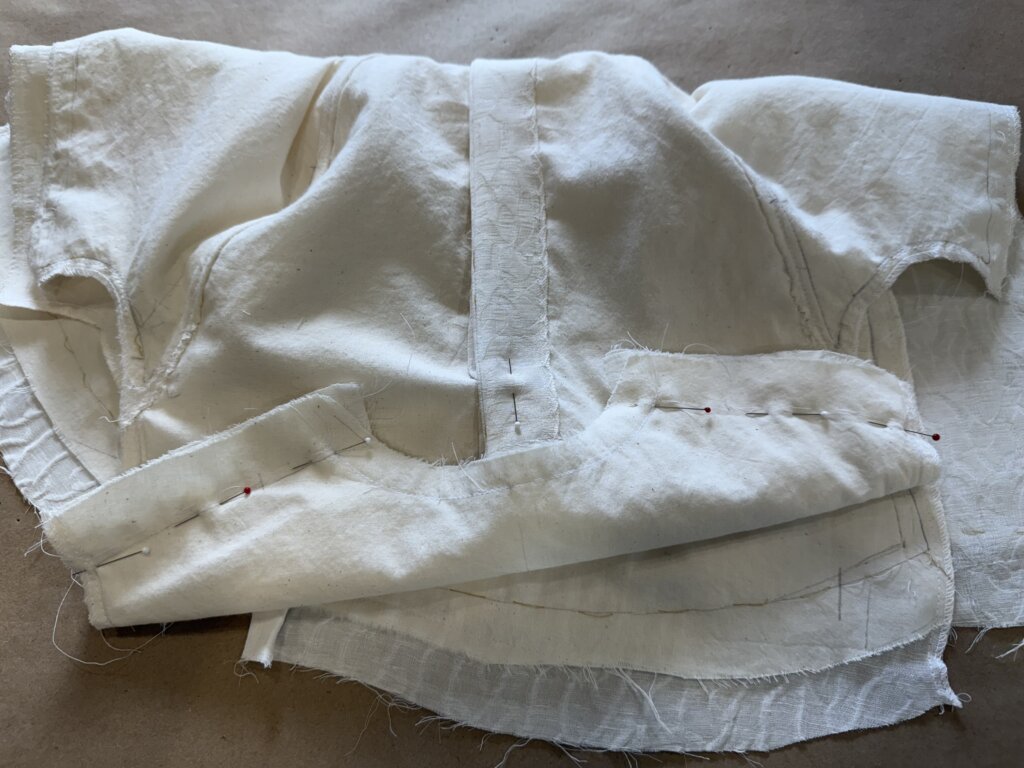
The last step before beginning to turn my 2D pieces into a 3D garment was testing. I used my scraps to test various seam finishes before making any construction decisions.
Collar, Sleeves, & Plackets
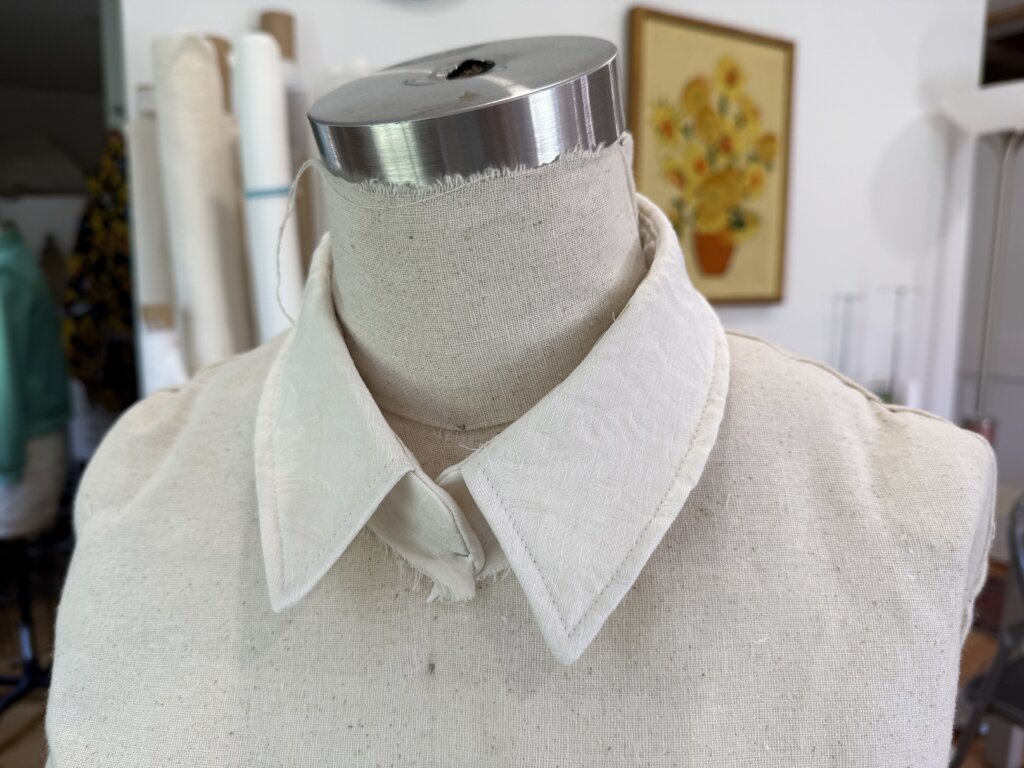
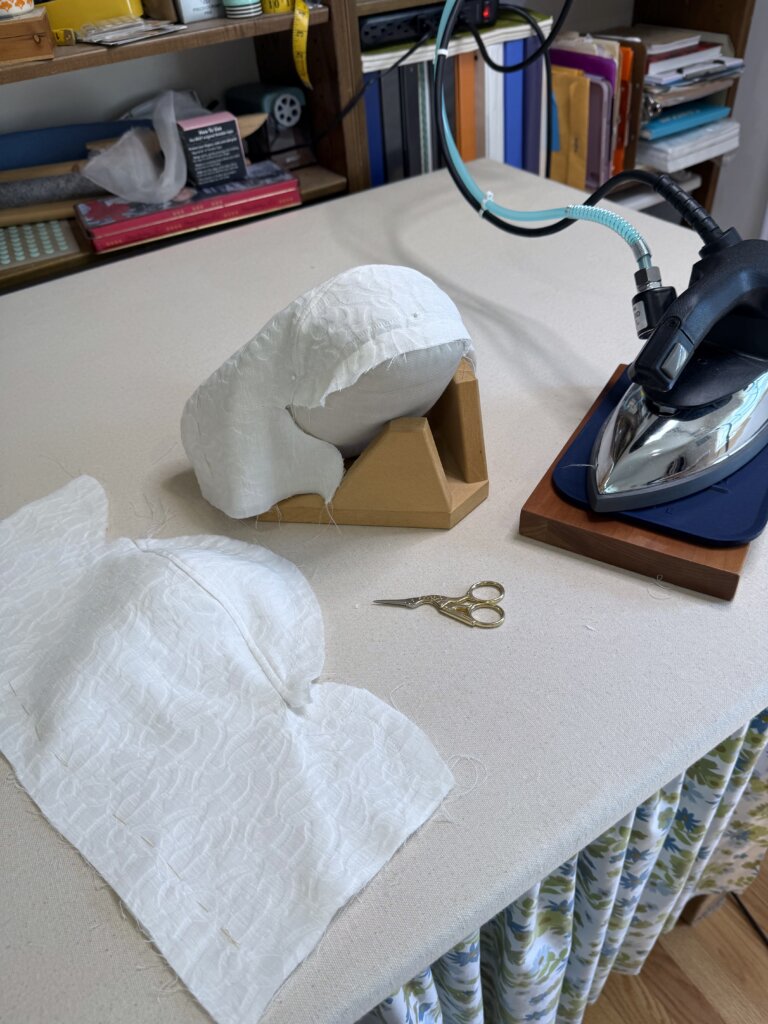
I started my top’s 3D construction by making the collar!
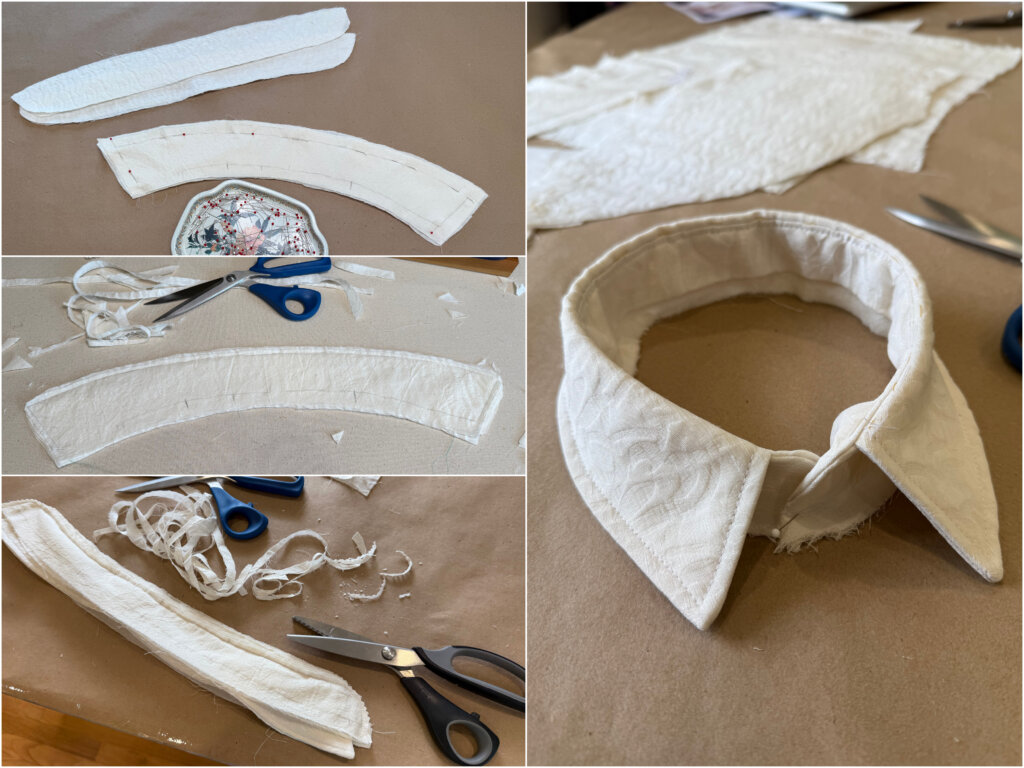
So satisfying!
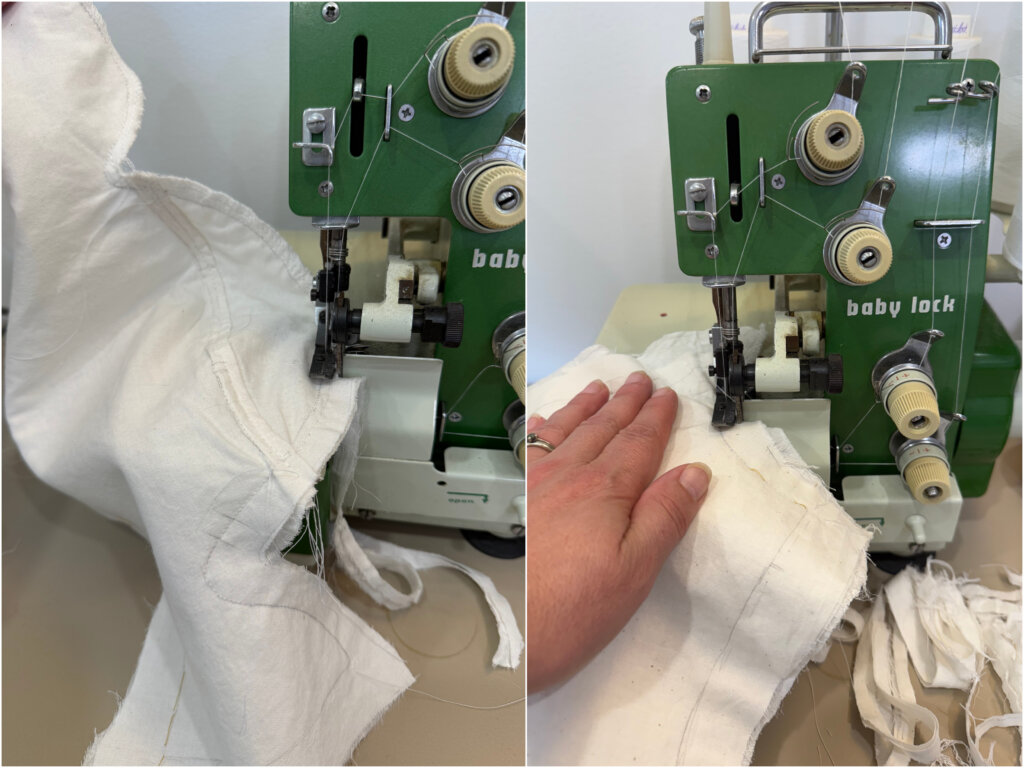
Next, up I put the sleeves together…
…including pre-finishing each sleeve’s edges and the top’s armholes with my grandmother’s cutie patootie vintage serger.
Next, I started working on the plackets. I had planned to simply fold each edge twice, before stitching invisibly to the underlining layer. But I realized that I didn’t add enough length to one of the sides. Oops!
No worries! I added a piece! And it might be even better this way!
I seamed on a strip of fabric that included the selvedge. This will offer less bulk than the double turned option. Happy accident!
Pinning & Seaming
Let the pinning and seaming begin!
Beautiful inside and out!
As you may remember in Pt 2, I opted to change a seamline on my mockup. Since I moved it almost a full inch, this meant that I didn’t have quite enough mockup fabric to turn the raw edges completely under for a clean finish. I compensated with a cross-stitch by hand over the raw edge.
You may think this is messy, but I honestly think this might be my favorite part of this whole garment. If you read my recent essay in Threads Magazine, you know I love “the mark of the maker”. I absolutely love the story that this “messy” bit has to share!
Then, I was on to the other side…

I’m less than 5′ tall, and though my tables were custom made to match a comfortable height, I have yet to find a chair that works for me.
While making this top, I decided to ditch the chair most of the time- even when machine sewing.
I got pretty good at it, and thought it was pretty fun! Now, I rarely machine sew sitting down!
I’m so curious: Do any of you machine sew while standing up?
Since it takes longer, for hand sewing, I often (but not always) sit.
Here I am taking advantage of one of the benefits of underlining! I’m finishing off the Center Back seam by hand stitching the folded allowance to only the muslin layer. The stitches will be invisible from the outside of the garment (since they don’t go through to the outside of the garment at all), therefore they don’t have to be beautiful or even. (I absolutely love sewing and seeing a messy, yet invisible, stitch!)
With the help of my Atlas thimble and a movie, this part was a pleasure.
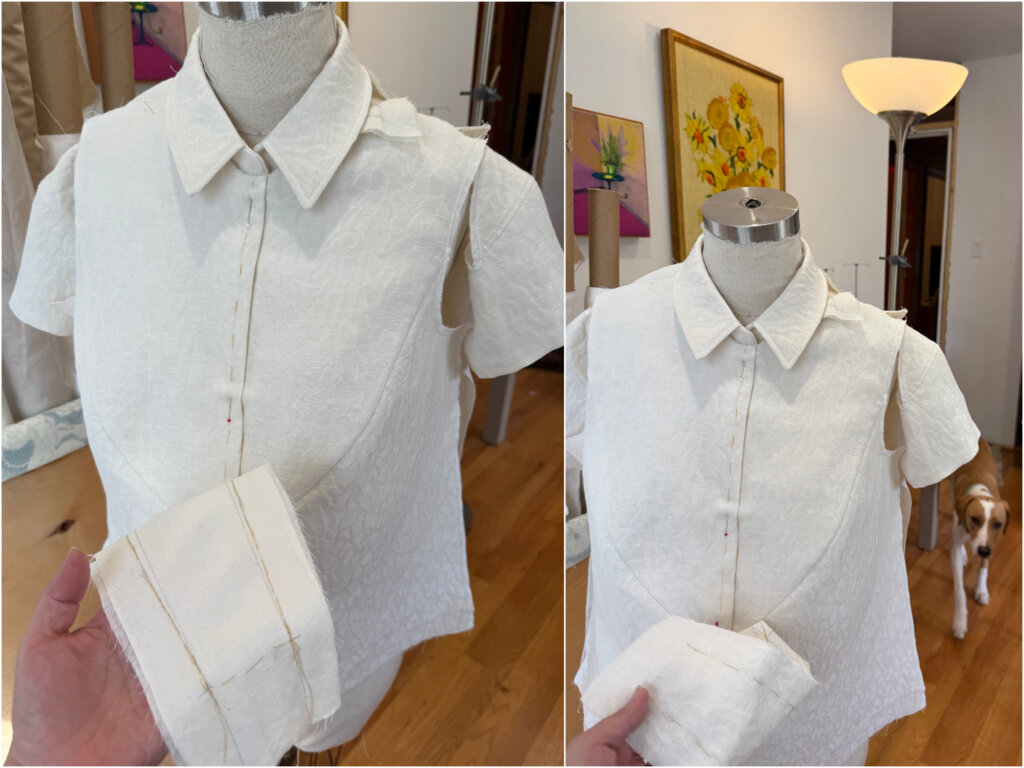
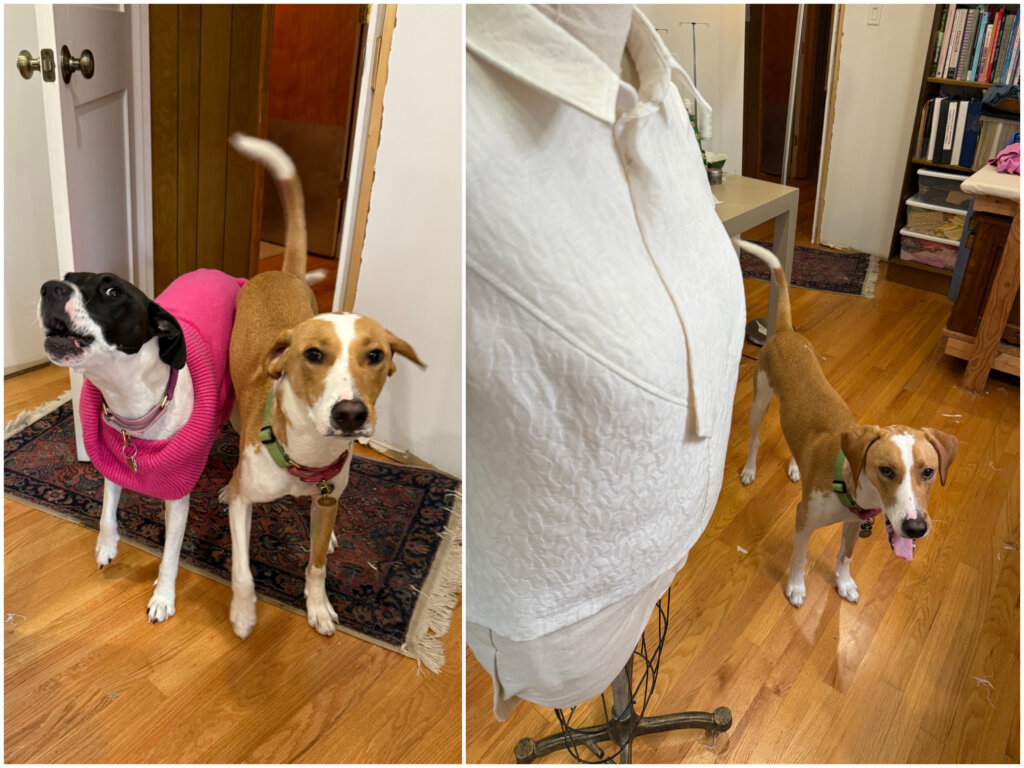
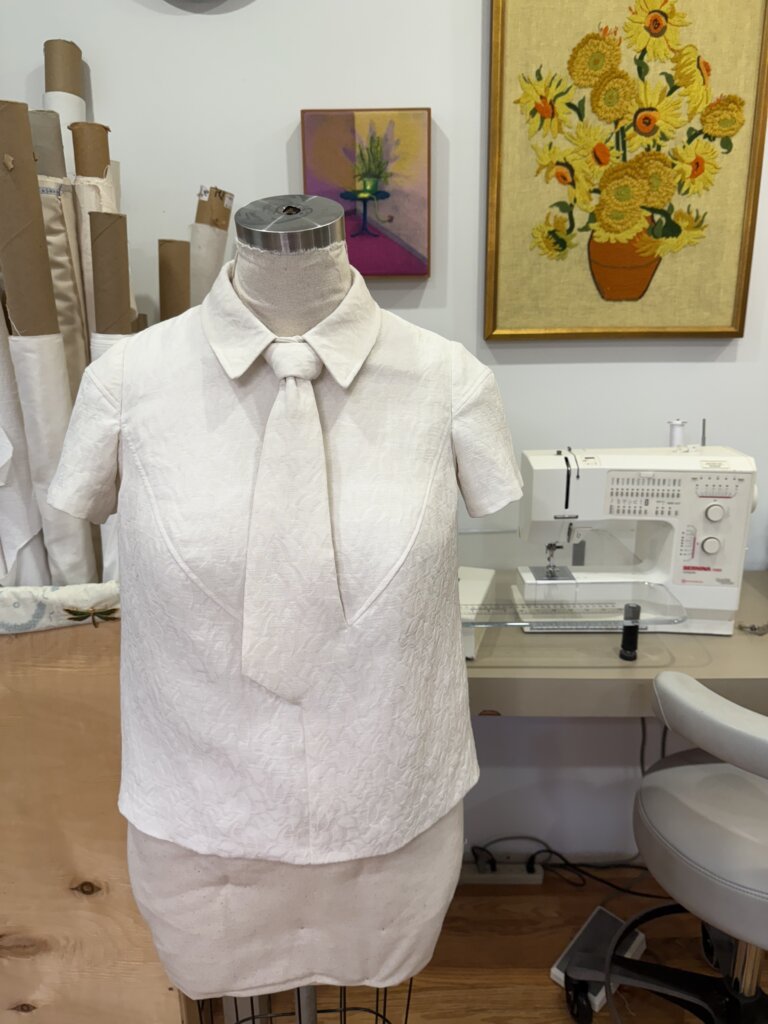
The pieces were coming together! I couldn’t resist a quick try-on with my custom dress form.
My new pup Scoop also had to get a look!
Next up, some top-stitching (by machine, while standing up).
The puzzle pieces were coming together!
Here’s a quick in-process look showing how the pieces fit together (kinda sorta), in case you are using this blog series to make your own Vanishing Tie Top.
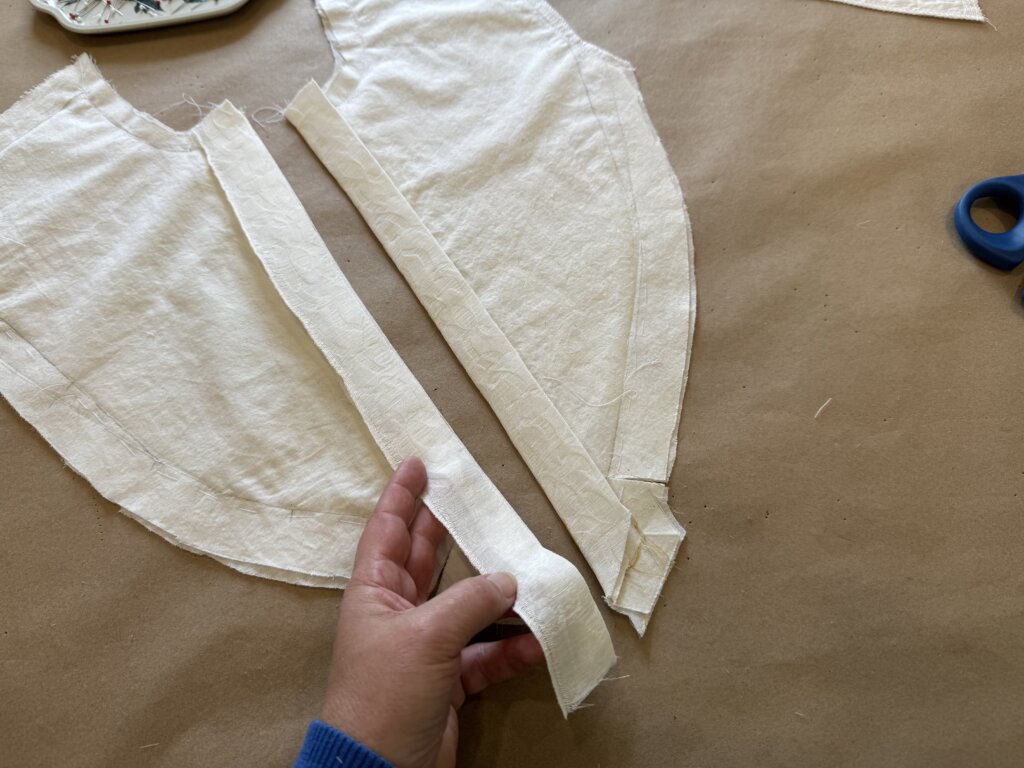
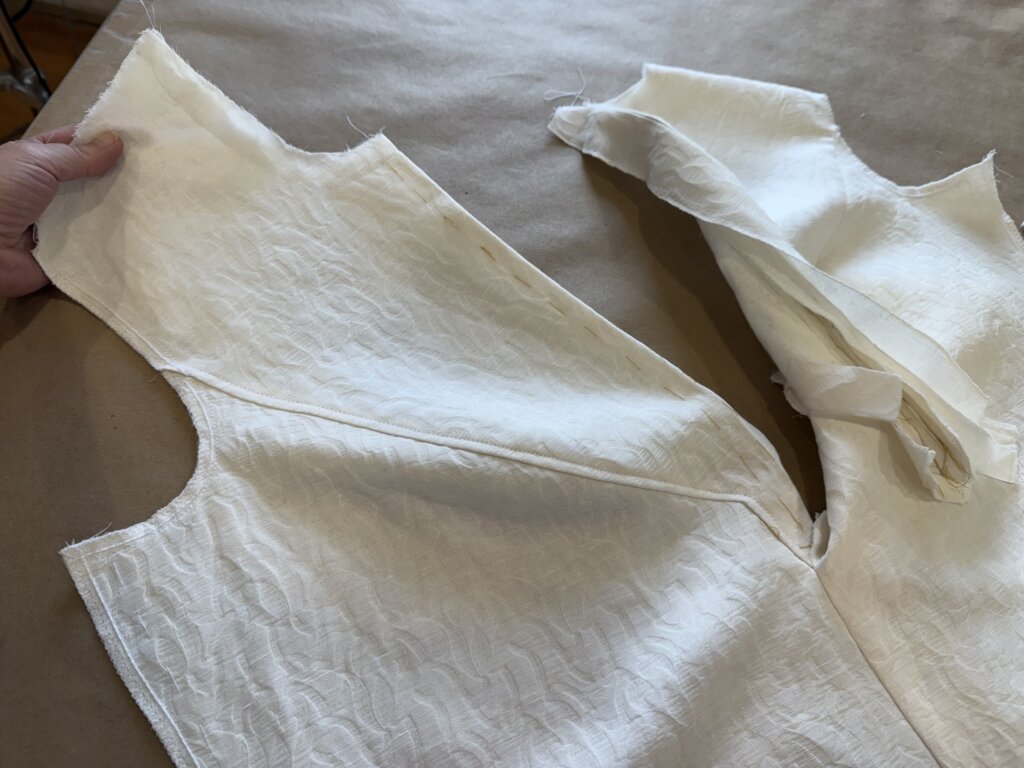
Next, I needed to figure out the plackets.
I started by invisibly cross-stitching the selvedge edge to the muslin underlining. Isn’t it pretty?
Then, I fiddled and futzed around to get the layers doing what I wanted them to do, before hand stitching them in place, and covering them with the selvedge side of the placket for a clean finish. Whew!

Starting to All Come Together!
It was time for all of the pieces to become attached to each other!
I started by adding the front to the back via the shoulder seams and side seams.
Then, I added the collar to the neckline.
I hemmed the bottom edge (invisibly to the underlining by hand)…
…before adding the sleeves into the armholes.
I first pin basted, then hand basted them in place, one quarter at a time. Then, I stitched over my hand basting, by machine with permanent stitches.
OMG! So close to the finish line!
I was so excited to try this on, and start figuring out the tie bit, that I forgot that I still needed to figure out the closures.
I’ve been pretty obsessed with pearl snaps these days, so instead of making buttonholes + picking out and stitching on buttons, I rifled through my pearl snap collection.
I needed at least 3 snaps. I found 2 that were perfect! They looked like 4-hole buttons!
When I couldn’t find a third to match, I decided to go for the gold. These snaps would be fully hidden when worn, so I liked having a little secret behind the tie!

Precious Fabric Challenge: My Day!
As you may remember from Part 1 of this series, this Vanishing Tie Top was my entry for TomKat Stitchery’s Precious Fabric Sewing Challenge!
As part of the month-long Challenge, the host Whitney Luckenbill asked about 30 “sew-lebirties” to pick a day to share what they were working on. I picked the very last day, knowing I’d need as much time as possible. I’m a “slow sewist”, after all!
I had planned on having the top totally finished to show off on “My Day”. But the week before, I ended up with a contract from Threads Magazine to write an article for their upcoming issue. I only had one week to write the manuscript, so I put my Precious Project aside and got a little behind on my Vanishing Tie progress.
It was worth it (you can read the Threads Article here), but I still needed to share something on “My Day” of the Challenge.
I planned on spending the entire day finishing up the top and sharing in my Instagram Stories. My dogs, Nimbus and Scoop, were in the studio that morning, being extra loud to help cheer me on!
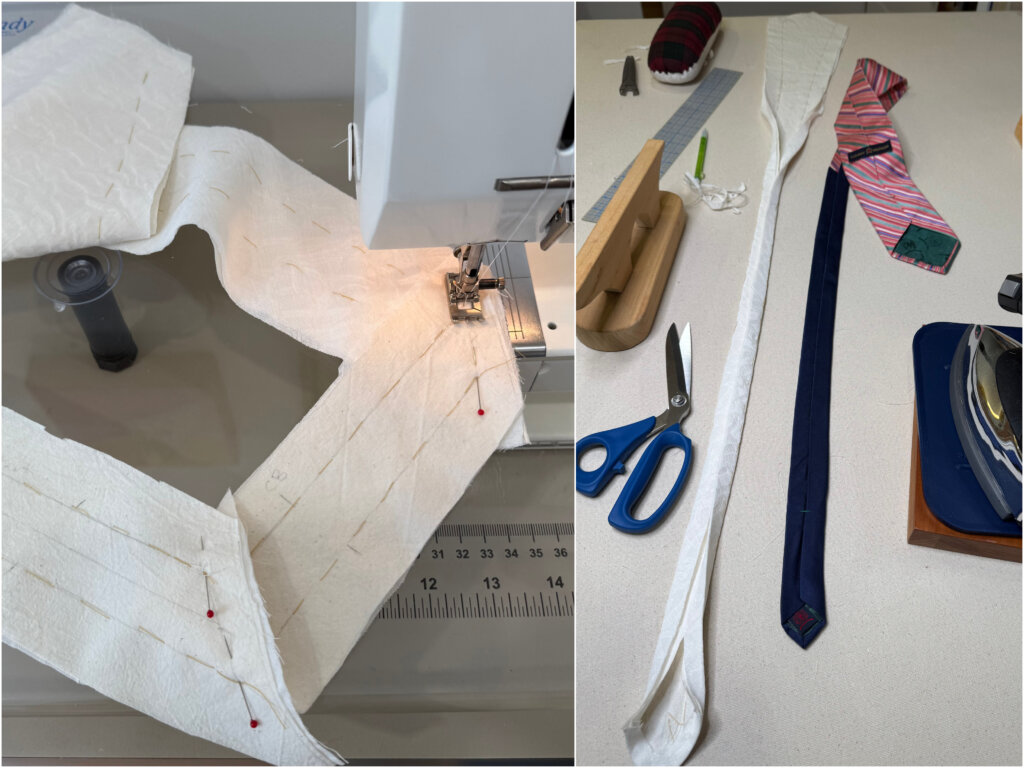
The main puzzle was the tie, which was still in pieces at this point. So I started by getting it kinda close to what it might become with some careful machine sewing, hand sewing, and pressing.
How the tie facing would work exactly was arguably the most difficult part of this top, and a step I had been putting off until the end. Well, the end was now here!
Since the people who preceeded me on the Challenge were mostly You-Tubers, I decided maybe sharing You-Tube style videos would be a fun way to share my content throughout the Day.
I did only this one take (which I actually shortened before sharing), pretending I was a You-Tuber, before realizing it’s just not my jam- and that I could waste the whole day doing this kind of extra work!
So enjoy my one and only Take, including a Scoop appearance!
As the clock in the video illustrates, the morning was almost over and I had gotten very little actual work done on my top.
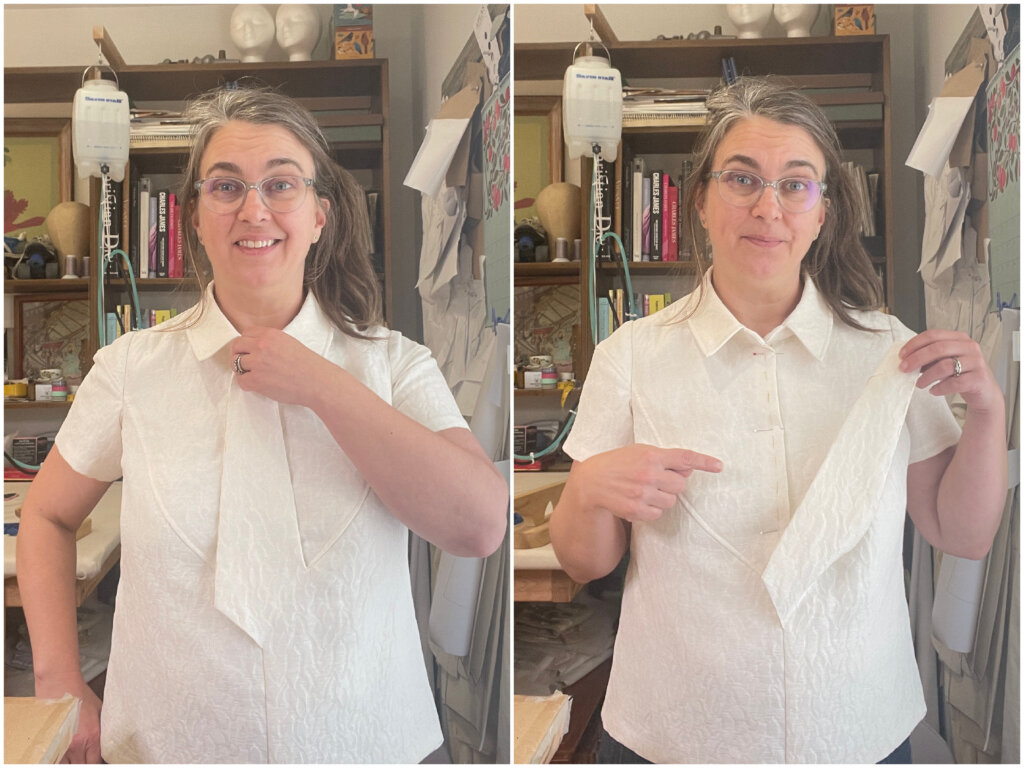
Finally, back in my zone, I followed along with a You-Tube video about how to tie a tie, and got my piece set up for success.
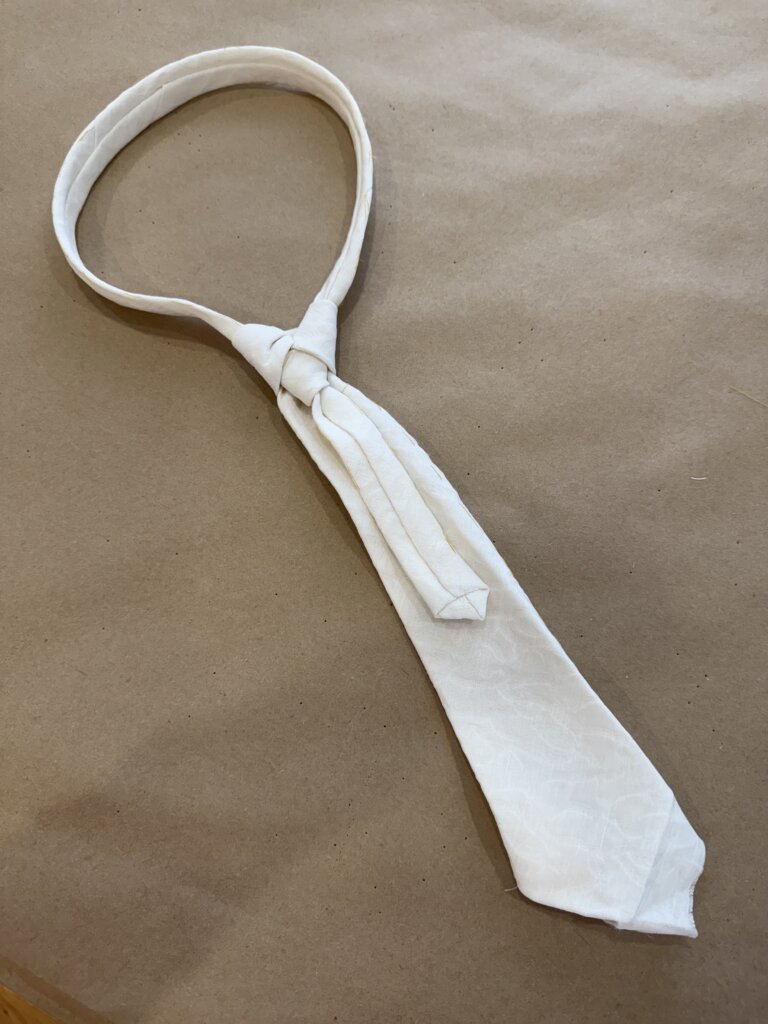
The crux of the Vanishing Tie design is that the knot is permanently stitched to the tie piece on the top itself.
Unlike the instructions in the Pattern Magic book, I wanted the tie to be able to be loosened and tightened. Being able to get the loop over my head and tighten it up would be crucial to my design becoming wearable.
With all this in mind, I did some careful hand stitching to the tie…
…before adding it around the neck of the top.
Next, I’d need to pull the front of the tie, which was also the front of the shirt, in front of the facing piece.
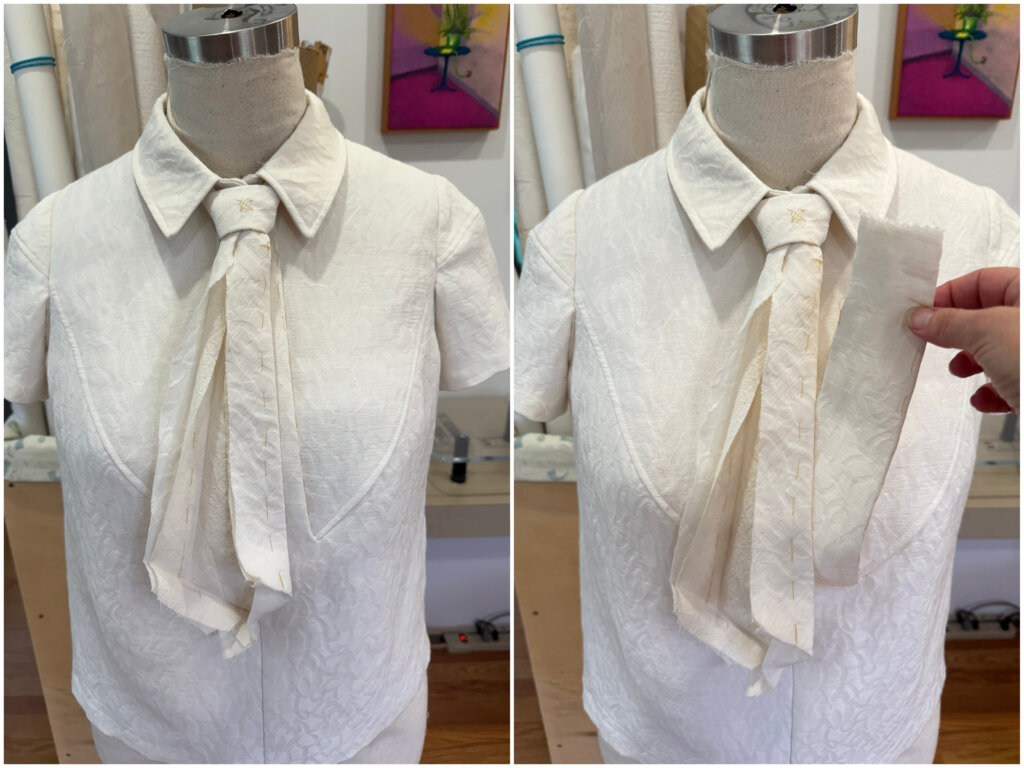
Since I was still testing, I had extra large allowances on my tie facing piece. It was finally time to trim down the excess, and add some more careful handstitches.
The front of the tie, from the front of the top, was then pulled through the knot, pinched to create a “tuck”, and then permanently hand stitched to the knot.
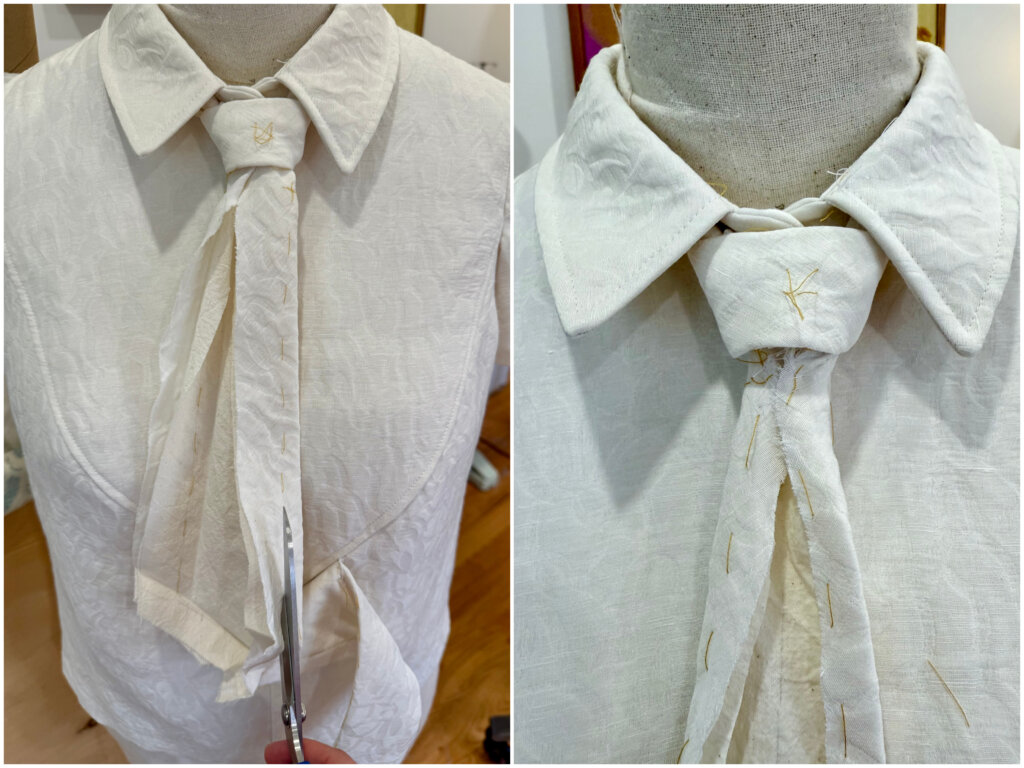
Then, I was able to loosen the tie and, with the help of my iron, get the facing set up behind the tie’s front.
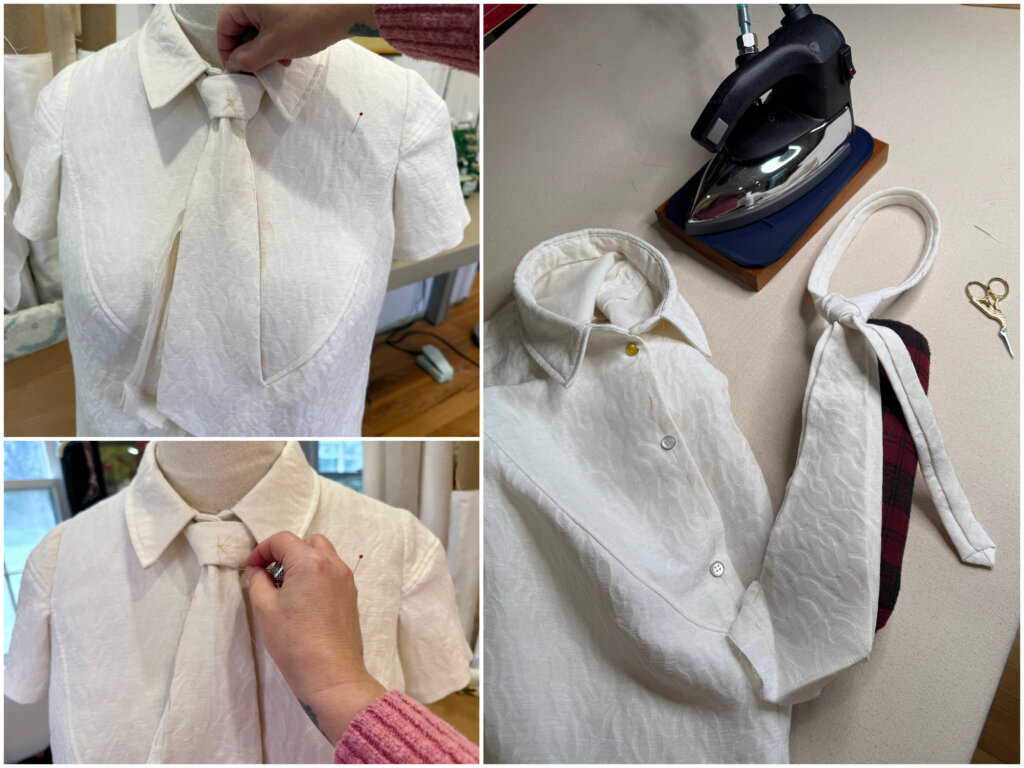
Next I hand stitched the facing to the tie. For the final construction steps, I used hand stitching to make a neatness to the corners and everything inside the top!
The last, but maybe my favorite, step was removing all of the helpful basting stitches. It’s so satisfying to give everything a final inspection and reflect on all the work that led to this moment.
The Final Reveal!
At 4:45pm on the final day of the Precious Fabric Challenge, my Vanishing Tie Top was complete!
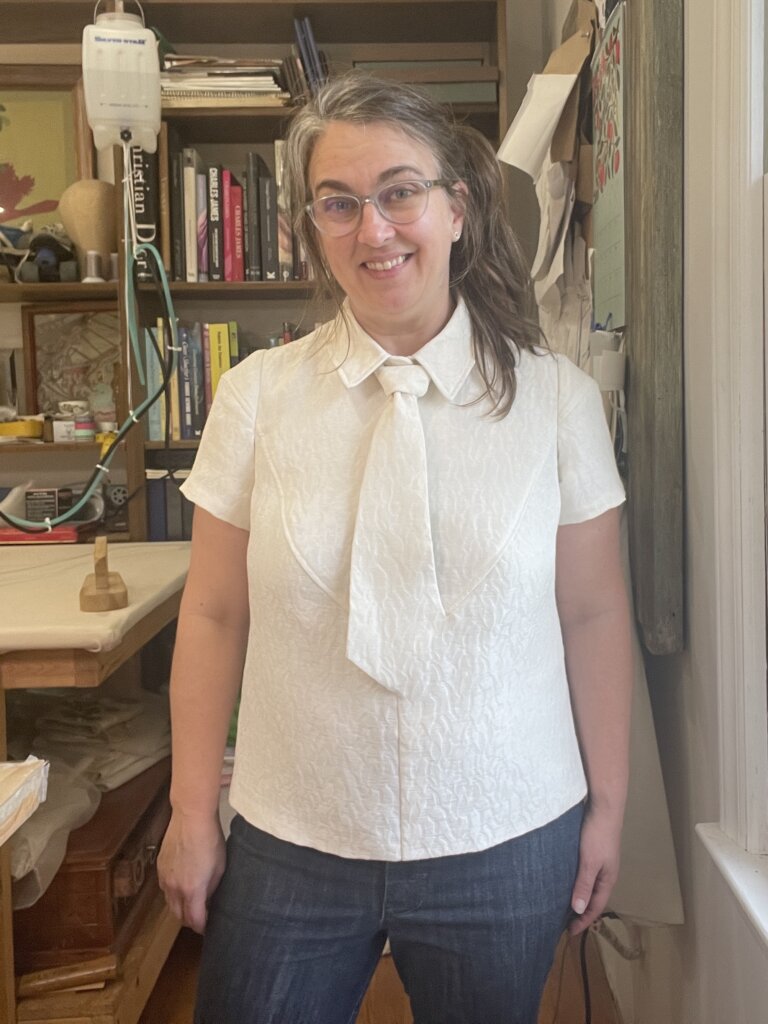
I love it!
Thanks for Following A-loooooong!
At this point you may be thinking WOW she put a lot of work into this. I need Instant Gratification Projects! I like Quick Makes!
Maybe it comes from when I was a teenager, and my Dad insisted that I learn to drive a Stick Shift before an Automatic Transmission, but I personally prefer doing the longer and more difficult version of things first.
If I wanted to make something similar again in the future, I could quickly and confidently skip the mockup, the underlining, the fitting, and go straight into finishing.
But before working my way to the end of this Stick Shift of a Project, I wasn’t ready for Finishing. I needed to learn the ins-and-outs of everything necessary to make this top a success. And also: What’s the rush? I love sewing. I enjoy the process of patternmaking and sewing more than I need a bunch of quick clothes. So, for me, there’s no reason to be speedy. I’d rather make it last as long as possible!
I love starting with “couture”. And bonus: I have gained enough education to dumb it all down later. Which seems pretty smart to me!
What do you think??!
I’m in love with the results!
I’m so grateful for my inspirations that made this all happen: this gorgeous fabric that I’ve been holding onto for a dozen years, the request from to join the Precious Fabrics Challenge, Raleigh Frocktails (though cancelled), Tomoko Nakamichi’s design from “Pattern Magic 2”, and all of you!
Now if I could just get over this flu…
and think of somewhere to wear this…
Thanks so much for following along!
NEXT BLOG POST: I’m not sure! I still need to make the Precious Fabric skirt to go with this top… I also took process shots for a few other 2025 makes, which could make it to the blog… I’ve also planning some upcoming personal projects… Or is there anything YOU are hoping I’ll share about? Let me know in the comments!
Want to learn more about the way I sew?
My Intro to Custom Sewing eCourse Skirt Skills starts Jan 7. Enrollment is OPEN!
“In these classes, I have learned to embrace taking the next step and figuring it out as I go. I used to get frustrated, and now I understand that there is no rush, and I can make something I will love.” – Alisabeth


10 Responses
I machine-quilt standing up! It’s so much easier to roll up the quilt and throw it over my shoulder while I stand at the edge of my cutting table and sew long, straight lines. My partner calls is “full-body quilting” and that is an apt description! For footwear, shoes or slippers is a necessity because my sewing room is a mess and there are definitely pins on the floor (ouch!). Your top came out beautifully!! 😍
I love hearing this! It reminds me of how I’d set up large tables to help support custom wedding dresses as I tried maneuvering them through the sewing machine. I love “Full Body Quilting”! I’m not a Barefoot Sewist either. I prefer sewing in a messy space, so there are pins all over my floor too! Thanks so much for sharing and following along!
This is soooo good! I will need to take a closer look at your gusset sleeve. I have experimented on a muslin and reacher liked it, but mine needs refinement. I have sewn standing for six years – I bought the Husky height adjustable workbenches from Home Depot for my sewing machine table and desk (I’m 5’2″) so I can use them sit or stand – super sturdy, on big casters, and easy hand crank. I recently upgraded to a fancy Bernina serger with knee lift, so I am trying to master it and have to sit now – haven’t mastered two-footed sewing while standing! But I miss the standing, and need to remember to raise my table more often if I am not serging.
I love hearing that you sew standing (and that you are experimenting with gusset sleeves), along with more about your custom setup. Petite people like us (though you are 3″ taller than me) need custom workspaces! I don’t have a knee lift on my machines, so I hadn’t thought about how that would add a level of complication. Good luck coming up with a workaround! Thanks so much for sharing and following along. It was great to hear from you.
Looks so good on you!!!
Thanks so much! It’s comfy too!
Thanks for sharing! It’s so fun to see your process step by step. Very inspiring, and I love the look!
Yay! My pleasure. Thanks for following along!
Your top came out so beautifully and is super cute on you! I’m very curious what style of precious fabric skirt you’ll make to go with?
I’m also under 5′ tall and much prefer standing up to sew. I don’t recall when I started though. I don’t wear shoes (sometimes socks depending on how cold my wood floor is) and I have a gel mat that I use under my “balancing foot”. I generally sit (at my sit/stand table) when I have a lot of hand sewing to do otherwise I stand for that too. I listen to pod casts while I do repetitive tasks and have complete silence when I have to focus. I’m looking forward to getting back to my TOP CLASS 2 efforts after a much longer break than I anticipated to make a wool/mohair coat for my daughter. And I think that’s everything (that’s fit to print) from me! Thanks for these blog posts Brooks Ann – I thoroughly enjoyed them!
Yay! Yes! I remember now that we are the same height. It’s so fun to know that you also sew standing up! Your routine sounds similar to mine. Twins again!
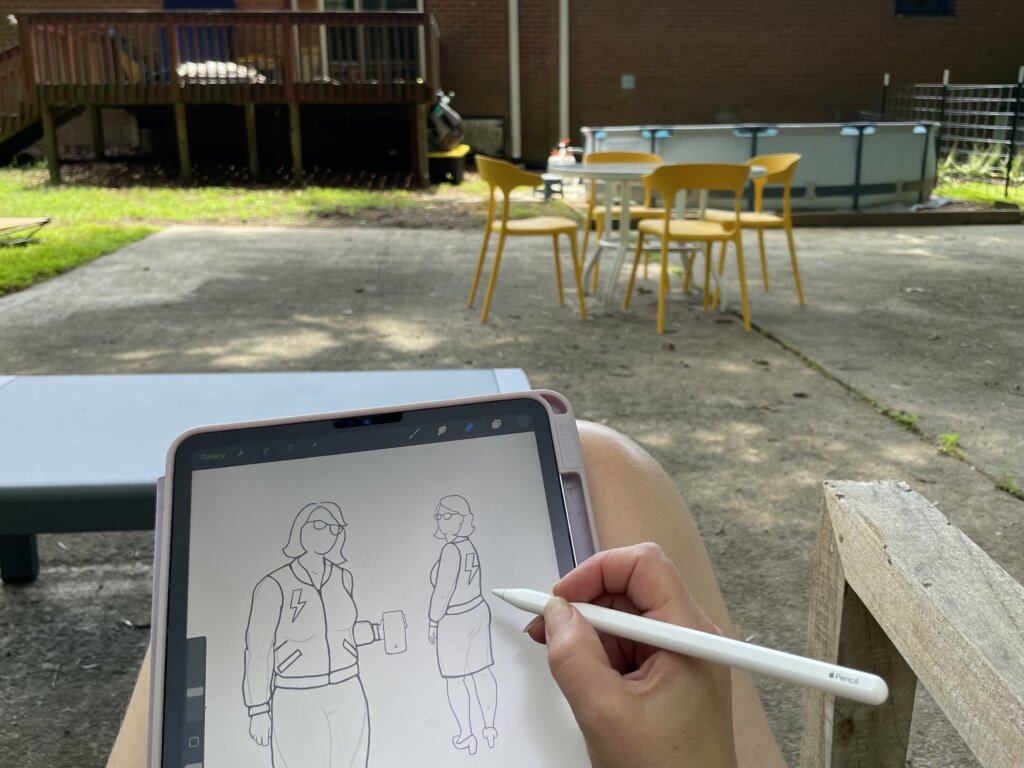
You can see the skirt I’m planning to pair with the Vanishing Tie Top in the sketch (shared in Pt 1 & Pt 2). I plan to use the opposite side of the matelassé and dye it navy. I’ve already drafted the pattern. Making it just hasn’t made it to the top of the to-do list yet.
Thanks for following along! It’s always a pleasure to hear from you.