When so many of you let me know how much you liked her custom wedding dress, it seemed like a good time to finally document its creation process on the blog!
Welcome to Part 1 of Andy’s Bridal Blog Series!
You may be thinking, “Oh yeah! Isn’t this a custom bridalwear blog?“
During the pandemic, weddings were out and online sewing was in! I had already been doing both for many years. The wedding dress business kinda fell away and teaching became my focus… naturally, without much notice.
Seemed too late and out of context to start blogging about Andy. I hadn’t been making wedding dresses for over 2 years. I didn’t even work in the same studio anymore…
I didn’t know Jenn and Andy would be my last bridalwear clients.
As a result, Andy’s dressmaking story (and the 2000+ dressmaking process shots and wedding day photos) mostly ended up in the Archives. Until now….
I’ll do my best to be kinda quick- but quick is not my strong suit!
Design & Sketching
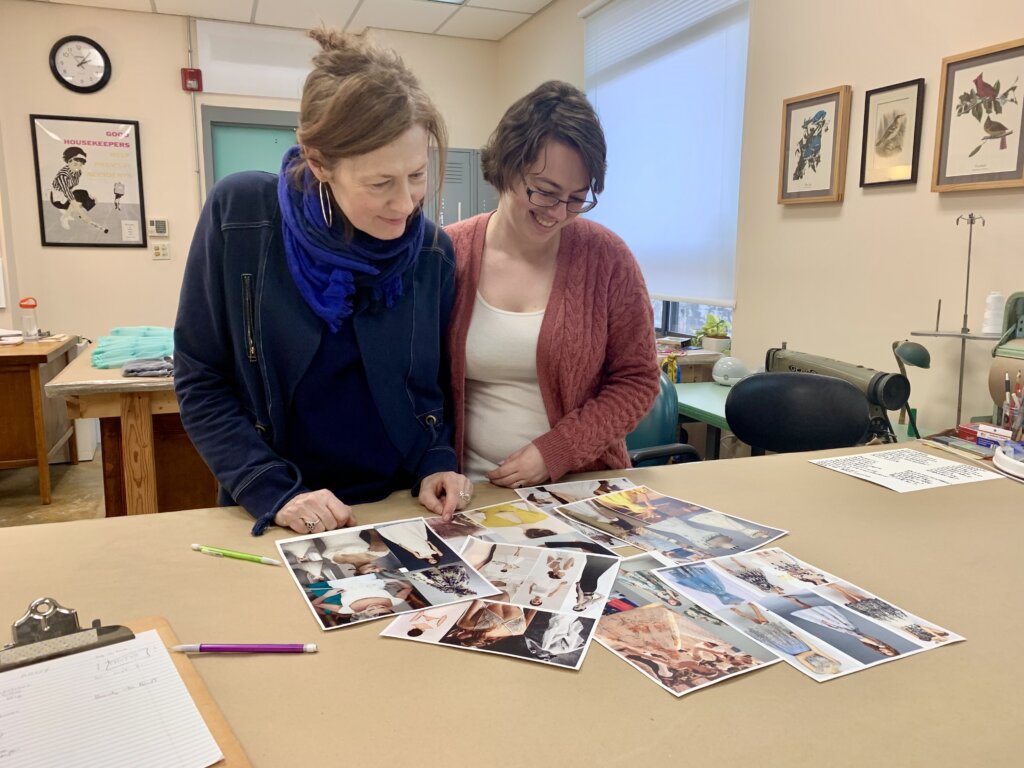
I’ll begin Andy’s story with our Design Consultation in February of 2019! Based on a questionnaire that Andy completed, I gathered lots of inspiration images for her and her mother to look over. Here’s the Pinterest Board.
Together, we brainstormed lots of options and picked some adjectives that descibed how she wanted to look and feel on her wedding day. Andy’s words were:
Whimsical Unexpected Charming Joyful Elegant
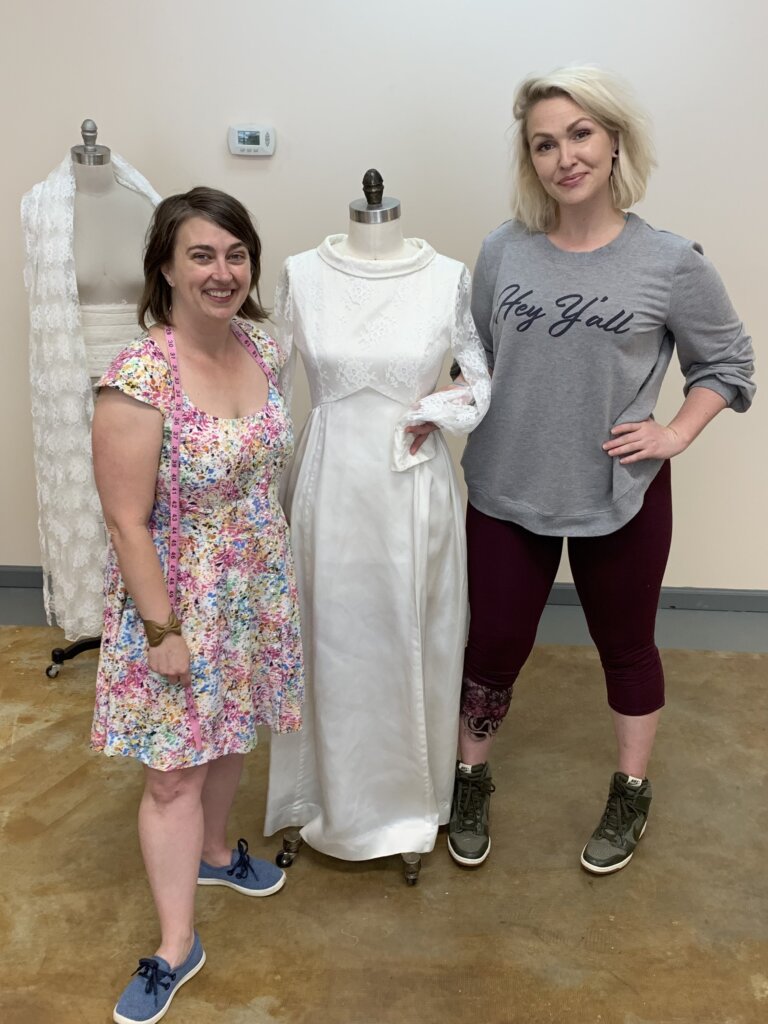
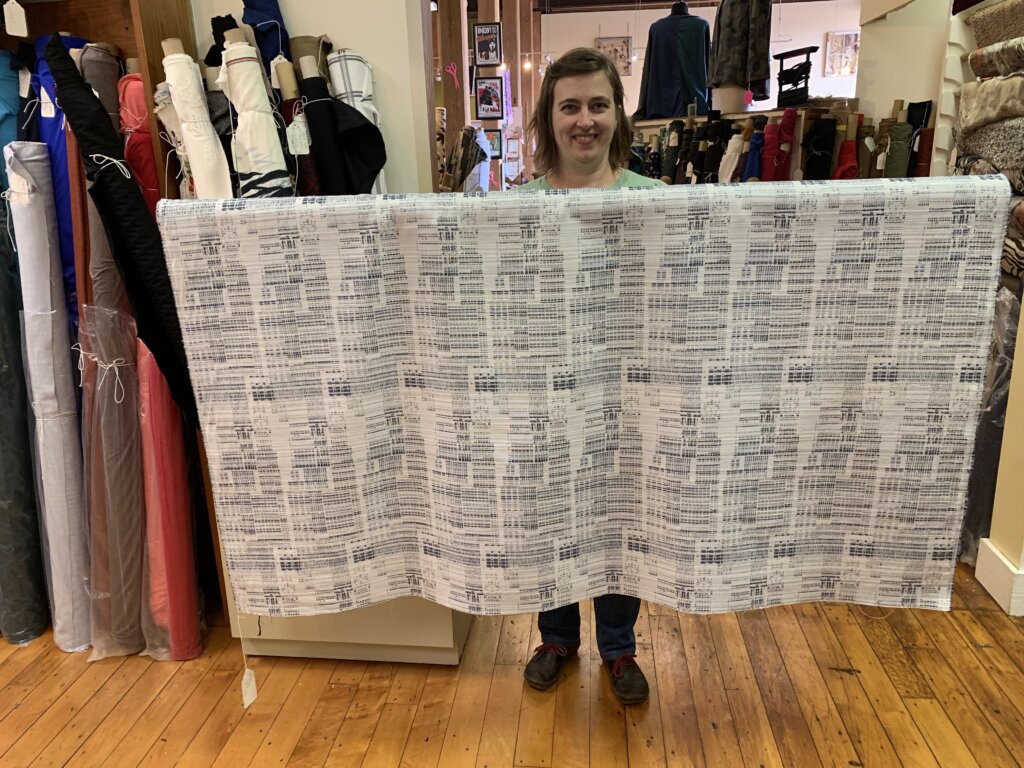
We also went to Mulberry Silks, where Andy fell in love with this fabric.
After our fun day together, I let all the ideas simmer.
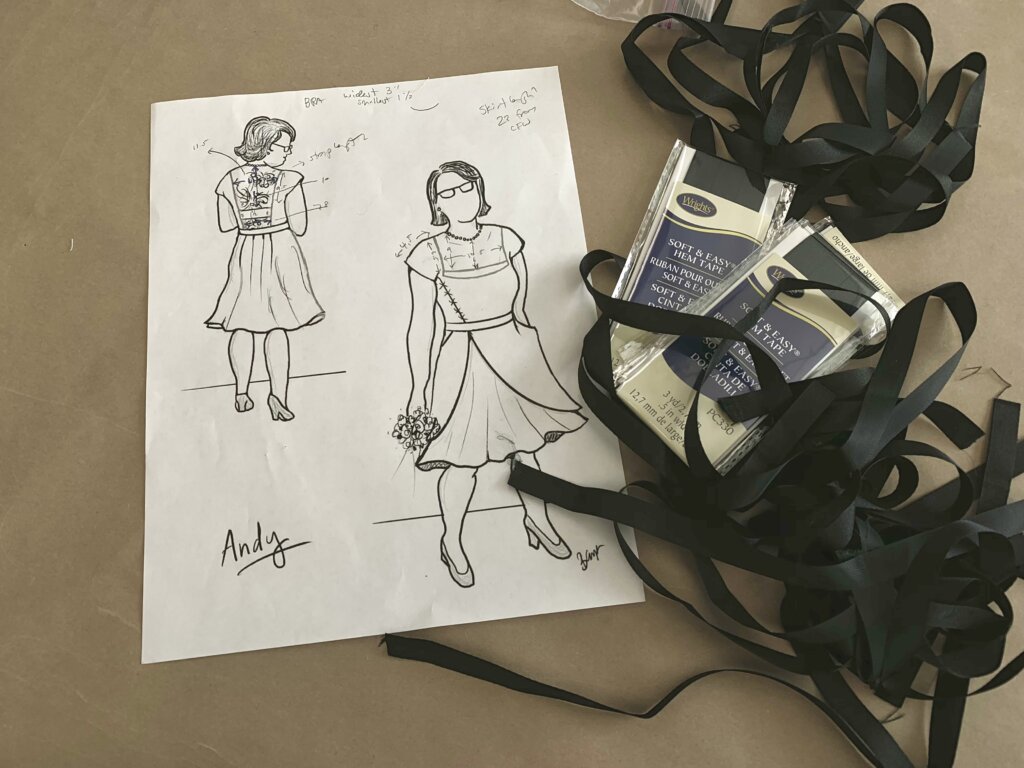
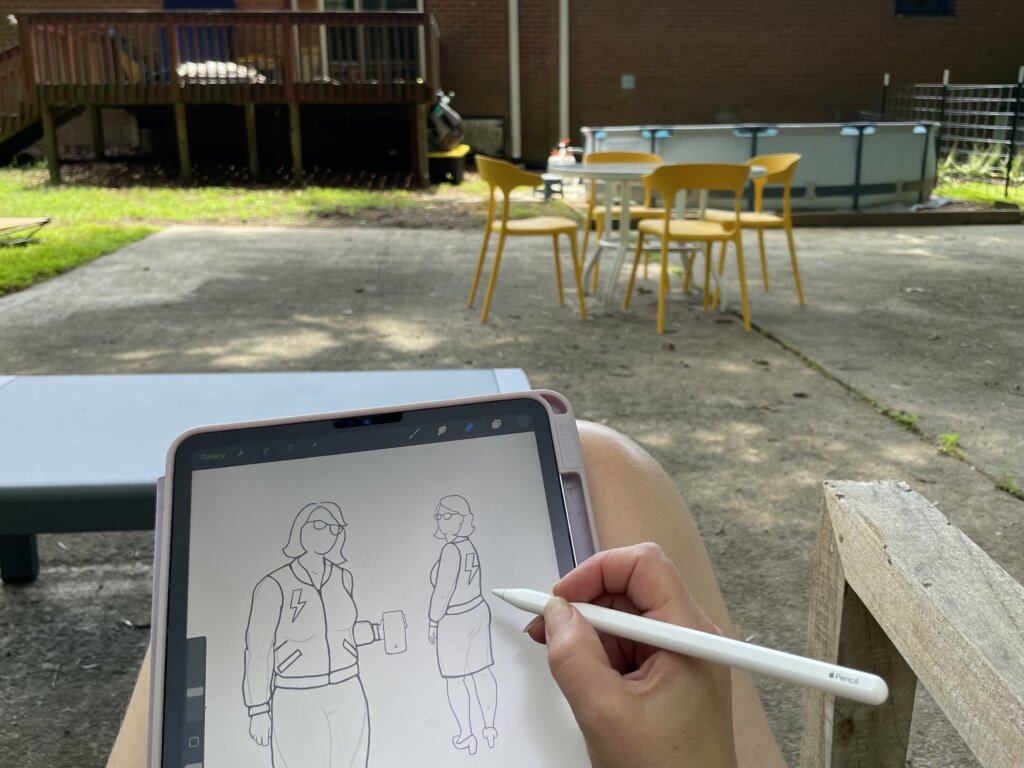
And (after some tutorials and practice doodles), the very first thing I created on my very first iPad was Andy’s wedding dress sketch. This was my intro to digital drawing!
And honestly, I just fiddle-farted around until I figured out how to use the tools to get what I wanted.
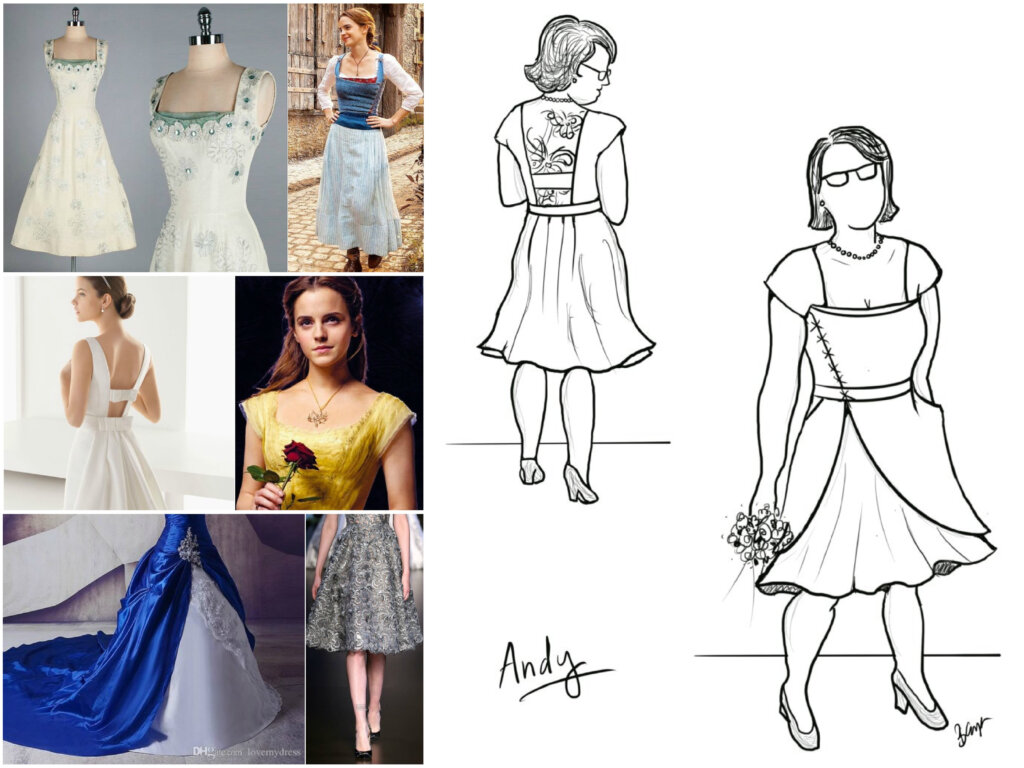
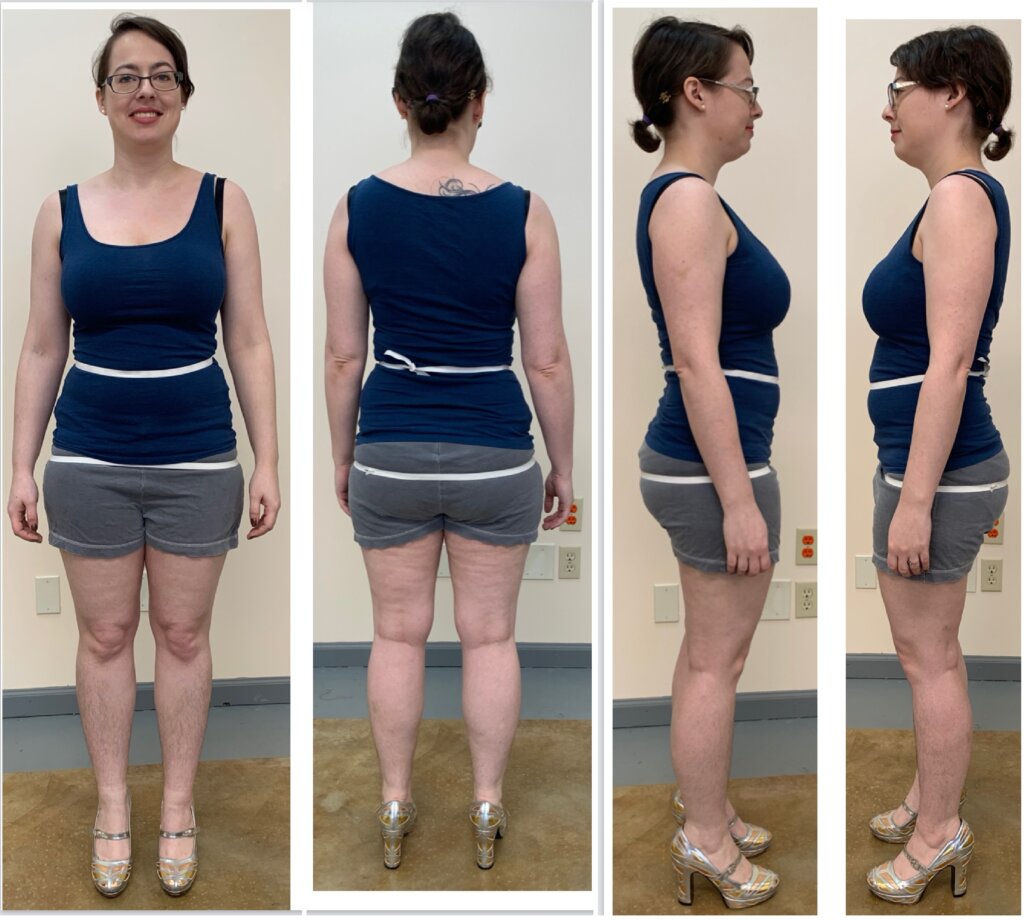
I first traced posed photos that I took of Andy– (which I won’t share because she wasn’t fully dressed! The dress design would be showcasing a large back tattoo.) The tracing process was very similar to the way I made my own croquis by hand in my previous blog post– only this time digitally!
Then I looked at the design inspirations that we had chosen, and played around with erasing and sketching until I created something I thought Andy would really like.
Andy's custom wedding dress sketch and design inspiration images
Enjoy more lots more details about the Design & Sketching part of Andy’s dress in this 2024 blog post “Figuring Out Fabrics by Designing Digitally”, which includes time-lapse replays of my sketching and fabric choice process, ending in the final design that we chose!
Andy loved the sketch and wanted to move forward! We met again (for more fabric shopping and) to take measurements and photos for a custom padded dress form.
Measurements are useful, but photos are often my main tool for creating any custom-fit garment.
If I had a Time Machine, I would have employed some of those newer methods to create Andy’s custom form. But those new methods were designed specifically for someone padding their own custom form solo.
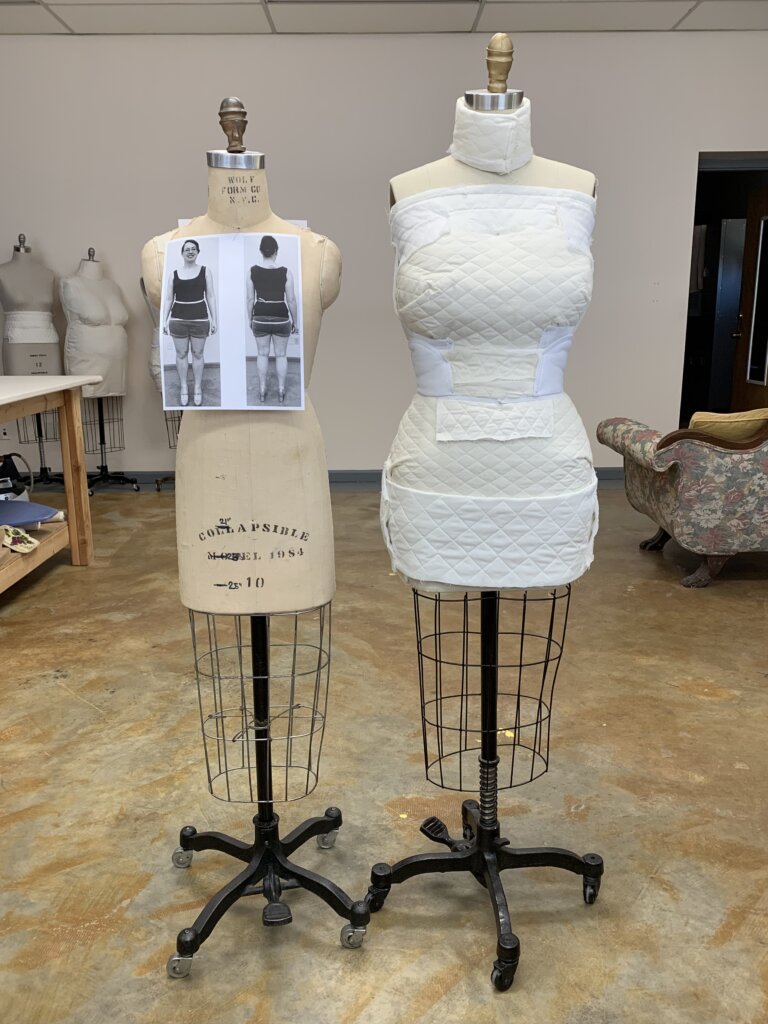
For this custom form, I ended up transforming Deborah into Andy!
Over the years, I have amassed a small group of forms. After Andy left my studio, I did some rough measurments and assessments of my seven forms to find the best starting point.
One of my Size 2 forms was still padded to match an earlier bridal client named Deborah. Here’s Deborah’s blog series.
Deborah seemed like the best starting point for Andy!
Deborah & Brooks Ann
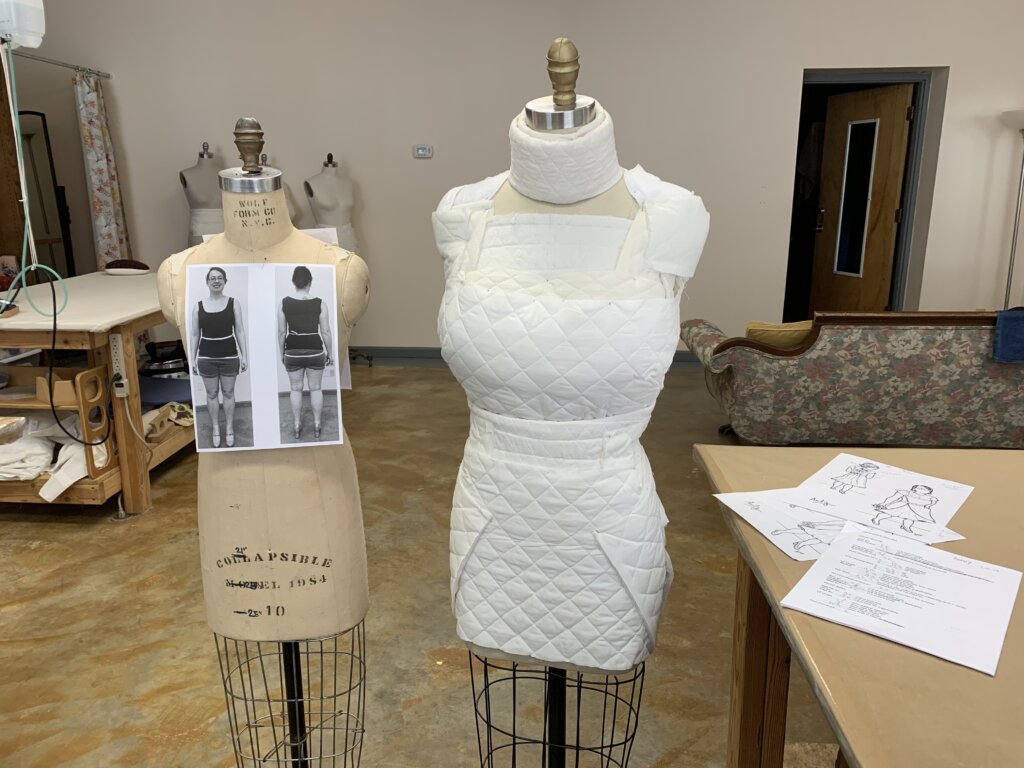
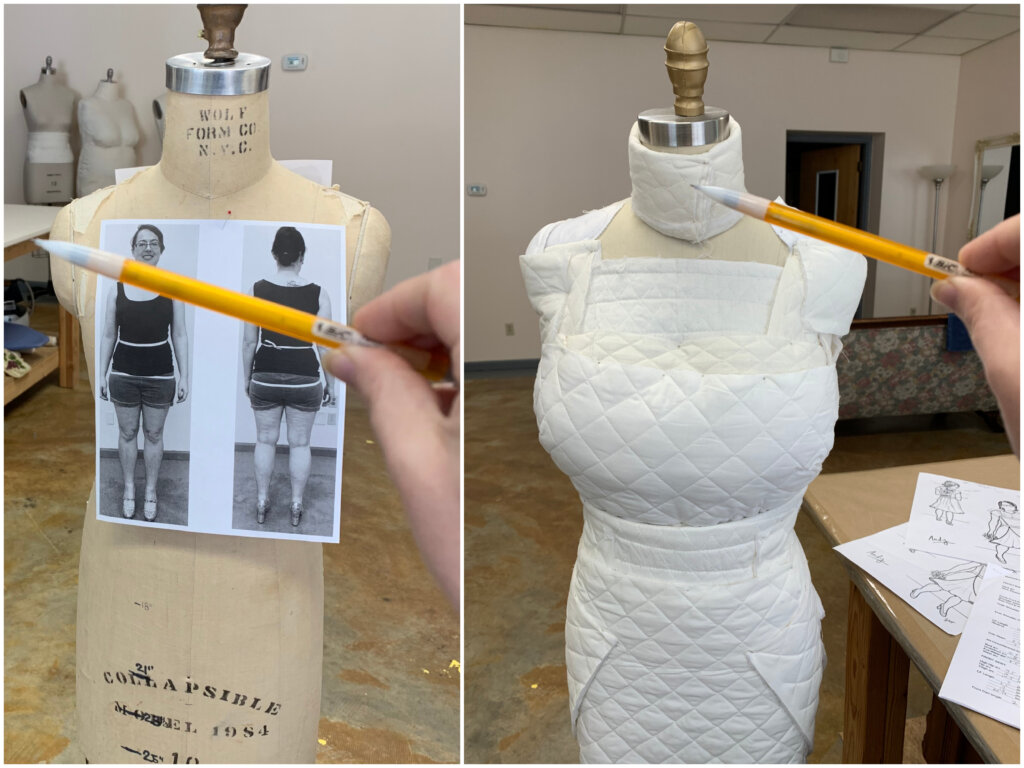
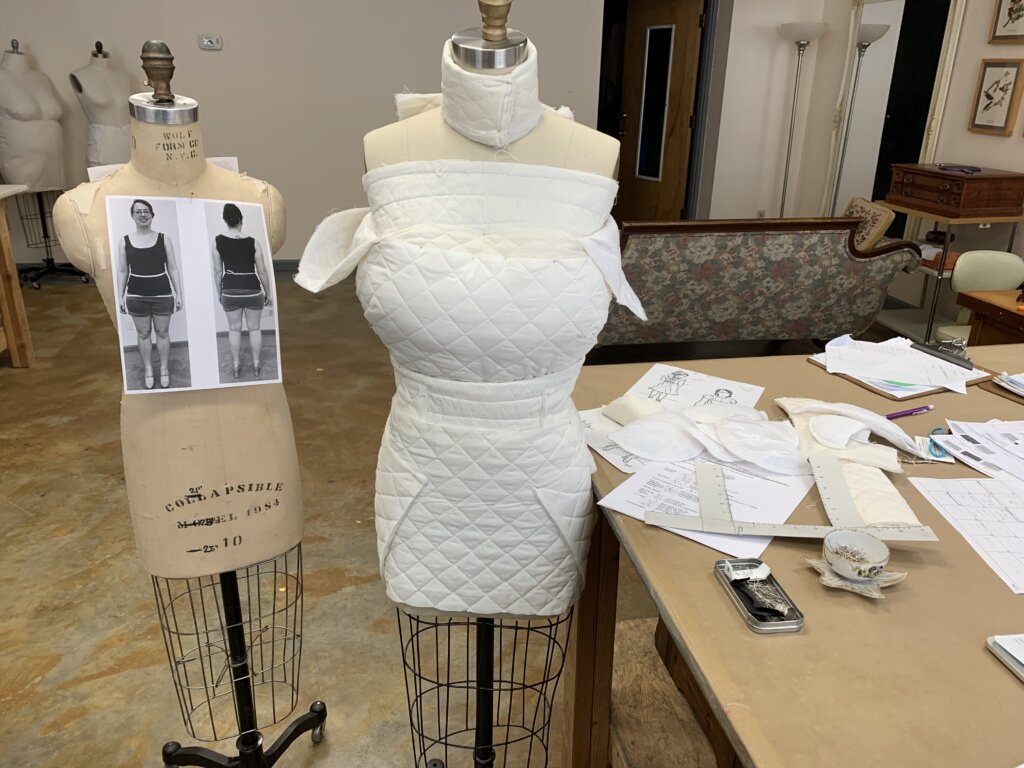
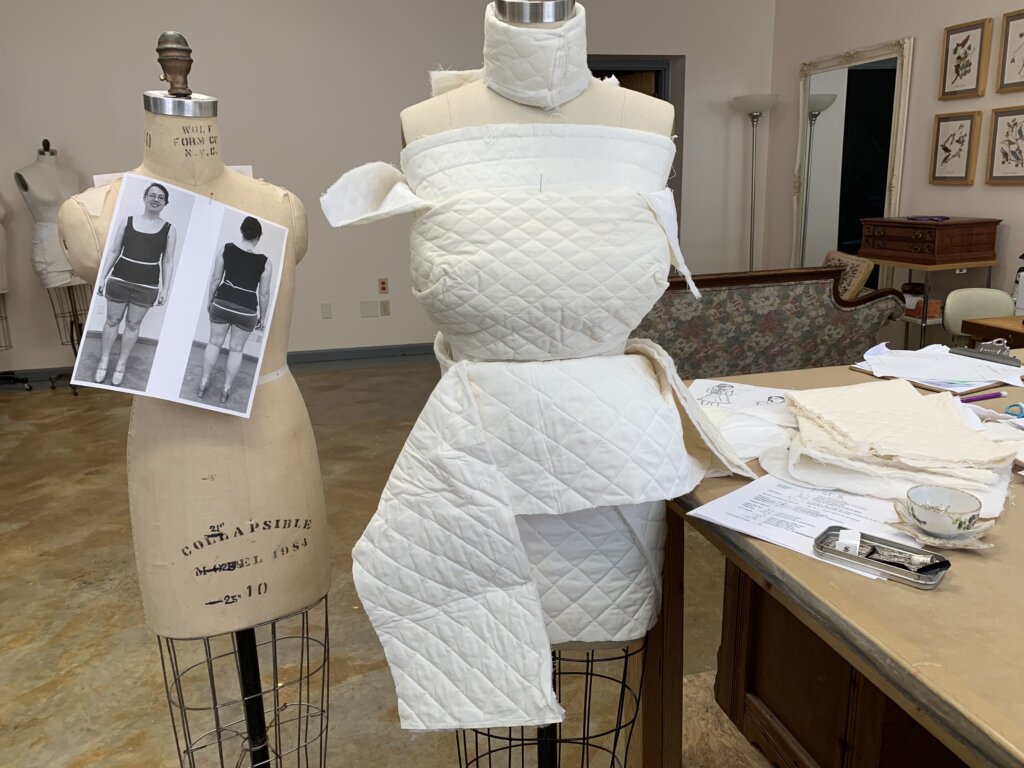
With printouts of Andy’s photos next to Deborah’s form and the measurement sheet nearby…
I began assessing Andy and Deborah’s angles and volume distribution, from the top…
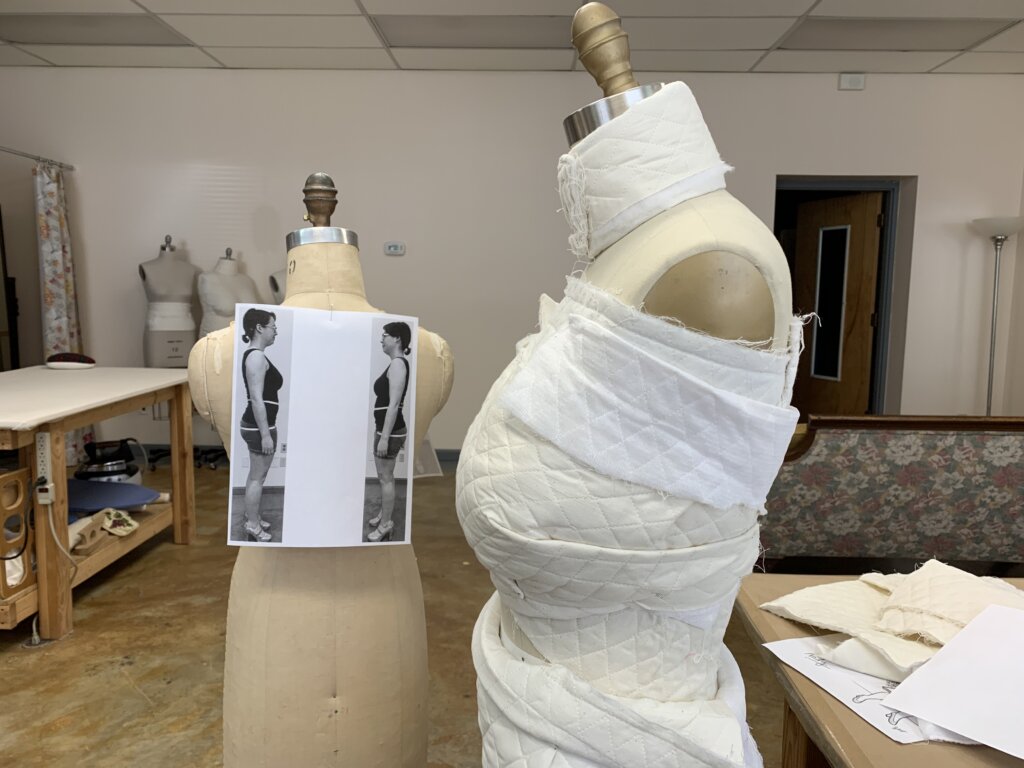
…which involved peeling off some layers…
…as I worked my way down,…
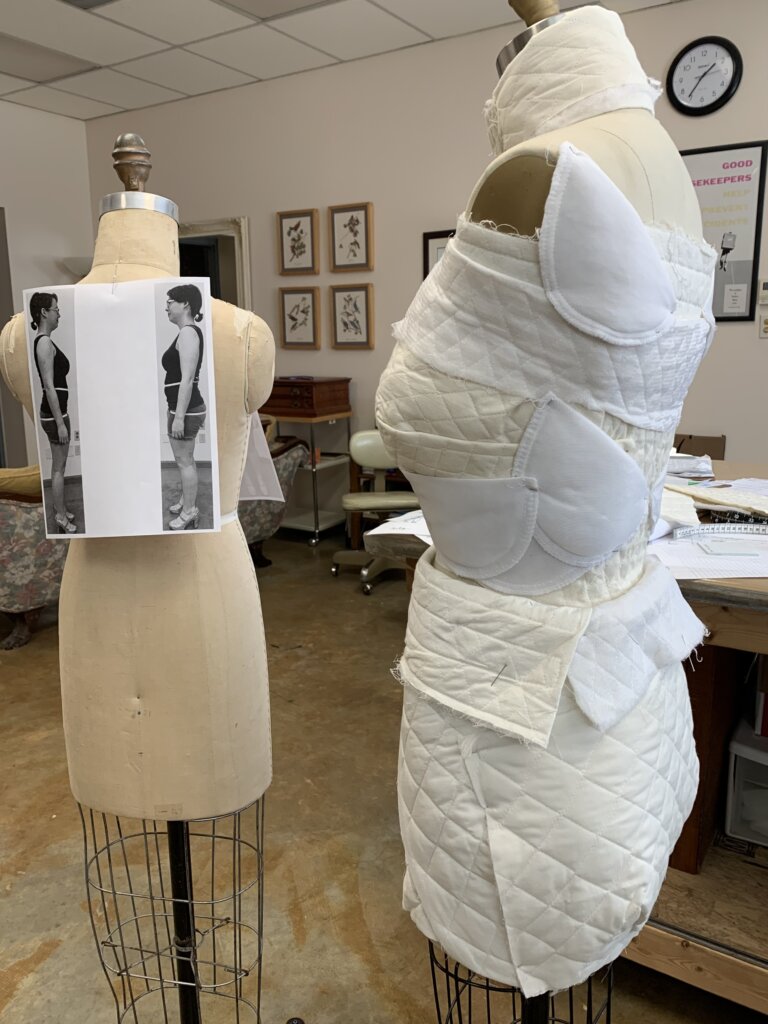
…while adding new padding.
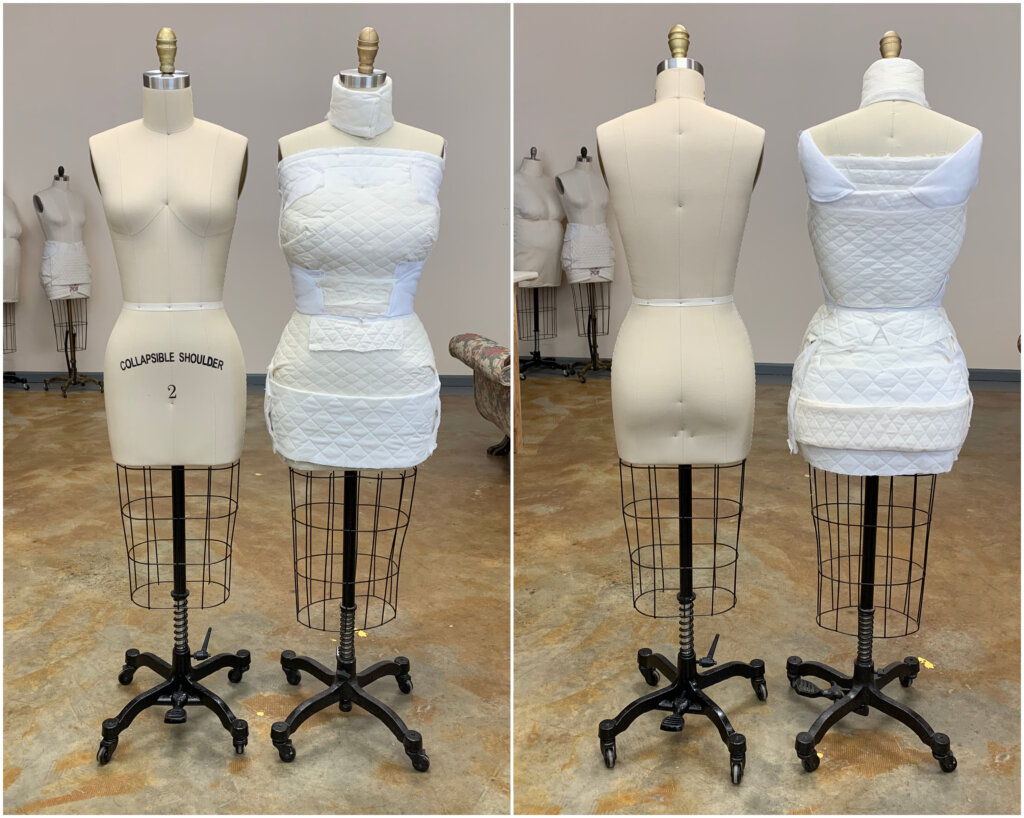
No more Deborah. It’s now all Andy!
These two forms have the same Size 2 base. Isn’t it cool to see the differences between the “generic size” and a specific individual body!?
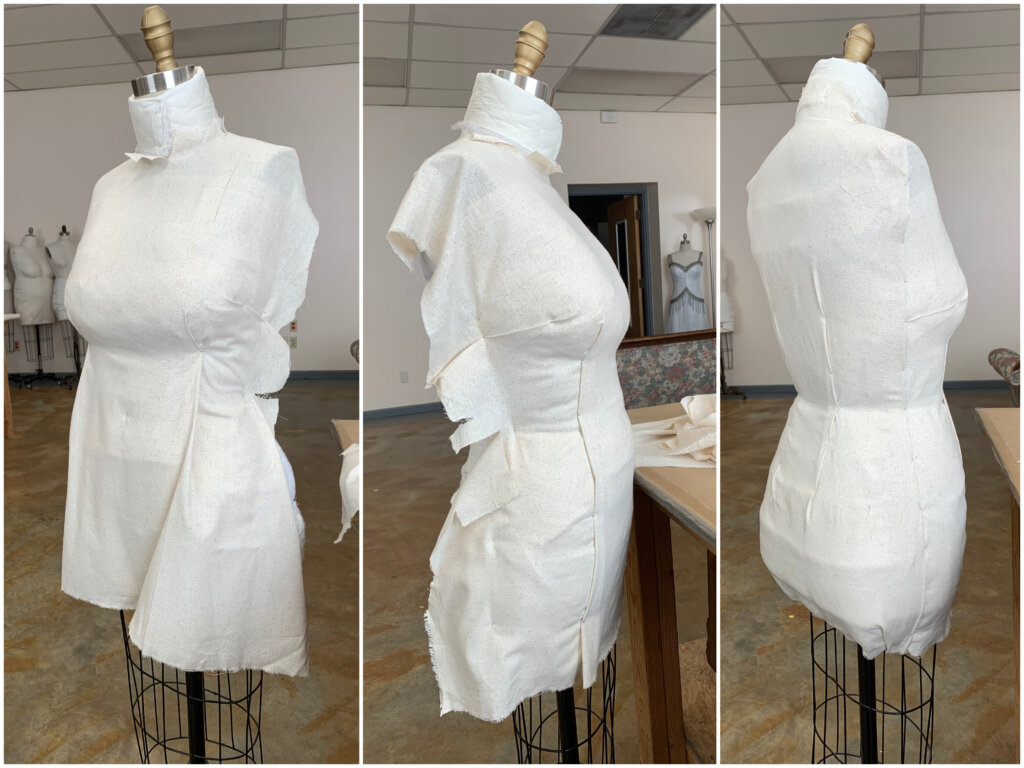
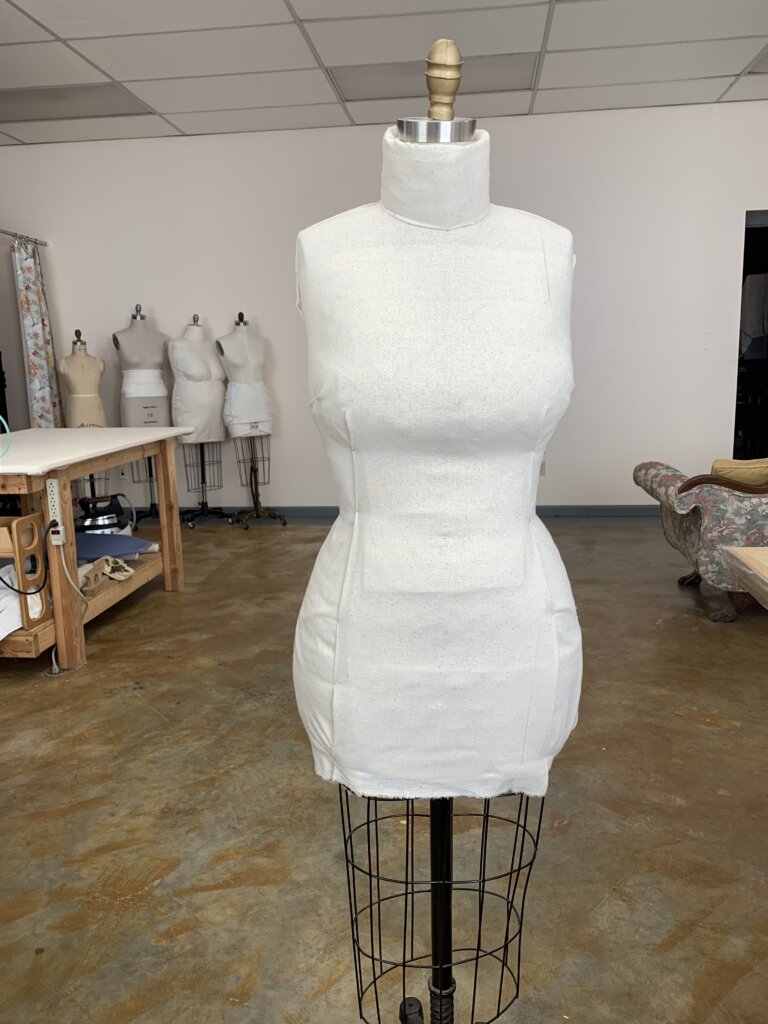
Next, I draped a quick removable cover, over the padding.
Here’s Andy’s custom form, ready for patternmaking play!
Draping the Pattern Pieces
There are 3 main methods for making a custom-fit pattern:
1) Draping starts with a custom dress form. The custom-fit pattern is made in 3D by draping fabric over the form, following the body. It’s very WYSIWYG (what you see is what you get.)
2) Flat Pattern Drafting starts with a custom sloper or block, which is a flat version of the 3D dress form. Using simple patternmaking principles, the pattern is drafted in 2D, following the flatness of uncut fabric. I teach Flat Patternmaking in my eCourses.
3) Alter/Hack something that already exists: Start with an already completed pattern or garment, then transform it into something new.
Draping is probably my favorite way to start a custom pattern, though I usually employ all three methods (at least a little) for every pattern I make.
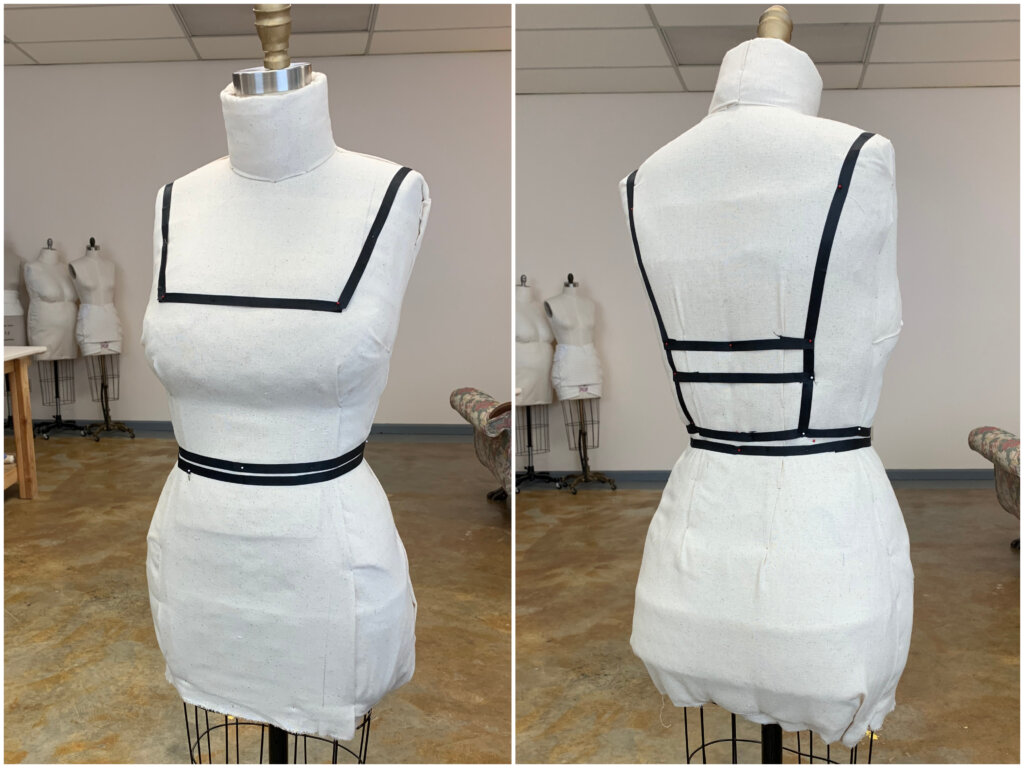
I started Andy’s custom pattern with a sketch full of notes and a bunch of twill tape.
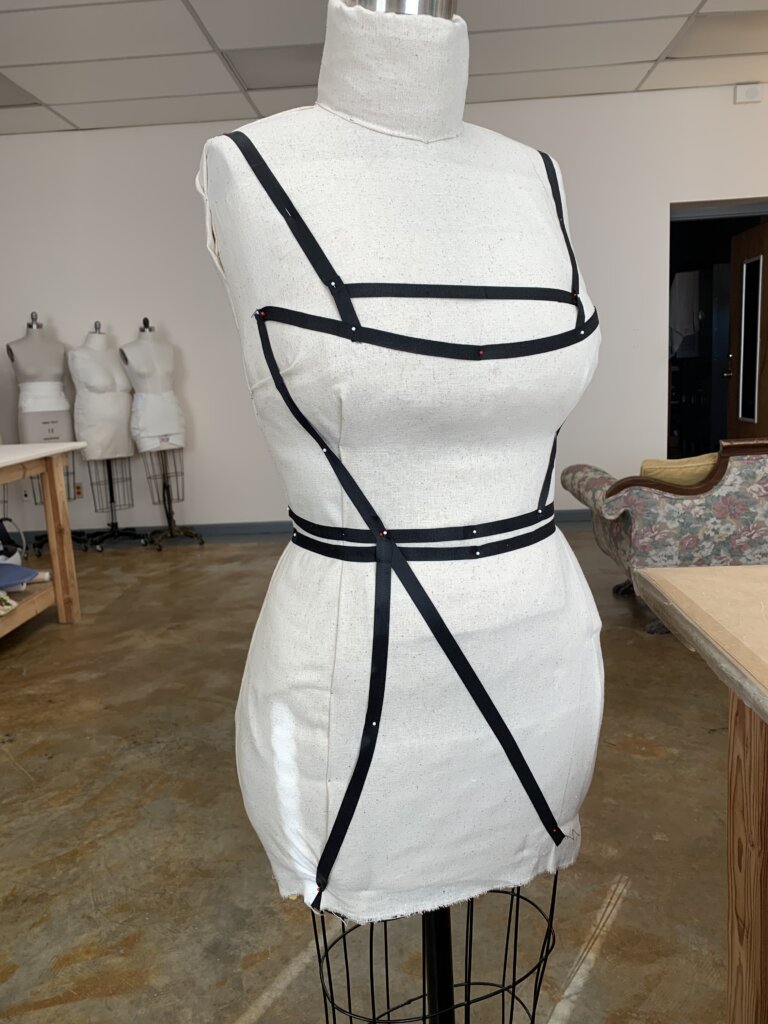
I used the twill tape and my notes/numbers to help me replicate the sketch’s design lines on the 3D form.
I just kinda played around, shifting the tape until I liked the shapes.
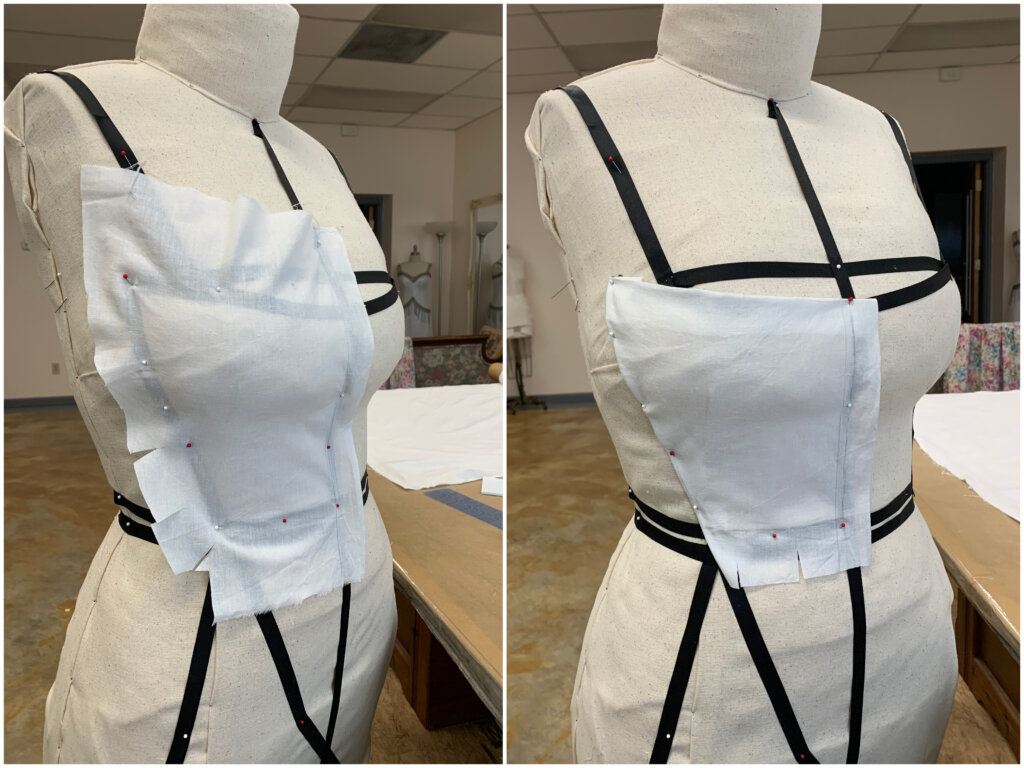
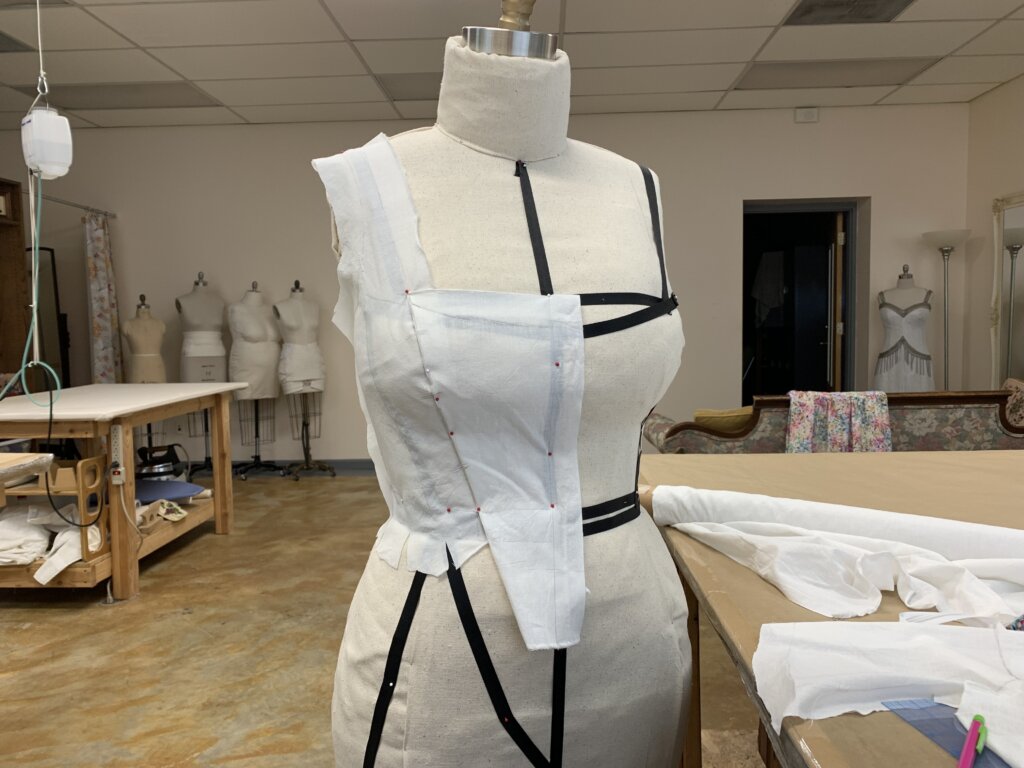
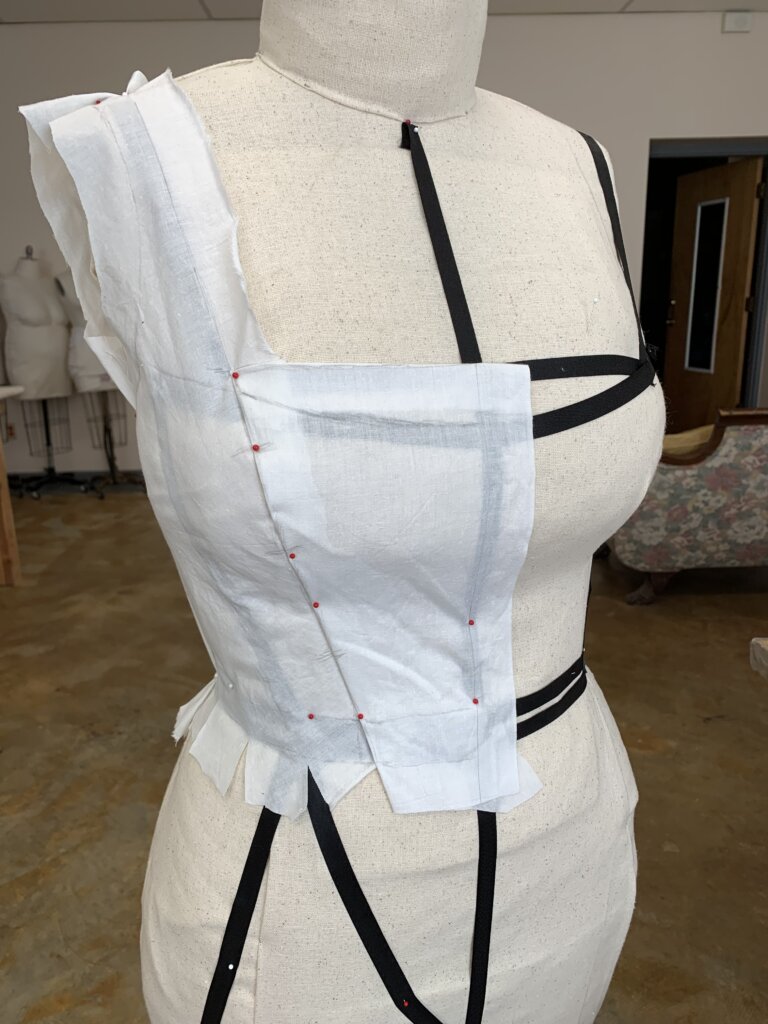
Then, I divided the body in half and draped roughly cut pieces of plain fabric onto the shapes created by the tape.
I smooth the fabric across the area I’m patterning, clipping allowances and securing by pins as needed. When I’m happy, I trace the lines onto the fabric with pencil.
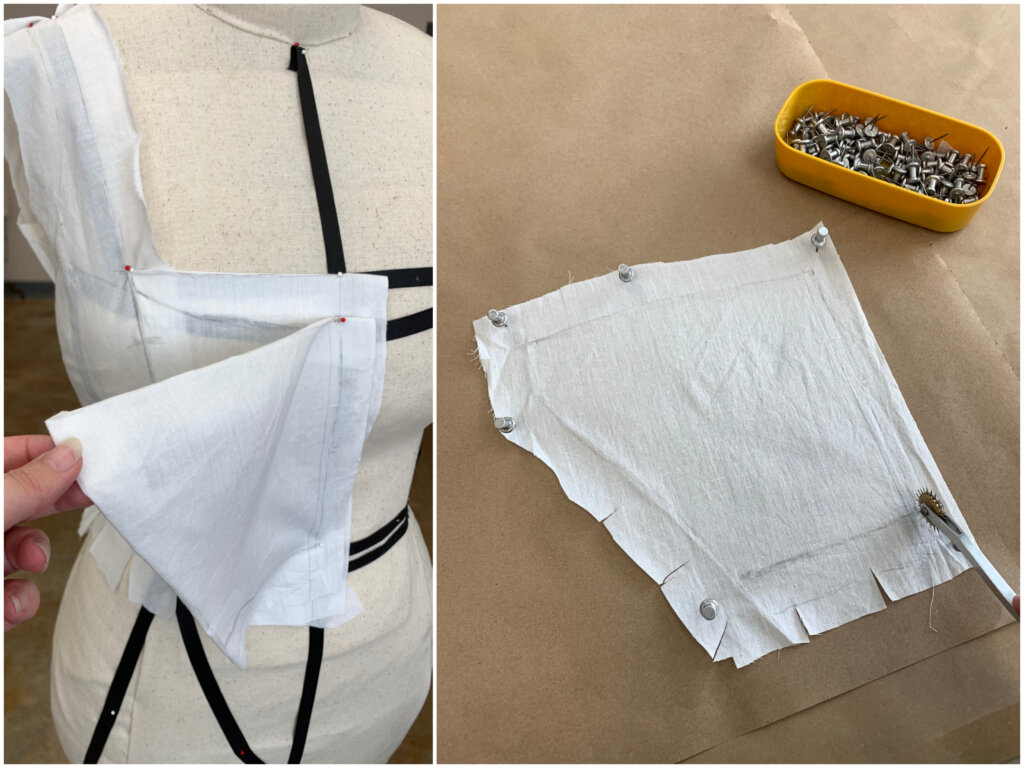
Next, I take the fabric piece off the form, clean up the lines while flat on the table, then try it back on, with allowances folded to the inside.
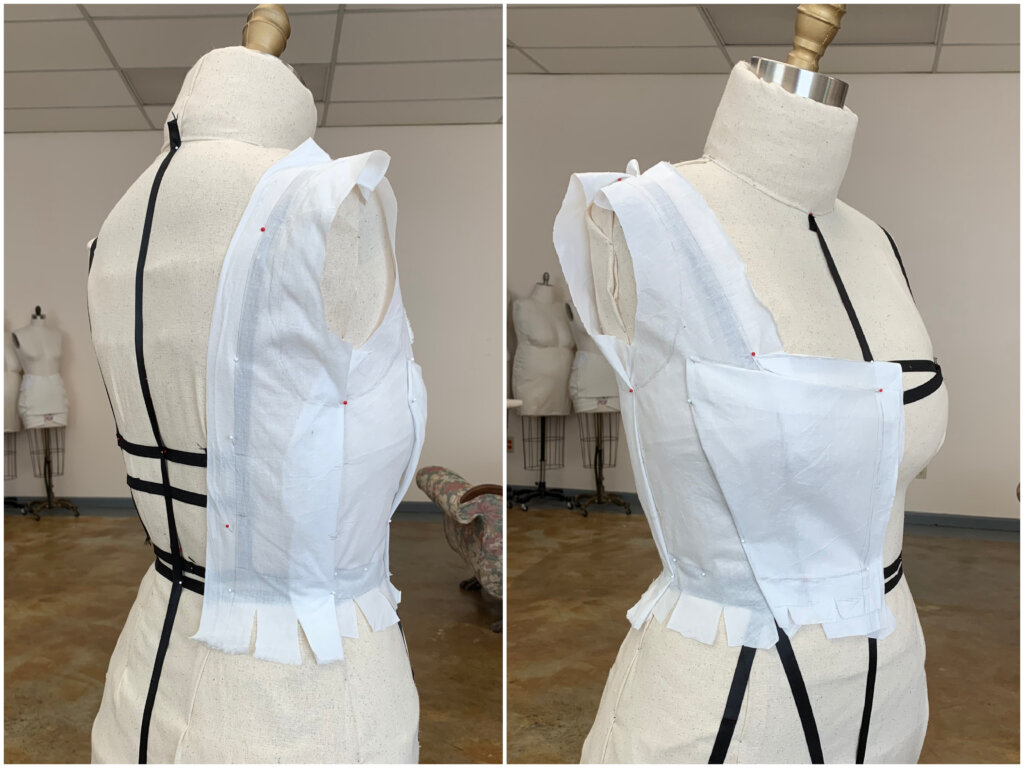
To continue my “rough drape”, I just kept going, doing something similar for every piece of dress’s bodice.
As new pieces are added, I draw notches across the seams. They’ll help me understand how to put the puzzle back together.
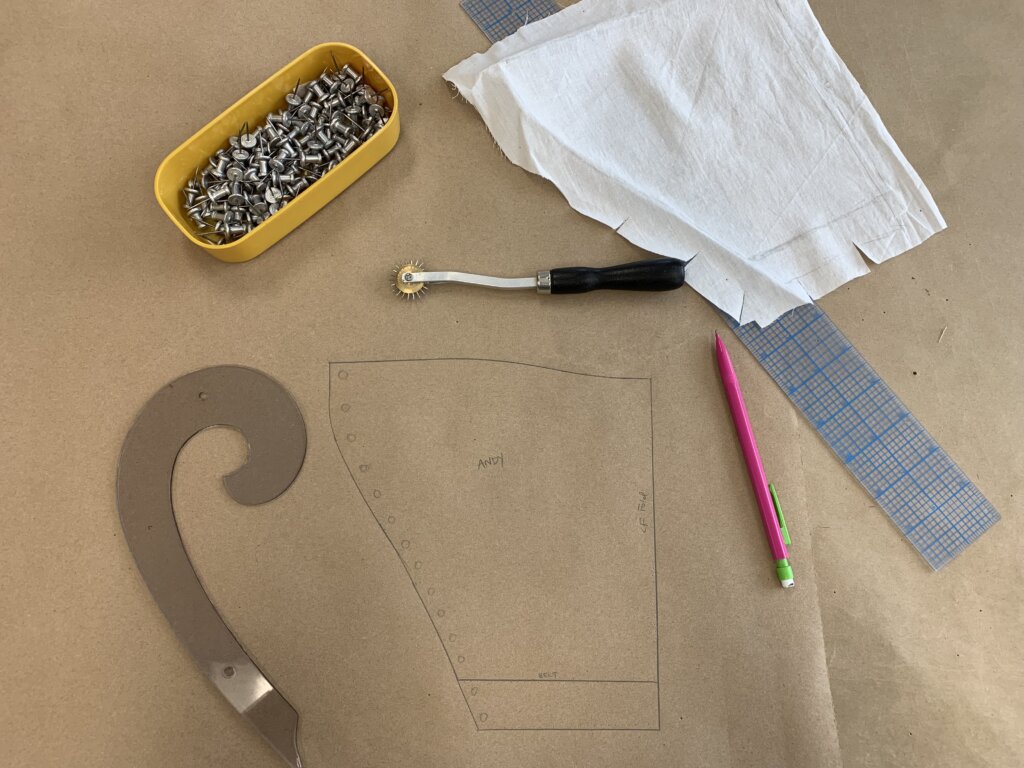
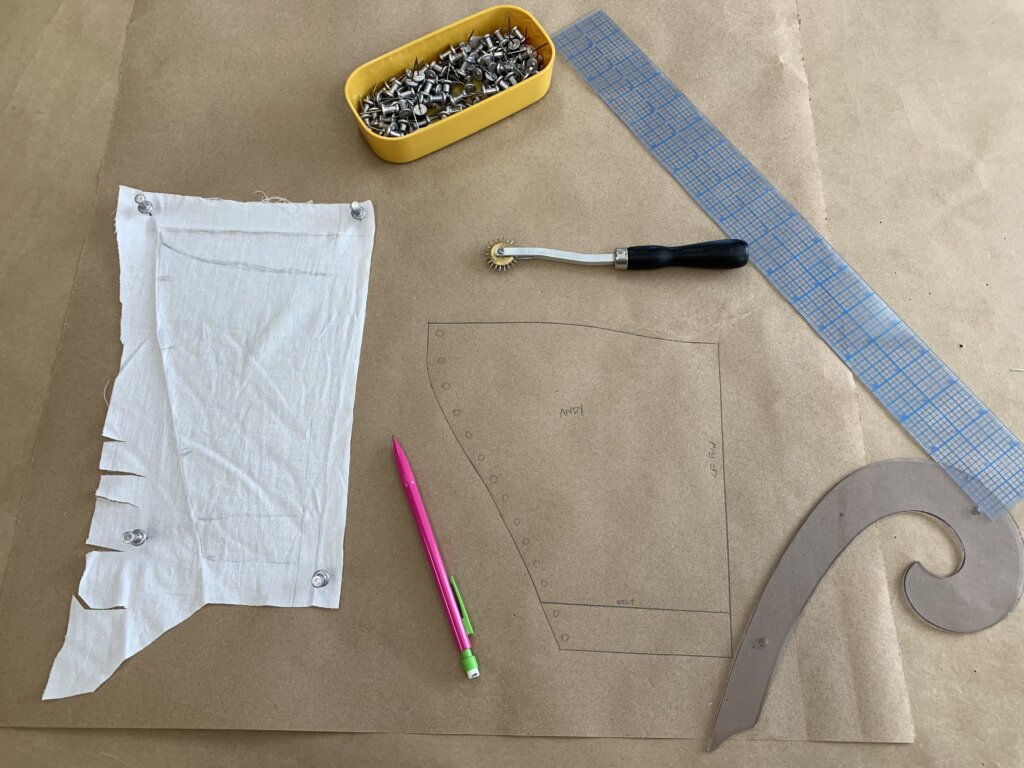
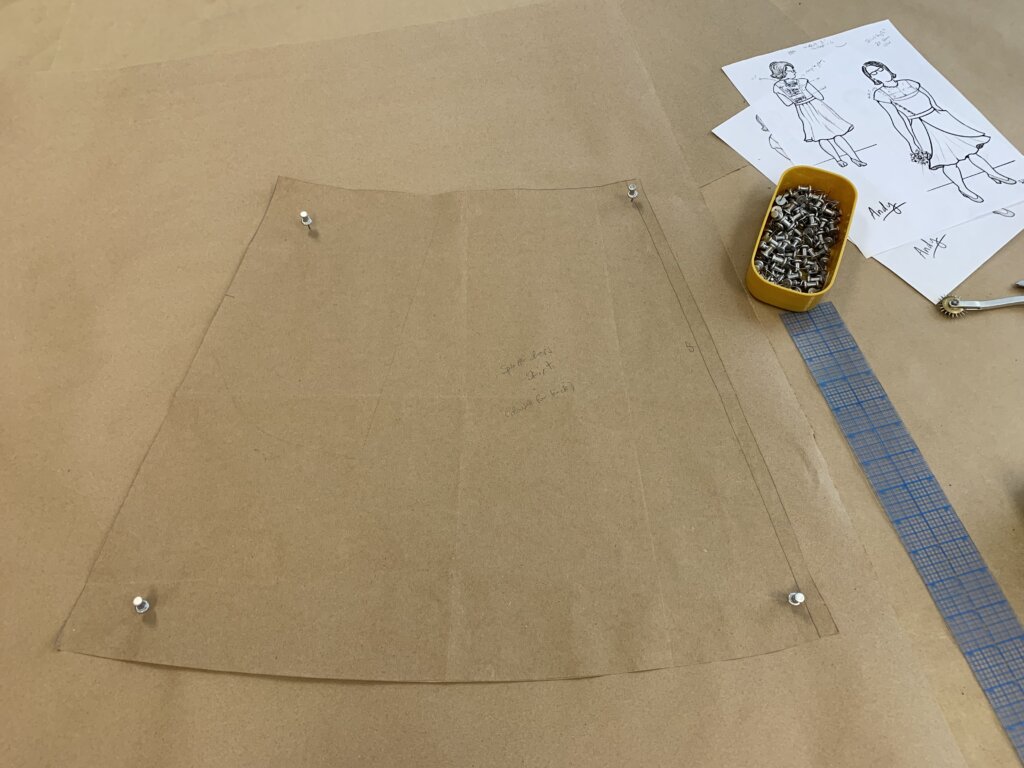
Once I was happy with each piece of my rough drape, I transferred the info from the fabric to a blank piece of paper, tracing the lines with my spiky wheel. I love my pinnable top table for securing the pieces in place while tracing.
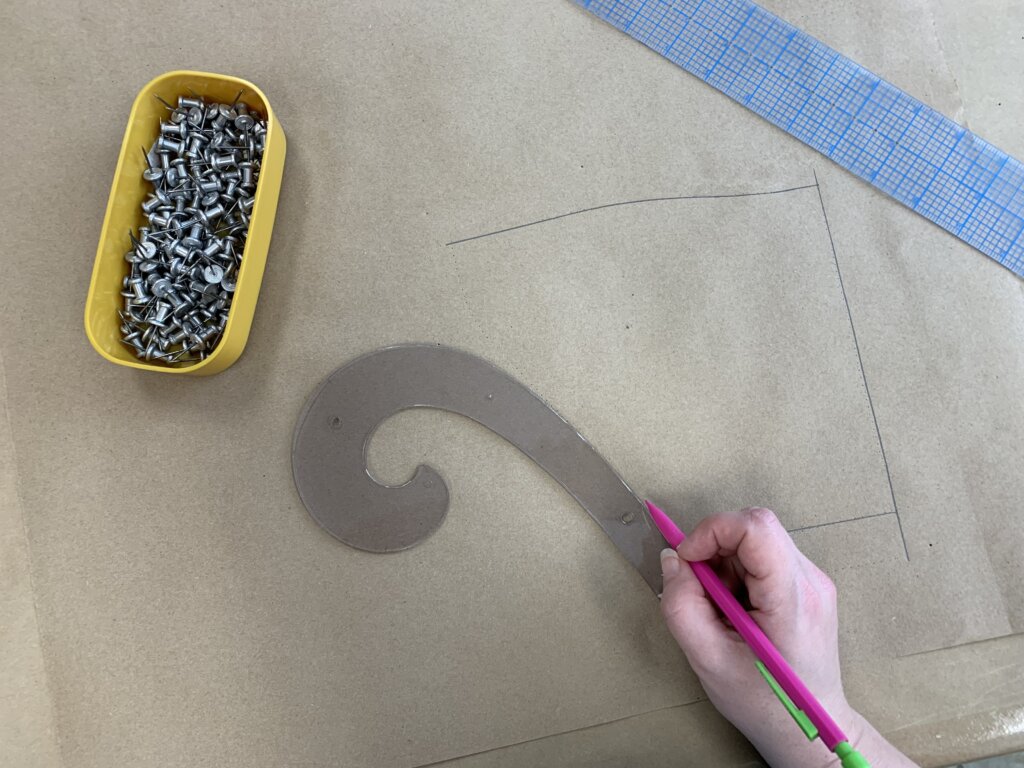
A spiky wheel tracing leaves little perforated lines on the paper. I was able to recreate the shape on the paper by “connecting the dots” using my pencil, ruler, and curve tool.
My first draft of Andy’s first pattern piece: Done!
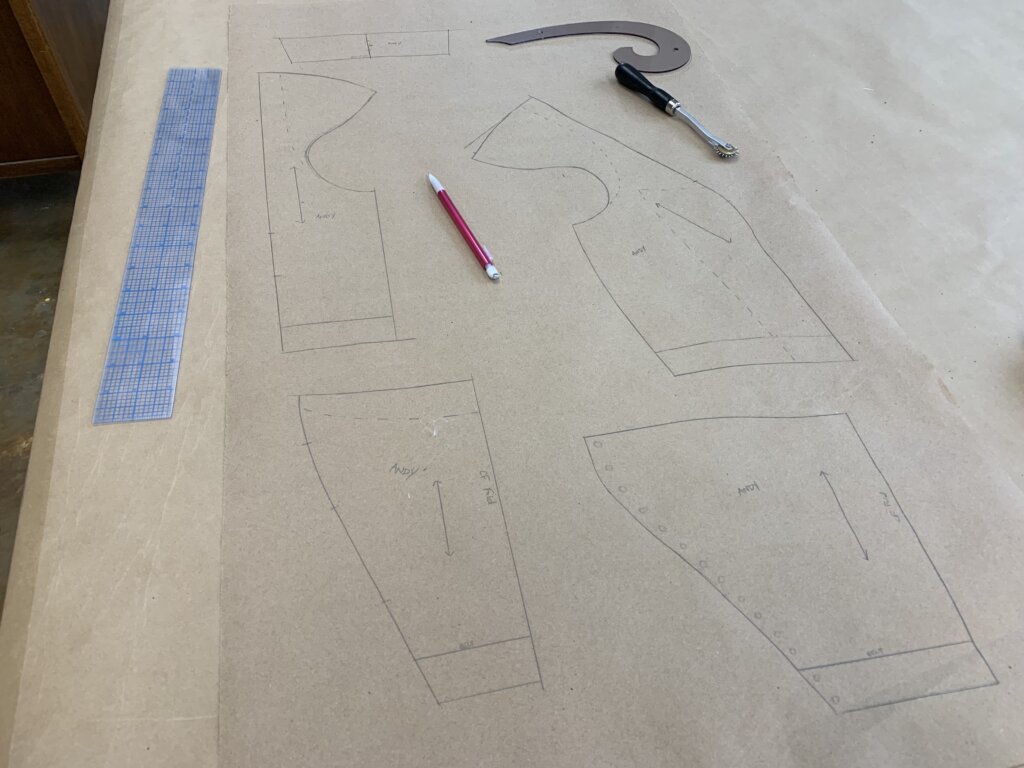
Then I continued, using a similar process to “draft” the rest of the pieces.
Adding some Flat Pattern Hacks
You may have noticed that Andy’s dress sketch included cap sleeves that I did not attempt while draping.
Instead, I pulled out a pattern of a dress I made for myself that had a sleeve I wanted to copy. I traced the sleeve shape from my personal pattern onto the lines of Andy’s rough drape.
And it looks like I used the skirt portion of that same personal pattern as the starting point for Andy’s underskirt pattern.
I’d save making the pattern for the overskirt until later- after I’ve got these bits of the first draft mocked up and tested. No need to get ahead of myself!
The First Draft
Here’s the first draft of the top of Andy’s dress, before truing. Truing is where you “walk the seams”, test, and make a neatness to each line, making sure every piece nicely matches the piece that it will eventually be sewn to.
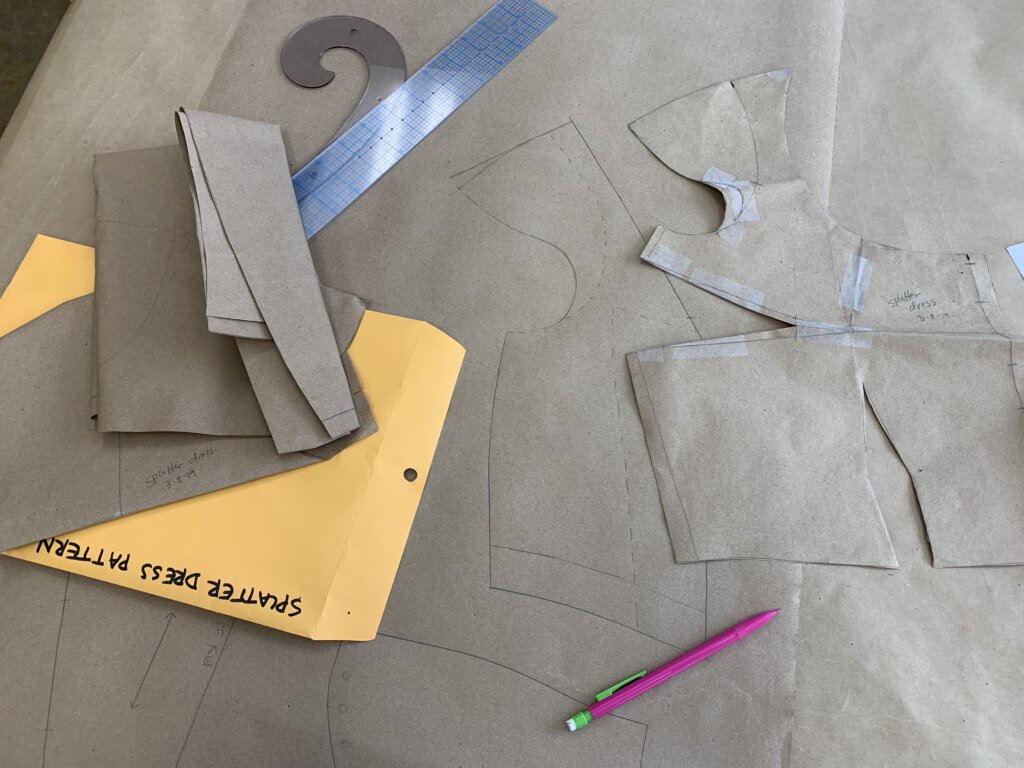
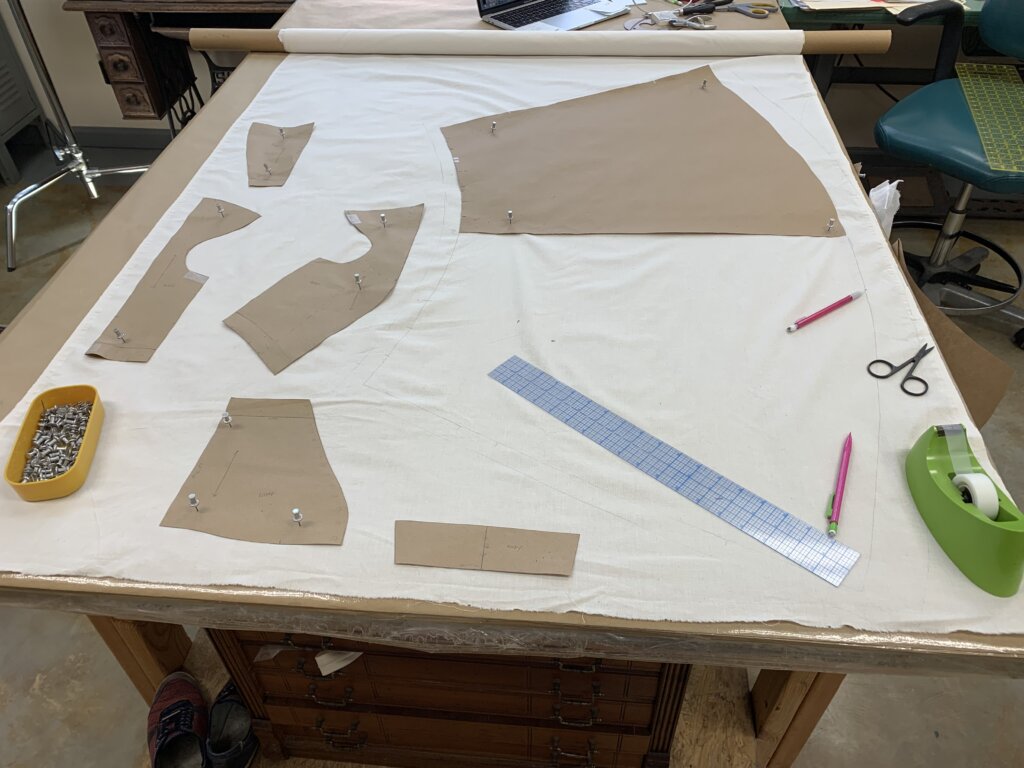
Here’s the only shot I got of all of the original pattern pieces. They’re getting traced onto the mockup fabric. So exciting!
Which is where I’ll start part 2!
Did you learn anything new? Have you ever padded a custom dress form? Have you ever made pattern pieces by Draping on a form? Have you ever made a wedding dress before? Do you love Andy’s inspirations? Have you ever told story for the first time, years after it happened?
I’d love to know! Thanks for following along!
NEXT POST: I’ll jump back into 2019 to show you how I made and fit the mockup of Andy’s wedding dress.
Want to learn more about the way I sew?
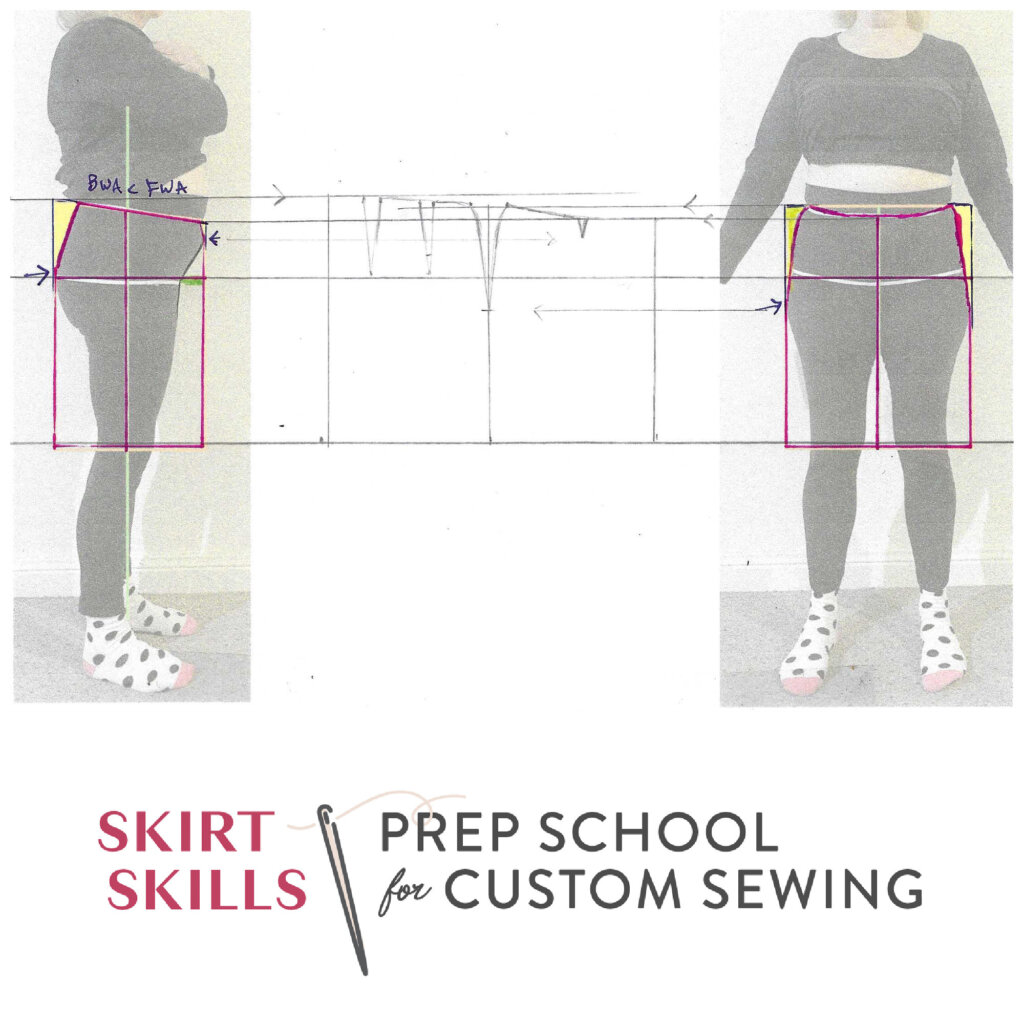
The Summer Session of my Intro to Custom Sewing eCourse Skirt Skills starts online June 10. Enrollment opens May 30!
“The more I review the lessons the more I’m learning, even though I’ve been sewing off and on most of my adult life. This approach is so freeing from the confines of commercial patterns. Brooks Ann put the joy back into my sewing! -Barb
“I’ve learned so much, and feel the most relaxed about sewing I have ever felt.” – Nicola
I’m a former professional costumer and couture dressmaker for one-of-a-kind bridalwear located in rural North Carolina, who teaches custom garment sewing to sew-curious solo-sewists online.
My blog mostly follows along with the couture process of how each heirloom-quality custom wedding dress was made from idea to wedding day, as well as personal sewing projects and other couture curiosities.
Welcome to my (temporary) Sewing Studio! Come on in! I love seeing other people’s workspaces and tools, so I thought I’d show you mine. I cleaned up after a big...
Duplicating the Vintage Dress’s Pattern (without taking it apart)
In my previous post, I introduced Jenn and the custom bridal wear project(s) for her wedding weekend. Check out the full story for all the deets, but to catch you...
I Made Myself the Coolest Dress pt. 1 – Pattern Design & Mockup
Though my personal wardrobe is mostly “the dressmaker has no clothes”, when I do make something for myself, it’s usually an epic project. I’m so excited to finally share this...
I’ve been blogging for TEN YEARS now, ya’ll! In “My 10 Year Blogiversary pt. 1”, I share links to each bridal blog series that I’ve created over the past decade....
It’s finally time to share about Deborah’s wedding day! HOORAY! Deborah and Blake were married in November 2017 at a church in Greensboro, NC with the reception at a nearby...
New Bridal Blog Series: My (kinda famous) friend Jenn!
Brooks Ann, Jenn, & Charles January 2017 Going Way Back… To begin my next bridal blog series, let’s head into the Way-Back Machine. And we’ll head farther back than this...
The bridal blog series is back! In each bridal blog series, you meet a new bride and I slowly post-by-post recount the process and share the behind-the-seams story of creating...
The bridal blog series is back! In each bridal blog series, you meet a new bride and I slowly post-by-post recount the process and share the behind-the-seams story of creating...
The bridal blog series is back! In each bridal blog series, I recount the process and share the behind-the-seams story of creating a one-of-a-kind custom couture wedding dress from start...
Sally is someone special. Back in December, I got an email from a dear friend named Sally that I had lost touch with. The subject line: “dear lord i’m getting...
As it starts to get cold, it sure is nice to think about summer! Gin and tonics… BLTs… beach trips… seersucker… Earlier this year, I worked with a bride who...
Welcome to Part 2 of the story behind making Andy’s 2019 wedding dress, where I’ll recount the testing phase of the custom process. If you’ve been following my blog for...
They say documenting the process triples the production time. (And I work more slowly than most.) My Nimbus was cold.She needed a new coat, sooner than later.
Welcome to Part Two! I’m back to share the nerdy behind-the-seams details of creating my Vanishing Tie Top for the Precious Fabric Challenge. But this photo-filled blog post doesn’t feature...
Do you have a fabric that you’ve been SAVING instead of SEWING? Yeah. Me too. So when Whitney Luckenbill of TomKat Stitchery asked me to be a part of her...
Welcome to my (temporary) Sewing Studio! Come on in! I love seeing other people’s workspaces and tools, so I thought I’d show you mine. I cleaned up after a big...
Welcome back! It’s the series finale! In this third and final post of My Warmup Jacket series, I share the behind-the-seams details of my jacket’s construction and finishing stories!
In this second post of My Warmup Jacket series, I share the behind-the-seams details of my jacket’s patternmaking and mockup stories! And after putting this patterning post together (which was...