

I made a dress! For myself! And I took a bazillion photos! And I’m excited to share them with you!
My passion is helping others look great. Unless I’m heading to a wedding where I made the bride’s dress or I’m self-sewing on-camera for one of my online workshops, I’m firmly in the camp of ‘the dressmaker has no clothes’.
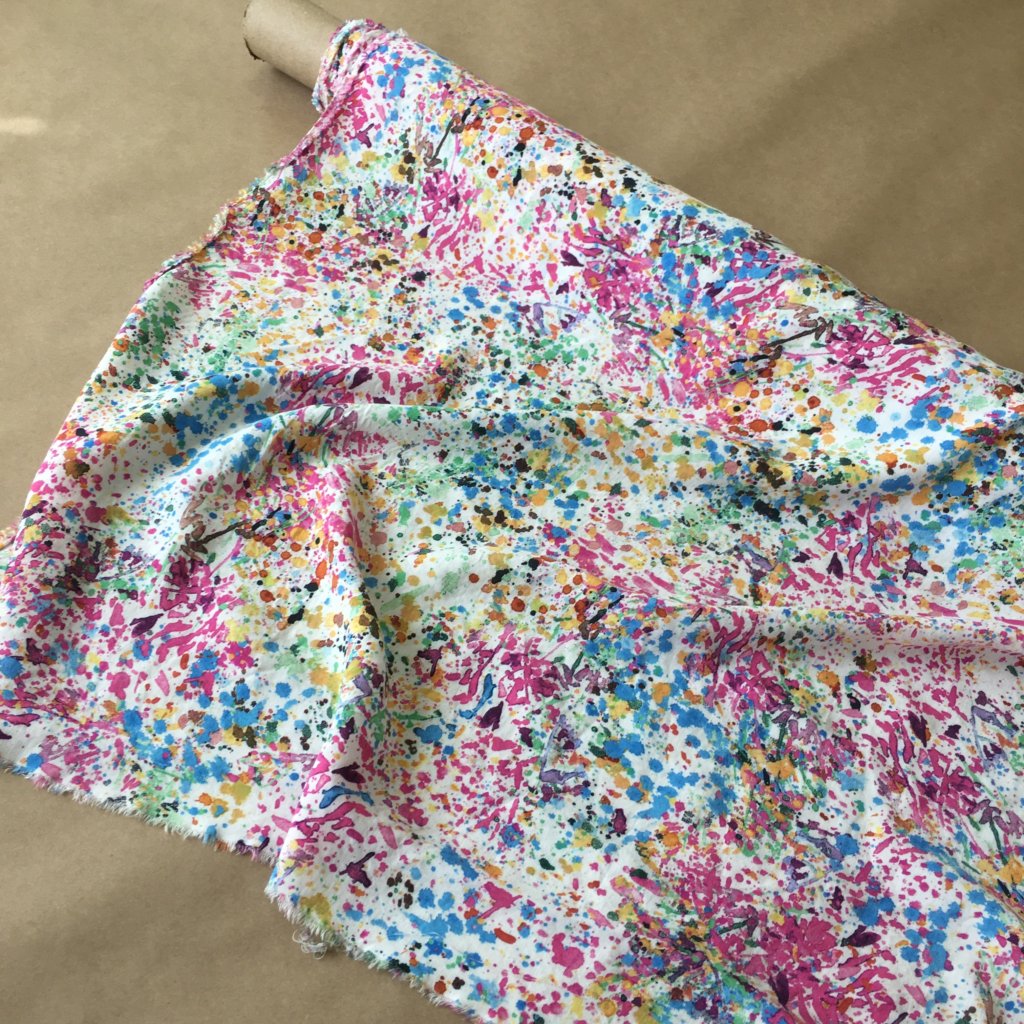
As a self-employed business owner, I have approximately 9 years of work on my To-Do List at all times. A few months ago, I was feeling so far underneath it that I was dragging along and feeling totally uninspired. To try to snap myself out of it, I looked around my studio for inspiration. The most inspiring thing I found was the fabric you see above: a colorful splatter print rayon from Mulberry Silks!
So instead of tackling my List, I decided to take some time to make something for myself!
And since a casual-ish dress for myself is much simpler than my bridal designs, and I know ya’ll love behind-the-seams process peeks as much as I love sharing them, I took photos of almost every step along the way! 417 photos to be exact… which I edited down to approximately 75… I was very tempted to keep editing out bits of the story until an Instagram poll significantly favored sharing EVERYTHING… So… I hope you enjoy this epically photo-filled double-feature!
Inspiration and Pattern
When you sew from your own custom patterns, the possibilities are endless. And if there’s one word to describe my sewing style it is likely: thorough. If I was going to get through a self-sewing project and back to everything needing my attention, I’d have to make some quick design decisions.
Since my sewing tendency is to want to slowly dabble my way through lots of new ideas and techniques (I especially love creative patternmaking!) yet what I actually choose to wear is mostly simple and uniform, I decided to update an old classic rather than create a completely new design. One of my most-worn dresses is the one I made for myself in my 3-part blog series on underlining (which was later condensed into an article for Seamwork Magazine). I still think of it as a relatively new make, but am now realizing that I finished it way back in 2014. This is how un-often I sew for myself.
In the past 5 years since making the inspiration dress, I’ve learned new things and I’ve gained new tools. Last year, I created my online workshop Top Class in which I made several custom-fit top blocks for myself. Other than the tops I created for myself on-camera during class, this would be my first time using these new tools. Updating my older well-loved pattern with a new-and-improved fit and possible slight design changes sounded like a good way to get this project rolling.
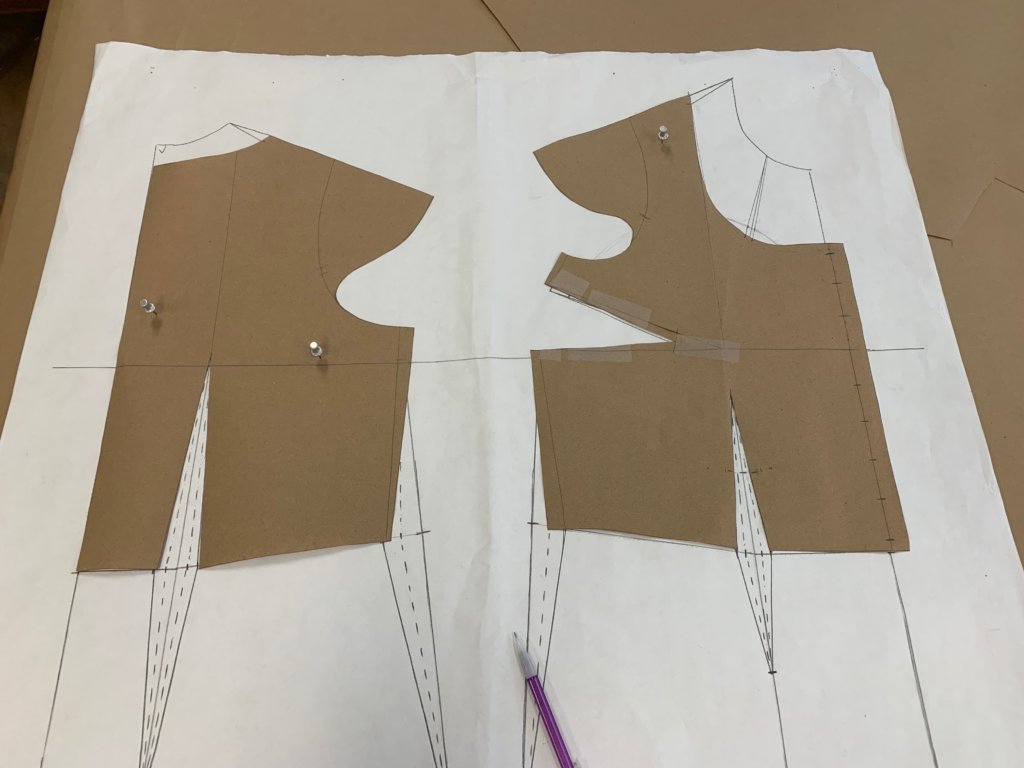
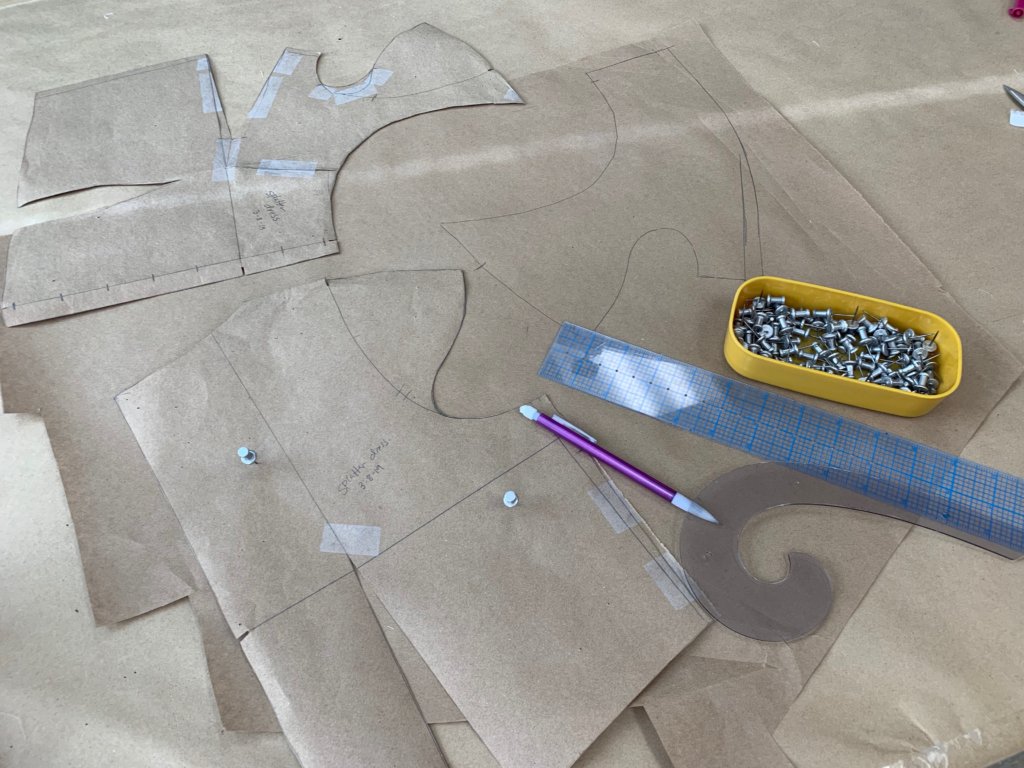
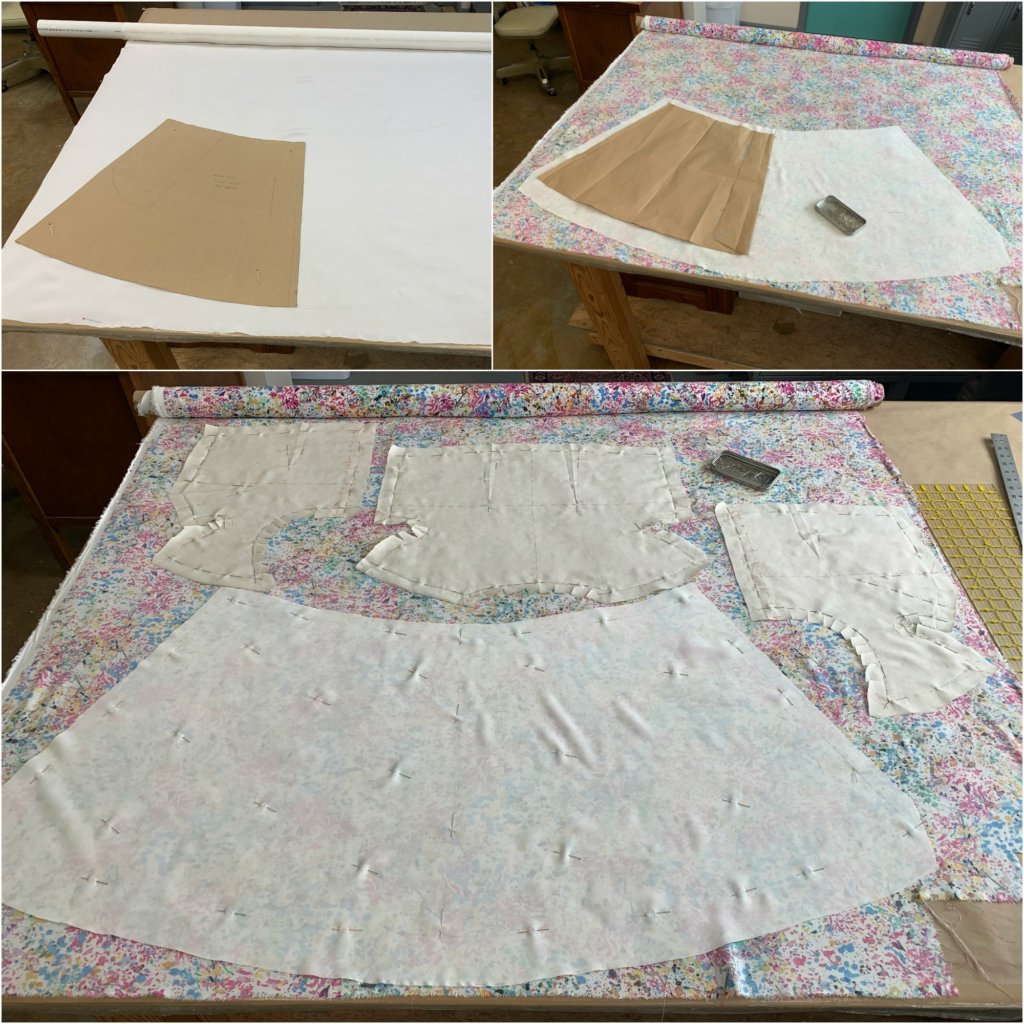
Here’s my custom fitted top block tool (which simply represents Size-Me) next to the top of my self-drafted pattern from my 2014 inspiration dress.
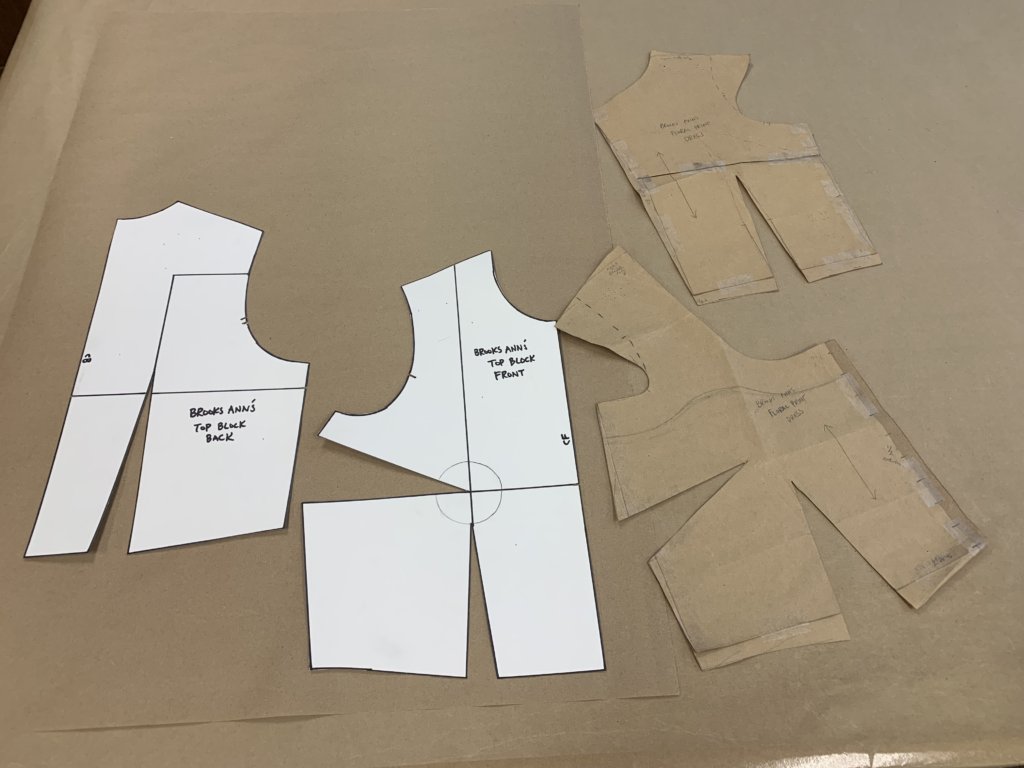
I got started by tracing around my top block onto a fresh sheet of paper. Then I used the design details of my inspiration pattern to give it a similar style with some new preferences.
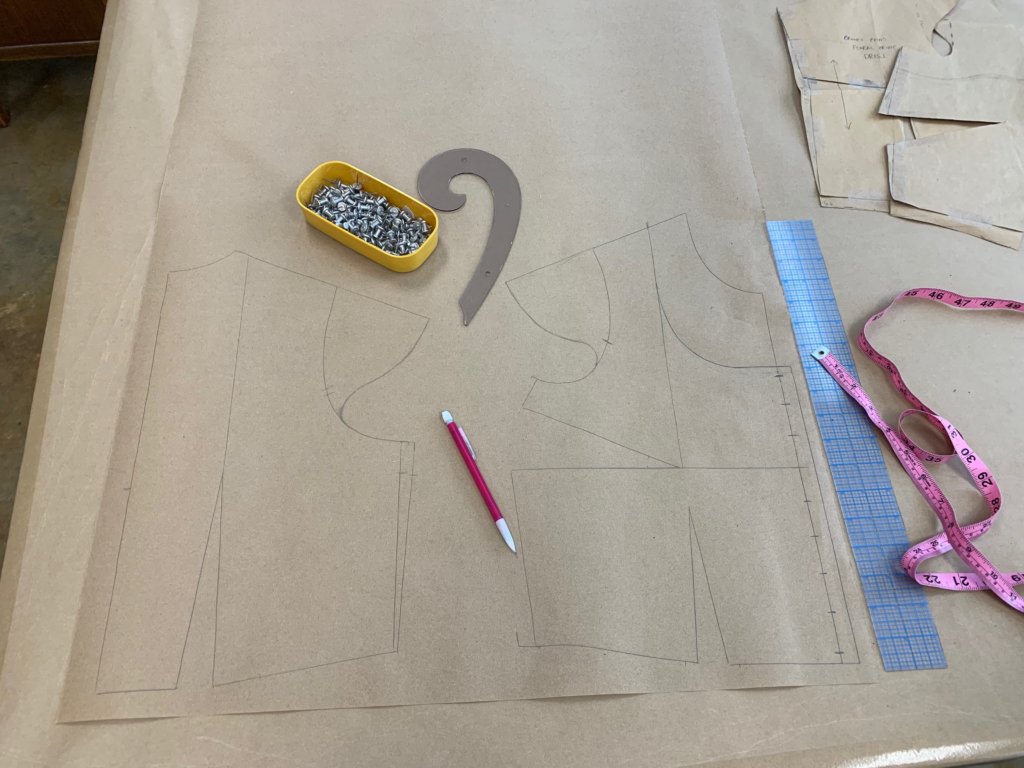
Then I finessed my neckline and cut-in-one sleeves while truing my seams. Gosh I love patternmaking…
Another tool we make during Top Class is a contouring map. This helps you discover bits of your pattern that might need tiny fitting tweaks before moving into fabric. My contoured body map predicted that this design would fit best with a bit taken out of the shoulders and a bit pinched out from the neckline. I’ve never taken the time to create a contoured body map before teaching this class (I’d just pinch out anything weird during my mockup fitting) but I have to say, I’m really digging this tool for a truly custom fit.
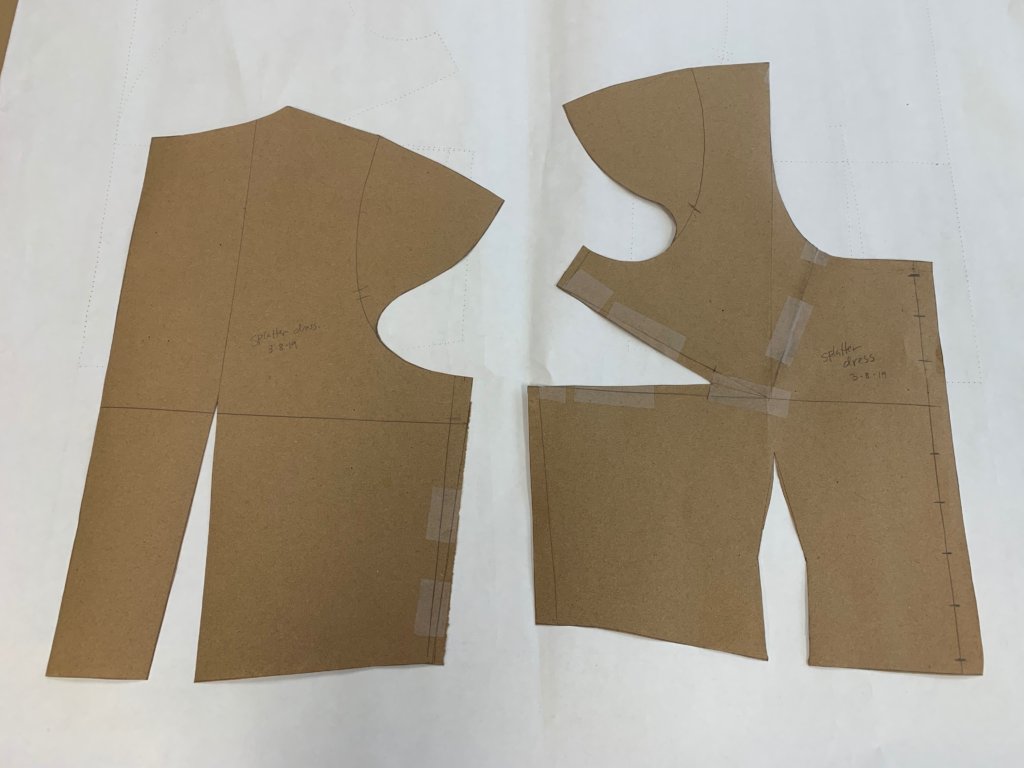
After backing off my bust dart and adding some additional custom contouring to the underbust dart, the pattern for the top of my new dress was ready to become a mockup!
Making the Mockup
I love the mockup process so much! It’s the open-book test right before the real test. You get to play around with design and fit changes, you get to practice techniques and, if you choose a mockup fabric that pairs well with your dress fabric, you can use it as your underlining (a process I detail in this blog series.)
In addition to keeping my design simple, I added another challenge for myself with this project: Don’t buy anything new. The rayon splatter print had been stashed away for 2 years and had a soft flowy drape. While looking for a suitable mockup material, I couldn’t find much of any one fabric that had a similar drape, but I did find a lot of random small pieces of fabrics leftover from linings for various wedding dresses. I managed to find one really nice cotton/silk remnant (which I believe was leftover from Erin’s wedding dress) that was big enough for my 3 top pieces.
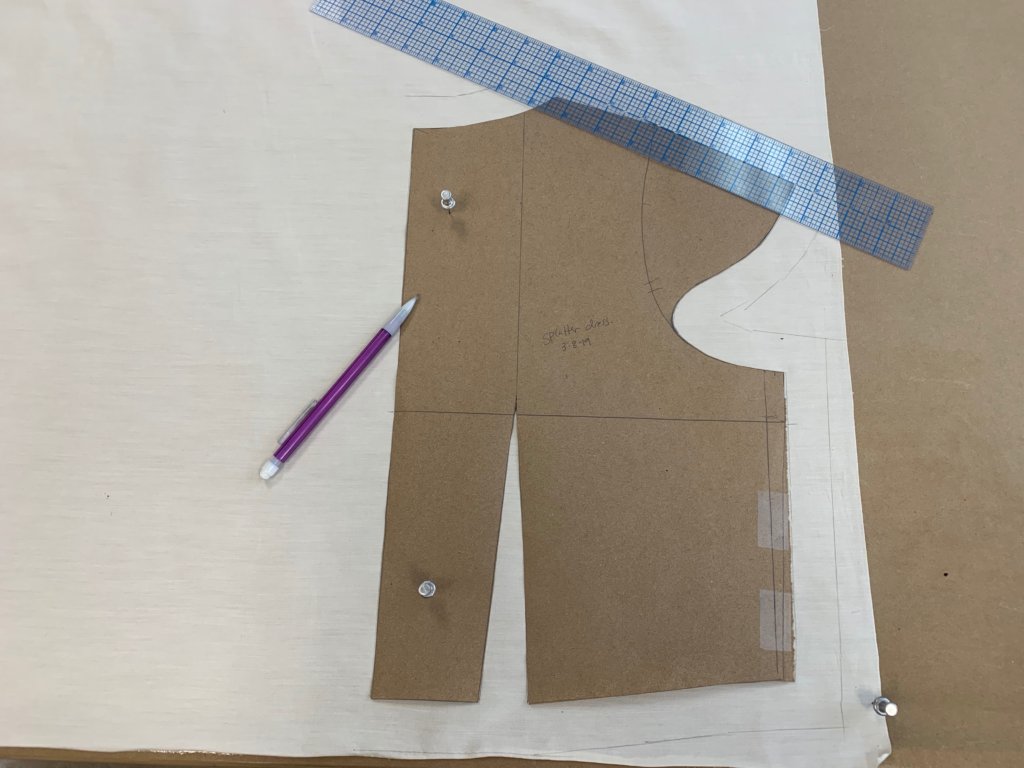
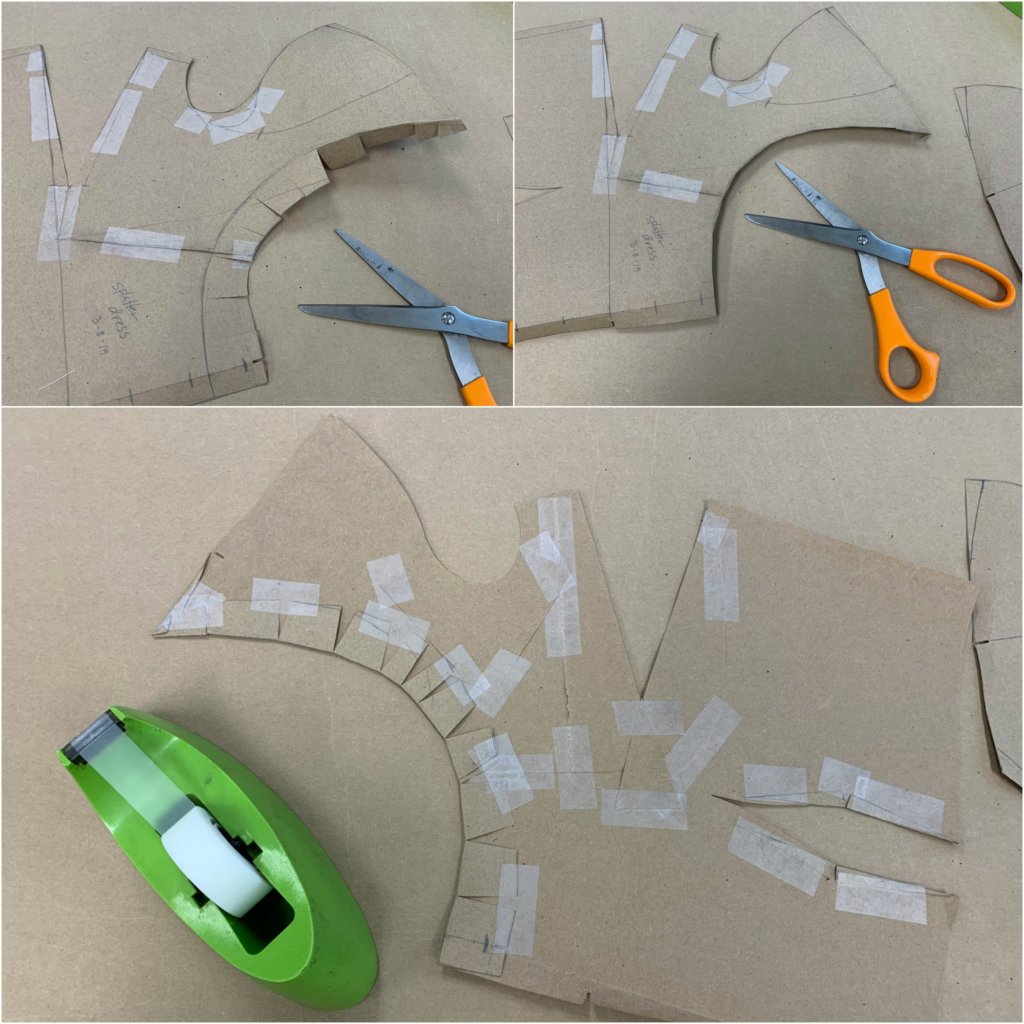
My patterns never include seam allowances. While some people see this as a pain, I don’t understand how having seam allowance included is helpful in any way! Seam allowance is simply the amount of fabric between the stitching line and the cut edge. If you mark your stitching lines (which are the ones that represent the fit), the amount of fabric between it and the cut edge is not really important at all.
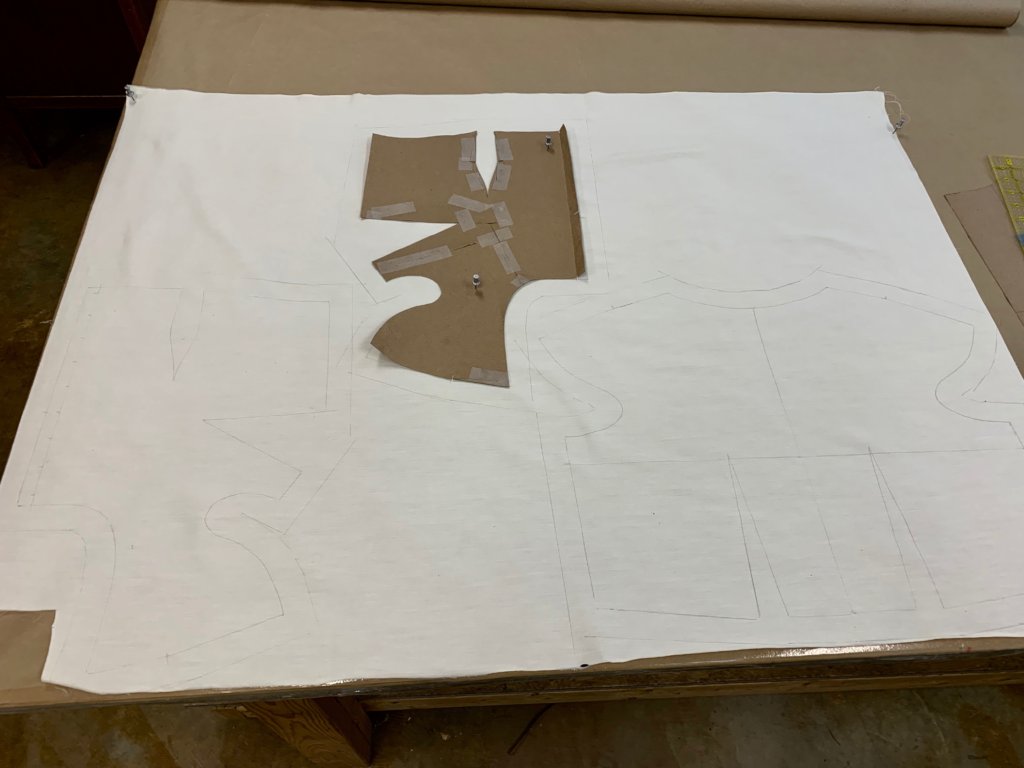
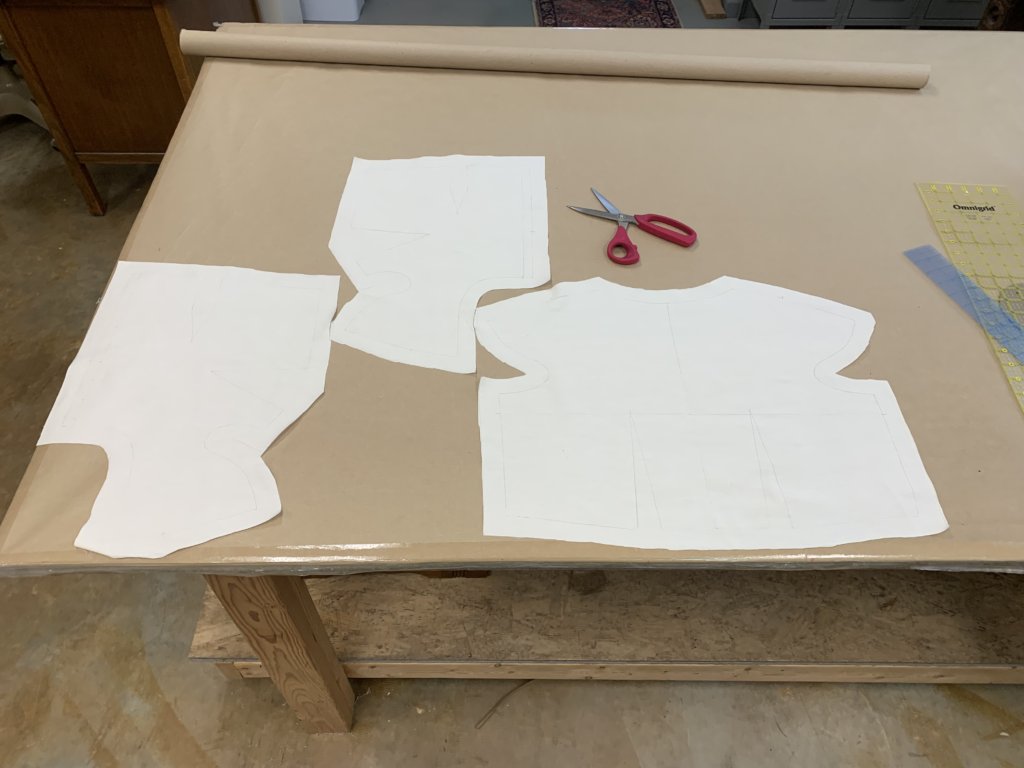
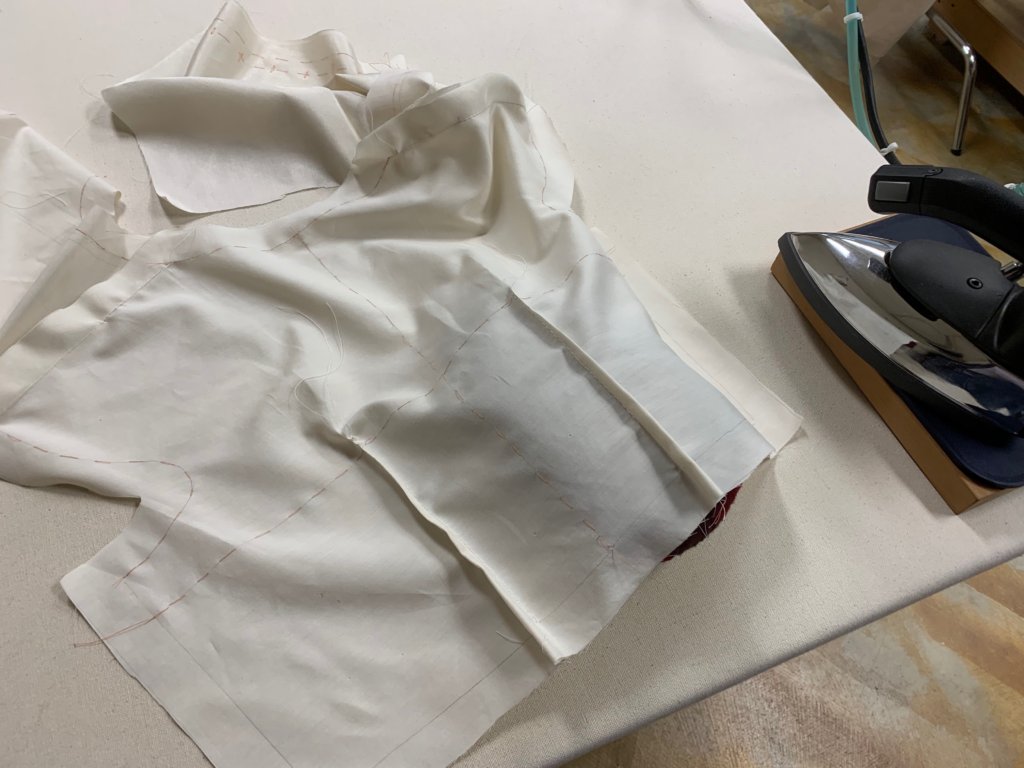
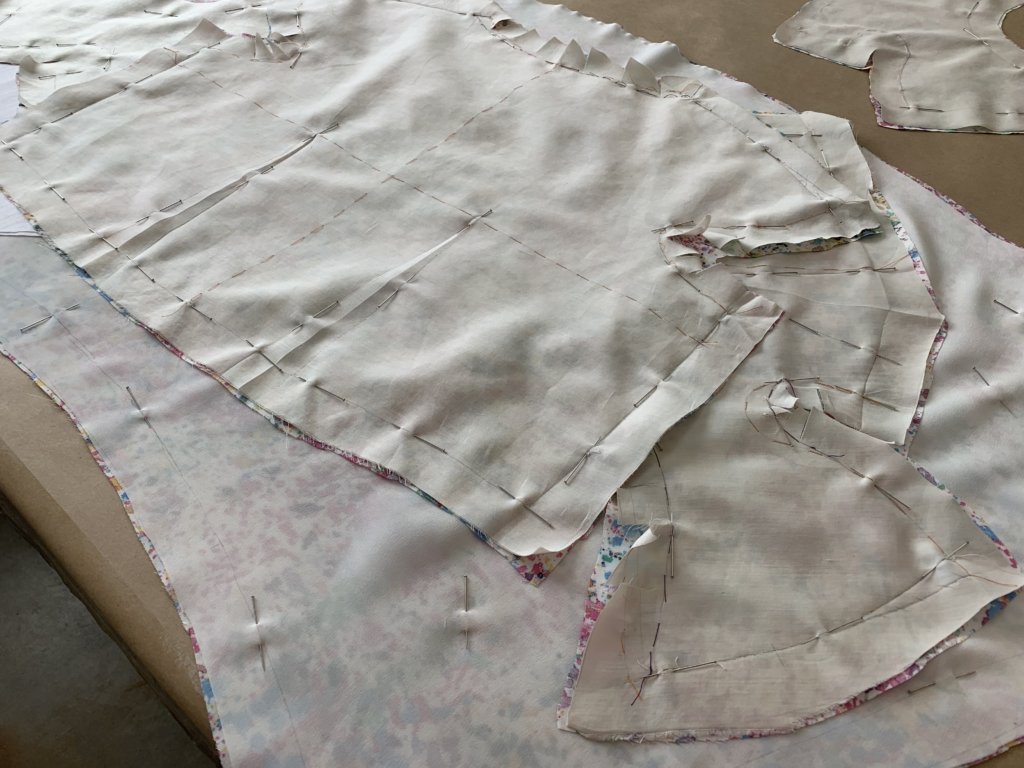
I rolled out my fabric in a single layer (I also don’t understand how cutting folded fabric is helpful at all!), squared it to my pinnable-topped table, placed my pattern on the grain, used a regular pencil to trace around the edges (which represent the stitching lines), before adding 1″ seam allowance around each piece (though since I’ve marked my stitch lines, cutting doesn’t need to be precise.)
I followed a similar process for marking my two front pieces onto my fabric…
… and cut them out.
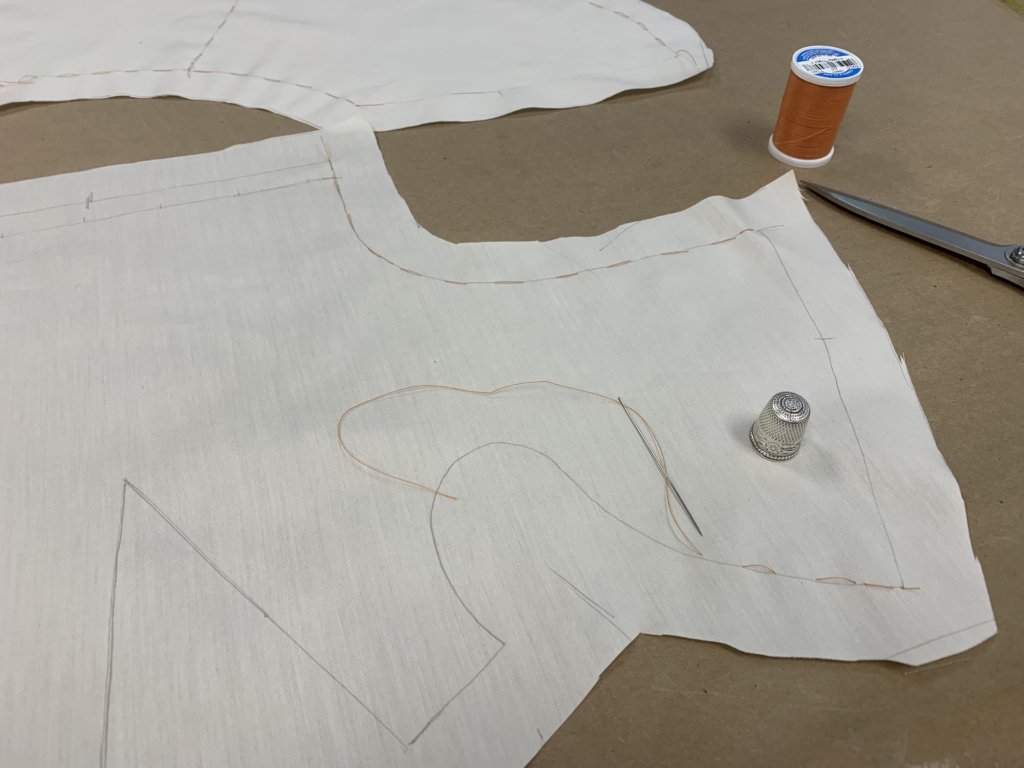
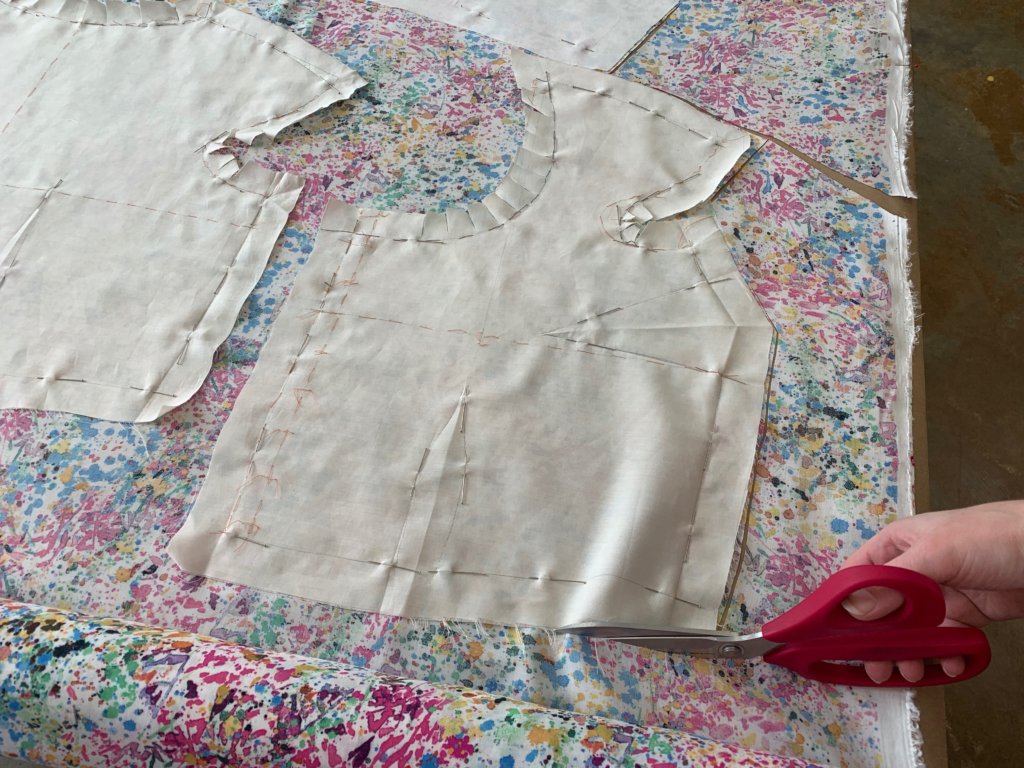
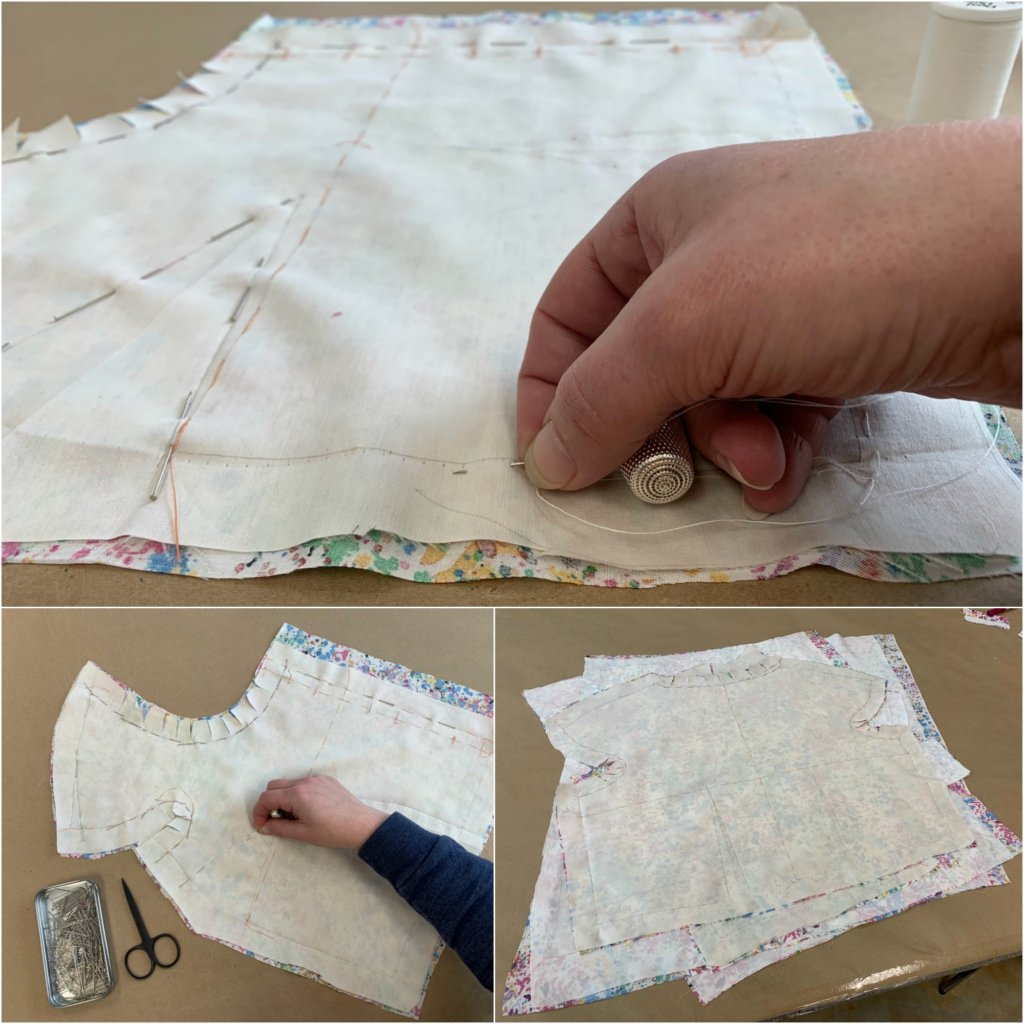
Next, any line that was drawn on the inside that I wanted to see on the outside during the fitting (and/or fitting prep), I traced with thread. Thread tracing, also known as threadmarking, is done with a quick running stitch by hand most often in a contrasting color. The neckline and armhole edges and the guidelines (such as CF, CB, and Bust Line) would be important to observe during my fitting.
The goal for this step is for these lines to be seen, with the added ability to be quickly removed/changed. This means the stitching itself requires no perfection and can be quick and huge. I think thread marking is the perfect time to practice and experiment with hand sewing in a totally no-risk way!
I only thread trace the edge lines and the guidelines, as those are the only ones I need to see on the public side of the fabric. Thread tracing the stitching lines is overkill. Any line that will be stitched to another only needs to be seen on the inside, where they are already clearly marked with pencil.
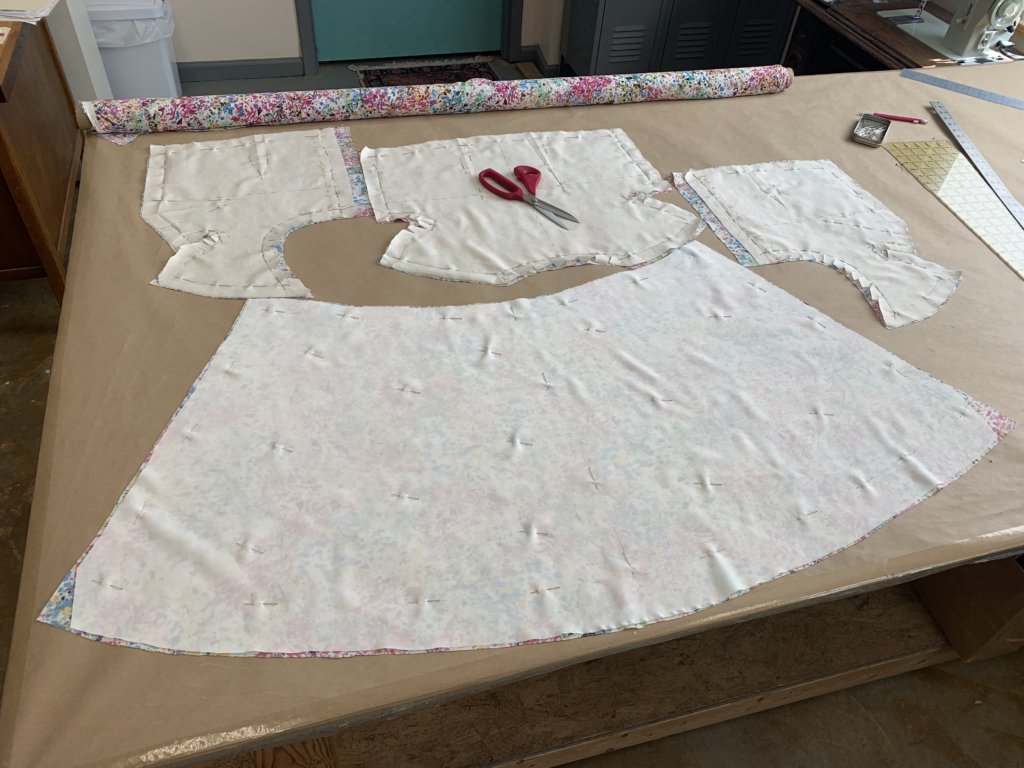
Then for some efficient workflow, I pinned everything that didn’t intersect anything else (matching my stitching lines- using my pins like a stitch)…
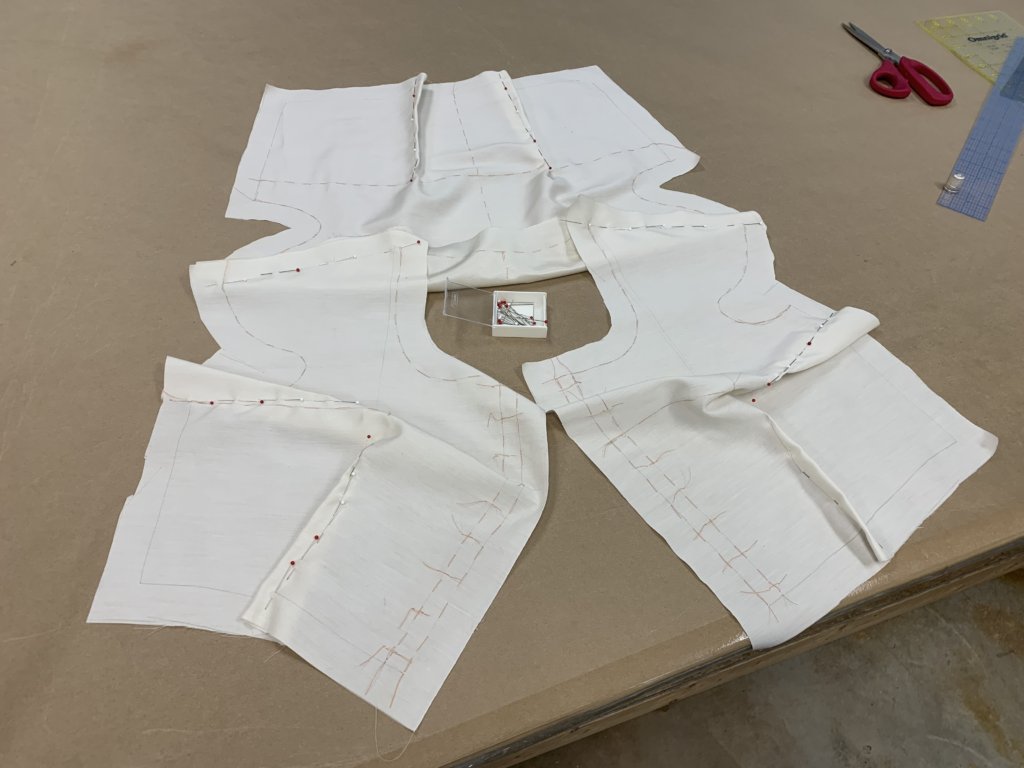
…then machine basted everything I pinned (with a long basting stitch for easy changes) …
…and pressed everything I stitched (using a tailor’s ham underneath the new shaping)…
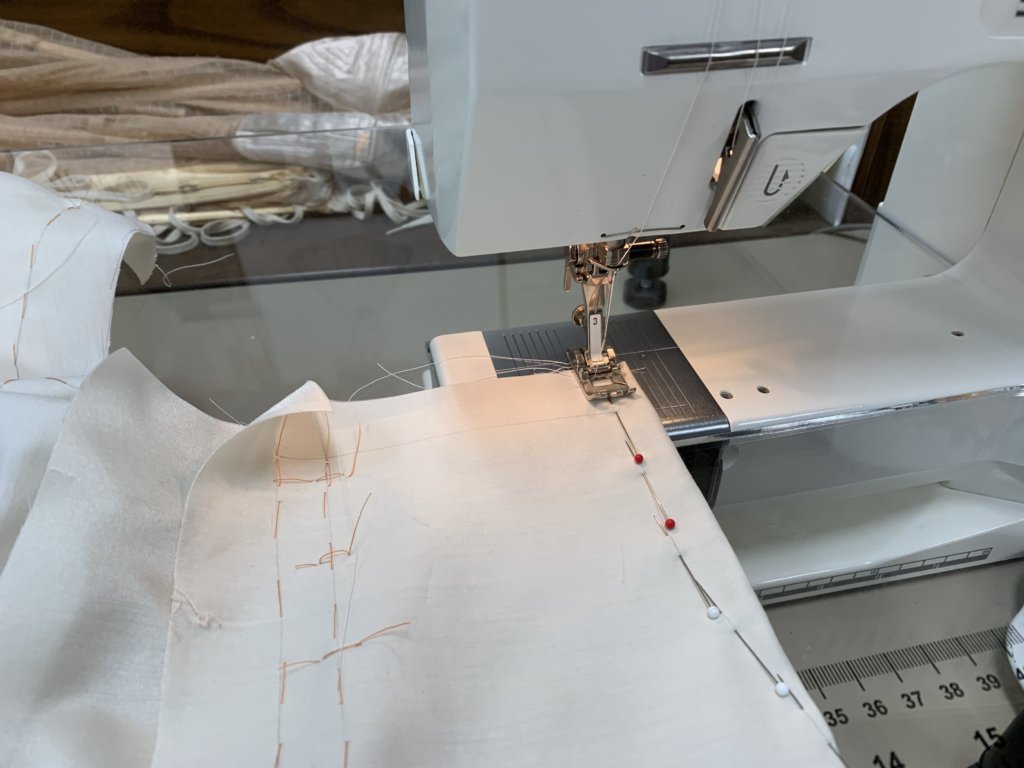
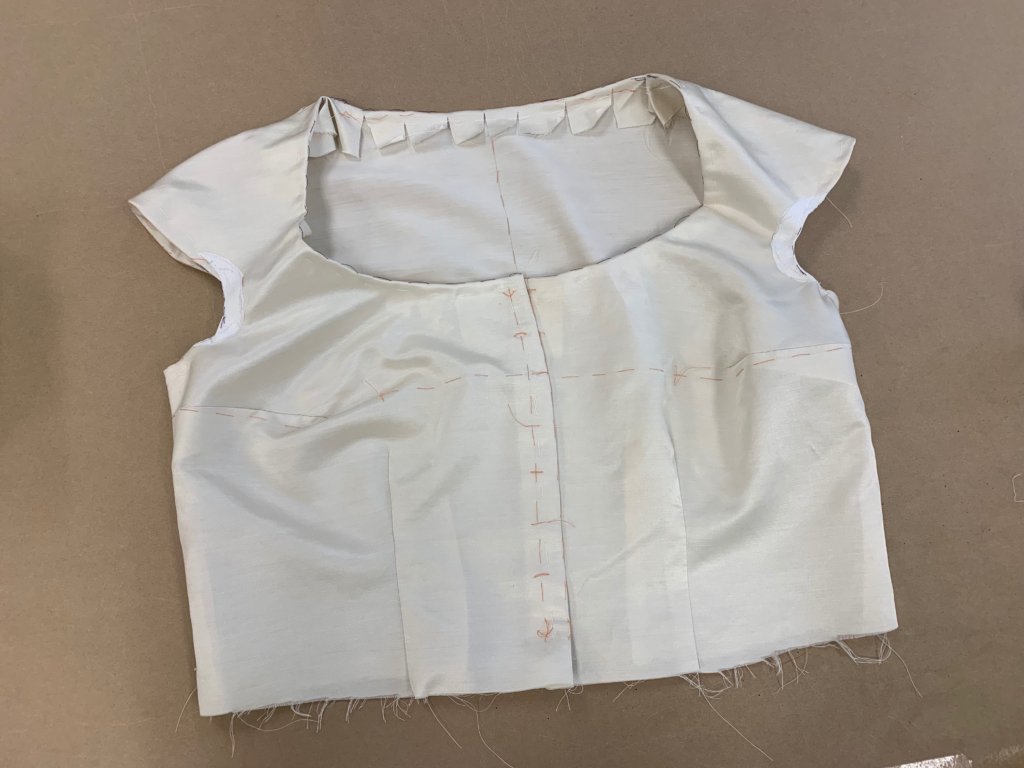
…before stitching the side seams, clipping the neckline and armholes, and using my thread marked lines as my guide to hand baste the edge allowances to the inside and out of the way.
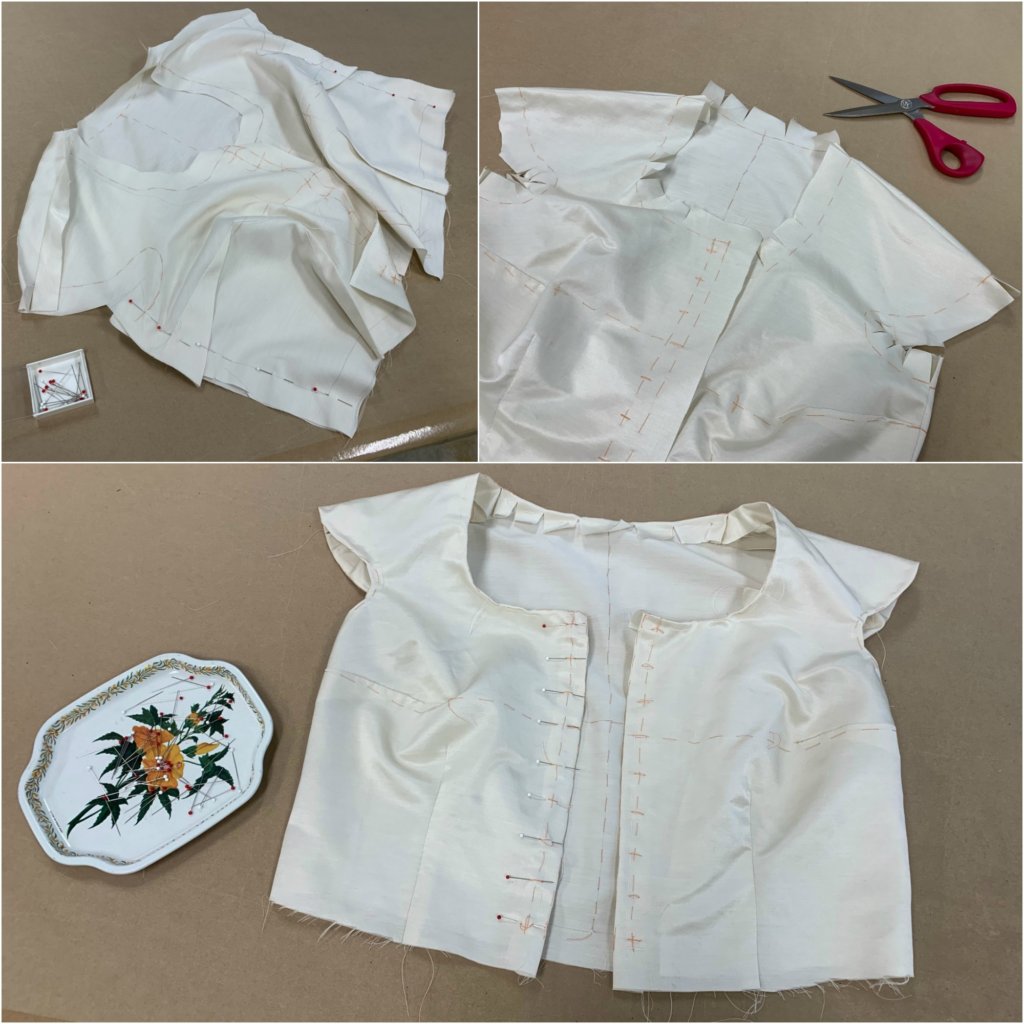
I marked where I planned to place my buttons and added pins to each (so that I could easily observe how the closures would work on my body) making my mockup fitting-ready!
Mockup Fitting and Corrections
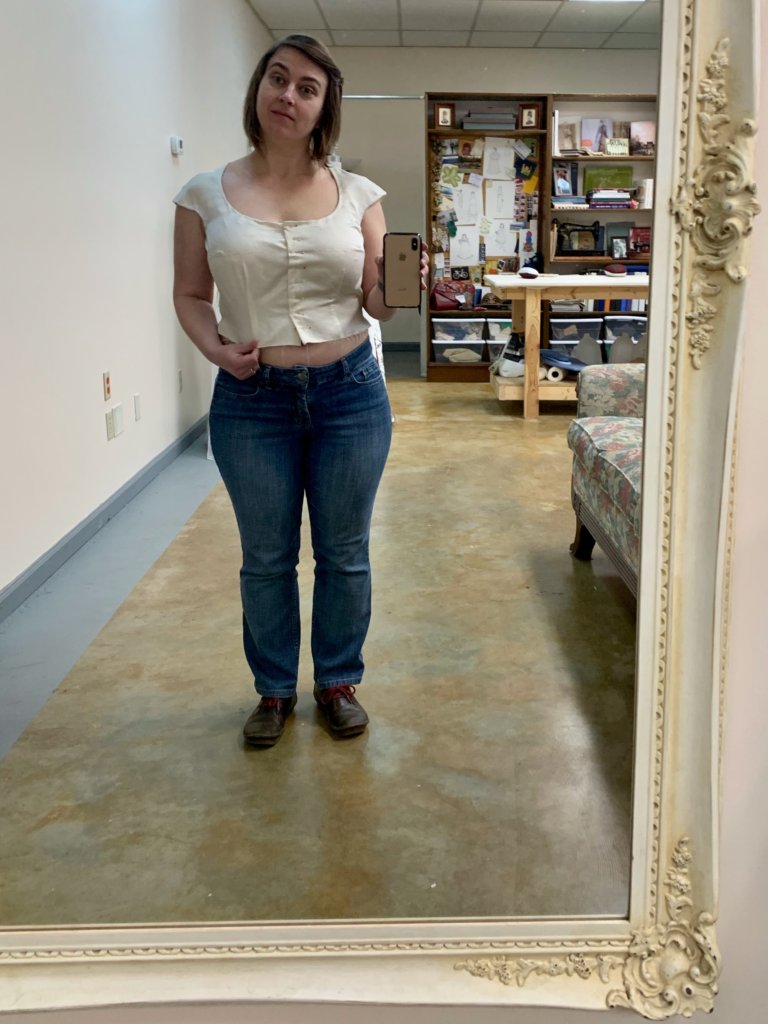
My first mockup fitting!
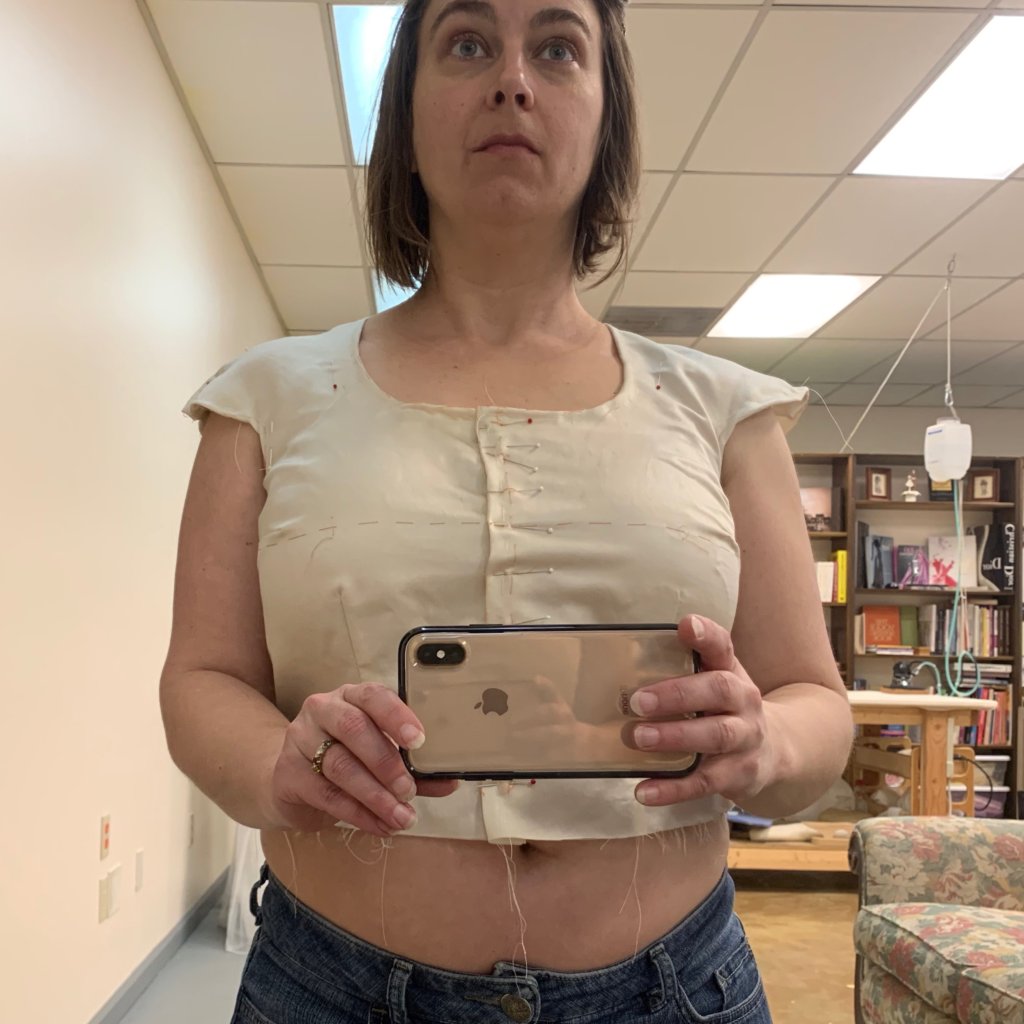
I liked the fit. A lot. Custom block FTW!
I liked the design too, but thought I’d like it even better with a few revisions. I decided to take a little away from the top of the sleeves to make them less pointy-outy. I’d also add a little more fabric to the front armholes. The most dramatic change I wanted to try was a lower, rounder, more open neckline.
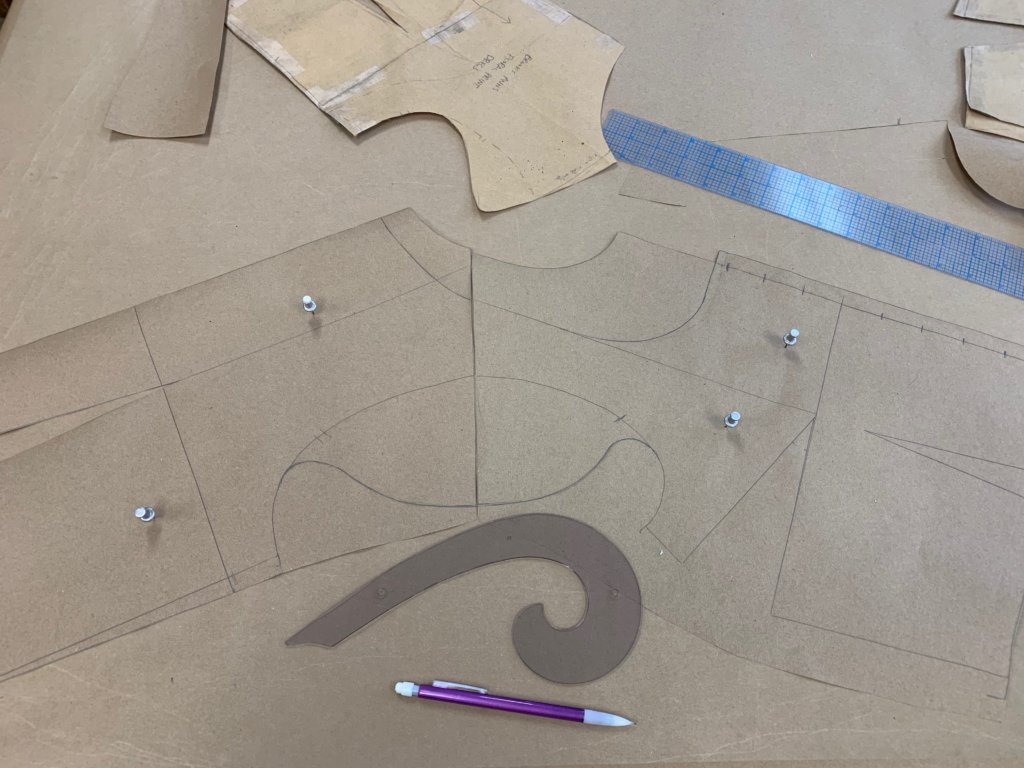
I used my body to estimate where/how much to add/remove before drafting my correction ideas onto my pattern.
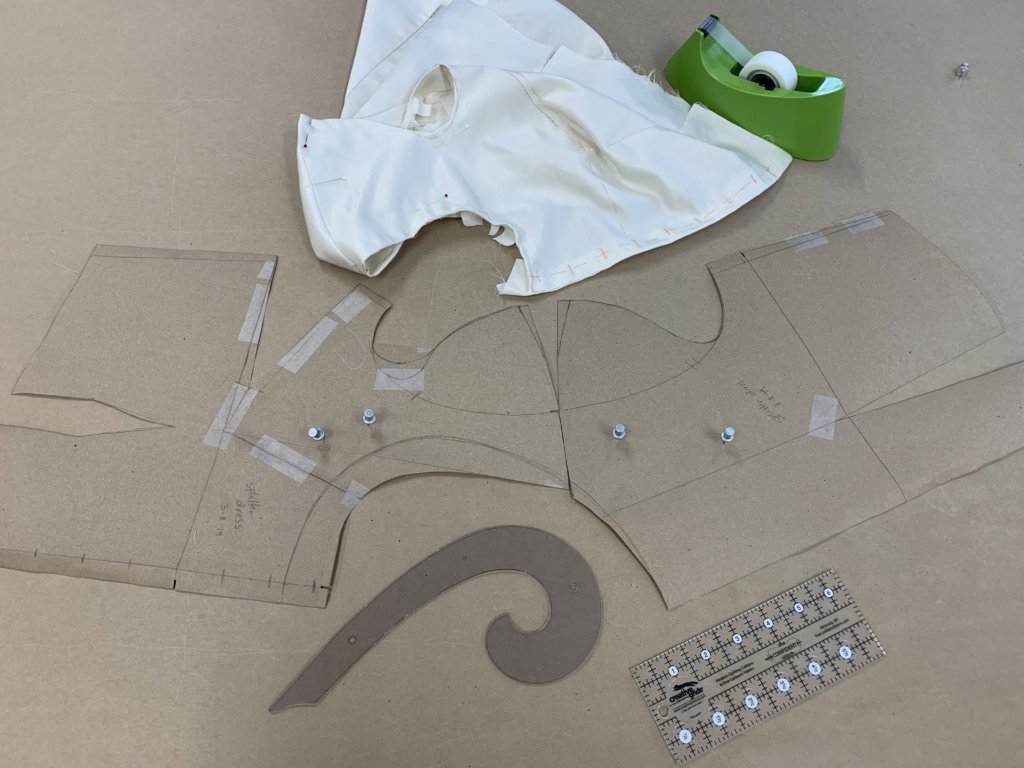
To extend the armhole, I taped a new shape onto the old one. With the shoulders and neckline, I’d be removing paper. I could totally cut the excess off and throw it away, but instead I usually: clip my curves on the paper, fold on my new line, and tape the rest to the back. Not only am I sentimental, I love a messy pattern. This method also provides a sturdier edge and offers “Command Z” powers to go back to the previous version, if desired.
Next, I opened and pressed the mockup seams and edges that would be changing. Then I matched my pattern back up to its original position on the fabric before drawing my new-and-improved lines.
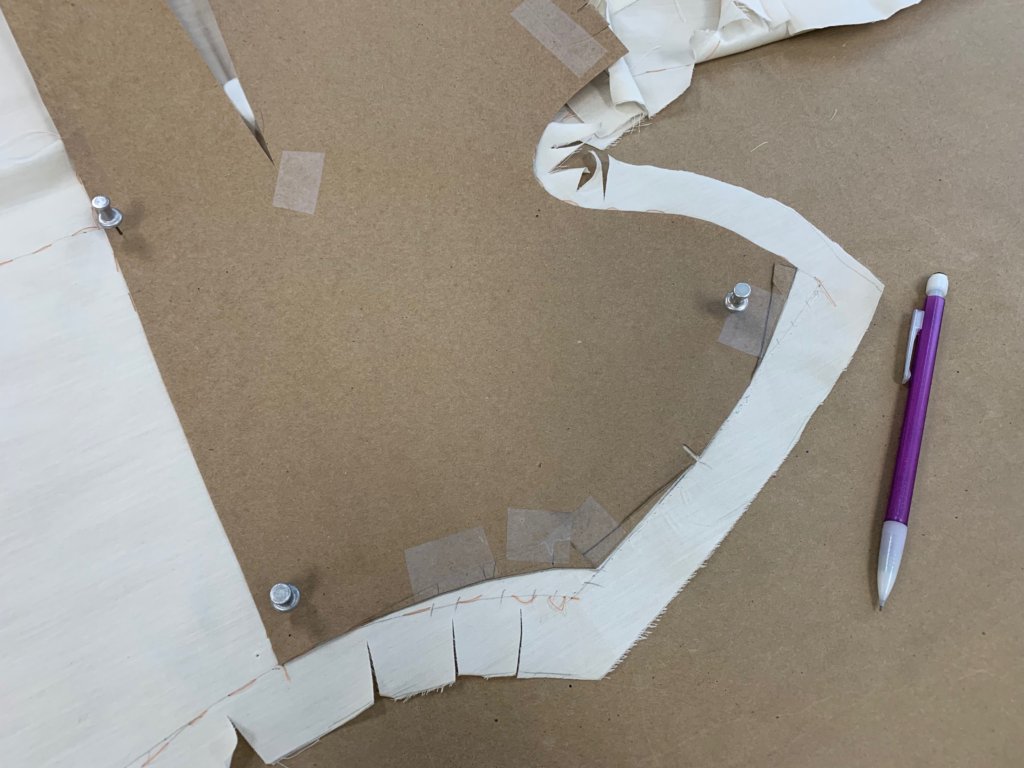

The bit of fabric I wanted to add to the front armhole extended into an area that was previously clipped in my mockup’s fabric. In order to get the most accurate read on how my revision will fit, I’d want to repair the clips or cut new fronts.
Since I’m really low on fabric and the clipped area is super-slight, I decided to repair! I used my pattern to cut little custom shaped pieces of fusible woven interfacing…
…and added the little crescent shapes to my mockup’s front armholes. I fused them with my iron to the outside of my mockup, which is the side that will be hidden inside the dress when I reuse this fabric later for my underlining (more on that soon!)

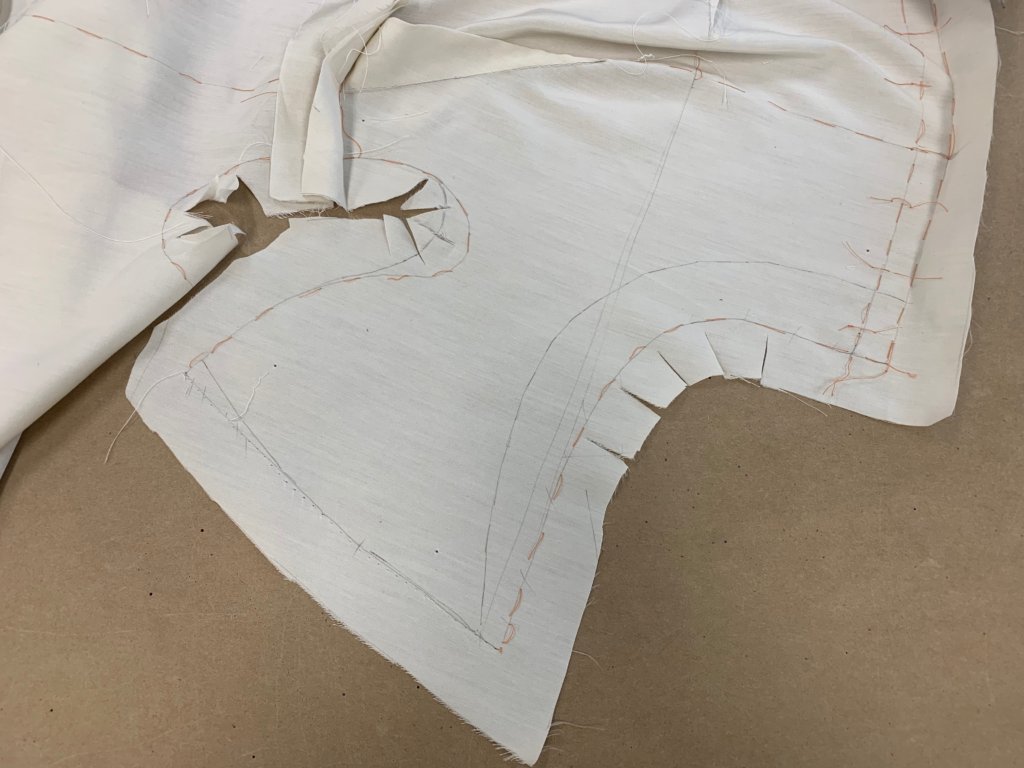
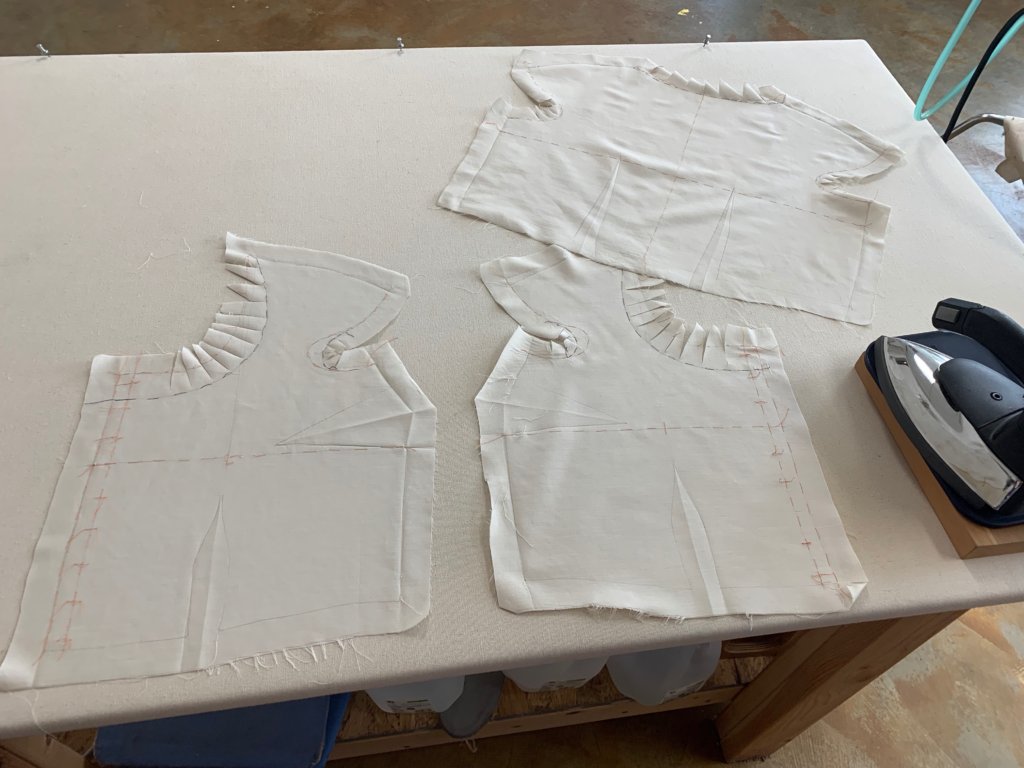
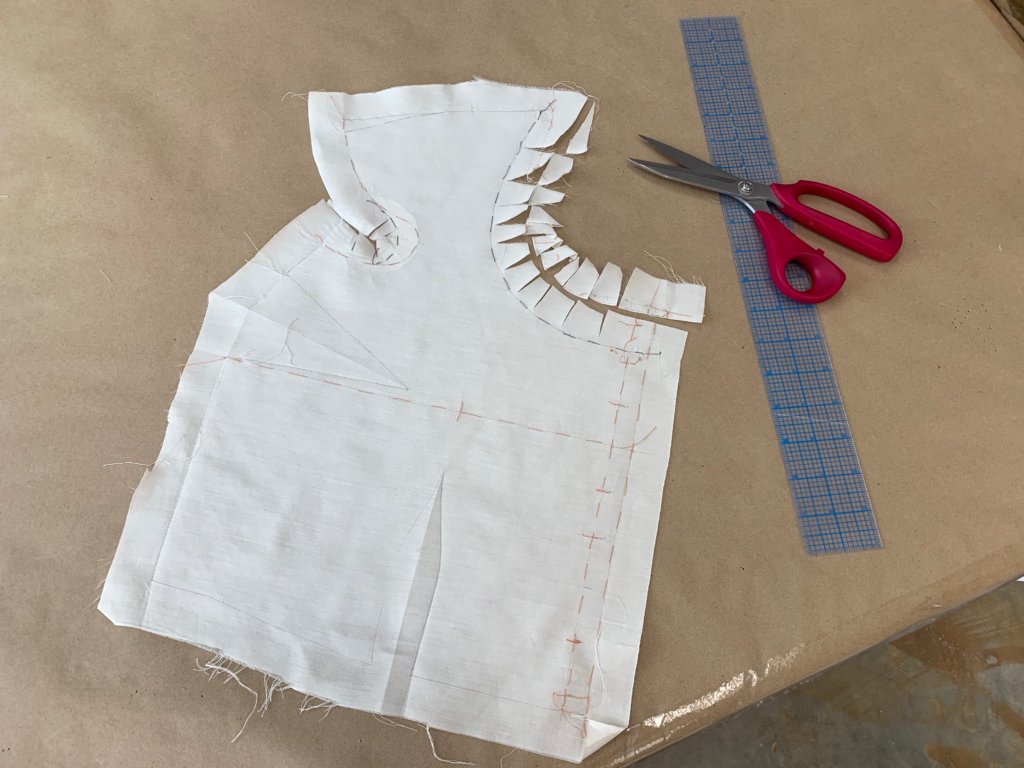
Next, I needed to clip my fabric down to my new neckline and baste the excess to the inside…

…to create mockup version 2…
…for mockup fitting #2!
Hooray!!! I loved it. I knew the skirt would add a little weight to the bottom and it already felt suuuuper comfy. I couldn’t wait to turn this into the top of a dress!
Final Decisions and Patterns
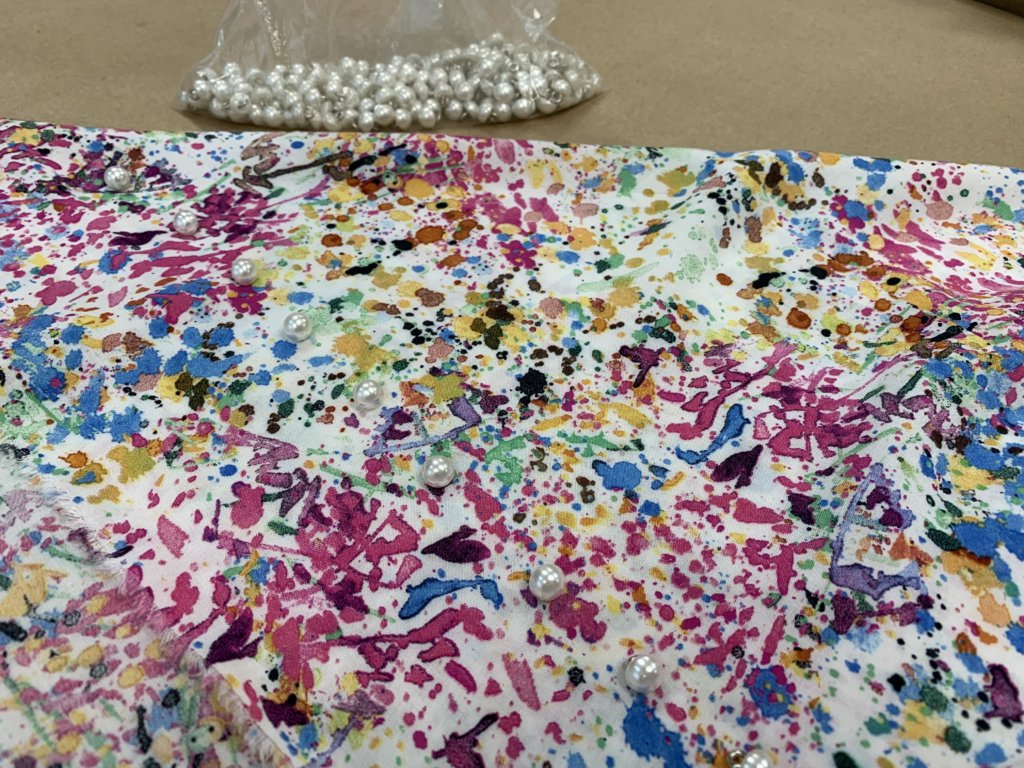
The inspiration dress featured lots of buttons all the way down the front. Since one of my goals for my new version was to skip all shopping, my splatter print rayon dress would be getting pearl bridal buttons!
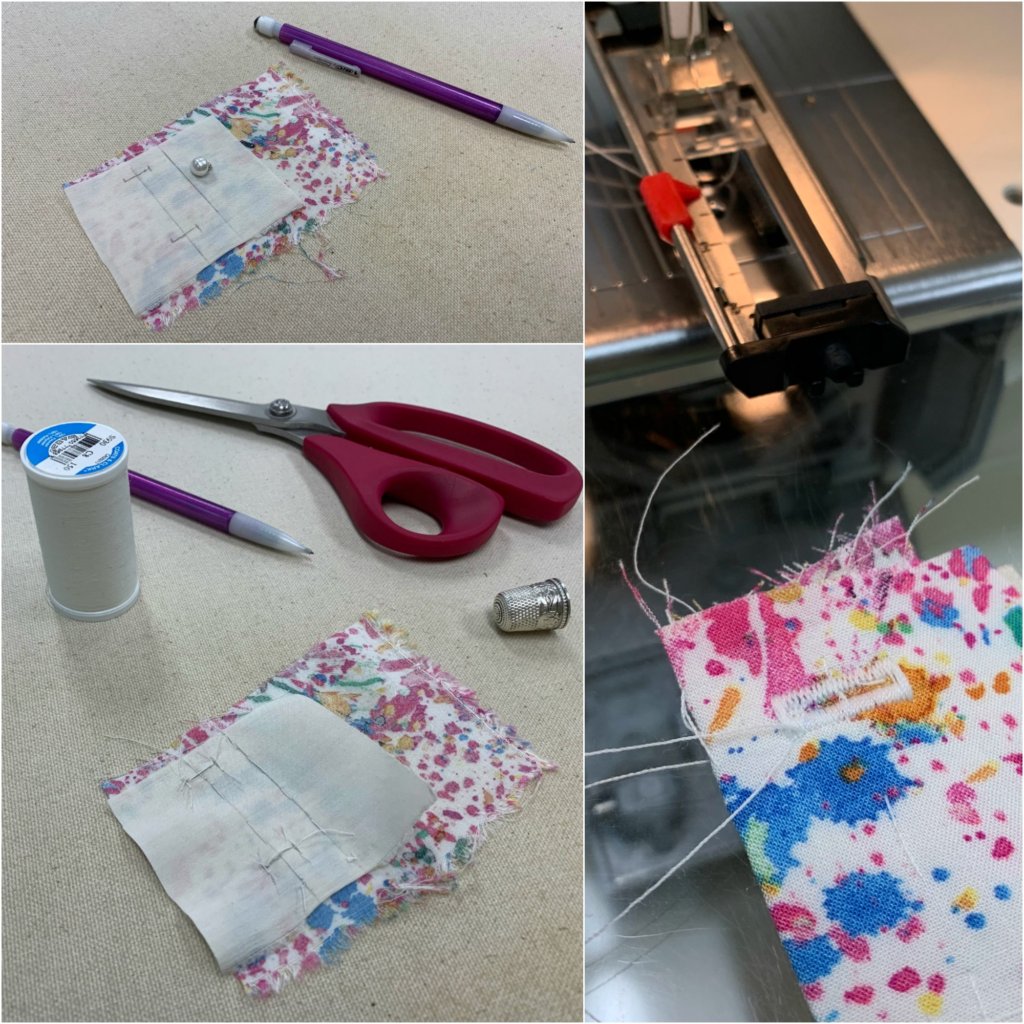
Before I started finalizing the patterns and cutting my fabrics, I’d need to make my final decisions on button placement and placket construction. To figure out my placket plan, I did some construction samples!
I experimented with scraps of my fabrics to create a stable area for my buttonholes without the addition of traditional interfacing. I’m not an interfacing gal, and though it is often recommended for buttonholes, I felt like traditional methods might add stiffness or other qualities that I was not looking for. Marking and folding and stitching some samples helped me decide upon my plan!
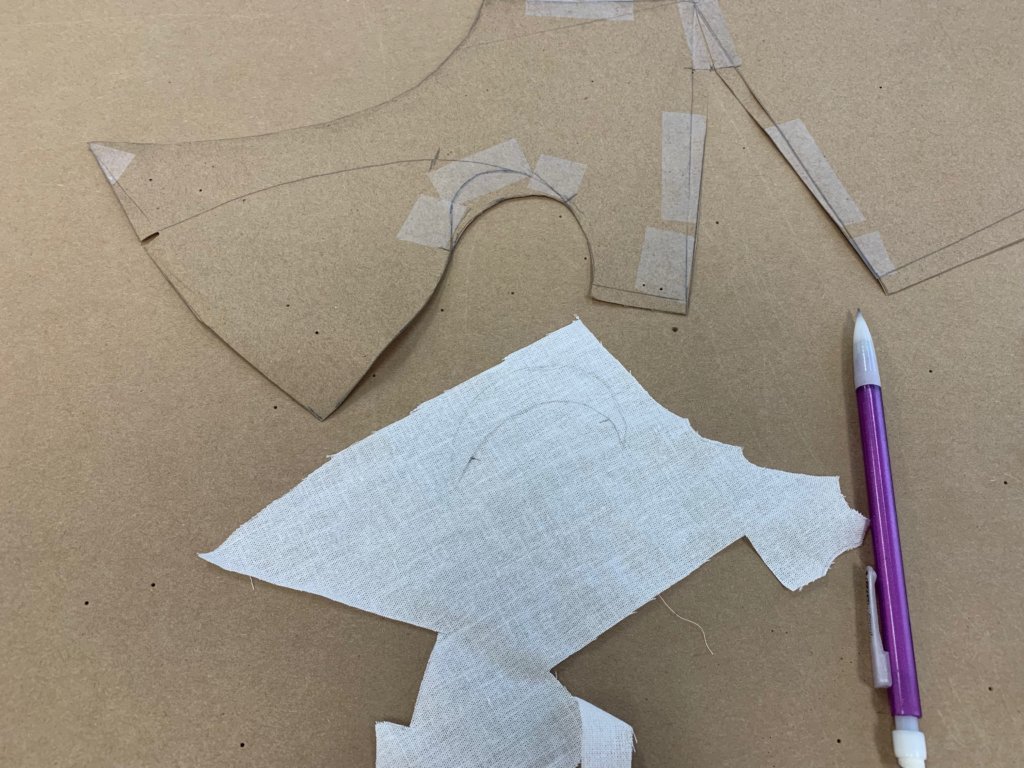
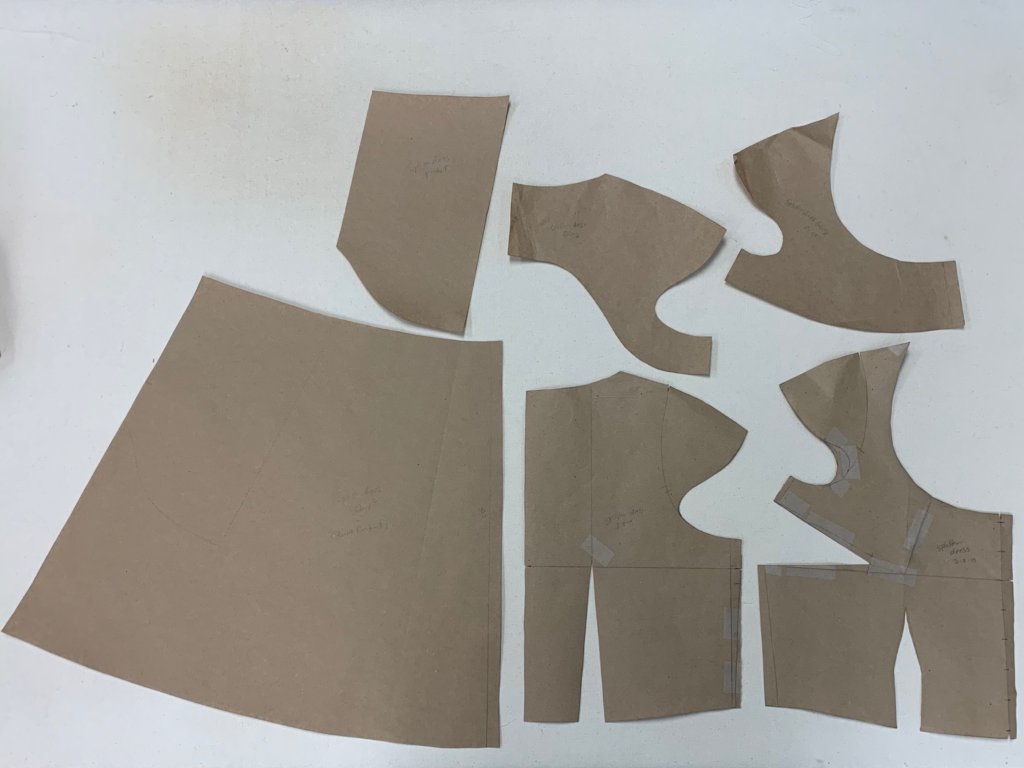
Once I was happy with my buttons and my buttonhole samples, I finalized my patterns by drafting facings. To create these pattern pieces, which would cleanly finish the neckline and armholes of the dress, all I needed to do was copy the upper bits of my finalized patterns.
After copying the skirt and pockets from my inspiration dress, truing, notching and labelling, my full pattern for my new dress was complete!
Underlining
The last bit before I started stitching this new dress together (which will begin in pt. 2 of this epic post!) was underlining. I love love love the process and the results of underlining. I also love love love when my mockup can double as my underlining fabric. Not only does it save time and fabric, you are certain that the dress will fit just like the mockup, because it IS the mockup, only with a fancier face.
To learn more about underlining, check out this 3-part blog series (with video!) and/or the condensed version I wrote for Seamwork Magazine. Incidentally, you’ll notice lots of similarities because the dress you’ll see me making is my inspiration dress.
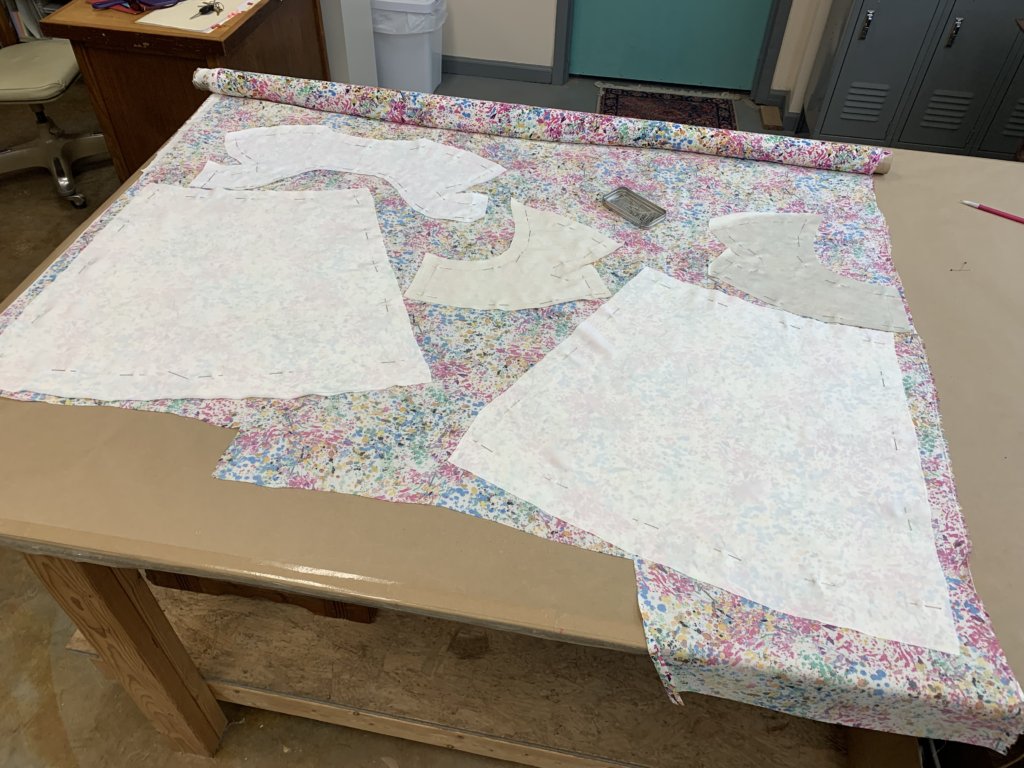
To prepare my mockup for becoming my underlining fabric, I took it completely apart again (which only takes a few minutes- Hooray for basting stitches!) before pressing all the pieces flat…
…and trimming away any excess allowances.
The skirt was a gathered design that didn’t require additional fitting (especially since I’ve confirmed the length and width based on my inspiration dress) so it hadn’t been mocked up yet.
I found enough silk crepe de chine (which I believe was leftover from lining Loula’s wedding dress) to cut all 3 skirt pieces. I used my pattern to mark and cut the silk and then used it again as a reference to carefully situate the silk onto the backside of the rayon, matching the grains. Then I also added the top pieces to the back of the rayon before securing the layers together as one with lots of pins.
Once pinned together (along the stitch lines), I cut the rayon around the edges of the underlining fabric.
I left a little extra allowance at the Center Front, based on discoveries in my buttonhole and placket experiments.
Then I followed the same process for the rest of the pieces (after finding a 3rd leftover lining for underlining my facings)…
…until everything was pinned, cut, and stacked.
The underlining fabric and the fancy fabric are then joined as one with hand stitches. Placing these basting stitches near the stitching line but into the seam allowance means that they are never in the way and never have to be removed. Edges can be underlined and threadmarked at the same time by placing the stitches on the line.
The goal of underlining, which is also known as flat lining, is to get the two layers joined together as if they were one, so it is important to keep the fabric flat and fully supported by the table as you stitch.
Once each piece was working together as a double layer, I was ready to turn this mess into a dress!
Whew!
Many may have opposite preferences, but I adore the prep work of sewing as much or more than the actual garment creation. And the more prep I do, the more fun I have and the better results I get in all future steps. Win-win!
NEXT POST: Ready for Part 2? Coming soon, I’ll share the epic photo-filled conclusion to making myself a colorful splatter print dress! Thanks for following along!


18 Responses
Really awesome post! I love how detailed it is. Can’t wait for part 2!
Yay! Thanks for following along!
A lovely and informative read!
I also LOVE patternmaking and testing (mockups) more than the actual garment construction! And sometimes I don’t get why people are scared of making their own patterns. ???? ???? I have said that if there was someone who could sit at the machine and do that for me I’d be happy! LOL
Looking forward to Part 2. ????
Happy to hear!Thanks for following Angelina!
As always your post are fun and informative. I’ve just started making my own patterns from a self fitted sloper and find that making the patterns are so much more fun too!
Thanks for sharing your sewing journey.
Hooray! My pleasure. Thank you for reading and sharing!
You do wonderful work! I enjoy seeing you create beautiful clothes.
Thanks Kate!
This is great Brooks Ann! Patternmaking’s not easy, its defintiely a highly skilled endeavour. But compared to retro-fitting a bought pattern sometimes I’m amazed at how much simpler it can be (once the block is perfected of course). Cut-on sleeve? why yes, I’ll just draw that on and then see how it looks. I remember thinking it surely must be more complicated than that, but really it’s not. I love seeing a true professional like you debunk the myths.
Yes! I tell my students that once you get past the custom blockmaking stage (which you only have to do once ever!) the rest is mostly deciding what you might want and then giving it a try. I’ve never sewn from a commercial pattern before. Custom is the only kind of sewing that makes sense to me!
This was fun! Did you incorporate the neckline contour dart into the bust dart?
Thanks for sharing your process.
Yes! Just like we did together in Top Class, I rotated a little bit of the neckline into the bust dart which should keep the neckline from gaping away from my body. My body is pretty full in this upper chest area, so it was a teeny tiny adjustment. Someone with more inward curves to their upper bust area would benefit most from this kind of neckline contouring. Thanks for following along Valerie!
Hi Brooks Ann, I loved reading through this post with a cup of coffee this morning. I’m just about to try the mock up of my skirt and I’m excited and apprehensive at the same time. I had an ah ha moment when I read about underlining as it unlocks a fabric that I’d like to use to make my skirt but isn’t quite right weight wise.
I have a dress that I made years ago and love the style of but the fit isn’t great. I can see now how easy it will be to design that style onto my block when I complete top class.
Cant wait for the next installment and to see your finished dress.
Sarah
Hooray for those ah-ha moments! And there’s no reason to ever be apprehensive about a mockup. A mockup is impossible to mess up! Its job is to give you the ability to play around and test any changes you can imagine without any risks. I love the mockup process so much! Thanks for taking my classes and following my blog Sarah!
Hi Brooks Ann, i am so enjoying this post. I signed up for the skirt class starting on July 8th and i am super duper excited and can’t wait for that day. This post is so informative and i feel so grateful for all the information you share with all of us. Thank you.
Yayayayay! I’m so excited to work with you! I think we are going to have a lot of fun together.
Thanks so much for this post! I went to see about flat-lining and plan to do just that!! Thank you!!! People pass along a lot of fabrics that are a bit light for me to turn into flatcaps. Yay!
Yay! I almost always want to give my fabrics a little boost. Underlining offers this and so much more! Just love it. Hope you do too!