Welcome to a somewhat meandering story of three custom garments!
This blog post loosely threads between my previous tutorial post on creating custom croquis, a couple of my “Custom Sewing Love Letters”, and there’s even some bridalwear throwbacks…
The common thread: My iPad.
In my most recent blog post about creating a custom sketching silhouette via a photo, you learned that I enjoy working with pencil and paper. I love the feel and the feel-ing of it. For me, a tactile sketching practice can be a rewarding way to slow down, unplug, and find respite from screens.
That said, I’ve been digitally dabbling for a few years, and I find myself falling more and more in love with digital sketching, as a second option. Not only can it be a quicker way to see results, it offers some cool benefits, especially when it comes to fabric selection.
I’ll share 3 examples of how I used the digital drawing program ProCreate to help me figure out the fabrics for each design.
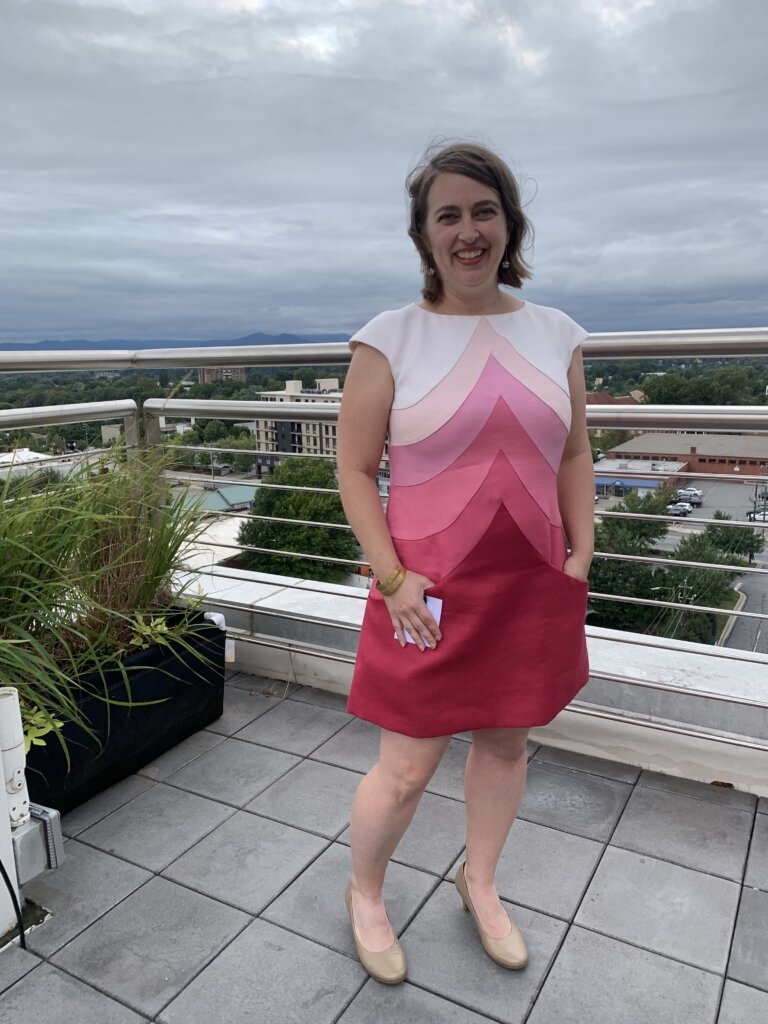
Color Blocked Dress - Take 2!
Remember this dress?
If you’ve been following my blog for a while, you may remember “I Made Myself the Coolest Dress”, a 3-part blog series published in 2020. Each post shares about 40 photos and lots of details!
I made this color-blocked dress in 2019 to wear to two kinda-fancy events:
- Asheville Frocktails (Will I see you at Raleigh Frocktails in October?)
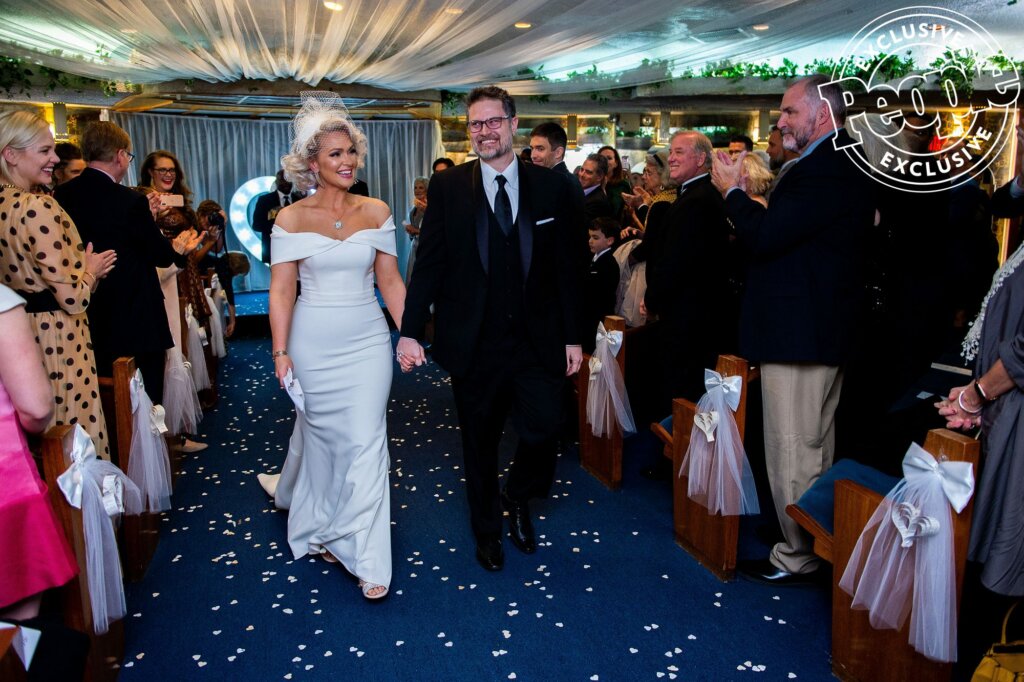
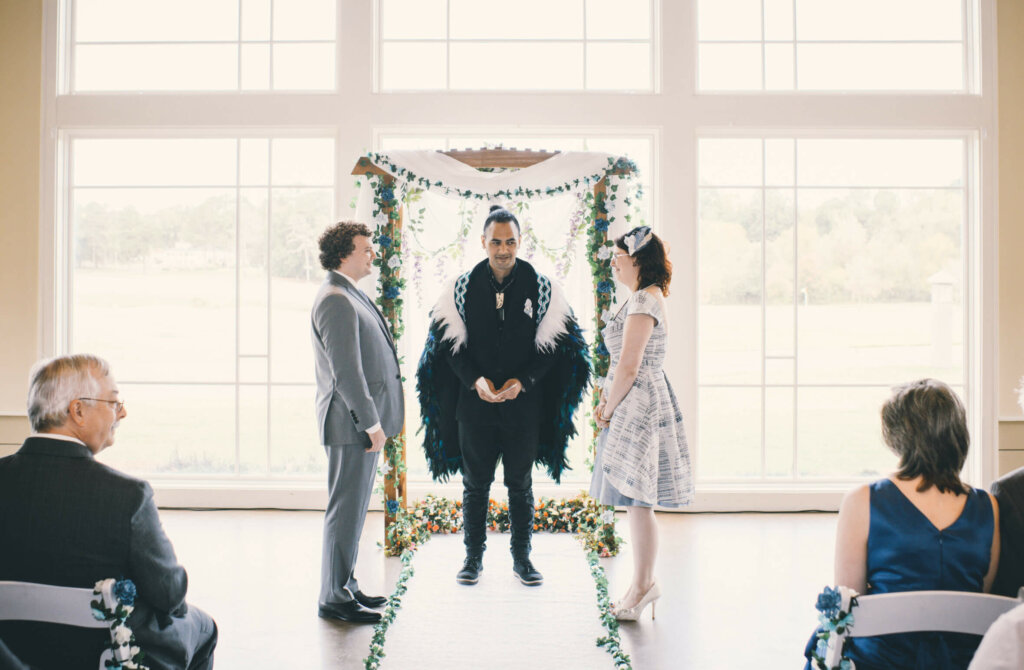
- My (kinda famous) friend Jenn’s wedding (see my hem and elbow in a People Magazine shot!)
I love rewearing my custom clothes.
I also love reusing my custom patterns.
Design Inspiration Strikes
When one of my students invited me to a sewing meetup at my local fine fabric store Mulberry Silks, I saw this wall of beautiful silk noil fabrics. The aforementioned dress came to mind.
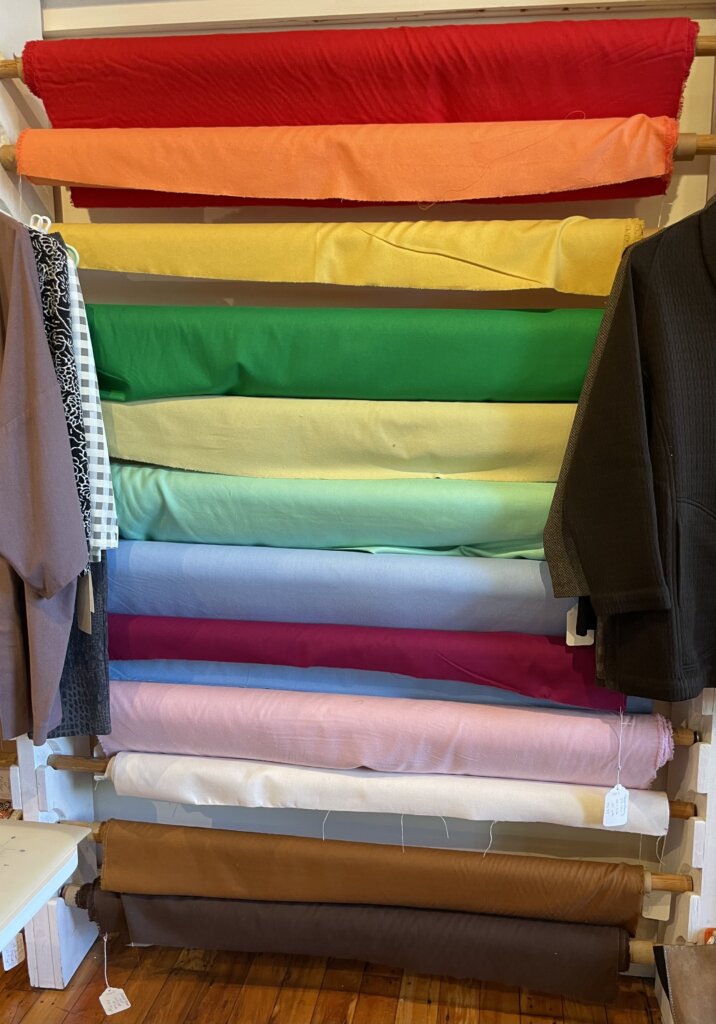
And the more I thought about it, the more I wanted to reuse that self-drafted pattern to make myself a quick, colorful, (less fancy) version.
As soon as I got back home, I got out my iPad.
On a Layer in Procreate, I traced my photo from Frocktails. In a separate Layer, I also imported the photo I took of the fabric rack to copy each available color into a Palette.
As I watched TV, I played around dragging-and-dropping my favorite colors into the pattern pieces. So fun!
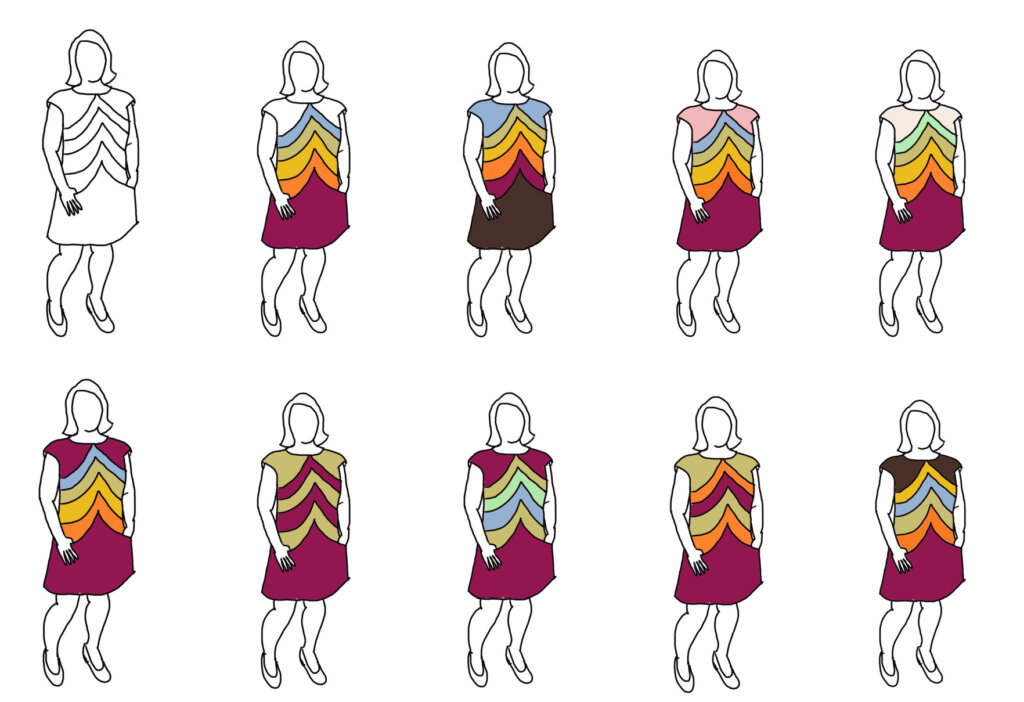
Here are some of my samples! You’ll notice I didn’t use some colors at all and strongly favored others. Do you have a favorite?
And here’s a time-lapse video loop of my digital sketching and pondering process!
Feel free to play around with my blank version for more options. I ultimately chose this version!
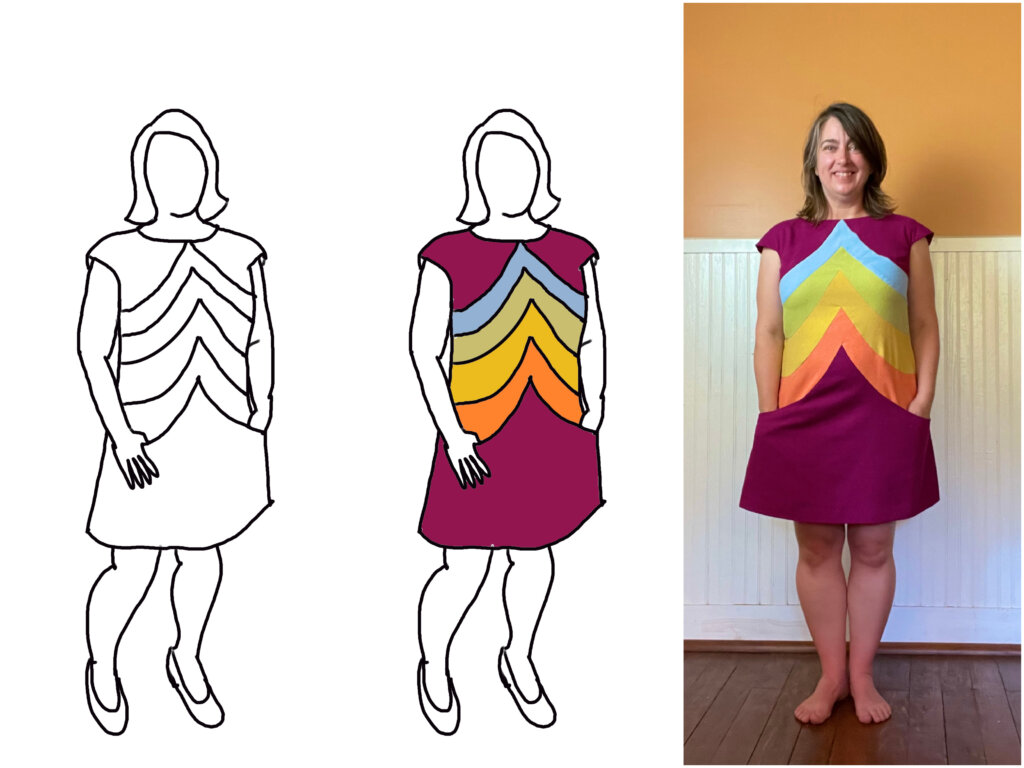
I made a Reel (my first Reel!) of me cutting my beautiful silk noil fabrics and sewing them up! I used more casual sewing techniques this time around. (Head to the blog series for the detailed “couture” version.)
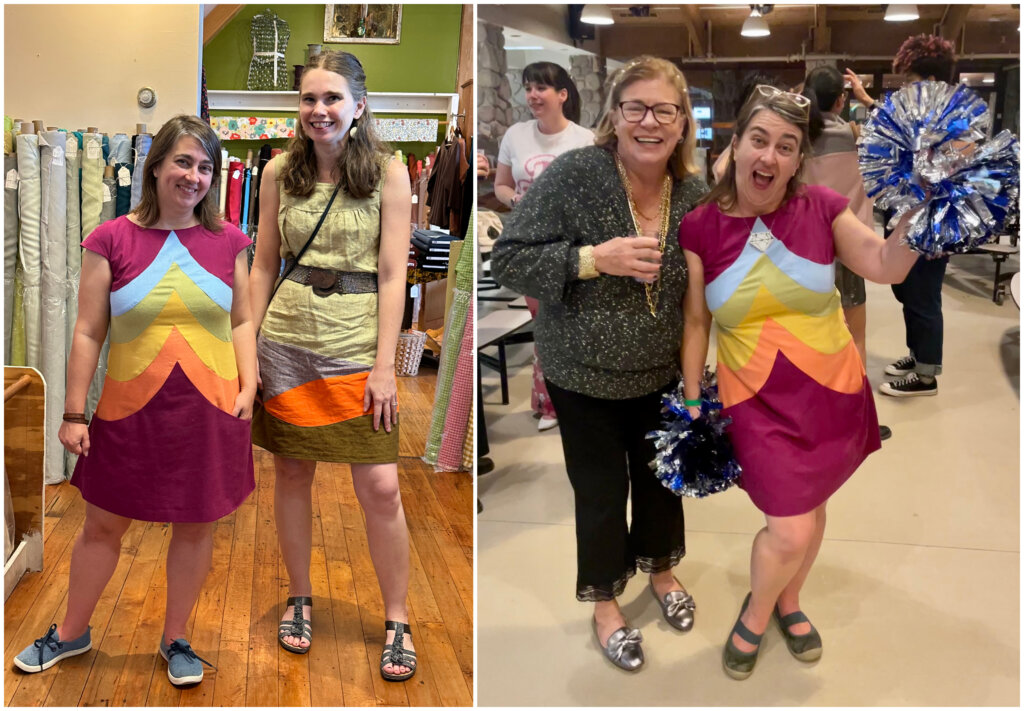
The next time we had a Sewing Meetup at Mulberry Silks, I wore the dress. I also wore it to last year’s Camp Workroom Social Gala.
My sketch really helped me figure out the fabrics and make this casual cool colorful dress a success!
And yes, it has pockets…
– Excerpts from the Love Letter email “Cool Custom Color-Blocked Dress: Take 2!”
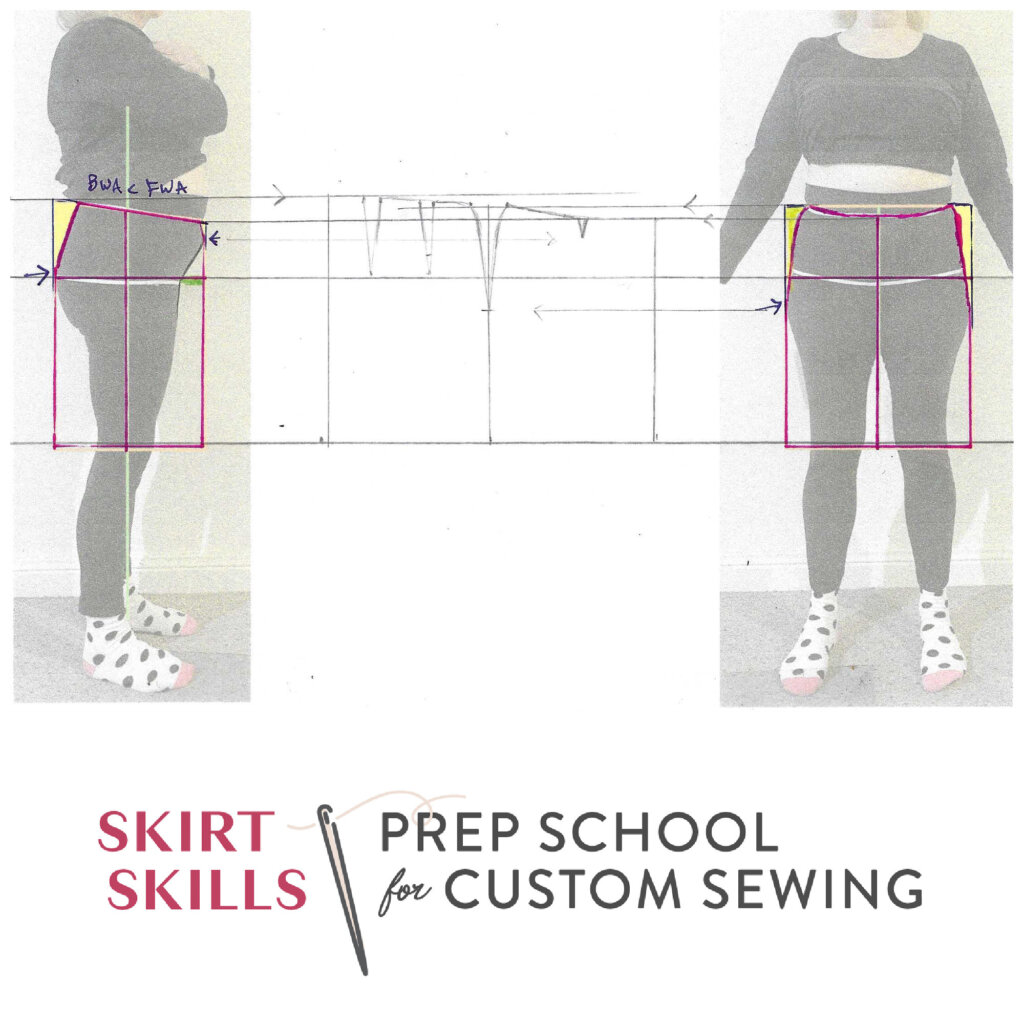
Scrappy Skirt / Love Letter
Another personal sewing project where I used my digital croquis to help me select my fabrics is my favorite everyday skirt (which incidentally, I’m wearing right now.)
Inspired by a quote from one of my students, I shared an email “Love Letter” to my scrappy skirt, and to buying more fabric than you need.
In this example, I’m mostly sharing that email (get on the list) starting with a quote of the note from my student:
“Brooks Ann, You have given me a whole new way of thinking about sewing, and after sewing for 60 years, that is pretty amazing!
One of the (many) things I realized in Skirt Skills is that I learned to sew when sewing was a way of saving money, so each 1/8 yard of fabric was carefully considered when buying. And I never left that practice behind- even when sewing was totally for pleasure. The idea of buying extra so I could practice on the actual fabric never occurred to me- and I love it!” – Jean
Pros Do a Lot of Practicing
Since I learned to sew in professional environments creating one-of-a-kind clothing, I most often don’t have the option to mess up. So, I don’t!
But don’t get me wrong, it’s not because I get everything right on the first try. Far from it!
One thing that pros do (that home sewists often don’t) is that we fully expect the creation process will involve lots of experimenting, practice, and mistakes!
And one secret to success is that we buy extra fabric. This allows the majority of the experimenting, practice, and mistakes happen off to the side- somewhere other the actual garment.
With the extra fabric, I’ll test things like finishes and closures, using the actual materials, as a way to ponder, practice and predict the process. I move forward to work on the garment when I feel really confident that my questions are answered and I know what I’m about to get myself into. (Bonus: This makes sewing the garment really enjoyable and satisfying!)
When it comes to fabric, I believe having way too much is way better than having even a smidge too little.
Even if that means leftovers.
And with my leftovers, I like to get creative.
Loving the Leftovers
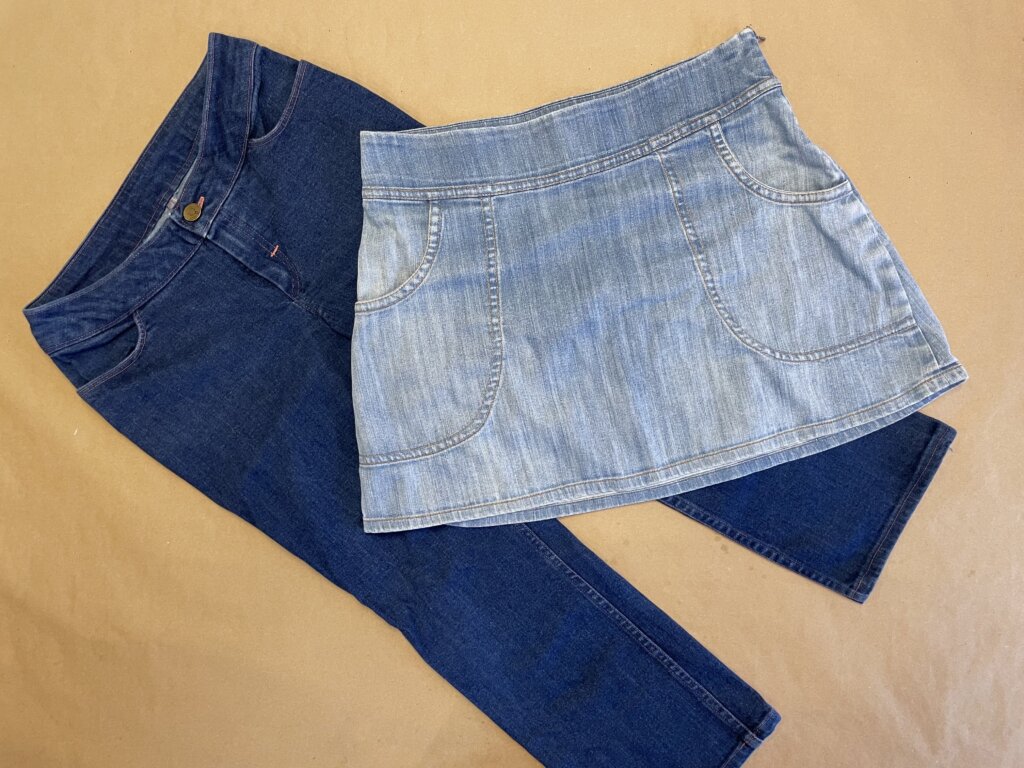
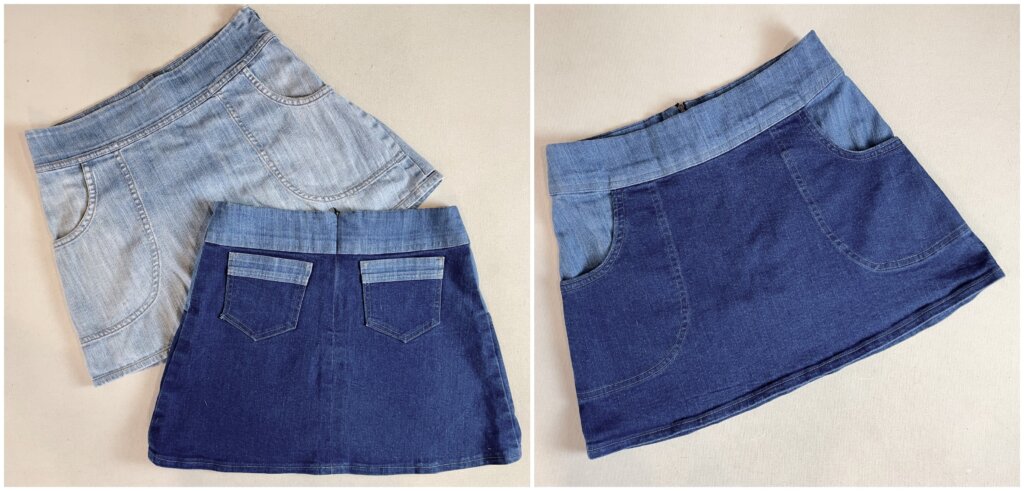
After finishing the jeans that I shared about on the blog, the weather was heating up. The previous summer, I wore one of my custom denim skirts almost every day. I wanted to make myself another.
I had leftover fabric of both denims, but not enough of either to make the whole skirt. Could I mix them up?
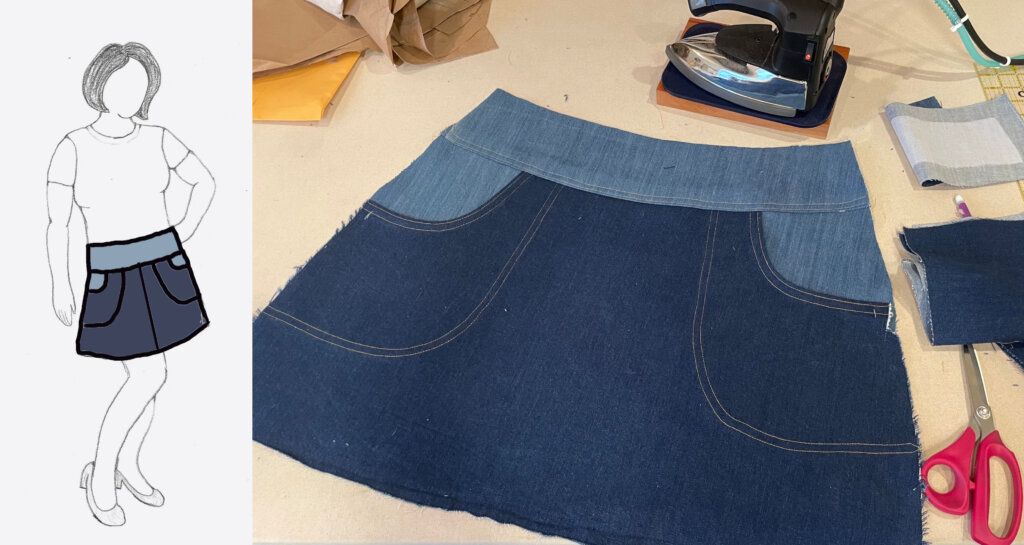
All in separate Layers the Procreate App on my iPad, I uploaded a paper sketch of a similar custom skirt, and drew the design lines of my favorite skirt on top. I uploaded a photo of the two denims, copied the colors, then played around to drag and drop them into the different sections of my design.
And ya’ll, I barely eeked out the skirt with the fabric leftovers (which was really satisfying)…
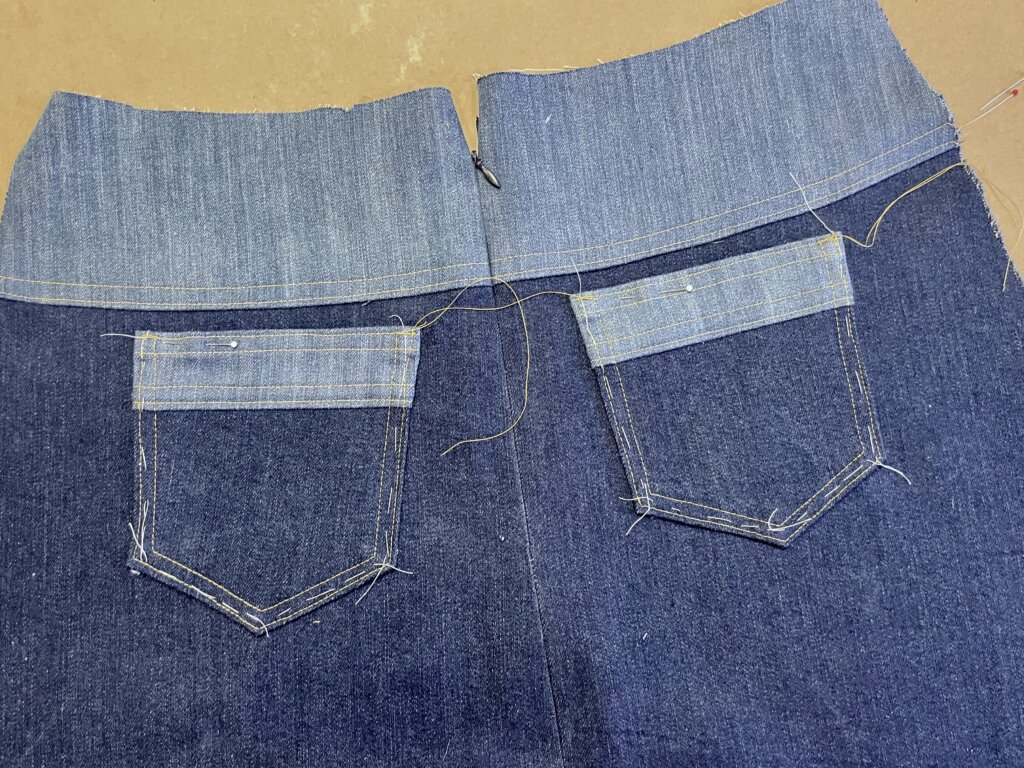
One thing I wanted, but didn’t add to my original skirt, was back pockets. But this photo shows every scrap of fabric I had left after cutting all of the new skirt pieces (and my no-allowances pocket pattern for scale.)
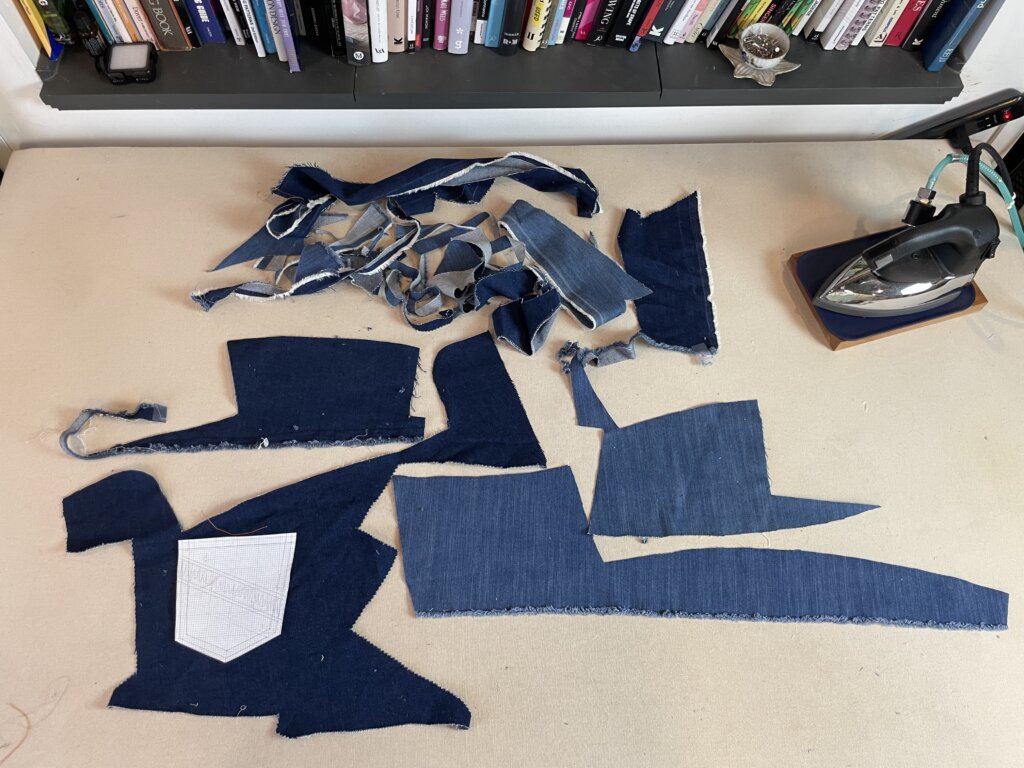
So I got even more creative! And this skirt got even cuter than I thought it would be, made from almost every teeny scrap leftover from my favorite jeans and my favorite skirt.
Scrappy skirt success! I wear these two skirts on rotation nearly every summer day. And the second version is truly a bonus: A tried-and-true loved pattern using up my leftover tried-and-true loved fabrics.
Win-win!
I hope this inspires you to go ahead and act like a pro: Get extra! Use it for practice, testing, and as insurance for creating with confidence (and very little unpicking).
Then, play around with everything that is truly left over. It’s got a lot of potential for a quick bonus project, which you might love. (And if not, no big loss. It was only scraps…)
Andy
Personal projects aside, the origin of my digital drawing journey began with a bride named Andy.
And you may be thinking, “Oh yeah! Isn’t this a custom bridalwear blog?“
It was! Here’s a link to each series.
During the pandemic, weddings were out and online sewing was in! I had already been doing both for many years. The wedding dress business kinda fell away and teaching became my focus… naturally, without much notice.
I’m a full-time custom sewing teacher now (and I love it! Learn more about my online sewing school.)
I have not made a wedding dress in 5 years.
The last bride to wear a Brooks Ann Camper Bridal Couture dress was Andy, who got married in Oct 2019.
The last bride I blogged about was Jenn (shown above- with the People Magazine finale). Here’s Jenn’s blog series.
Andy and Jenn got married (to other people) the same weekend.
My plan was, after I finished blogging about Jenn, I’d start blogging about Andy (even though I worked with both brides simultaneously.)
Well, the pandemic changed a lot of plans, and I never started Andy’s blog series.
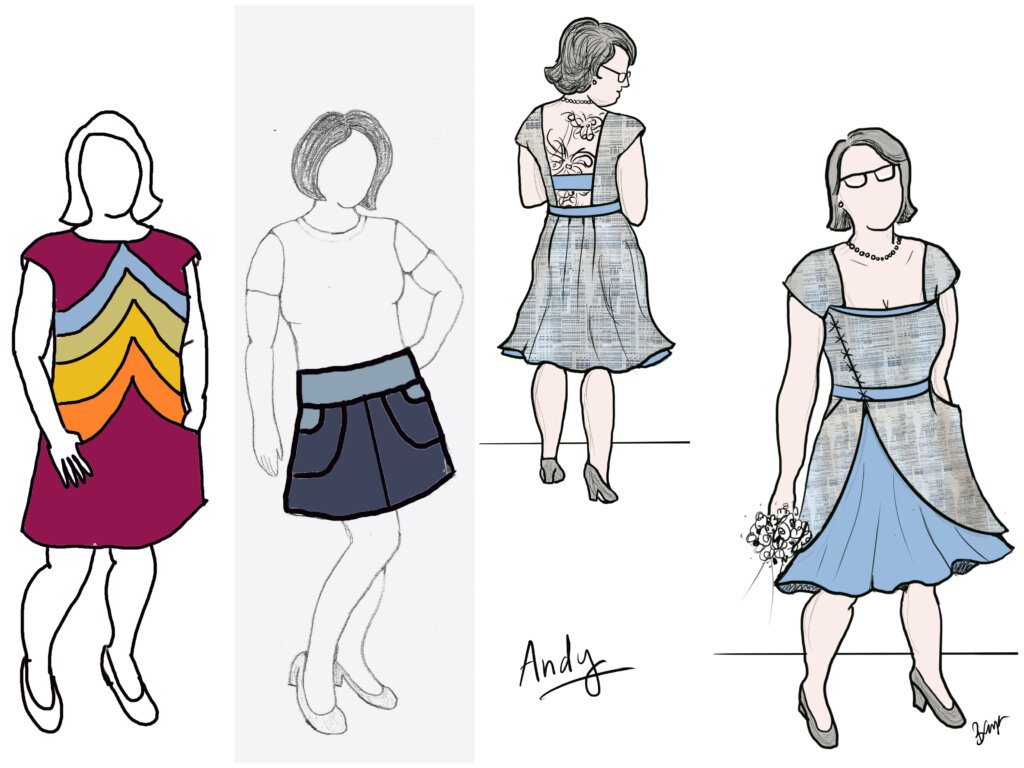
So here’s your introduction to Andy– via a bit about how I sketched her custom design digitally!
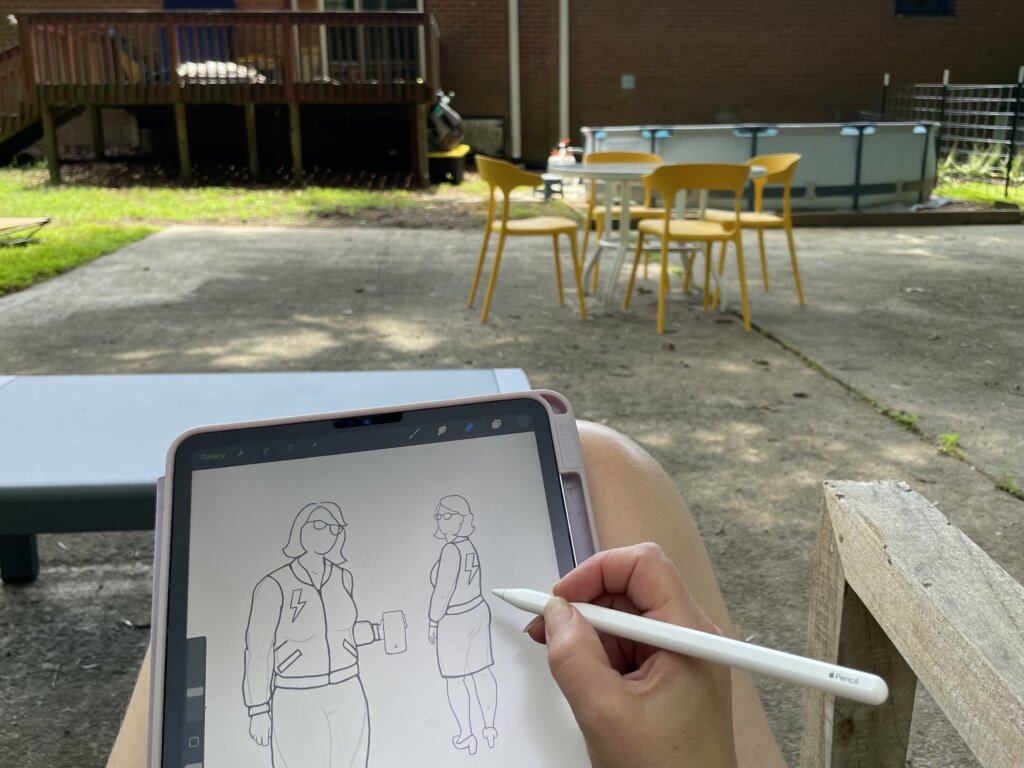
My Intro to Digital Drawing
(After some tutorials and practice doodles), the very first thing I created on my very first iPad was Andy’s wedding dress sketch. This was my intro to digital drawing!
And honestly, I just fiddle-farted around until I figured out how to use the tools to get what I wanted.
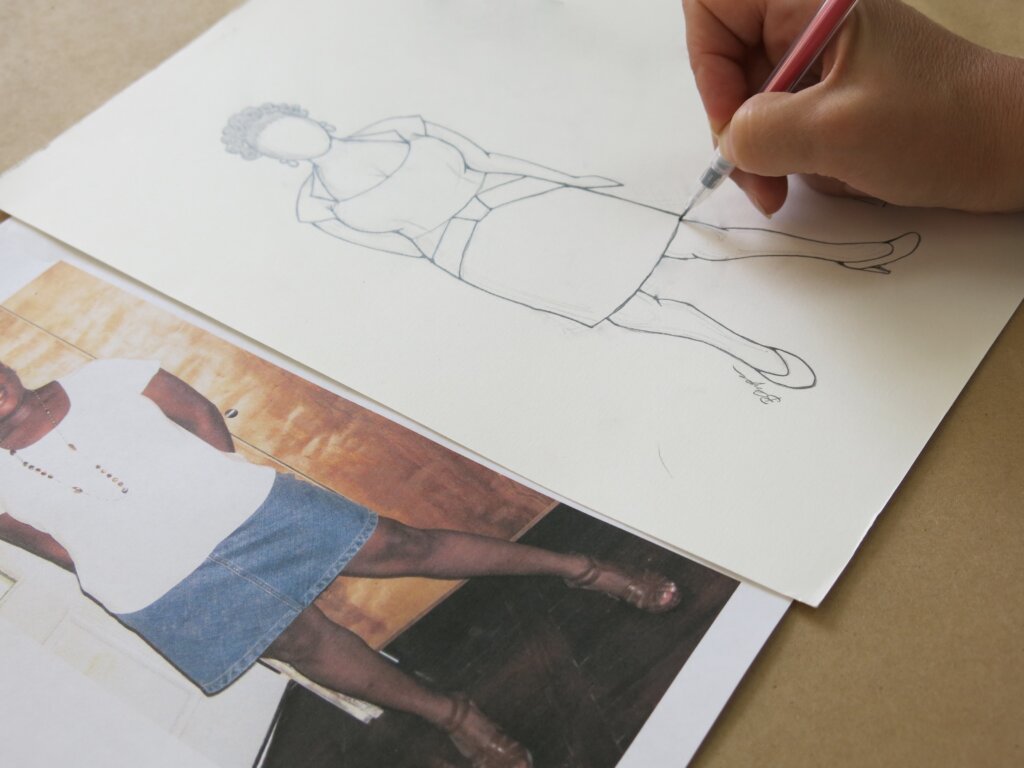
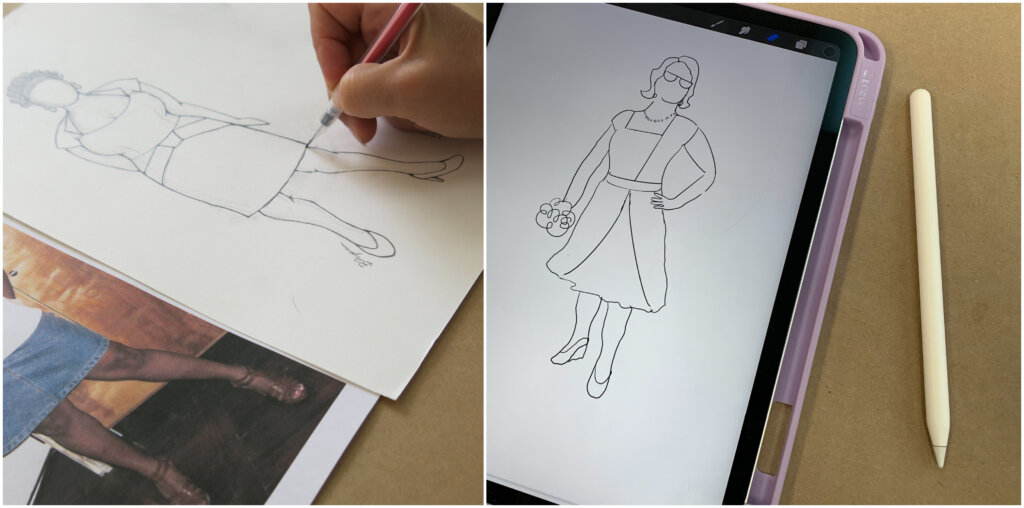
I first traced photos that I took of Andy during our Design Consultation– (which I won’t share because she wasn’t fully dressed! The dress design would include showcasing a large back tattoo.) The tracing process was very similar to the way I made my own croquis by hand in my previous blog post– only this time digitally!
Then I looked at the design inspirations that we had chosen, and played around with erasing and sketching until I created something I thought Andy would really like.
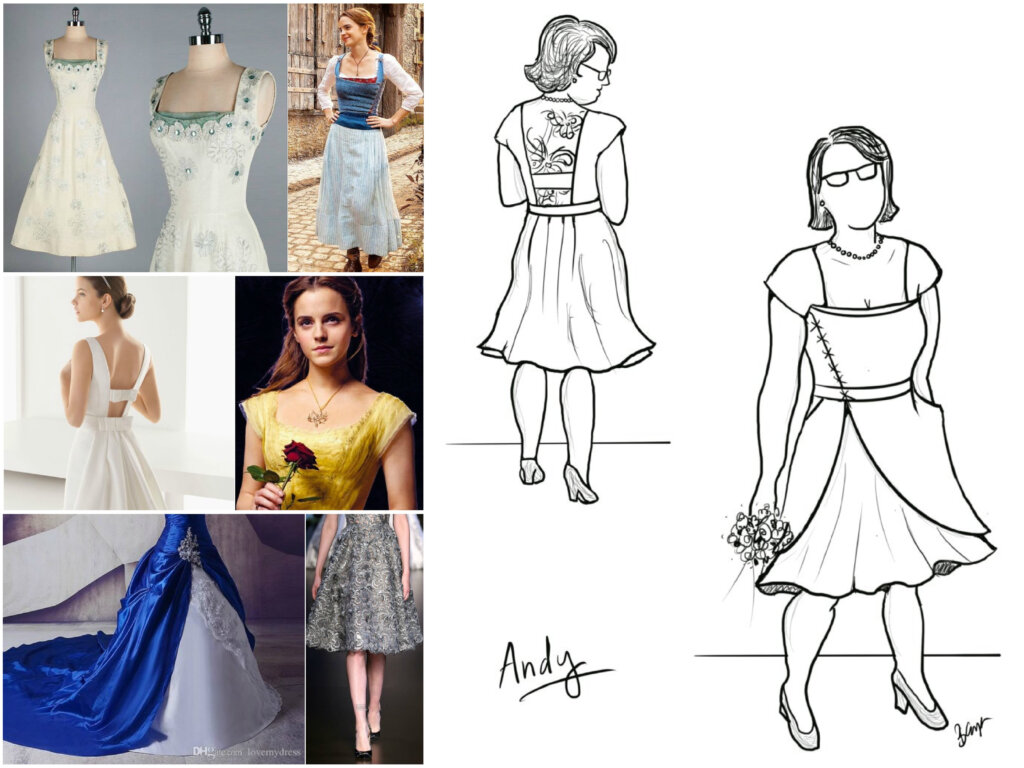
Here’s a time-lapse replay loop of my OG sketching process. Sketching always involves a lot more erasing than drawing!
And here’s another, after I added the back.. where I played around with fabrics and details, ending in the final design that we chose!
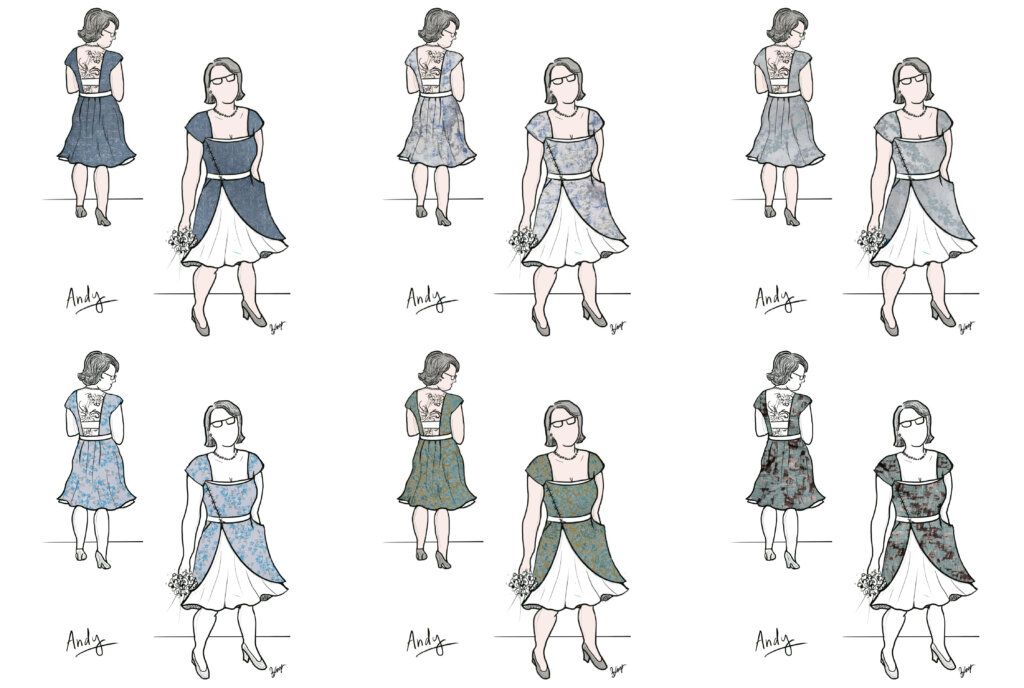
In this play session, I used these six swatches (from Mood Fabrics) and online photos of the yardage…
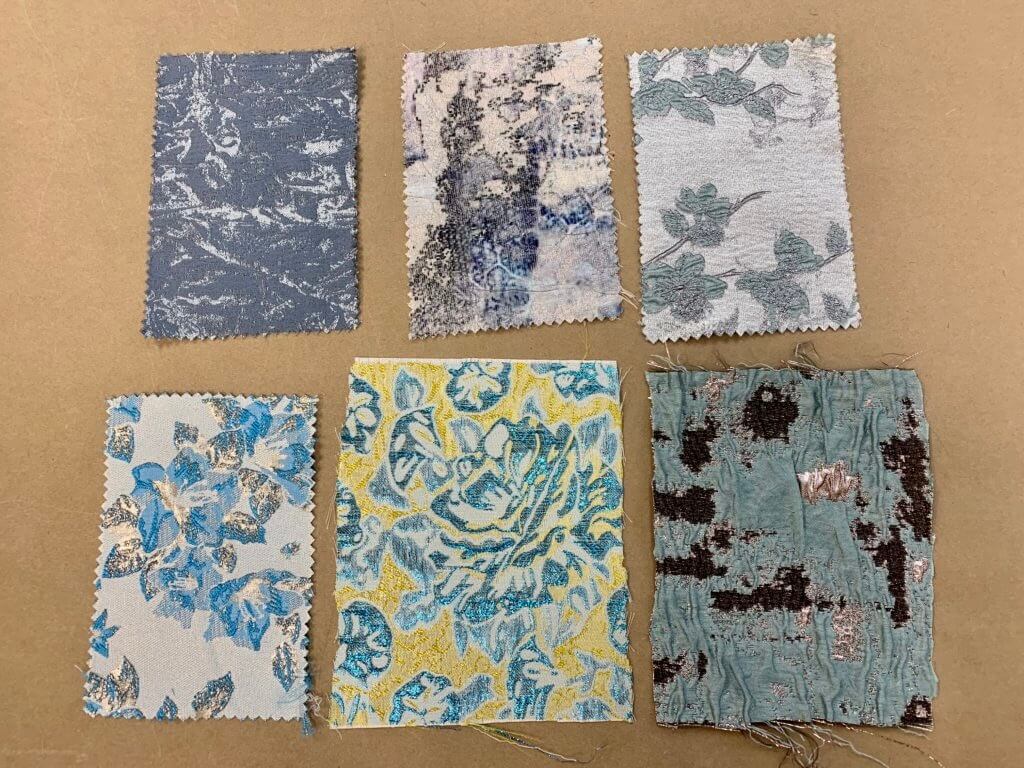
…to create these six sketches (knowing they will look different when made into a dress. The patterns on the fabric are not ‘to scale’ in my sketches!) I made a Layer with a photo of the fabric, added the sketch on top, then erased the areas where I wanted to reveal the fabric. Pretty neat, huh?
We also went to Mulberry Silks, where Andy fell in love with this fabric, and I took this photo…

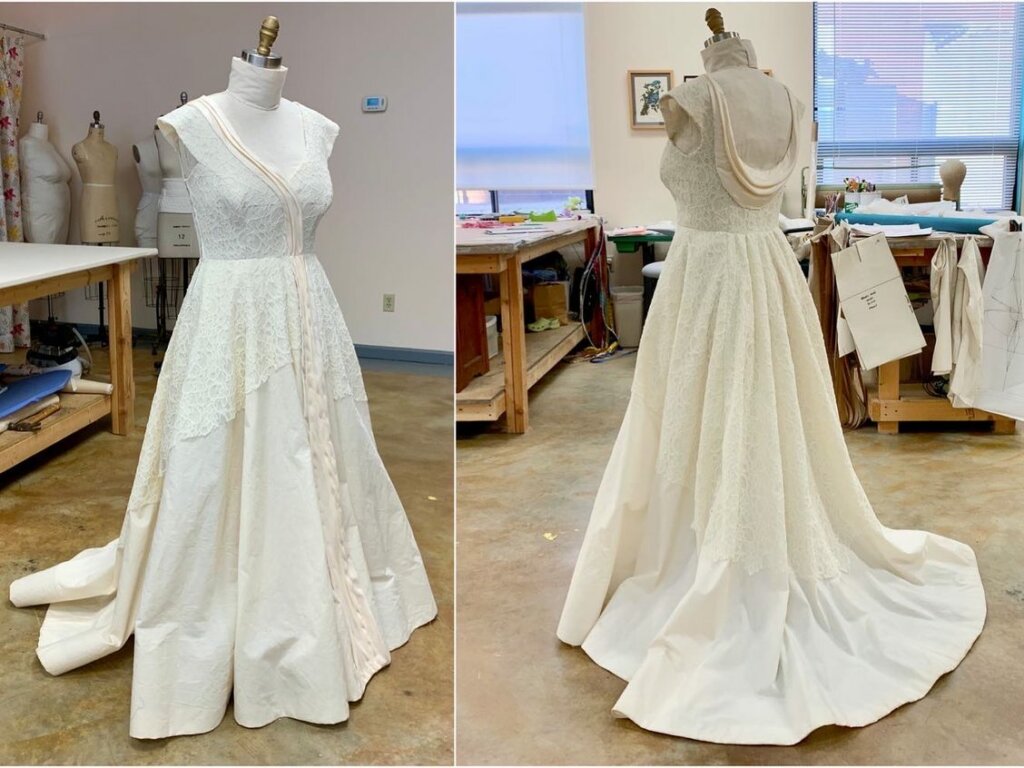
…which I used to make this sketch, and ultimately, Andy’s wedding dress!
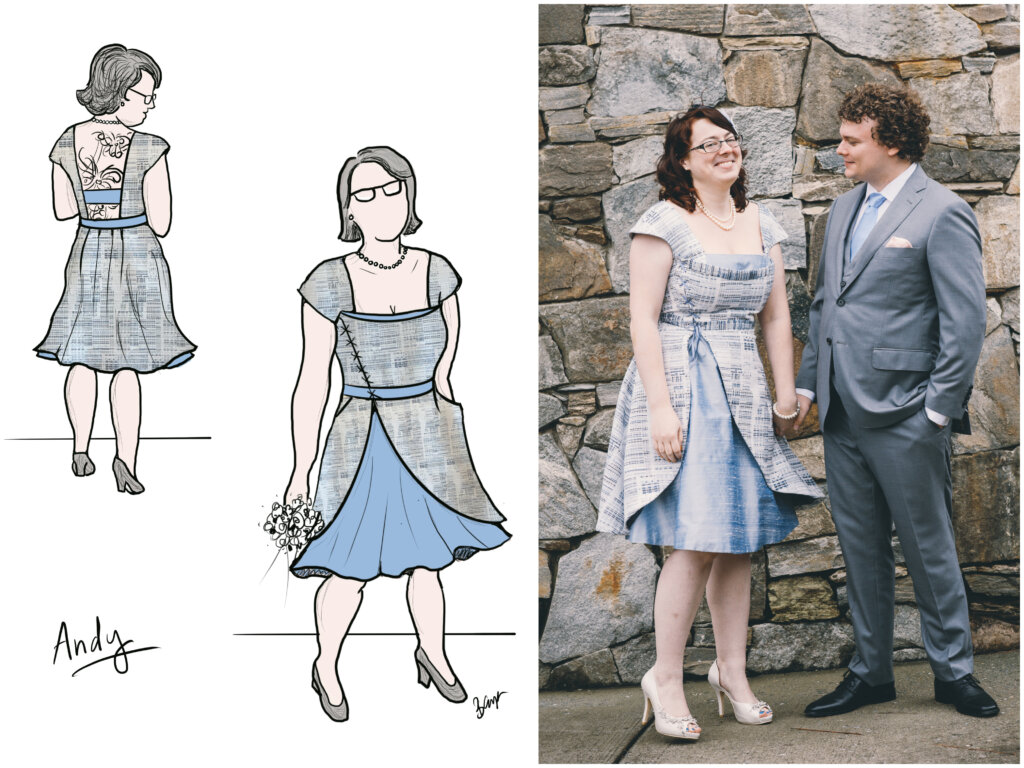
A little digital drawing helped me illustrate the dress design fairly accurately, before any patterns were drafted or any fabric was cut.
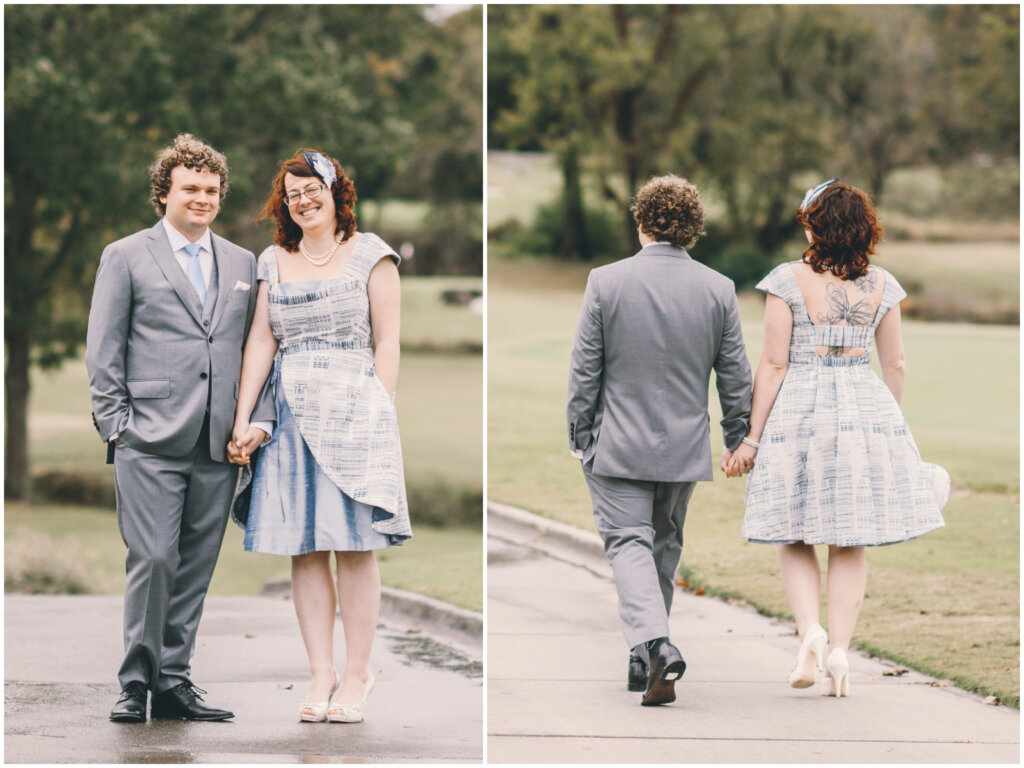
A few months after the sketch was approved, Andy married her best friend in this awesome one-of-a-kind dress!
Tying it up!
While I do think it matters if you are sketching on custom croquis vs. fashion croquis, it does not matter if you sketch with a Number Two Pencil or an iPencil. Play around and discover what works for you!
And remember: Sketching is not about drawing ability. Accurate representation is rarely neccesesary.
The goal of a sketch is communication between the maker, the wearer, and the designer. (If you are all three of these: As long as you understand what you are trying to communicate, then you’ve reached your goal!)
Scribble, doodle, erase, play around, and practice sketching your sewing projects onto your silhouette. And I’ve found that incorporating swatches and photos of fabric can also be a fun and helpful part of planning a successful project.
Even if you feel sketchy about sketching, pencil in some time to give it a go! You might be surprised by how much you enjoy it.
Thanks for following along! Let me know what you think.
NEXT POST: Not sure what I’ll blog about next! (I am dreaming up some ideas for what I might wear to Raleigh Frocktails….)
Want to learn more about the way I sew?
The 10th anniversary session of my Skirt Skills eCourse starts August 21. Enrollment opens Aug 10!
“It’s so fascinating to see how it all comes together. This class has changed my whole philosophy on sewing.” -Vicki