I Made Myself the Coolest Dress pt. 2 – Dyeing & Underlining
In part 1 of this short blog series, I tell the story of how I designed, drafted the pattern, and fit the mockup for a super-cool dress for myself. This second post is all about the fabric!
Choosing the Fabric
My rule of thumb for purchasing fabrics is to buy enough for my pattern + plenty of technique tests + enough to recut the largest piece if I had to. Since my sewing practice involves plenty of prep, I rarely need to recut, so as a one-of-a-kind custom wedding dressmaker, the “fabric stash” I’ve accumulated over the years is mostly white.
I rarely wear white. And in addition to Frocktails, I was planning to wear my new dress as to a special wedding (more coming soon!)(spot my hem and elbow in People Magazine!)… But with a custom dye job, I could make white fabrics any color I want….
…and since I so rarely sew for myself (#thedressmakerhasnoclothes) I might as well work with a favorite…
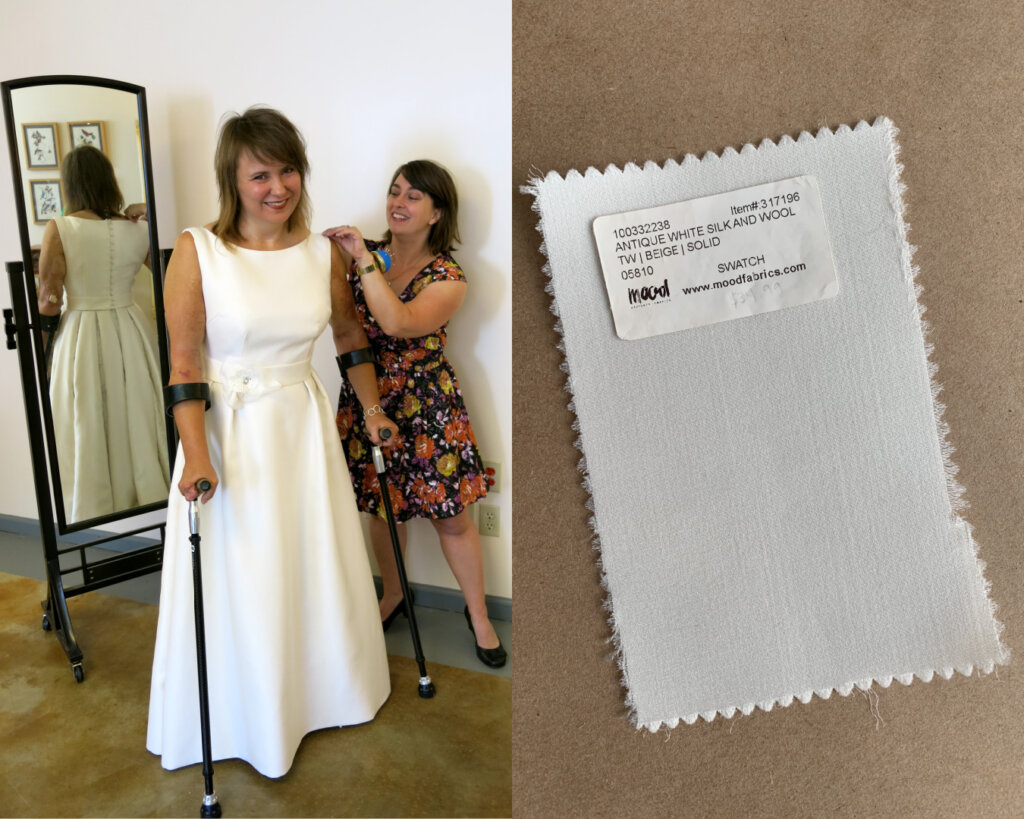
Deborah’s bridal gown was made from the dreamiest silk/wool satin. It’s not only goooorgeous, it was really fun to sew. I did not need to recut while creating her dress, so I had some scrumptious yardage left over…
Since my dress was going to be all about curves, I cut a sample of Deborah’s leftover bridal fabric for some tests. Beautiful!
Strategies
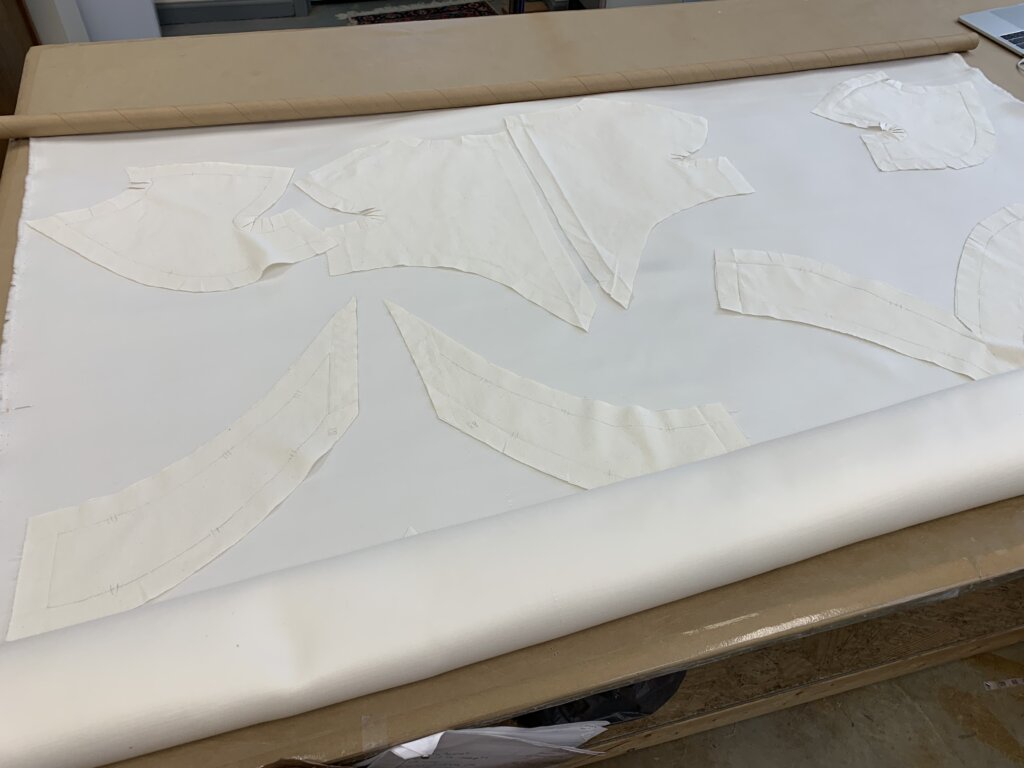
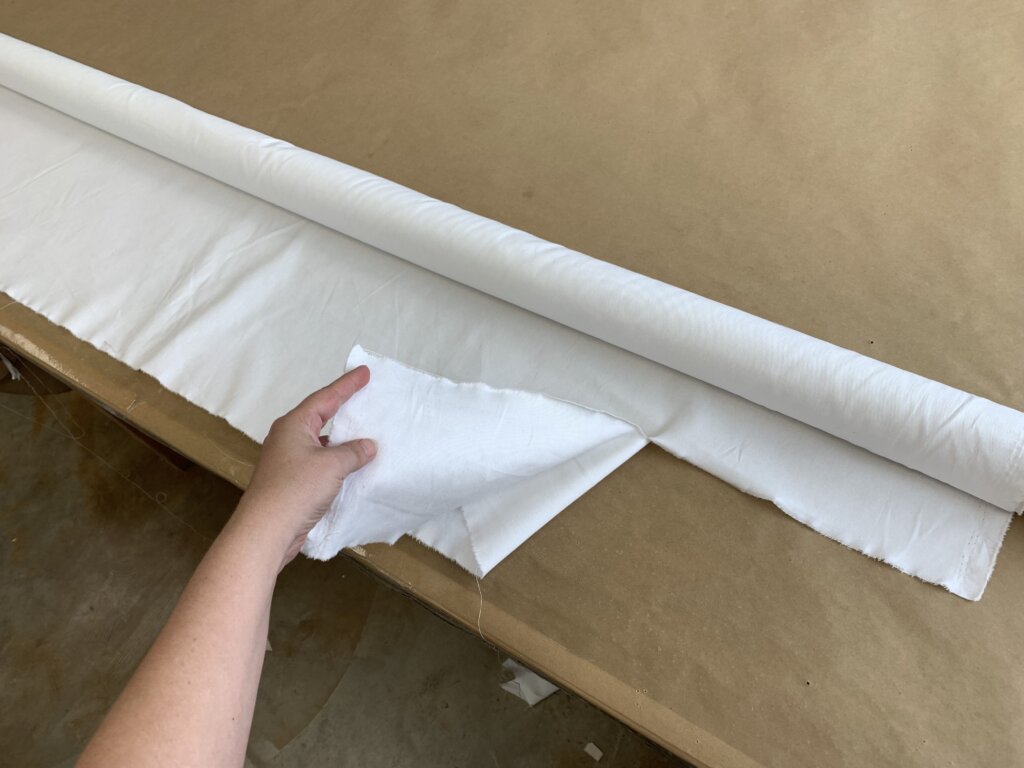
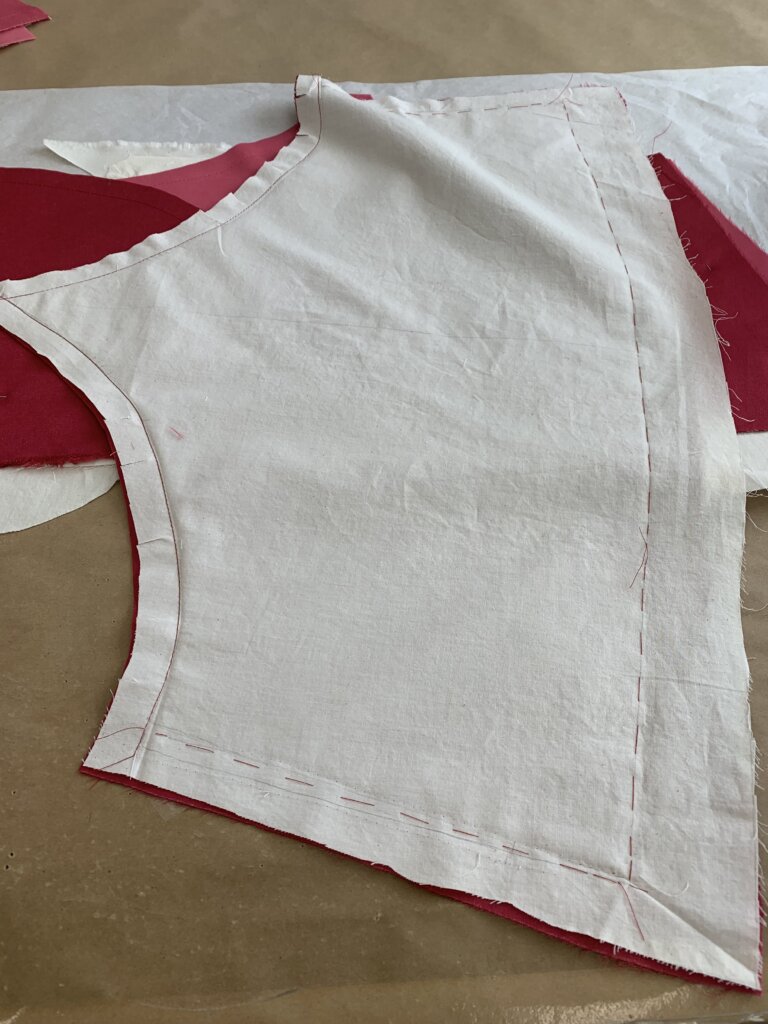
If you’ve been following me for a while, you’ll know that I love reusing my mockup as the underlining of the real garment. In order to do this (and for help with layout strategies), I’d need to take it apart. Mockups are made with temporary basting stitches, so it was super-fast to disassemble (but not quite this fast)! (And if you are curious about my lack of a seam ripper, here’s how I remove stitches with scissors.)
Since I would be dyeing different pieces of the same fabric different shades of the same color, I’d need to be strategic about my layout. I fiddled around…
…and found that I had just enough. Eeek! I double checked that Mood Fabrics still had more in stock (and at that time they did.)
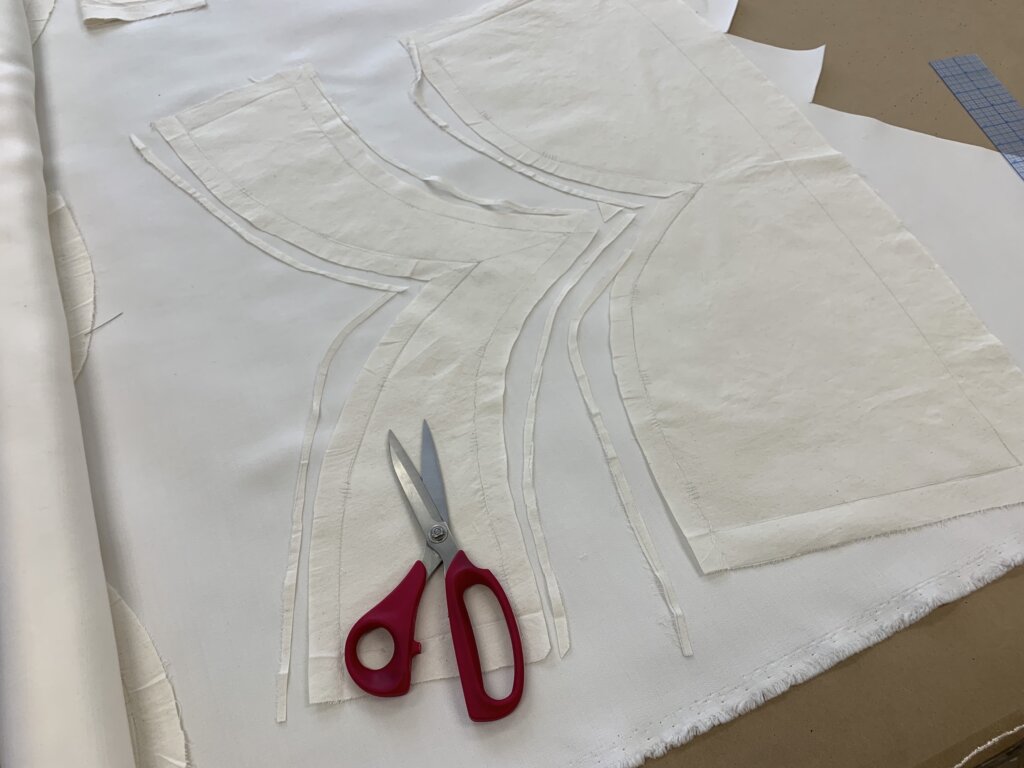
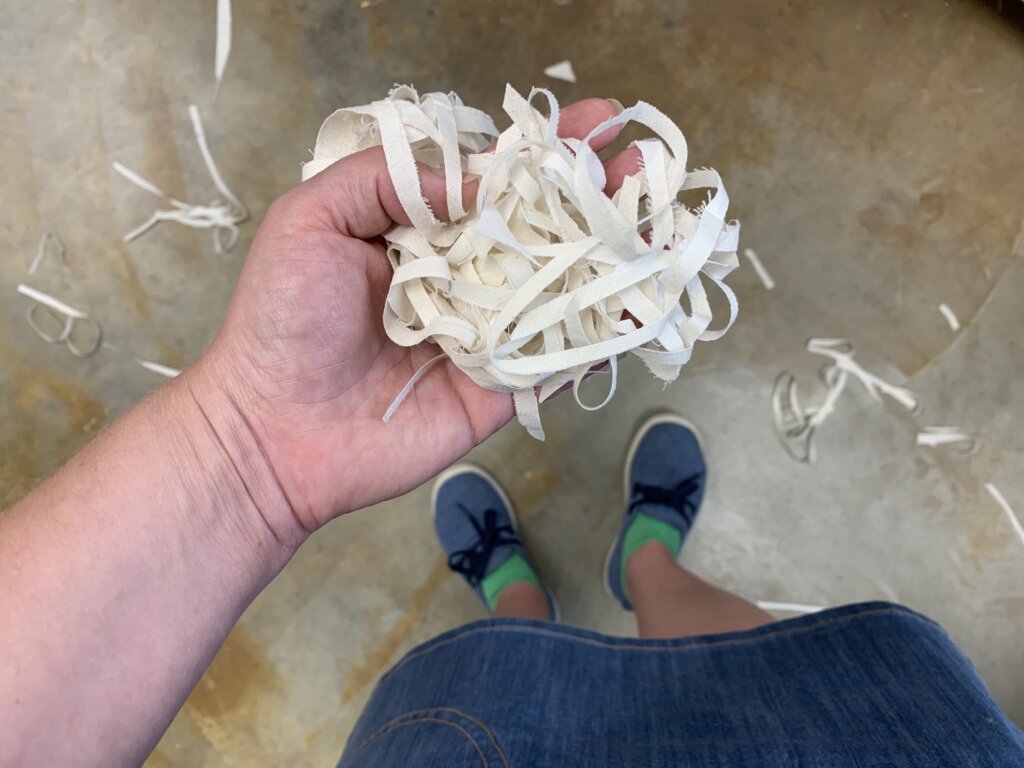
But to make more room, I trimmed my allowances.
A fun and messy way to make more space!
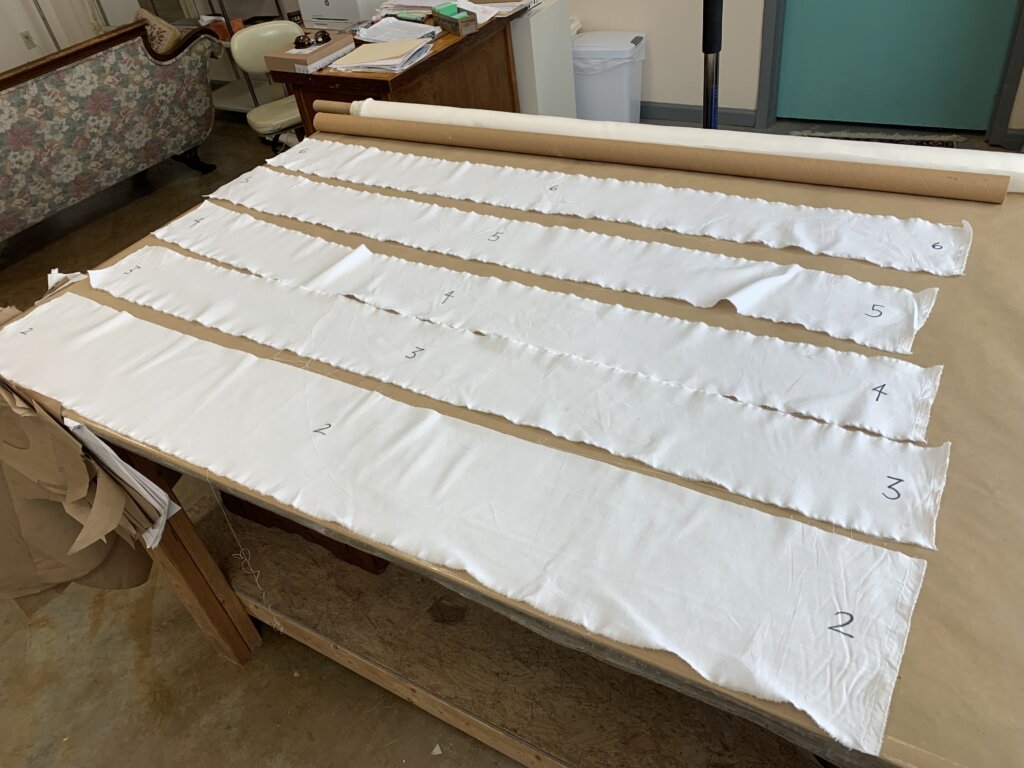
The white pieces at the top of my design were prepped for underlining…
…while everything else was prepped for dyeing.
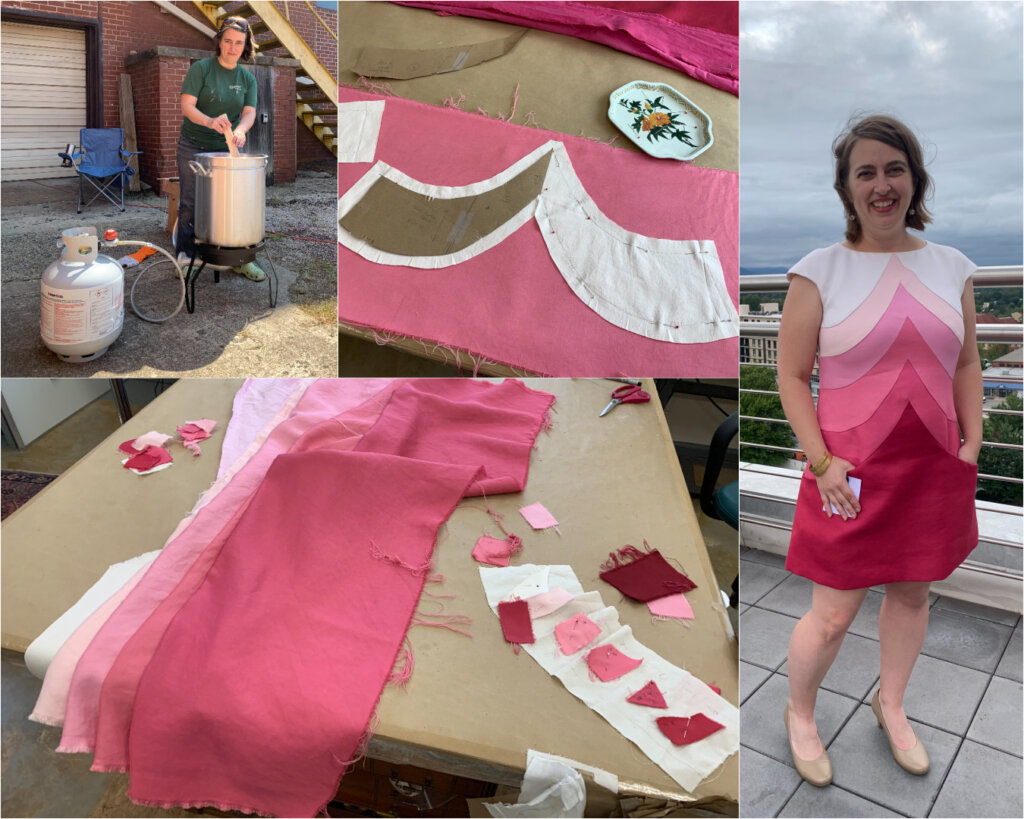
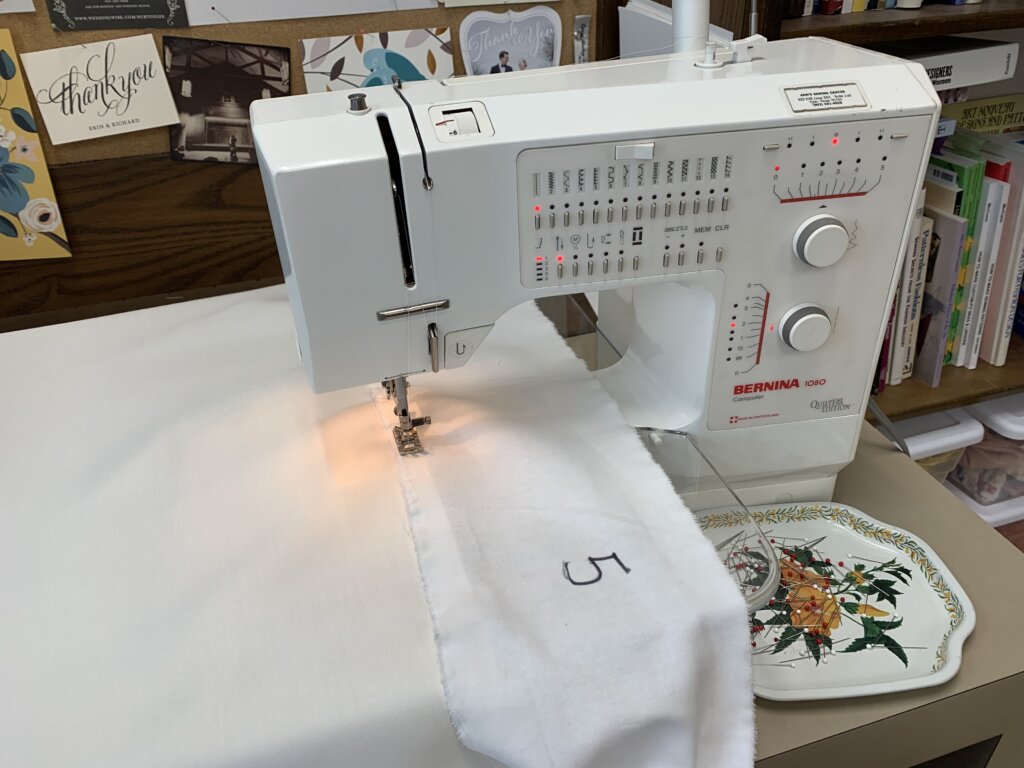
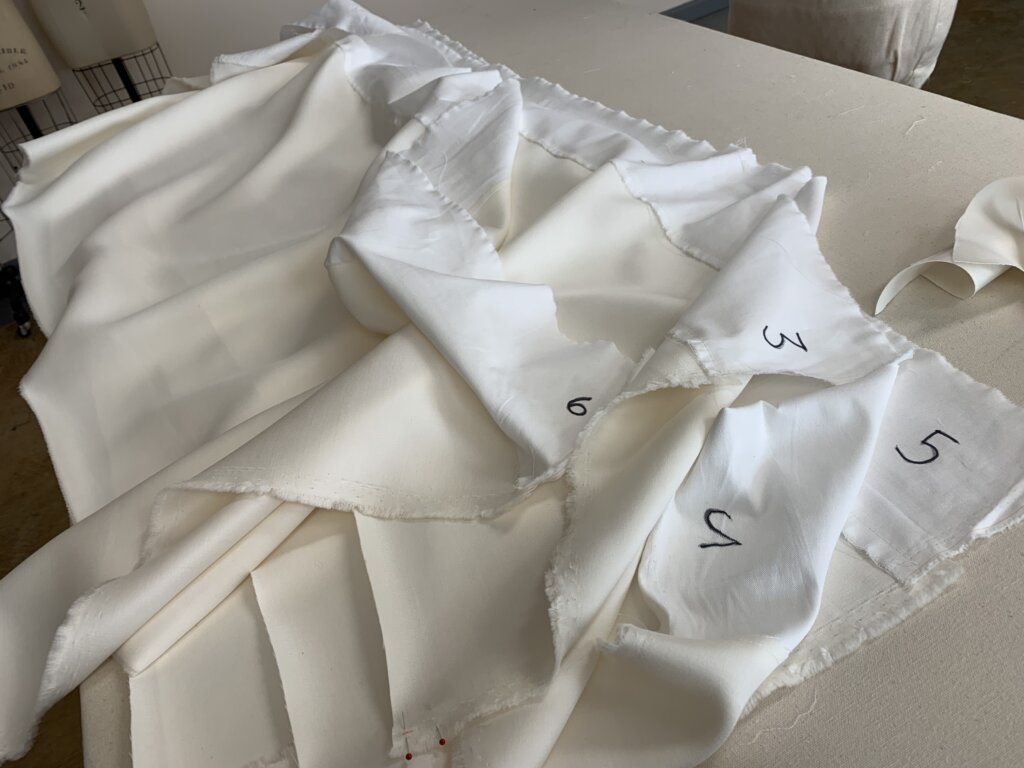
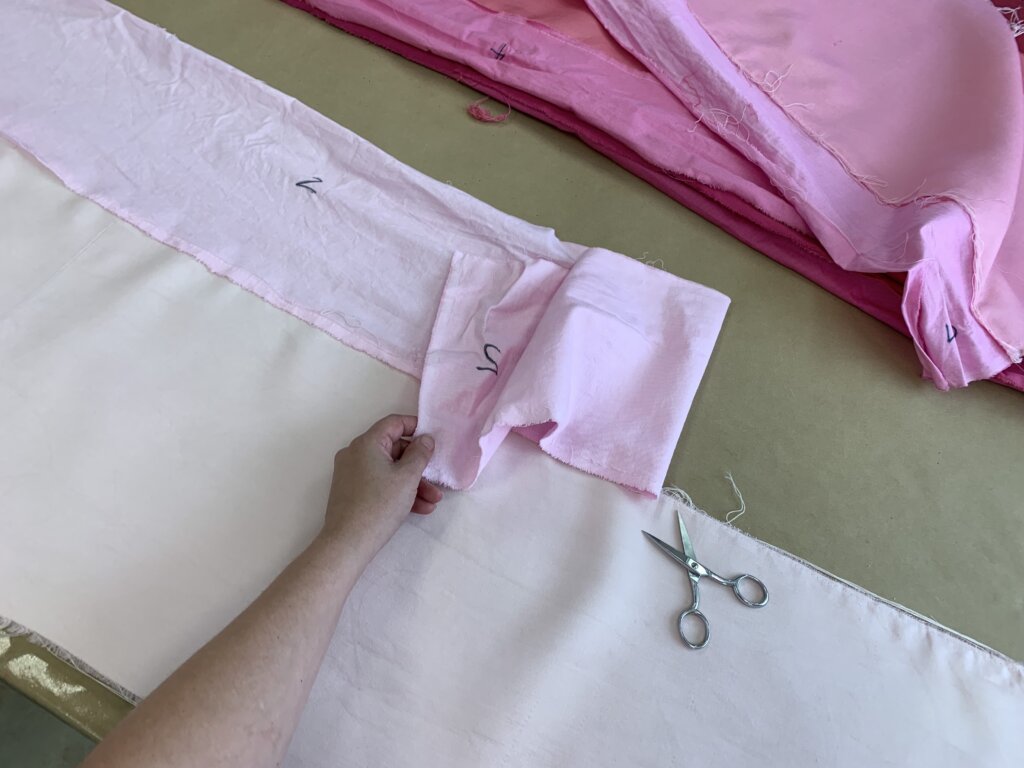
To keep myself organized, I ripped strips of muslin…
…and labeled them with a number for each color.
Using the muslin pieces from the mockup dress as my guide, I cut custom-sized strips of the silk/wool fabric- each just long enough for the pattern pieces that would become each color shade.
This was tricky and took forever (but was also kinda fun.)
Then I machine basted the silk/wool strips to the muslin strips.
I am not one to “play chicken” with fabric (remember my rule of thumb above?), so this was a real nail-biter!
Ready or not- my fabric was now prepared for dyeing!
Dye Testing
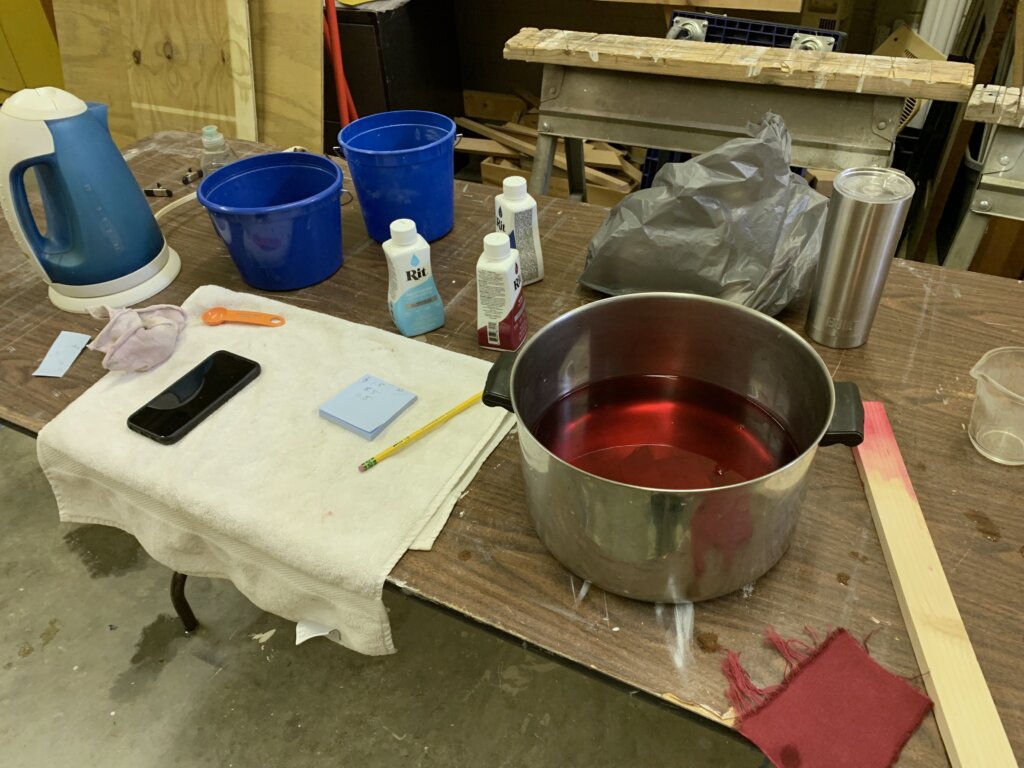
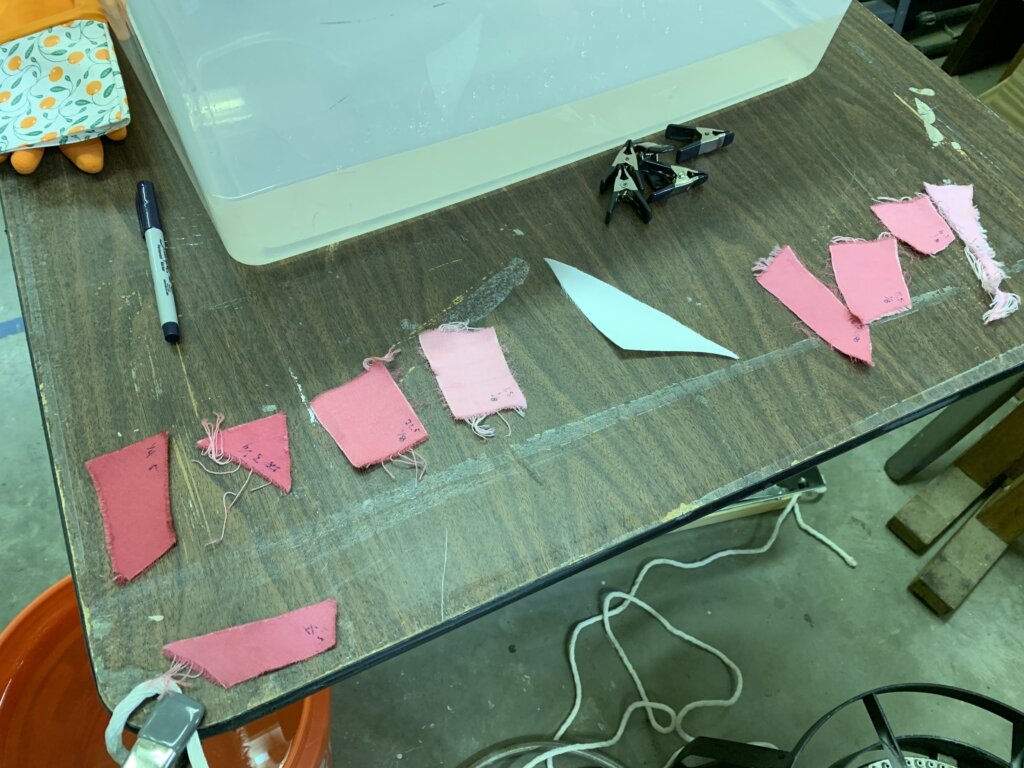
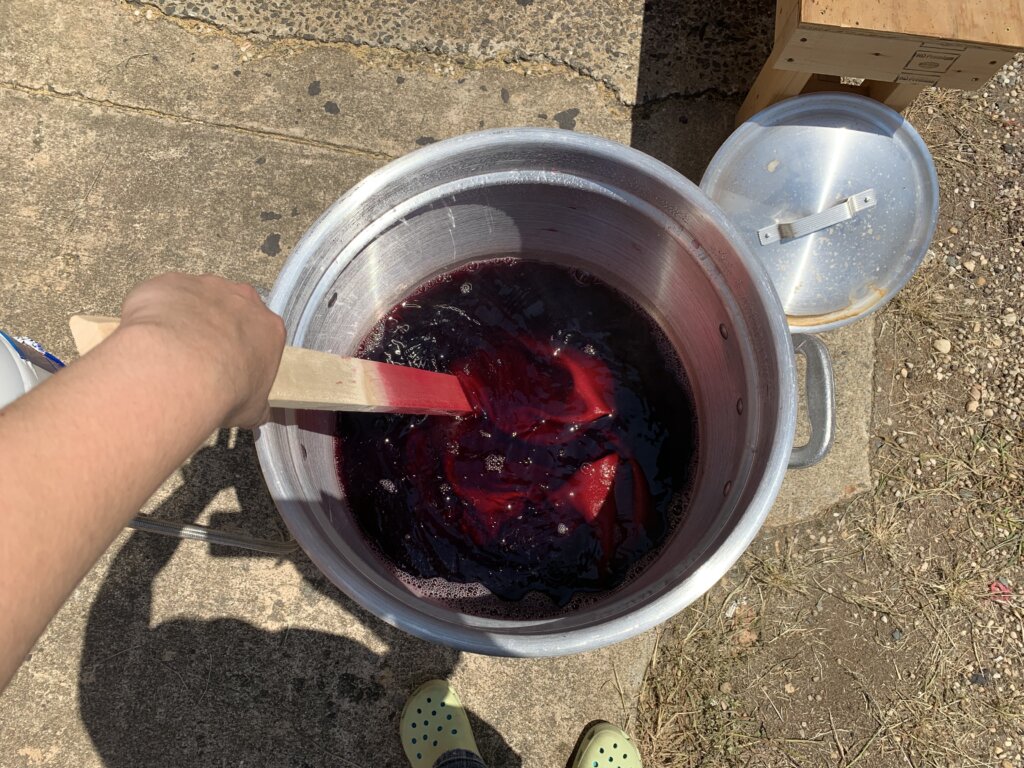
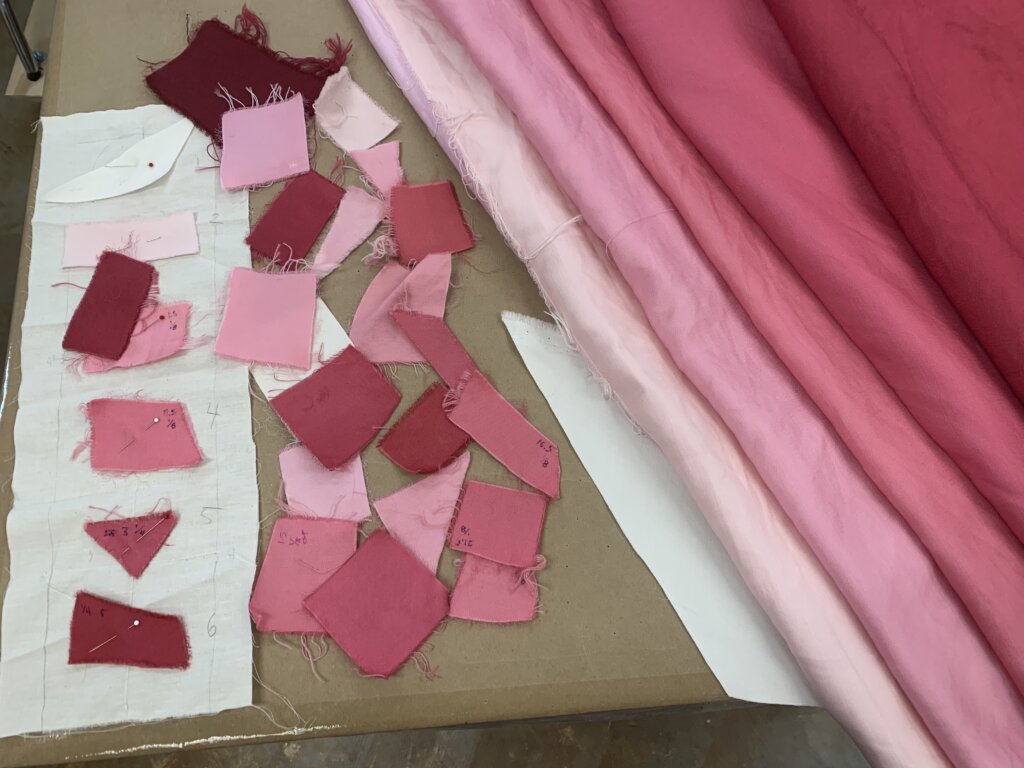
With the help of my handsome husband Charles and some scraps of the silk/wool fabric, I tested the colors to come up with a plan. To keep things simple, I decided to use the RIT dye color of “Wine” straight from the bottle but with varied lengths of time in the dye bath.
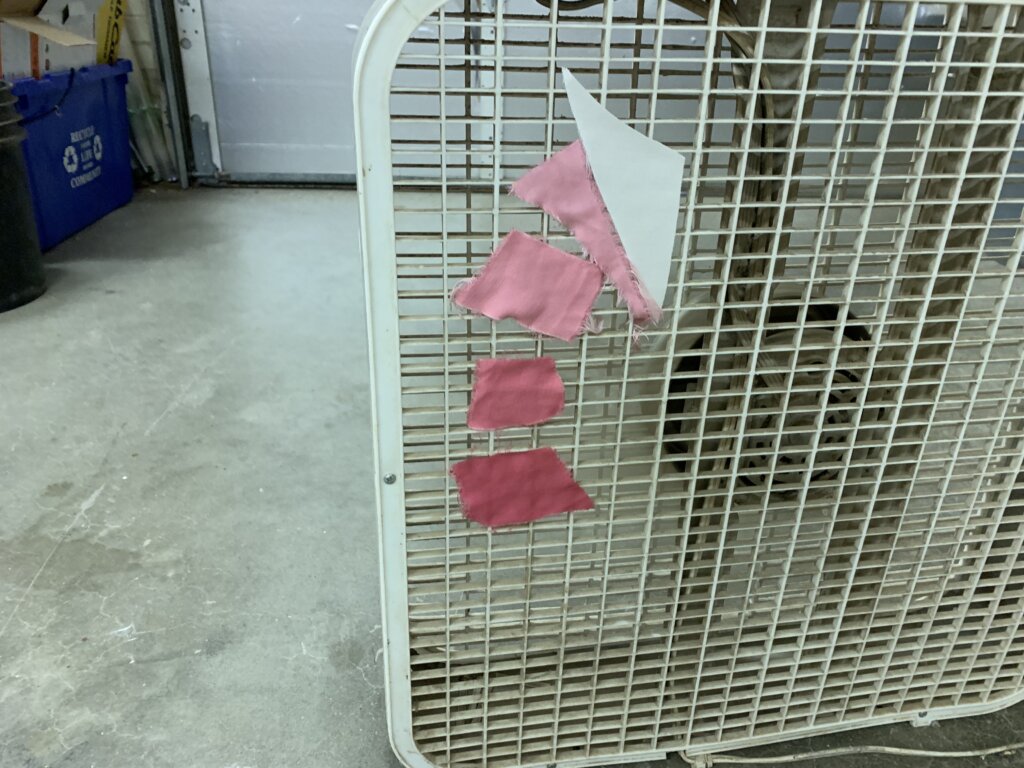
And it’s important to see how things look when dry!
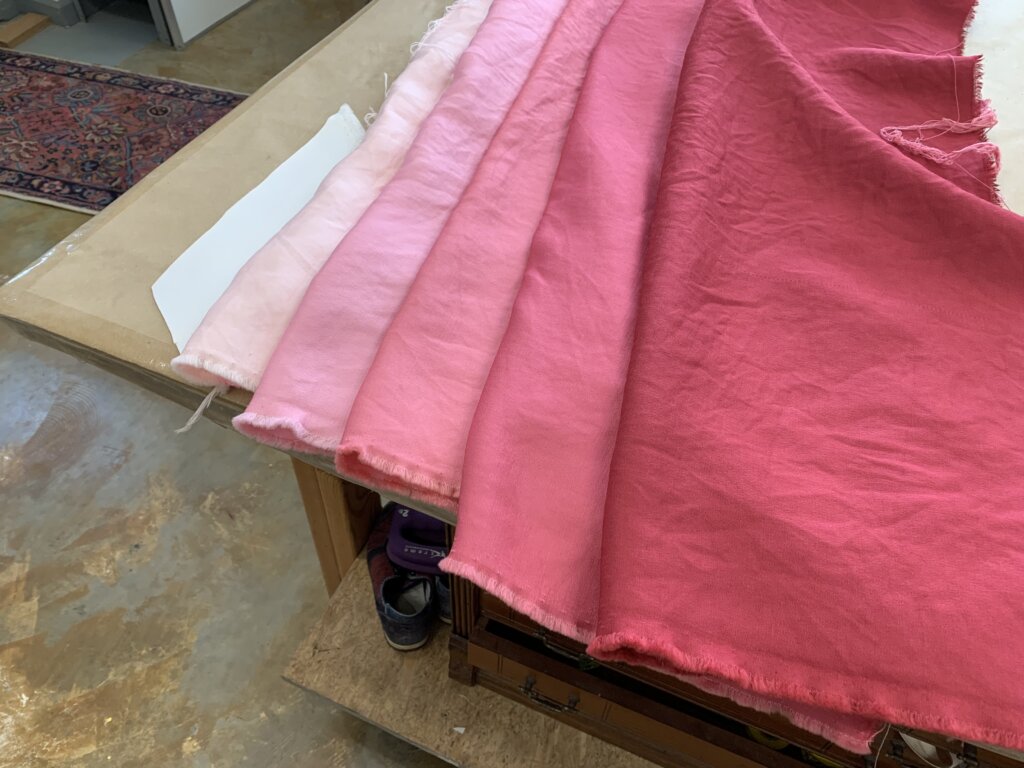
Well, my original thought was that I could simply throw all the fabric into the dye, and then remove the strips in order at strategically timed intervals- allowing the higher strips to soak less and the lower strips to soak up the dye the longest. But after testing a bunch of samples, it became clear that I’d need to be very careful and that I’d need to have at least 2 different baths. The fabric loved soaking up the dye!
On each of my preferred samples, I wrote the recipe for how much dye was used and how much time it spent under water. My ombre color plan became much more tedious than I had hoped, but I felt it was too late to turn back now so…
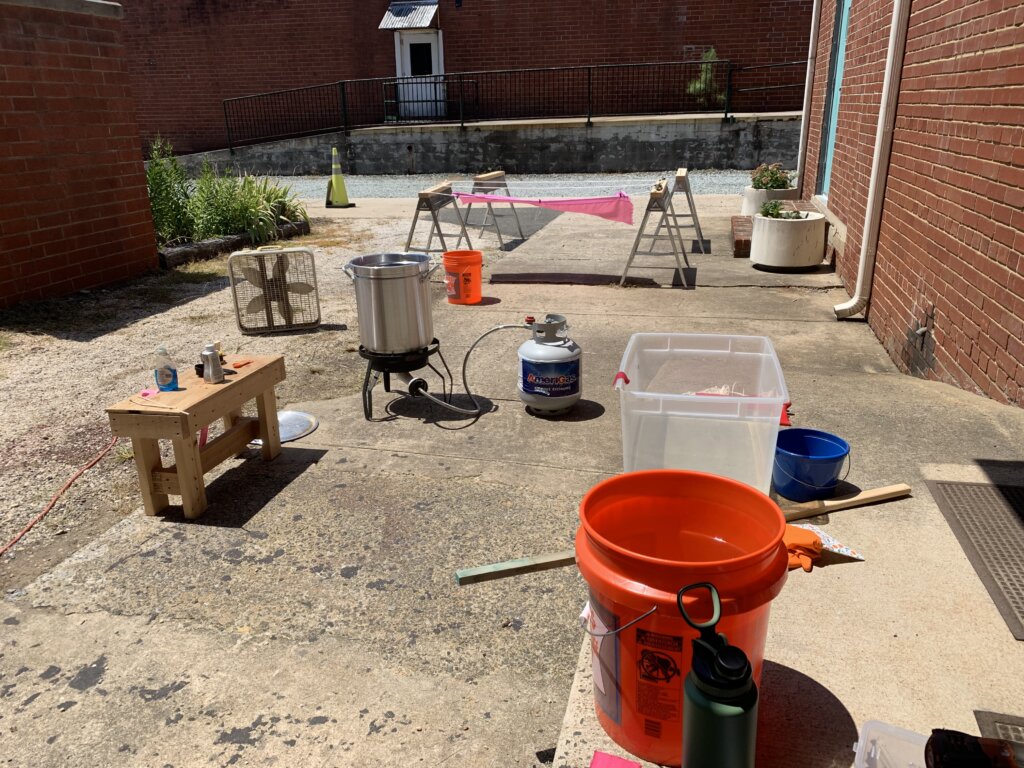
I'm dyeing here...
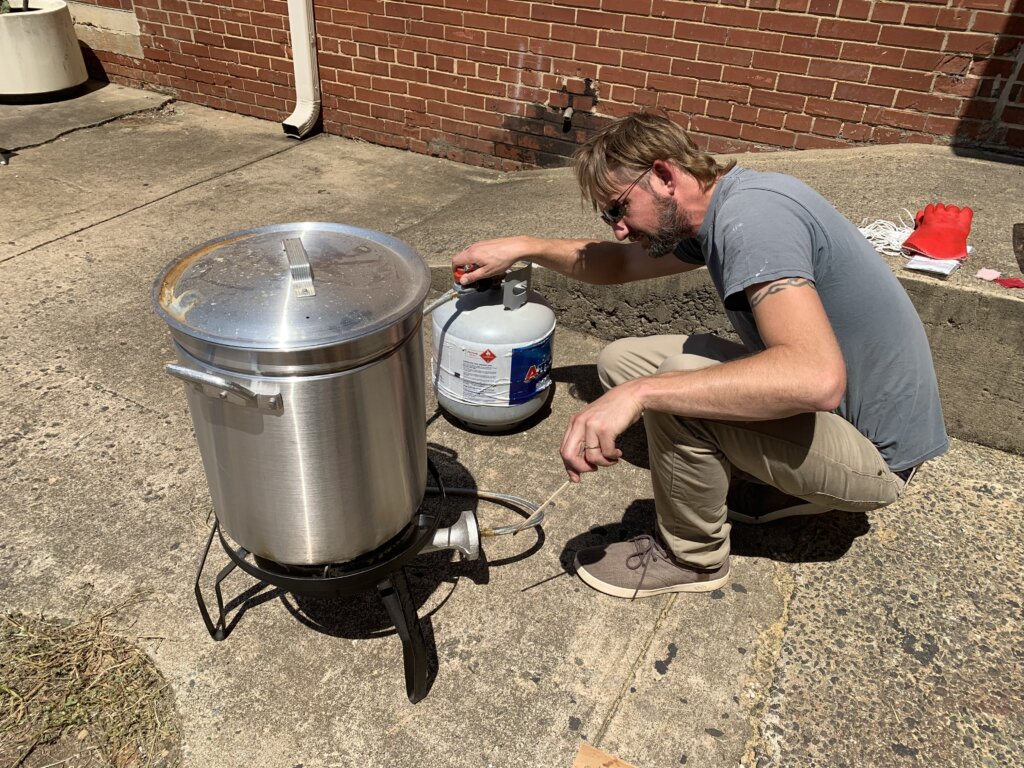
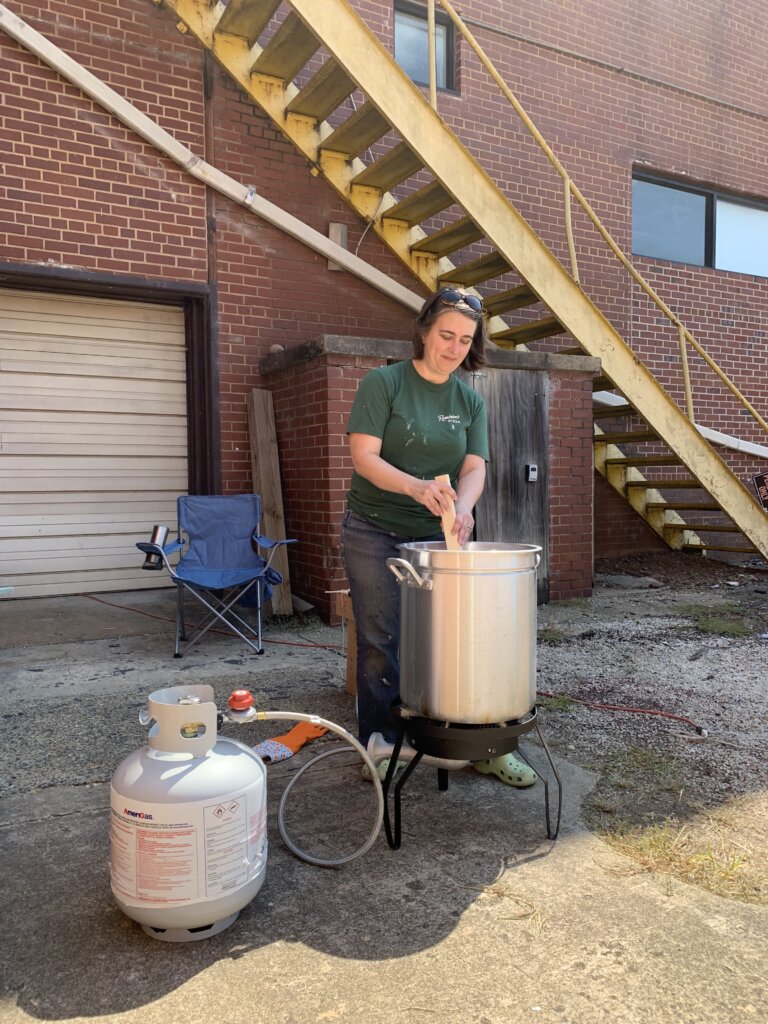
Charles set up the “dye vat”…
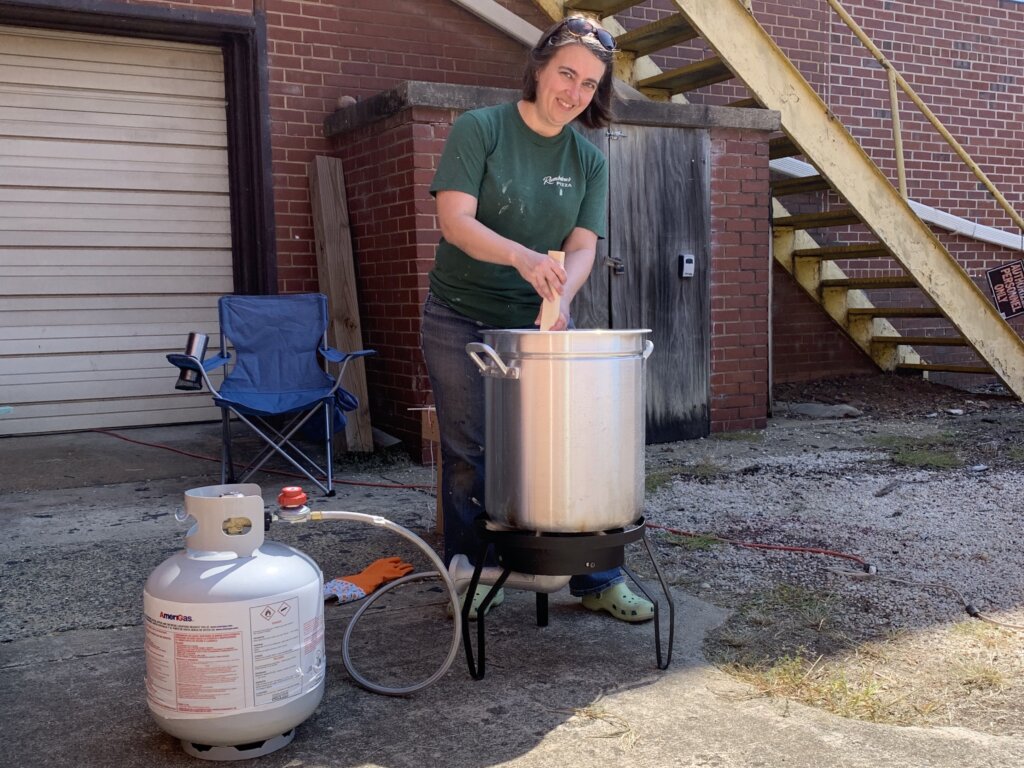
…and I got started soaking the strips in the wine dye bath!
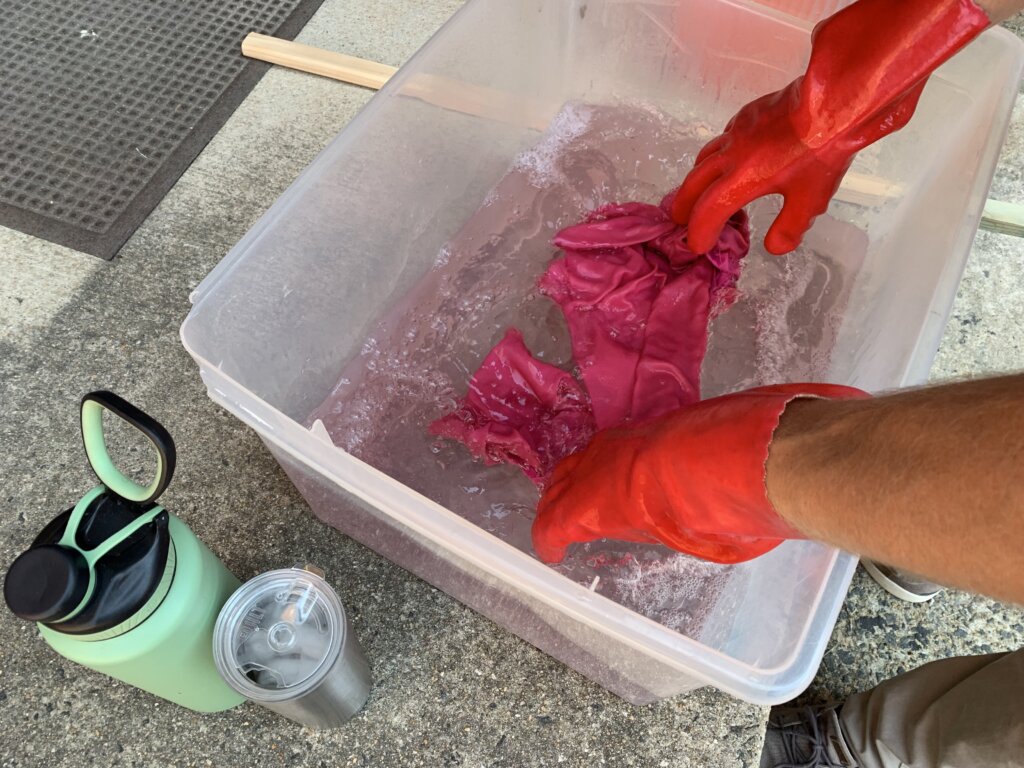
After each strip soaked its appropriate amount of time, it would get rinsed..
…and then hung out to dry.
And then we’d dye another strip…
…and hang it to flap in the breeze…
…until I was happy with the colors! Whew… Aren’t they gorgeous! ?
And I couldn’t have done it without the help of (Charles and) my samples!
Underlining & Fabric Prep
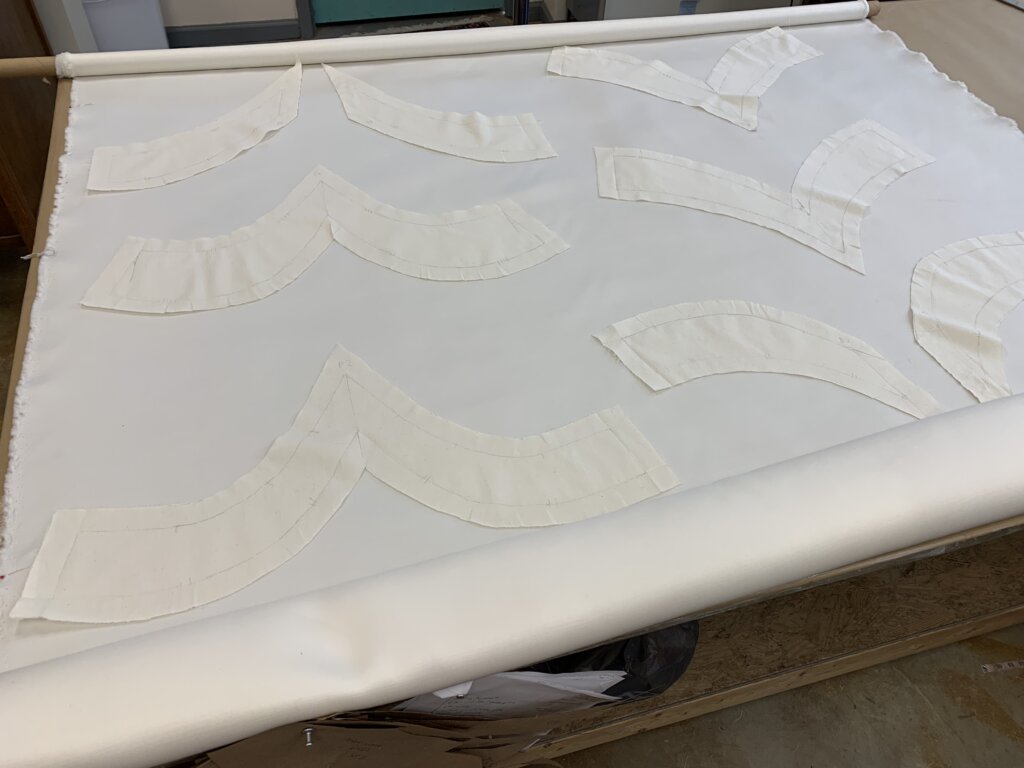
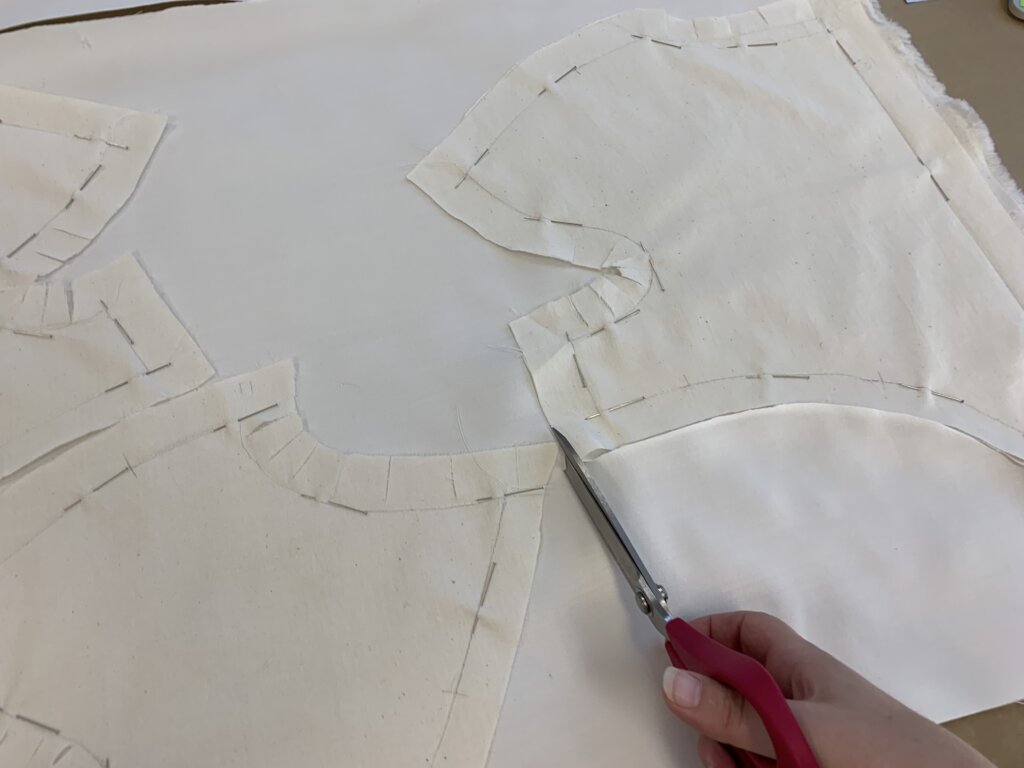
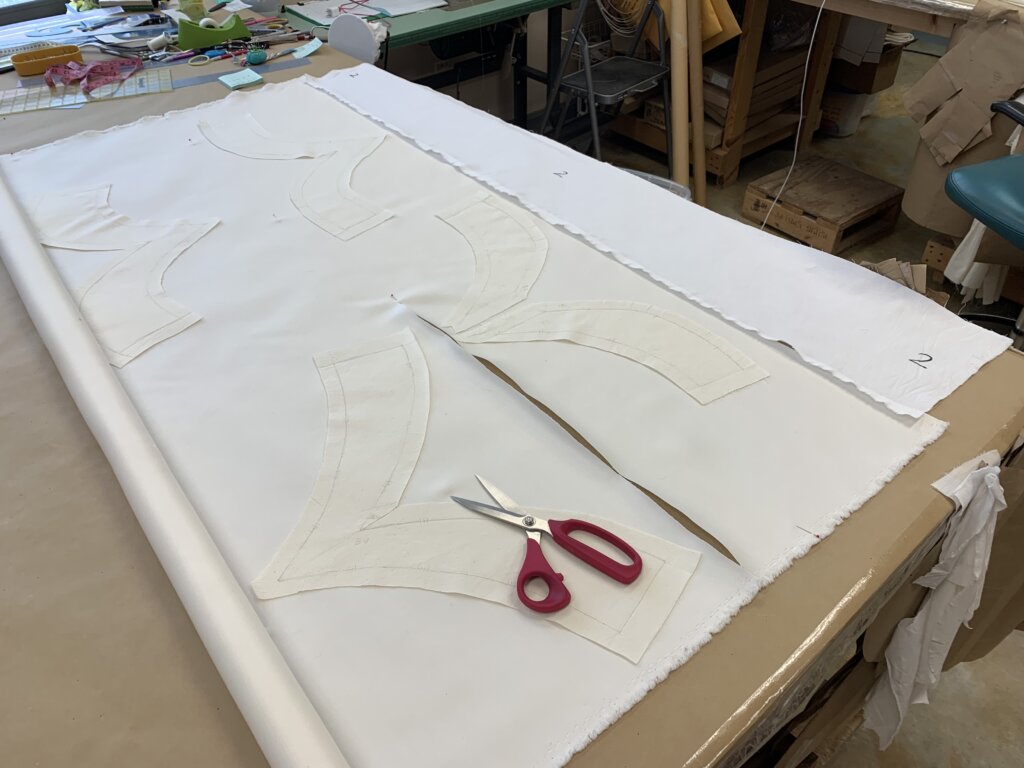
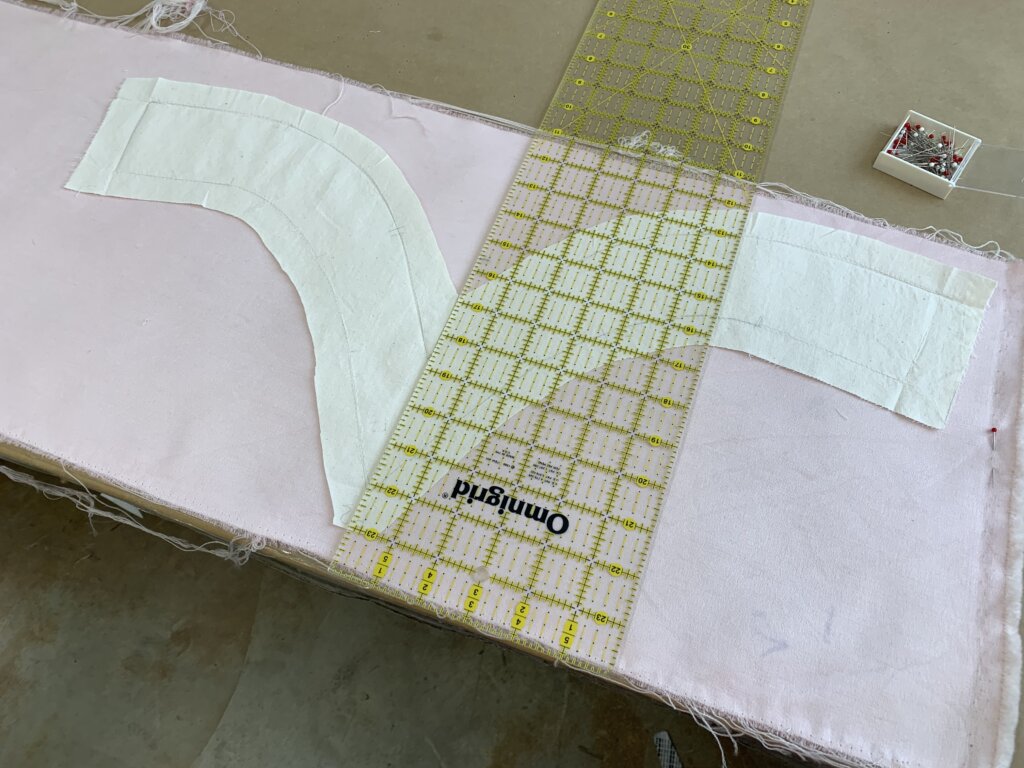
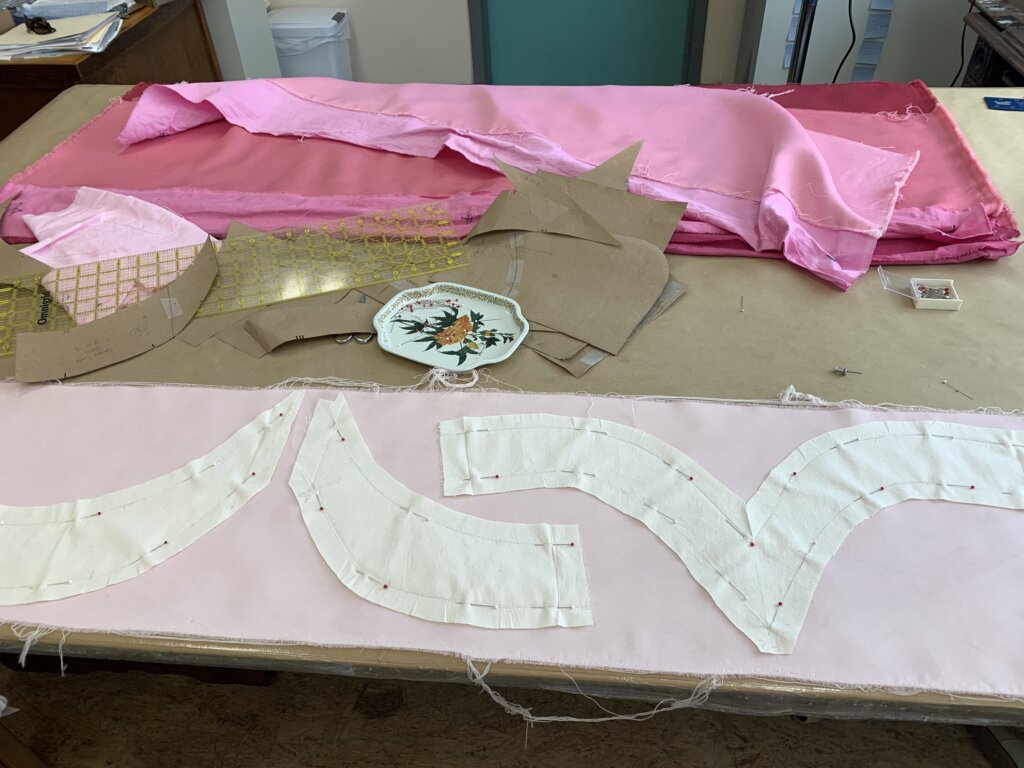
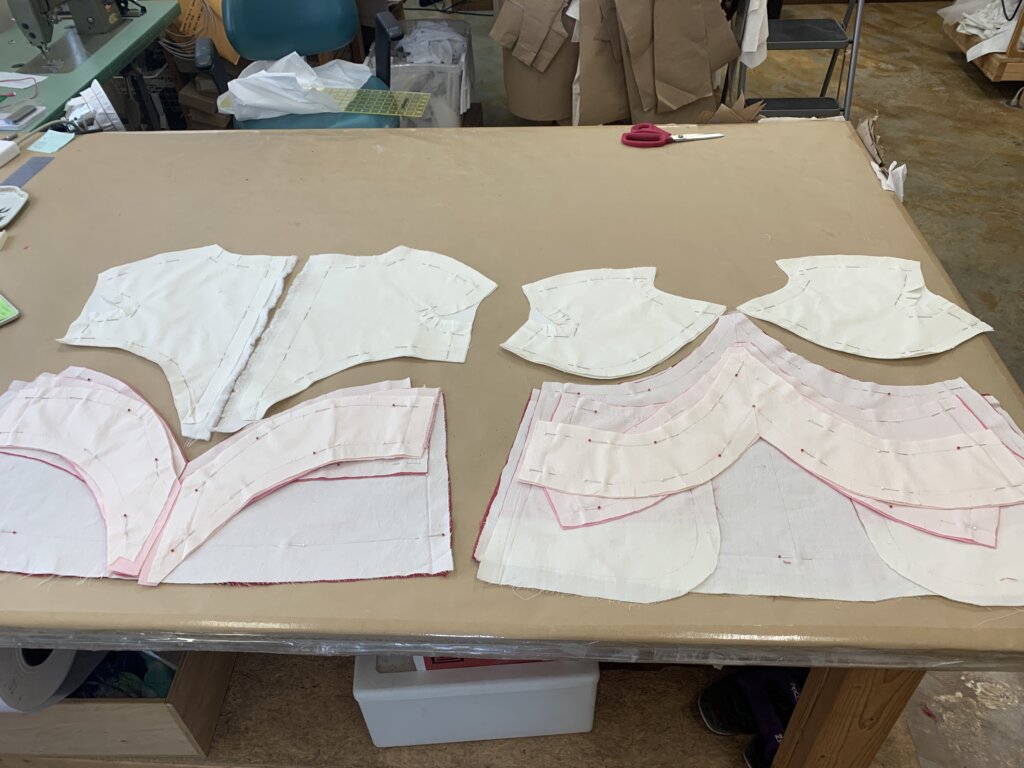
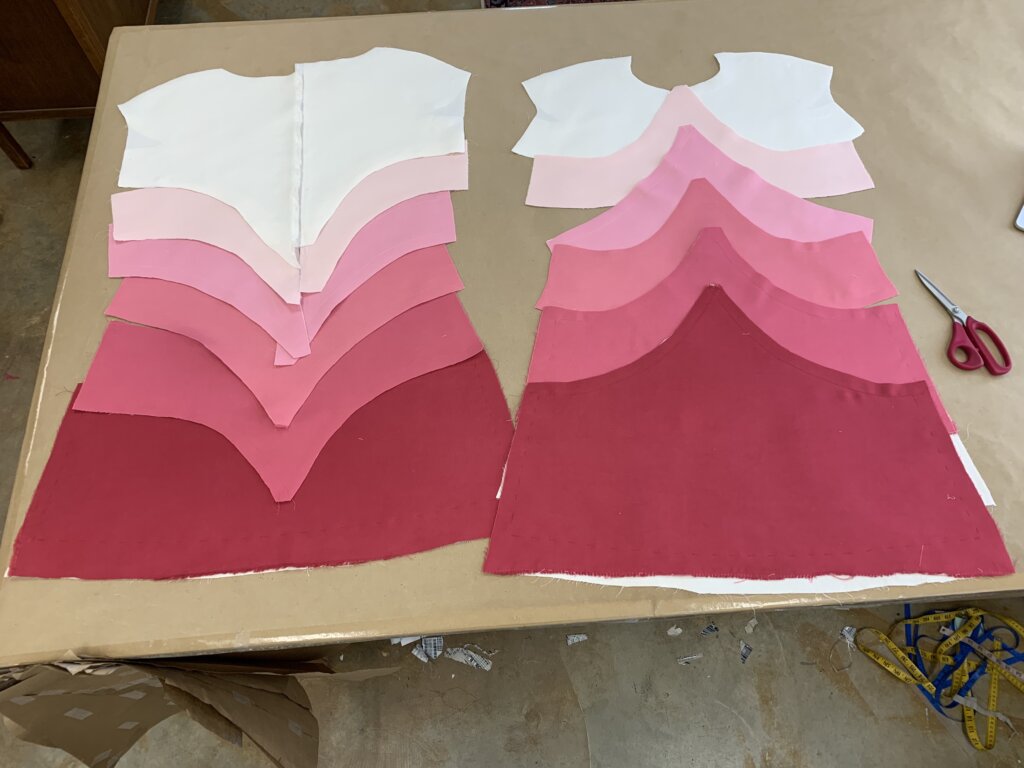
Next up, I’d prep the fabric for underlining and cutting the curves! First, I removed the muslin strips…
…and laid the appropriate muslin pieces onto the dyed silk/wool making sure the grain lines matched…
…and used my paper pattern to double check that the curves were exactly as I meant them to be.
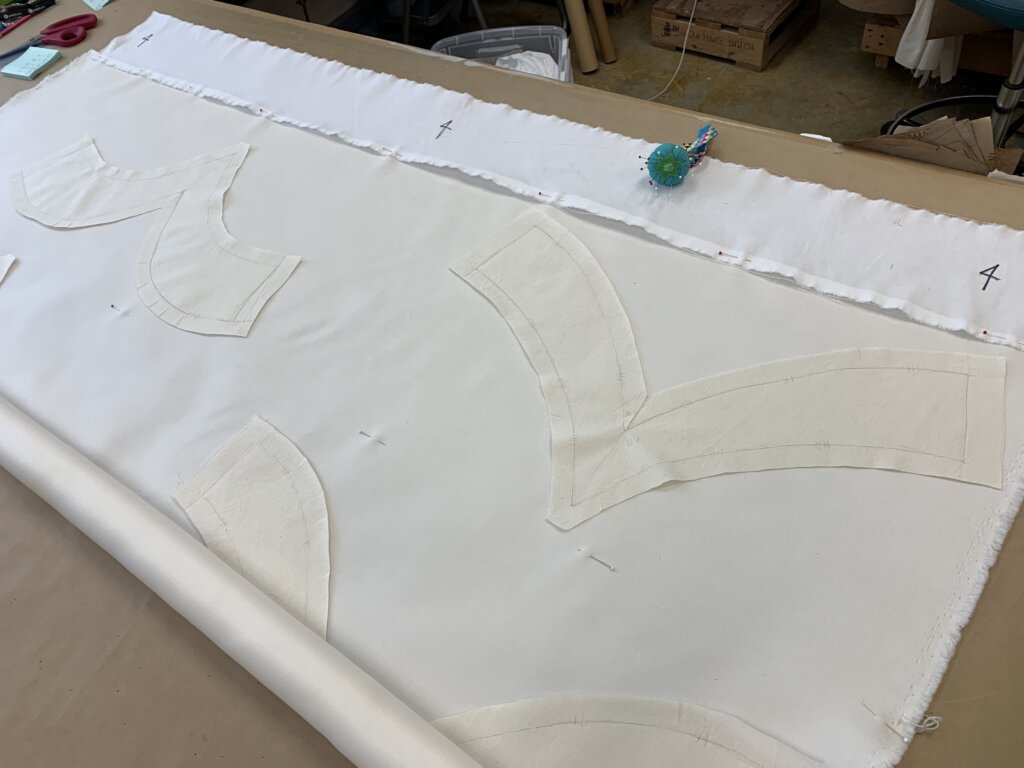
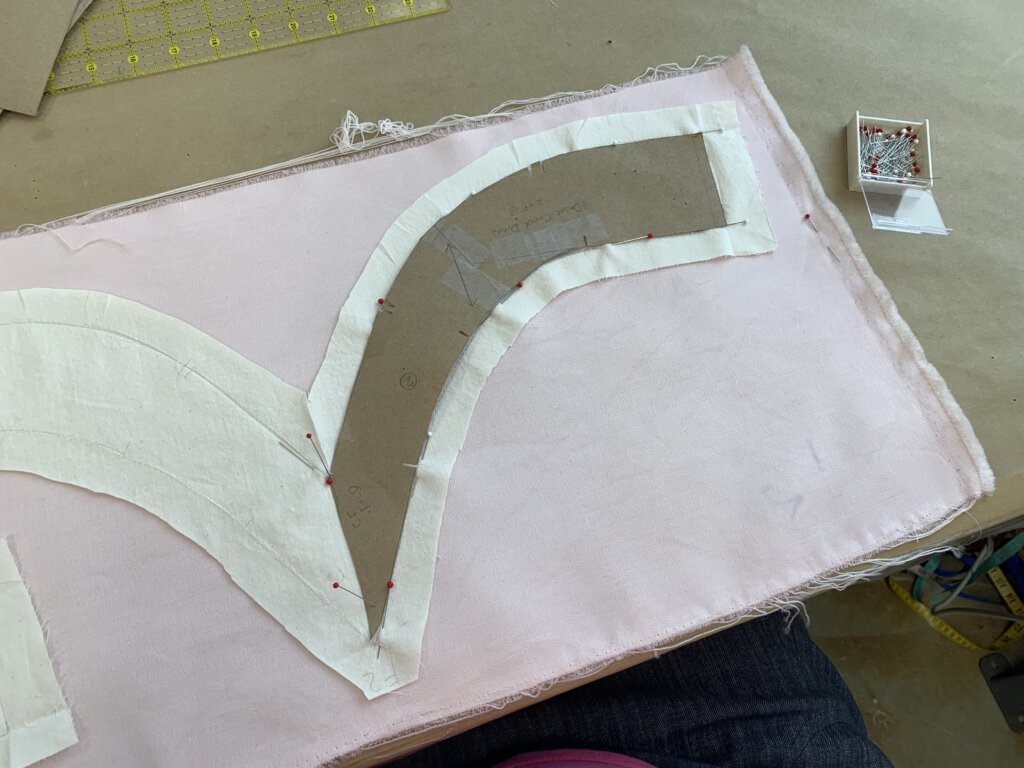
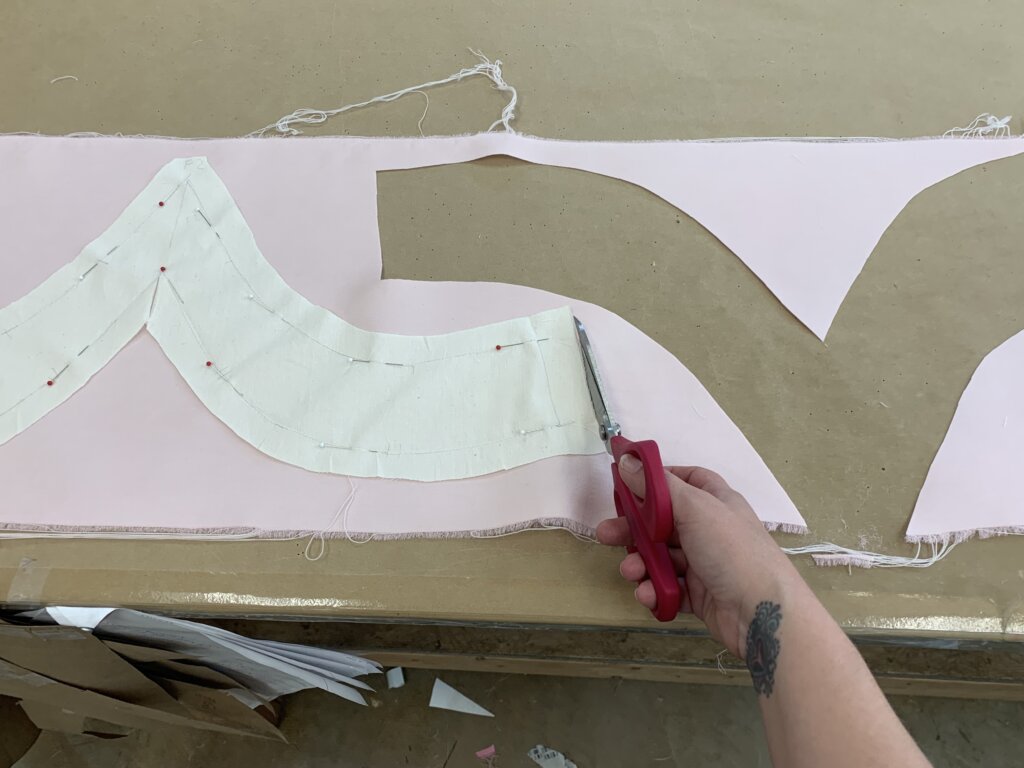
Then I carefully pinned the layers together…
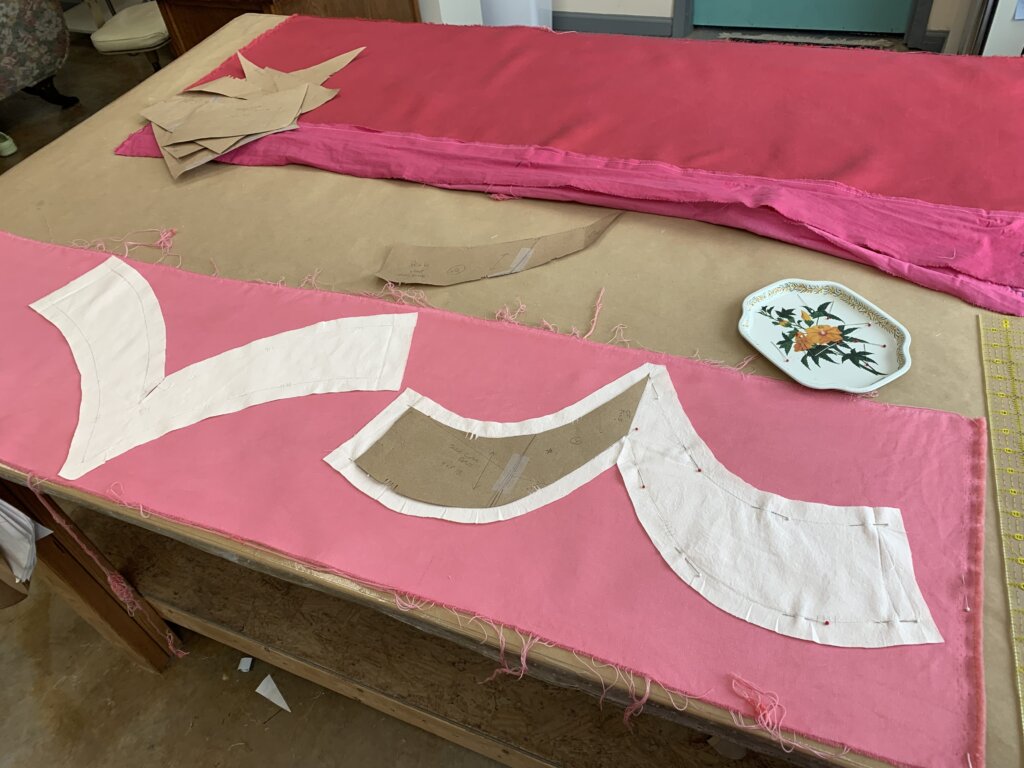
…and cut the silk/wool into its final shapes.
…repeating the process with each new color…
…until all the pieces were cut and pinned!
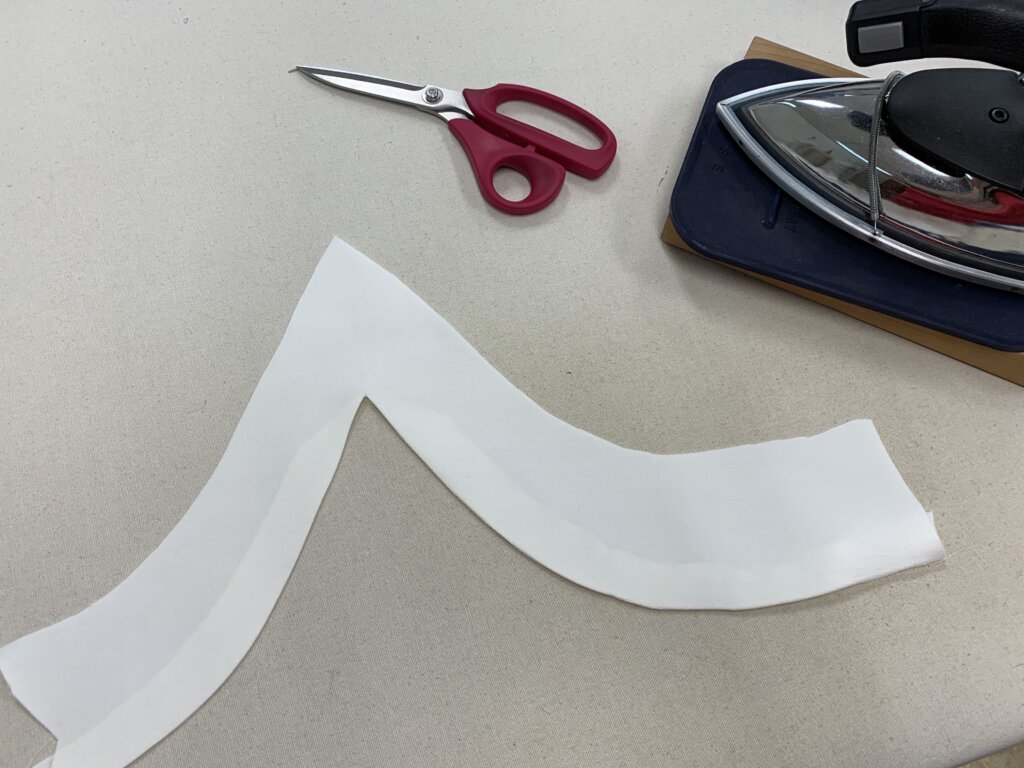
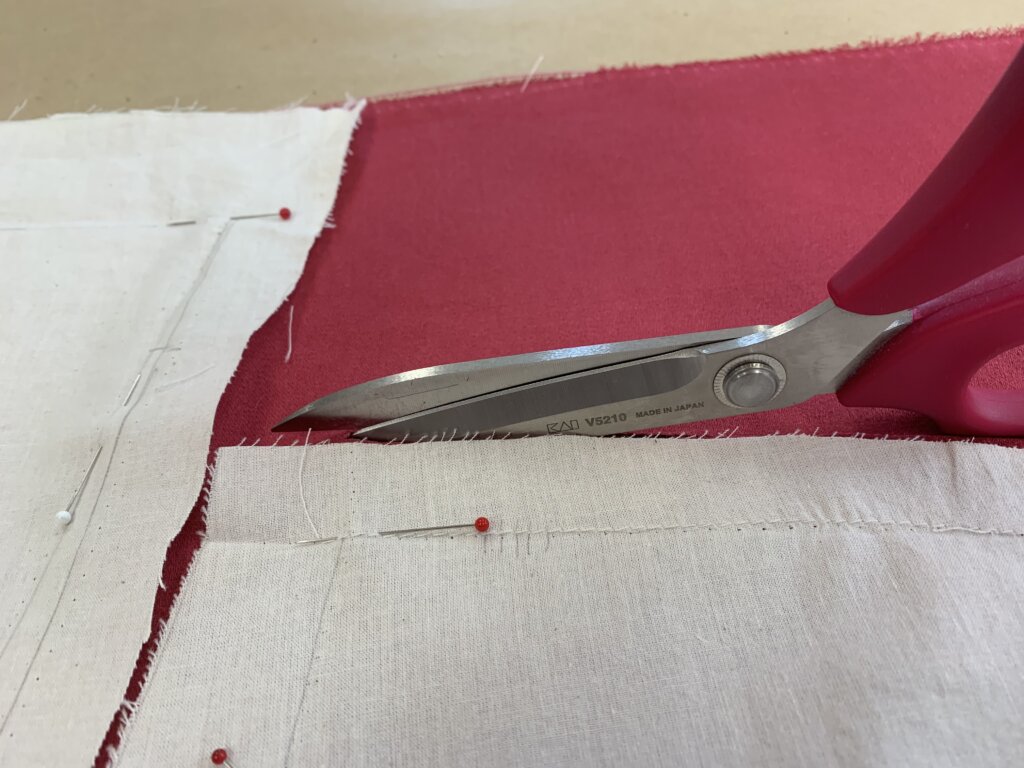
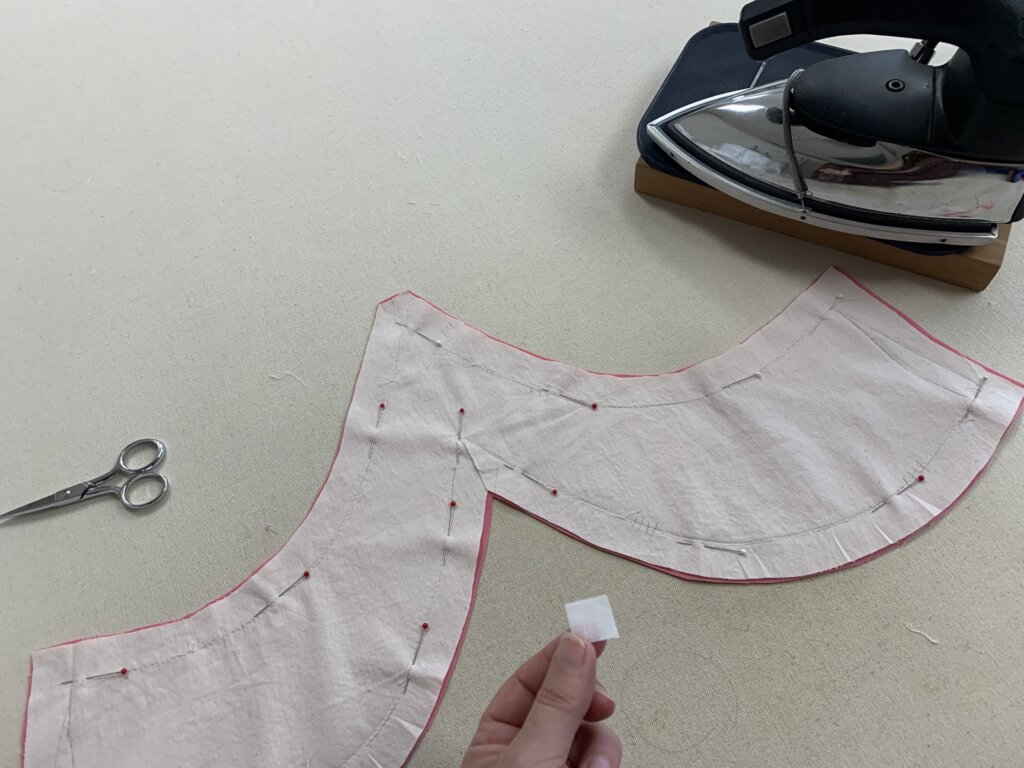
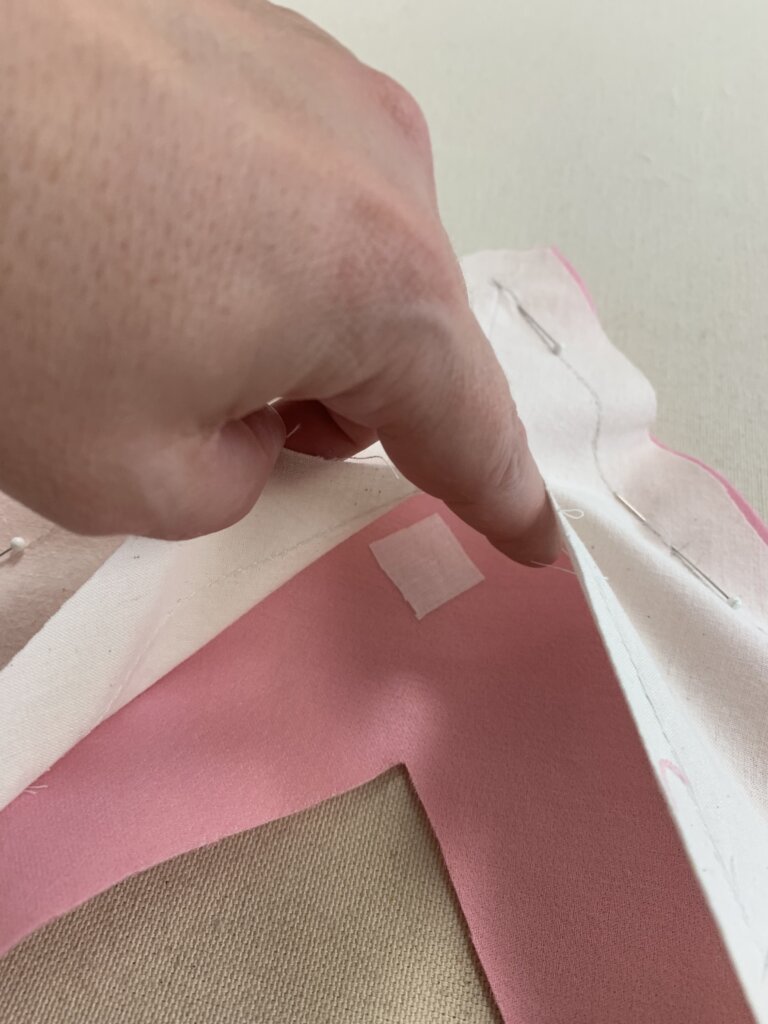
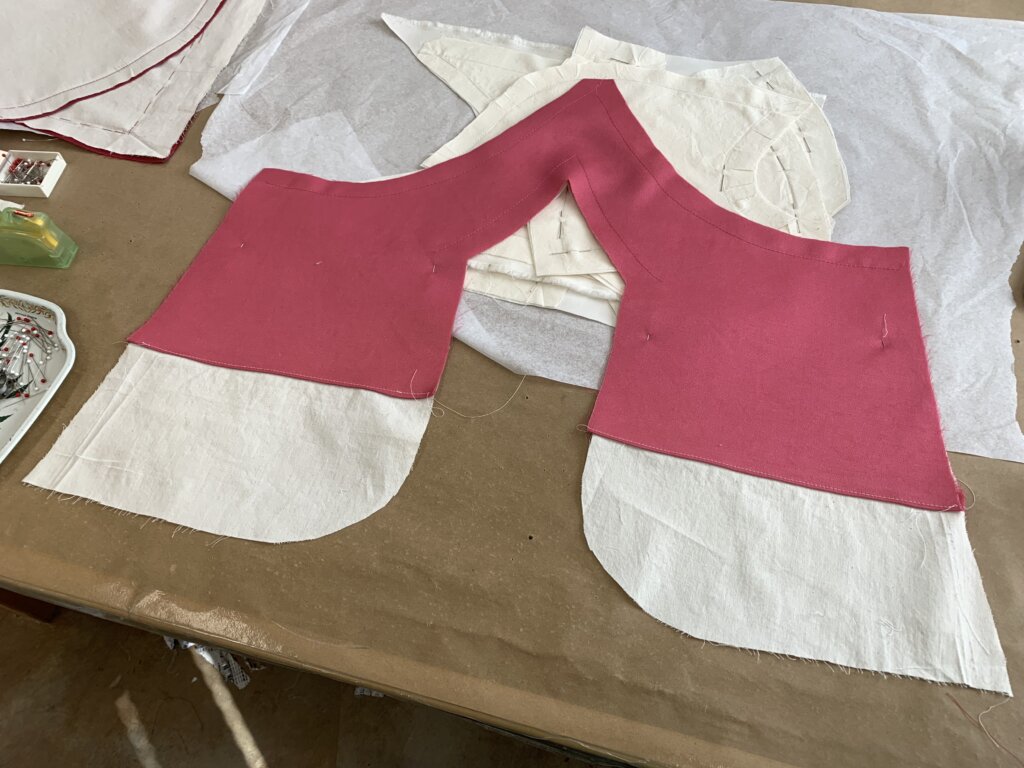
As you may recall from when I made my mockup, the inside curve has a weak spot where the fabric has to be clipped during construction. To combat any weakness, I cut a tiny square of woven fusible interfacing…
…and fused it right at the spot where the silk/wool will be clipped…
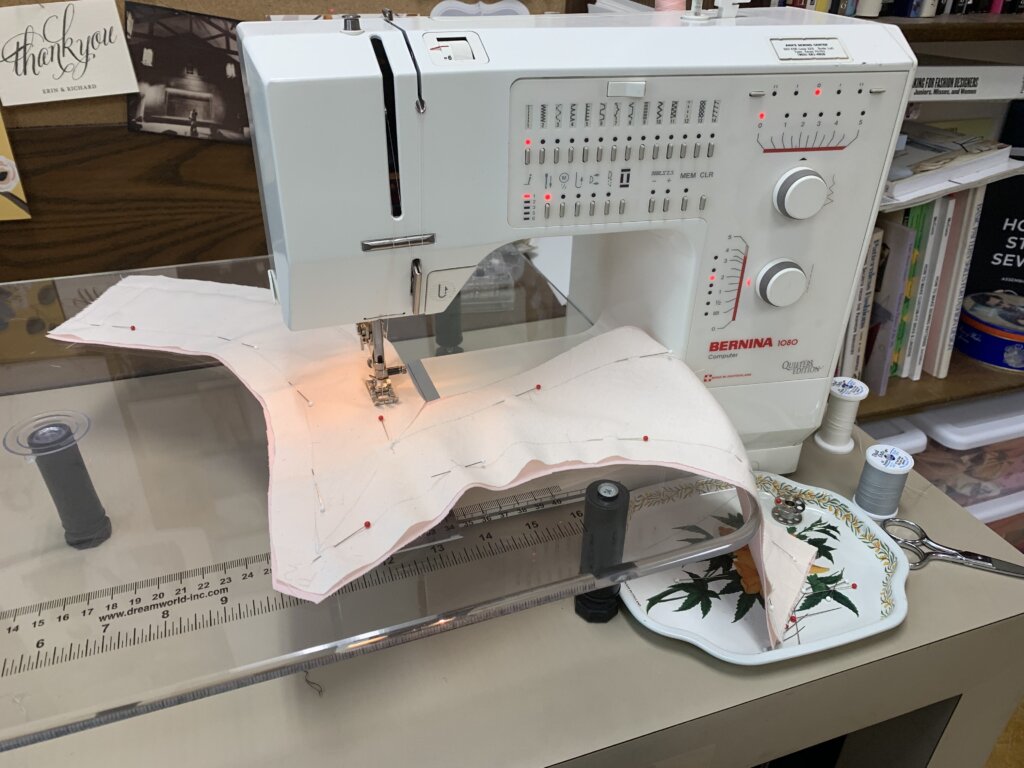
…before slowly stay-stitching every curve by machine.
The layers at the dress’s edges and side seams were basted together by hand to complete the underlining process…
…(and getting creative with the pocket pieces).
Ta-da!
Though it was more work than I was expecting, it was also more beautiful than I was expecting! Pushing through the puzzles paid off.
Isn’t it the coolest?
NEXT POST: I share all the juicy construction details to finish up this dress!
How did the dyeing process affect the texture of the fabric? I made my wedding dress out of Mood’s 4-ply crepe and planned to dye it afterwards. I preshrunk my fabric (put the yardage in a bucket of water and used the sous vide to hold it at 200 degrees for a while – this also meant that I didn’t have to worry about water spots) before I cut. I had to boil the fabric in the dye bath (dharma acid dye) to get it to set. The fabric ended up with a very nice sueded texture after dyeing.
It made it a little softer and the satin weave became somewhat less smooth, but it mostly went back to the original texture after I pressed it. But I can see how something with a crepe weave (like your dress) would change more dramatically. Glad you did the prep and got a very nice texture. Sounds beautiful!
I’m a former professional costumer and couture dressmaker for one-of-a-kind bridalwear located in rural North Carolina, who teaches custom garment sewing to sew-curious solo-sewists online.
My blog mostly follows along with the couture process of how each heirloom-quality custom wedding dress was made from idea to wedding day, as well as personal sewing projects and other couture curiosities.
Welcome to my (temporary) Sewing Studio! Come on in! I love seeing other people’s workspaces and tools, so I thought I’d show you mine. I cleaned up after a big...
Duplicating the Vintage Dress’s Pattern (without taking it apart)
In my previous post, I introduced Jenn and the custom bridal wear project(s) for her wedding weekend. Check out the full story for all the deets, but to catch you...
I Made Myself the Coolest Dress pt. 1 – Pattern Design & Mockup
Though my personal wardrobe is mostly “the dressmaker has no clothes”, when I do make something for myself, it’s usually an epic project. I’m so excited to finally share this...
I’ve been blogging for TEN YEARS now, ya’ll! In “My 10 Year Blogiversary pt. 1”, I share links to each bridal blog series that I’ve created over the past decade....
It’s finally time to share about Deborah’s wedding day! HOORAY! Deborah and Blake were married in November 2017 at a church in Greensboro, NC with the reception at a nearby...
New Bridal Blog Series: My (kinda famous) friend Jenn!
Brooks Ann, Jenn, & Charles January 2017 Going Way Back… To begin my next bridal blog series, let’s head into the Way-Back Machine. And we’ll head farther back than this...
The bridal blog series is back! In each bridal blog series, you meet a new bride and I slowly post-by-post recount the process and share the behind-the-seams story of creating...
The bridal blog series is back! In each bridal blog series, you meet a new bride and I slowly post-by-post recount the process and share the behind-the-seams story of creating...
The bridal blog series is back! In each bridal blog series, I recount the process and share the behind-the-seams story of creating a one-of-a-kind custom couture wedding dress from start...
Sally is someone special. Back in December, I got an email from a dear friend named Sally that I had lost touch with. The subject line: “dear lord i’m getting...
As it starts to get cold, it sure is nice to think about summer! Gin and tonics… BLTs… beach trips… seersucker… Earlier this year, I worked with a bride who...
Welcome to Part 2 of the story behind making Andy’s 2019 wedding dress, where I’ll recount the testing phase of the custom process. If you’ve been following my blog for...
They say documenting the process triples the production time. (And I work more slowly than most.) My Nimbus was cold.She needed a new coat, sooner than later.
Welcome to Part Two! I’m back to share the nerdy behind-the-seams details of creating my Vanishing Tie Top for the Precious Fabric Challenge. But this photo-filled blog post doesn’t feature...
Do you have a fabric that you’ve been SAVING instead of SEWING? Yeah. Me too. So when Whitney Luckenbill of TomKat Stitchery asked me to be a part of her...
Welcome to my (temporary) Sewing Studio! Come on in! I love seeing other people’s workspaces and tools, so I thought I’d show you mine. I cleaned up after a big...
Welcome back! It’s the series finale! In this third and final post of My Warmup Jacket series, I share the behind-the-seams details of my jacket’s construction and finishing stories!
In this second post of My Warmup Jacket series, I share the behind-the-seams details of my jacket’s patternmaking and mockup stories! And after putting this patterning post together (which was...


3 Responses
How did the dyeing process affect the texture of the fabric? I made my wedding dress out of Mood’s 4-ply crepe and planned to dye it afterwards. I preshrunk my fabric (put the yardage in a bucket of water and used the sous vide to hold it at 200 degrees for a while – this also meant that I didn’t have to worry about water spots) before I cut. I had to boil the fabric in the dye bath (dharma acid dye) to get it to set. The fabric ended up with a very nice sueded texture after dyeing.
It made it a little softer and the satin weave became somewhat less smooth, but it mostly went back to the original texture after I pressed it. But I can see how something with a crepe weave (like your dress) would change more dramatically. Glad you did the prep and got a very nice texture. Sounds beautiful!
This is really well done!