

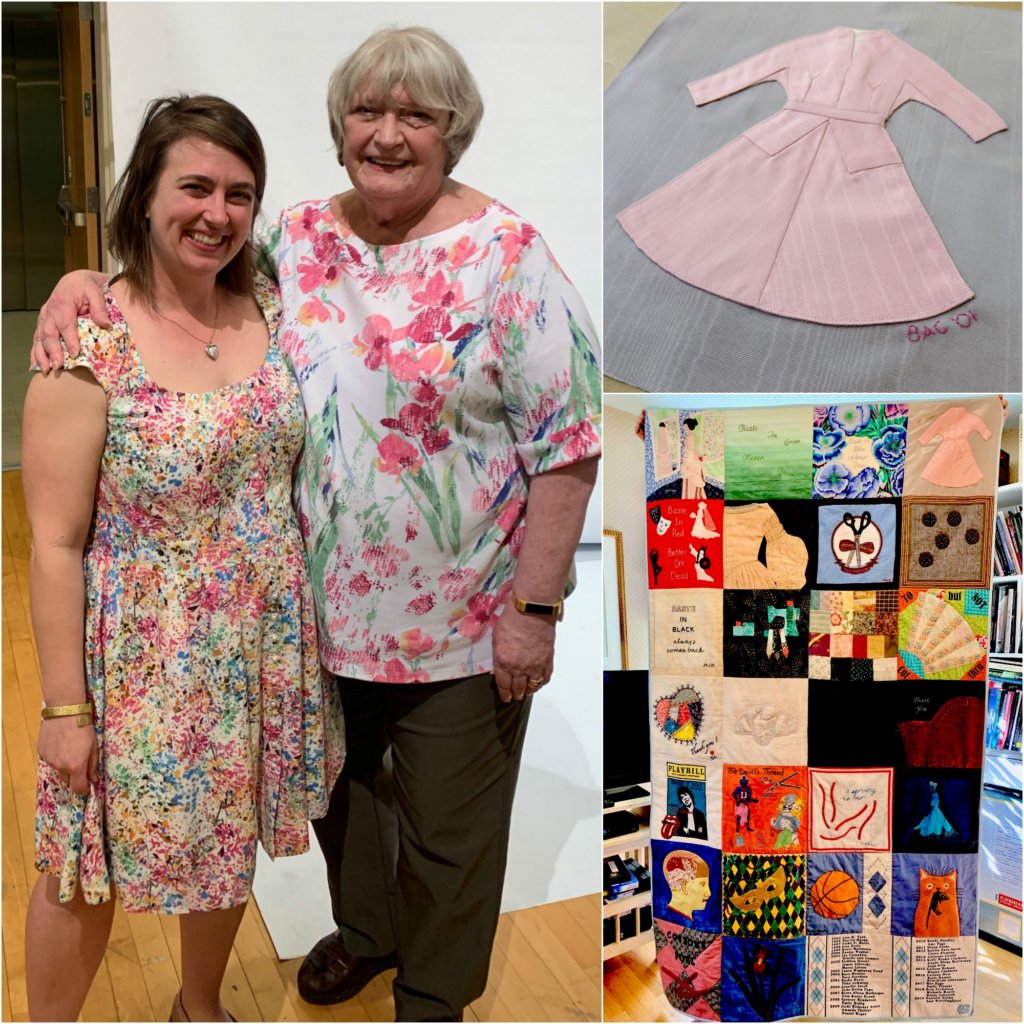
Though you may be itching for the beginning of a new bridal blog series (me too!), I recently worked on an unusual and special project that I really wanted to share. I made a Dior-inspired square for a surprise “Couture Quilt”!
First off, let’s establish that I am a dressmaker, not a quilter. I have zero quilting experience. However, I thought it might be fun to share how a non-quilter couturier tackled this non-traditional project step-by-step. I fear that I’m sharing waaaay too many photos, but this teeeeeny flat dress was soooo adorable that I couldn’t help myself!
What!? Who? When? Why?
The quilt was a surprise for Judy Adamson in celebration her retirement as the director of the University of North Carolina’s Costume Production MFA program, a 3-year full-time very-intense program where I learned all about the production side of professional costuming. Most schools will offer Masters Degrees in Costume Design, but very few are focused on the people and the skills needed to turn a designer’s sketch into reality- which is much more interesting to me than design (and way more interesting to me than fashion-based education). I learned custom pattern making, custom fitting, couture sewing, dyeing, millinery… all the good stuff! (And the graduates get hired! I landed a dreamy Broadway millinery job right out of school. Graduates work for professional theatres, film, opera… One of my classmates is Dolly Parton’s costumer…)
The program is very small. Each year, only two incoming students are accepted. (The program is also very difficult. Each year, one or both may drop out. Judy started the program in 1993. In 2001, I was the 8th graduate of the program!) The very small class size led to a very special education and very special relationships with our teachers. Most classes were taught by Judy herself. She helped turn us all into who we are today!
In April, former graduates gathered to celebrate her years being our mentor. As a surprise gift, many of us contributed a 12″x12″ custom square for a “Couture Quilt”.
My Inspiration
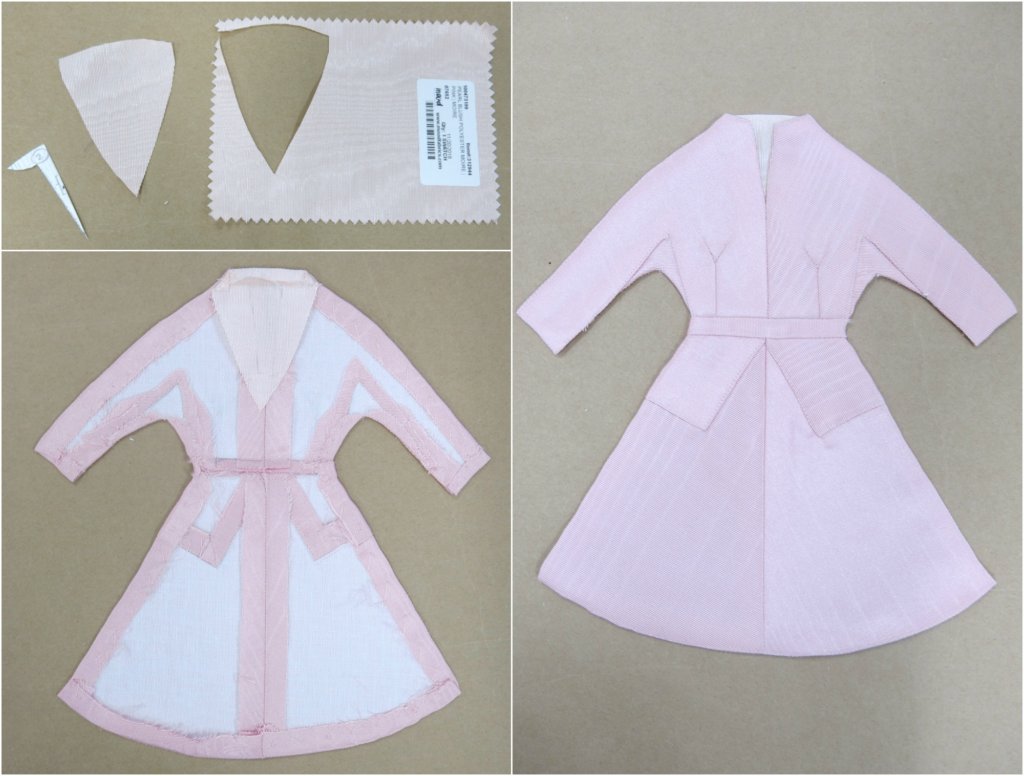
My square was inspired by a memorable class project. One of my favorite classes was 20th Century Period Patternmaking. In this course, Judy would share a different inspiration image with each student each week and our assignment was to recreate it from start to finish. One of my favorite projects was when I was handed Christian Dior’s LaCigale. This dress and class project lit a lifelong love for diamond gussets and Y-darts.
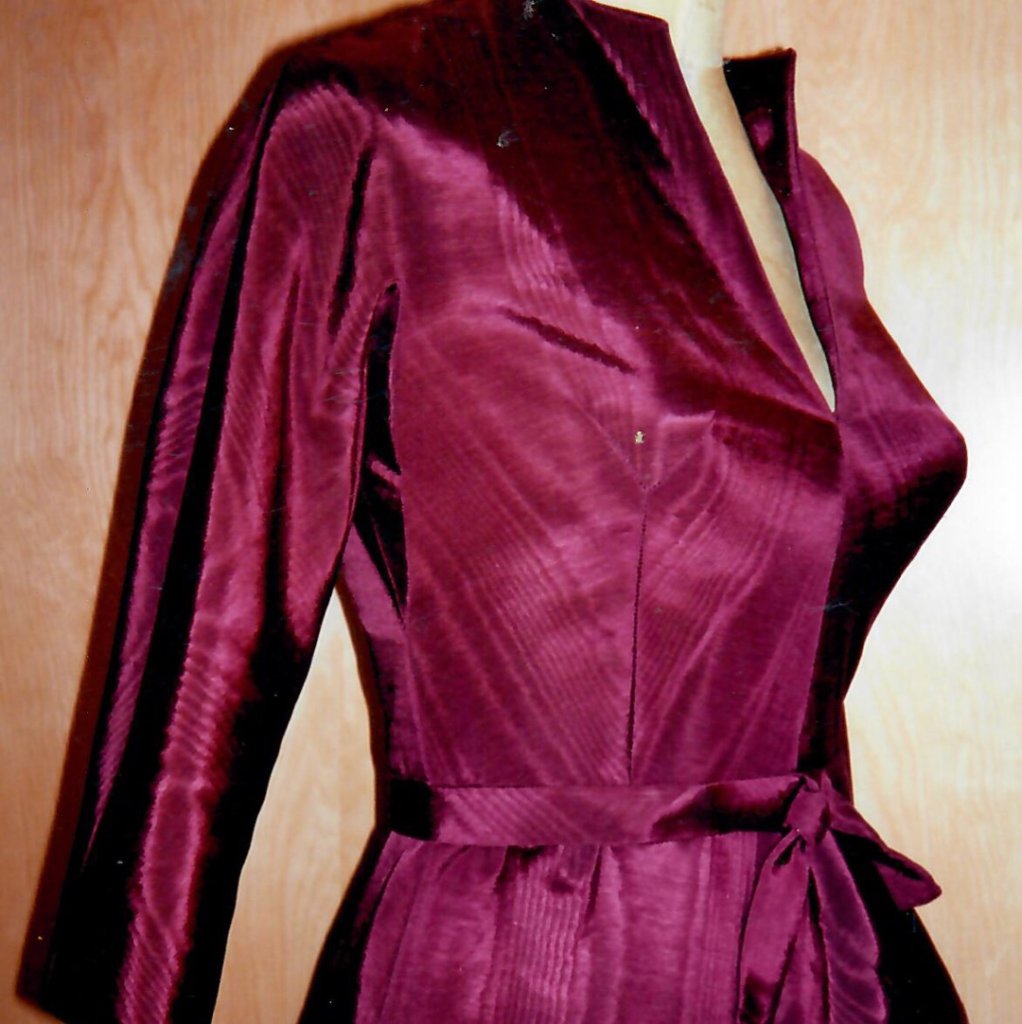
Here’s the original (Dior ~1952) next to my class version (Camper ~2000).
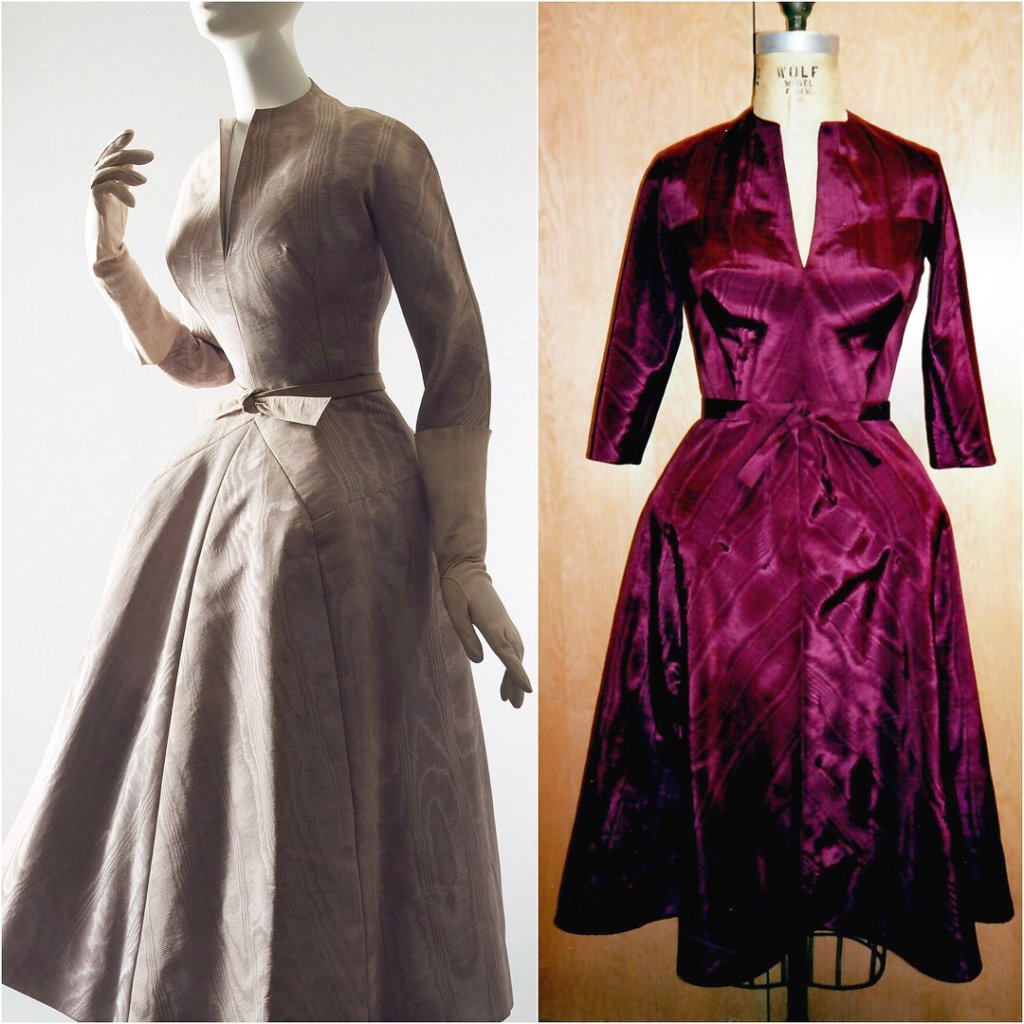
I hope you can see past the bad scan of a worn-out pre-digital photograph, to see the Y-darts and the cut-in-one sleeves with diamond gussets! This was a very fun puzzle to figure out and I learned a lot through this assignment.
The elements of LaCigale seemed like they’d translate into interesting shapes when flat, so I bought some moiré fabric and jumped into the challenge.
My Quilt Square Design
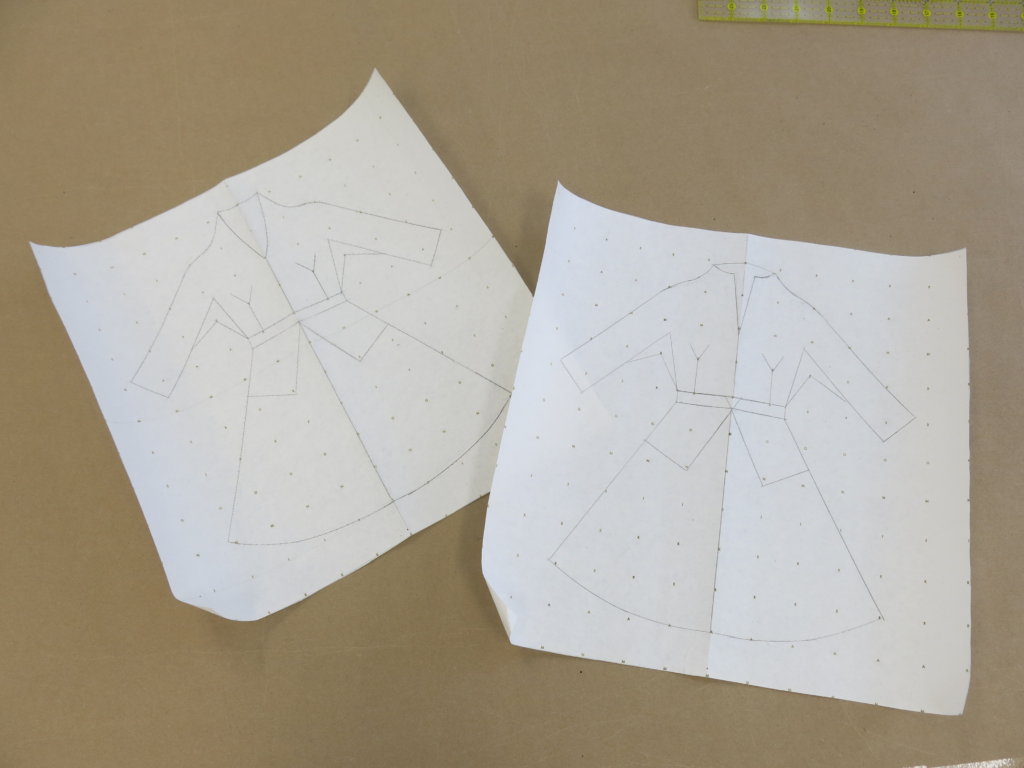
I sketched my original design idea on a post-it note that was stuck to my laptop for weeks before I started plotting it on some gridded dotty paper. I cut the square to size before using my rulers and curve tools to create half of the design ‘on the fold’.
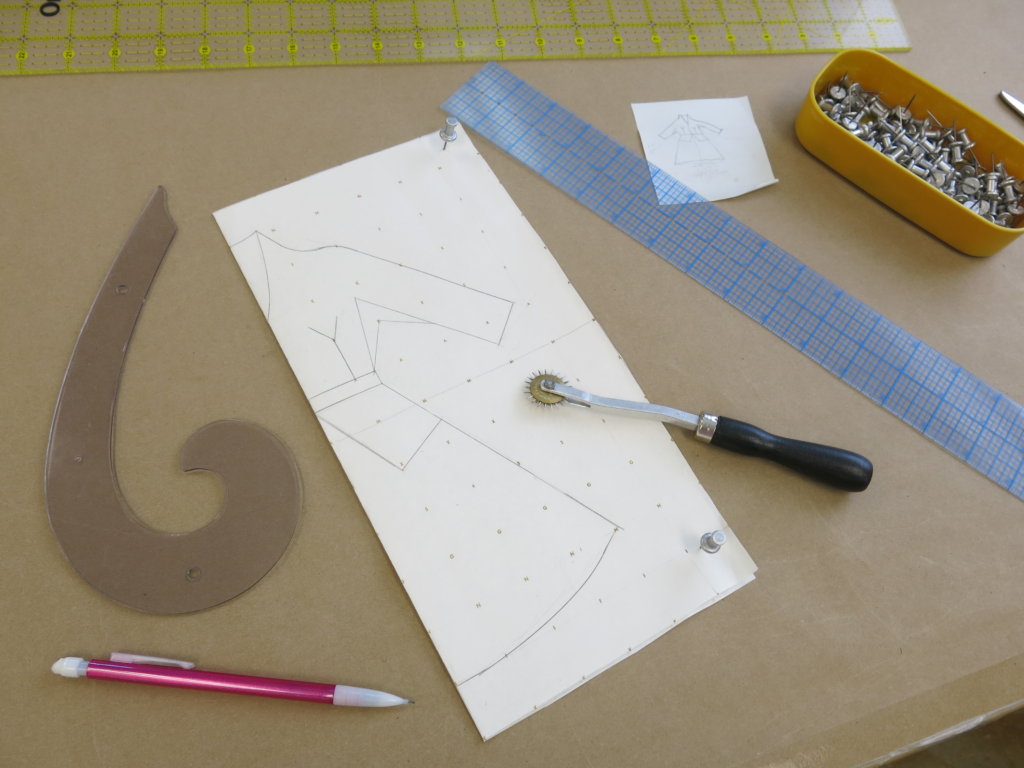
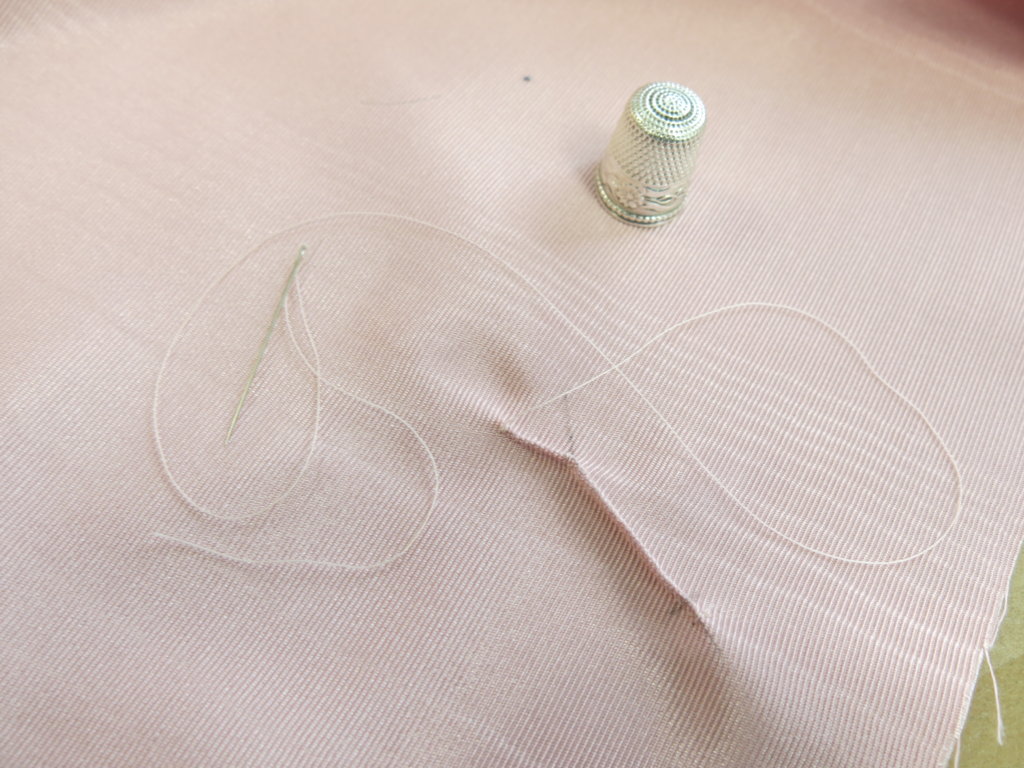
I used my spiky wheel to trace the lines…
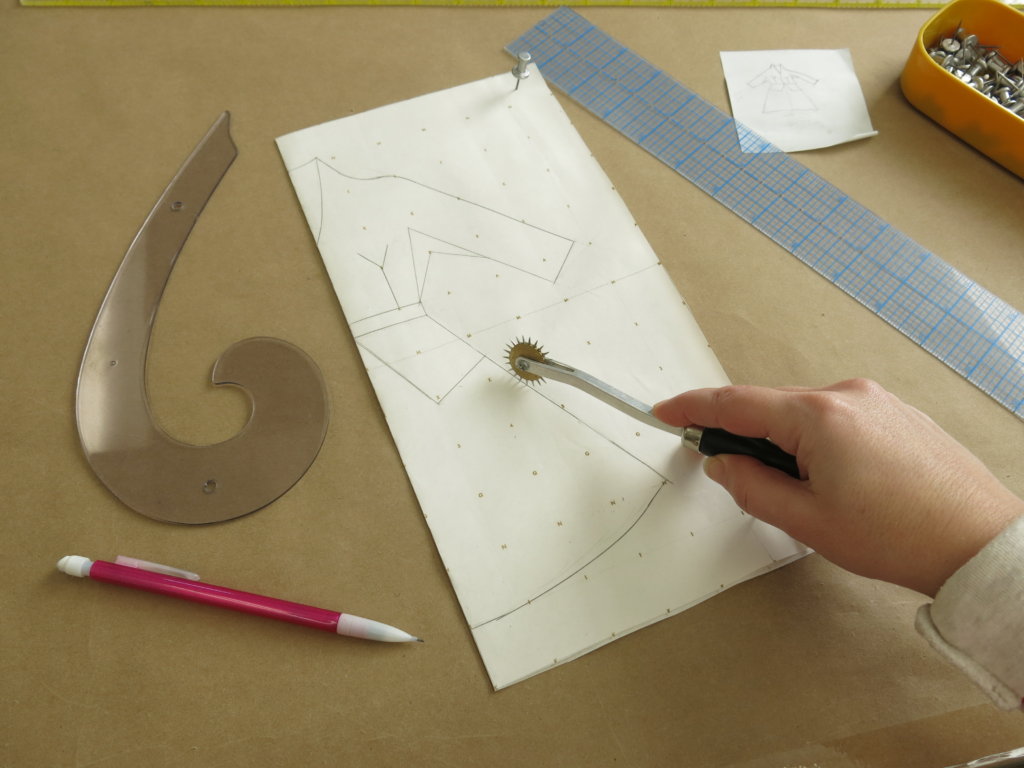
…transferring a dotted outline on the opposite side of the square.

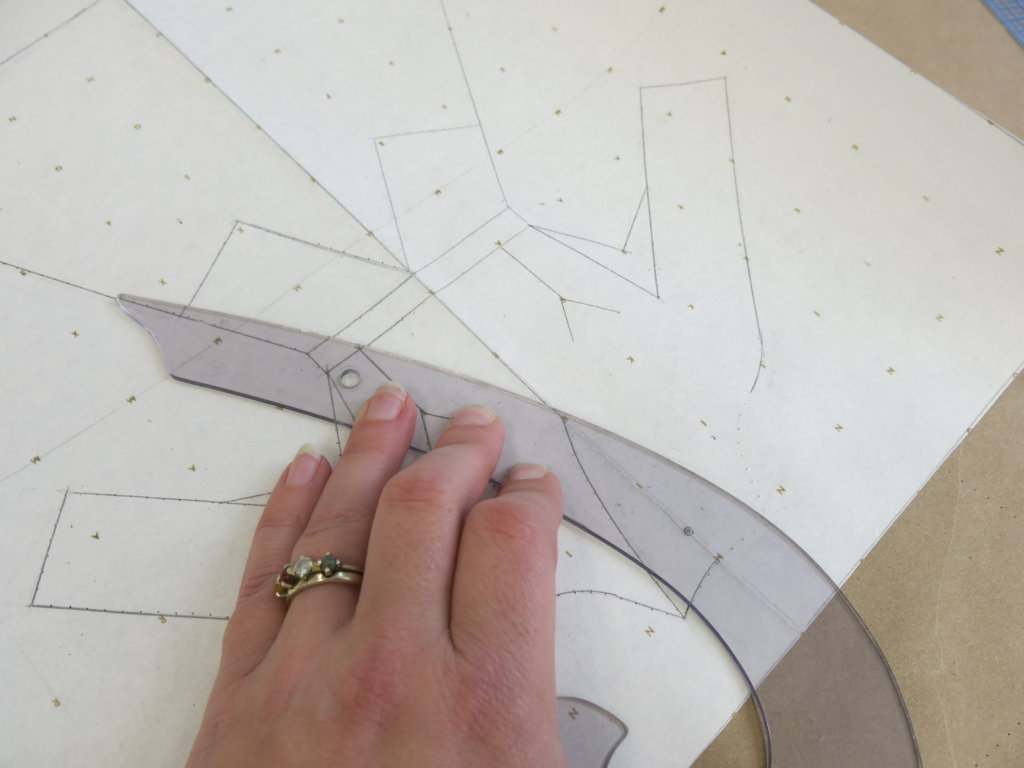
Then I used my rulers and French Curve to connect the dots.
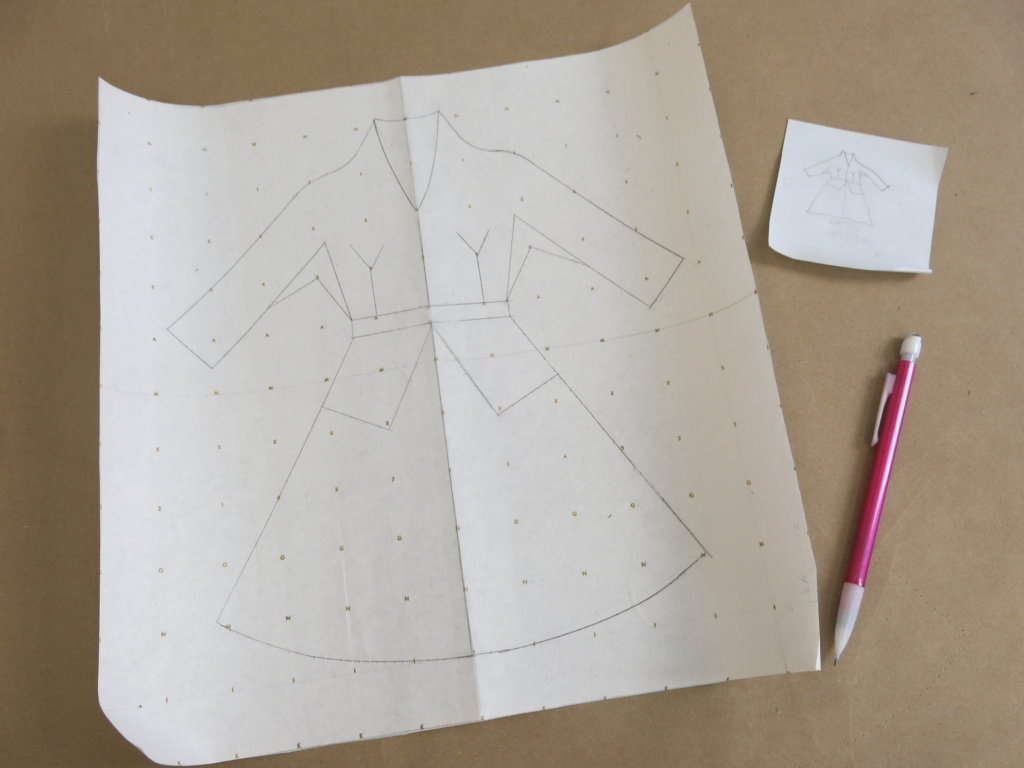
Ta-da! Now able to observe my full symmetrical design, something about it was bugging me. I wondered if I could change the neckline to look a little more like my Dior-inspiration…
Instead of erasing, I decided to keep the original so that I could easily compare the two. So I cut a new dotty paper square…
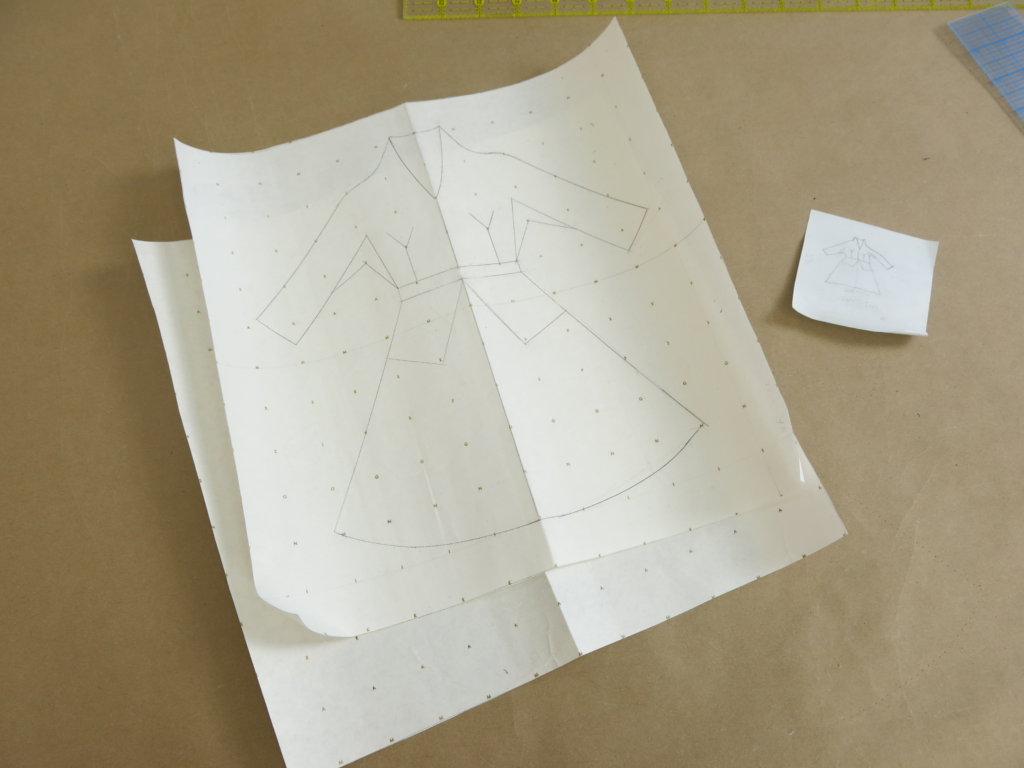
…doubled them up and spiky wheeled Design #1…

… to trace and create Design #2…
…which was the winner!

Squaring Away!
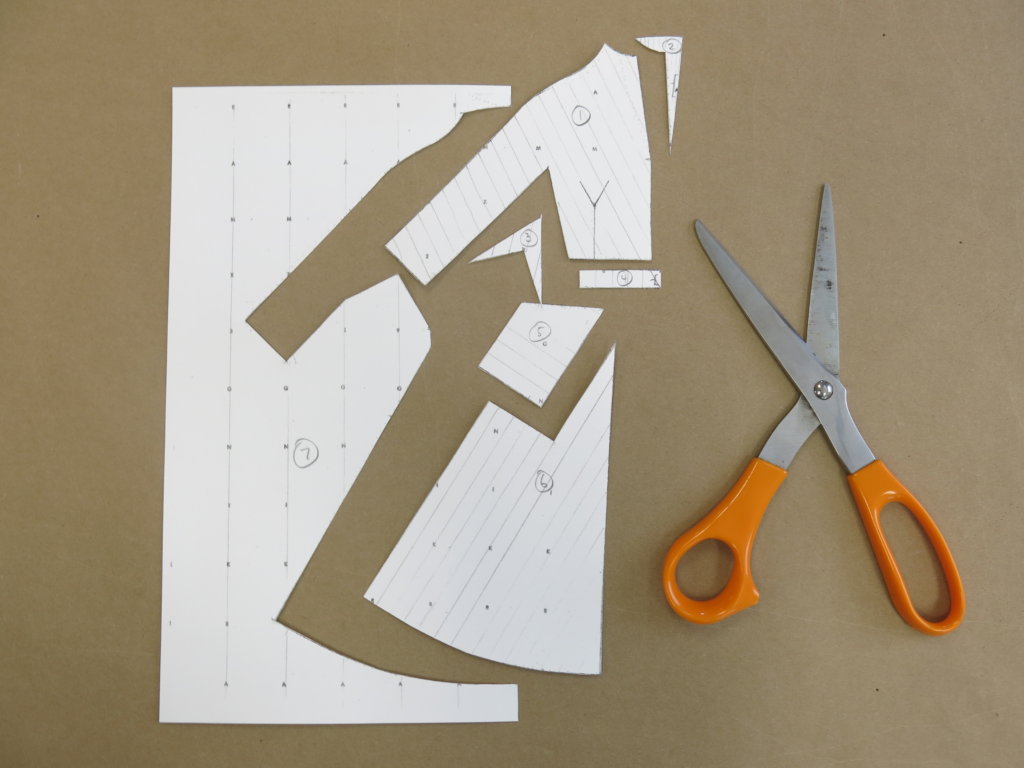
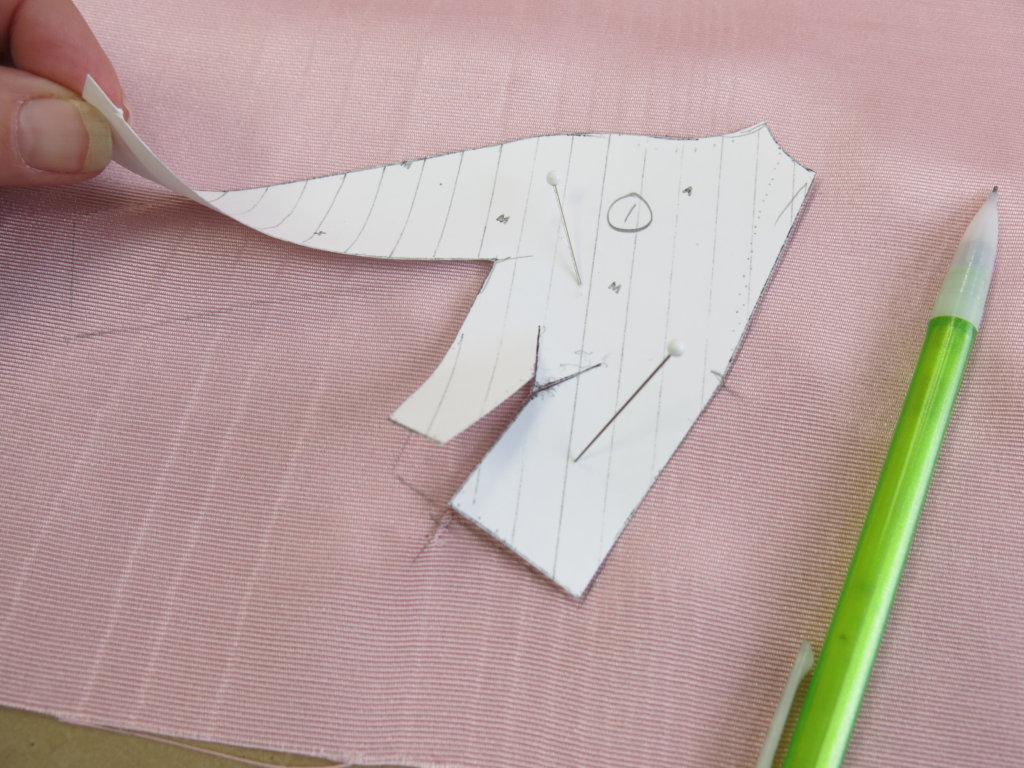
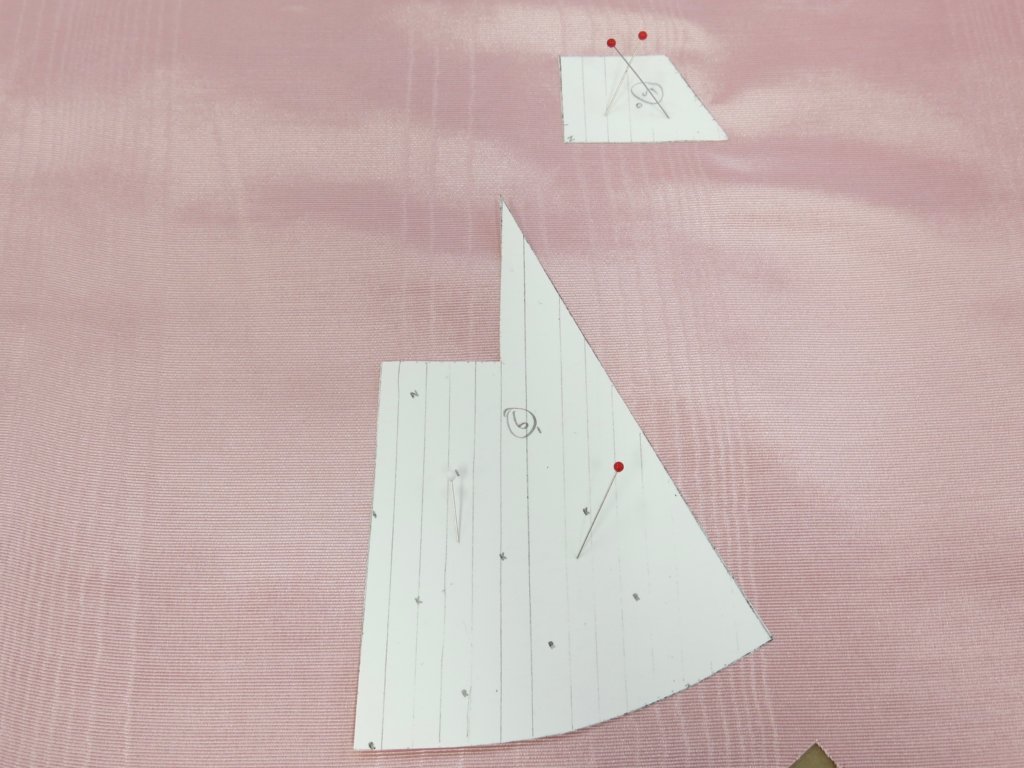
I began creating my square by creating a couple of copies of my template.

Since moiré fabric features interesting ‘ribs’, I played with the design to find interesting and contrasting ways to play with the grain for a little extra pop. My final grain decisions were marked on the paper template along with labels numbering each piece. I kept one as a Master for reference…
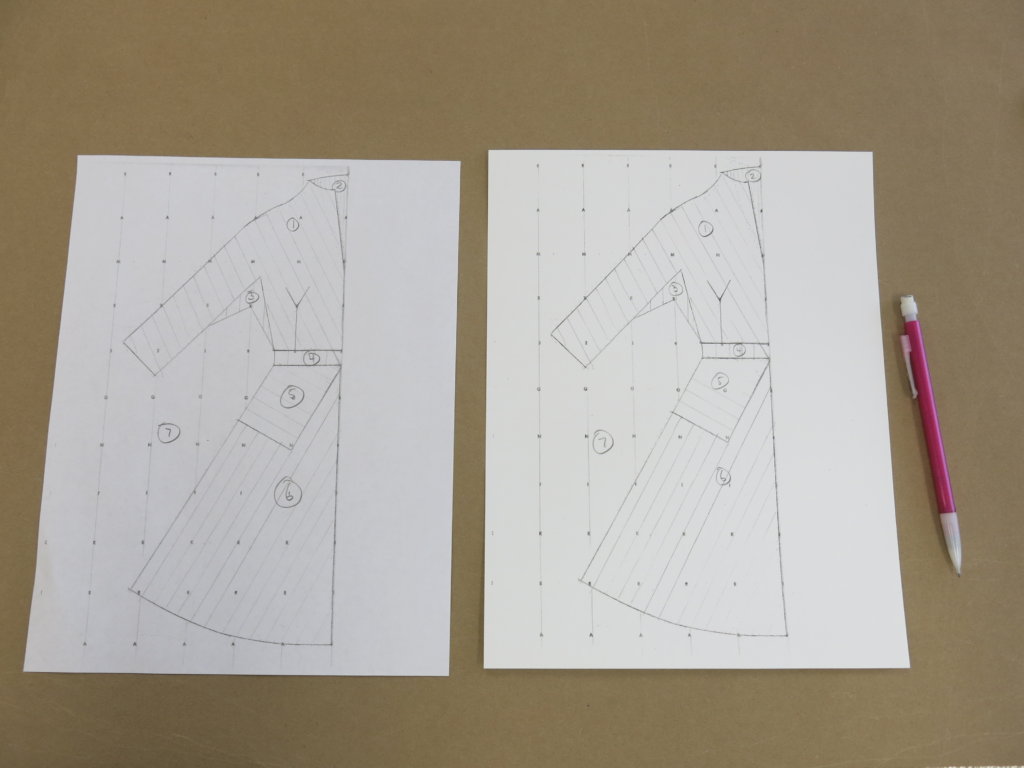
…then cut one apart for my pattern pieces.
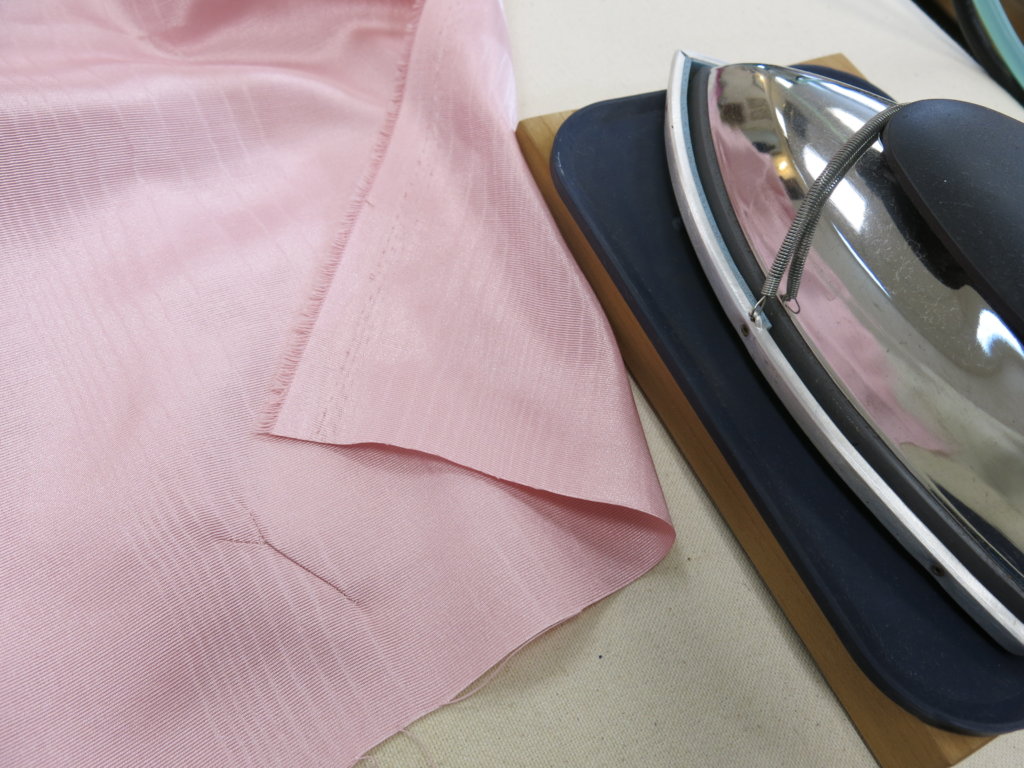
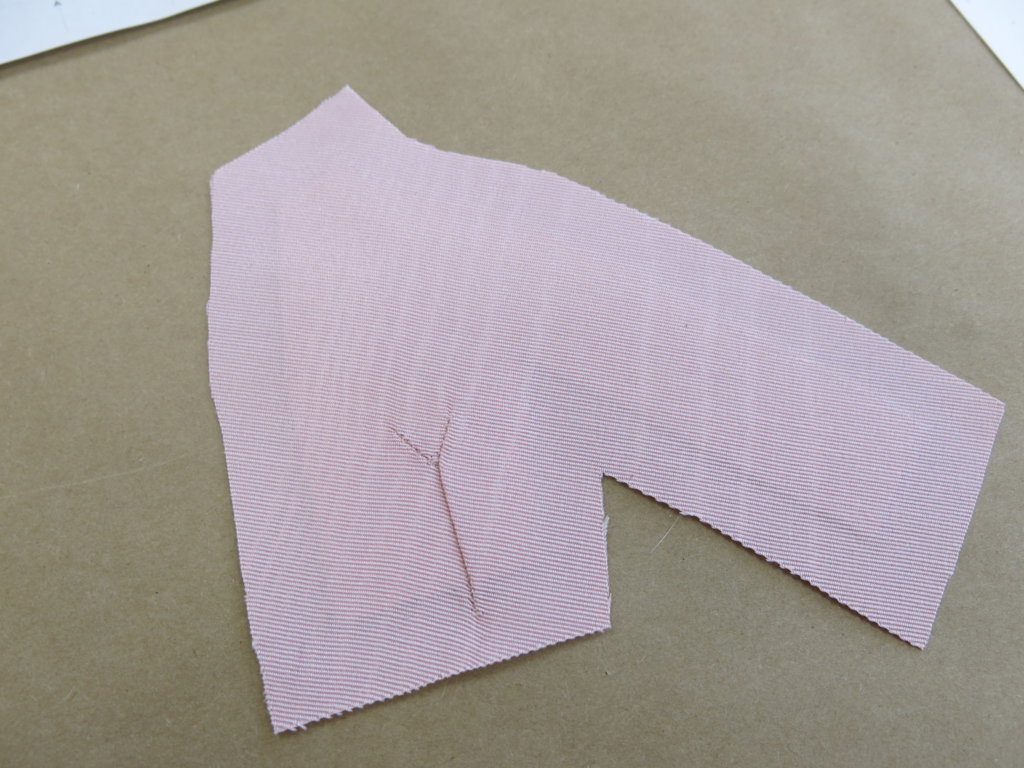
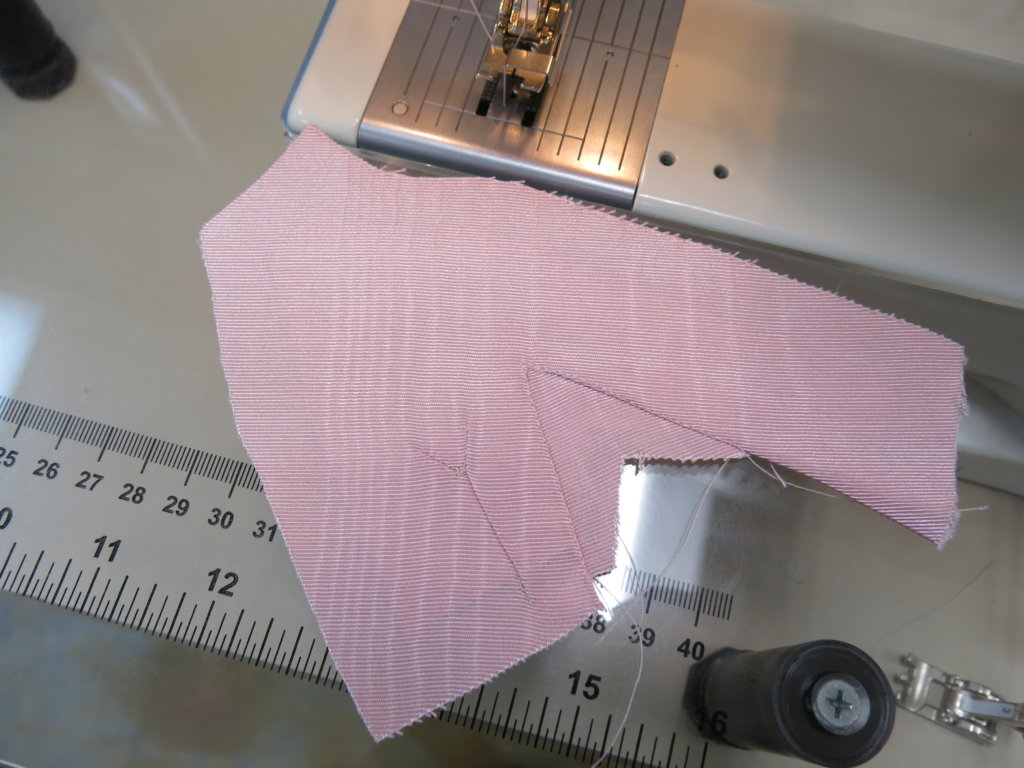
Since the purpose of a dart is to create shaping, I’d need to get creative giving the fabric the appearance of a Y-dart while remaining flat. I cut the Y of my pattern lines and traced it with pencil onto the back of my fabric (which was lined up with my preferred grain)…
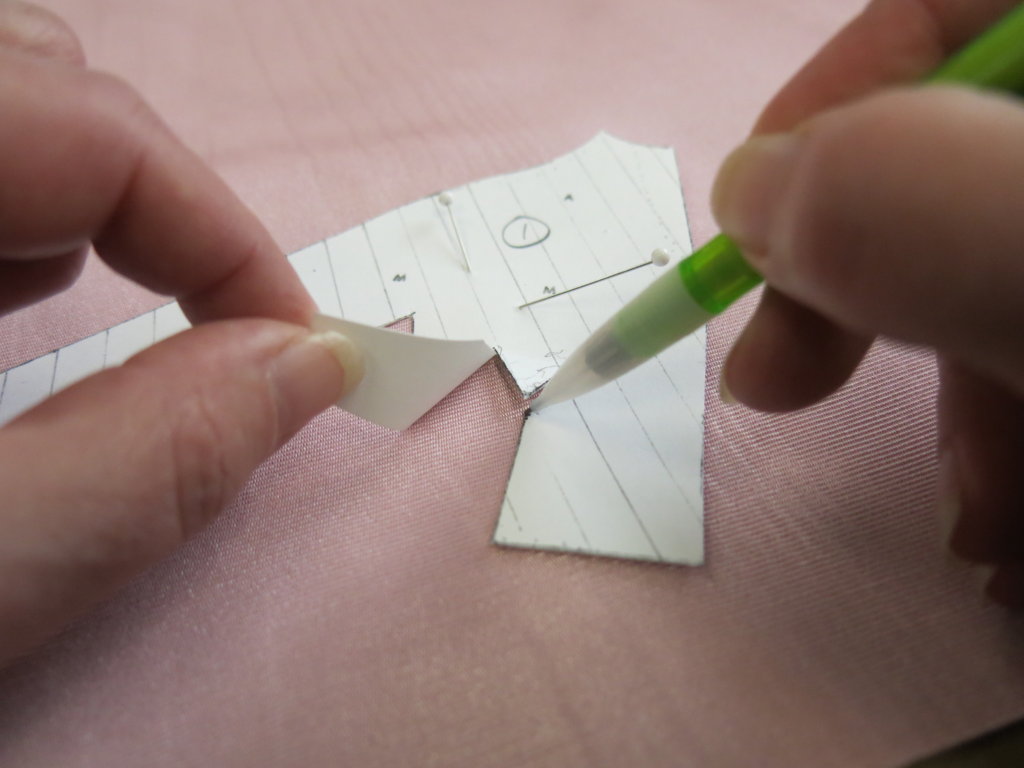
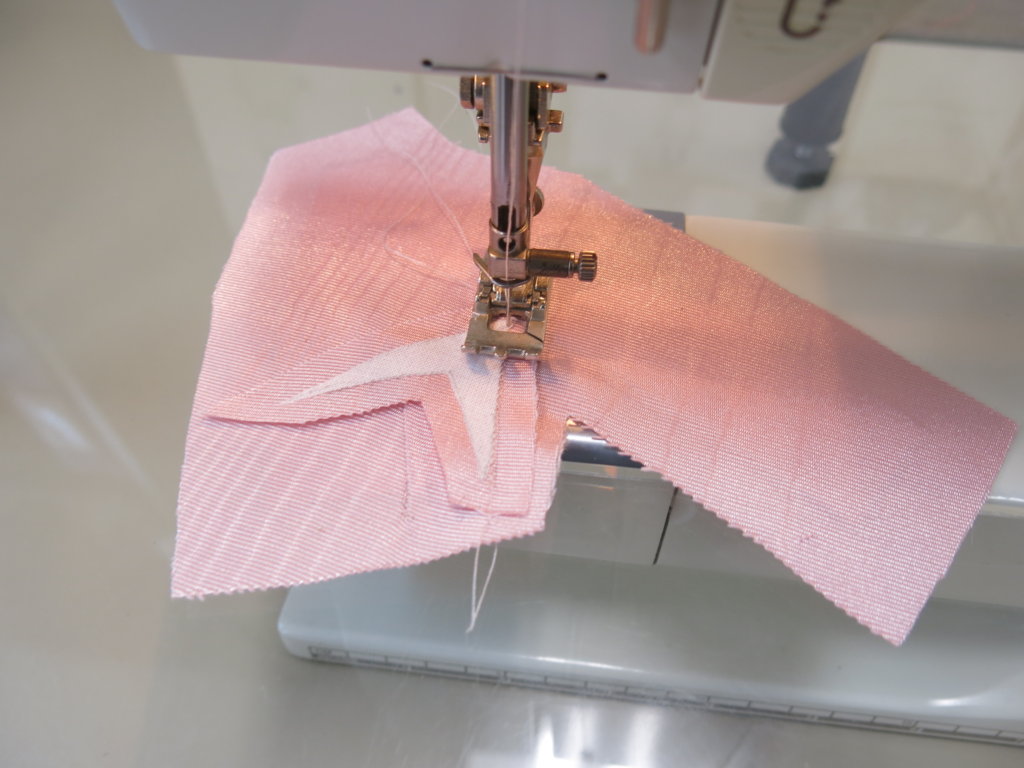
Then I used these marks to carefully hand stitch the shape pinching out only the teeniest amount of fabric possible.
When pressed, it was flat enough for me!
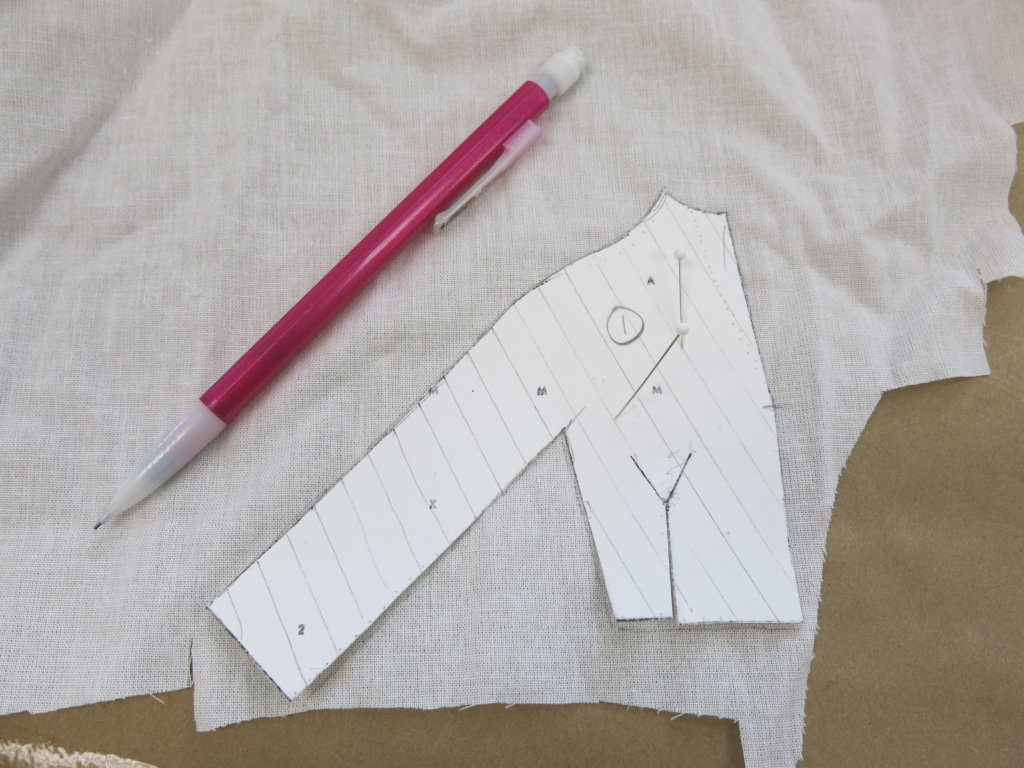
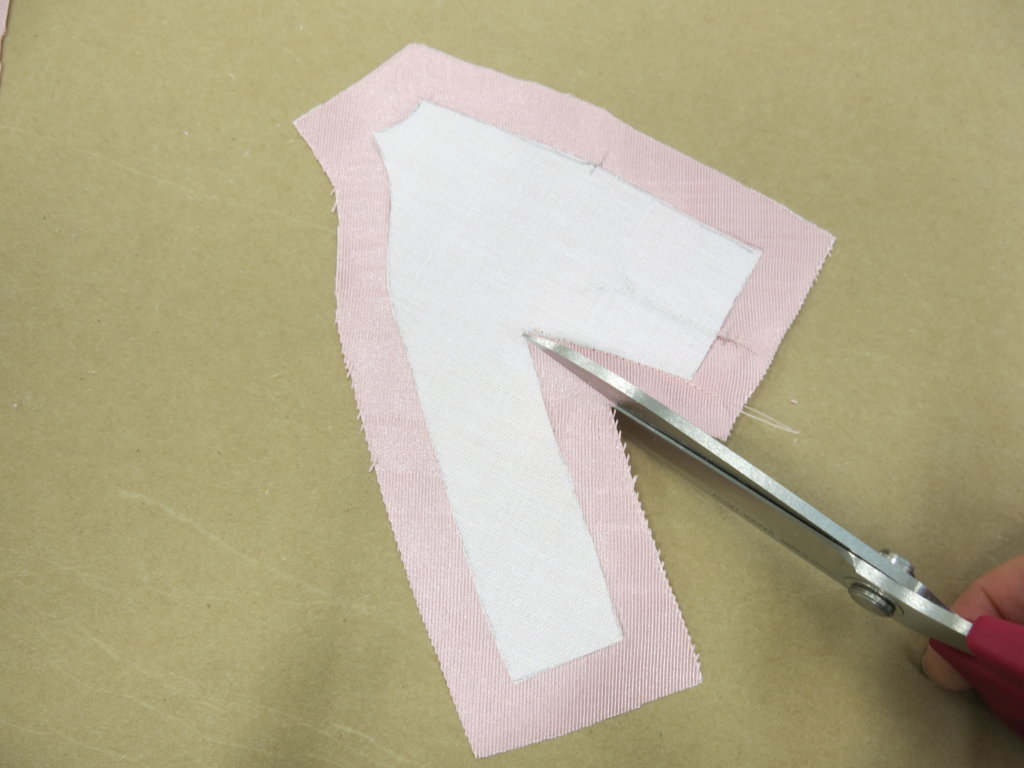
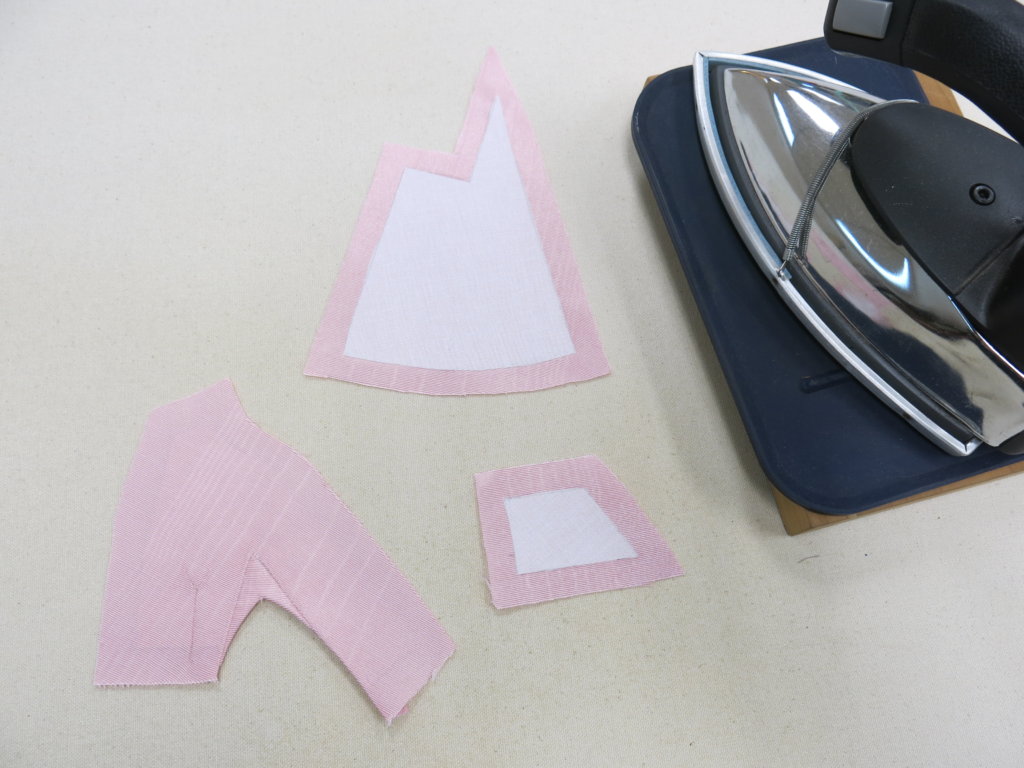
Then I lined up my template again and marked the rest of my shape on the back of the fabric…
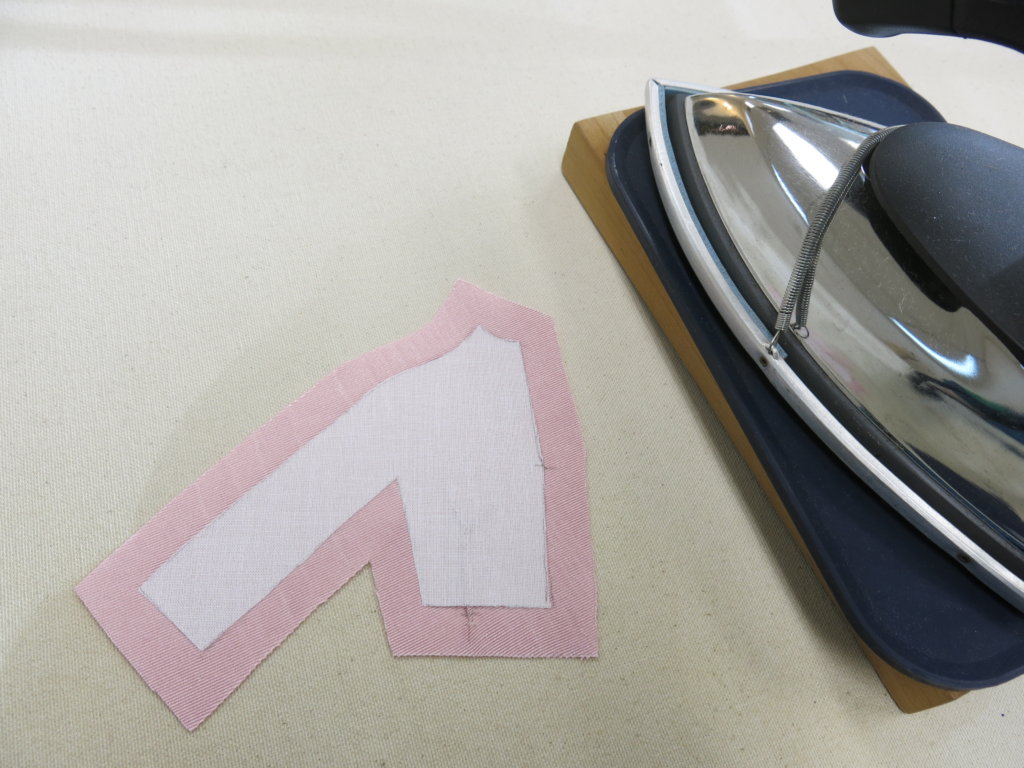
…and reused it to cut some woven fusible interfacing. To stabilize the moiré, I marked and cut the interfacing “on-grain” instead of repeating the decorative grain…
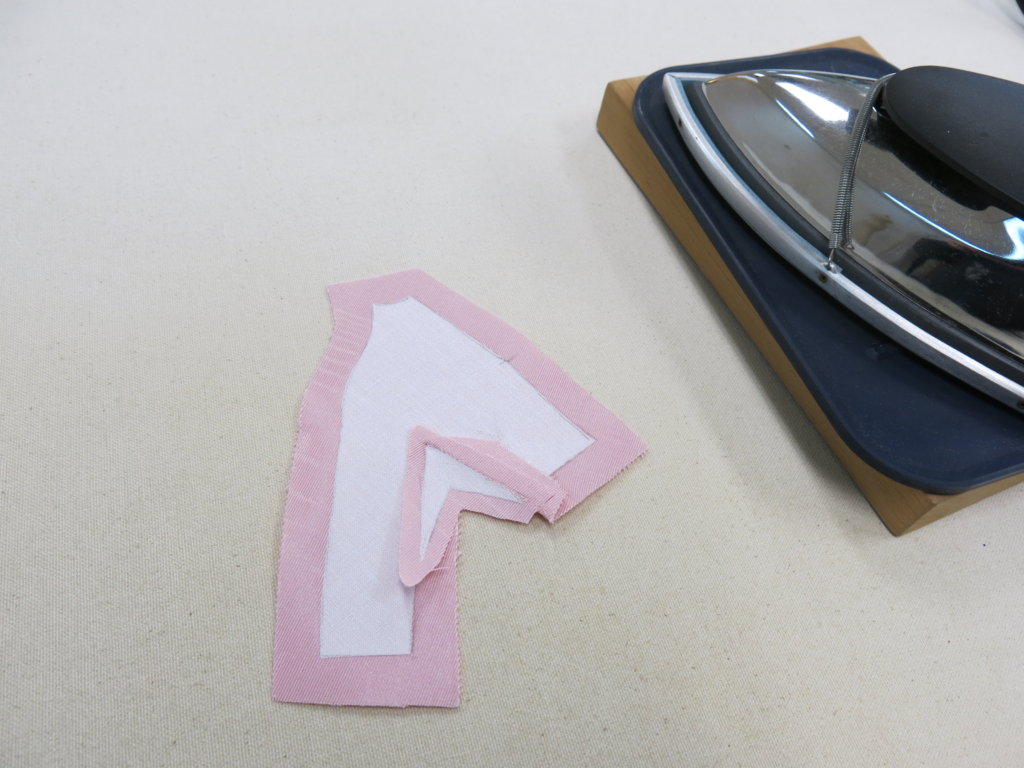
…which, once fused with the iron, offered both the stability and the shapes to reach my goals.
Y-dart success!
Next up: those cute gussets!
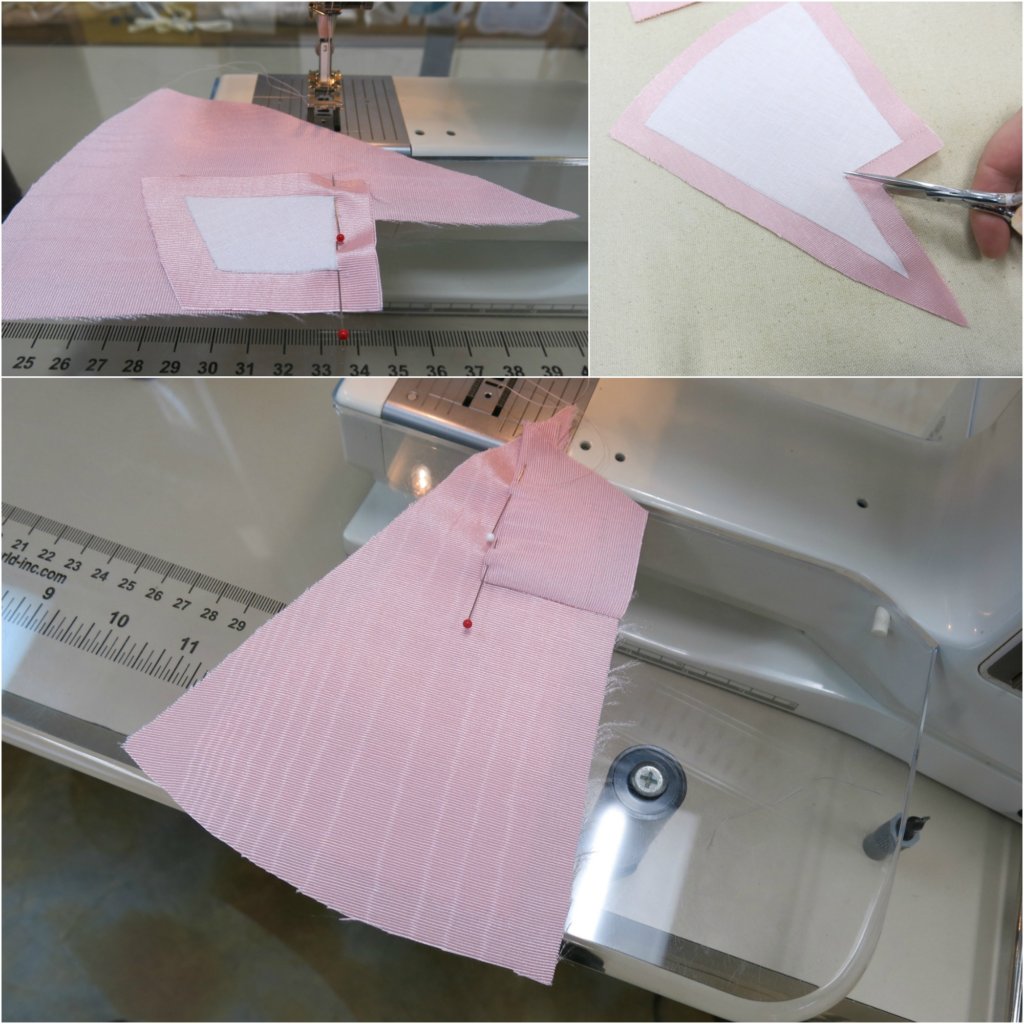
I marked and fused the gusset pieces before machine stitching one side in place…
…clipping to my underarm point (which is the scary part of any cut-in-one gusset sleeve)…
…pulled the piece through the clip to the back, pressed it in place,…
…and then top stitched it in place right along the edge.
I followed a similar process for the skirt by choosing and marking my preferred grain and moiré marks…
…and adding a bit of stabilizer…
…before stitching, clipping, and stitching the cool Dior hip panel in place.
Then I created the opposite side in the same way (with the templates flipped)…
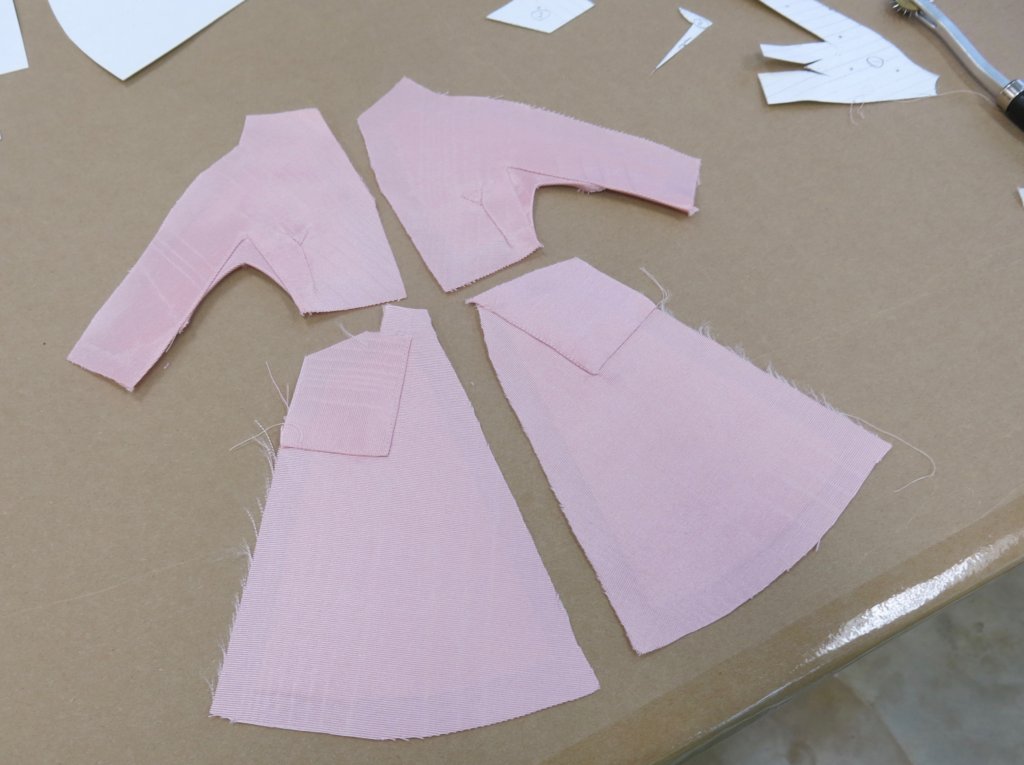
…and stitched the two sides together!

The adorable little belt was next…
…which connected all my little dress pieces into one! Yay!
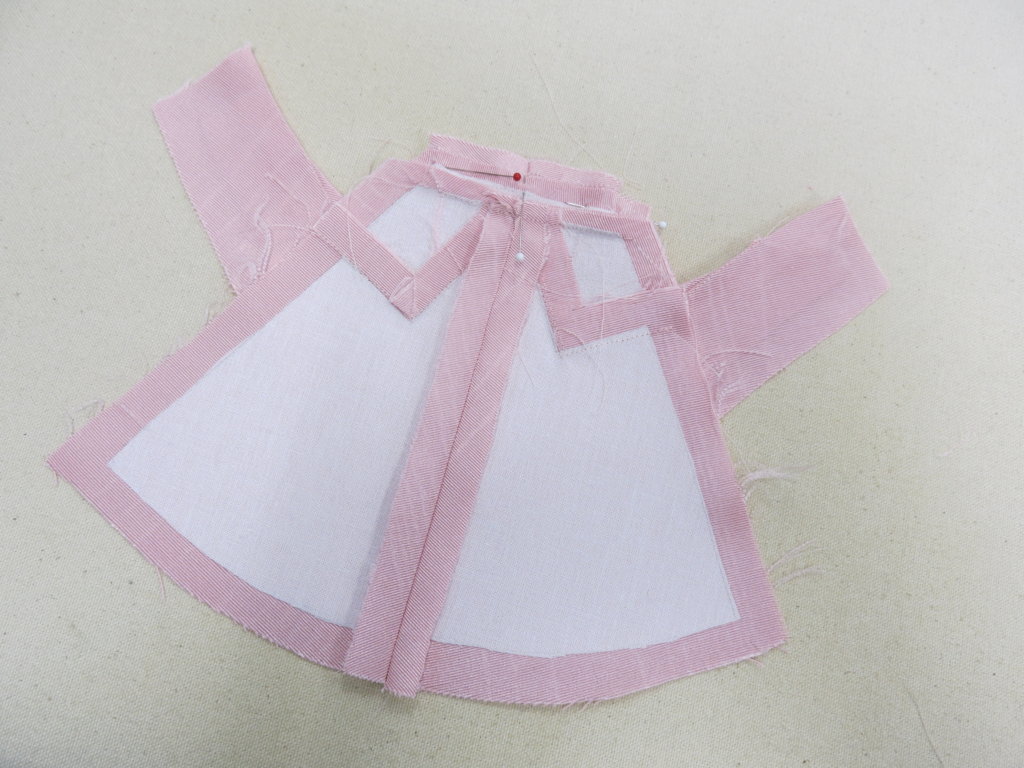
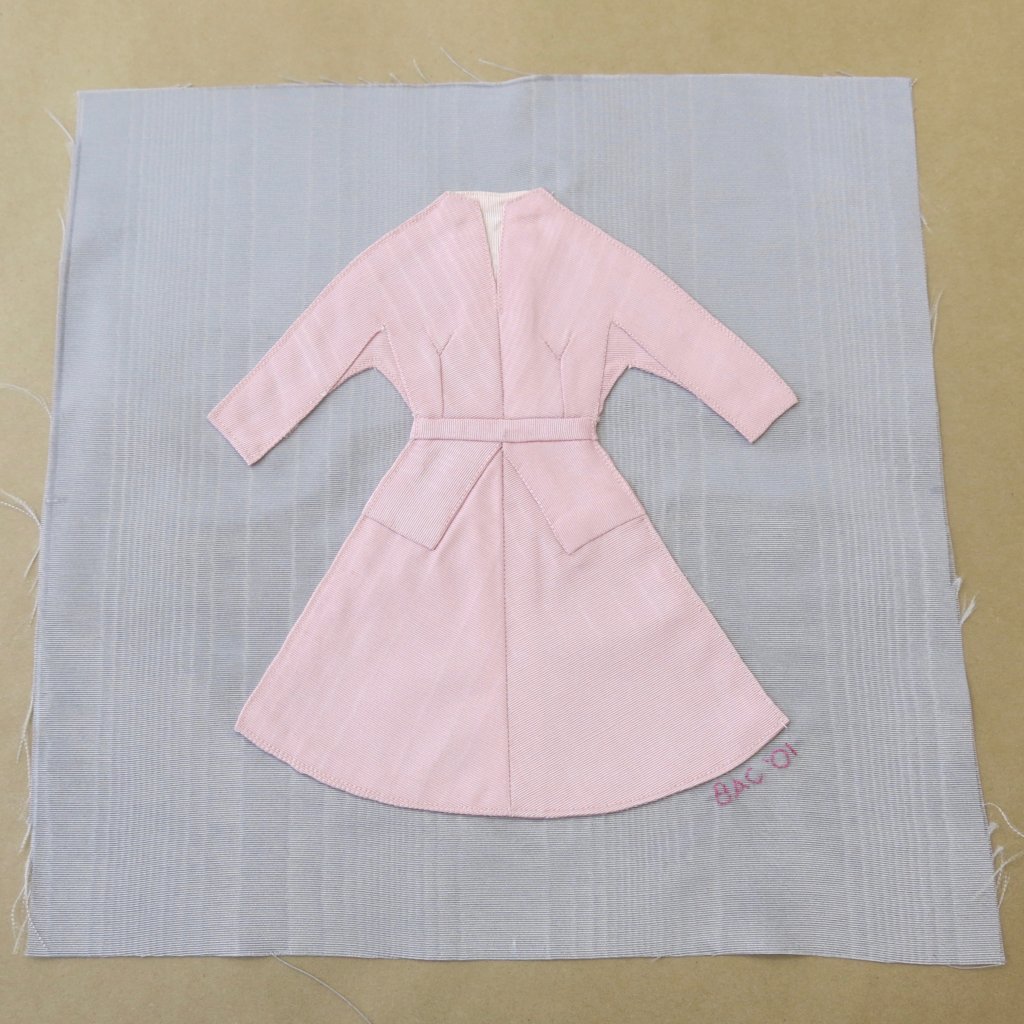
Sew cute!
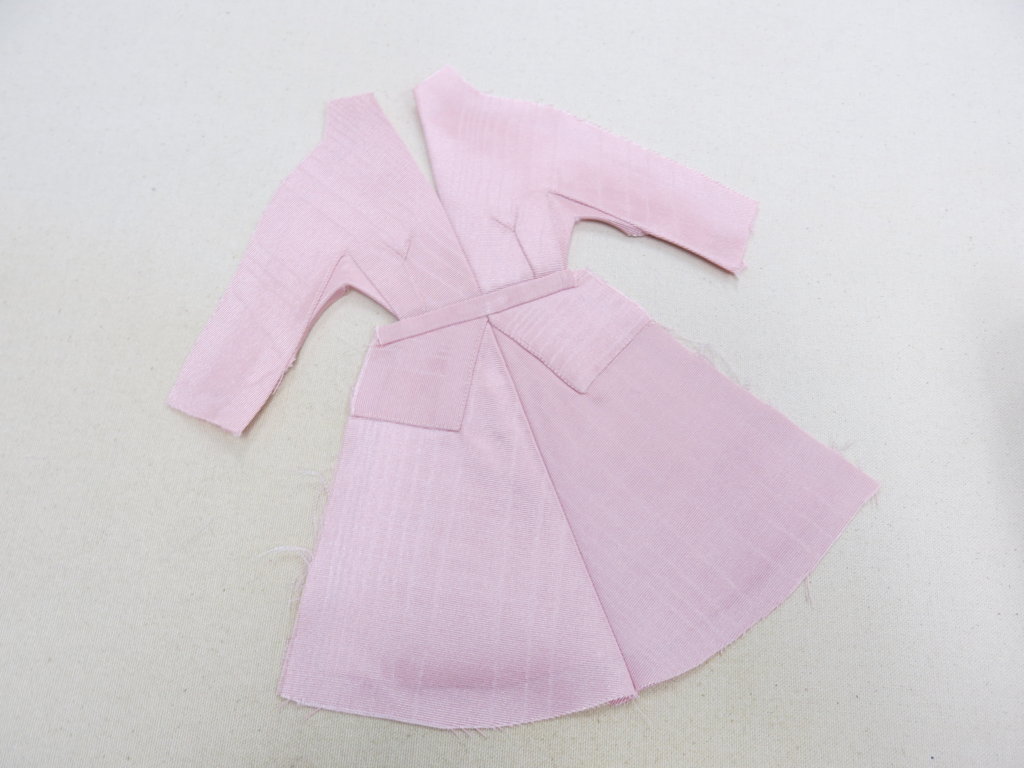
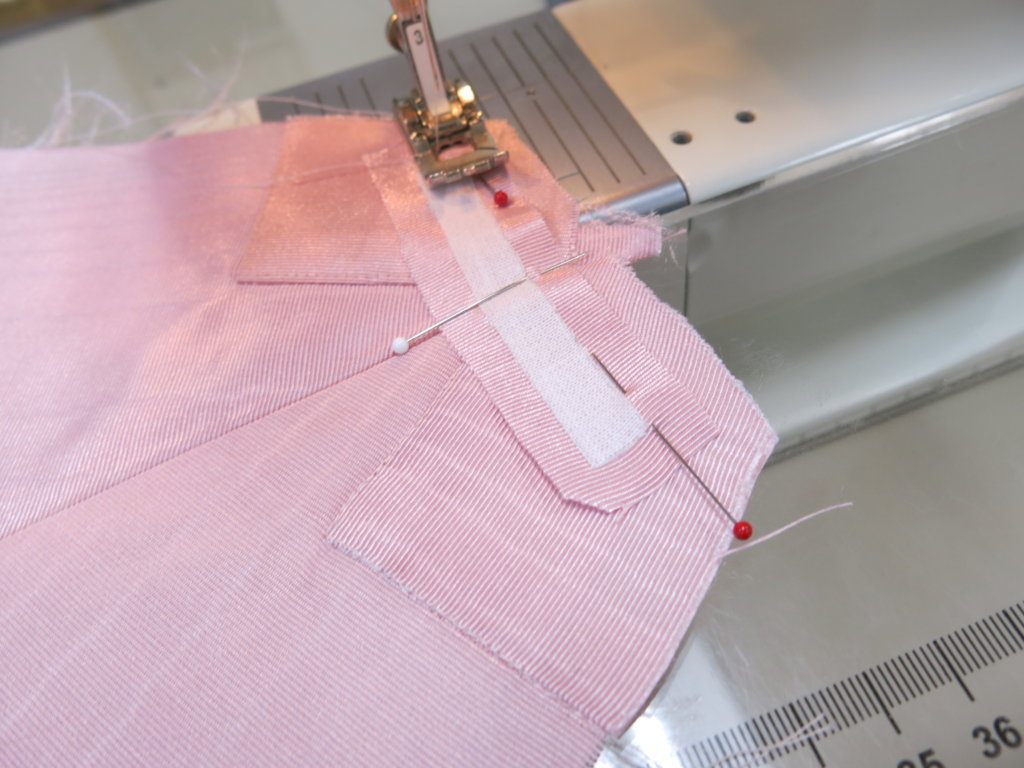
Next I machine stitched around all of the dress’s edges…
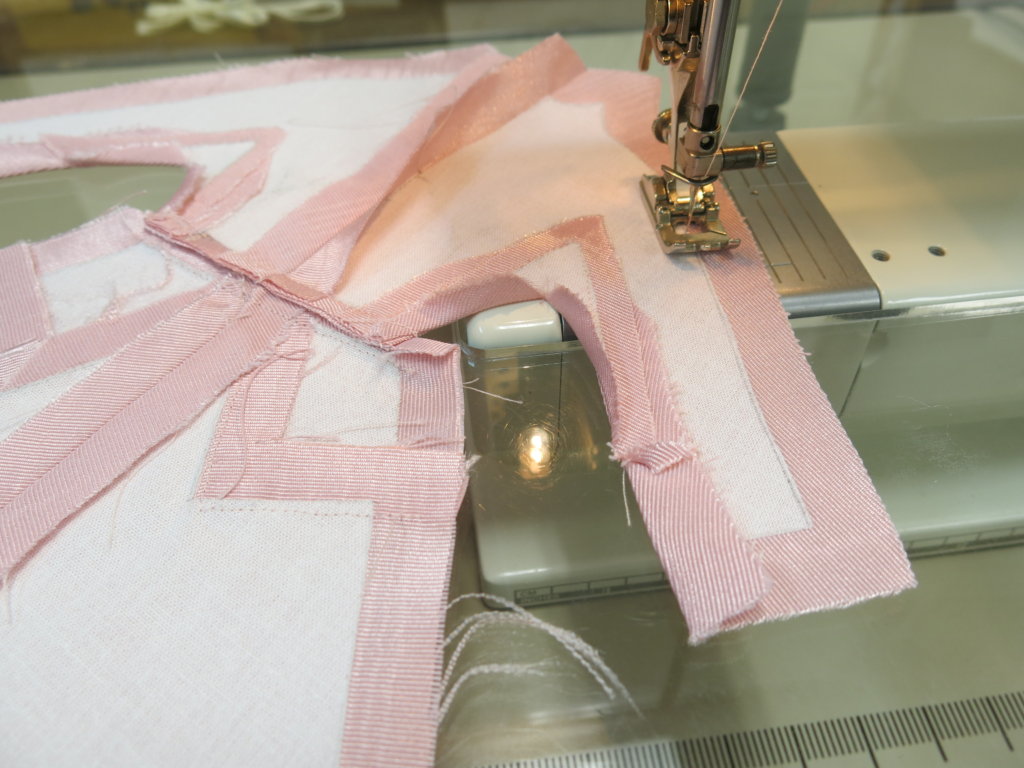
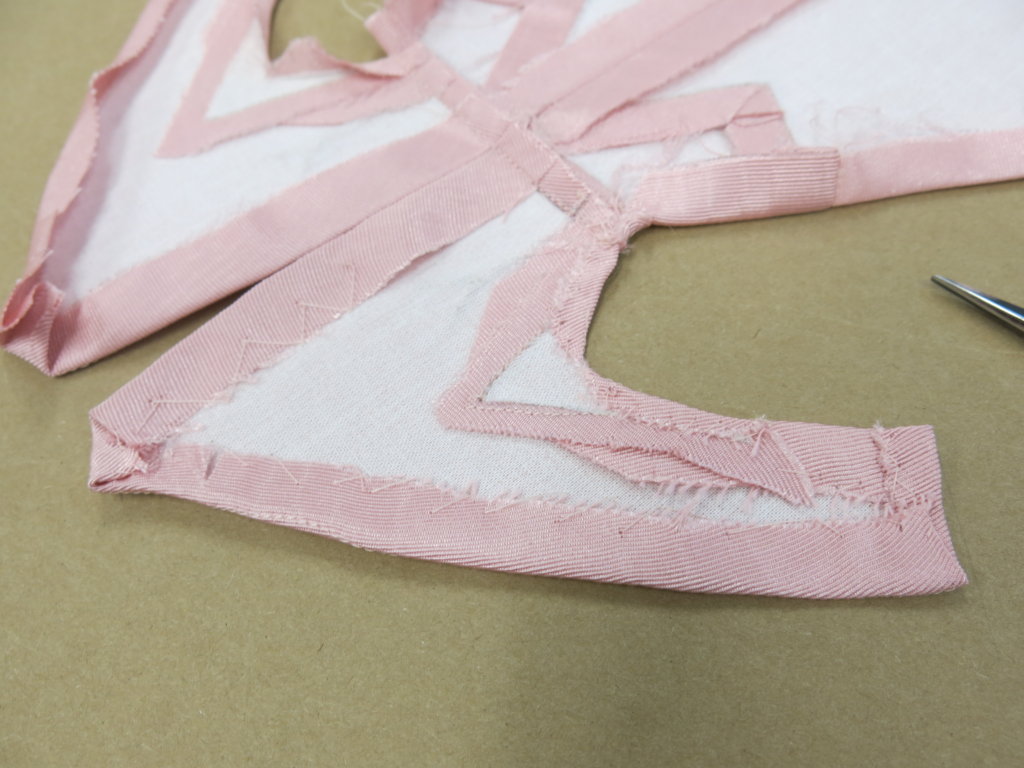
… so that I could use the stitching line as my guide to easily and cleanly turn under and press all the allowances out of the way.
To control the allowances, I catch-stitched them in place by hand (catching my stitches through the interfacing layer only).
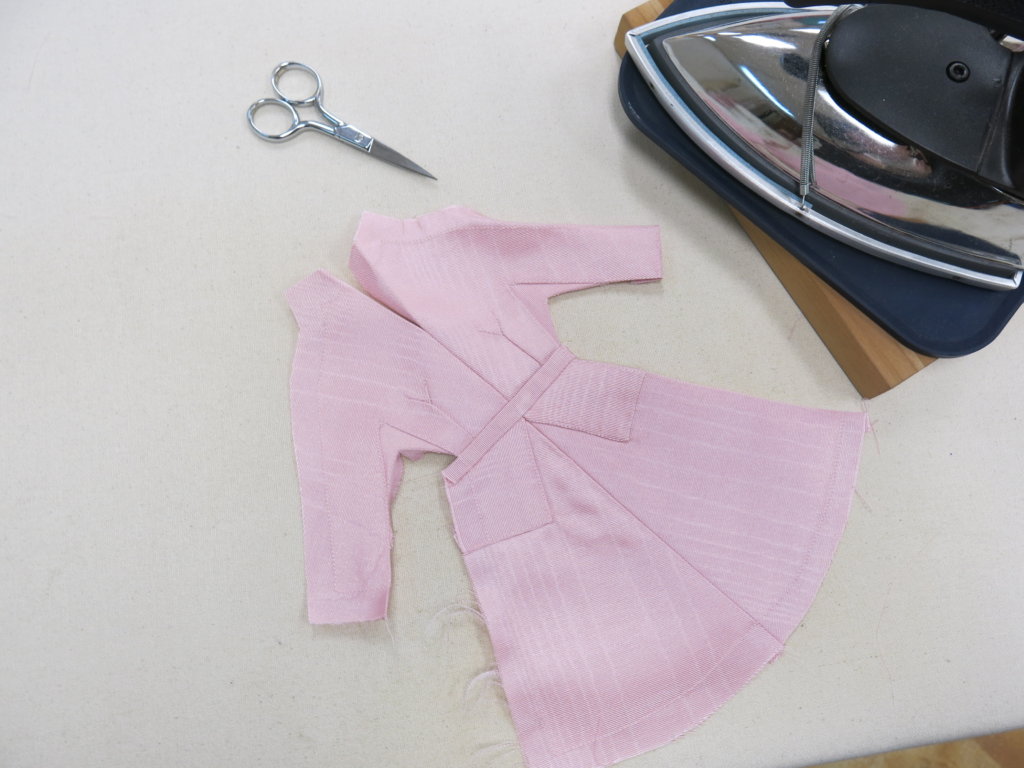
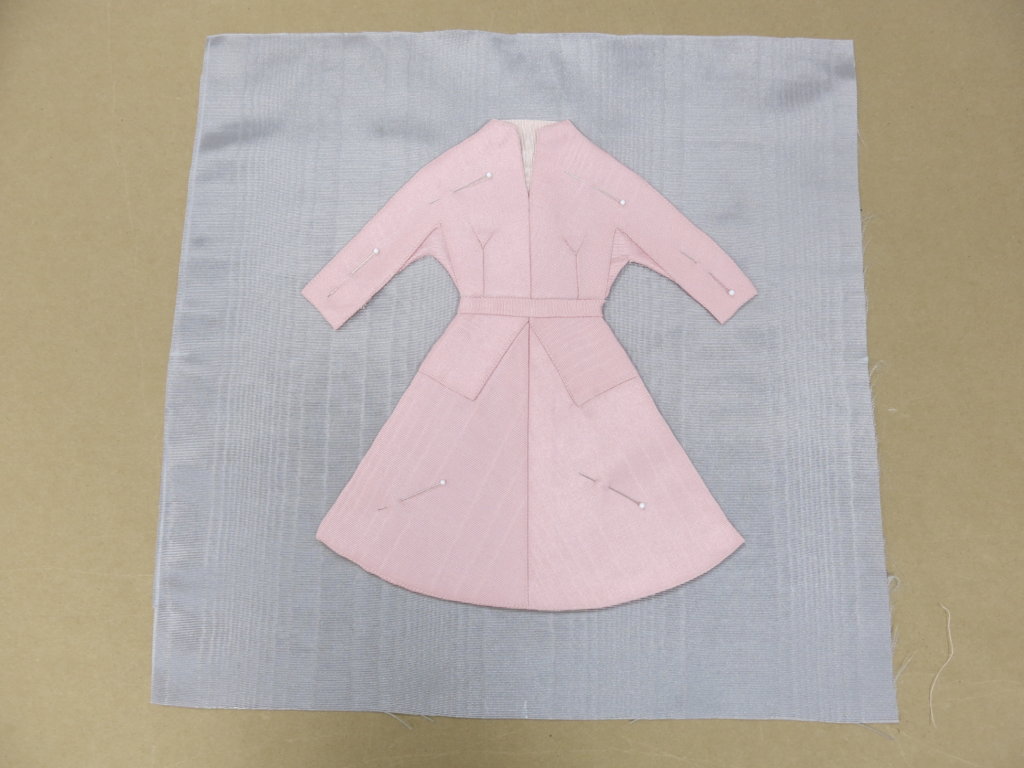
For the inside of the neckline, I wanted a little contrast in color. And since the dress is so little, I only needed a little fabric. I used the swatch of a color I didn’t order!
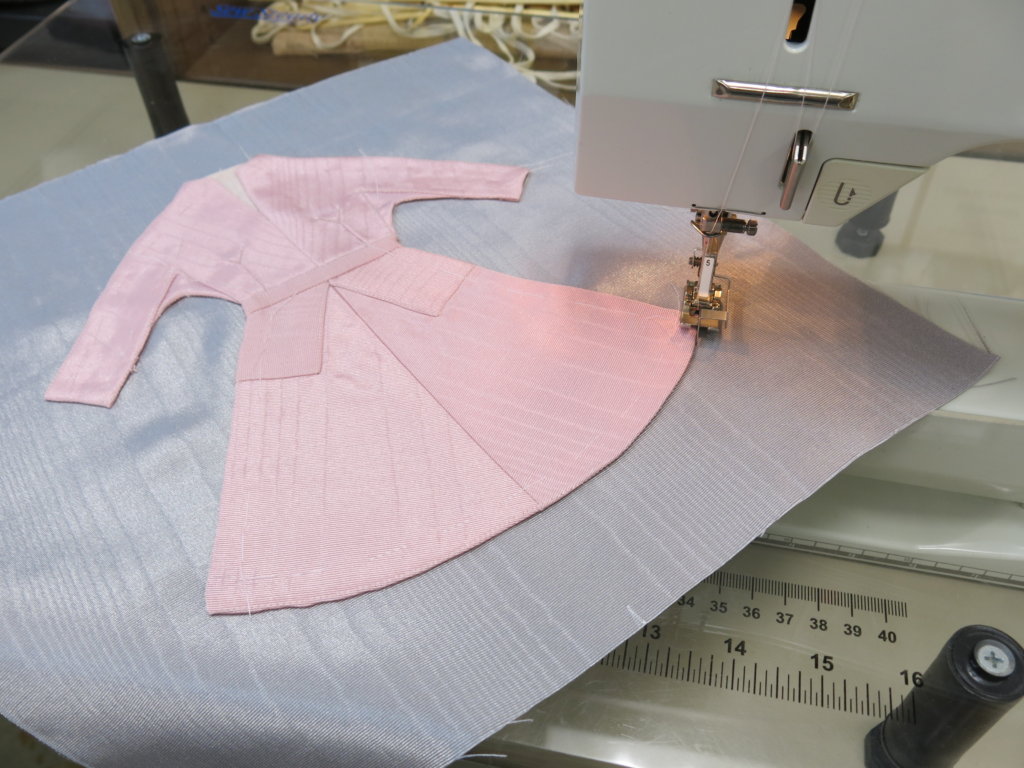
With the dress complete, I pin-basted it onto the background square…
…before hand basting it and edge stitching it in place by machine.
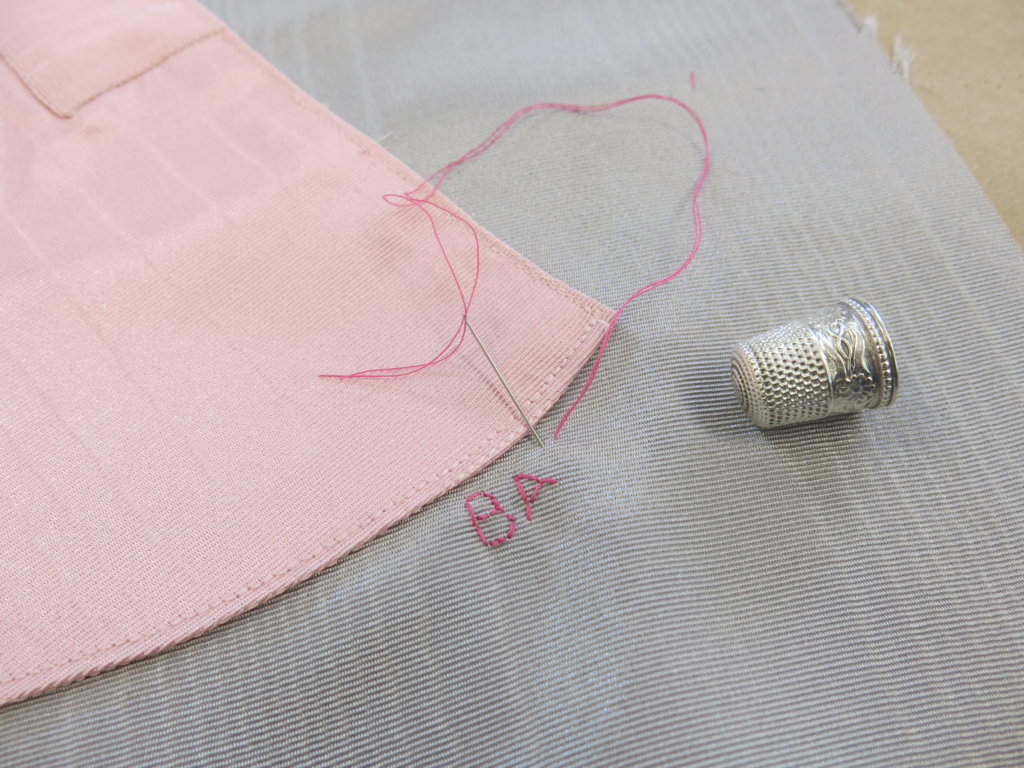
For the finishing touch, I embroidered my initials with the year of my graduating class.
And declared my Dior-inspired couture quilt square complete!
I shipped my square off to fellow graduate Randy Handley who was gathering and sending everyone’s squares out to be machine-quilted together!
Be There or Be Square!
Ta da! Here I am with Randy presenting the completed quilt at the celebration. All with masterful form, you’ll see that everyone who participated interpreted their square a little differently (many with inside jokes).
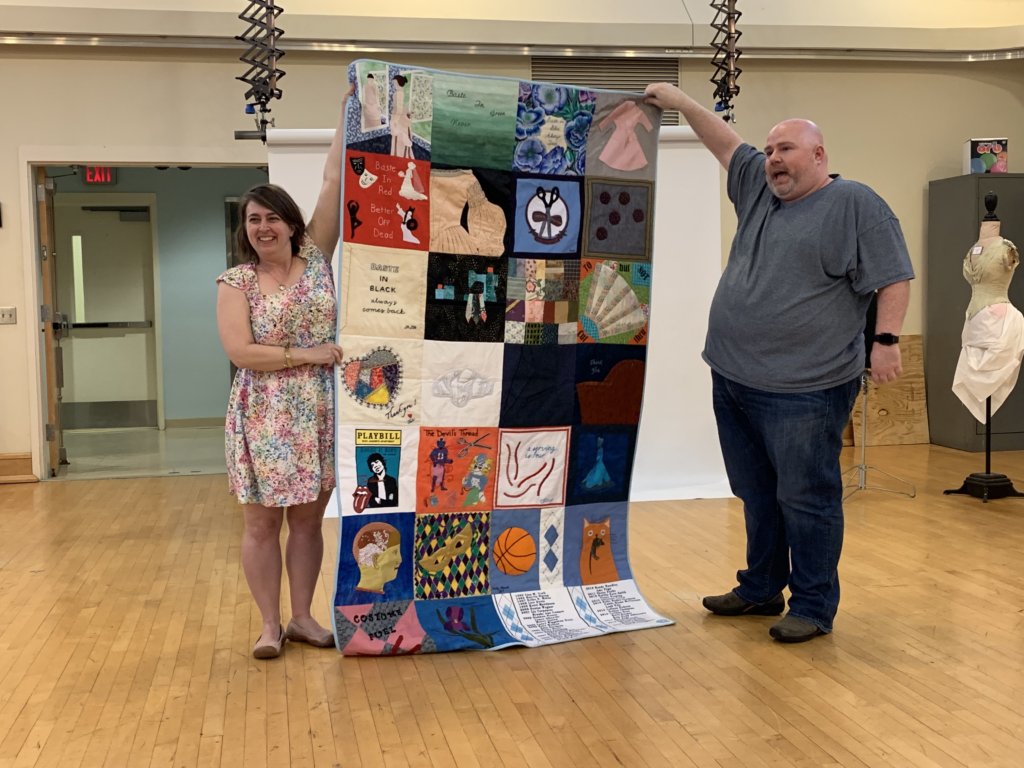
I wore my new splatter print dress from my previous blog series and I had a fantastic time celebrating a fantastic woman!

Though I had fun, I don’t predict trading bridal and garment sewing for quilting anytime soon! I hope you enjoyed following along for this unusual project!
To learn more about my sewing education and career, listen to my interview on Love To Sew podcast!
NEXT POST: I’m so excited to finally begin blogging about the creation of a wonderful winter wedding dress for a beautiful bride named Tiffany! Now is a great time to join my email list so you don’t miss a post!


6 Responses
Thanks so much for this wonderful post. I look forward to all your newsletters, but found this one especially fun and inspirational.
Thanks for following along and thanks for your comment! I was worried that this post might not be received as well as others, since it is a bit off-topic for me. So happy to hear that you liked it!
Awesome post! thank you!
Loved the teeny tiny dress couture with Y DART
and all the photos! of the process.
Such a great idea/gift.
Thanks Marie Camille!
Really a couture quilt block, amazing! I would not have the patience to work with these tiny pieces.
I was a little out of my comfort zone, but it was really fun! A teeny flat dress is soooo much quicker to sew than my usual 6-8 month dressmaking process. Thanks for following along!