Once Caitlin said “yes” to the dress…
I invited her back to my studio to take some measurements. I take approximately 40 measurements of each bride in order to create custom patterns that fit their unique silhouettes.
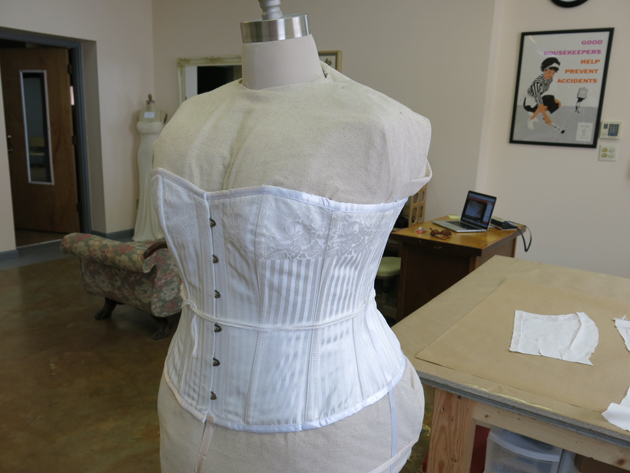
Since Caitlin would be wearing a corset under her custom wedding dress, I took the measurements on her body while she was wearing her corset. In the photo above, you can see the customized dressform wearing Caitlin’s corset, which she ordered from a company called Corset Story.
To create the pattern, I started with the underdress. Though Caitlin’s dress would have a full lace overlay with long sleeves and a collar, the underdress would be sleeveless with a rounded neckline in the back and a V-neckline in the front.
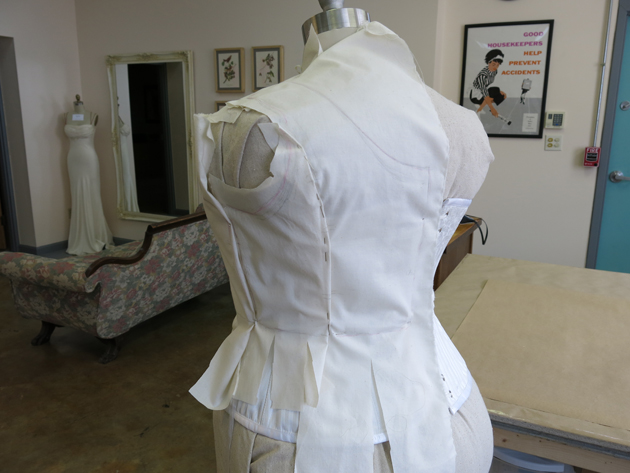
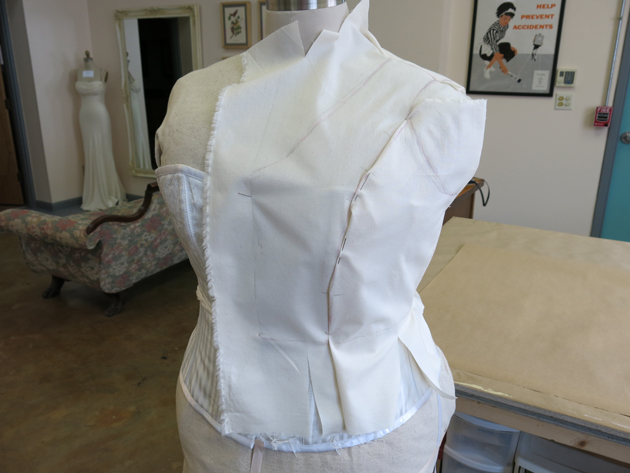
To make the underdress pattern, I draped pieces of muslin on top of the “Size-Cait” dressform and corset. I marked and moved and cut and pinned until my fabric pieces resembled the intended shapes from the sketch on the front and the back. Since her body is symmetrical, I only had to do this on half of the form.
I started my drape on the front…
…and then worked on the back.
 This part of the draping process is called the “rough drape”.
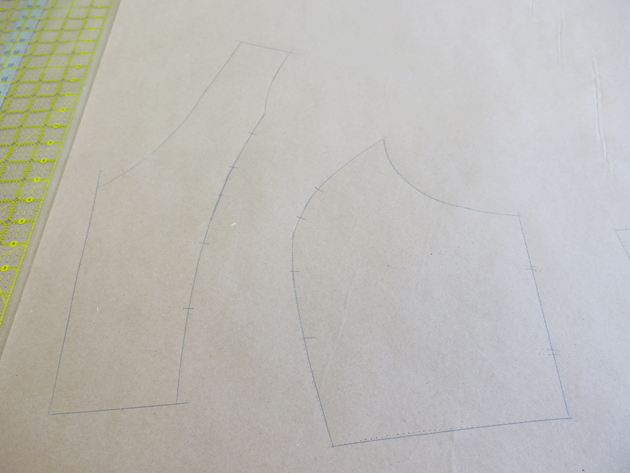
I then unpinned my “rough drape” fabric pieces and laid them flat onto paper. Using a spiky wheel, I was able to transfer my markings to the paper underneath to create the outline for the pattern.
Here’s what the two pieces from the front of the underdress look like flat on the paper…
 …and here are the back two pieces ready to be cut out.
I used these patterns (and patterns I made for the skirt) to create a muslin mockup of the underdress for Caitlin to try on in our first fitting. Since the mockup is a “test dress”, we’d be free to make changes and adjustments for the perfect design and fit.
Then I did the same process for the overdress, but this time with lace. I was able to use the underdress patterns as a starting point, but the overdress needed sleeves and a collar added to its pattern for the mockup dress. I didn’t mockup the lace overskirt, since it would not have any extra design features from the underskirt (which will ultimately be made using her mom’s wedding dress fabric!)
And here is the “test dress”, all ready to try on!
I had two different lace trim options for Caitlin to choose from, so I added a different band of lace to each edge of the collar. In our fitting, we’d decide which one she likes best.
 I sent these preview images for Caitlin to review before she came to the studio for her first fitting.
I hoped it would fit really well and that she’d love how the design looks on her!
NEXT POST: Caitlin’s fitting!


4 Responses
This is truly a work of art!
Thanks Rosalyn! And this is just the mockup!
Ooo, I love both of those lace collar pieces, and the belt is to die for!!
Caitlin’s mom made the belt for her own wedding dress back in 1969. We just repurposed it for the new design!