In my previous post, I created a second mockup of Jenn’s rehearsal dinner top. We rejoin the story in the summer of 2019 for the second mockup fitting- which took place immediately before Jenn’s bridal shower.
The 2nd Mockup Fitting
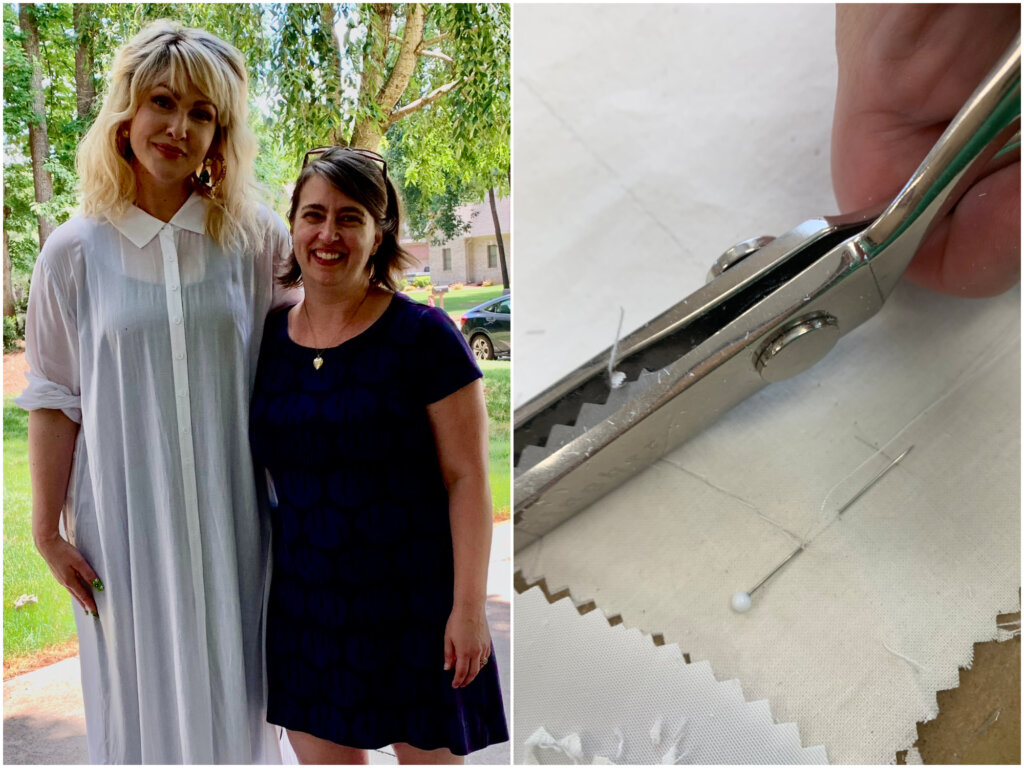
Jenn lives in Brooklyn, but the party was at her parents’ home- about an hour away from where I live in North Carolina! My husband Charles and I got there early, so Jenn and I could work through a mockup fitting in her parents’ bedroom!
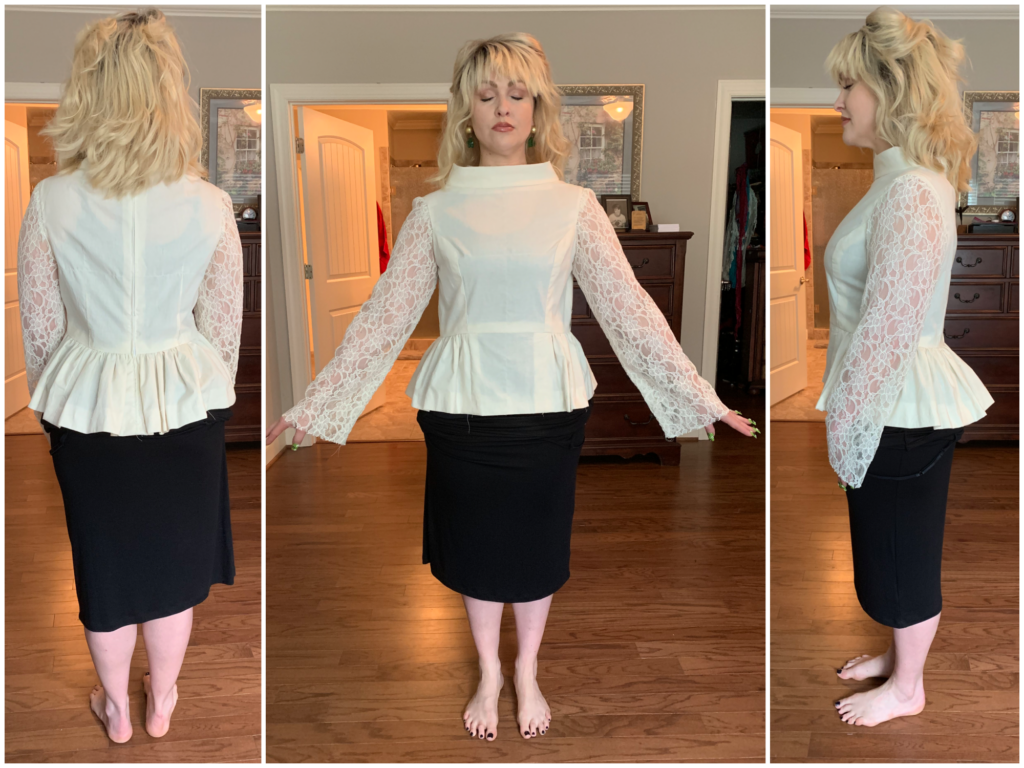
Here’s how it looked when she first tried it on:
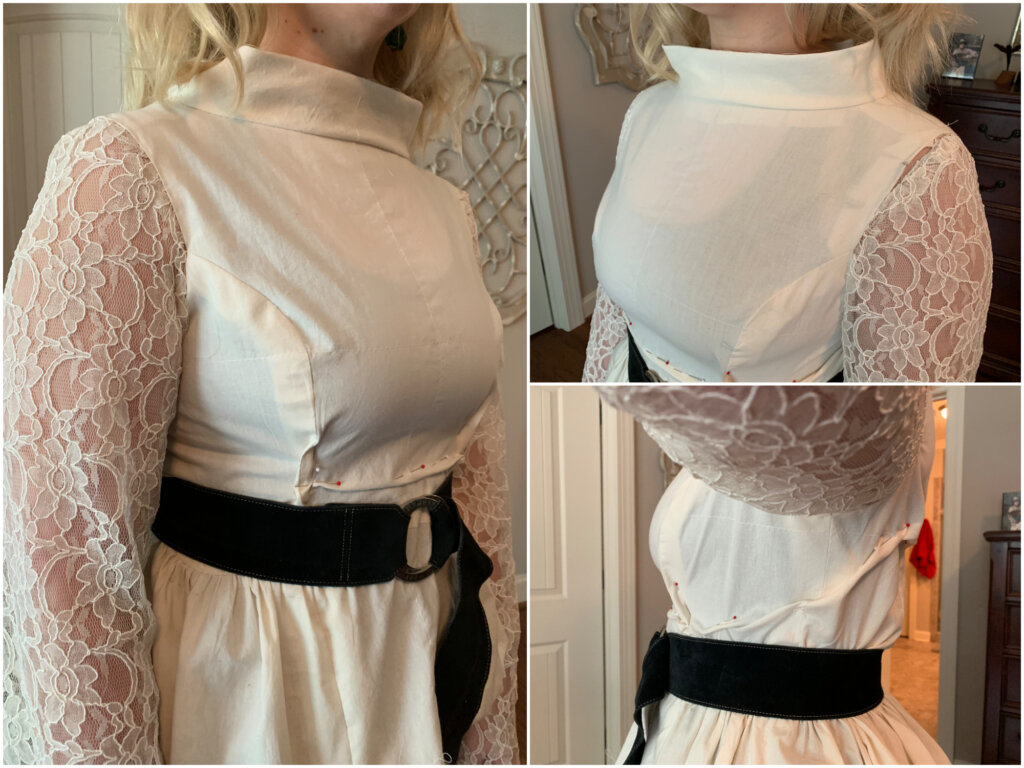
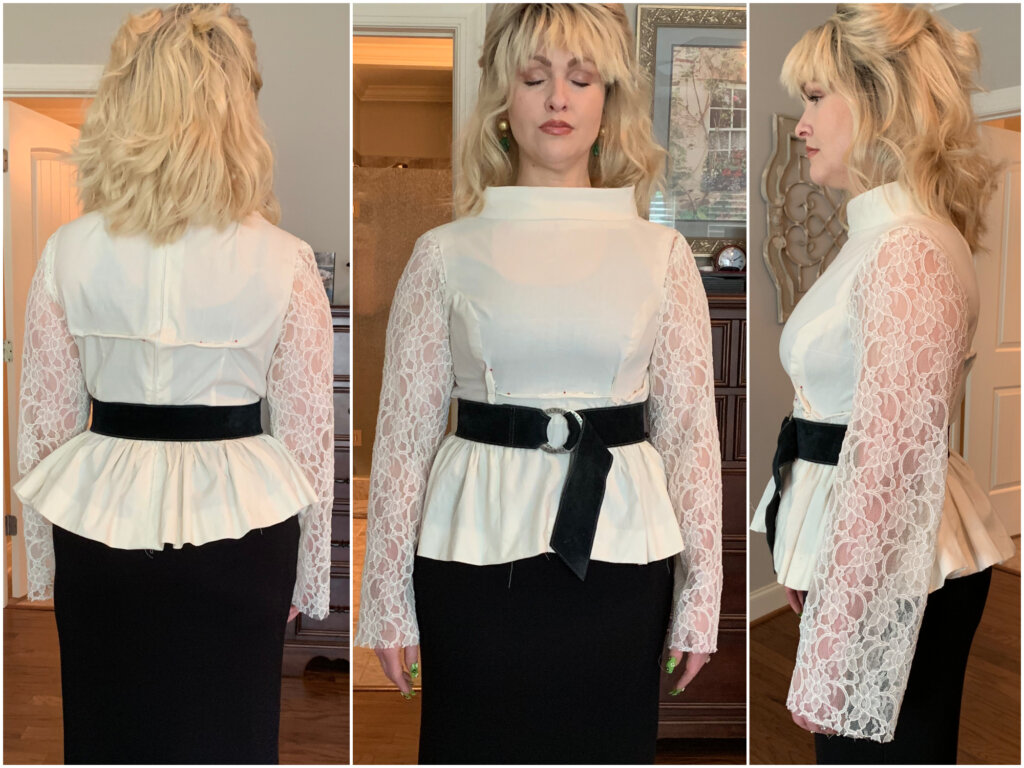
Not bad! But fittings are amazing opportunities to sleuth for clues to make improvements. So next, I pinned out some fullness and ripped open any tight bits!
The top will be belted, so we tried on a few belts during the fitting. We liked this width, so the fit was adjusted accordingly.
With the improvements noted from a successful fitting, I felt confident to move out of the mockup phase and into garment construction. I would reuse these mockup pieces as the underlining for the fabric of her mother’s wedding dress. More on that in a bit…
But first… a party!
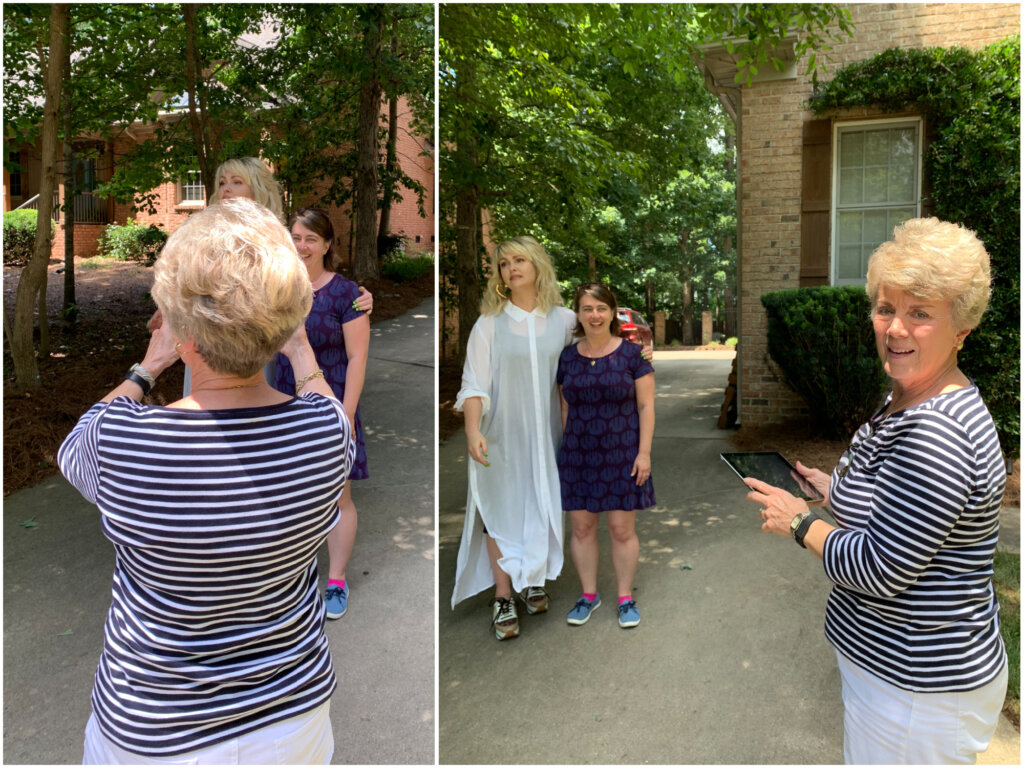
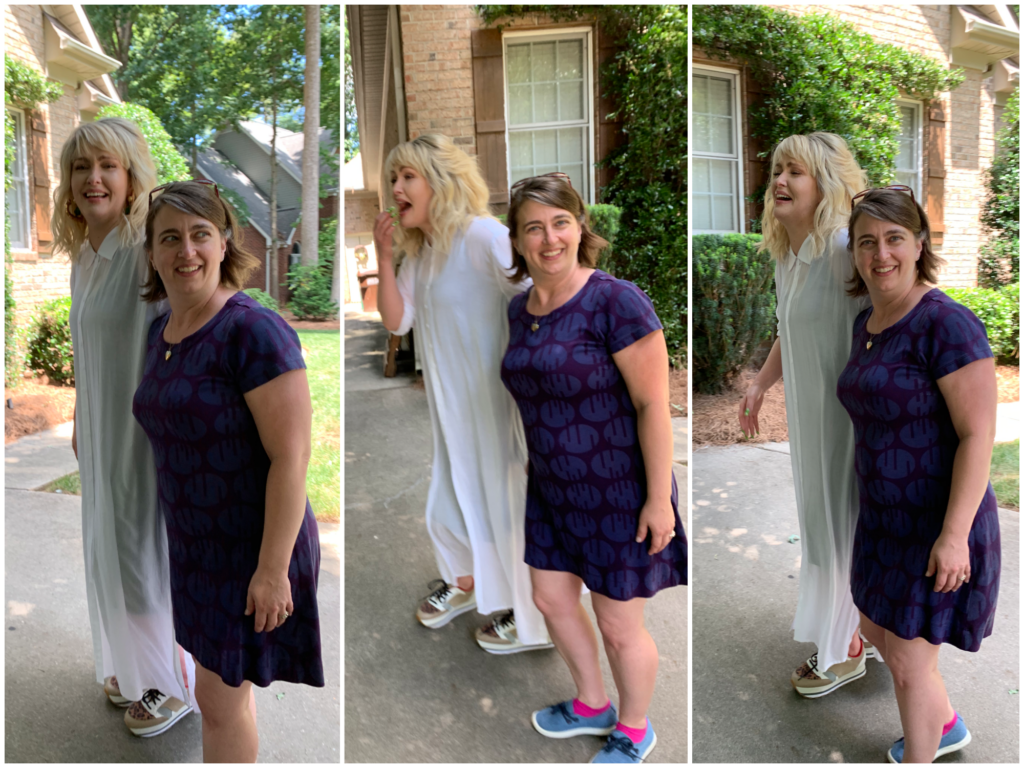
At some point during the party, I asked Charles to get a shot of me and Jenn together for this blog post. But anytime you get Charles and Jenn together, things get silly. Instead of taking a normal photo, he started taking pictures featuring this lady (he did not know) as she was taking pictures of us…
Almost every shot was like this…
…which Jenn (and I, to a lesser extent) thought was hilarious!
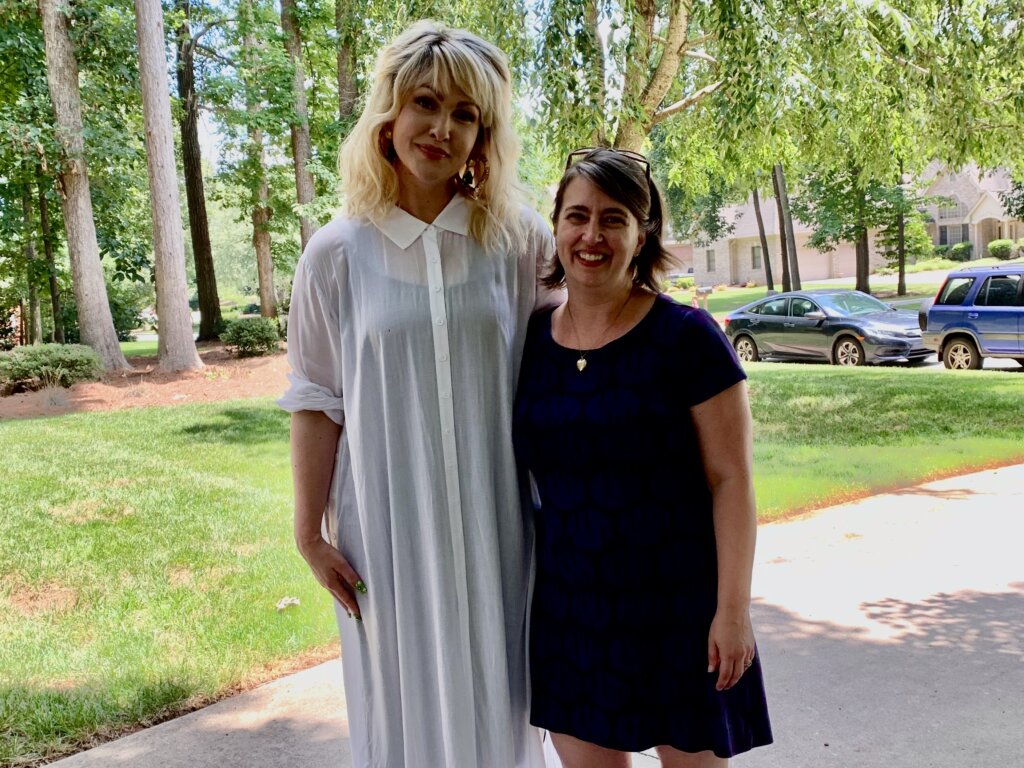
I eventually got my shot!
Charles and Jenn have been joking together since they met in NYC in 2003. We all had a really fun time hanging out with her family and friends from North Carolina to celebrate her upcoming marriage.
Back to the Mockup
After the party, I took the mockup back to my studio…
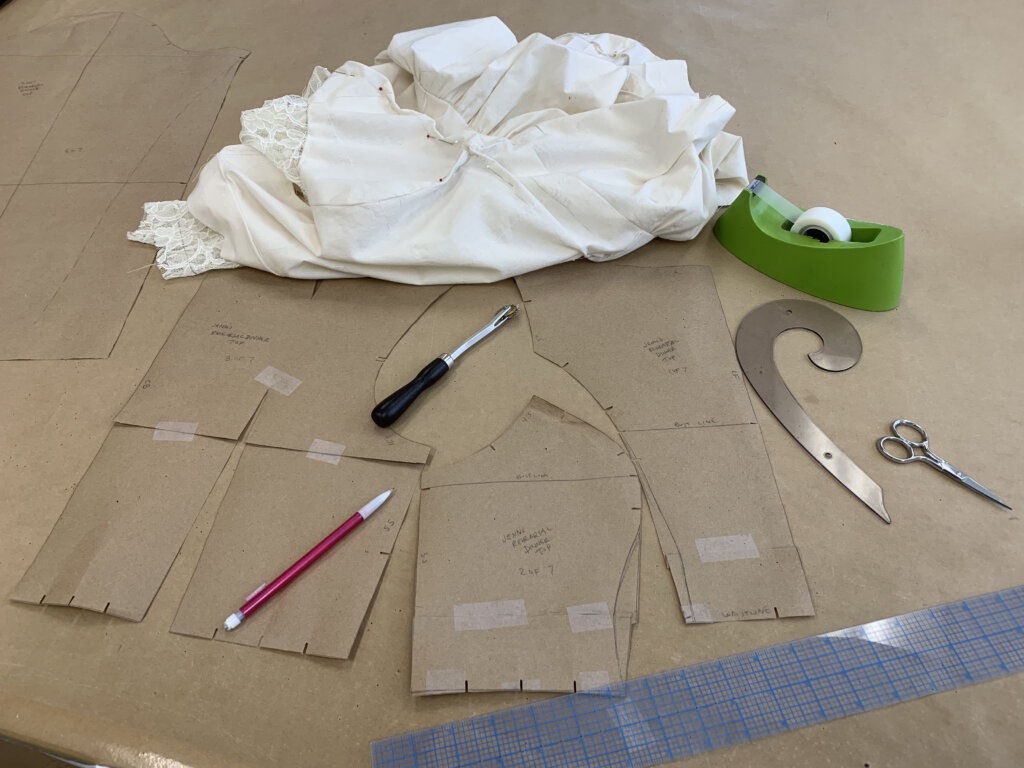
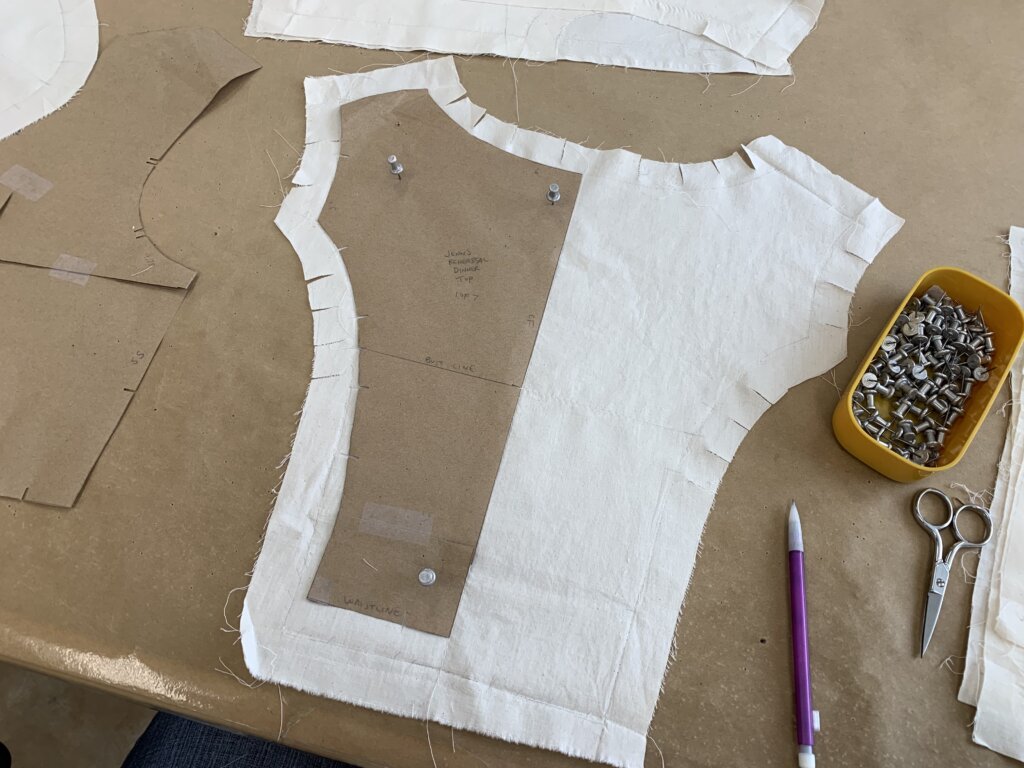
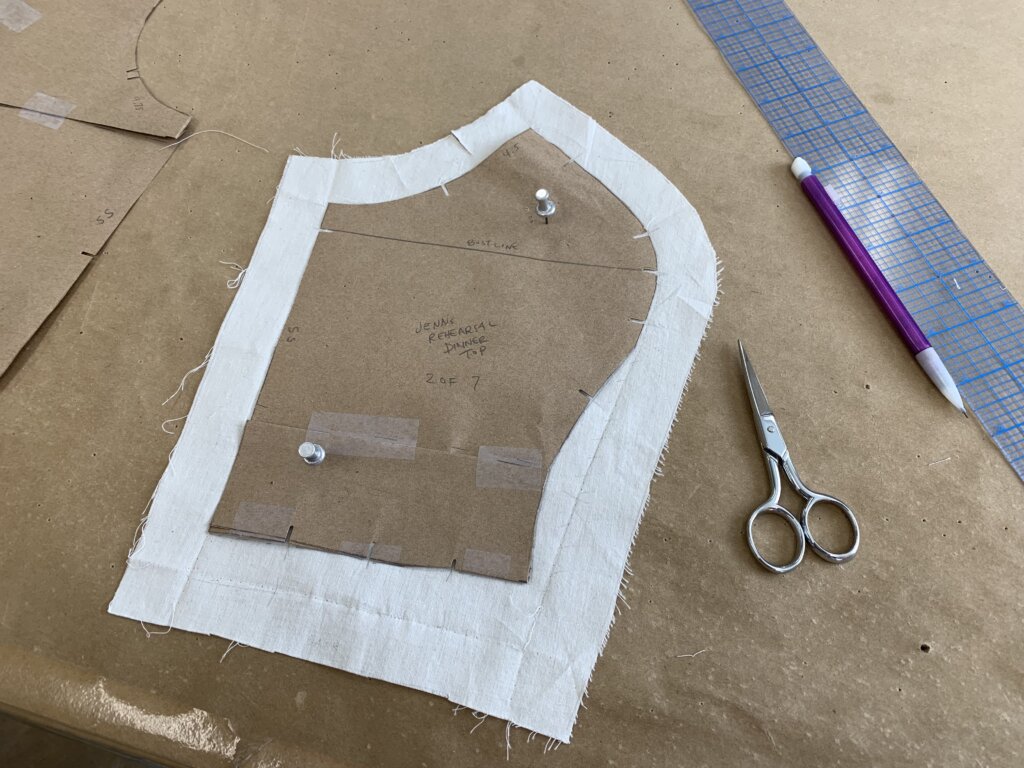
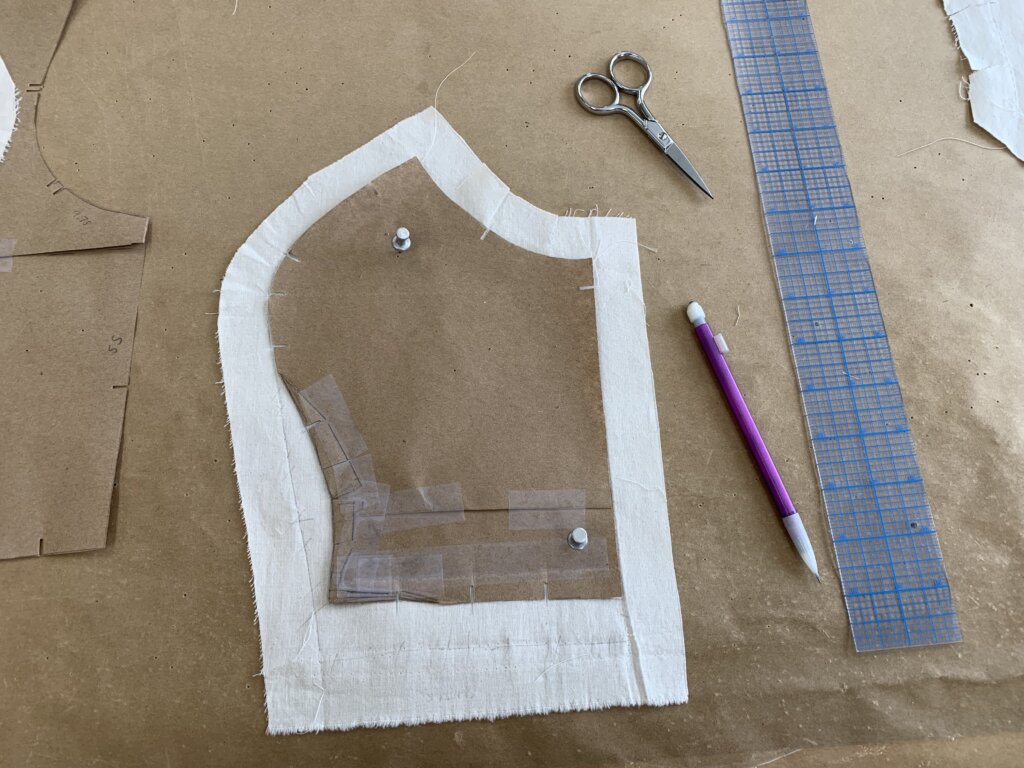
…where I used the info from my pins and slashes to transfer the changes to the pattern pieces.
But that wasn’t the end for this mockup…
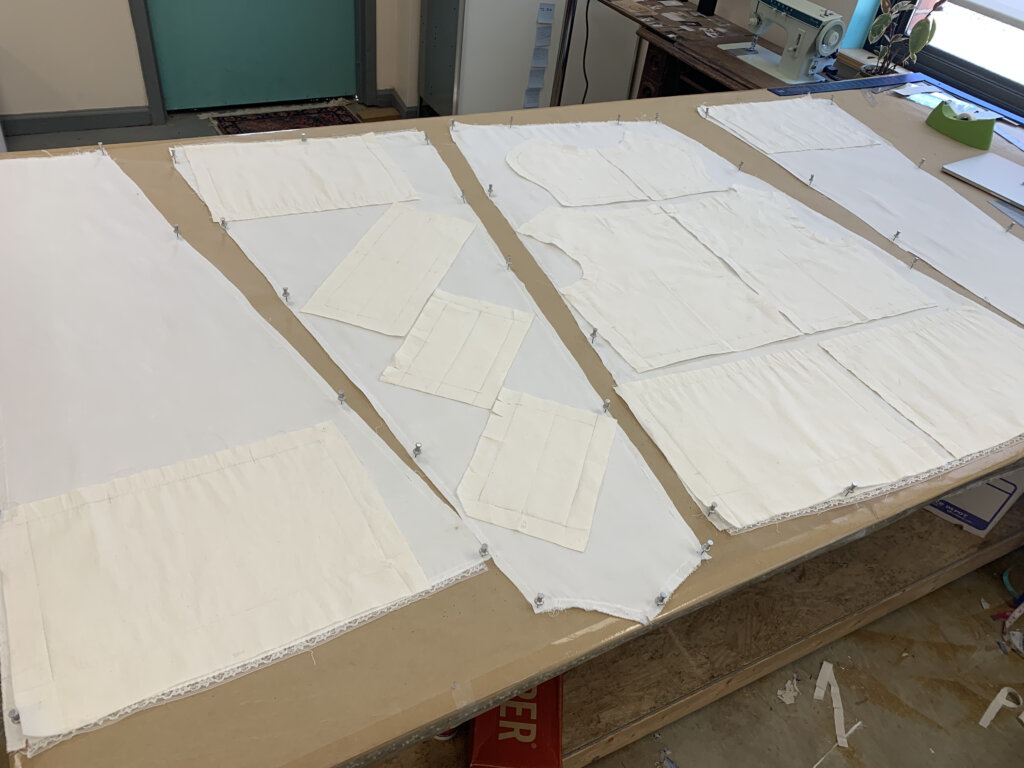
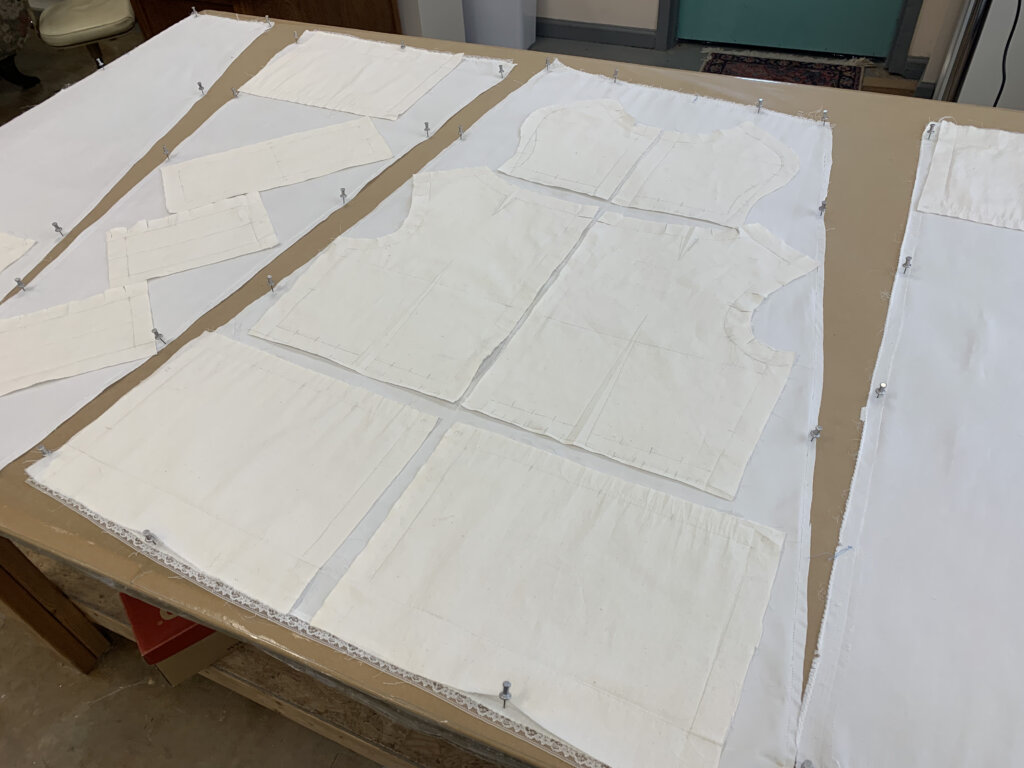
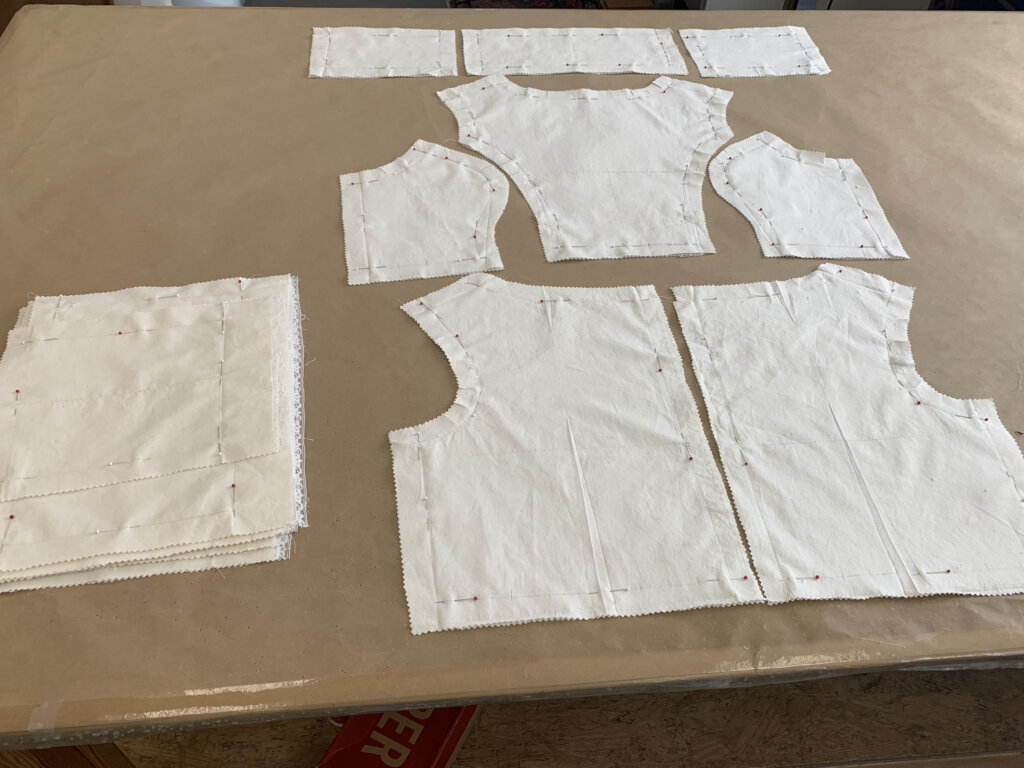
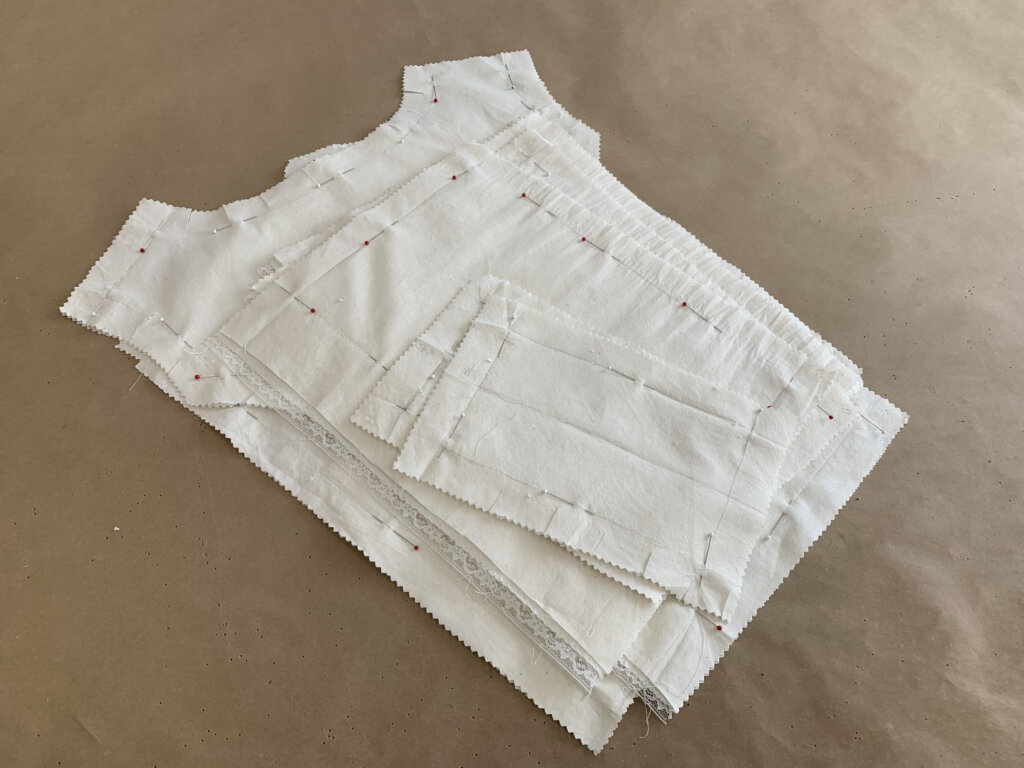
Next, I took the whole mockup apart- which was quick and fun because every edge was hand basted and every seam was machine stitched using a basting stitch length. Super zippy to rip!
Then, I pressed all of the mockup pieces flat…
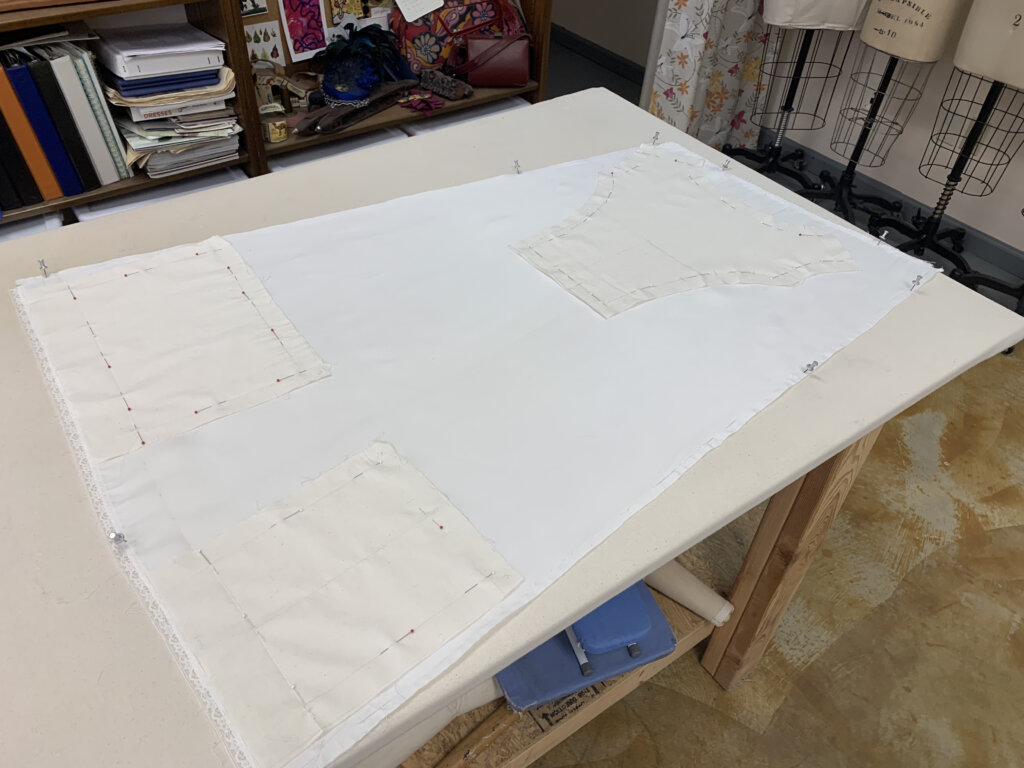
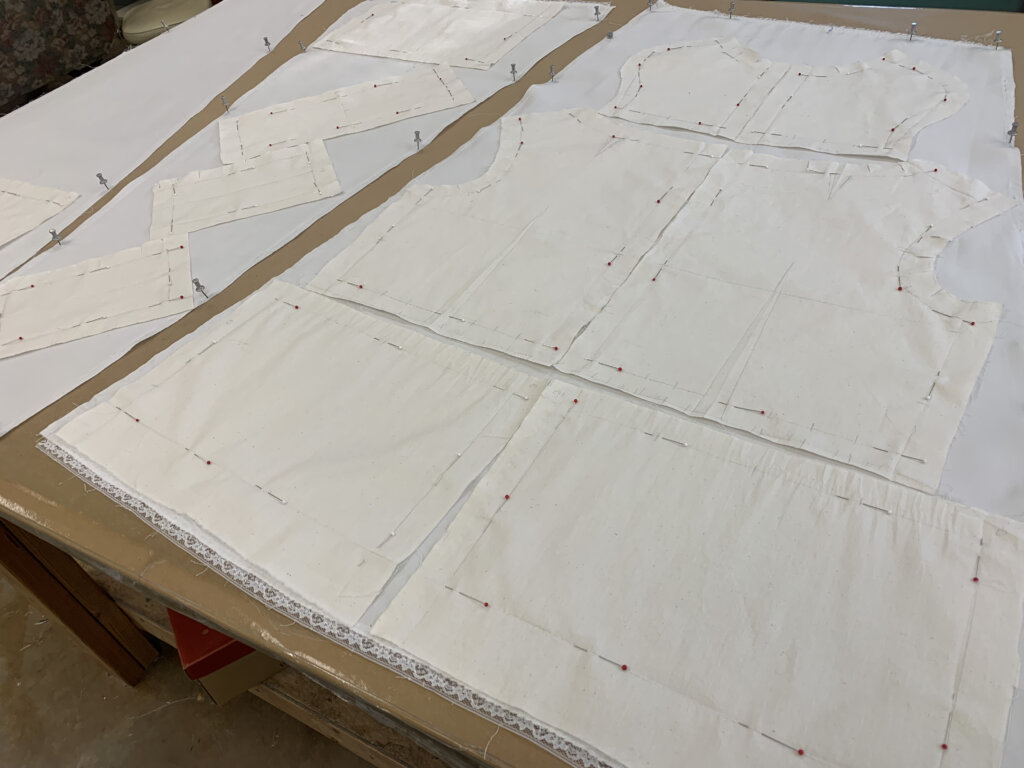
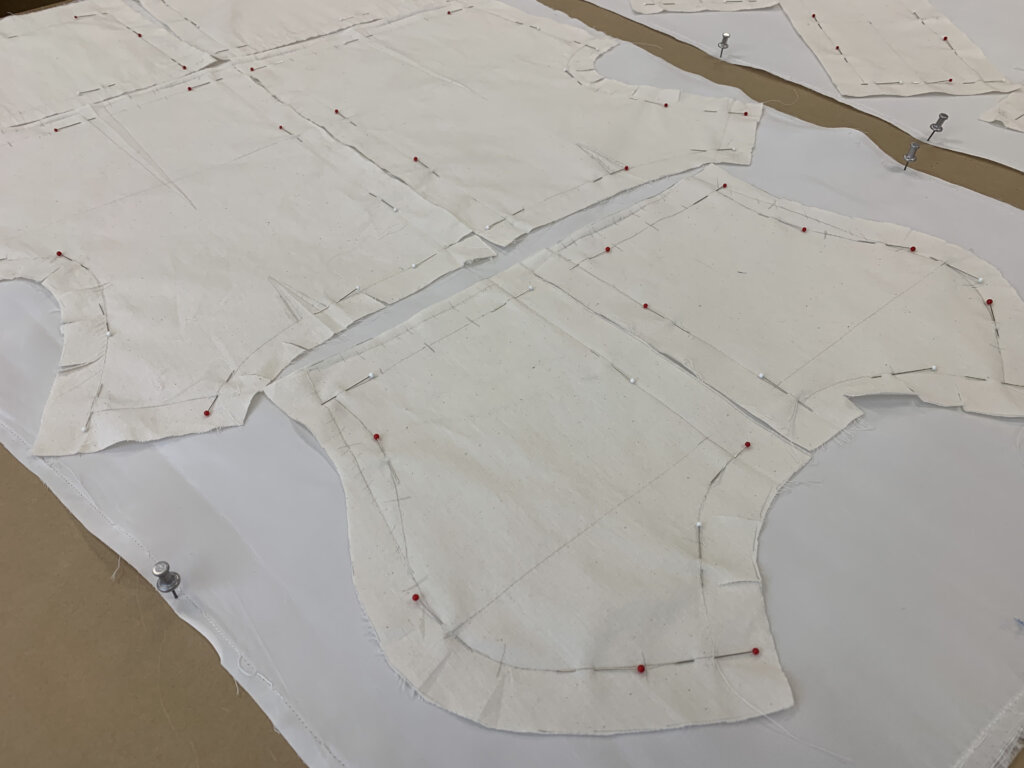
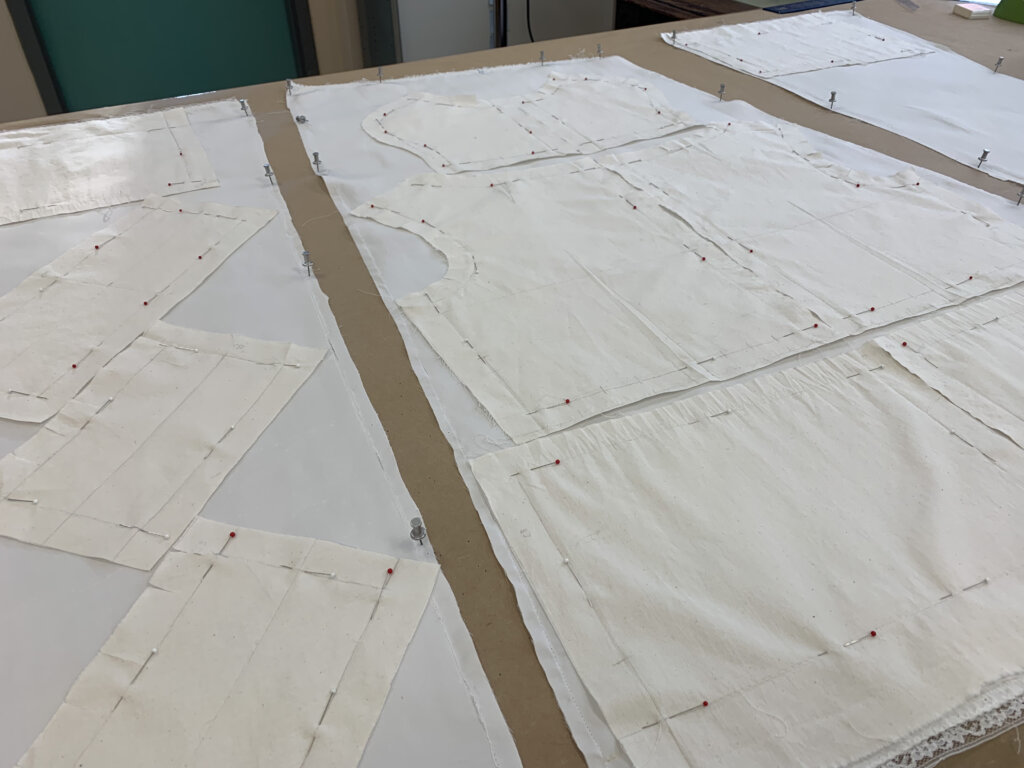
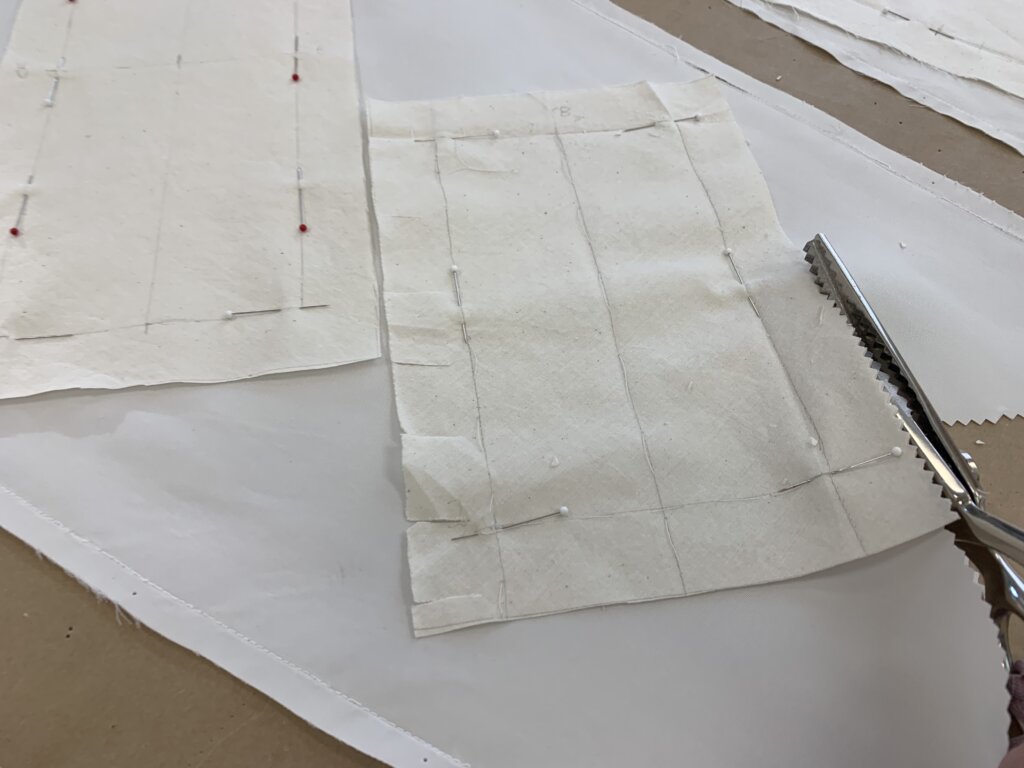
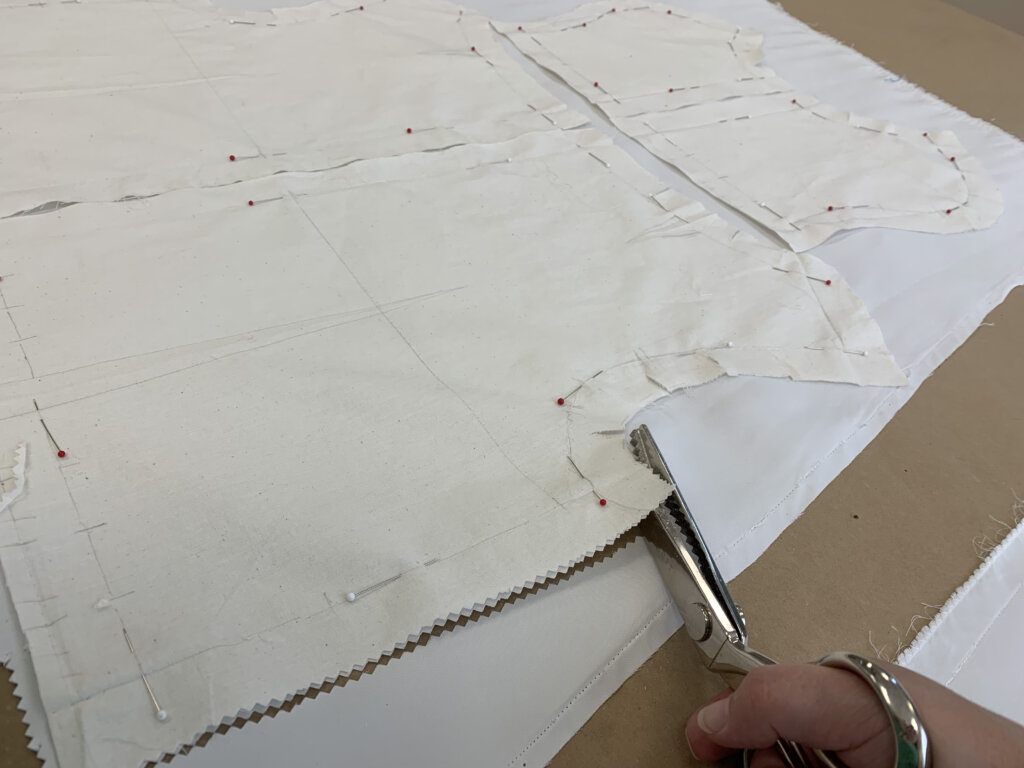
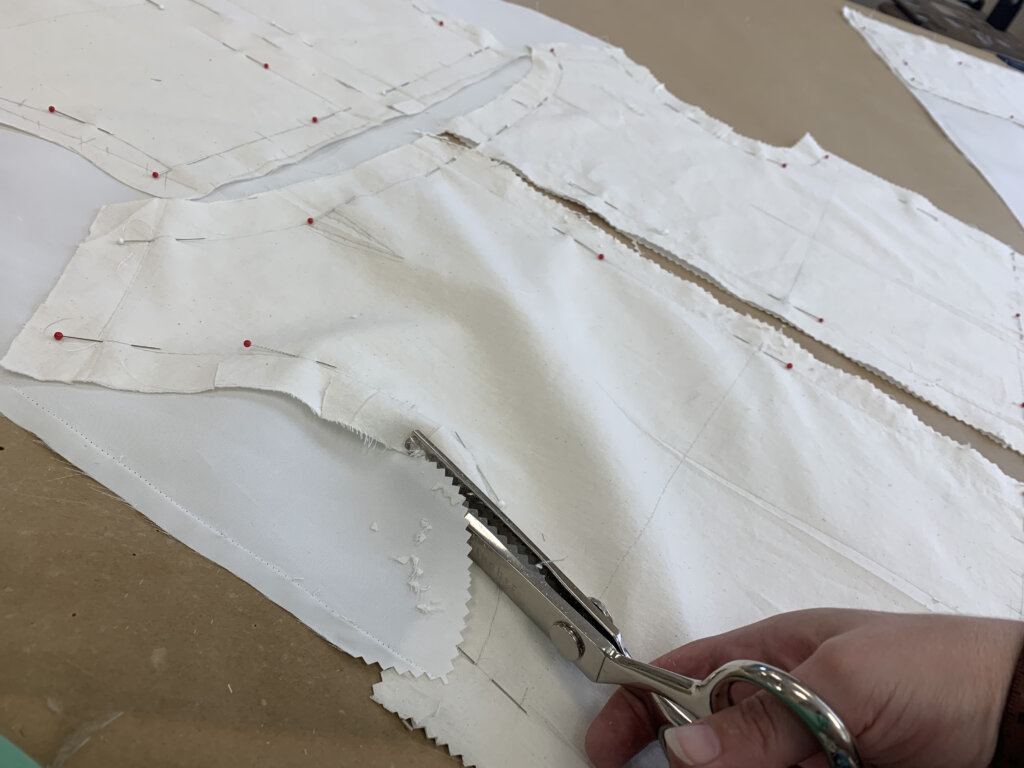
…and used the corrected pattern pieces to transfer the new-and-improved fitted lines onto the fabric.
I used my pencil along the edge of the paper to draw all of the new stitching lines and notches for each piece.
My pattern pieces are only for half of the body, so I flip each piece over to transfer its lines to the fabric on the opposite side.
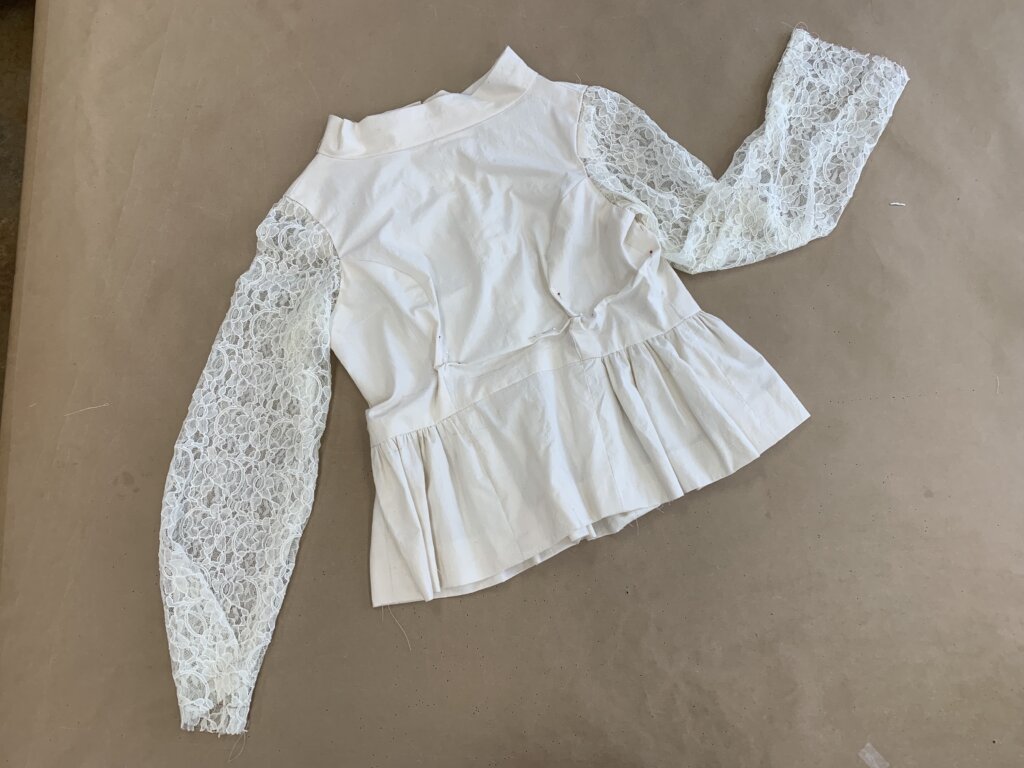
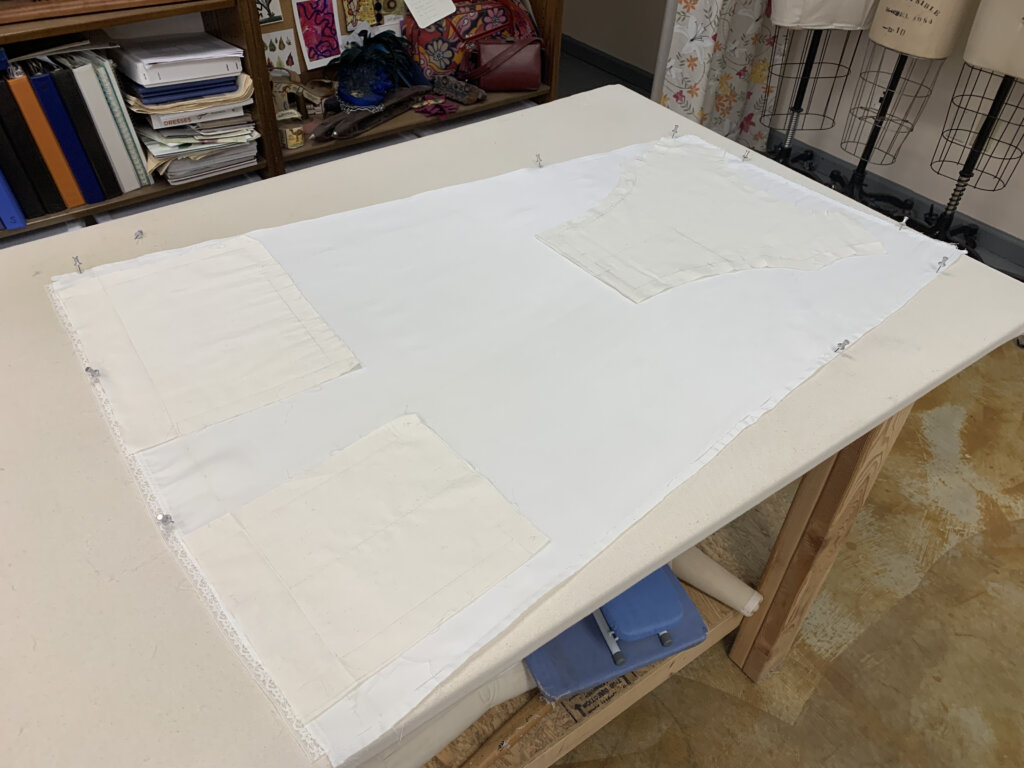
After all of the new stitching lines were pencilled in, any excess allowances were trimmed to create a new-and-improved version of the mockup- which will hide inside Jenn’s wedding rehearsal top!
(Accidental sneak peek in the back of another wedding dress I was in the middle of making at the time. Andy’s bridal blog series will follow Jenn’s!)
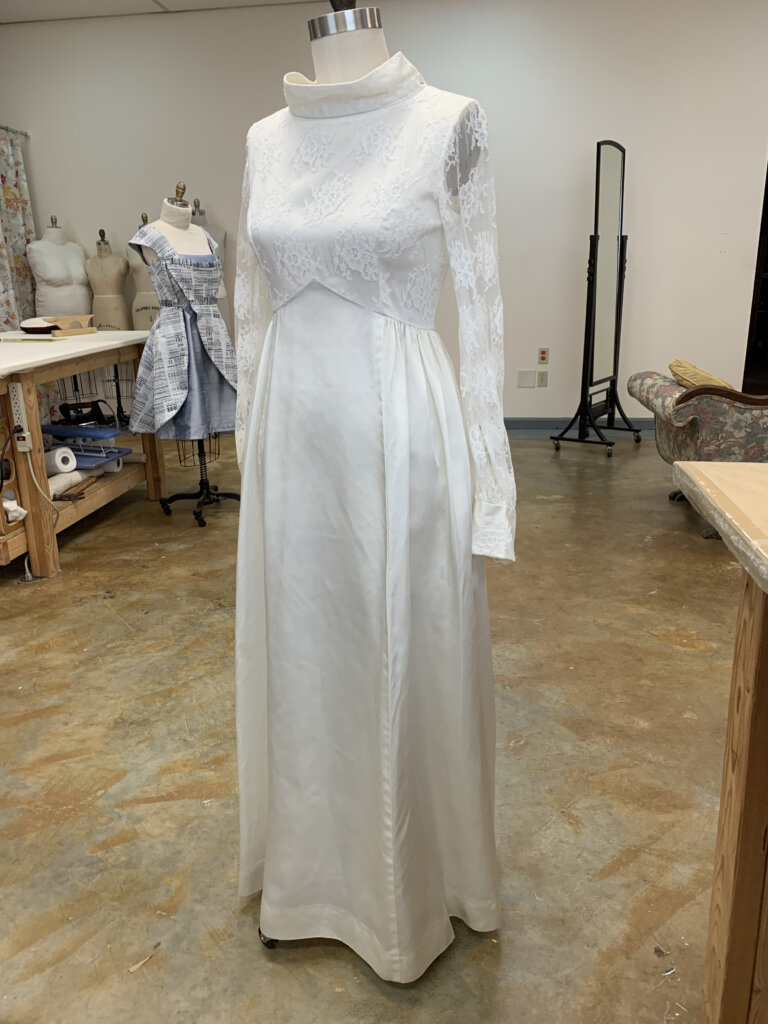
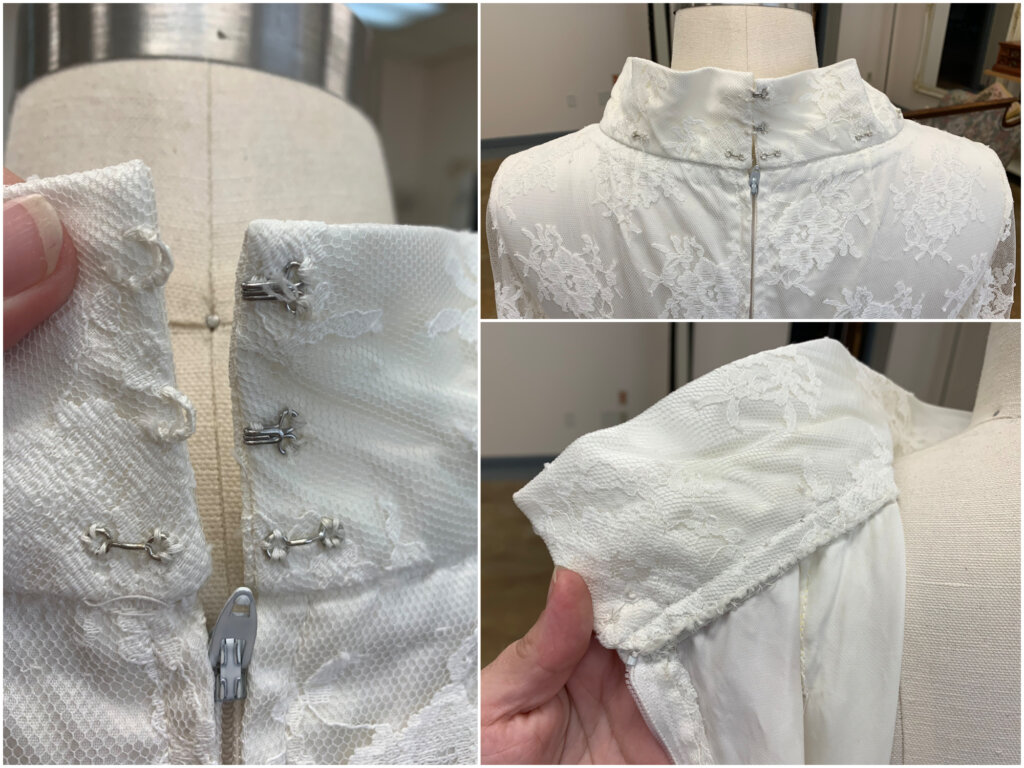
But before ripping the dress apart, I took a minute (and some photos) to appreciate all of the beautiful little stitches inside this handmade garment. In 1970, Jenn’s grandmother made this dress by hand for her daughter’s wedding day. It was an honor to create this custom piece with 3 generations of history!
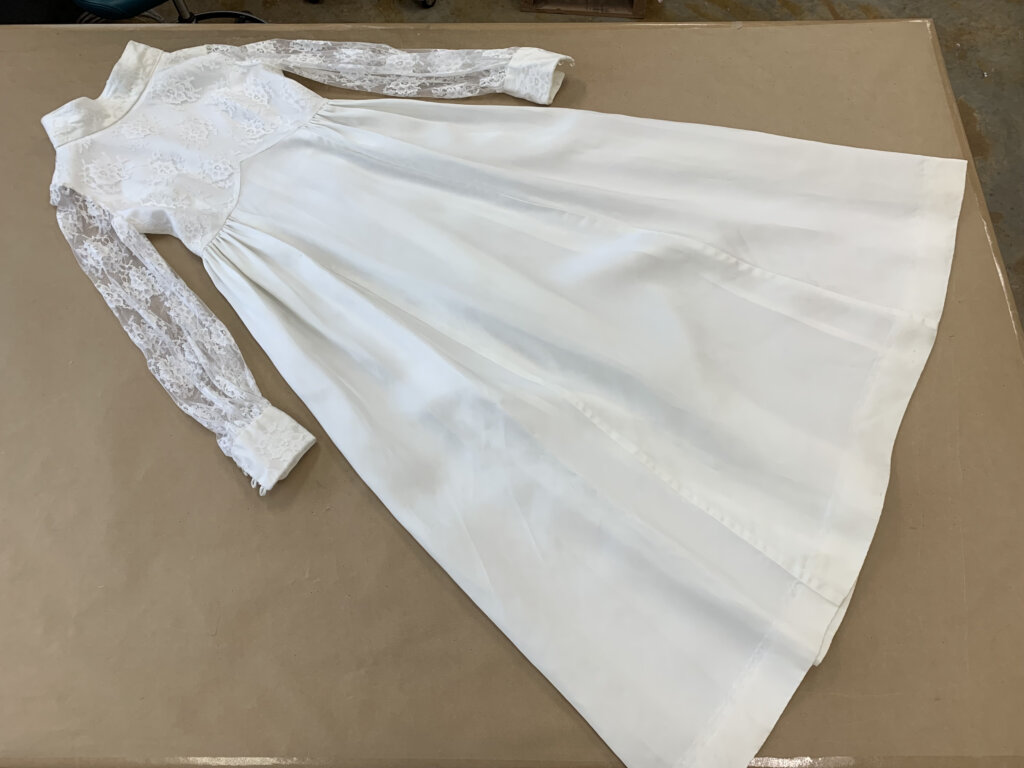
Then, after laying the dress down intact for the last time,…
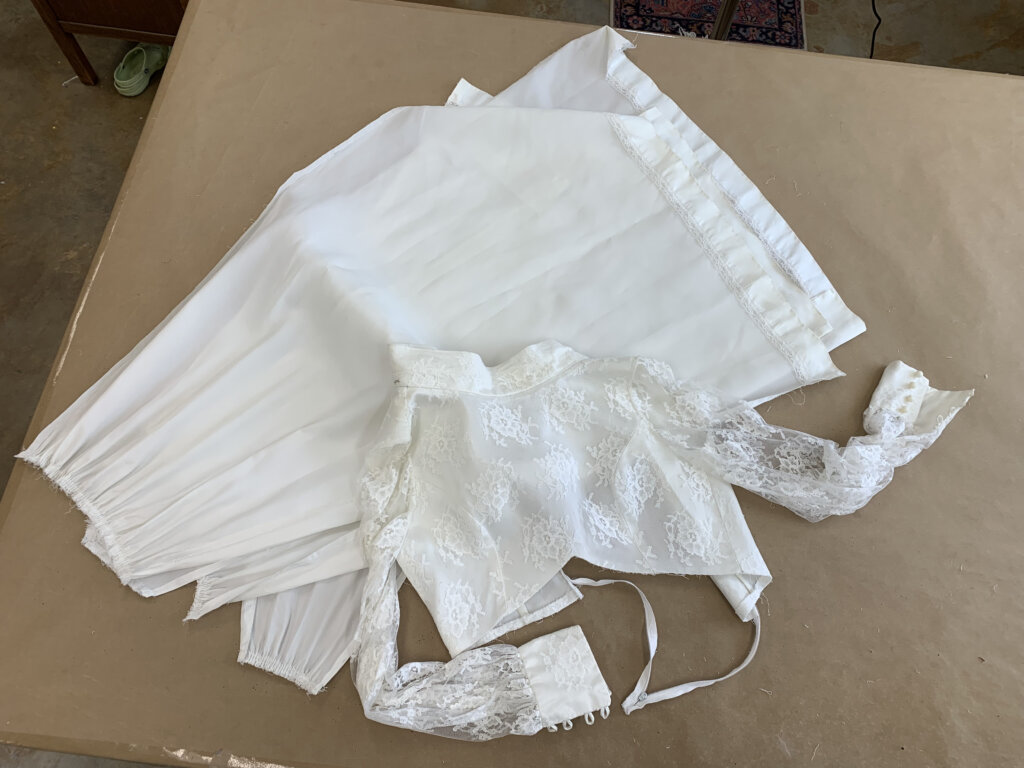
…I disassembled it!
Though the pieces of Lydia’s top were too small to reuse for Jenn’s top (so I didn’t unstitch them), I would later reuse the original sleeve cuffs sewn by grandma.
I also left the hem lace to save grandma’s stitches for the hem of Jenn’s peplum.
The majority of Jenn’s top would be made from the satin skirt pieces of Lydia’s dress.
Preparing for Underlining
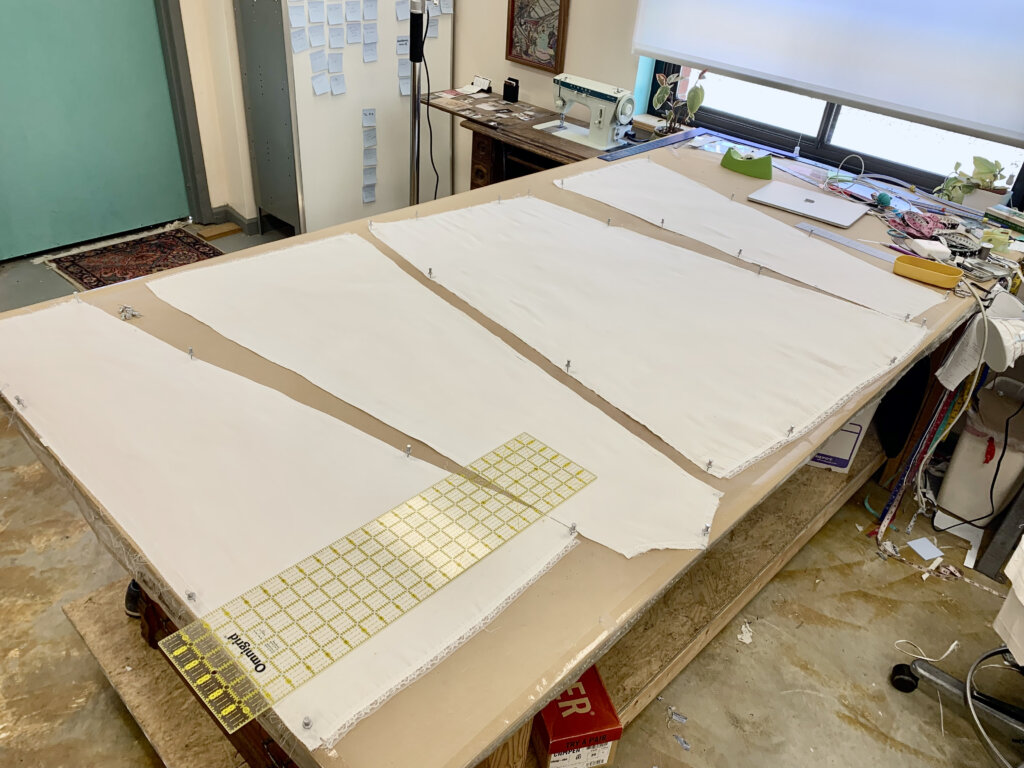
With everything torn apart, it was finally time to start building!
I pressed each piece of vintage skirt fabric before pinning it flat to my pinnable-top table with the inside up.
Then, while paying attention to the grain lines, I laid out my marked mockup/underlining pieces onto the satin. I placed the hem edge of the peplum pieces along the the edges with grandma’s hem lace.
I used my pinking shears to follow along each edge…
…of each piece…
…until the wedding dress fabric was a match to the back of the mockup pieces.
Pretty neat, huh?
To be continued…
Though I’ve still got more to share of the underlining process for this top, I love this technique so much that I use it in almost every garment I make.
I’m a former professional costumer and couture dressmaker for one-of-a-kind bridalwear located in rural North Carolina, who teaches custom garment sewing to sew-curious solo-sewists online.
My blog mostly follows along with the couture process of how each heirloom-quality custom wedding dress was made from idea to wedding day, as well as personal sewing projects and other couture curiosities.
Welcome to my (temporary) Sewing Studio! Come on in! I love seeing other people’s workspaces and tools, so I thought I’d show you mine. I cleaned up after a big...
Duplicating the Vintage Dress’s Pattern (without taking it apart)
In my previous post, I introduced Jenn and the custom bridal wear project(s) for her wedding weekend. Check out the full story for all the deets, but to catch you...
I Made Myself the Coolest Dress pt. 1 – Pattern Design & Mockup
Though my personal wardrobe is mostly “the dressmaker has no clothes”, when I do make something for myself, it’s usually an epic project. I’m so excited to finally share this...
I’ve been blogging for TEN YEARS now, ya’ll! In “My 10 Year Blogiversary pt. 1”, I share links to each bridal blog series that I’ve created over the past decade....
It’s finally time to share about Deborah’s wedding day! HOORAY! Deborah and Blake were married in November 2017 at a church in Greensboro, NC with the reception at a nearby...
New Bridal Blog Series: My (kinda famous) friend Jenn!
Brooks Ann, Jenn, & Charles January 2017 Going Way Back… To begin my next bridal blog series, let’s head into the Way-Back Machine. And we’ll head farther back than this...
The bridal blog series is back! In each bridal blog series, you meet a new bride and I slowly post-by-post recount the process and share the behind-the-seams story of creating...
The bridal blog series is back! In each bridal blog series, you meet a new bride and I slowly post-by-post recount the process and share the behind-the-seams story of creating...
The bridal blog series is back! In each bridal blog series, I recount the process and share the behind-the-seams story of creating a one-of-a-kind custom couture wedding dress from start...
Sally is someone special. Back in December, I got an email from a dear friend named Sally that I had lost touch with. The subject line: “dear lord i’m getting...
As it starts to get cold, it sure is nice to think about summer! Gin and tonics… BLTs… beach trips… seersucker… Earlier this year, I worked with a bride who...
Welcome to Part 2 of the story behind making Andy’s 2019 wedding dress, where I’ll recount the testing phase of the custom process. If you’ve been following my blog for...
They say documenting the process triples the production time. (And I work more slowly than most.) My Nimbus was cold.She needed a new coat, sooner than later.
Welcome to Part Two! I’m back to share the nerdy behind-the-seams details of creating my Vanishing Tie Top for the Precious Fabric Challenge. But this photo-filled blog post doesn’t feature...
Do you have a fabric that you’ve been SAVING instead of SEWING? Yeah. Me too. So when Whitney Luckenbill of TomKat Stitchery asked me to be a part of her...
Welcome to my (temporary) Sewing Studio! Come on in! I love seeing other people’s workspaces and tools, so I thought I’d show you mine. I cleaned up after a big...
Welcome back! It’s the series finale! In this third and final post of My Warmup Jacket series, I share the behind-the-seams details of my jacket’s construction and finishing stories!
In this second post of My Warmup Jacket series, I share the behind-the-seams details of my jacket’s patternmaking and mockup stories! And after putting this patterning post together (which was...