Much of what makes a couture dress beautiful (and expensive) is hidden deep inside the layers. I love sharing “behind the seams” peeks into how flat fabric can be transformed. Thanks for following along!
The Experiments
As you may remember from Tiffany’s sketches and/or mockups, a dramatic collar and open neckline will frame Tiffany’s gorgeous face and neck. In order to determine the right methods to achieve this, I worked through some experiments and samples.
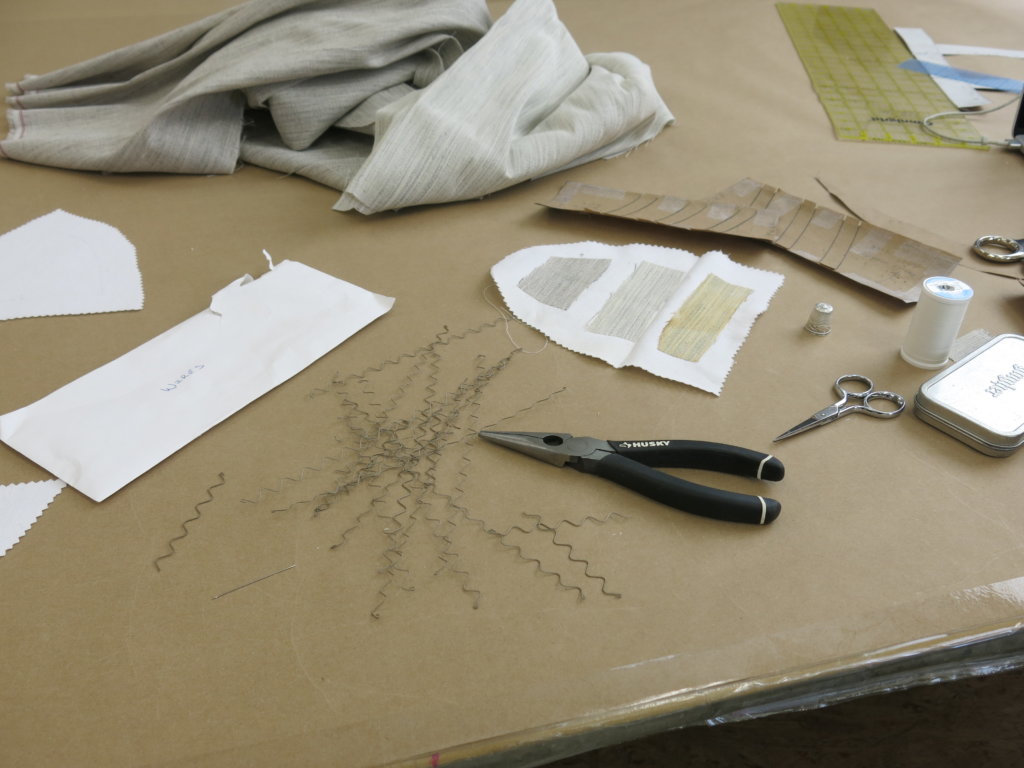
“Wiggle Bones” (also known as “Zig Zag Wires” or “Serpentine Supports”) are a specialty item that I remember from when I was earning my MFA in Costume Production. These light and flexible “bones” were originally used primarily for supporting ladies high neck collars in Edwardian times, but are now near impossible to find. The only place I know that sells them is Farthingales in Canada.
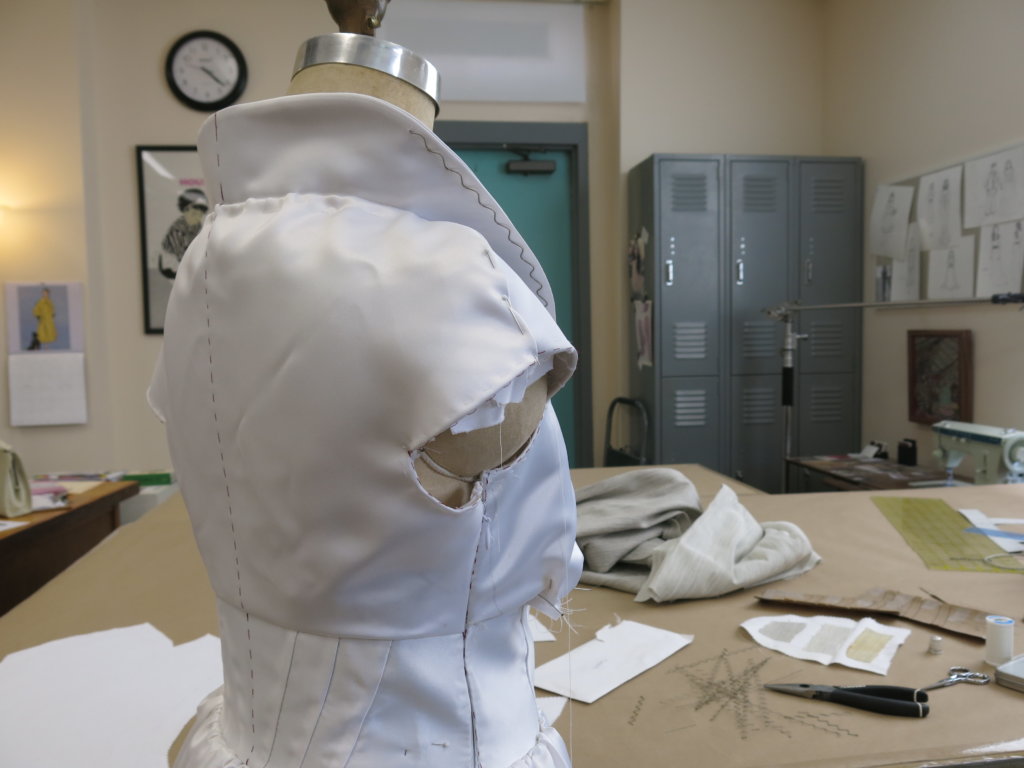
My first collar creation experiments were playing around with wiggle bones on Tiffany’s mockup dress. As I played with different methods and placements, I got excited about how they could offer the lightweight structure I was looking for!
So next I explored different construction techniques and materials to make them disappear inside the collar for a crisp clean finish.
Creating the Collar
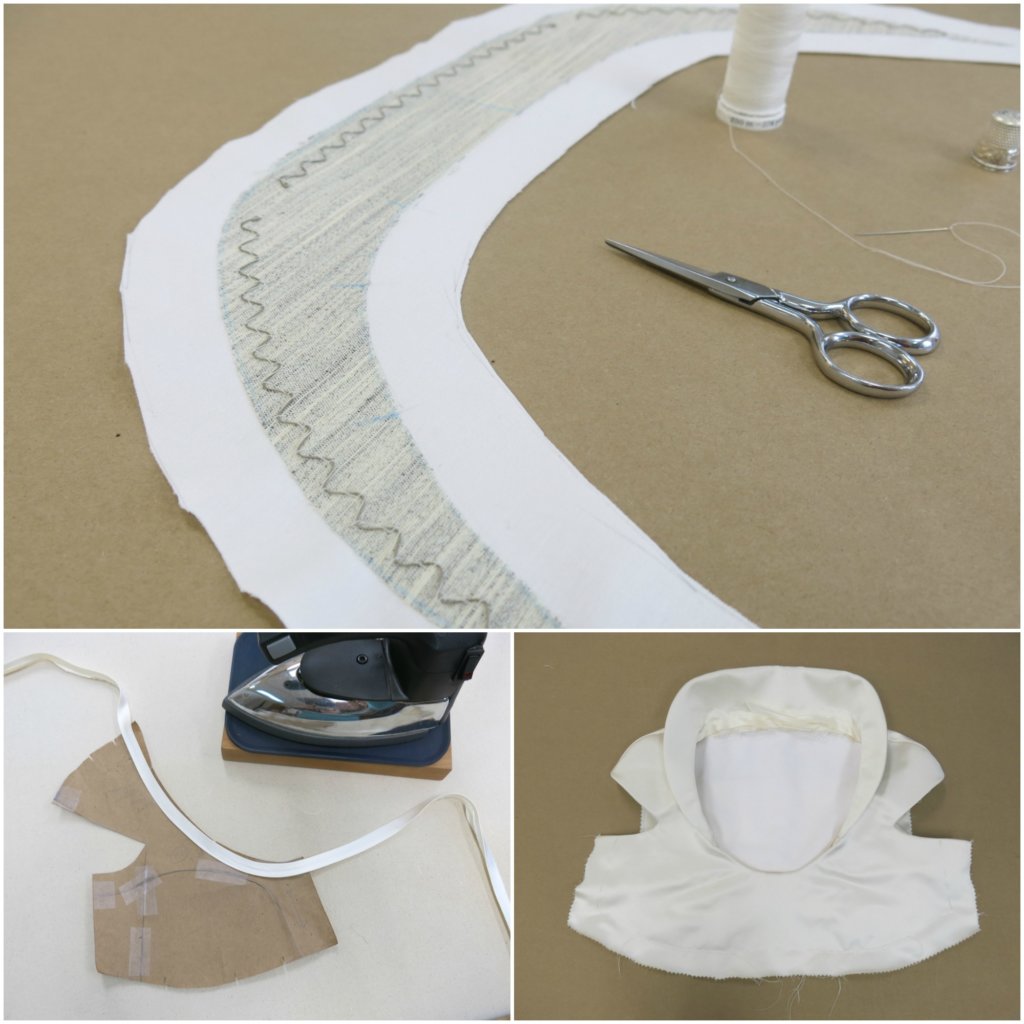
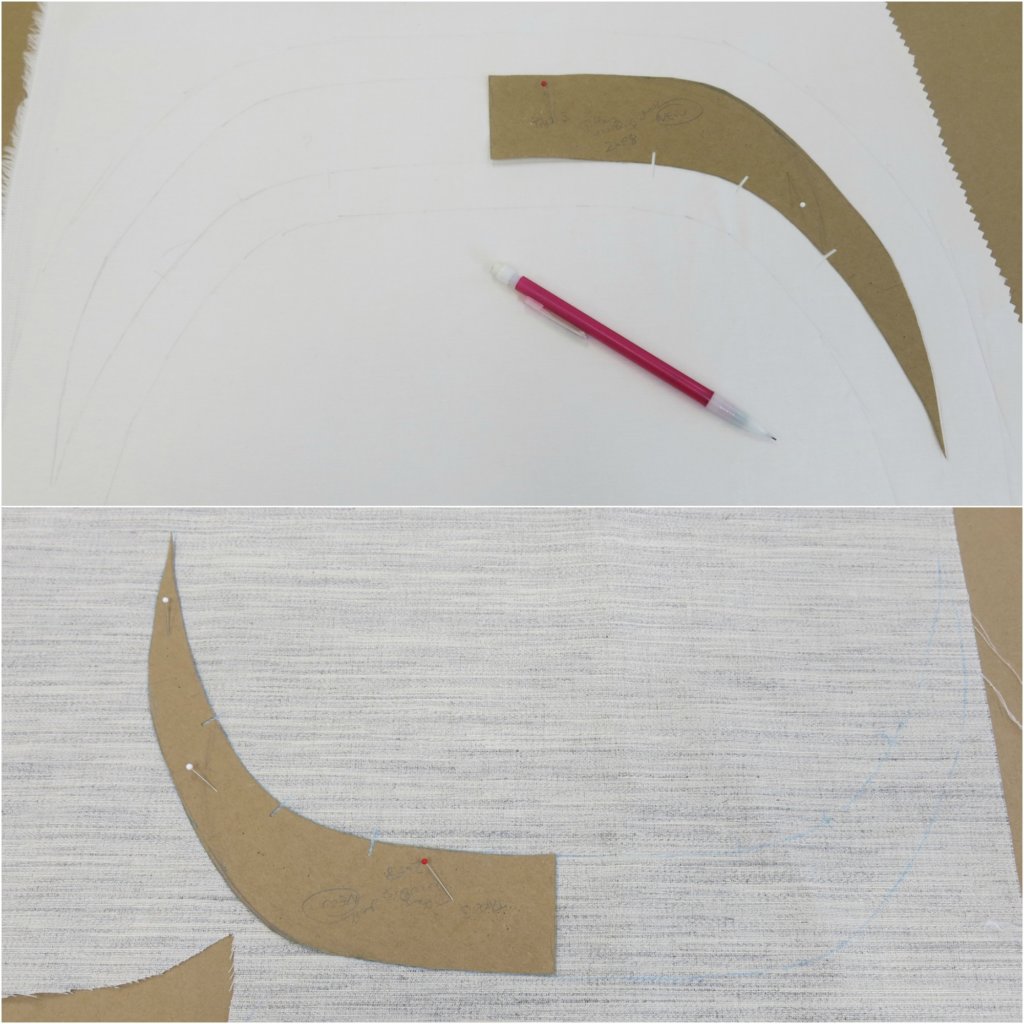
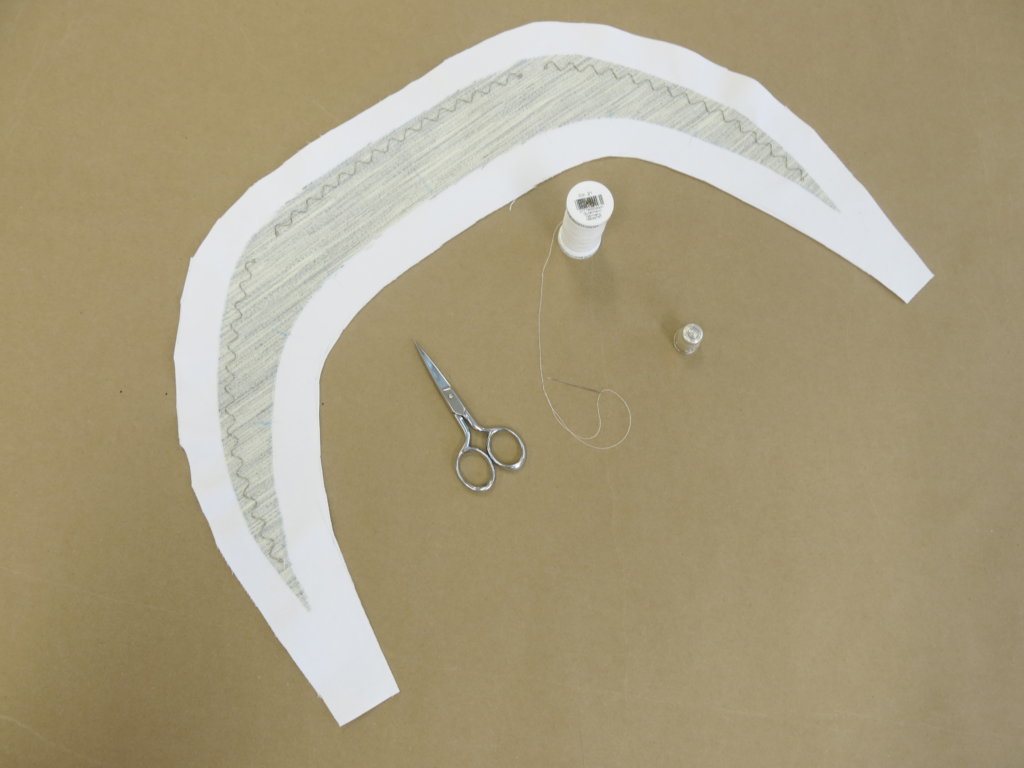
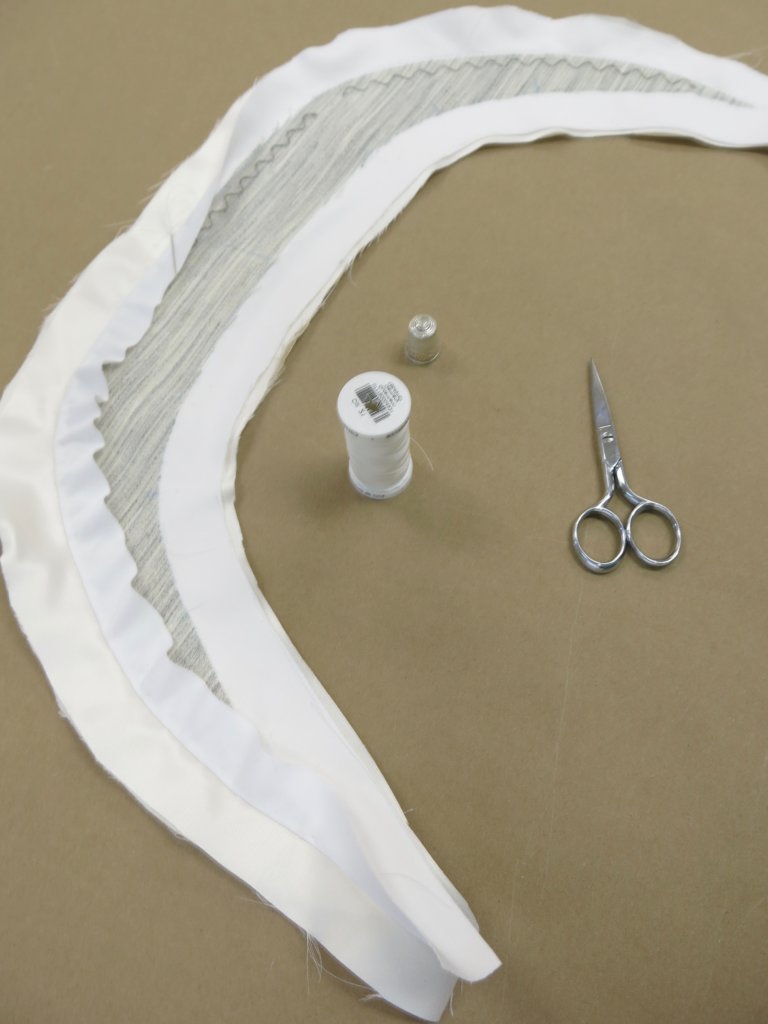
My experiments eventually led me to use my custom pattern to mark and cut the collar from the cotton underlining and fusible tailor’s canvas.
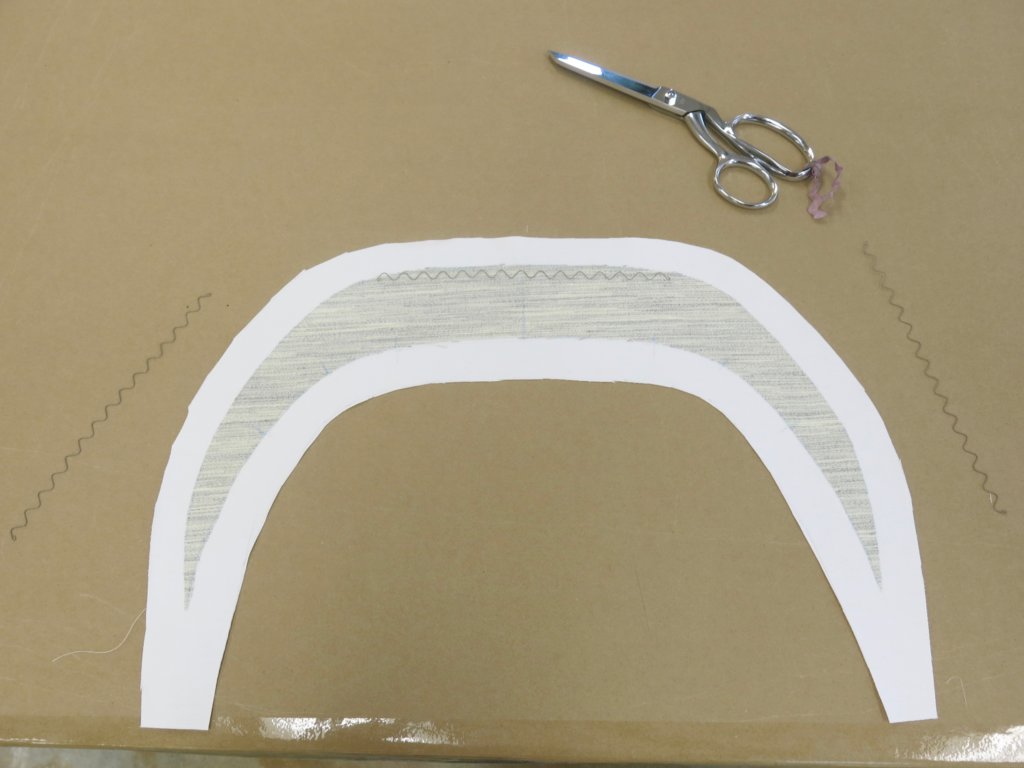
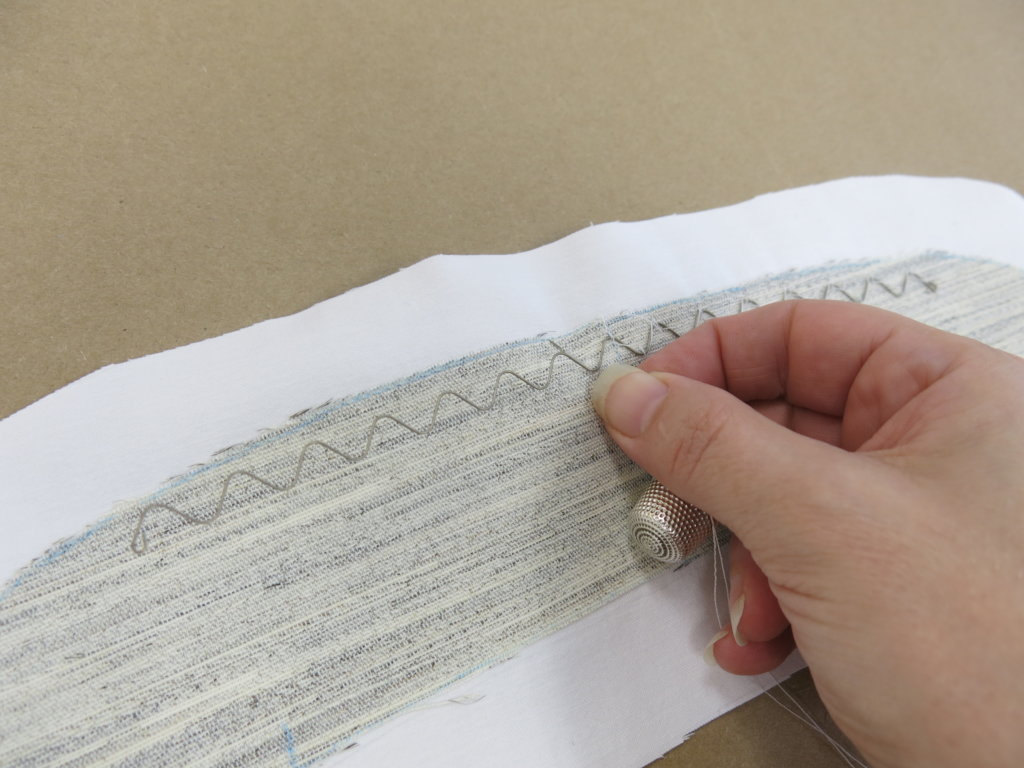
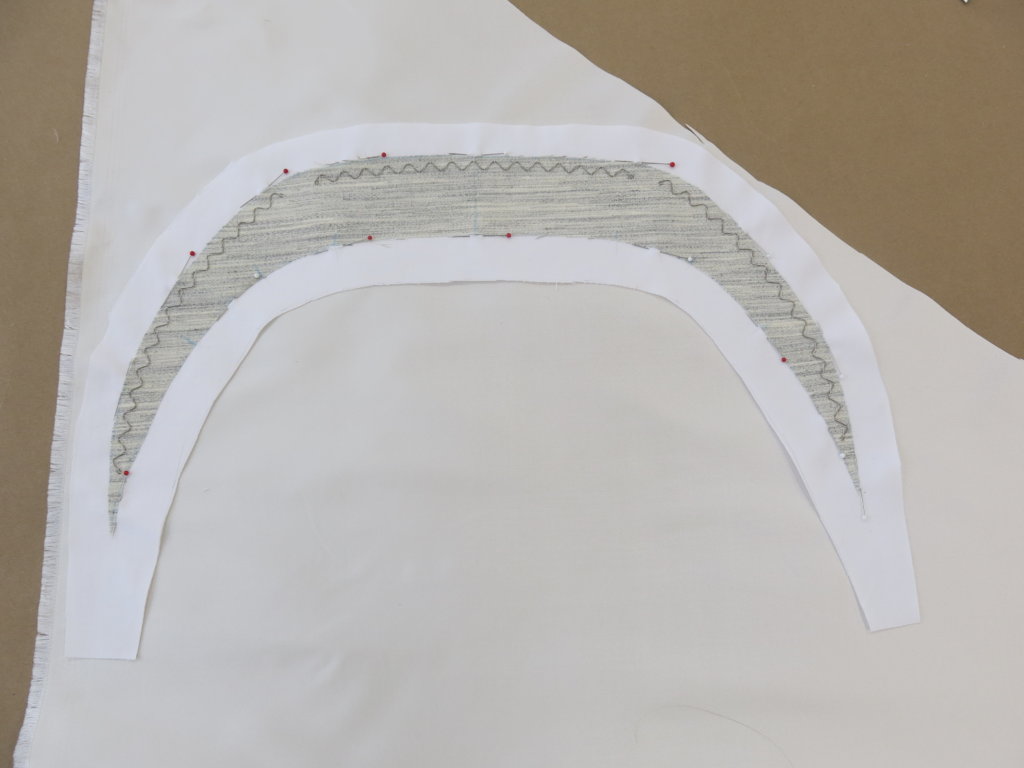
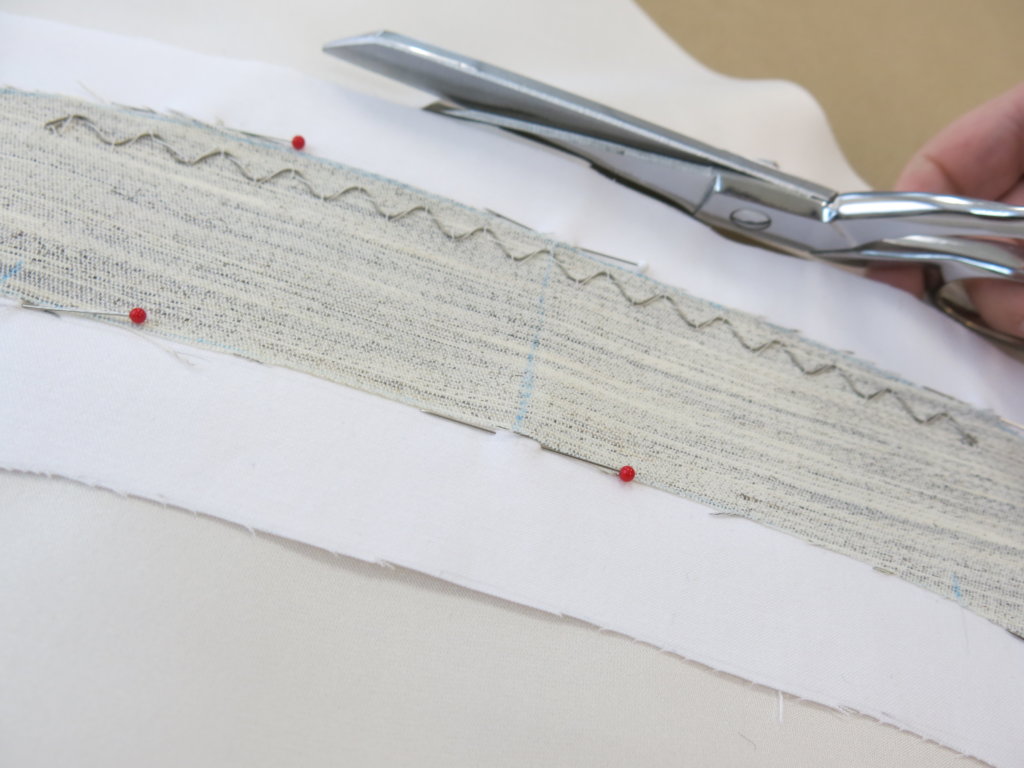
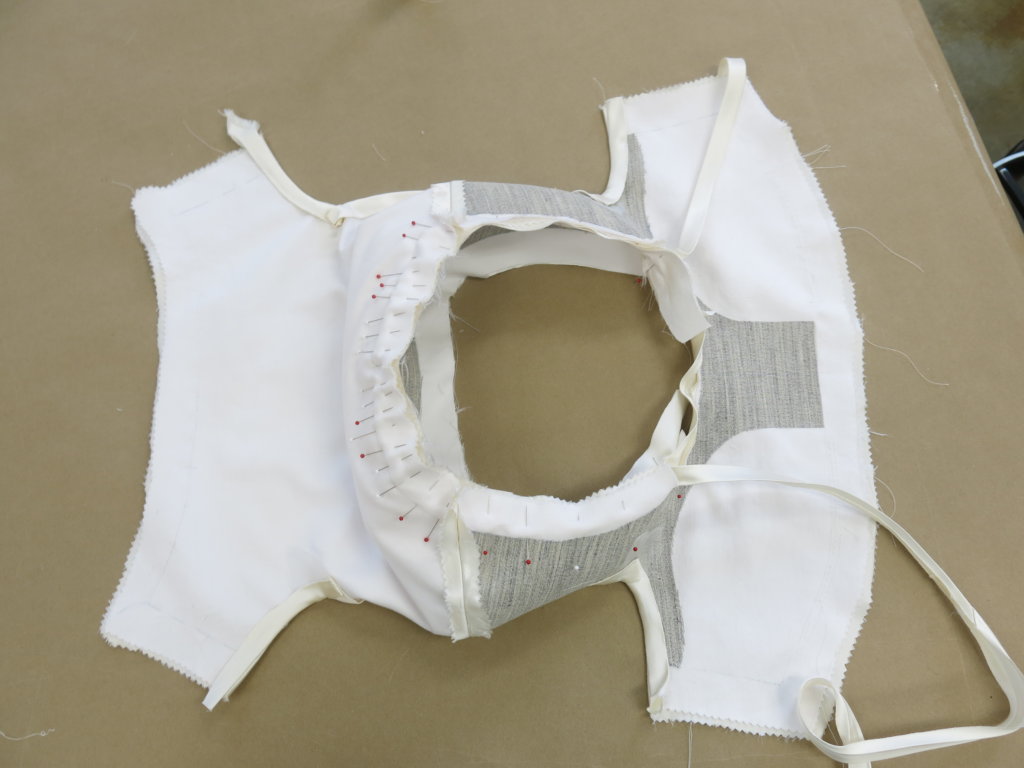
Once fused together, I strategically placed my wiggle bones…
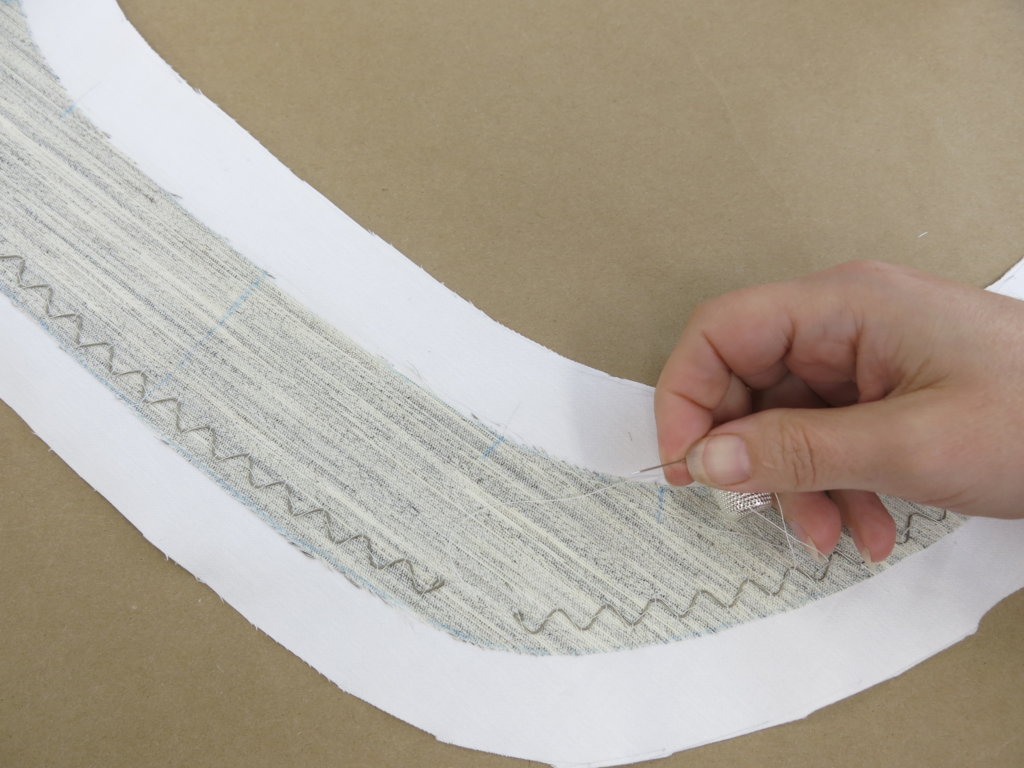
…and hand stitched them securely in place.
This was really fun! Since I had not yet added the silk layer, it was totally fine if the hand stitches looked wonky or went all the way through. If I do things right, nothing on the inside will be seen from the outside of the dress.
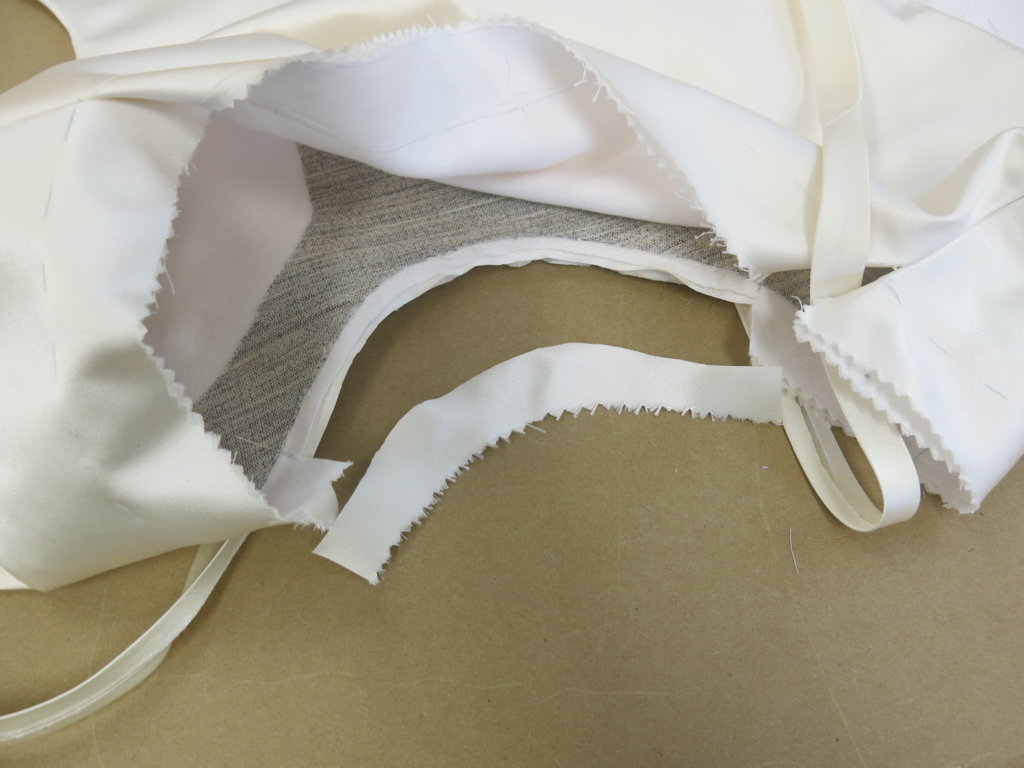
Here’s a secret peek inside the wiggle bone layout. Leaving a little space where horizontal-becomes-vertical allowed for a nice “break” to create the beautiful shape.
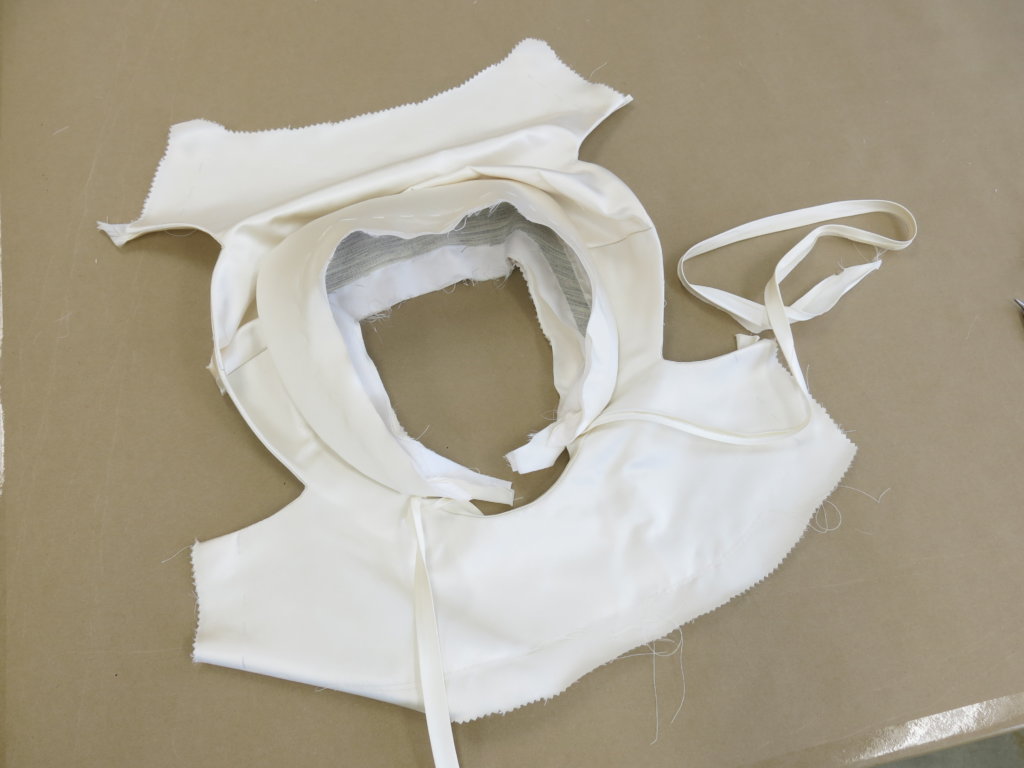
Once the wiggle bones were permanently in place, I added the collar piece to the silk…
…for cutting and underlining.
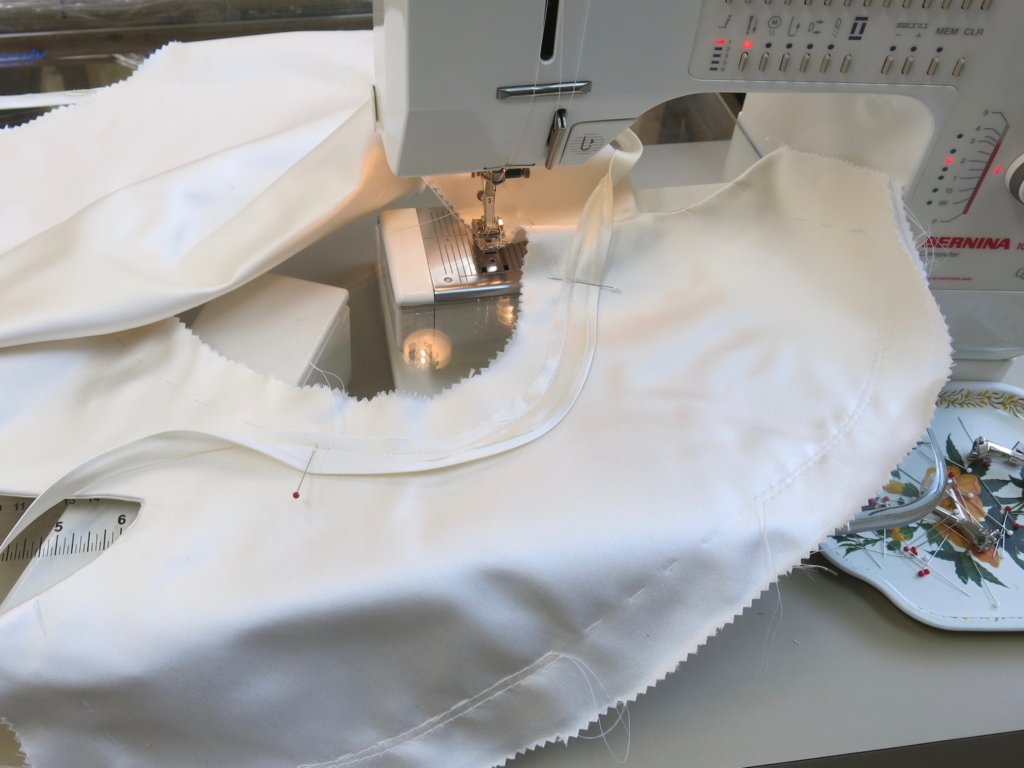
I also created another collar piece as the facing and machine stitched the two together along the outer curved edge.
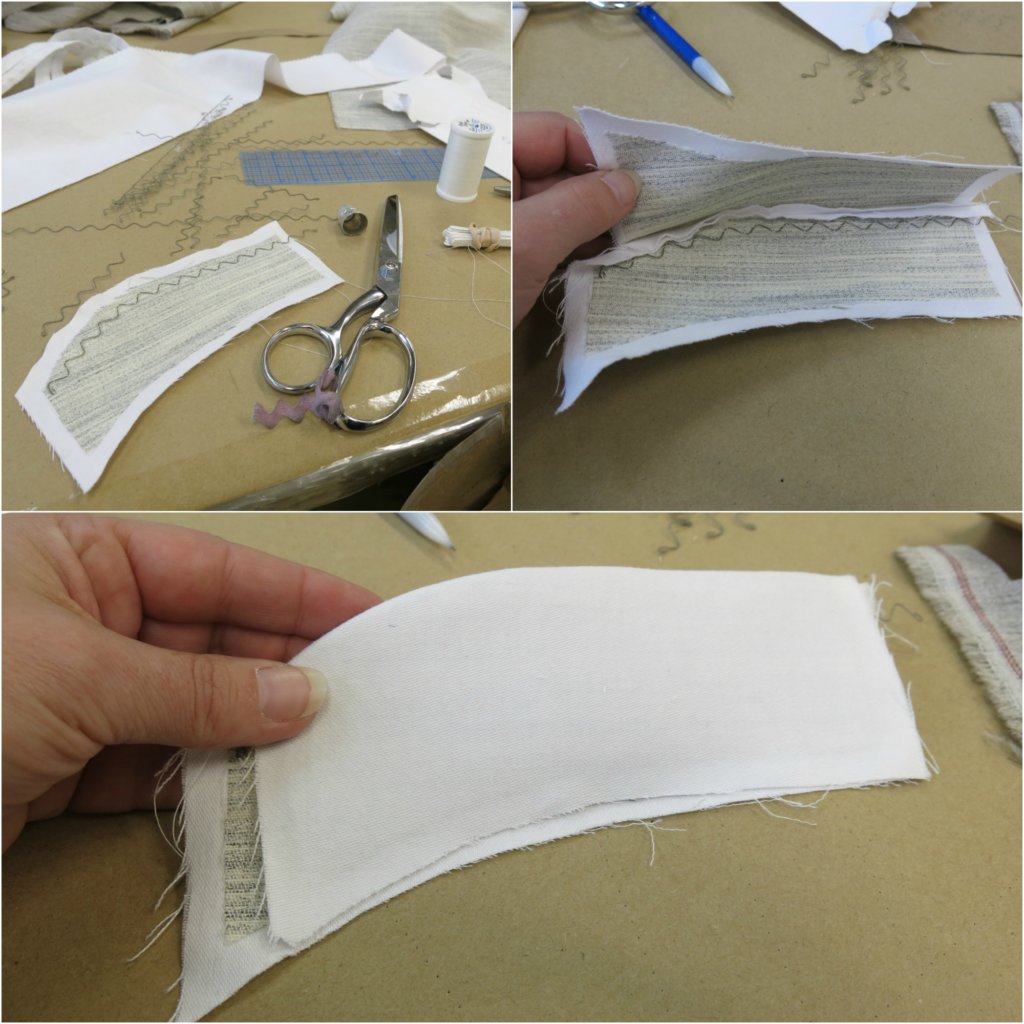
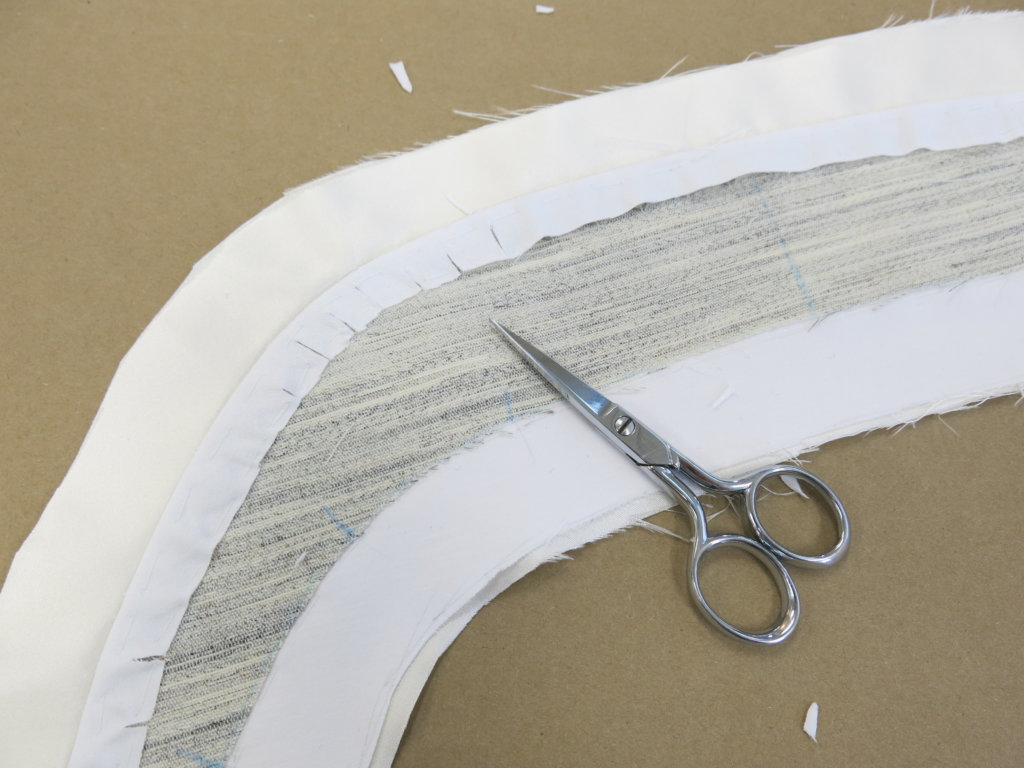
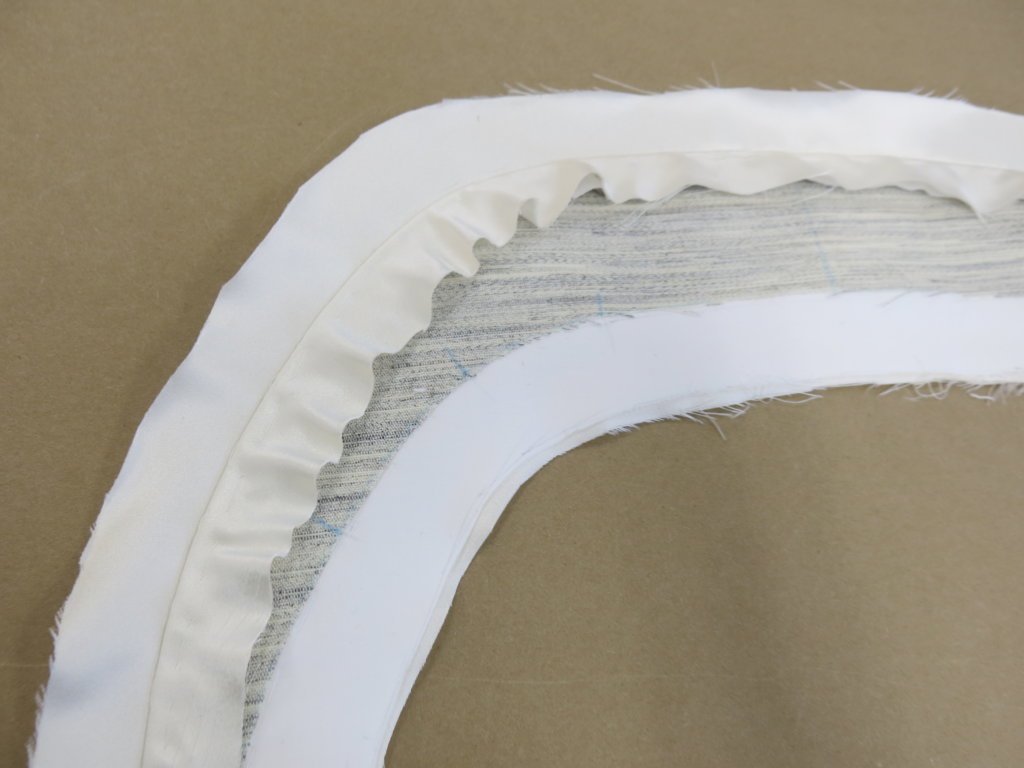
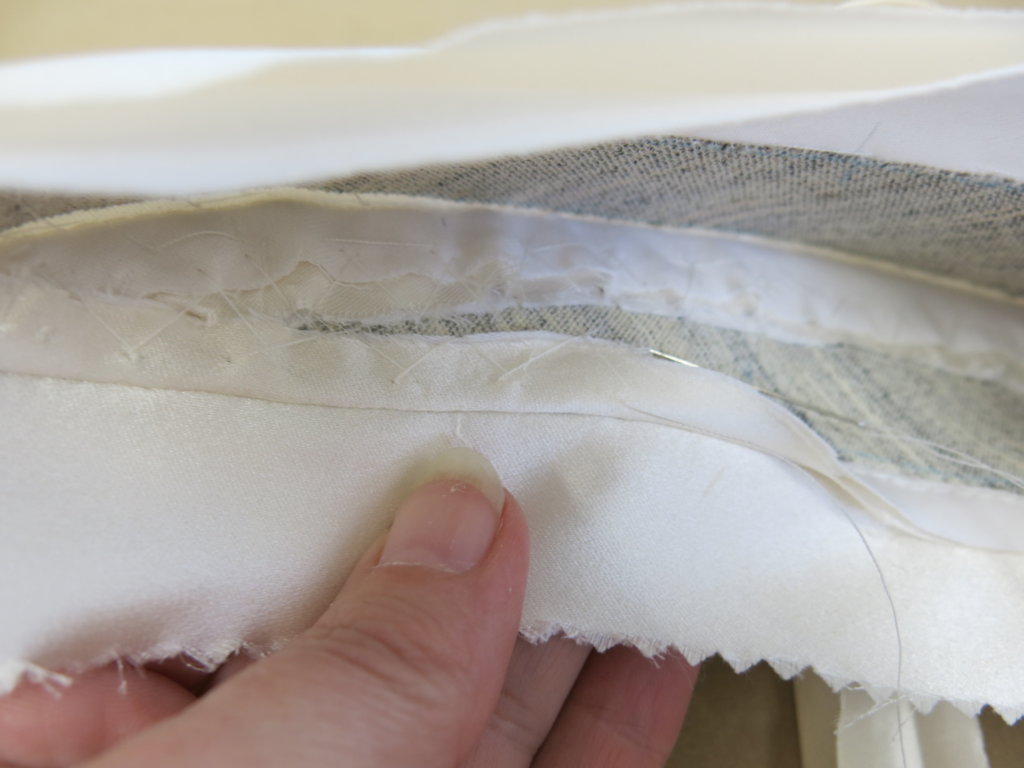
When allowances are turned inward on a curve, this creates ripples. These would need to be controlled for a clean finish.
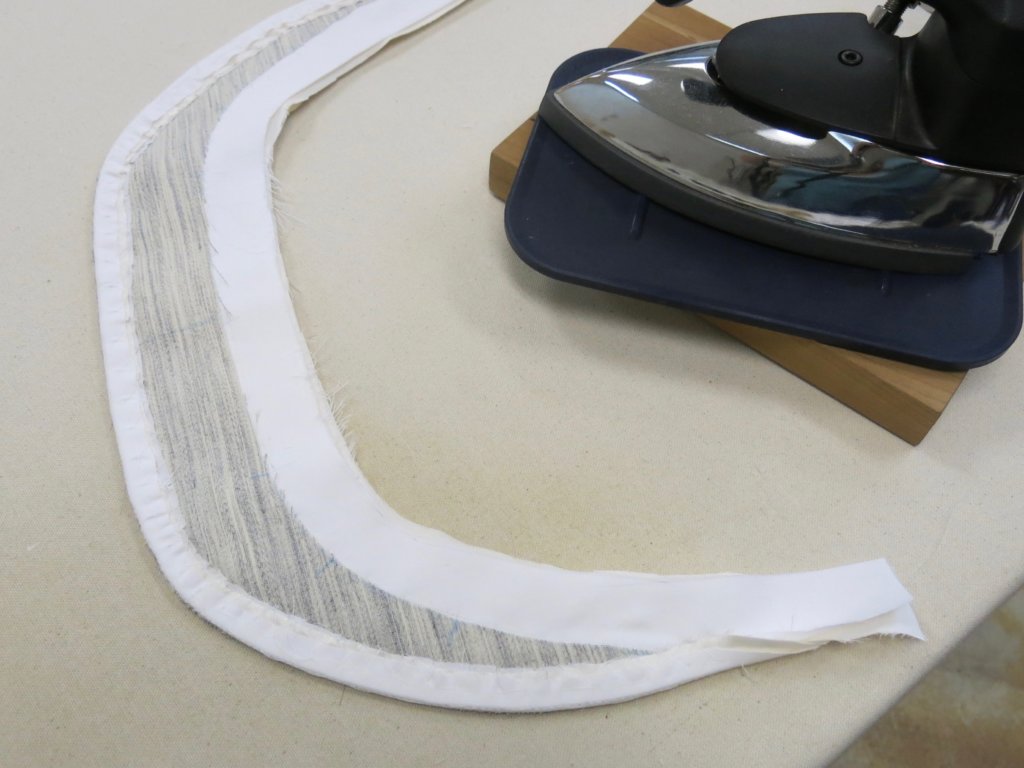
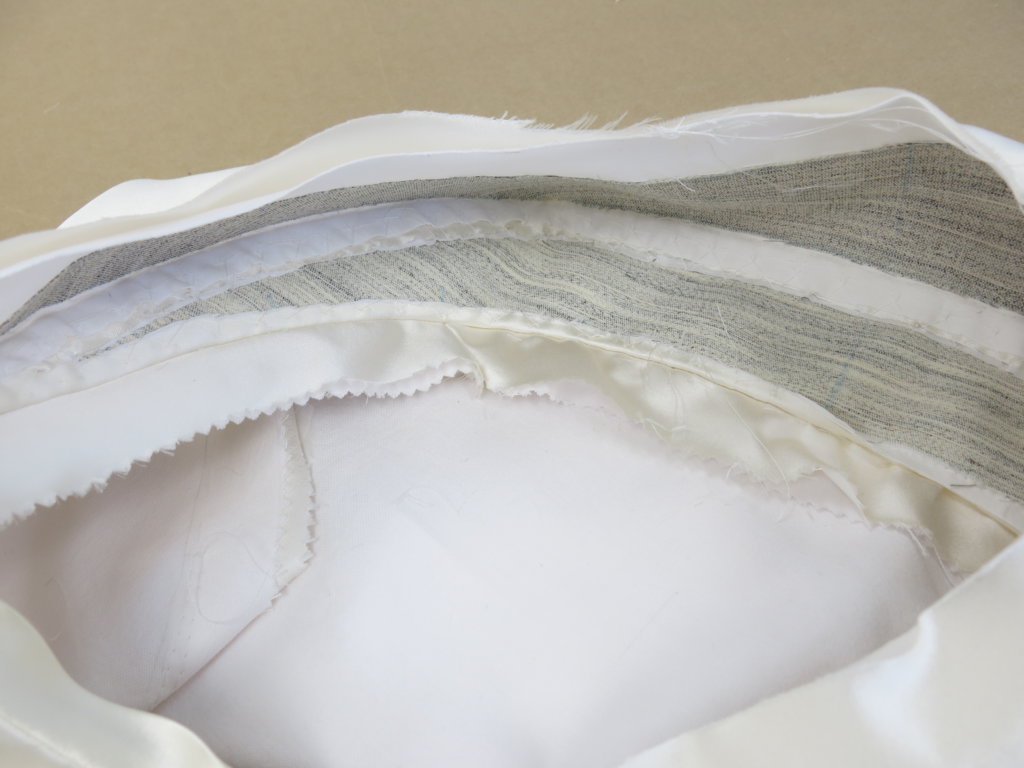
So the first layer was trimmed and all the little bubbles were clipped away before the allowance fabric was hand stitched smoothly over the metal.
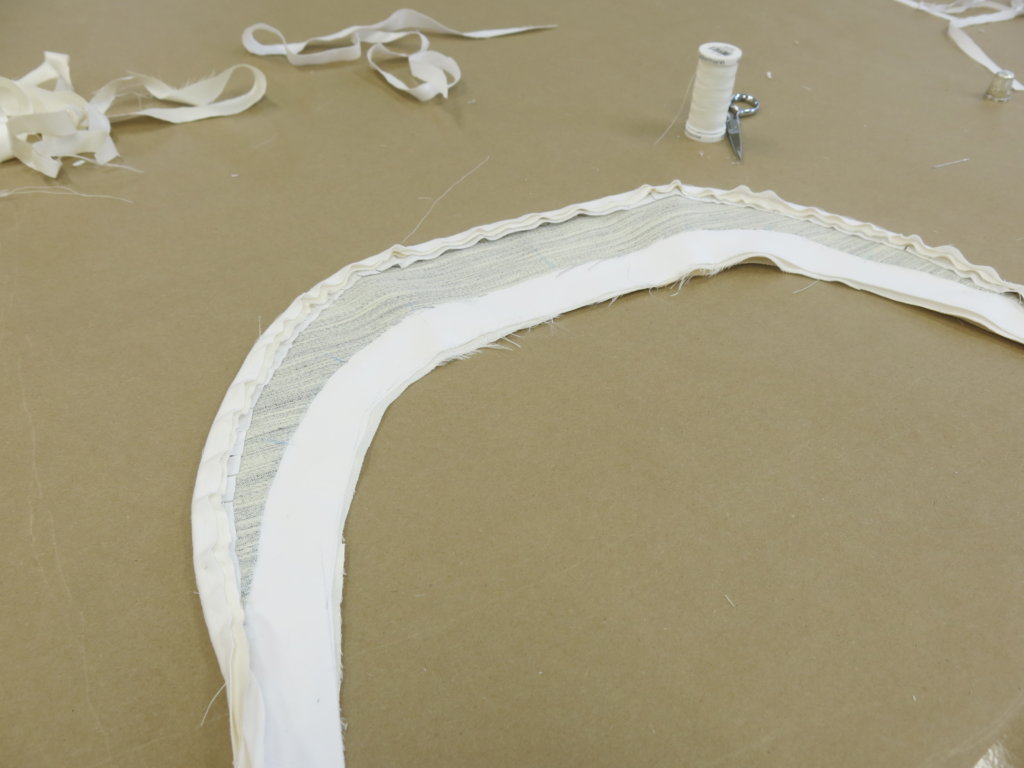
Then each consecutive layer was also turned, trimmed, and clipped…
…until each underlining layer and each silk layer was smooth and secure.
With a strategic press, it was a flat success!
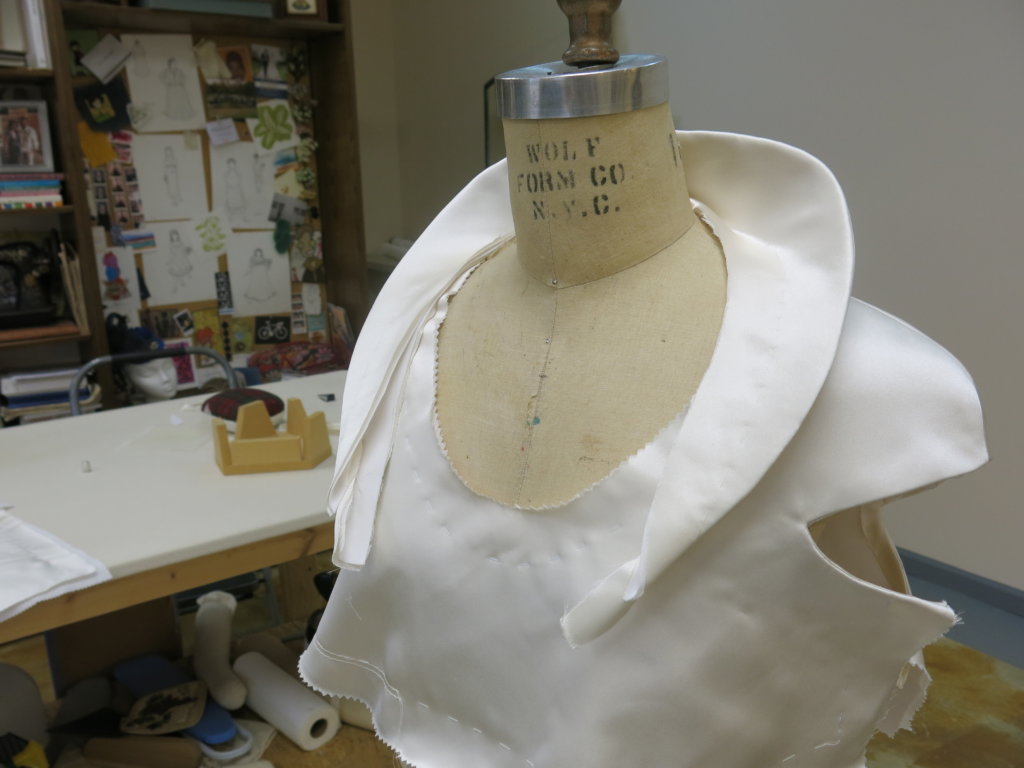
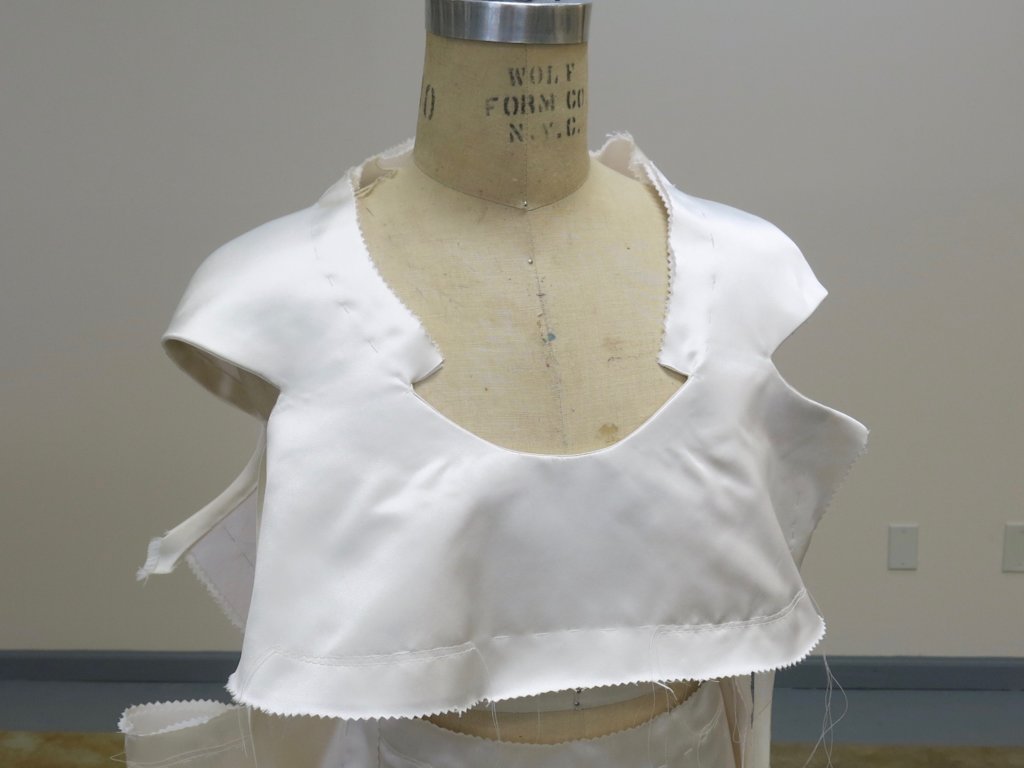
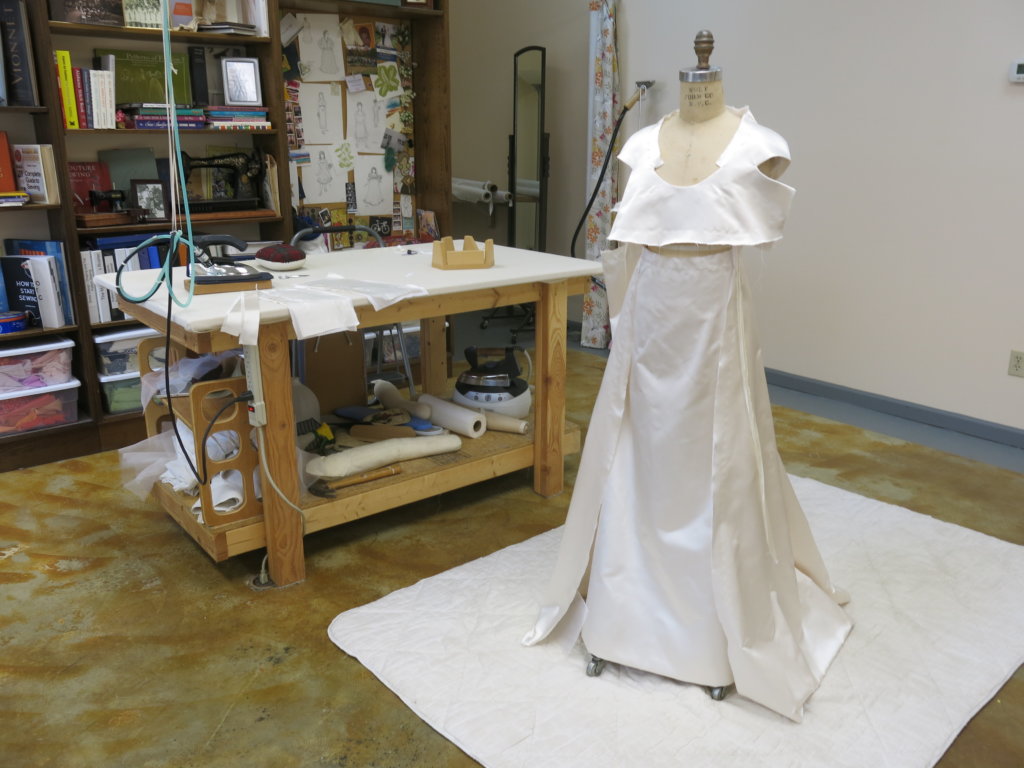
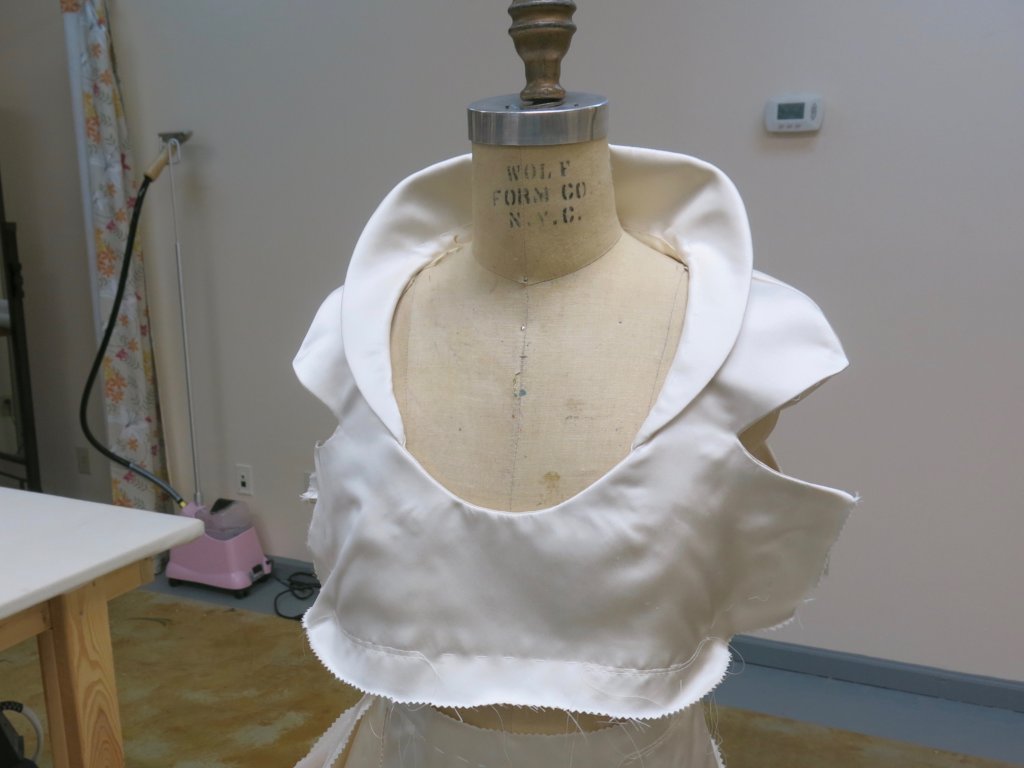
I was able to turn the collar right-side-out and drape it across the shoulders of the dress form to check my work.
I was really happy with the buttery smooth finish! The curves and the silk looked just delicious. Wiggle bones and careful construction For The WIN!
The Décolletage
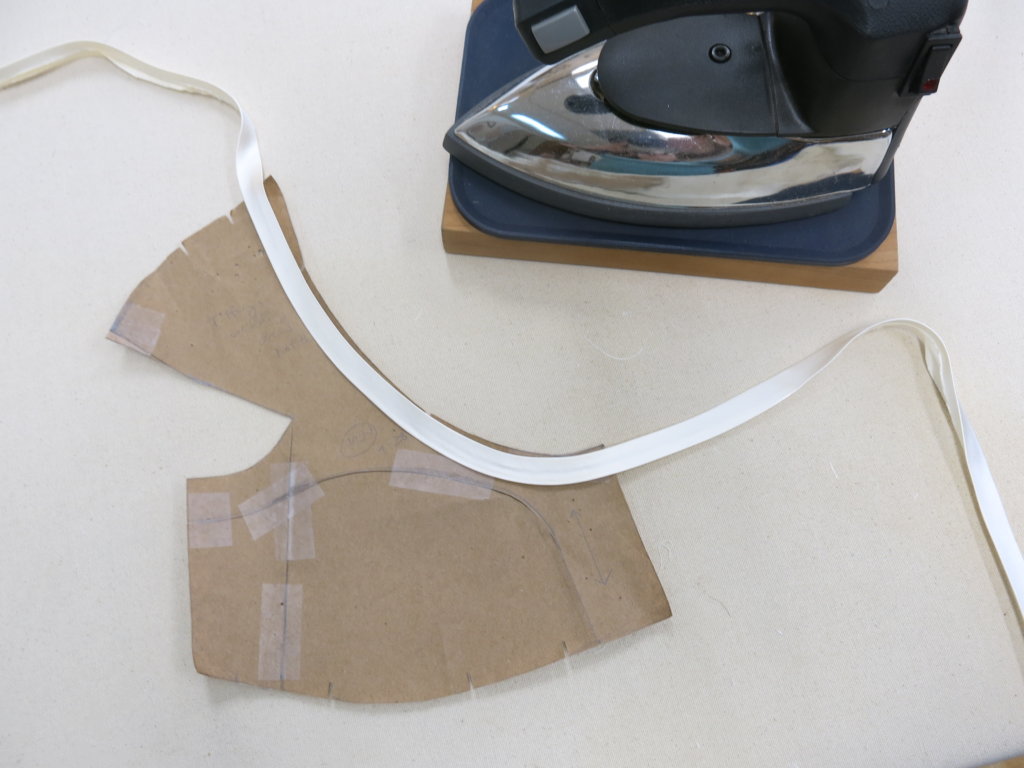
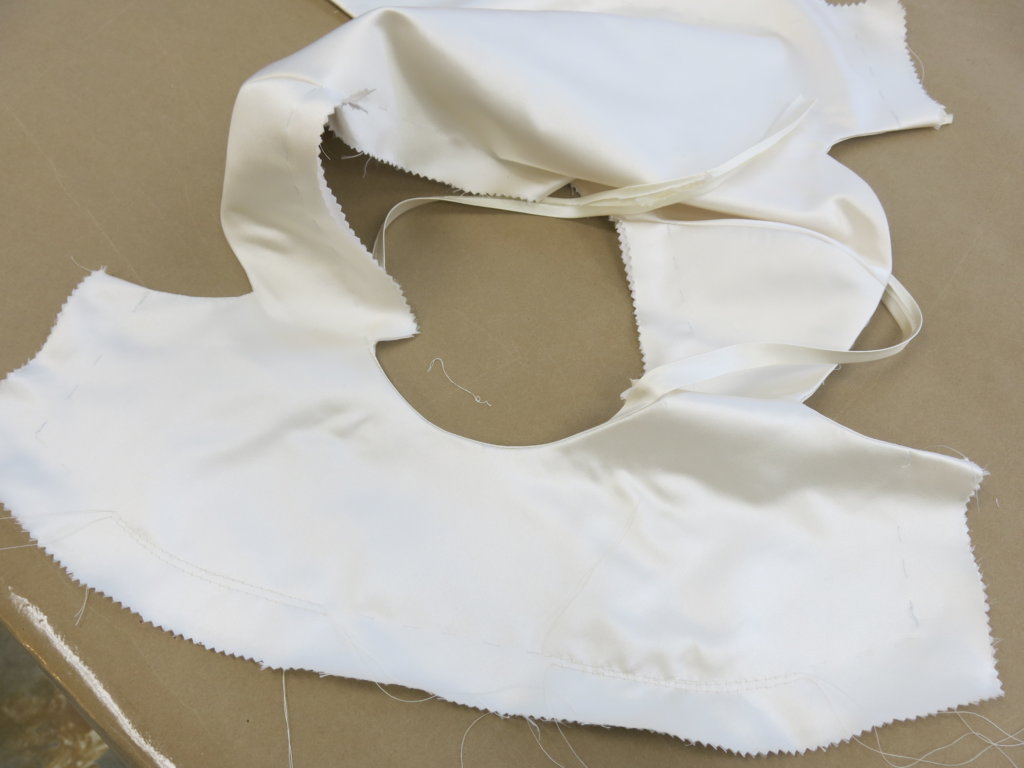
Next up: the Neckline! The collar covers most of the neckline edge, but the lower décolletage of the bodice needed to be finished before it could be added. I’d use the same custom made bias tape as the cut-in-one sleeve finish.
I used my custom drafted pattern to shape the tape…
…to match the lower neckline curves…
…which I machine stitched in place.
Once permanently stitched, I trimmed the allowances…
…and turned the tape to the inside for a clean press on my tailor’s ham.
Looking sharp!
With the armholes shoulders and lower neckline finished, it was finally time to add the collar!
I love seeing my dresses in parts and pieces as much as I love seeing the finished look. How about you?
Couture Connections
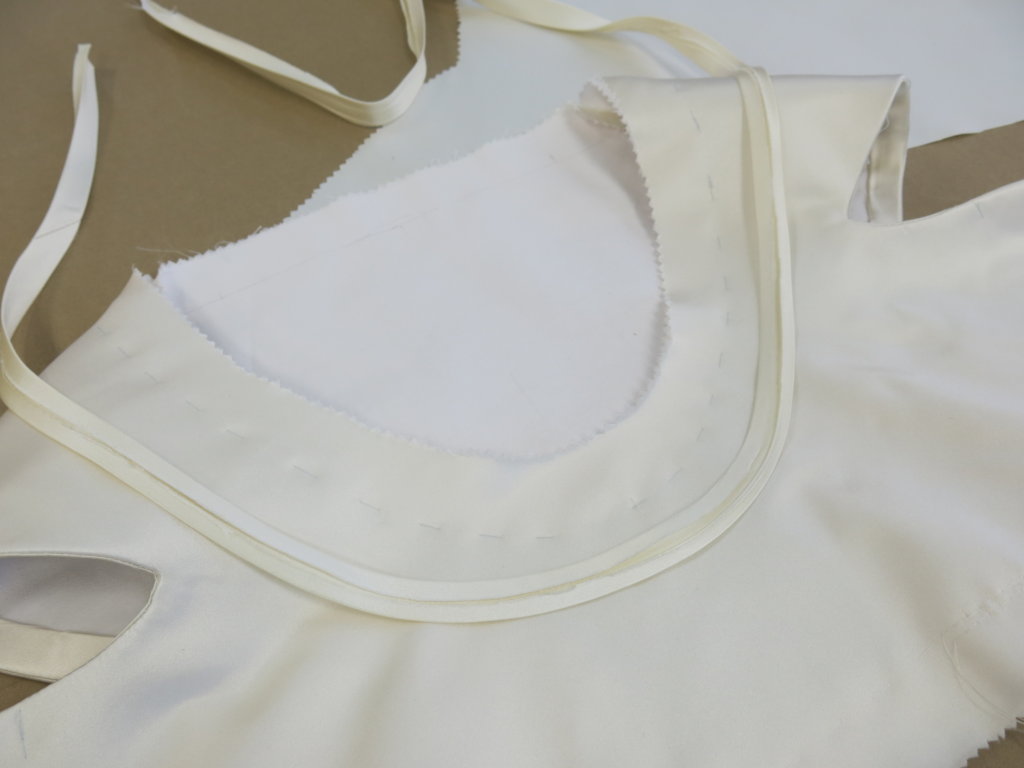
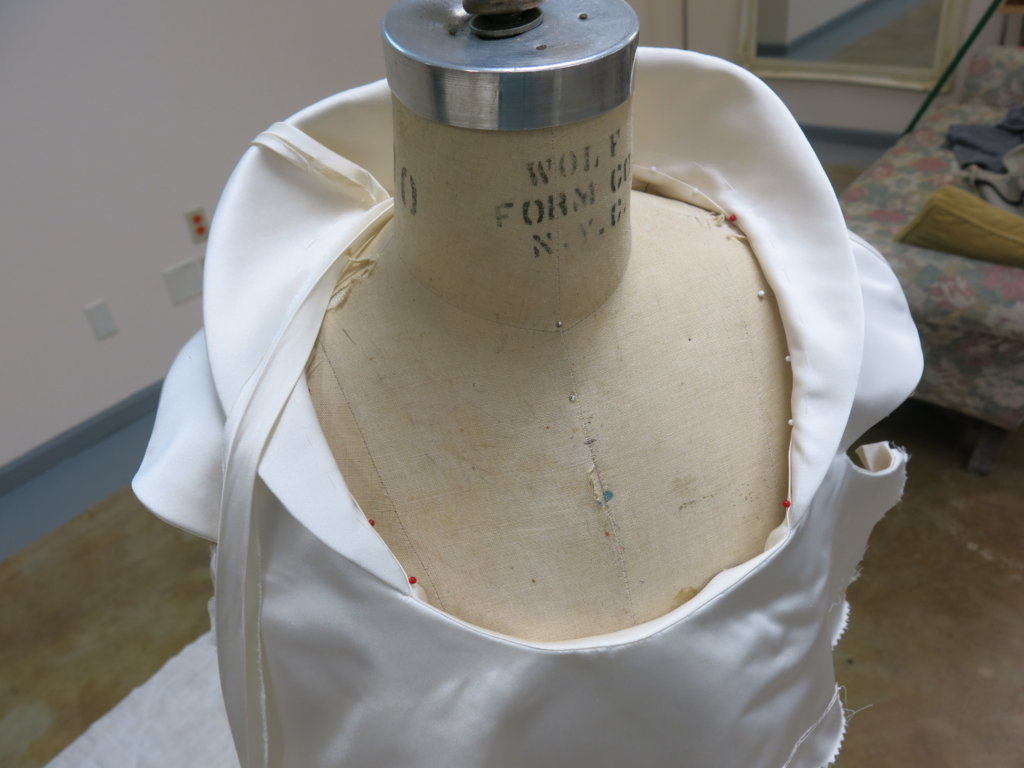
Next, I carefully pinned the inner collar in place around the neck…
…before carefully machine stitching it in place.
I then trimmed the collar allowance and hand stitched it in place.
I did not trim the allowances of the bodice layer at this time. The collar (and other parts of the design) were changed many times throughout the custom process of Tiffany’s dress. Leaving this allowance would leave me the ability to make some changes after the final fitting, if the bride wasn’t thrilled (though it would mean creating and attaching an entirely new collar.)
For these reasons, I also merely basted the rest of the bias tape that would be used for finishing, until I was confident it was really finished.
Yay!
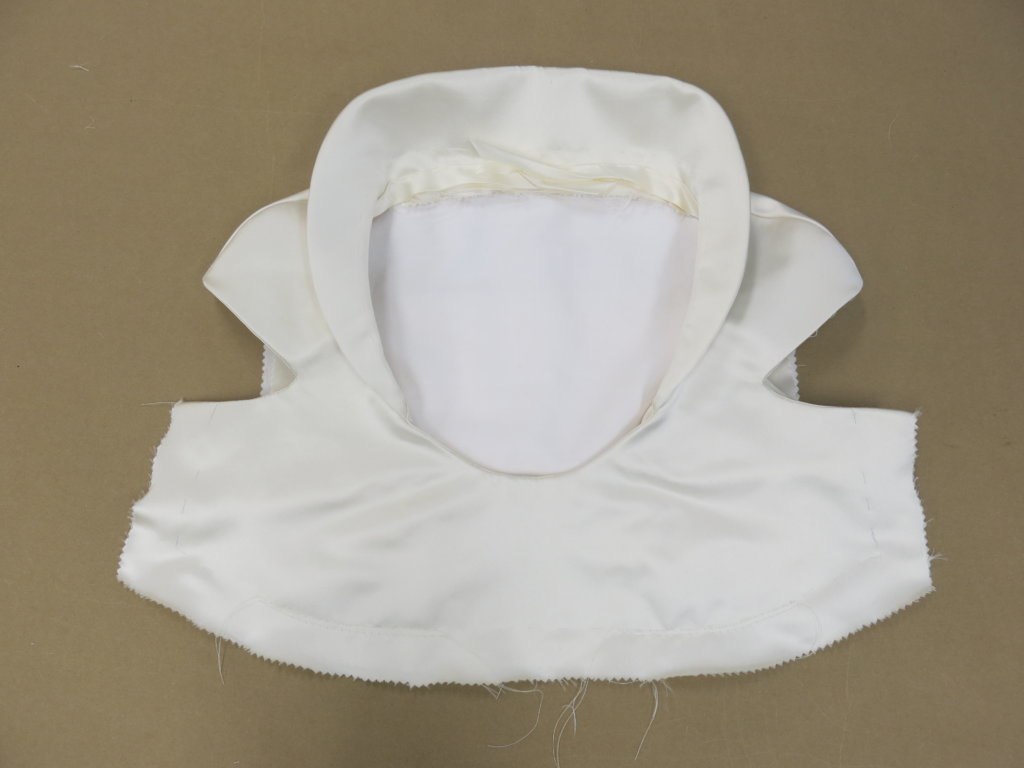
Ta da! Tiffany’s custom collar and neckline were ready for the final fitting and I was really happy with how it turned out!
And now you know some of the secrets hidden inside!
With the top of the bodice ready, it was finally time to attach the skirt and midriff and combine all the little parts and pieces into one beautiful wedding dress. So exciting!
Have you ever made a complicated collar or played with “wiggle bones” (or some other obscure notion)? I’d love to hear more about it!
NEXT POST: The rest of the dress is assembled and Tiffany tries it on!
ALSO: There’s only a few opportunities each year to become one of my students and this weekend is one of them! My online course SKIRT SKILLS (aka Couture for Beginners) opens for registration this Saturday Aug 8, 2020! A FREE PREVIEW offer is also available for a few more days! Learn more at www.SkirtSkills.com!
I’m a former professional costumer and couture dressmaker for one-of-a-kind bridalwear located in rural North Carolina, who teaches custom garment sewing to sew-curious solo-sewists online.
My blog mostly follows along with the couture process of how each heirloom-quality custom wedding dress was made from idea to wedding day, as well as personal sewing projects and other couture curiosities.
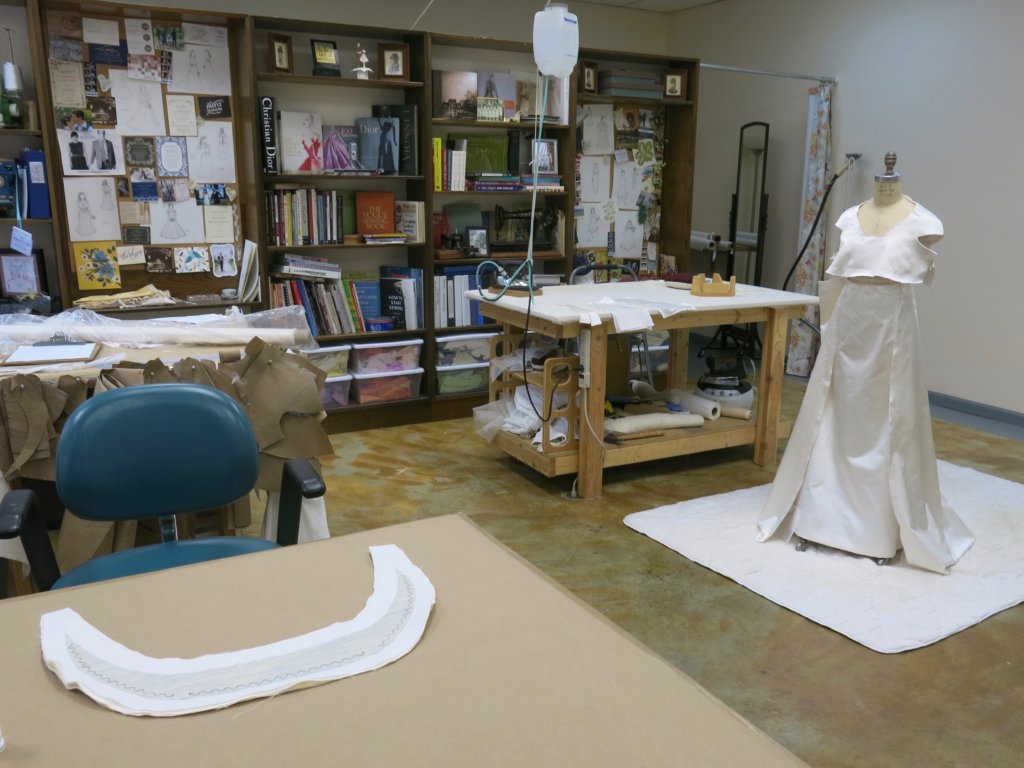
Welcome to my (temporary) Sewing Studio! Come on in! I love seeing other people’s workspaces and tools, so I thought I’d show you mine. I cleaned up after a big...
Duplicating the Vintage Dress’s Pattern (without taking it apart)
In my previous post, I introduced Jenn and the custom bridal wear project(s) for her wedding weekend. Check out the full story for all the deets, but to catch you...
I Made Myself the Coolest Dress pt. 1 – Pattern Design & Mockup
Though my personal wardrobe is mostly “the dressmaker has no clothes”, when I do make something for myself, it’s usually an epic project. I’m so excited to finally share this...
I’ve been blogging for TEN YEARS now, ya’ll! In “My 10 Year Blogiversary pt. 1”, I share links to each bridal blog series that I’ve created over the past decade....
It’s finally time to share about Deborah’s wedding day! HOORAY! Deborah and Blake were married in November 2017 at a church in Greensboro, NC with the reception at a nearby...
New Bridal Blog Series: My (kinda famous) friend Jenn!
Brooks Ann, Jenn, & Charles January 2017 Going Way Back… To begin my next bridal blog series, let’s head into the Way-Back Machine. And we’ll head farther back than this...
The bridal blog series is back! In each bridal blog series, you meet a new bride and I slowly post-by-post recount the process and share the behind-the-seams story of creating...
The bridal blog series is back! In each bridal blog series, you meet a new bride and I slowly post-by-post recount the process and share the behind-the-seams story of creating...
The bridal blog series is back! In each bridal blog series, I recount the process and share the behind-the-seams story of creating a one-of-a-kind custom couture wedding dress from start...
Sally is someone special. Back in December, I got an email from a dear friend named Sally that I had lost touch with. The subject line: “dear lord i’m getting...
As it starts to get cold, it sure is nice to think about summer! Gin and tonics… BLTs… beach trips… seersucker… Earlier this year, I worked with a bride who...
Welcome to Part 2 of the story behind making Andy’s 2019 wedding dress, where I’ll recount the testing phase of the custom process. If you’ve been following my blog for...
They say documenting the process triples the production time. (And I work more slowly than most.) My Nimbus was cold.She needed a new coat, sooner than later.
Welcome to Part Two! I’m back to share the nerdy behind-the-seams details of creating my Vanishing Tie Top for the Precious Fabric Challenge. But this photo-filled blog post doesn’t feature...
Do you have a fabric that you’ve been SAVING instead of SEWING? Yeah. Me too. So when Whitney Luckenbill of TomKat Stitchery asked me to be a part of her...
Welcome to my (temporary) Sewing Studio! Come on in! I love seeing other people’s workspaces and tools, so I thought I’d show you mine. I cleaned up after a big...
Welcome back! It’s the series finale! In this third and final post of My Warmup Jacket series, I share the behind-the-seams details of my jacket’s construction and finishing stories!
In this second post of My Warmup Jacket series, I share the behind-the-seams details of my jacket’s patternmaking and mockup stories! And after putting this patterning post together (which was...


4 Responses
Your skills in problem solving (solution finding!) and experimenting are just so inspiring!
Thanks for following along!
Love seeing your techniques and I learn something new “wiggle bones” which I had never heard of before.
They are really fun to work with (and not expensive). I hope you’ll give them a try someday!