The basted fitting is an important and exciting part of the custom process. After all the hard prep work, it is the first time that the ideas back in the design and sketch phase become a custom-fit reality. The custom dress form, the custom pattern drafting, the mockups, the fittings, and all the careful and creative cutting and crafting of the silk, have all led up to finally becoming a wearable form. I’ve permanently finished everything I’m confident won’t change- and the rest, gets basted. The basted fitting is the first time the real garment is try-on-able, but also another helpful opportunity for making changes and improvements.
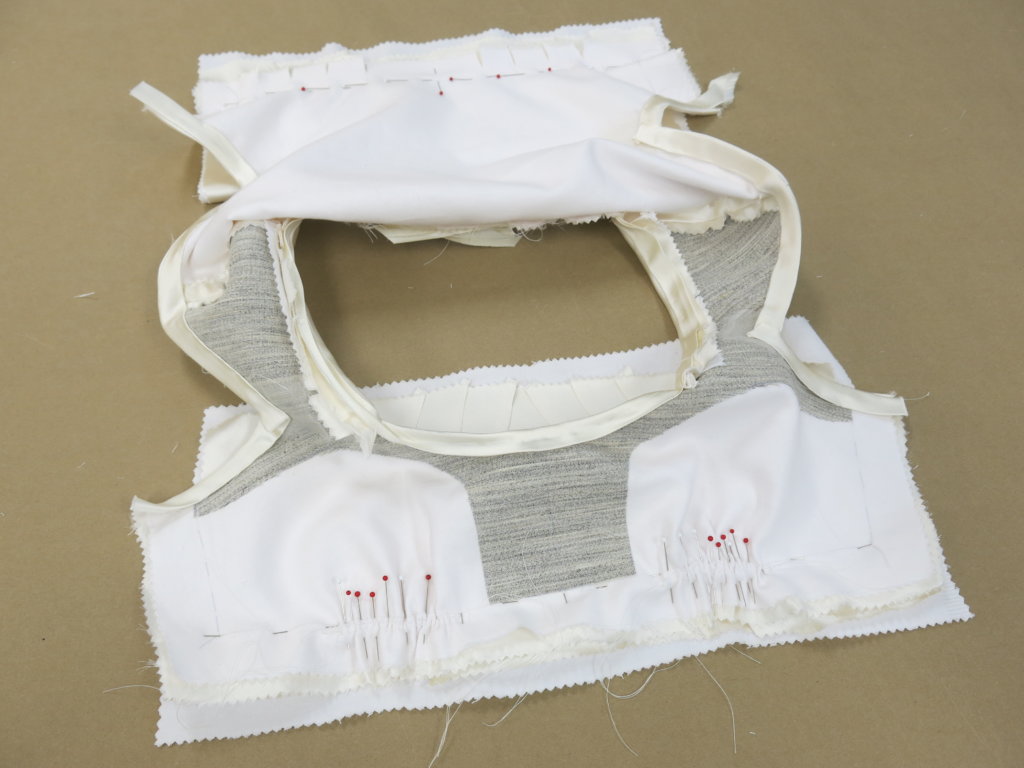
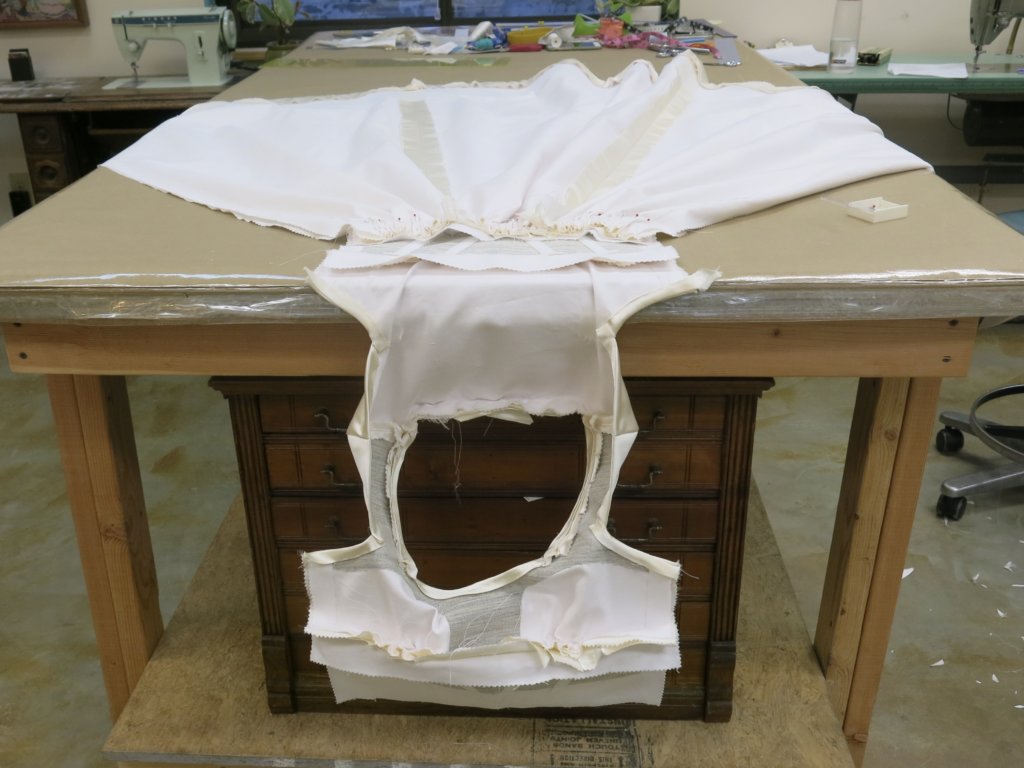
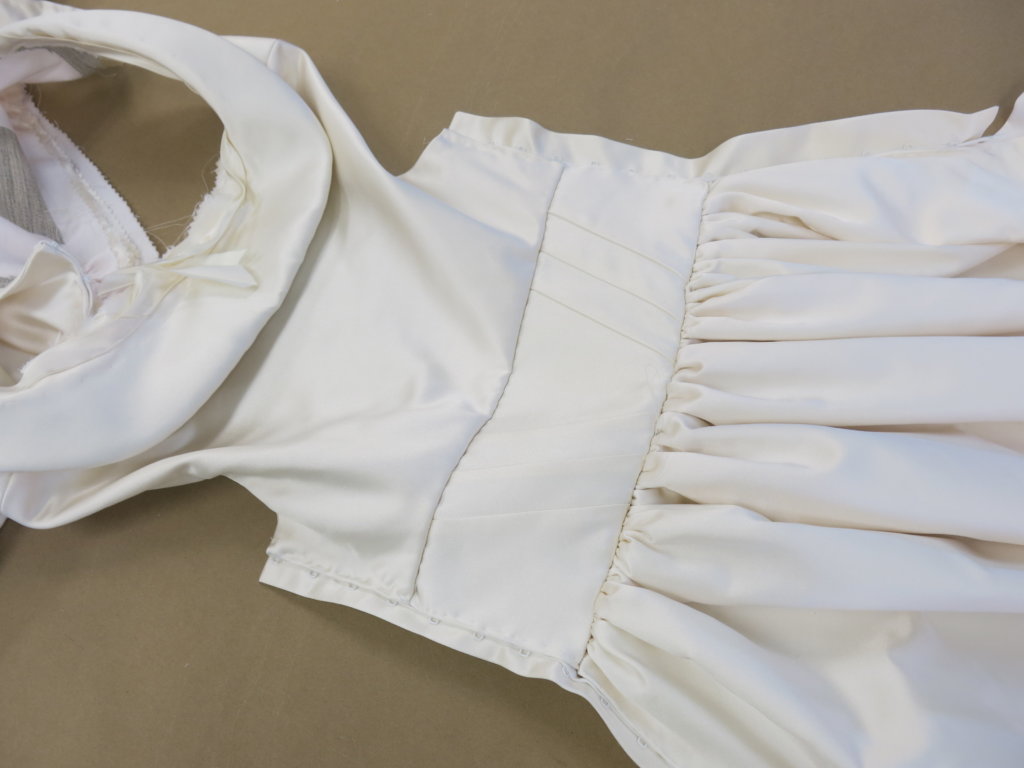
Adding the Midriff Band
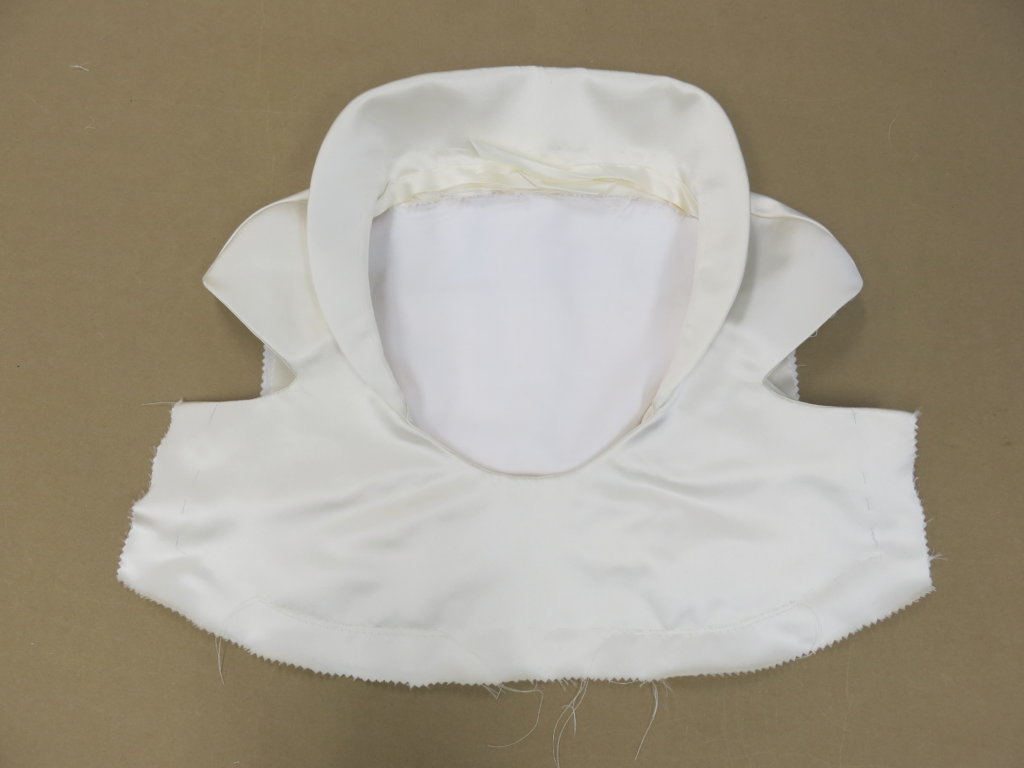
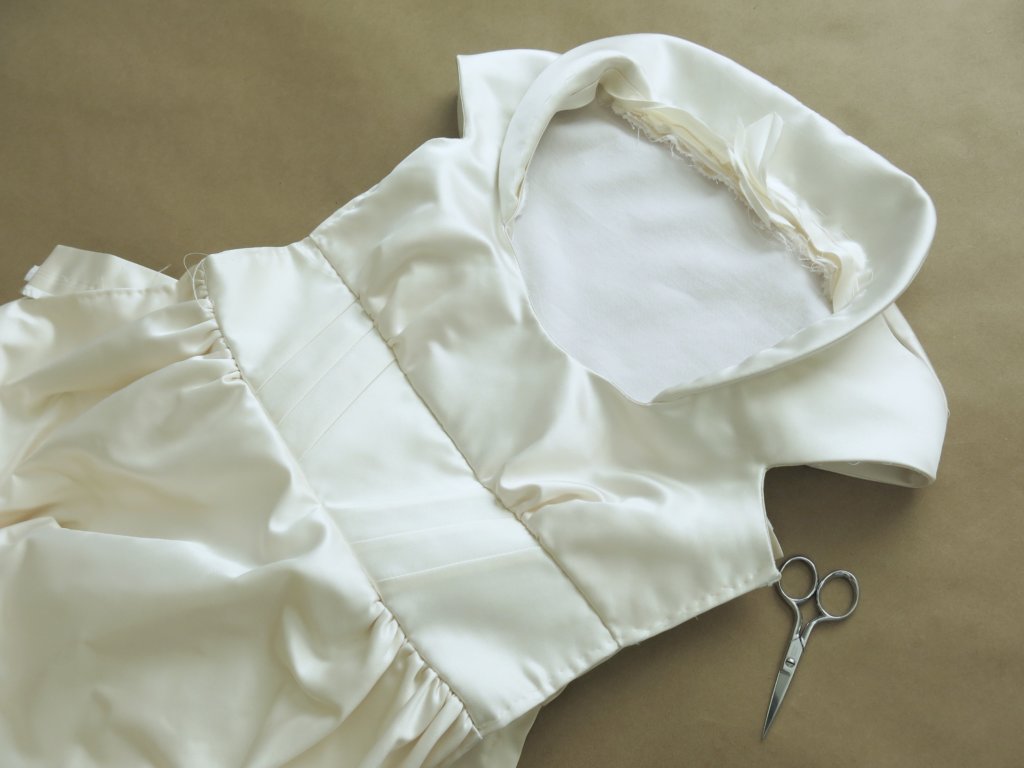
So when I left the story last, I had just finished creating and adding the collar– with some bits permanently finished and other bits basted.
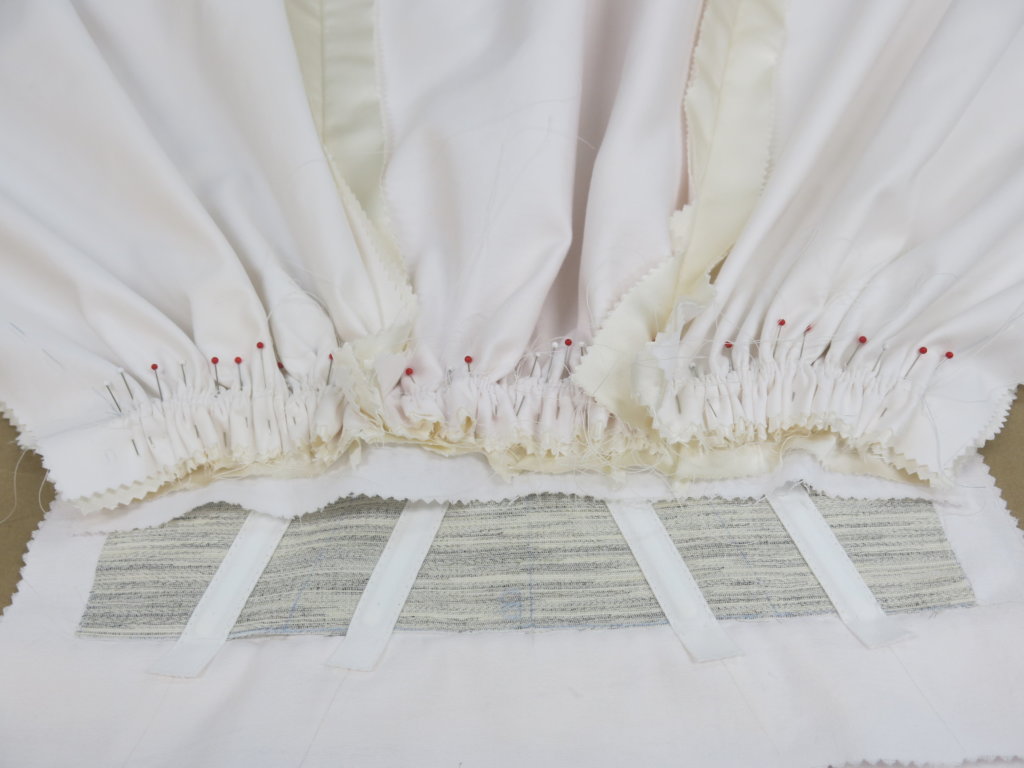
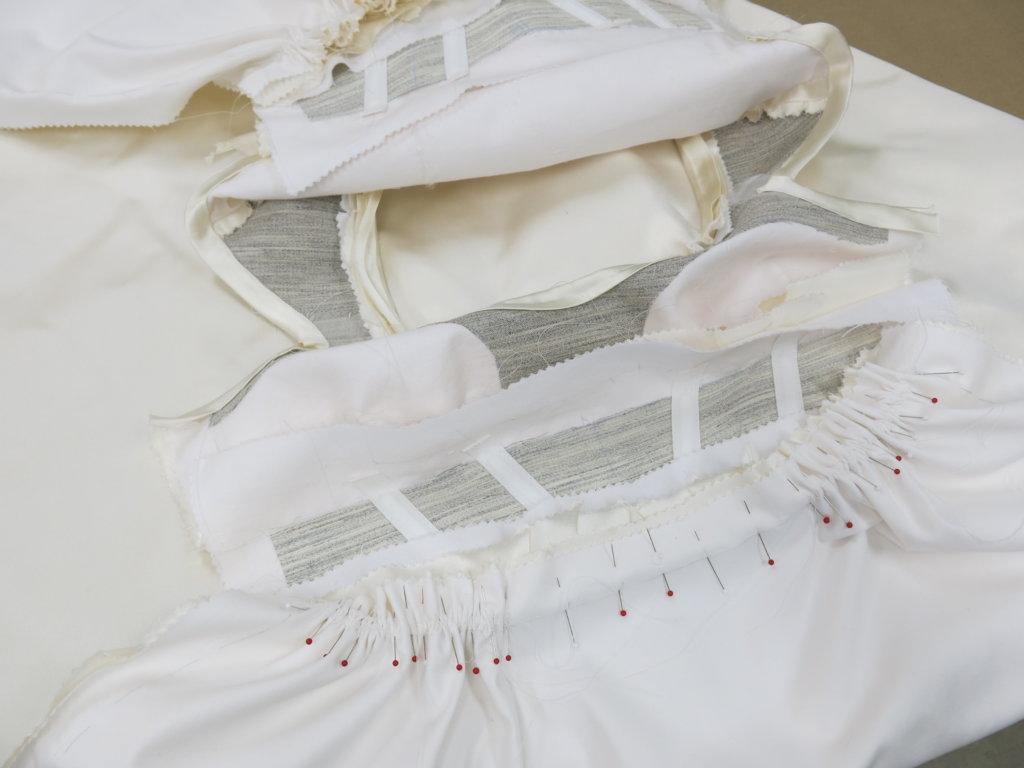
After the back of the skirt was stitched in place, I pinned the front half of the skirt, controlling its gathers to match our design, before stitching the front waist seam.
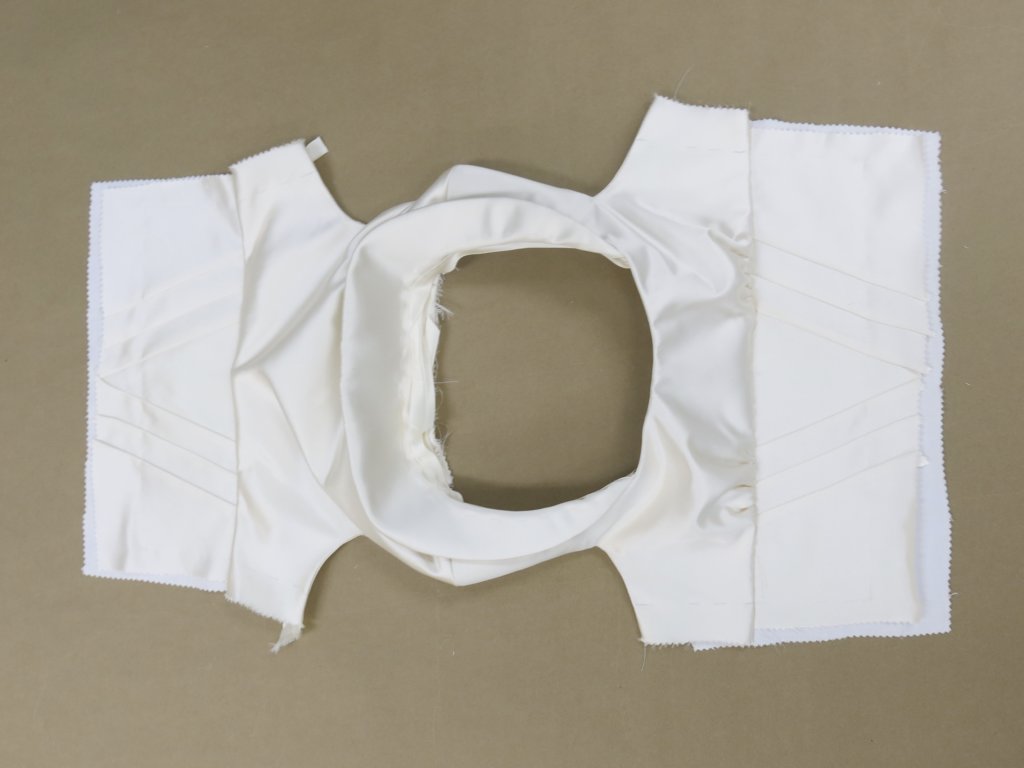
The Side Seams and Closures
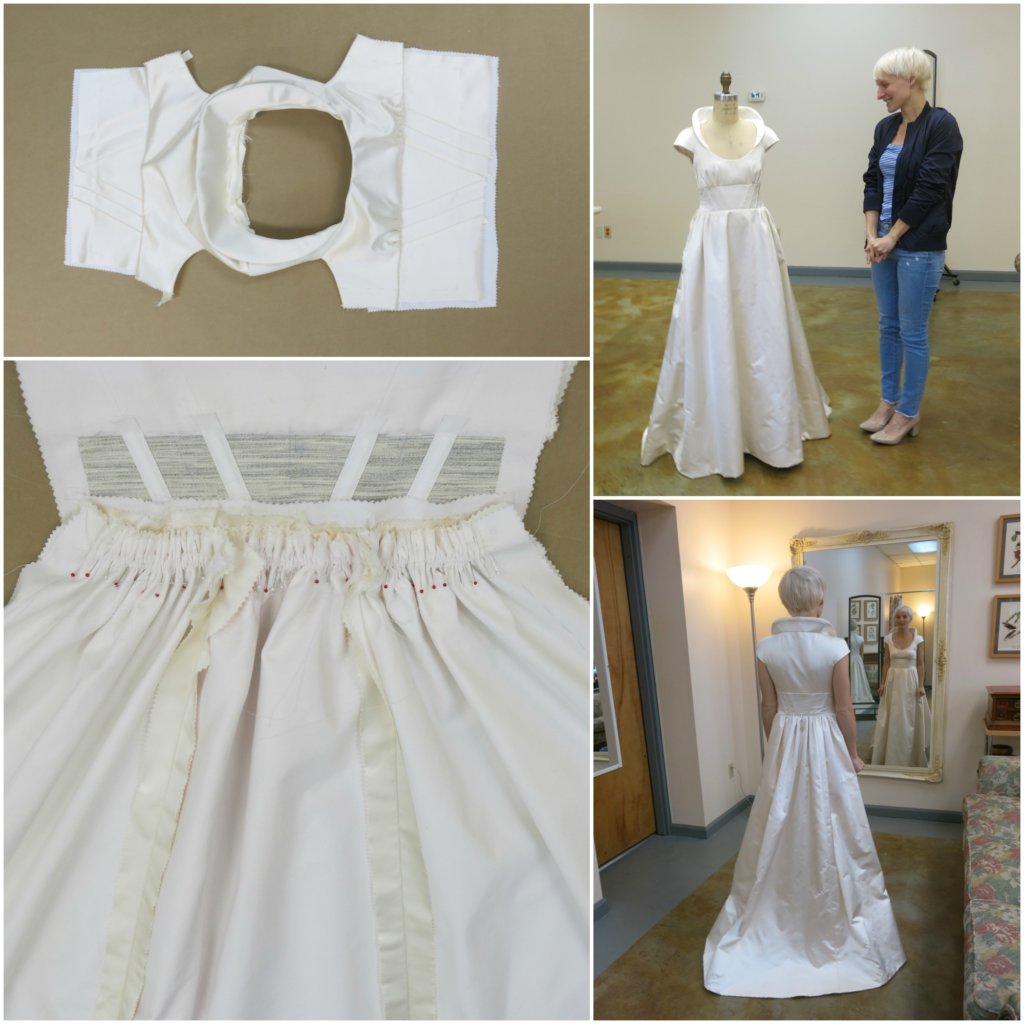
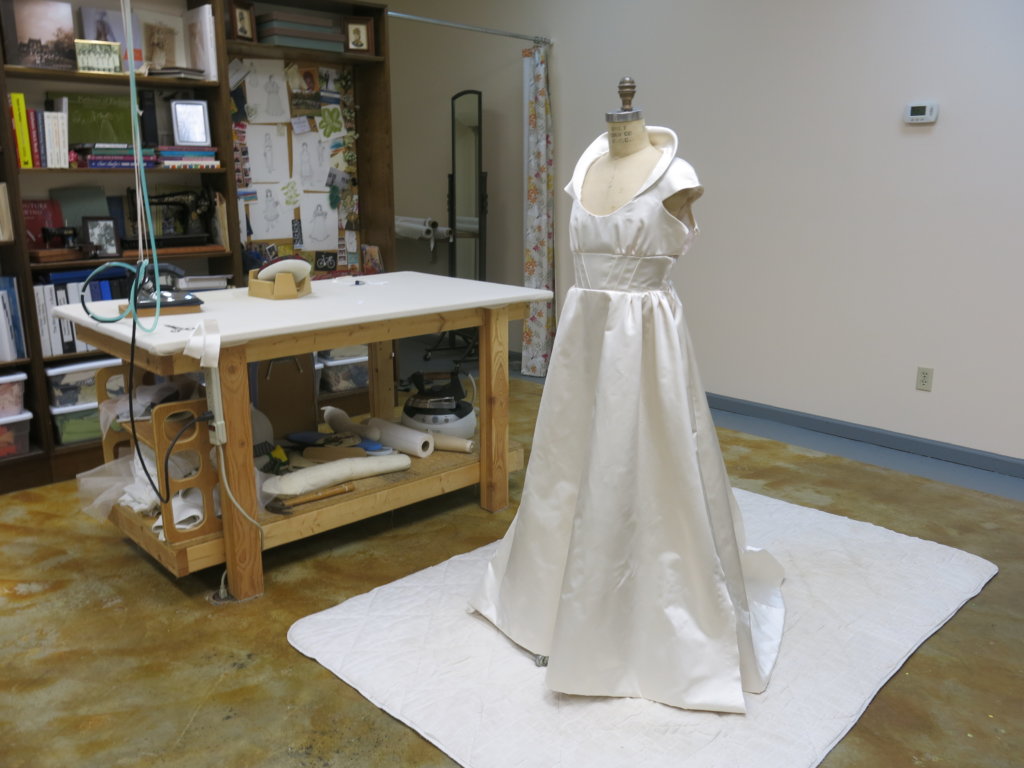
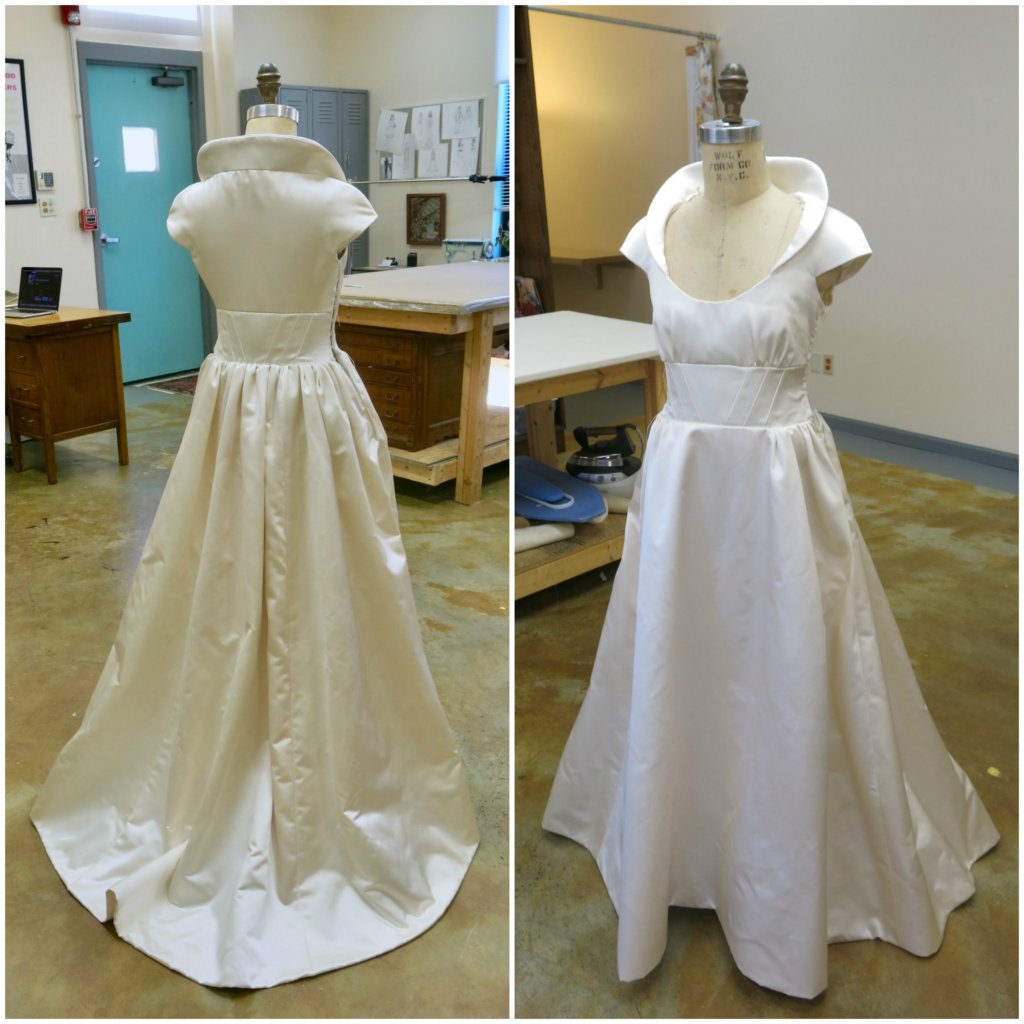
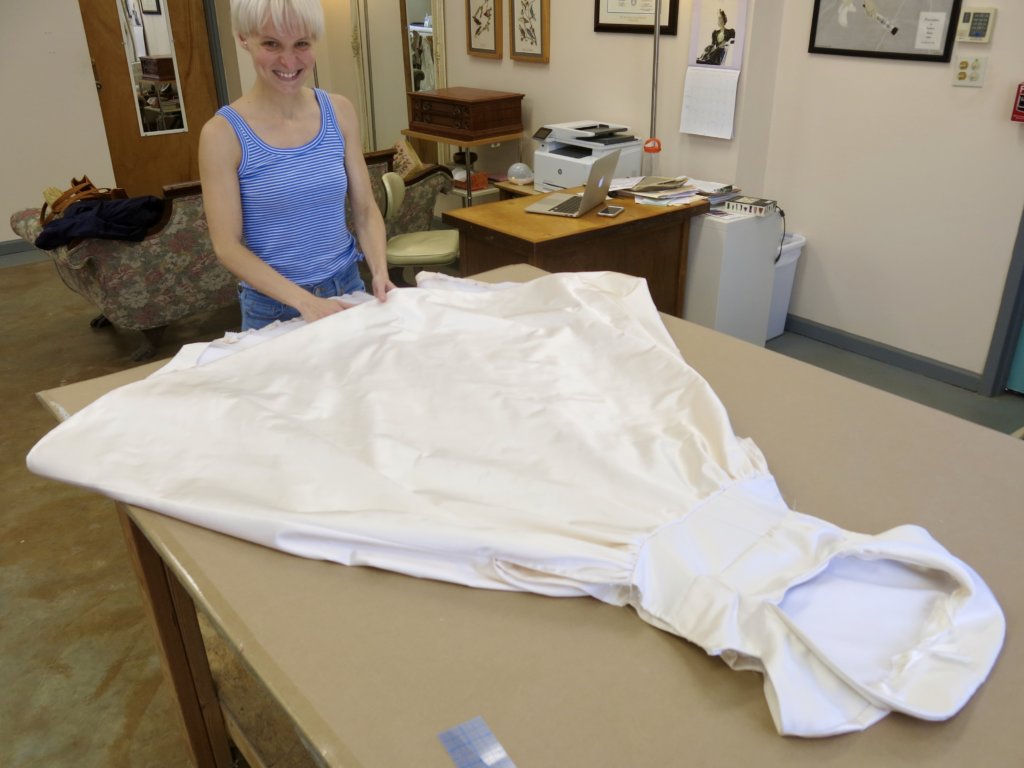
Huzzah! All pieces are one! Though the side seams were still completely open and unfinished, I couldn’t resist trying Tiffany’s dress on the dress form for the first time!
Looking good!
But back to work!
Different fabrics offer different fit and feel, so even though we previously fine tuned the dress to fit Tiffany’s body in mockups, it would be important to leave somewhere for easy fitting adjustments before permanently finishing the garment in the final fabrics.
With Tiffany’s dress, the side seams are the only places I have available for final fitting adjustments. So for her basted fitting, these would be held together with basting stitches, rather than permanent ones.
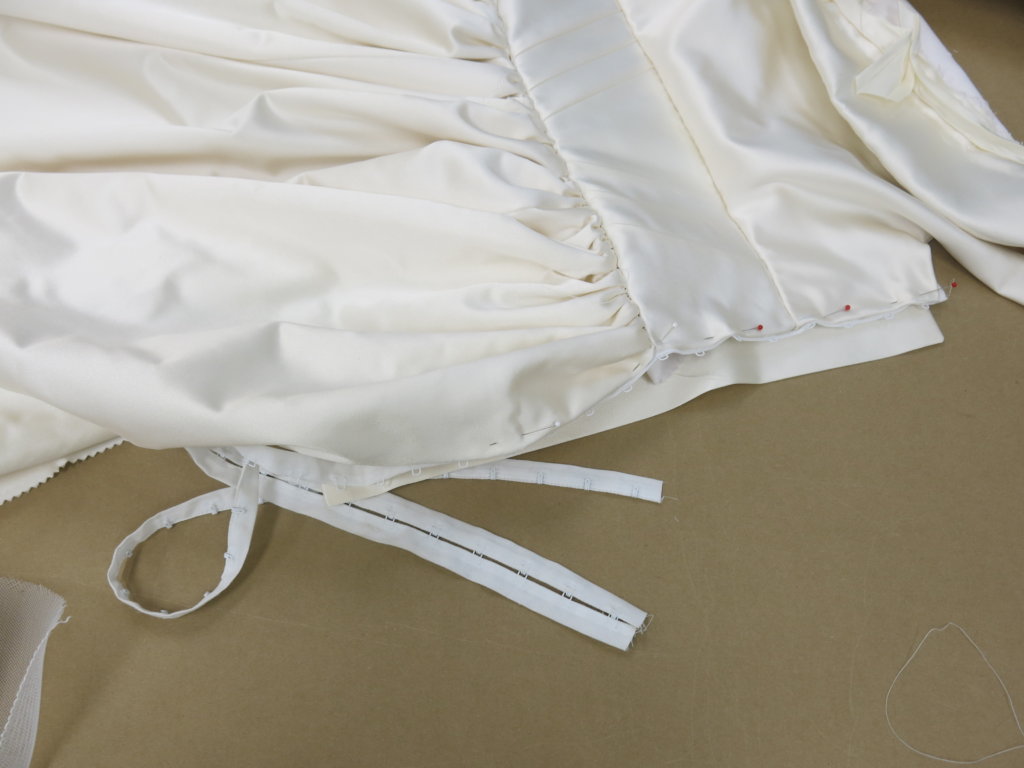
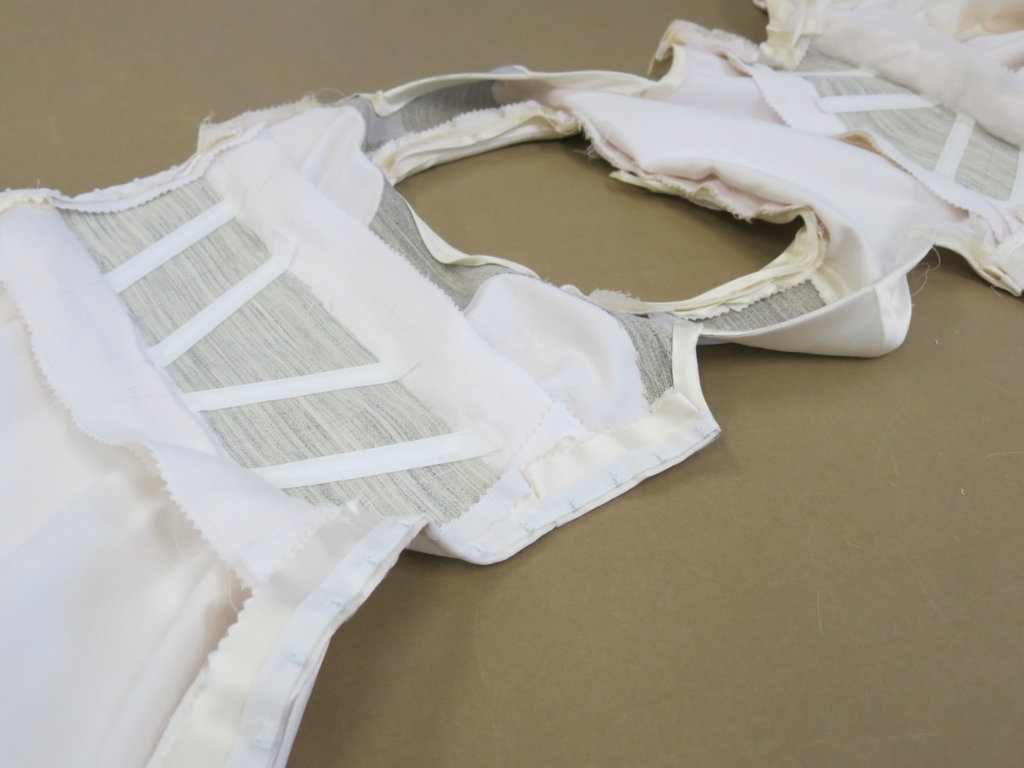
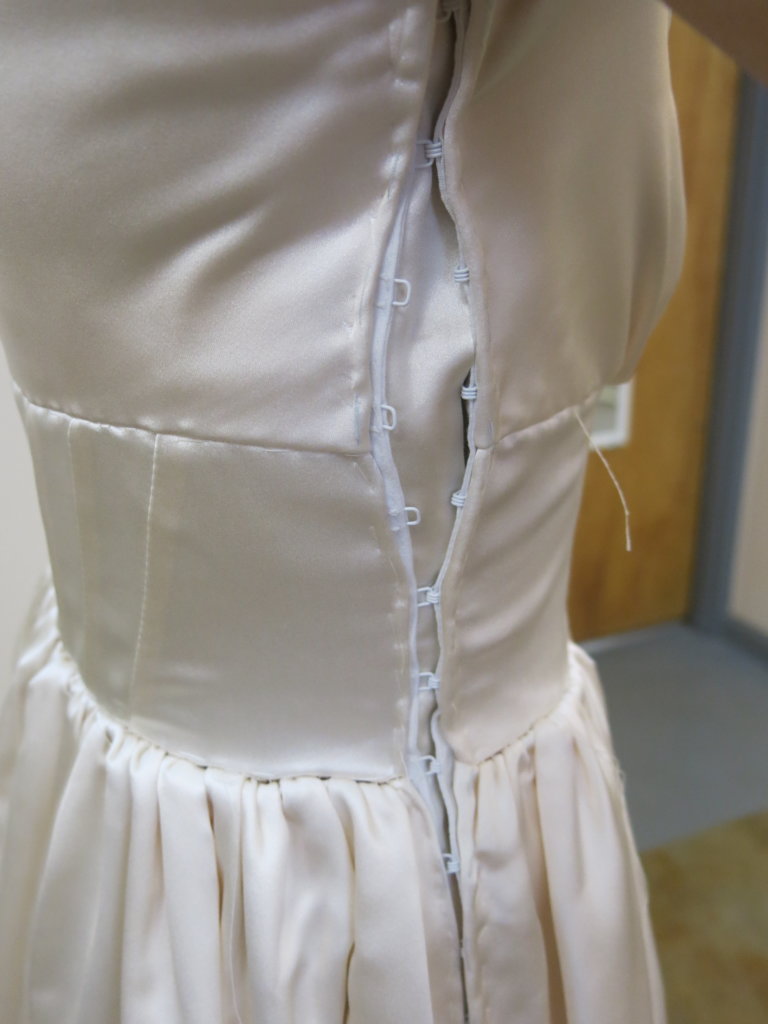
To close up each side seam, I’d need to add the closures. Each side of Tiffany’s wedding dress would be secured by hook and eye tape. The eye side of the tape would have a fabric shield behind it.
After one side was pinned in place…
…and hand basted in place…
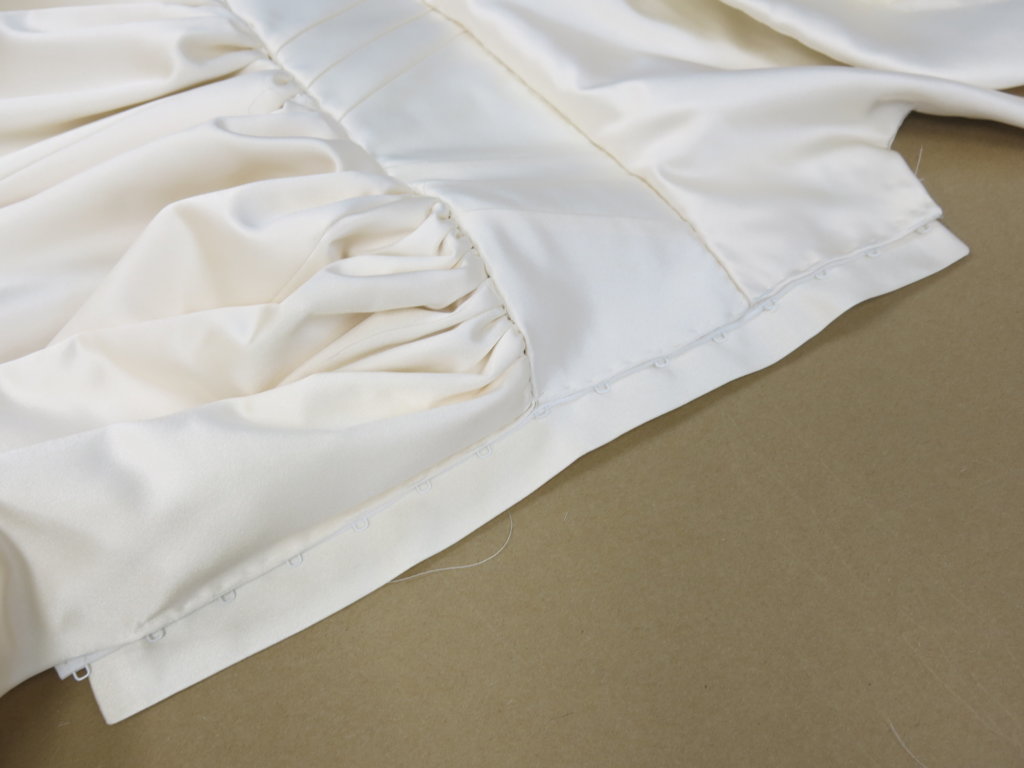
…I did the same to the opposite side.
Then the front sides got their hooks hand basted in place…
…and the side seams below the closures were finished by machine.
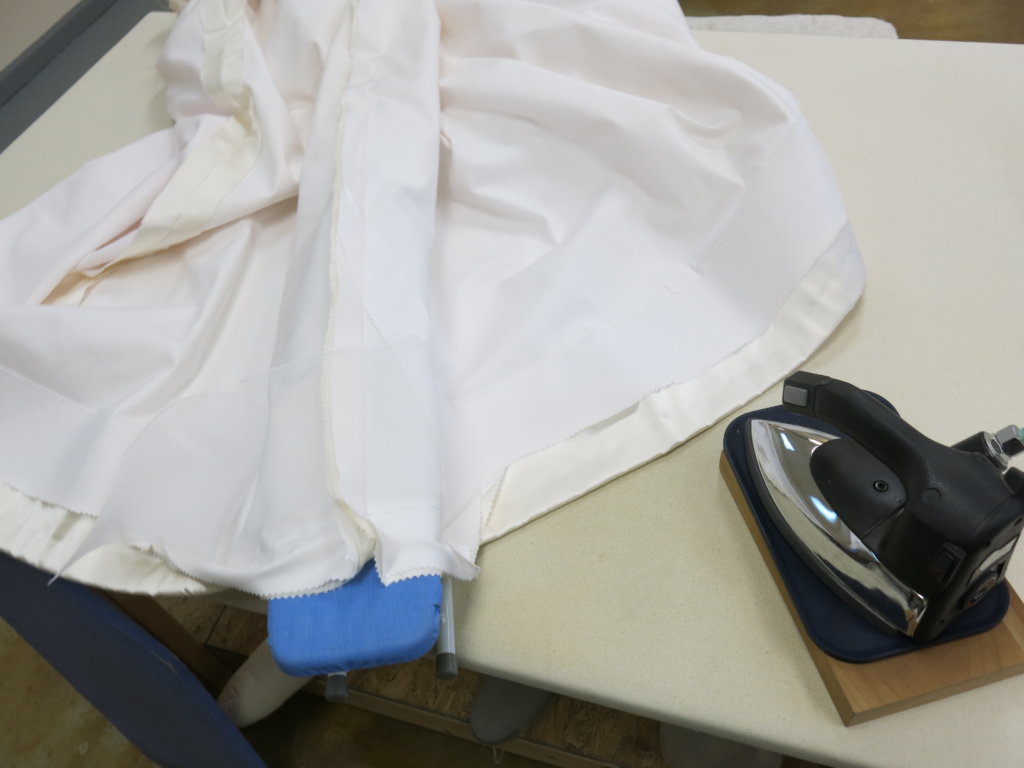
I moved my sewing machine in order to have my table behind it- to fully support the dress. And to keep everything as clean as possible, the floors around each area I use gets covered with tissue paper. I also keep a mattress pad under my dress form as soon as I start working with the “real” fabrics.
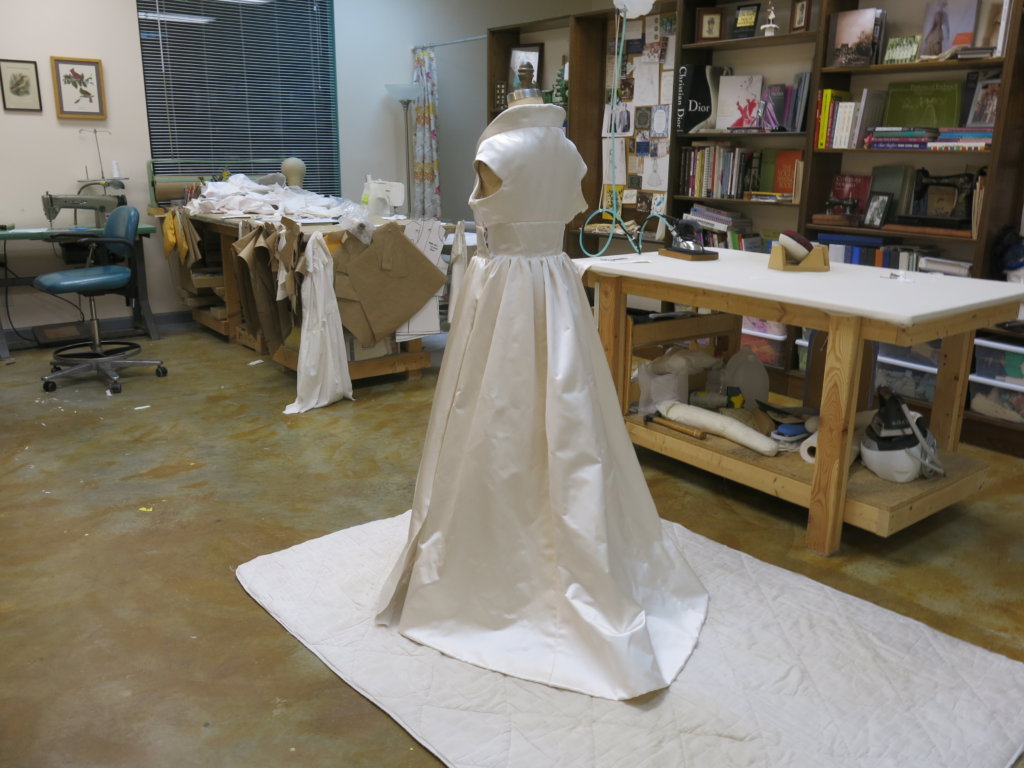
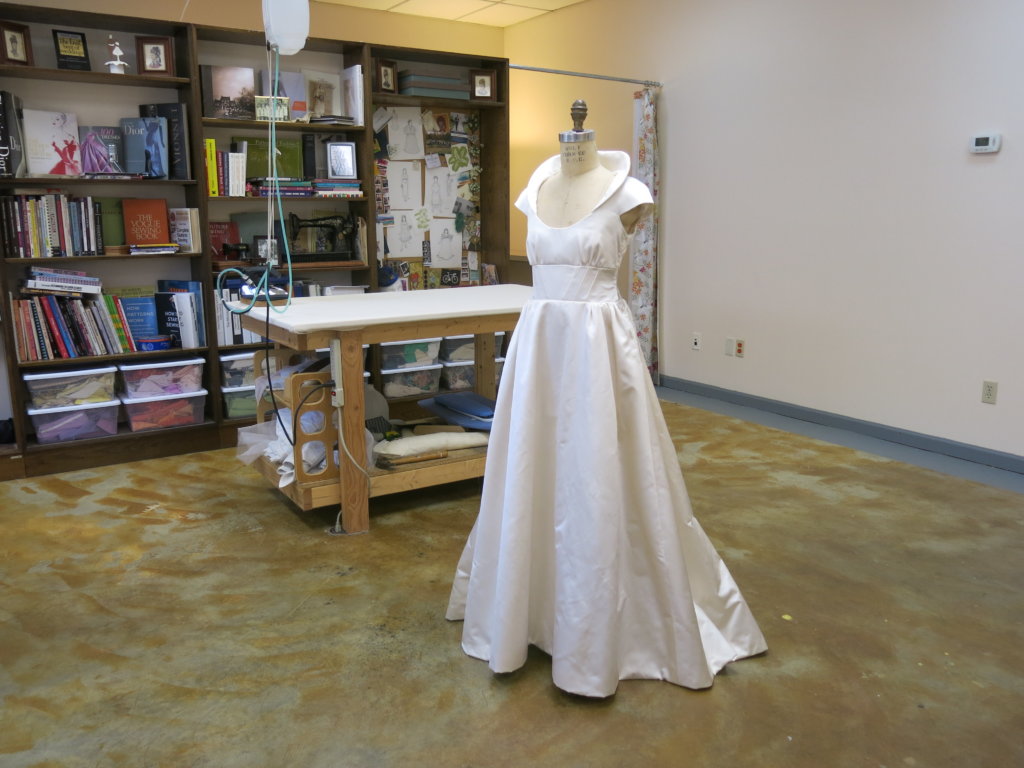
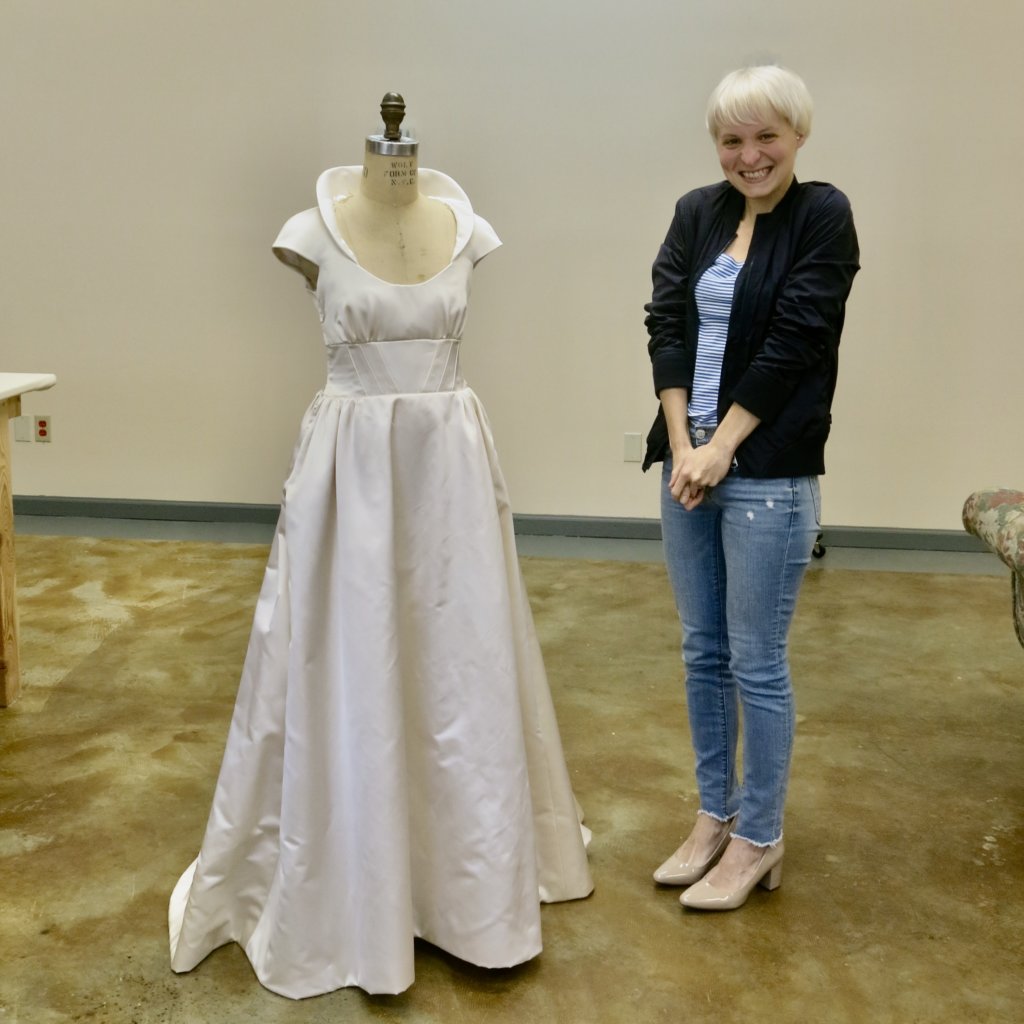
Squeeee! The studio was cleaned up and the gorgeous silk wedding dress was arranged on the dress form awaiting Tiffany’s arrival.
Though unlined and with bits basted, it was thrilling to see it all come together.
Aaaaannnd….Tiffany was also thrilled!
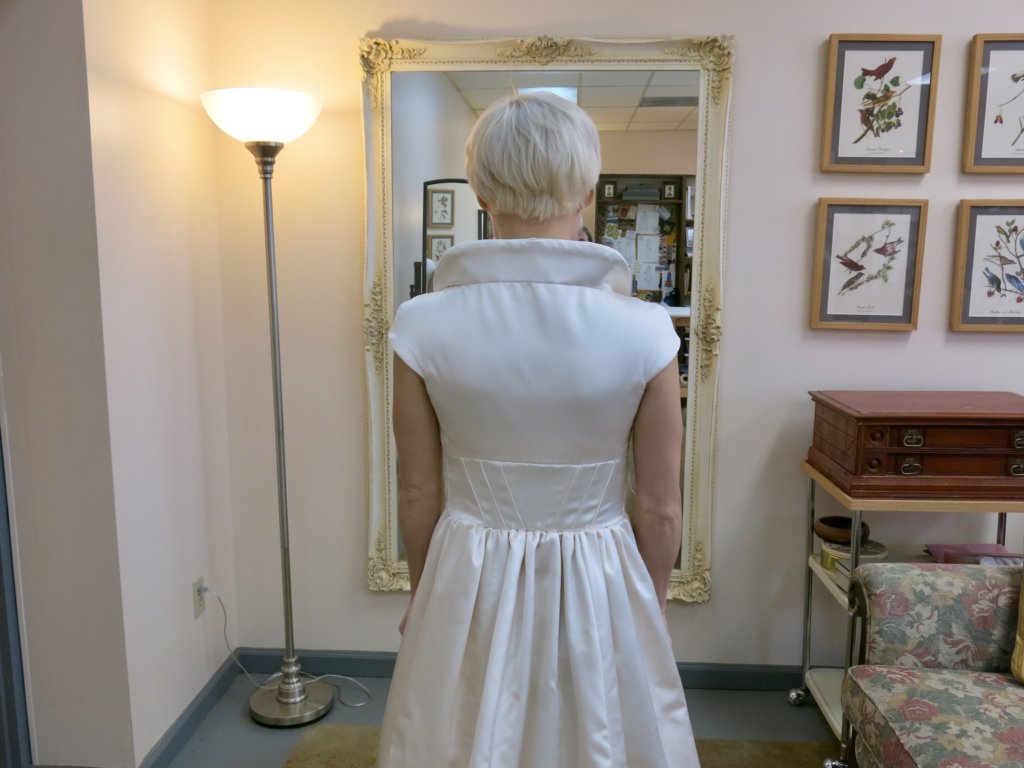
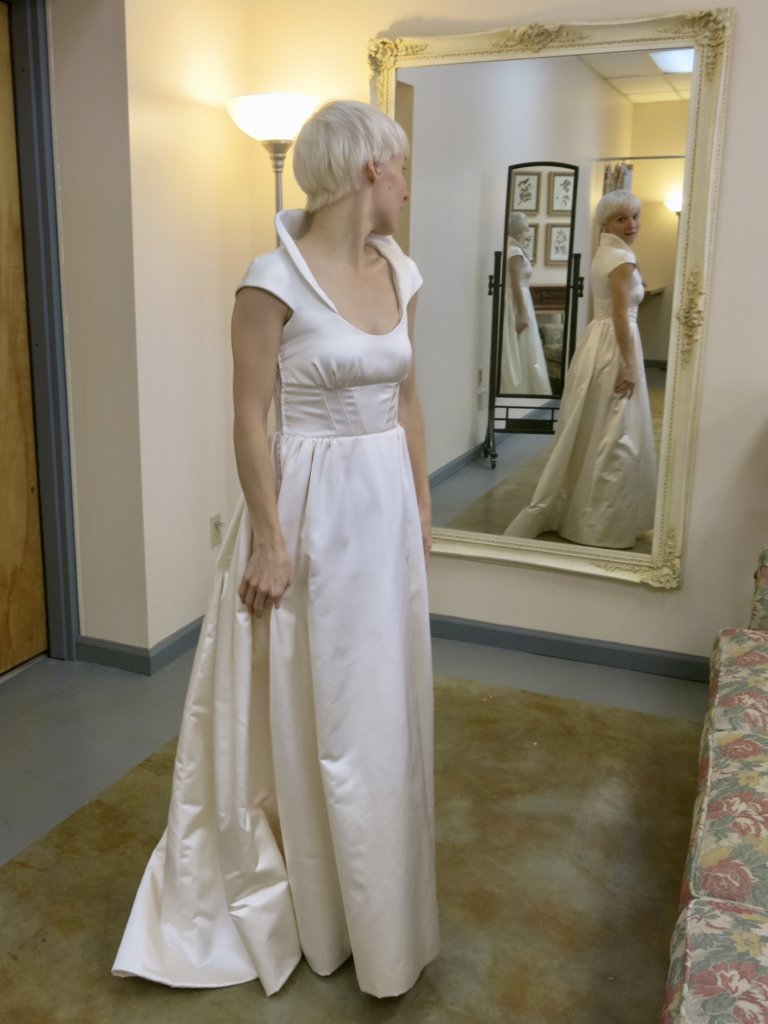
She tried it on…
…and looked incredible!
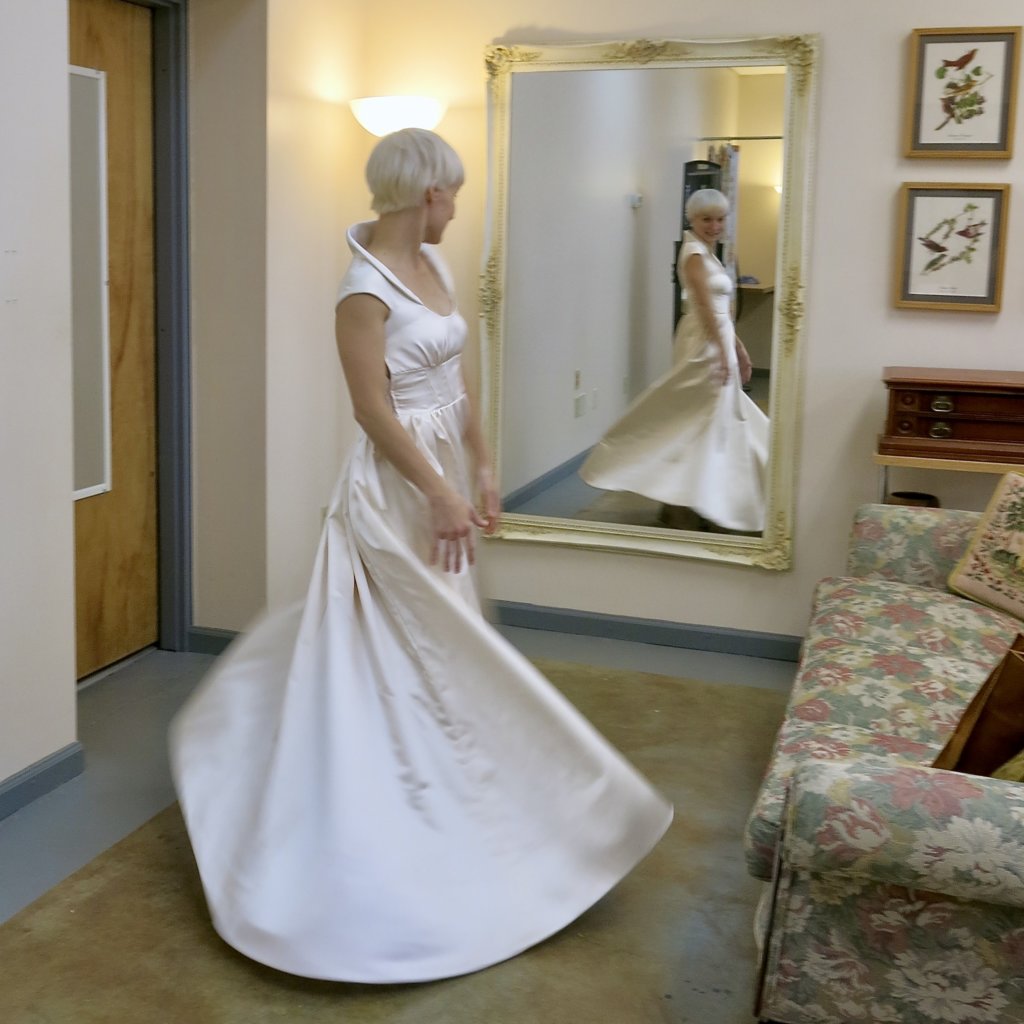
I forgot to take many photos, but I was happy to catch the bride-to-be giving her wedding dress a spin!
But back to work!
The basted fitting showed that the bust and underbust were a tad too tight and that the waist was a little too loose. No worries! Basted fittings are all about making these types of last minute improvements! There would be no scars from unpicking permanent stitches, because I took the time to baste everything in place.
With the final notes taken, we were both delighted with the final fitting and ready to get the dress finished up for Tiffany’s wedding day!
The Corrections
After Tiffany left the studio, I wanted to get the corrections over with right away (so I could begin finishing)!
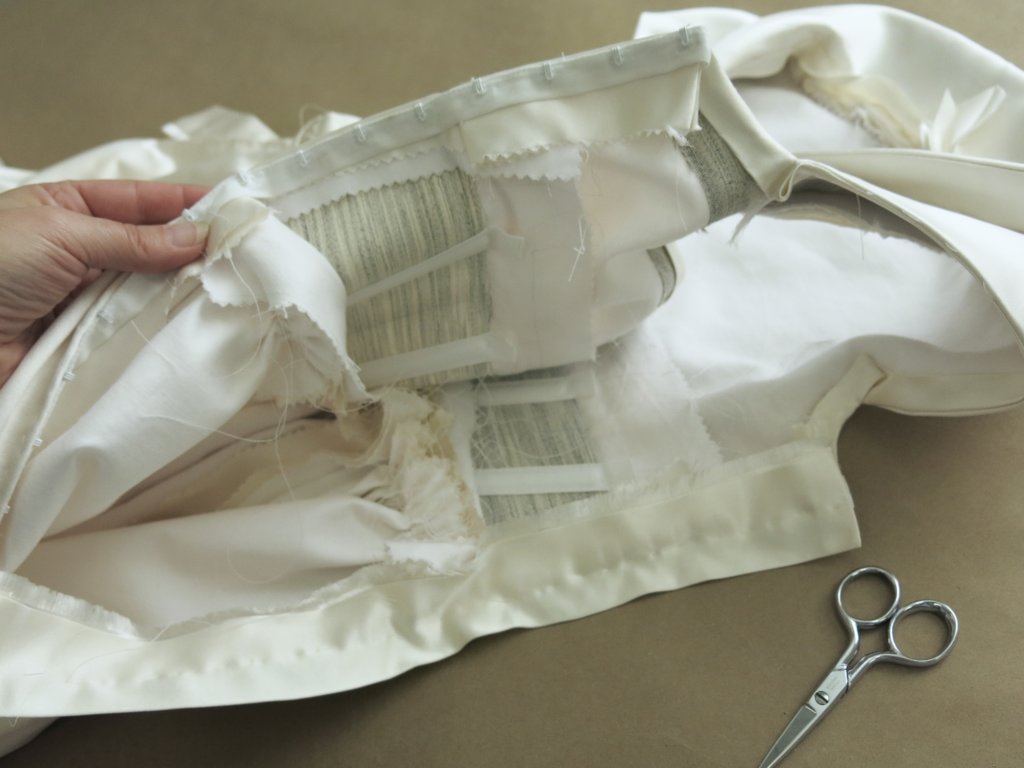
I’d first need to remove the hook & eye tape, the shields, and all the basting stitches.
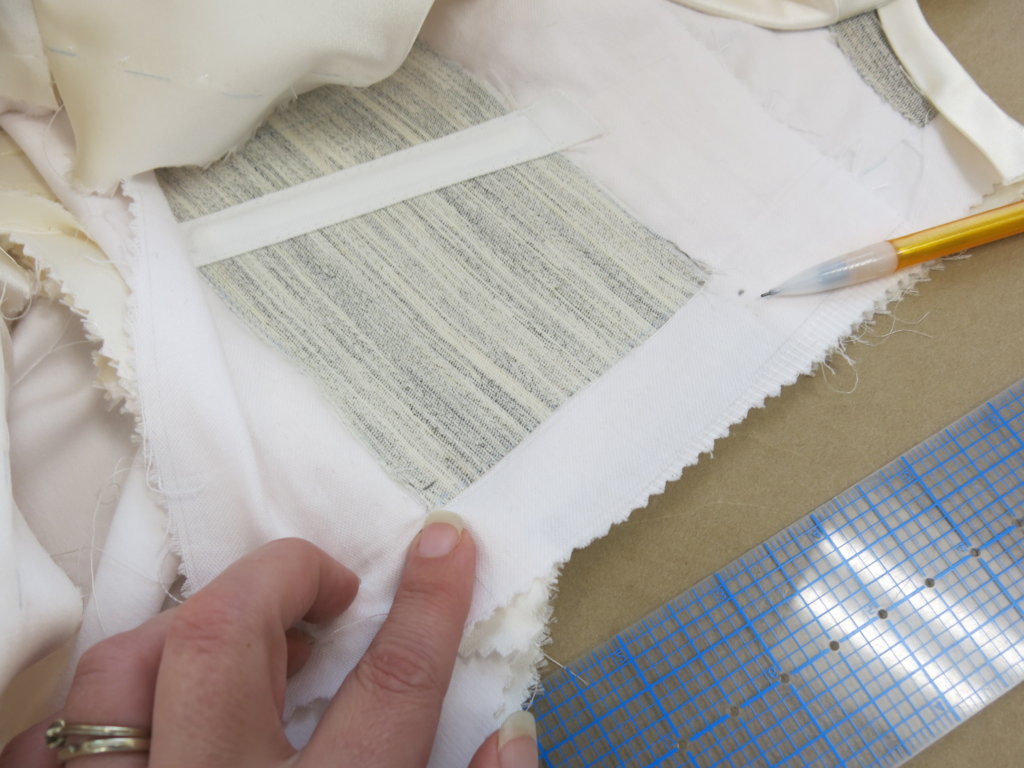
Then I made two marks inside (on each side) indicating how much I needed to add to the underbust and how much I needed to remove from the waist.
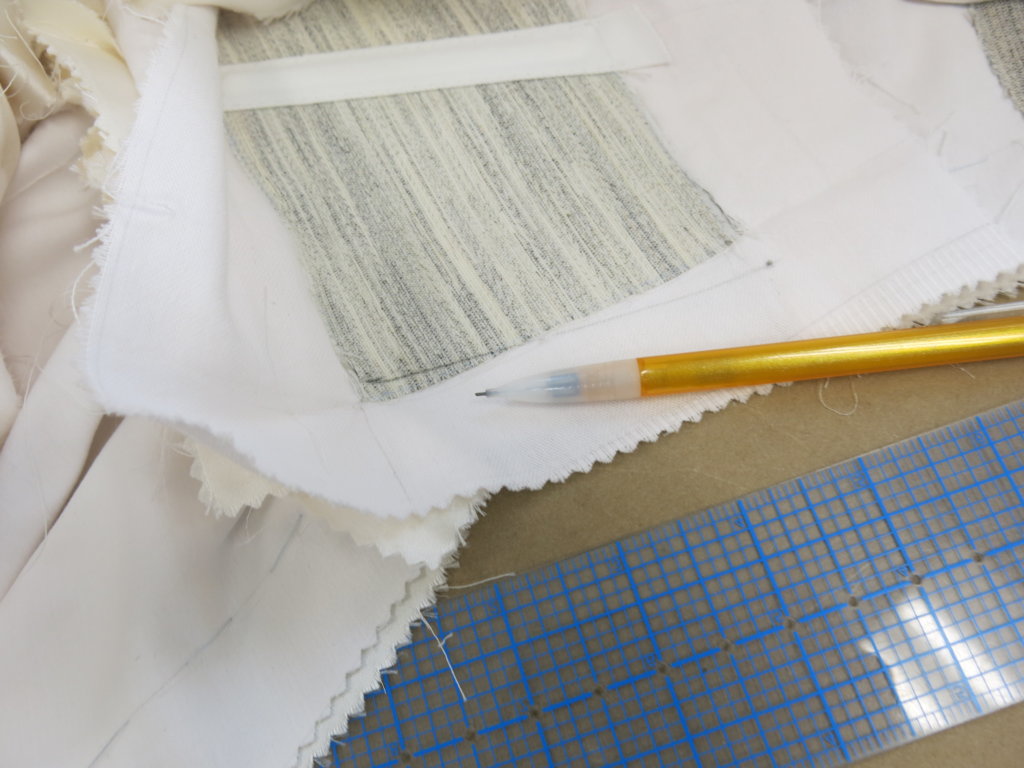
Then I connected the dots with a straight line.
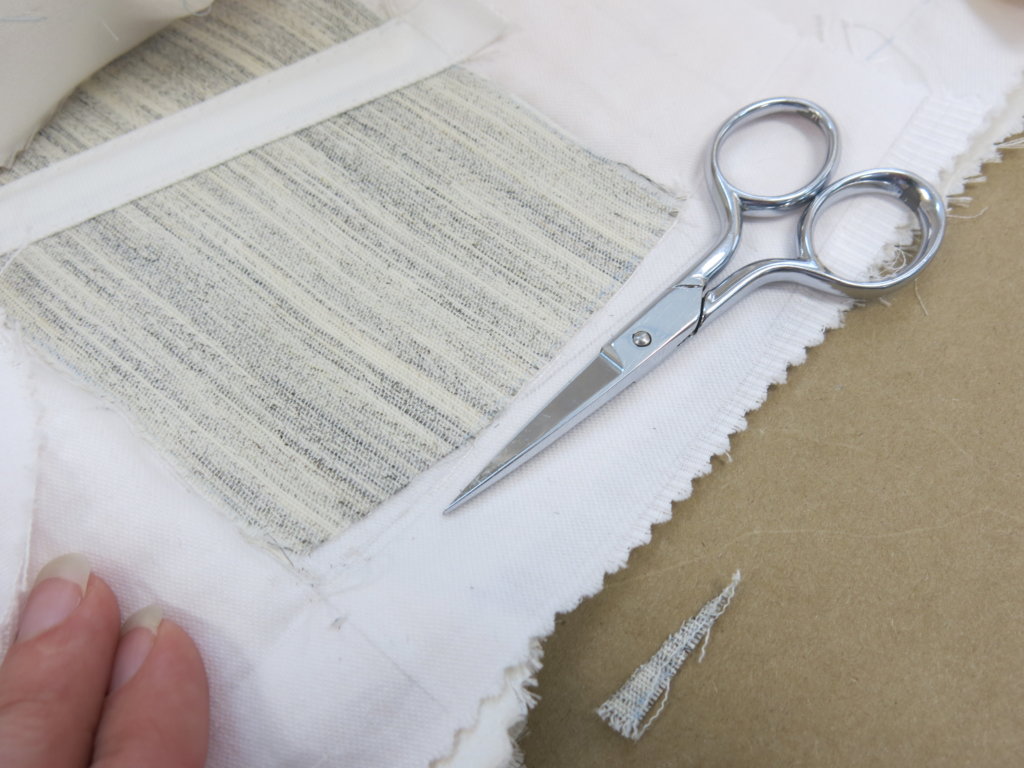
The interfacing no longer matched my line, so I trimmed away a little at the waist…
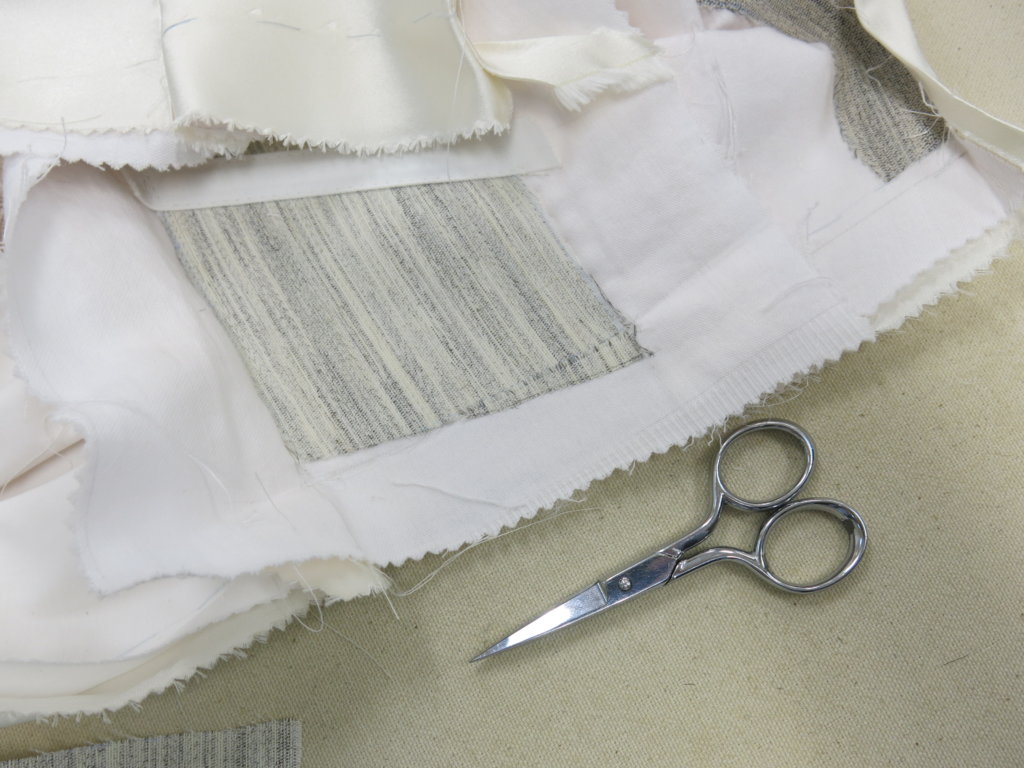
…and added a little above it!
And that was pretty much it for corrections! The rest of the custom process would be all about making neatnesses and FINISHING THE DRESS! Permanent stitches and final presses from now on, ya’ll…
NEXT POST: The final bits of construction: Finishing and Lining! So exciting…
I suppose you are talking about the fusible tailor’s canvas that you can see in a few shots of this post. In previous posts, you’ll see me add it into the dress. Hope this answers your question!
I’m a former professional costumer and couture dressmaker for one-of-a-kind bridalwear located in rural North Carolina, who teaches custom garment sewing to sew-curious solo-sewists online.
My blog mostly follows along with the couture process of how each heirloom-quality custom wedding dress was made from idea to wedding day, as well as personal sewing projects and other couture curiosities.
Welcome to my (temporary) Sewing Studio! Come on in! I love seeing other people’s workspaces and tools, so I thought I’d show you mine. I cleaned up after a big...
Duplicating the Vintage Dress’s Pattern (without taking it apart)
In my previous post, I introduced Jenn and the custom bridal wear project(s) for her wedding weekend. Check out the full story for all the deets, but to catch you...
I Made Myself the Coolest Dress pt. 1 – Pattern Design & Mockup
Though my personal wardrobe is mostly “the dressmaker has no clothes”, when I do make something for myself, it’s usually an epic project. I’m so excited to finally share this...
I’ve been blogging for TEN YEARS now, ya’ll! In “My 10 Year Blogiversary pt. 1”, I share links to each bridal blog series that I’ve created over the past decade....
It’s finally time to share about Deborah’s wedding day! HOORAY! Deborah and Blake were married in November 2017 at a church in Greensboro, NC with the reception at a nearby...
New Bridal Blog Series: My (kinda famous) friend Jenn!
Brooks Ann, Jenn, & Charles January 2017 Going Way Back… To begin my next bridal blog series, let’s head into the Way-Back Machine. And we’ll head farther back than this...
The bridal blog series is back! In each bridal blog series, you meet a new bride and I slowly post-by-post recount the process and share the behind-the-seams story of creating...
The bridal blog series is back! In each bridal blog series, you meet a new bride and I slowly post-by-post recount the process and share the behind-the-seams story of creating...
The bridal blog series is back! In each bridal blog series, I recount the process and share the behind-the-seams story of creating a one-of-a-kind custom couture wedding dress from start...
Sally is someone special. Back in December, I got an email from a dear friend named Sally that I had lost touch with. The subject line: “dear lord i’m getting...
As it starts to get cold, it sure is nice to think about summer! Gin and tonics… BLTs… beach trips… seersucker… Earlier this year, I worked with a bride who...
They say documenting the process triples the production time. (And I work more slowly than most.) My Nimbus was cold.She needed a new coat, sooner than later.
Welcome to Part Two! I’m back to share the nerdy behind-the-seams details of creating my Vanishing Tie Top for the Precious Fabric Challenge. But this photo-filled blog post doesn’t feature...
Do you have a fabric that you’ve been SAVING instead of SEWING? Yeah. Me too. So when Whitney Luckenbill of TomKat Stitchery asked me to be a part of her...
Welcome to my (temporary) Sewing Studio! Come on in! I love seeing other people’s workspaces and tools, so I thought I’d show you mine. I cleaned up after a big...
Welcome back! It’s the series finale! In this third and final post of My Warmup Jacket series, I share the behind-the-seams details of my jacket’s construction and finishing stories!
In this second post of My Warmup Jacket series, I share the behind-the-seams details of my jacket’s patternmaking and mockup stories! And after putting this patterning post together (which was...


5 Responses
It’s absolutely beautiful, very Rennaisancy. I love the stand-up collar
Thanks! I love how it frames Tiffany’s beautiful face and neck.
wow…kinda reminds me of Snowwhite…just lovely!!!
What kind of interfacing are you using? Thanks
I suppose you are talking about the fusible tailor’s canvas that you can see in a few shots of this post. In previous posts, you’ll see me add it into the dress. Hope this answers your question!