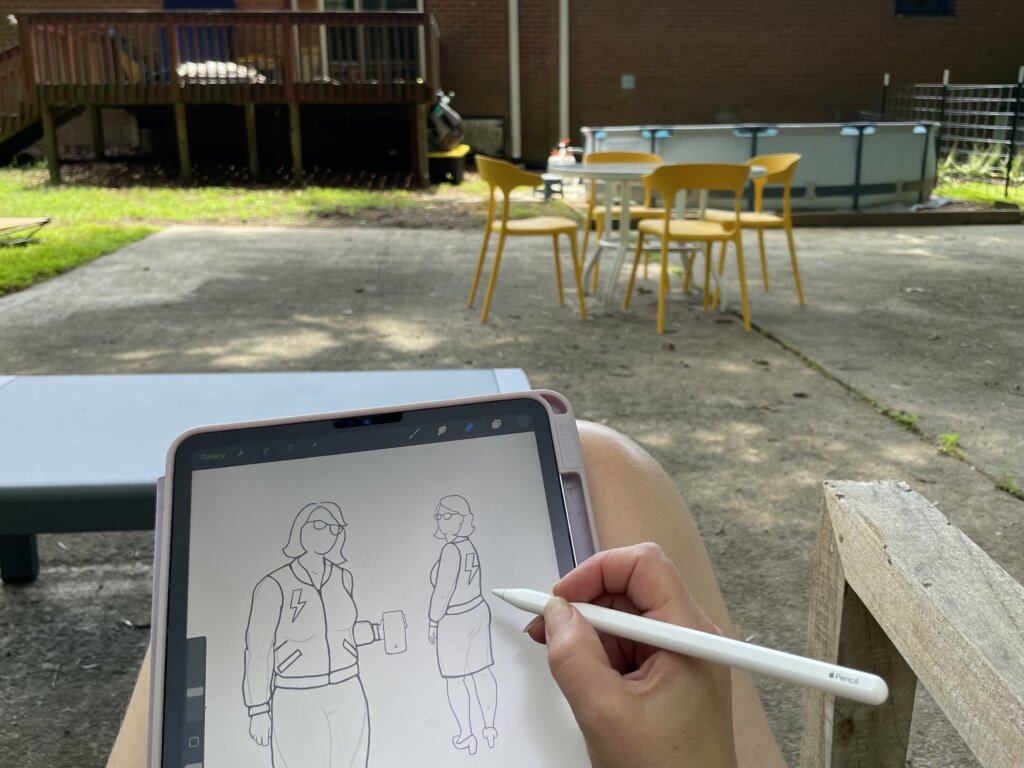
The blog is back! The newsletter is back! The Skirt Skills Freeview is back!
There’s a bazillion reasons why I’ve been offline since my dog died on the first day of May, and many were because I was creating content for you! After 6+ years of teaching my popular Online Course Skirt Skills, I’ve spent most of my Stay-At-Home time creating a new-and-improved 2nd Edition. This comprehensive “Intro to Custom Sewing” online course shares 16 hours of self-produced video(!), and I am so excited about what I’ve created. Now that production is complete, I’m offering a free preview for the next couple of weeks before registration opens on August 8 for a Skirt Skills session starting August 20. Learn more here!
Back to the Bridal Blog!
But likely you are here for the blog! And I’m back to sharing about Tiffany’s wedding dress! Yay!
If you’ve been following my blog for a while, you know that I share all the “behind-the-seams” goodies as I create each custom wedding dress. (If you are new, you might enjoy starting here!) I don’t begin sharing the story until after the bride is married, so all of these photos are from the past. Tiffany’s wedding was in December of 2018, long before the Coronavirus started postponing weddings. I hope you enjoy the continuation of Tiffany’s story, which I’ve been telling post-by-post for quite a while. To get caught up, start here (and click through as the story unfolds)!
And I know you are all barely able to contain your excitement to hear about bodice construction with cut-in-one short sleeves! Yaaayyyyy! Wait… what??
Ok… so I know this post may only appeal to super sewing nerds, but there’s actually a lot to share about a seemingly simple (boring?) topic. Personally, I think cut-in-one sleeve construction is super fun and incredibly interesting. I hope you will too!
So without further ado…
Marking & Cutting the Bodice
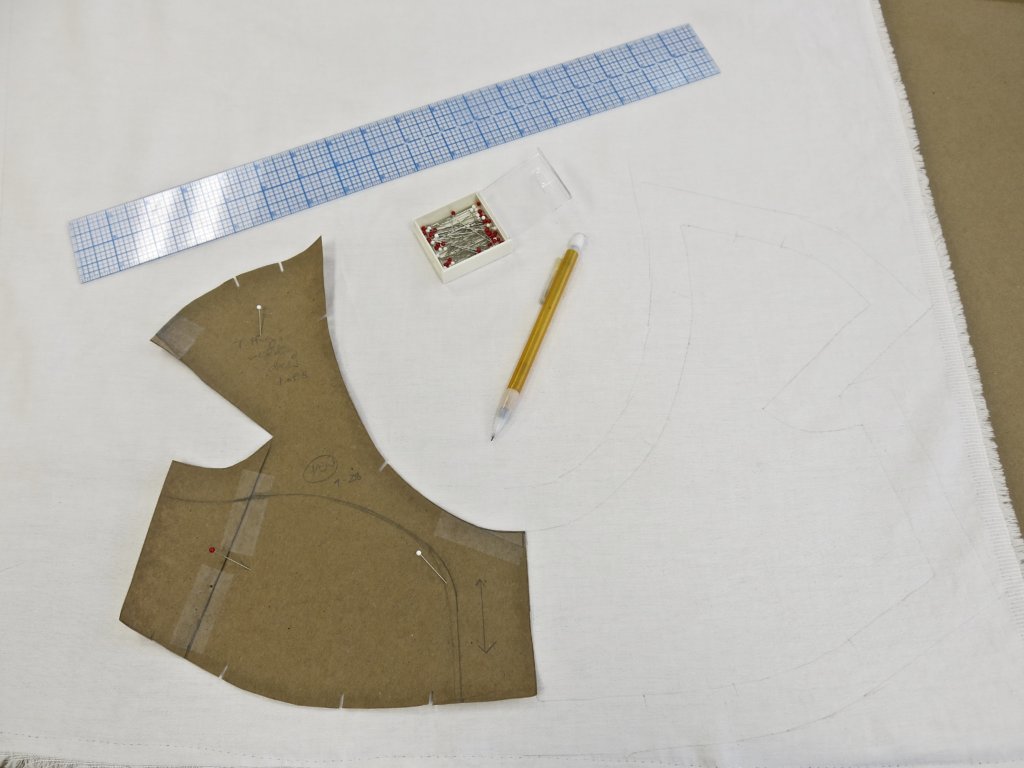
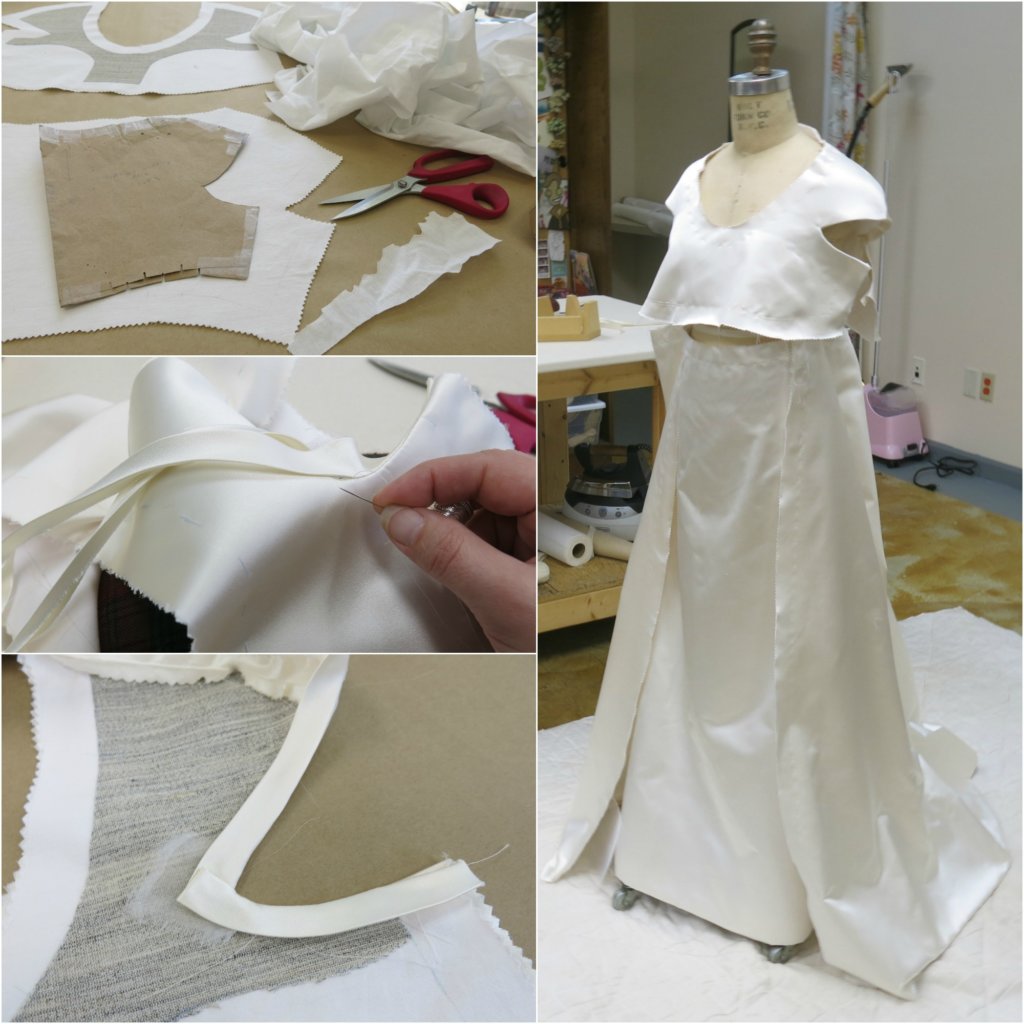
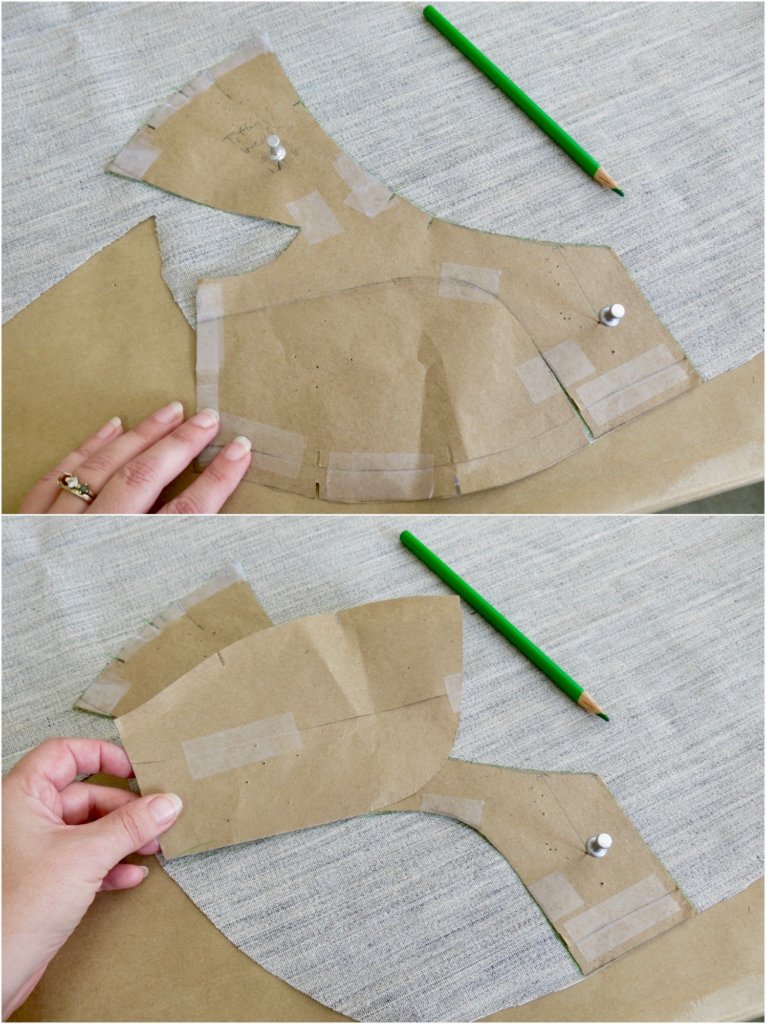
To give the front of the bodice, shoulder, and armhole a little extra structure, I would apply fusible tailors canvas to the cotton layer. I only wanted certain areas to include the canvas, so I cut and created a hinge in my paper pattern, to make my marks.
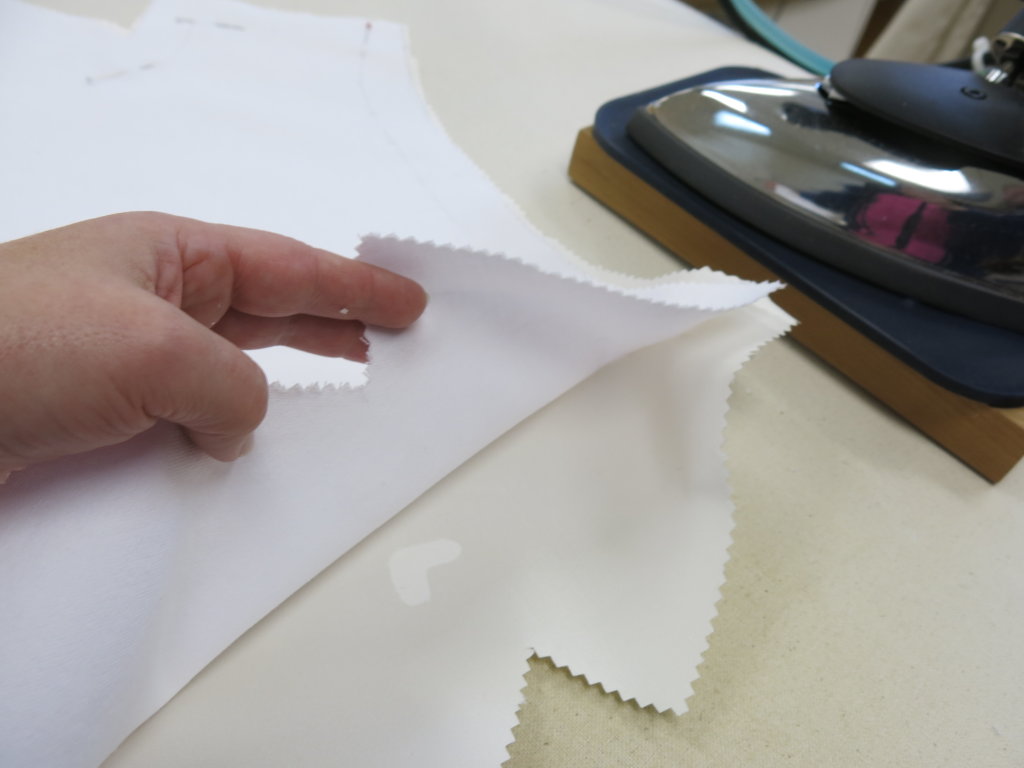
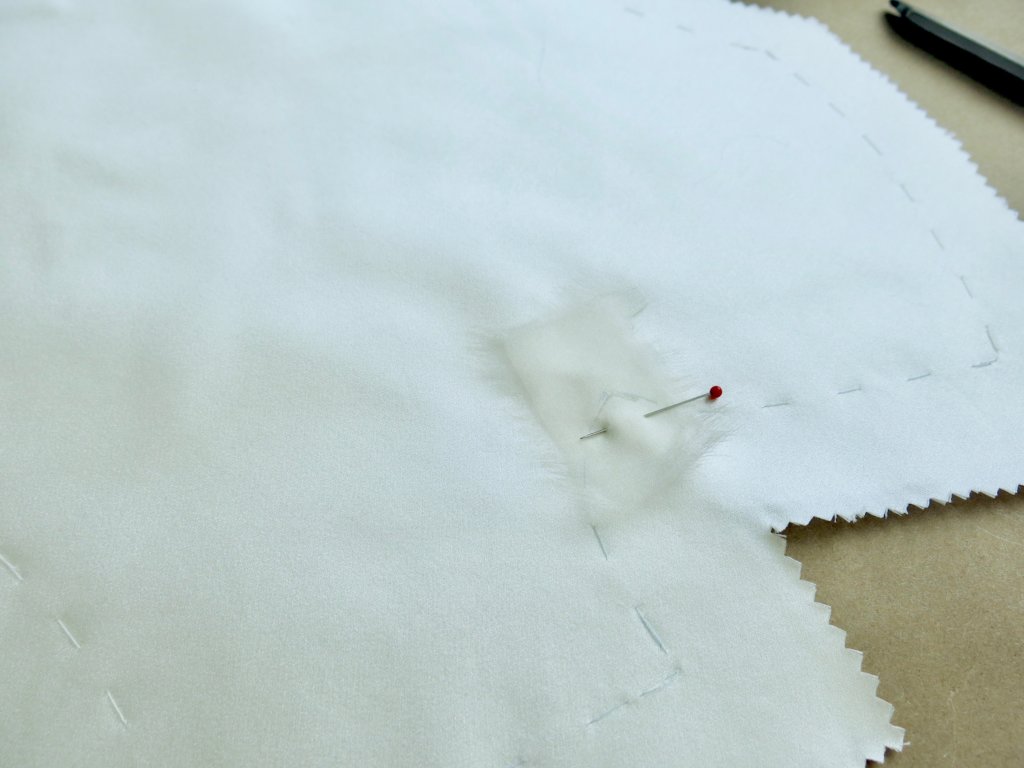
Once fused to the cotton, I was able to lay out the underlining pieces onto the gorgeous silk satin. I added lots of pins…
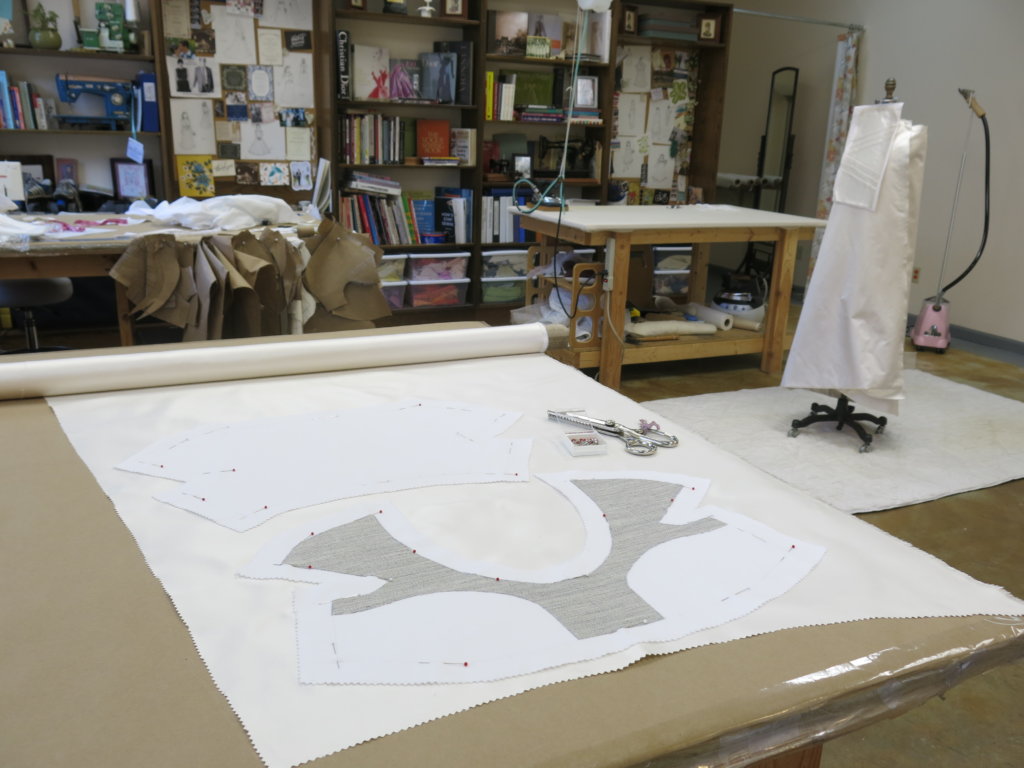
… and used the edges of the cotton as a cutting guide. These pieces were almost ready for underlining, with one exception…
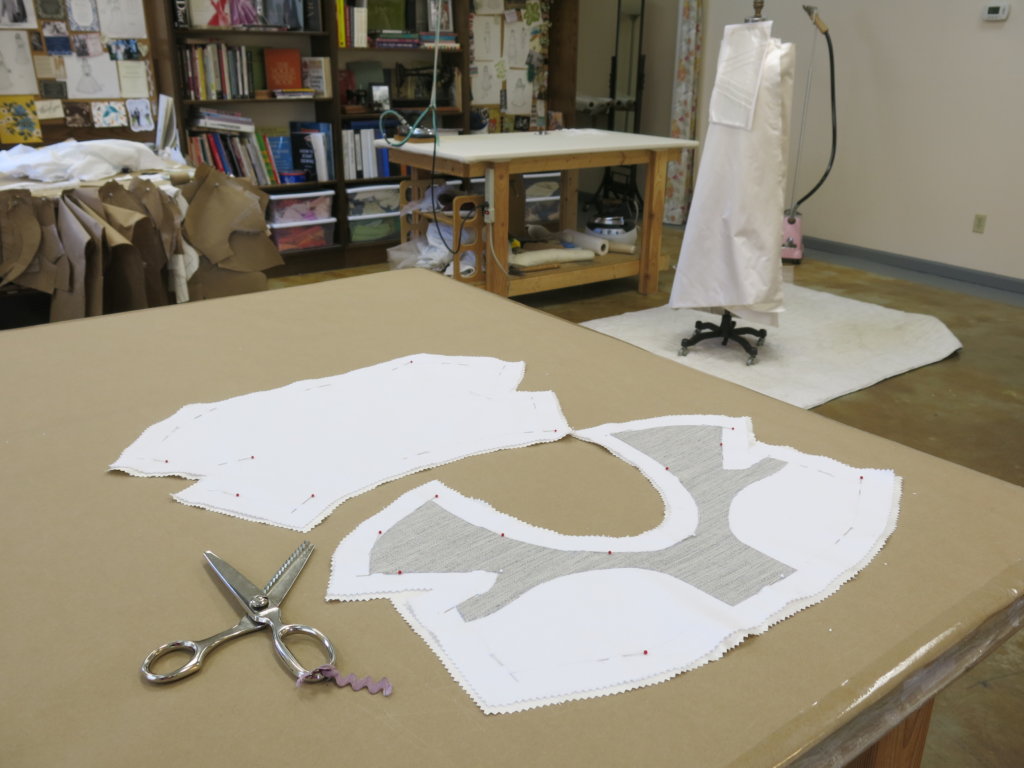
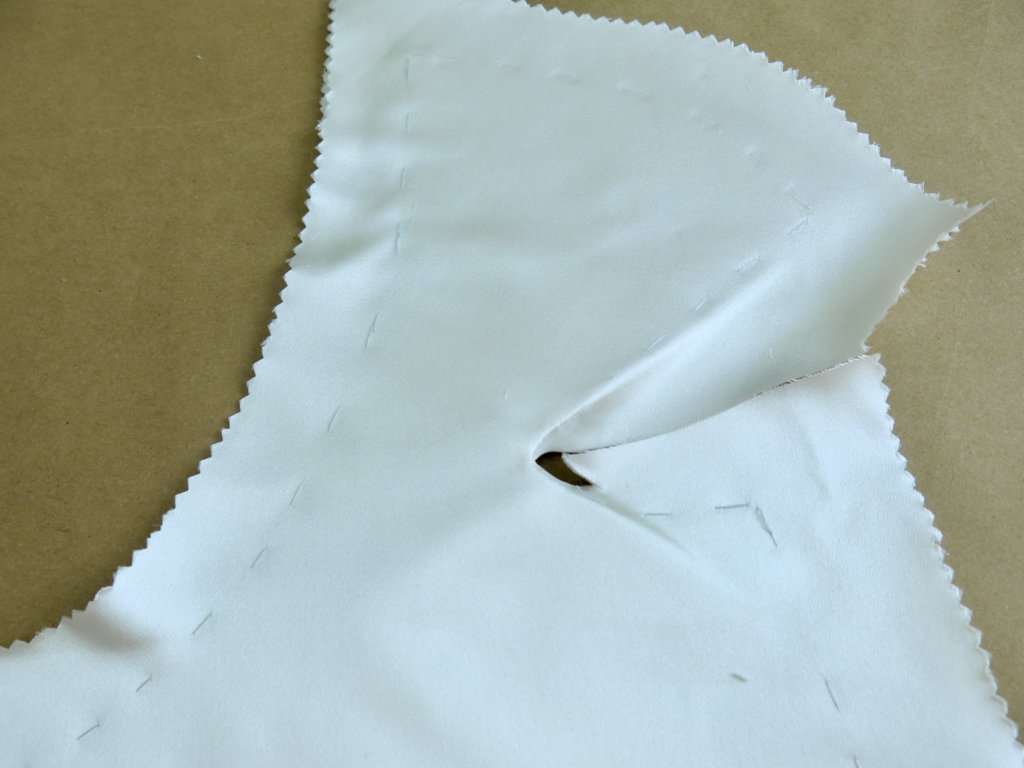
Turning Corners
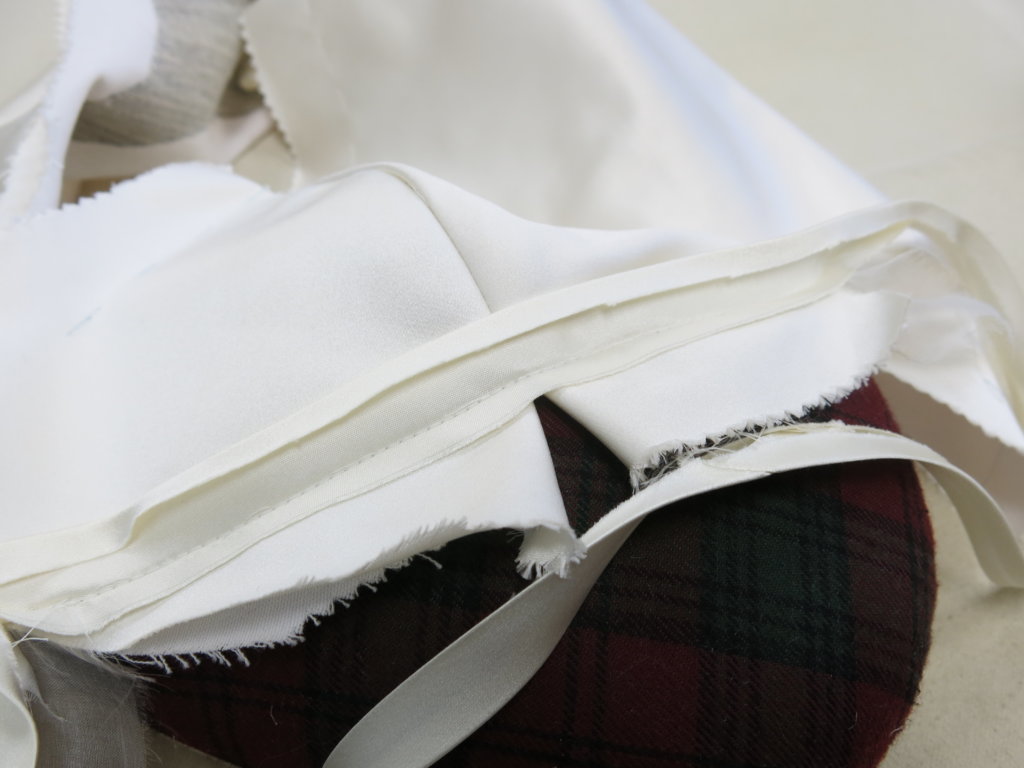
The cut-in-one short sleeves of Tiffany’s wedding dress feature a corner where the sleeve becomes the armhole. This creates a weak point in the fabric of the bodice. While this doesn’t matter in the mockup – which you can see here is beginning to fray- this area on the front and back of each side of Tiffany’s wedding dress would require a lot of extra care… (my specialty!)
…so I worked through several samples to come up with a plan for my process!
The Process
My plan involved strategic bits of interfacing, creative stay stitching, careful cutting, and lots more…
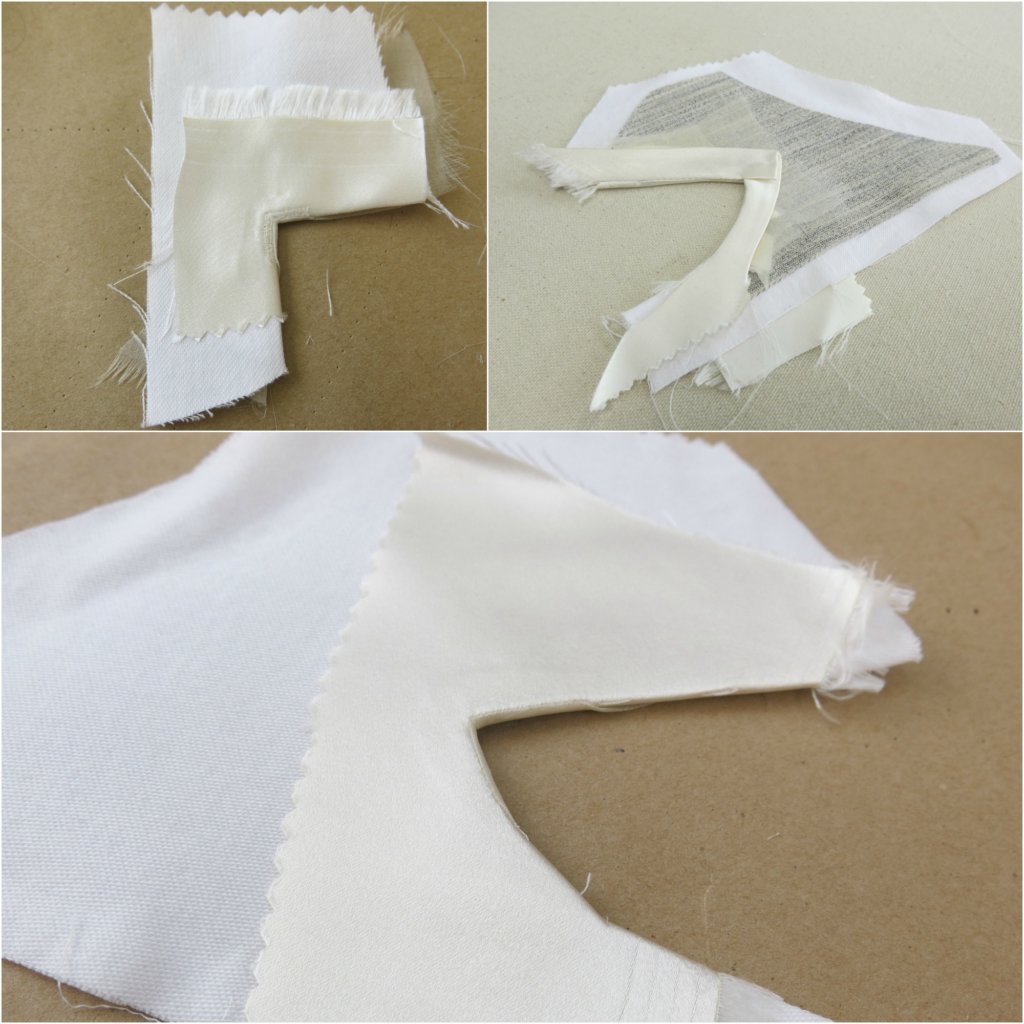
Before I could complete the underlining step, I wanted a little targeted security on the silk layer and the cotton layer.
I cut custom-sized rounded-edged pieces of lightweight fusible interfacing to match the shape of each tricky corner. I first fused one to the cotton layer which includes my markings. Then I placed a pin at the marked corner…
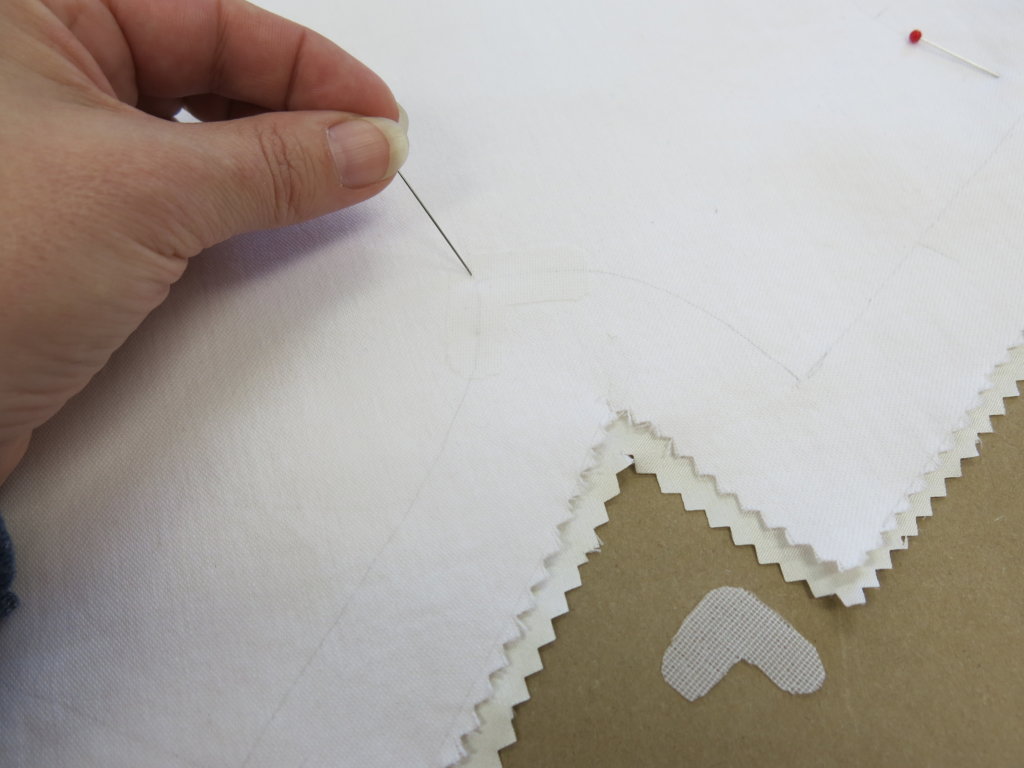
…which helped me perfectly place my interfacing on the unmarked silk layer for fusing. This step makes this tiny area stronger and less likely to unravel!
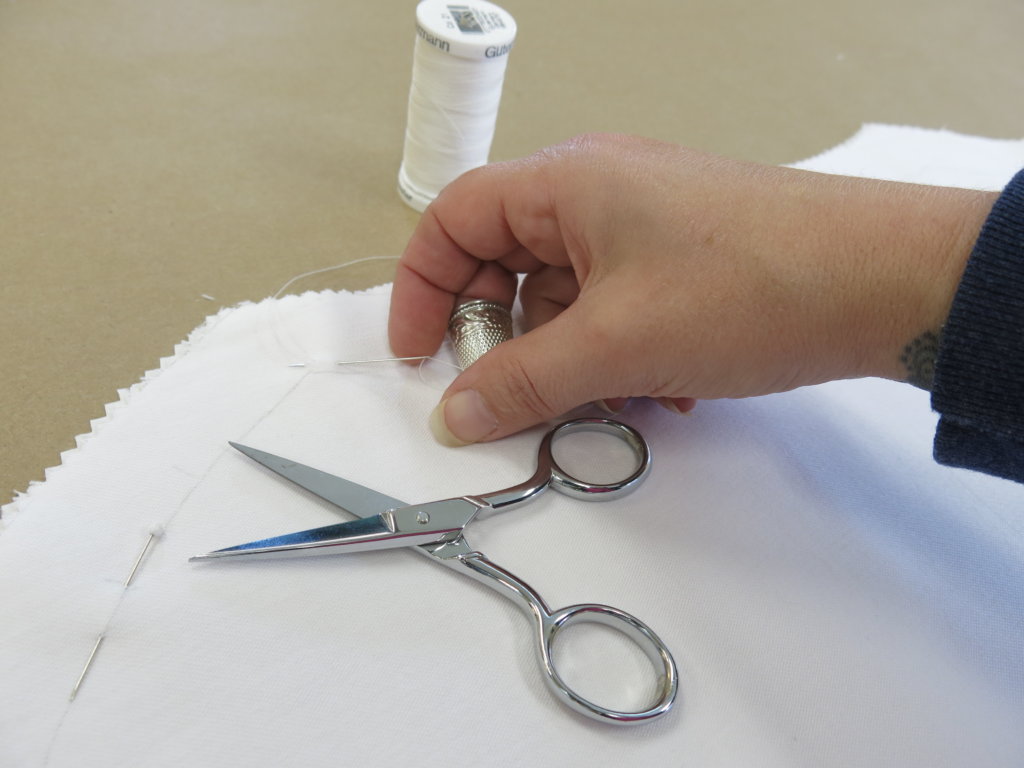
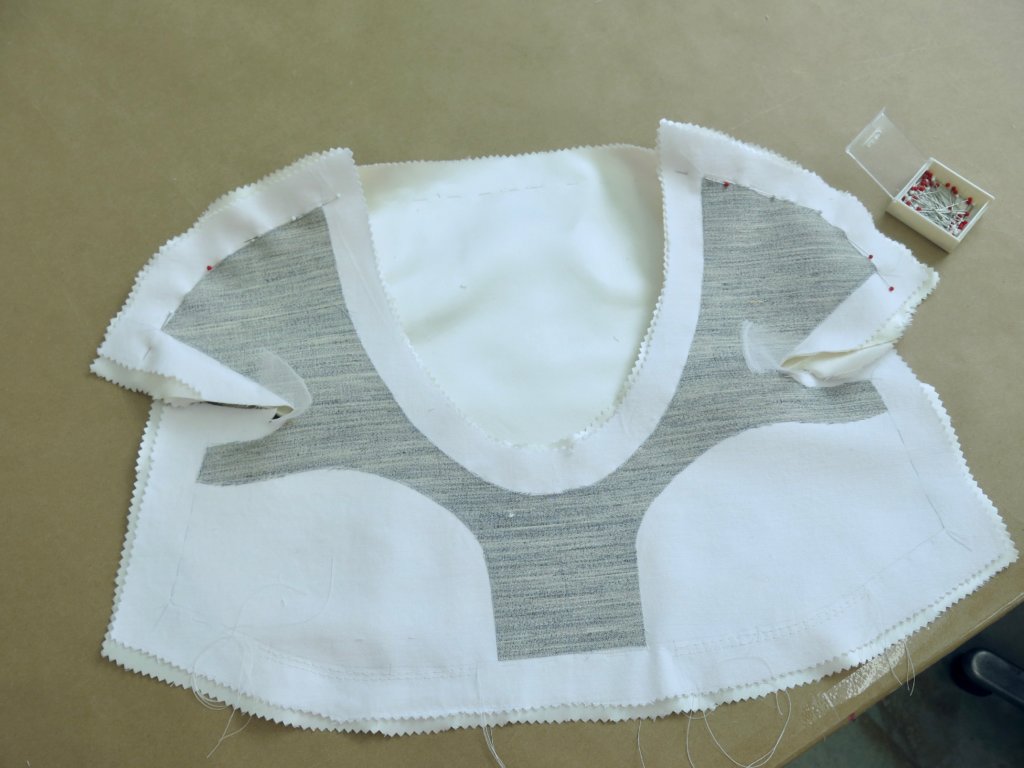
After all four corners of both layers were interfaced, I pinned the layers back together for underlining. Underlining is when you join two pieces of fabric together as if they were one (Learn more here.) To join the layers, I hand stitch all the way around each piece.
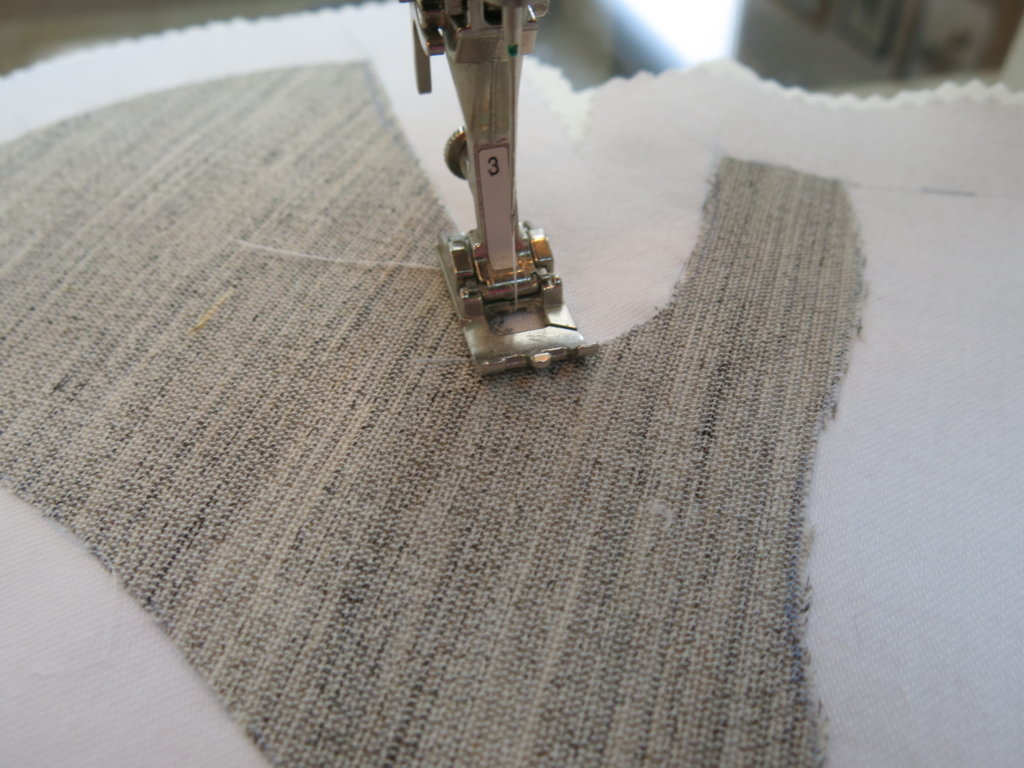
Once the back and front pieces were underlined, I added a row of teeny tiny stay-stitching by machine through all the layers following the exact angle of each little corner.
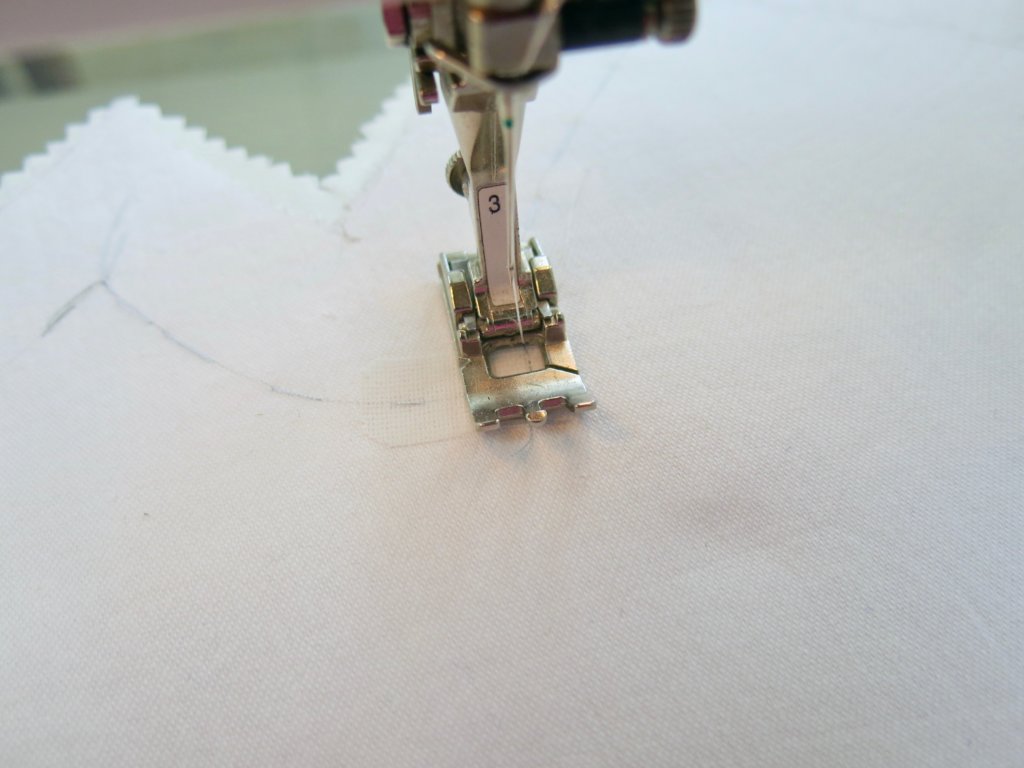
Like the interfacing, this concentrated stitching would help prevent the area from unravelling, once it becomes the garment’s edge.
The stay stitching step was added to all four sleeve-becomes-armhole corners.
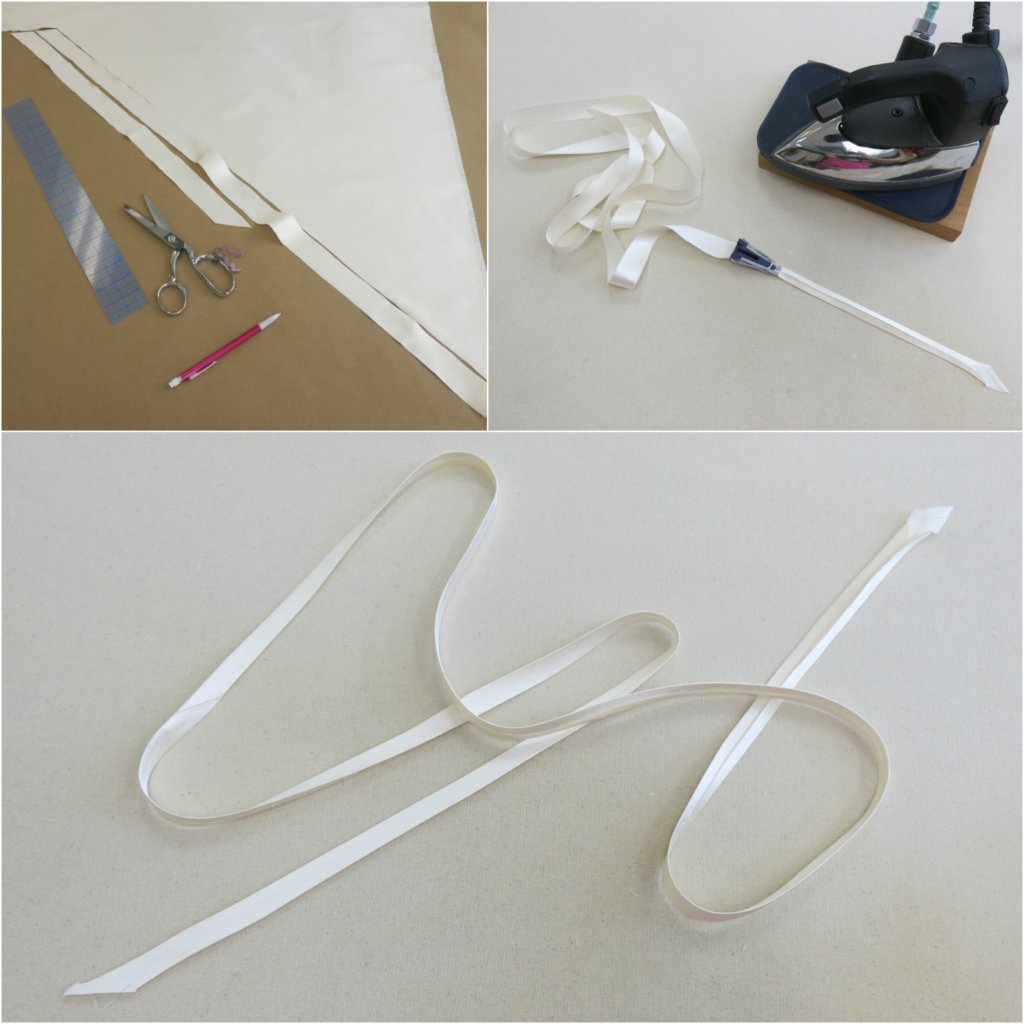
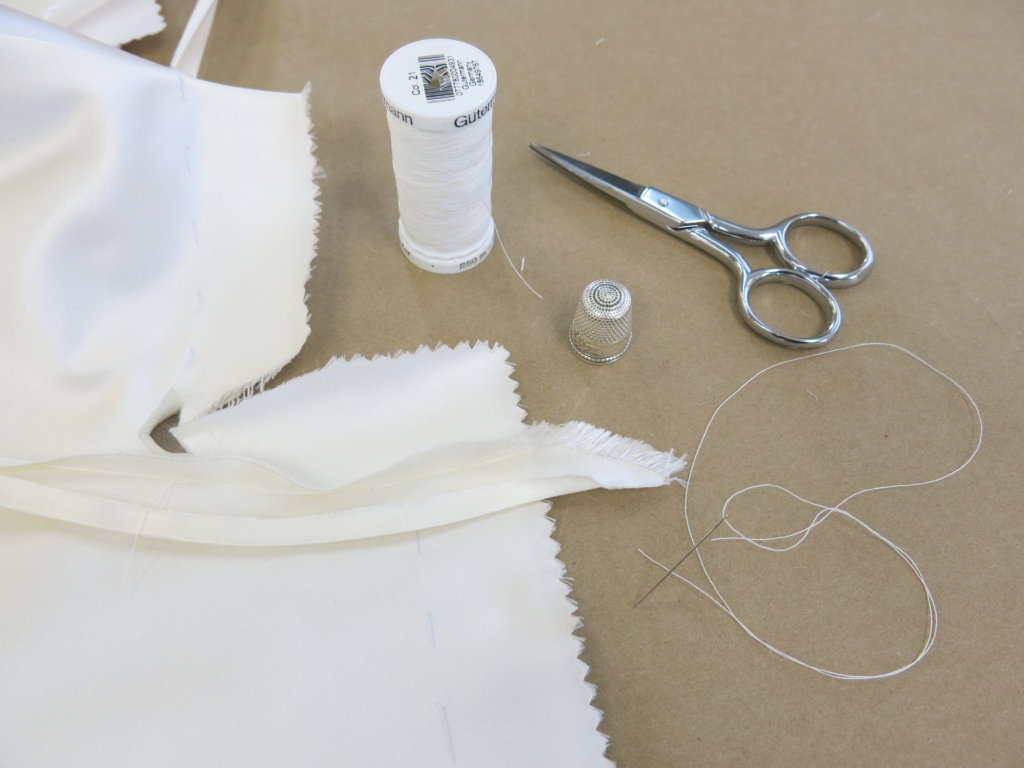
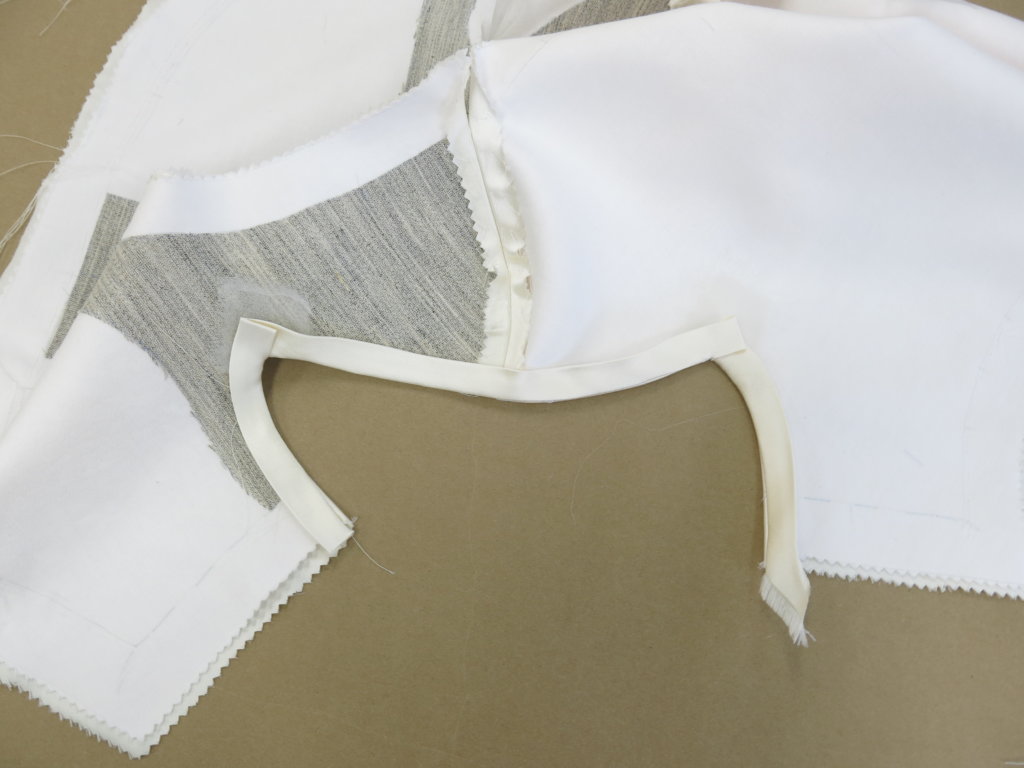
To prep finishing the edges, I made my own custom bias tape using the same silk satin as the dress.
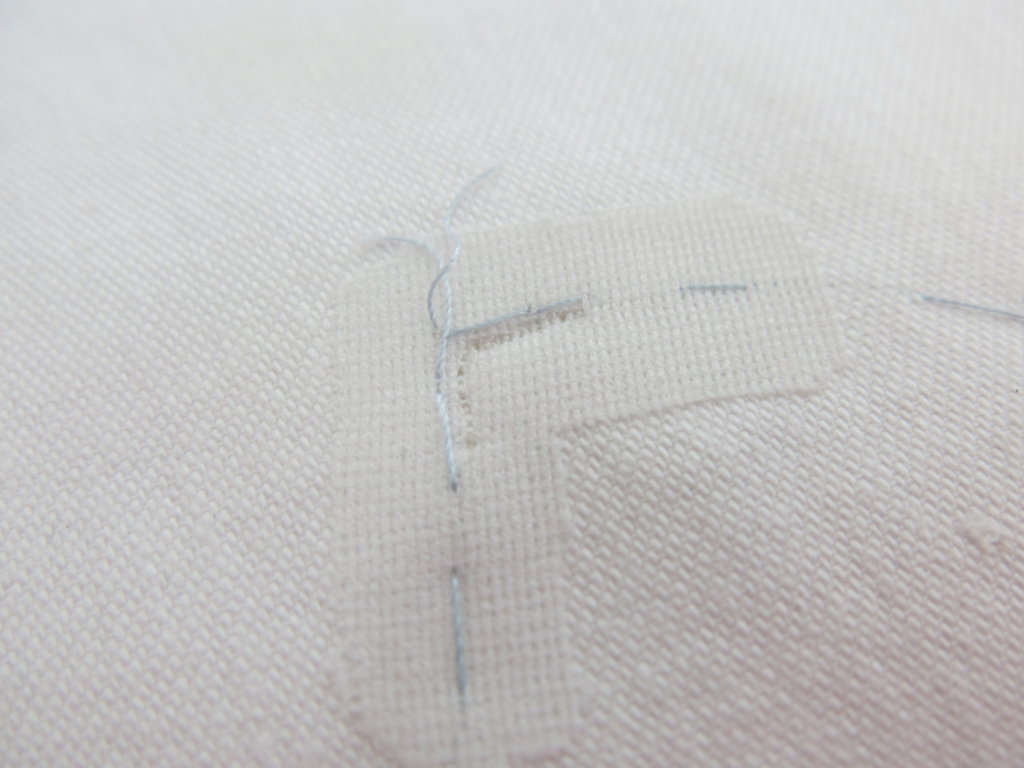
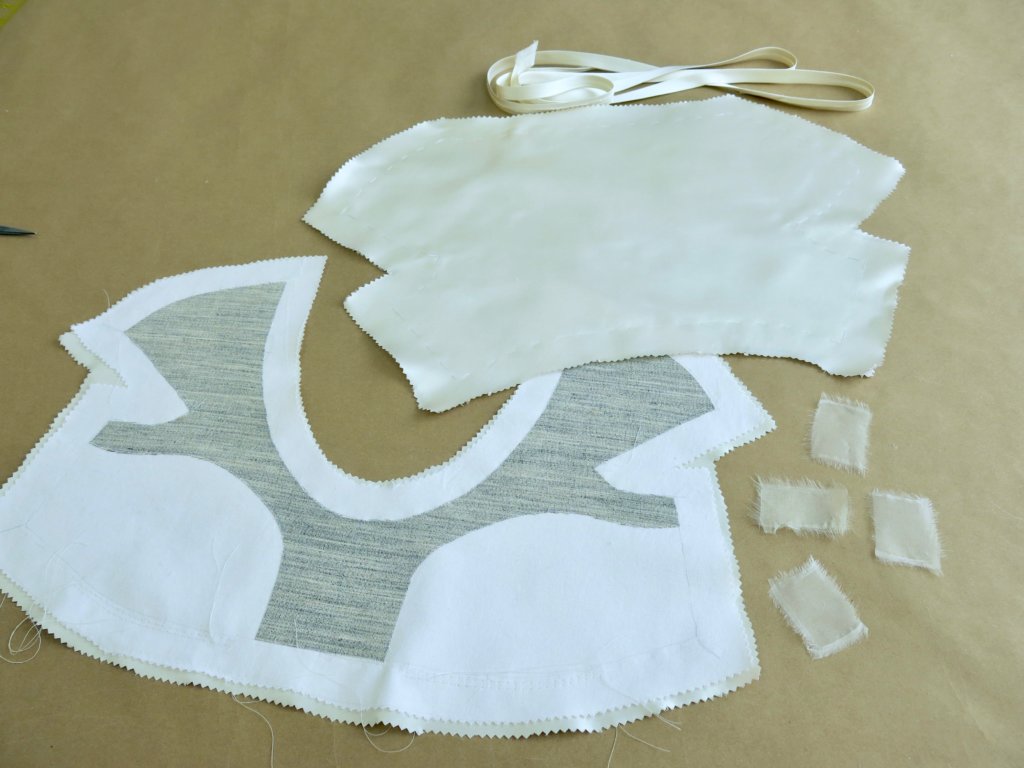
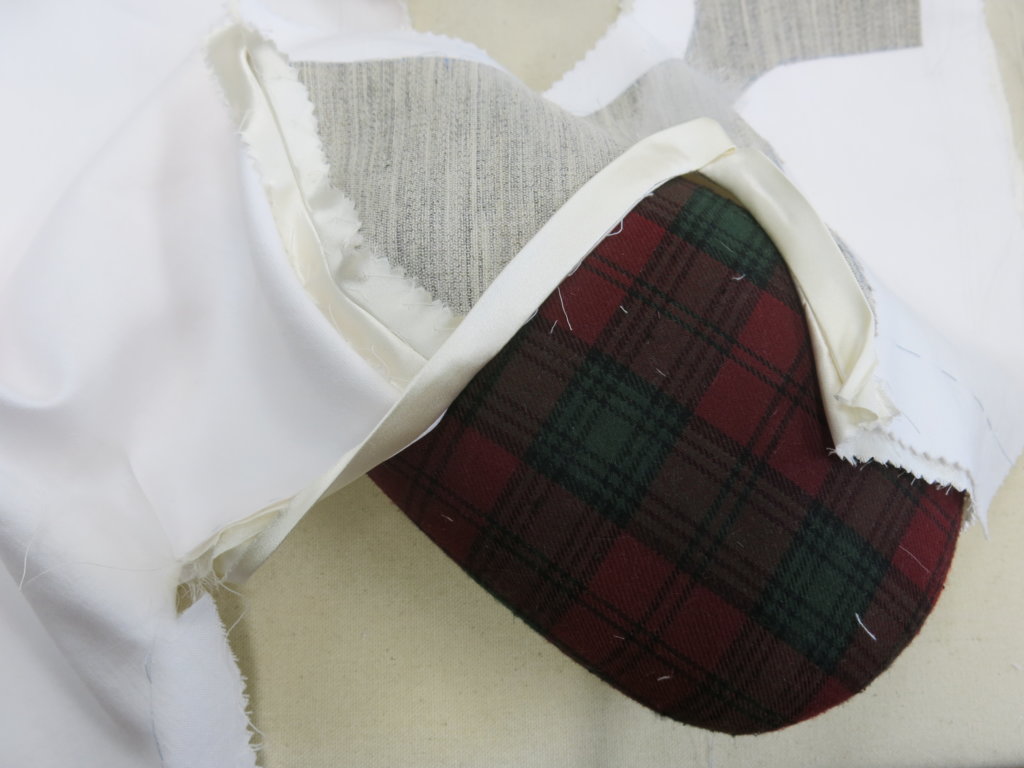
Here’s the front and back pieces interfaced and underlined with stay-stitched corners. I’ve also got my custom bias tape ready as well as 4 small rectangles of silk organza.
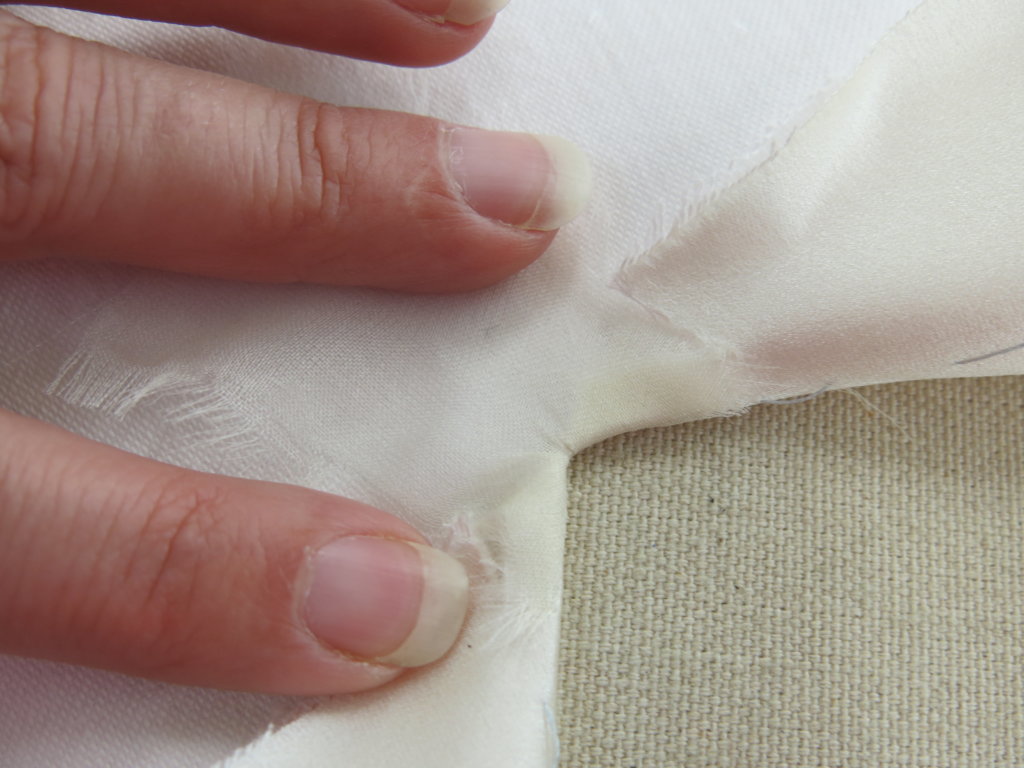
The organza is yet another safeguard for potential unravelling at the corners, and it helps to cleanly turn the corner to the inside. I pinned one organza rectangle to each corner from the public side before attaching it right on my stitching line with another row of stay stitching by machine.
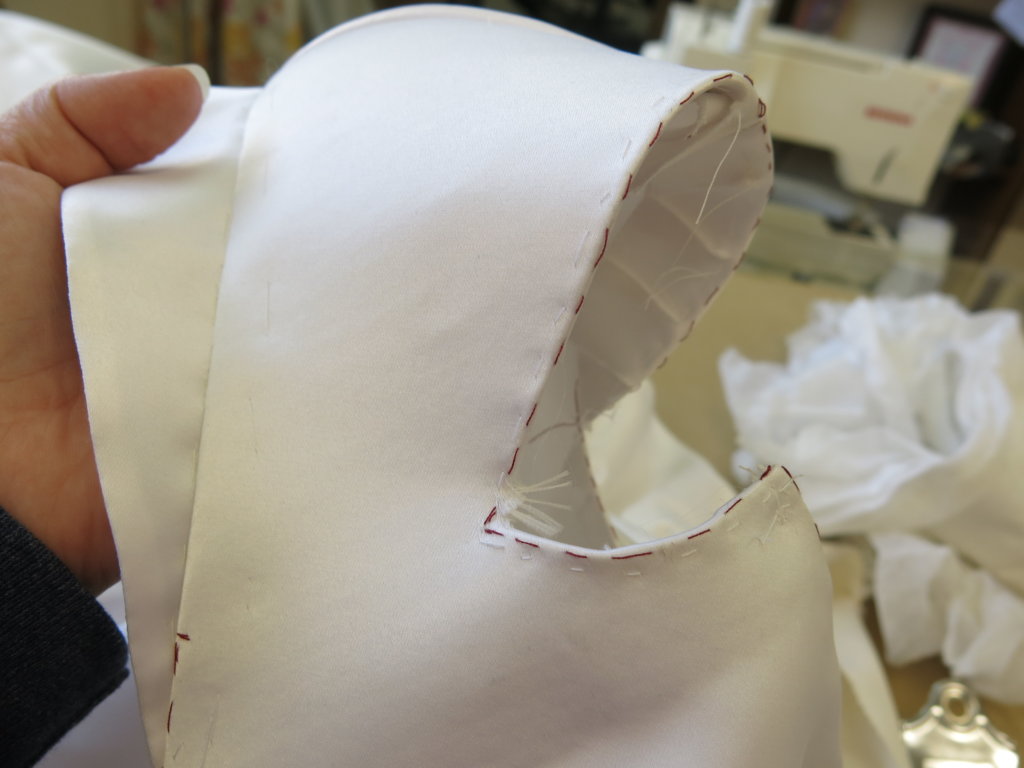
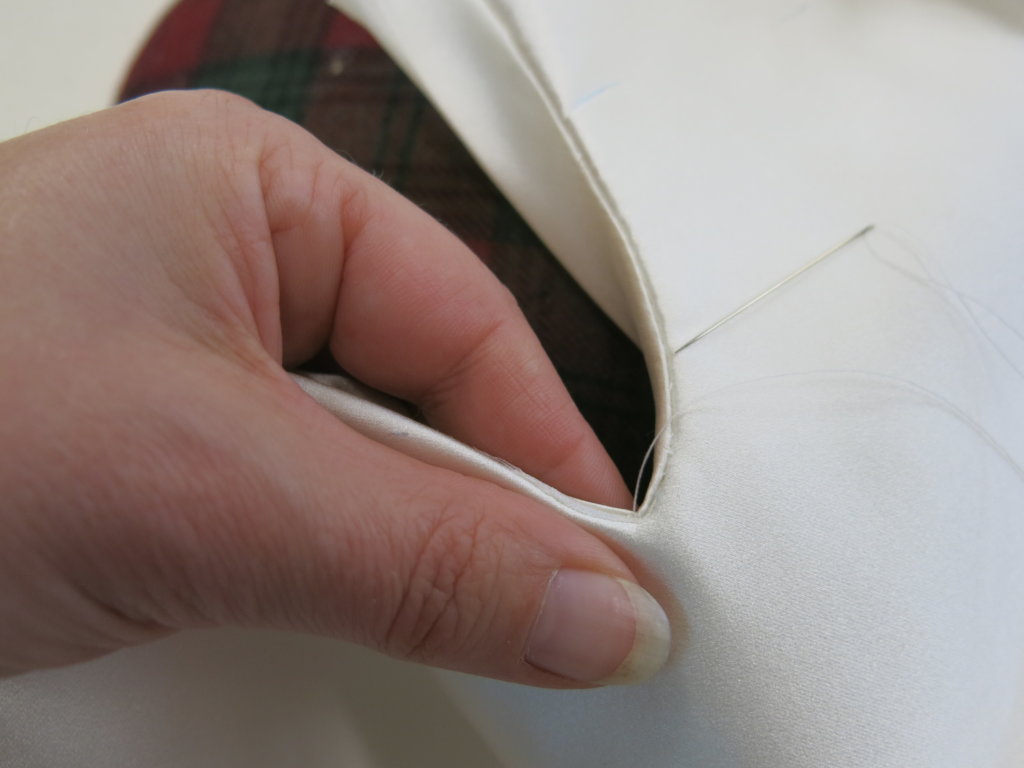
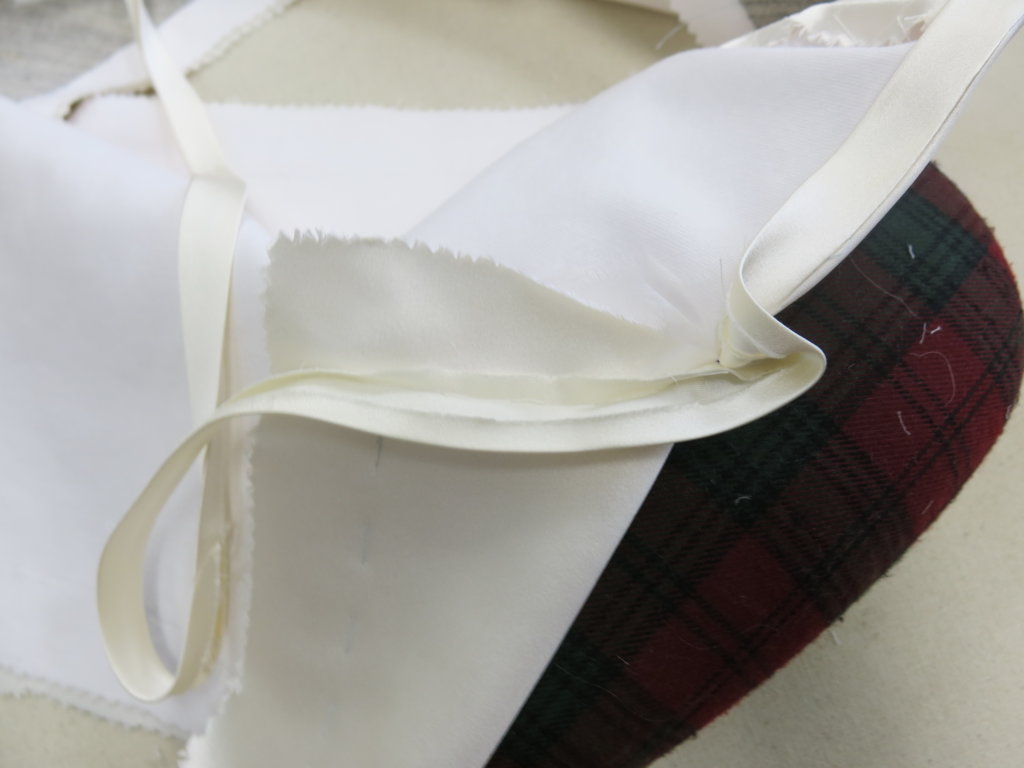
Then, I was finally ready to make the cut! I used my sharp fabric scissors to slice all the way through the allowances stopping right at my outermost staystitch…
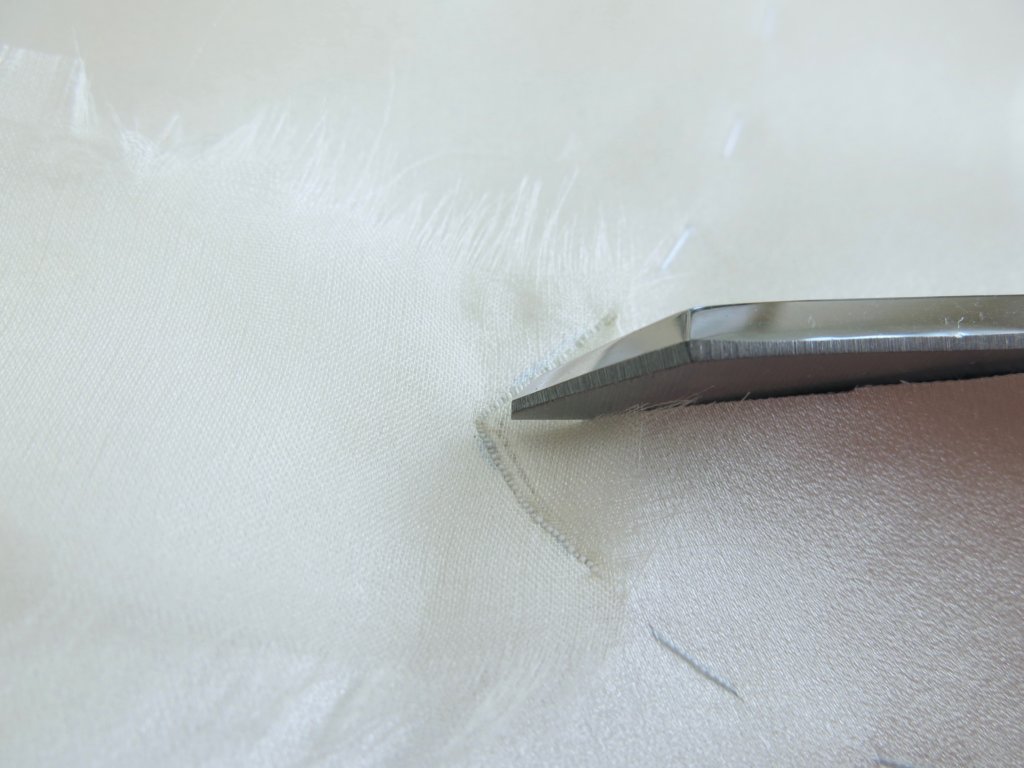
…which allowed me to turn the corner and fold all the excess fabric underneath. Immediately after the turn, here’s what it looked like from the public side…
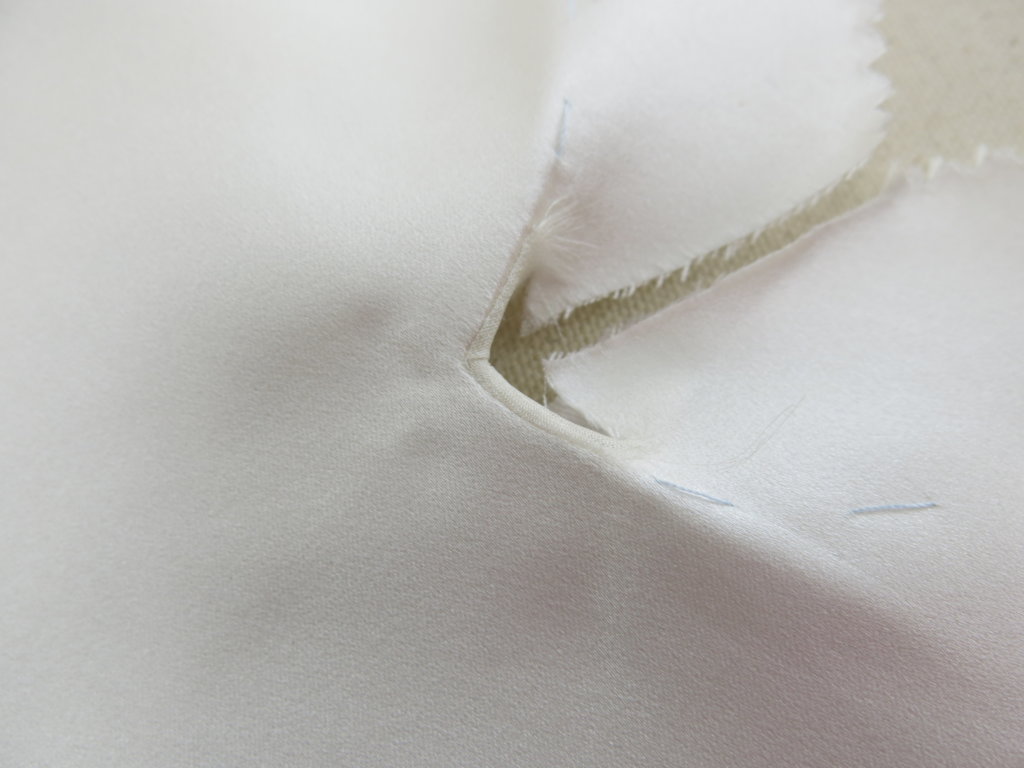
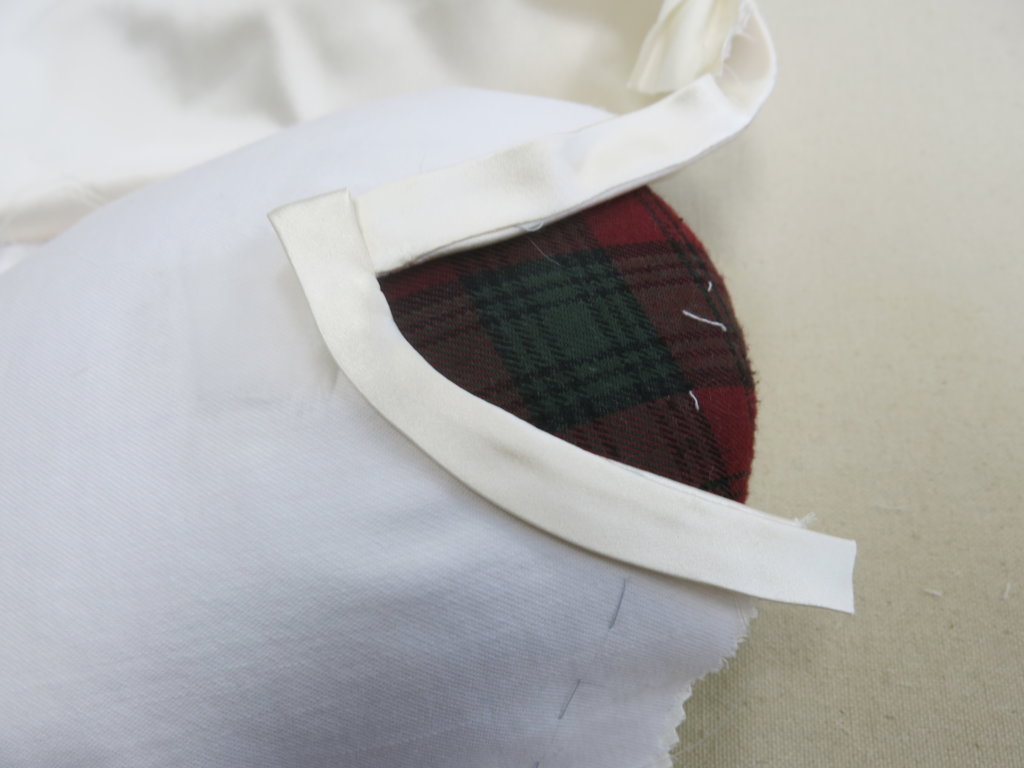
…and from the inside. You can (hopefully) see how the silk satin split but became encased by the silk organza. Whew!
Once all four corners were turned…
…it was time to seam up the shoulders!
Once pinned and machine stitched, I pinked the shoulder seam allowances and cross stitched them open by hand to the underlining layer- keeping them exactly where I want them.
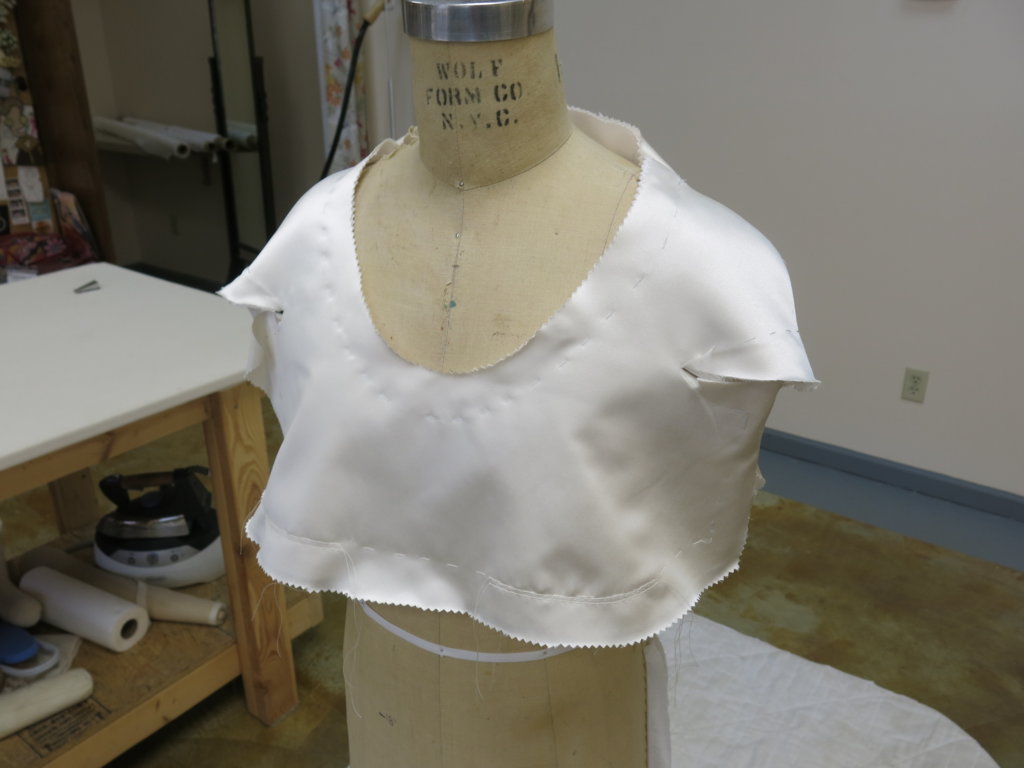
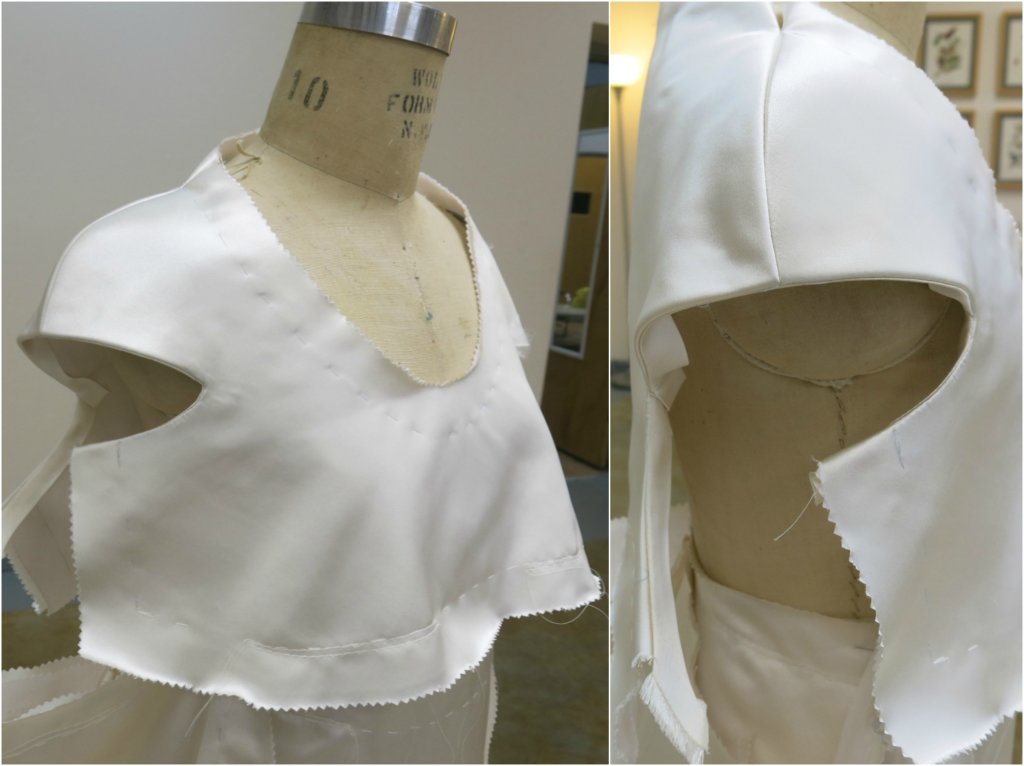
Starting to look (kinda sorta) like a top!
Now it was time to add the custom bias tape to finish the edge! I first hand basted the front lower armhole on one side…
…then machine stitched it in place right along my stitching lines.
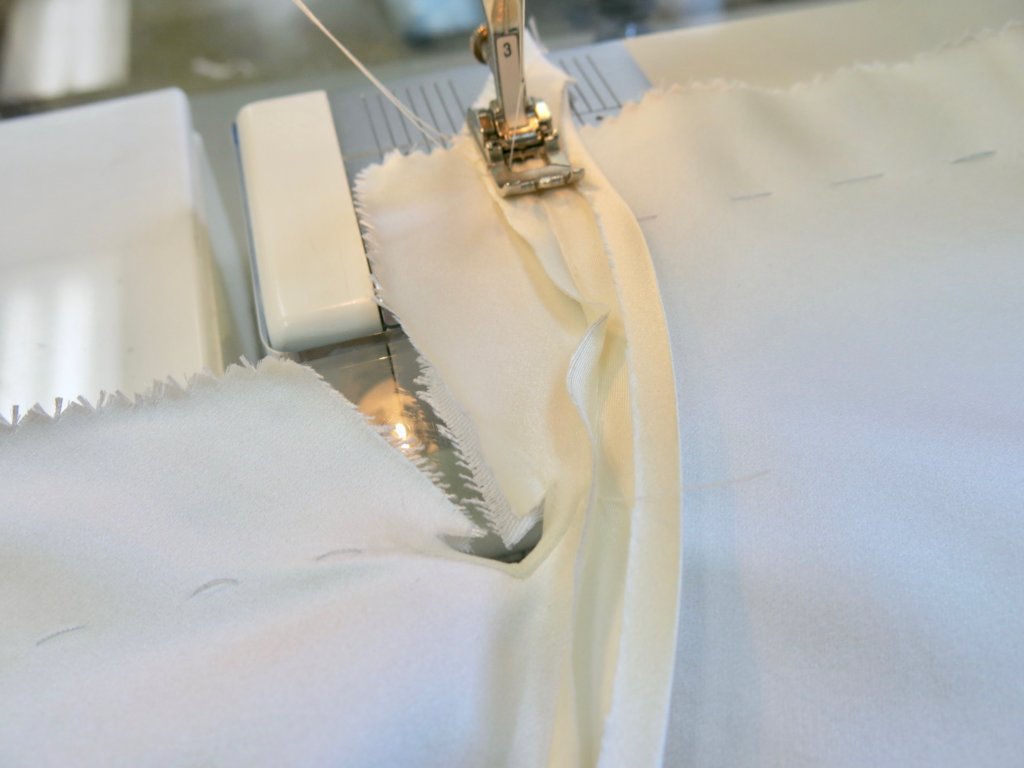
At my ironing table (and over my tailor’s ham), I trimmed the allowances at slightly different lengths to create a smooth transition…

…when I folded it all to the inside. Looking good!
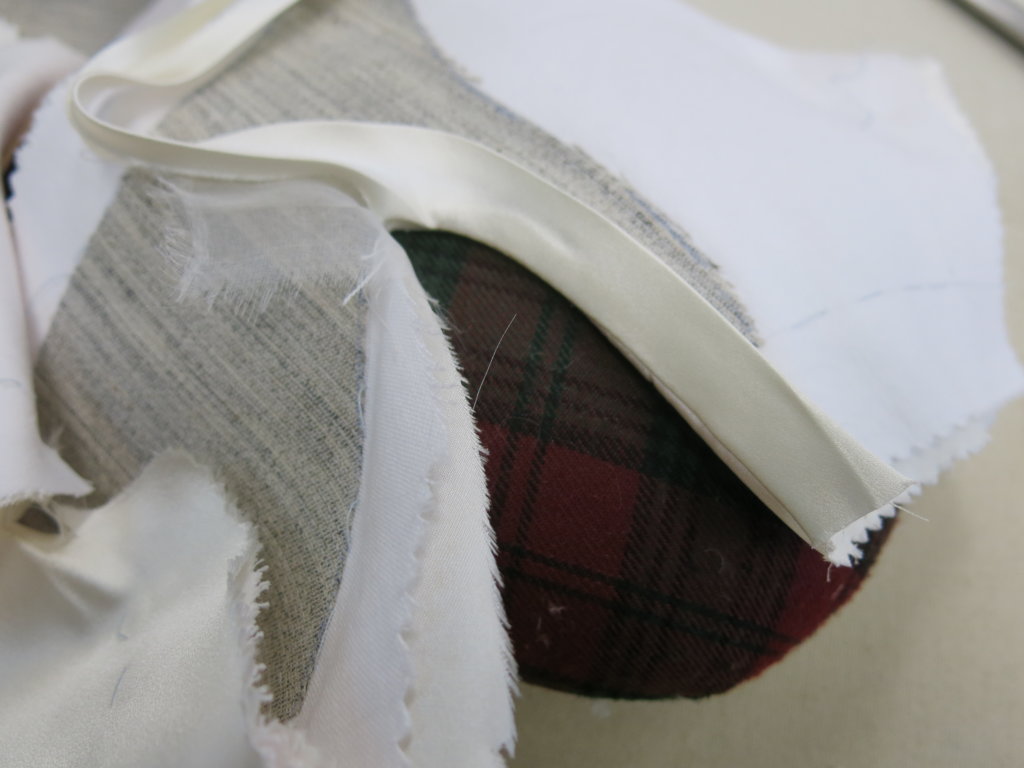
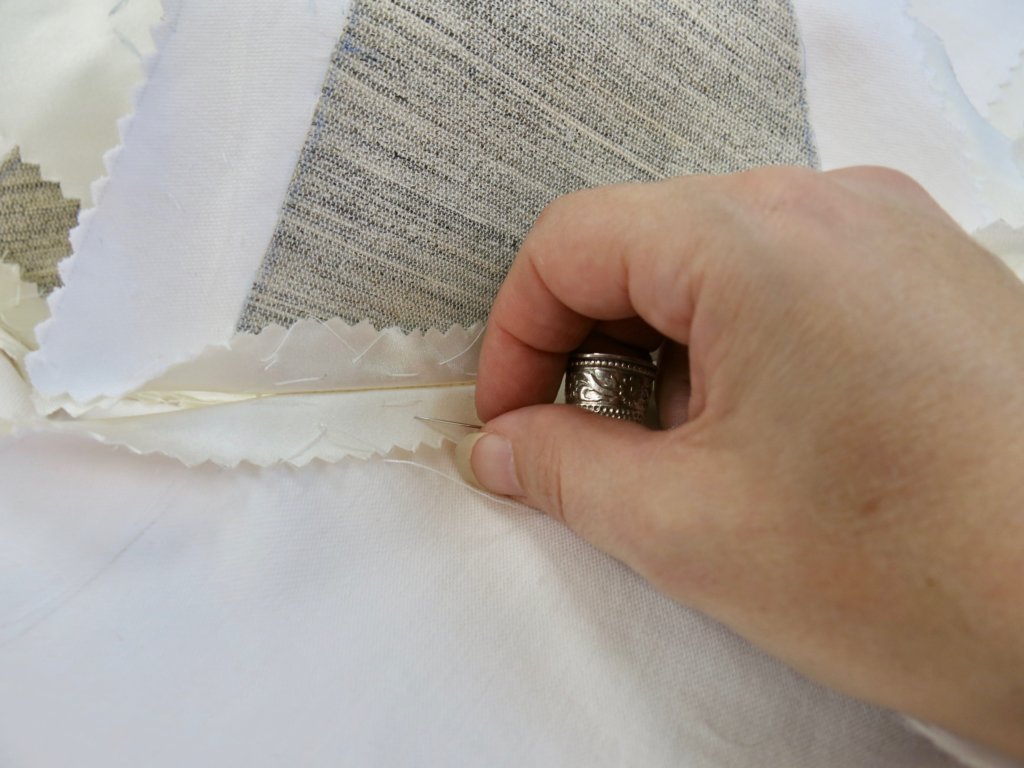
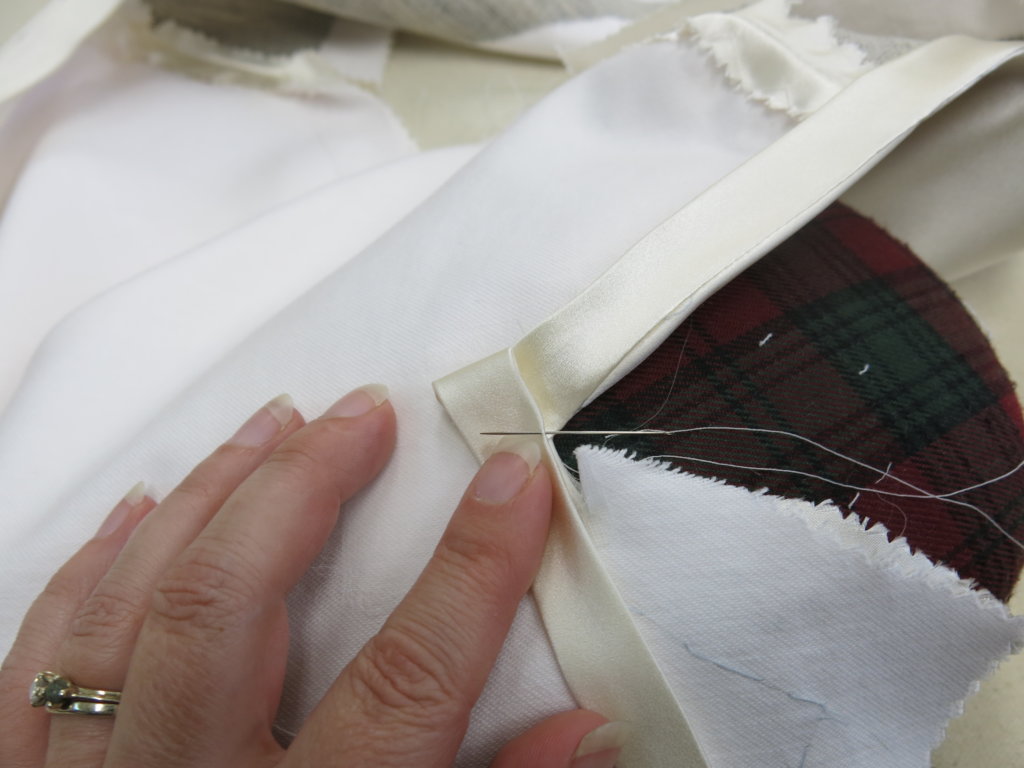
To secure the tape in the inside corner, I folded it…
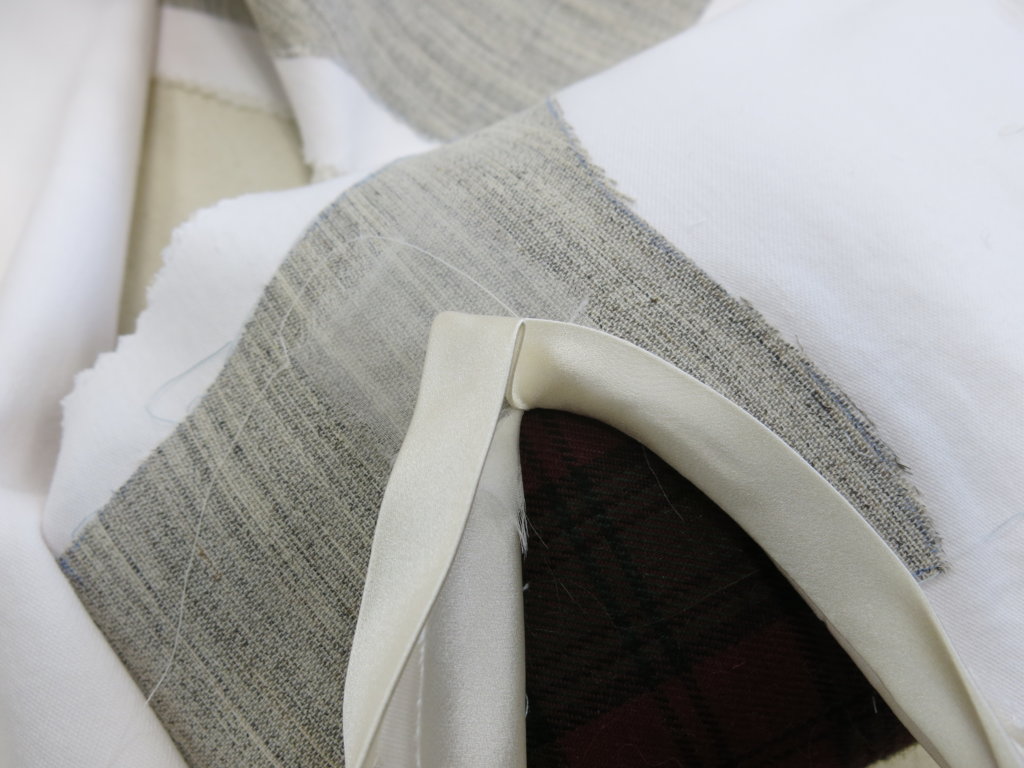
…and stitched the trickiest bit with tiny hand stitches.
Then I hand basted and machine stitched the upper sleeve all the way across the shoulder seam…
…which I then trimmed, turned, and pressed under as well…
…before making another tricky inner turn…
…and attaching the tape to the back armhole edge…
…to repeat the process.
When both armholes reached this state, they’d be ready to add the lining inside for a clean finish!
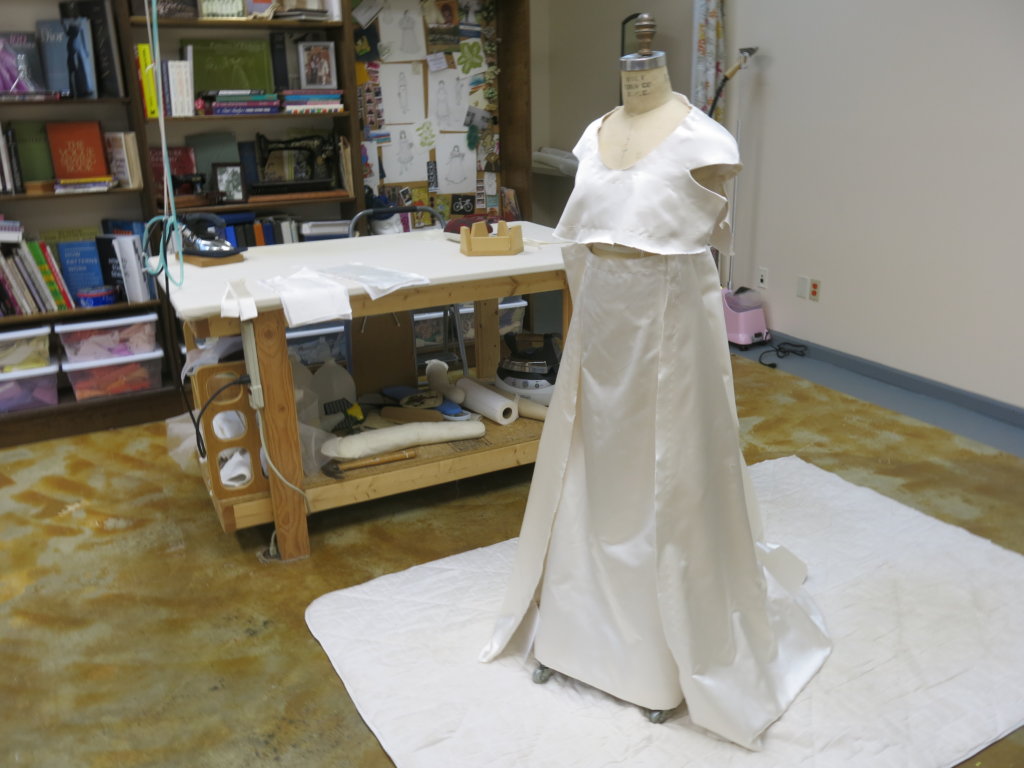
Here’s the finished look! So much of what goes into making a couture garment so beautiful is hidden, so I love sharing these peeks “behind the seams”!
With the skirt pieces (mostly) together and the top pieces (mostly) together) and the midriff pieces (on the ironing table) (mostly) together, Tiffany’s custom wedding dress was starting to (mostly) take shape on the dress form! So exciting.
Though they often require a lot of careful work (which is why they are rarely found in ready-to-wear garments), I love cut-in-one sleeves. And many of my brides do too! I add them to most of my own tops and dresses and you can find several more examples in my Bridal Portfolio (including my own wedding dress and jacket)!
Have you ever sewn cut-in-one sleeves?
NEXT POST: Tiffany’s gorgeous neckline and collar!!!!