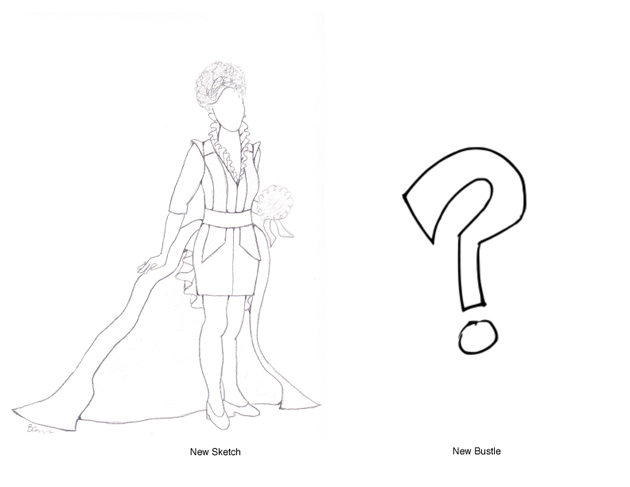
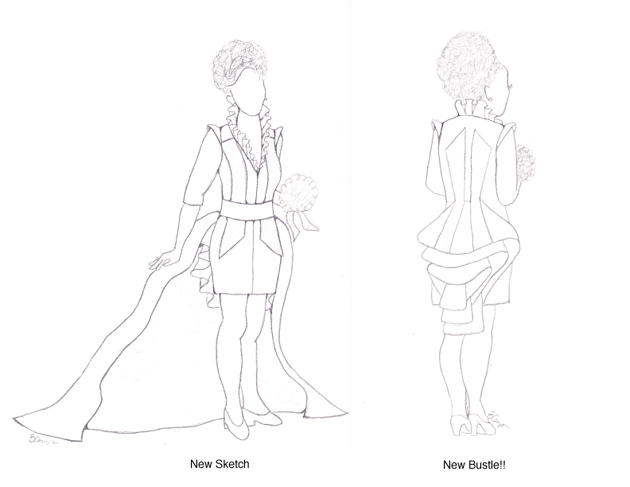
 Lila Rose’s mockup was almost ready, with the main exception being the “bustle”. As you may remember, we changed the sketch several times before deciding on the design above. Lila Rose definitely wanted a bustle type structure on the back of her skirt. It would be hidden under a removable train for the ceremony, and then revealed for the reception.
Our original sketch was frillier all-around and had a ruffled jabot-style idea for the bustle.
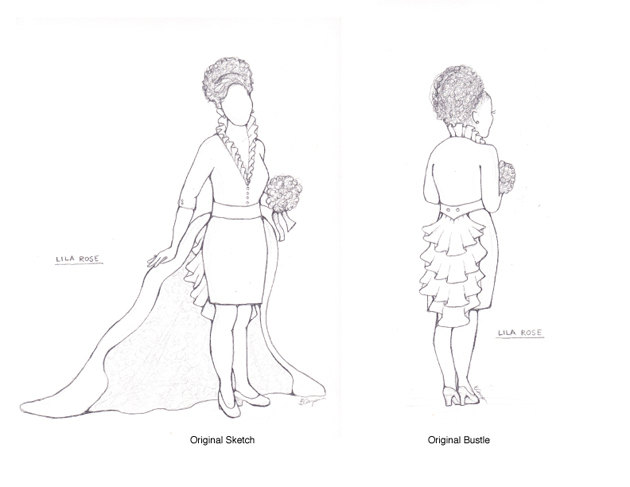 With our edgier new sketch, I didn’t feel like the frills would still work. I started playing around with ideas to design a bustle that would enhance the new sketch’s awesomeness. The bustle for this design needed to be cool, sleek, and unexpected.
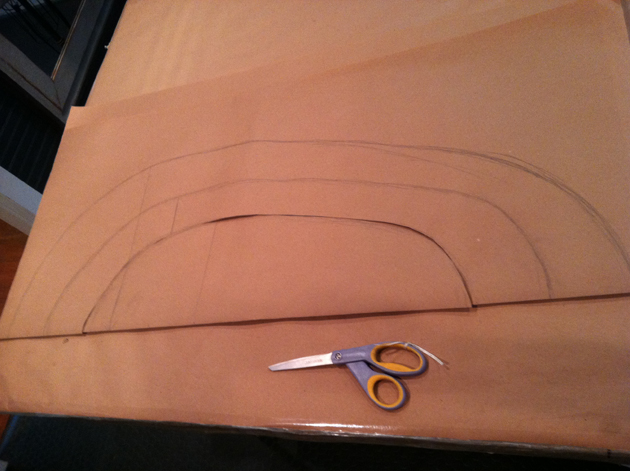
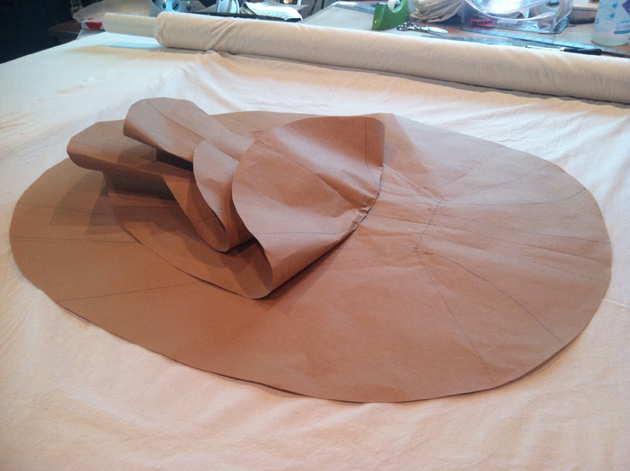
I played around with the idea of making the bustle out of three concentric egg shapes that I would somehow fashion into an interesting shape. So, I took some measurements and drew out some egg shapes on the fold of some stiff paper. I cut them out and used them as patterns.
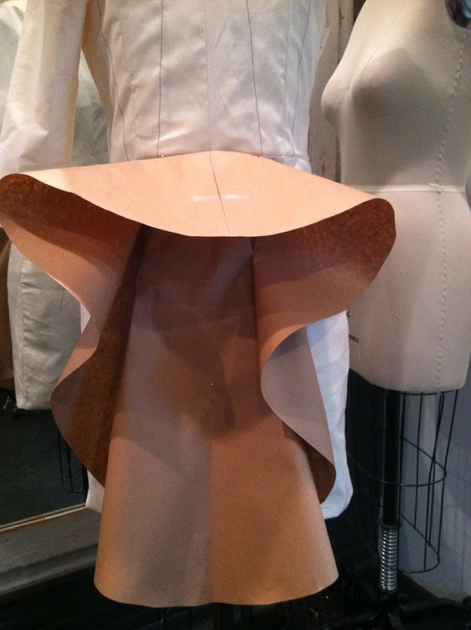
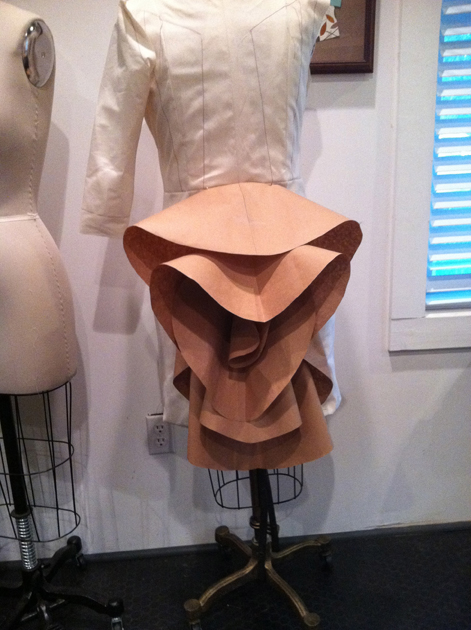
Then I just played around with the pieces of paper on the dressform.
I started to like what I was seeing! Once I was able to see some direction to where the bustle was headed, I took the shapes onto the table and started making precise calculations of where to fold and where to stitch in order to create a cool symmetrical pattern.
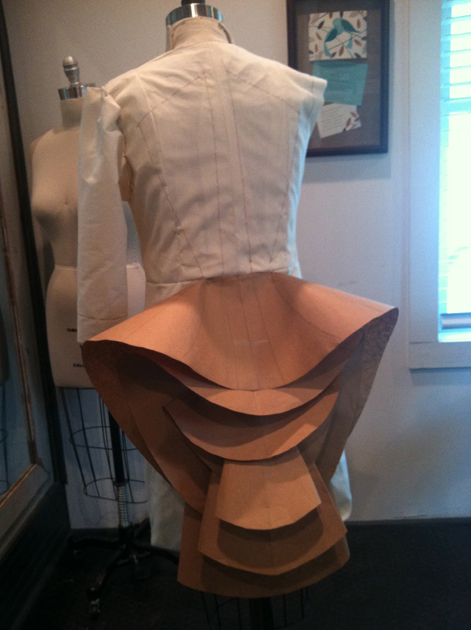
Then I tried it back on the dress form.
Very cool! I knew that I could take this idea and turn it into a bustle that Lila Rose would absolutely love! Next I needed to make the bustle into fabric so that she could try it on for her mockup fitting.
In order for the fabric bustle to stand out away from the body, it would need to be interfaced with something stiff. I recently found a new interfacing company that makes their own interfacing right here in the US called Fashion Sewing Supply. I was excited to have this opportunity to try out their PRO-WOVEN “Super-Crisp” fusible cotton interfacing.
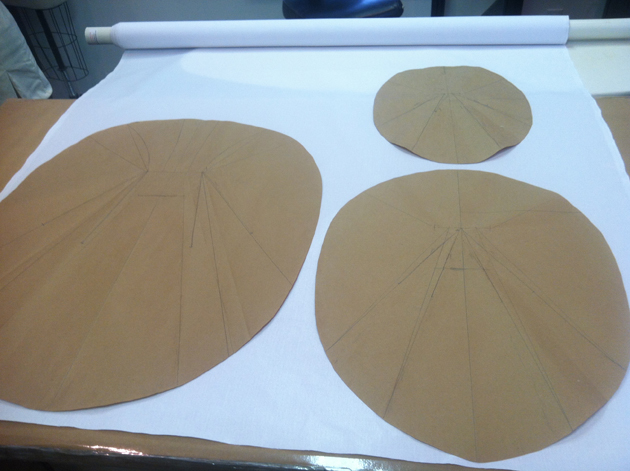
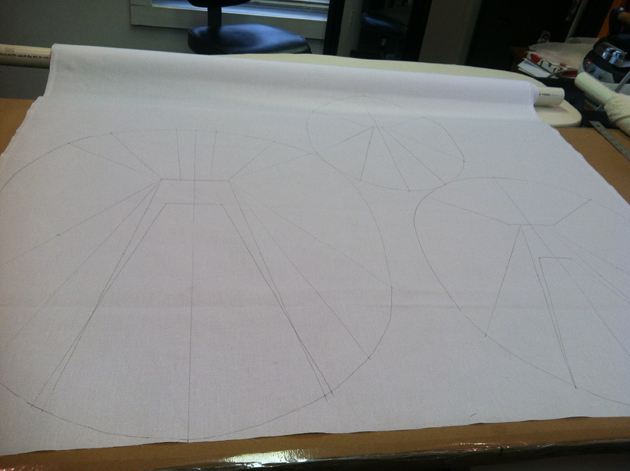
I drew my patterns out onto my interfacing without seam allowances.
You may be wondering how I get all of my inner lines drawn without tracing paper. (I never use it so sometimes I forget that most people do!) I do it by pencil tracing along the edges, folding and drawing along the folds, or marking an endpoint with a pin and then using a ruler to connect the two points. With this method, marking a pattern onto fabric is almost exactly like marking a pattern onto paper.
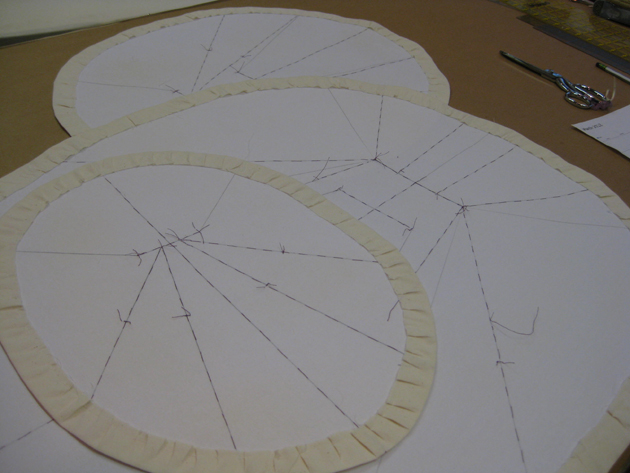
Then I fused my egg shapes onto washed muslin with seam allowances. My hope was that these would be perfect for Lila Rose and I could use this part of the mockup as the underlining layer in her actual dress. I prepped and threadmarked the shapes for the fitting.
Lila Rose “Bustle” Challenge = Busted!
All I had left was to finish the assembly of the mockup before Lila Rose’s first fitting.
Next post: Photo-filled mockup preview!!!




5 Responses
WOW! You are one talented gal. I am so excited to see this dress with the final fabric choices. :D
Amazing work, Brooks Ann!
Way to hustle to make a bustle.
Hello Brooks Ann….it’s Pam from Fashion Sewing Supply :)
Wow…you are an amazingly talented lady…I am so impressed with your beautiful work!
Thanks Pam! I’m so happy that I found your company and your excellent interfacing. I look forward to working with you again and again.