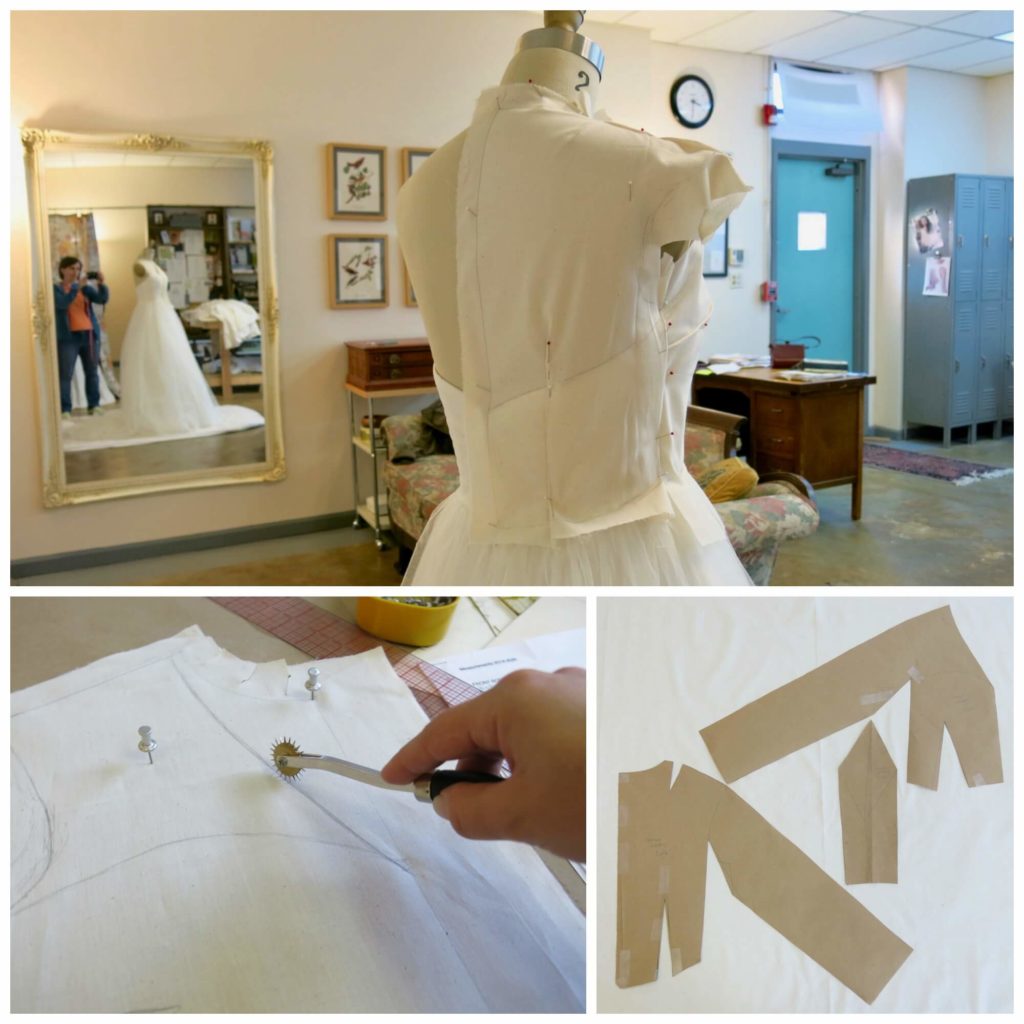
 Once the design and sketch for Cameron’s custom wedding overdress was complete, I was ready to start my favorite part of the custom process: patternmaking.
There are essentially three ways to create a custom pattern: Draping, Flat Pattern, and adjusting an existing pattern or garment. I usually use a combo of these techniques. In Cameron’s case, I used all three!
Something Old, Something New
Instead of starting from scratch for the lower part of Cameron’s custom wedding overdress, I pulled out the pattern I draped back in 2009 for Leah’s wedding “overdress” with train. Since Leah allows me to keep her dress on display in my studio (the colorful dress below), I could easily envision how the shapes of her skirt could be changed up to fit Cameron’s design and body. Leah’s paper pattern was a great starting point for creating new pattern pieces for Cameron’s long full overdress skirt with train.
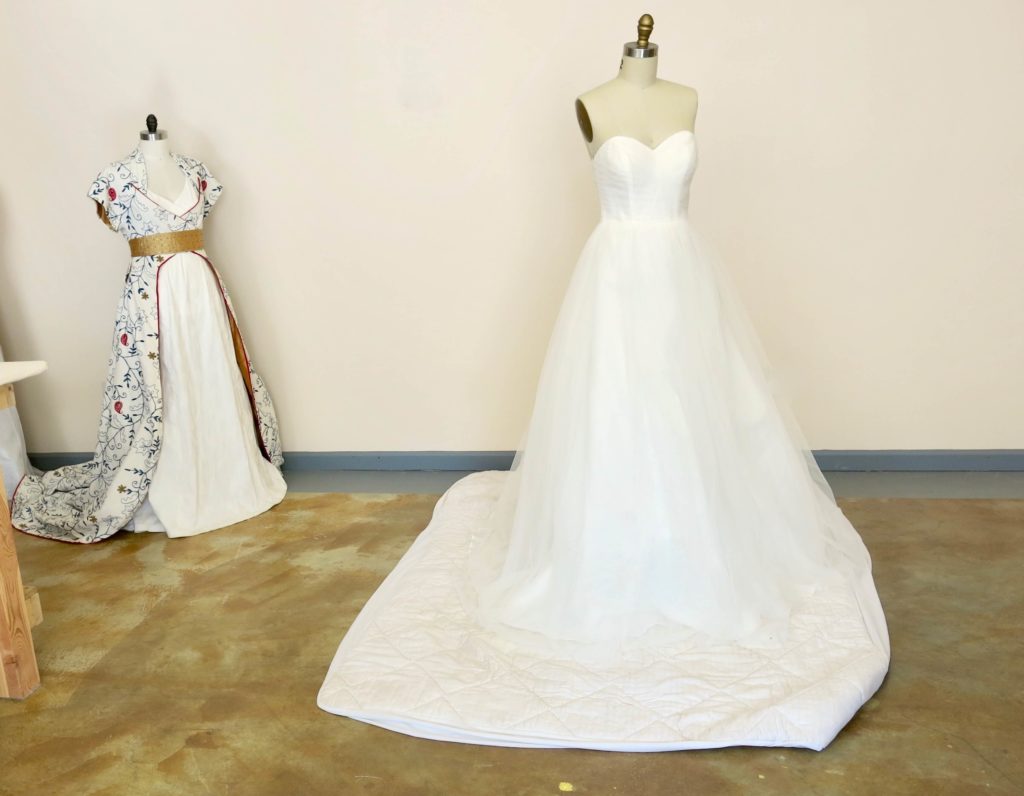
Since Cameron already had a store-bought wedding “underdress”, I’d need to do all my draping and patternmaking with it underneath. To make sure the hem of her new dress stayed free of dust and threads, I put an old mattress cover on the floor before adding it to a dress form. I padded the form out to match Cameron’s body using the measurements taken while wearing the dress during her Design Consultation.
Draping a Block
Draping is a patternmaking technique that works in 3D by manipulating fabric onto a dress form. Though I teach custom flat patternmaking in my online courses, I most often start with draping for my brides. There are many reasons why I replicate my bride’s silhouette by padding a dress form, so I usually start my custom patternmaking process in 3D.
While patterning Cameron’s overdress, I had a lot to consider. We were still searching for the perfect fabric, but Cameron really wanted a sheer white fabric featuring a large floral design. I’d need to be strategically clean in my patternmaking, especially in the areas above the underdress. The sheerness of the fabric would mean that the inner workings of the seams and darts would show to the outside and the flowers would look best if they were unbroken. Being thoughtful about the placement of the dress’s construction lines would help showcase the fabric and Cameron’s beautiful shoulders and back.
Since Cameron’s style was all about vintage, I was excited to eliminate the traditional armhole seams and set-in sleeves by creating cut-in-one gusset sleeves for her overdress. This style is one of my absolute favorites and can be found in many vintage couture garments. I love cut-in-one gusset sleeves so much that I even used them in the jacket I made to wear over my own custom wedding dress!
These type of sleeves can be created using flat pattern techniques, but flat patterning requires a block. A block is a blank flat 2D representation of a person’s figure. While custom blocks can be drafted directly on paper using measurements, you can drape a custom block if you’ve got a custom dress form. Since it would be important for me to also know the lines of Cameron’s underdress, it was a no-brainer for me to start in 3D.
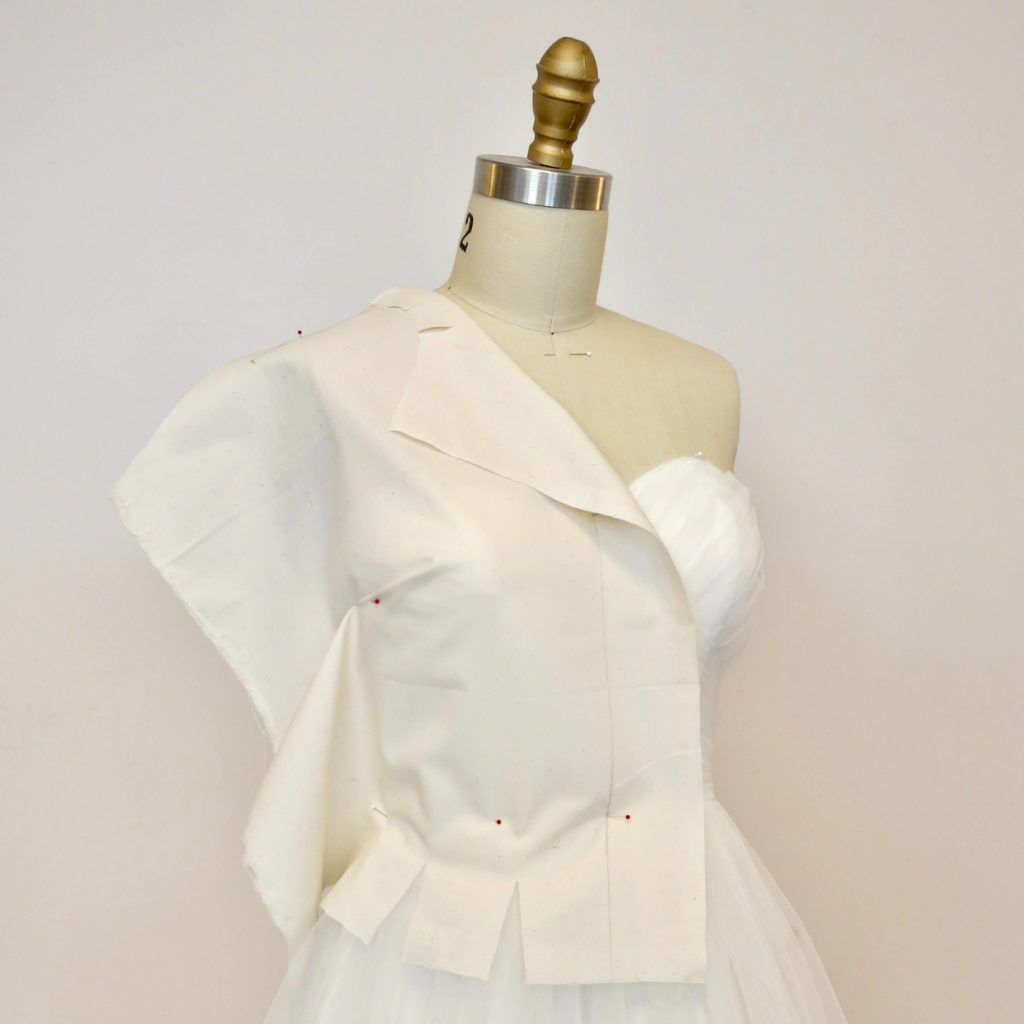
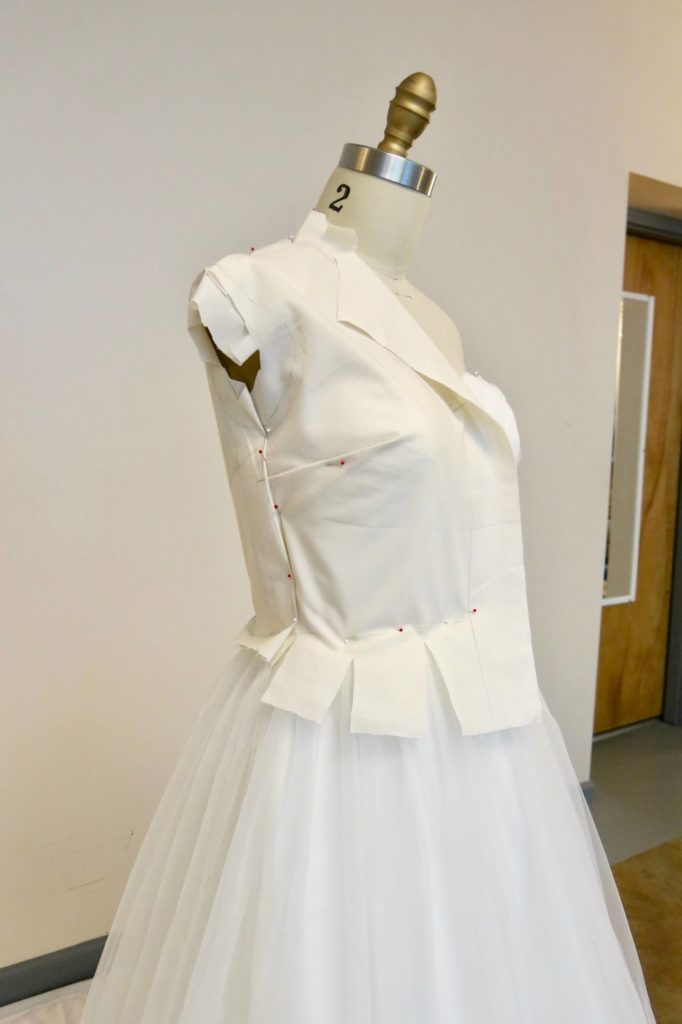
Draping starts with a step called the rough drape. On half of the form (assuming the body is fairly symmetrical), you pin the grain line down the center before cutting, pinning, and manipulating the fabric to create the design and fit you were envisioning. This happens one pattern piece at a time.
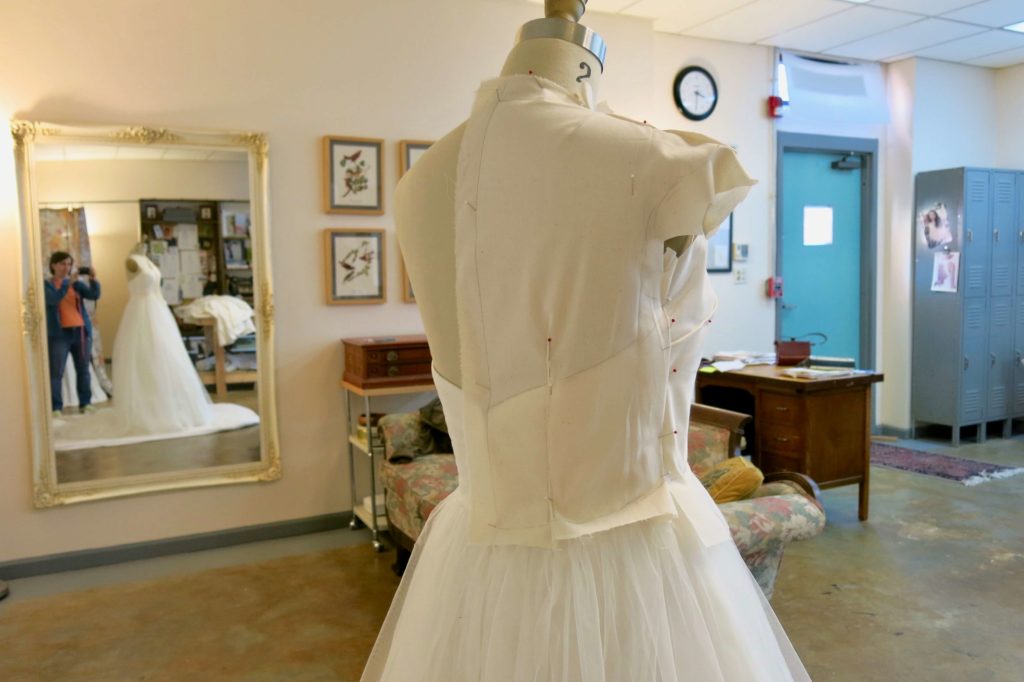
Once darts, seams, and edges are roughed in, you follow them with pencil lines directly onto the fabric.
When the pieces are unpinned and flattened, you’ve got a rough 2D version of the 3D work done on the form!
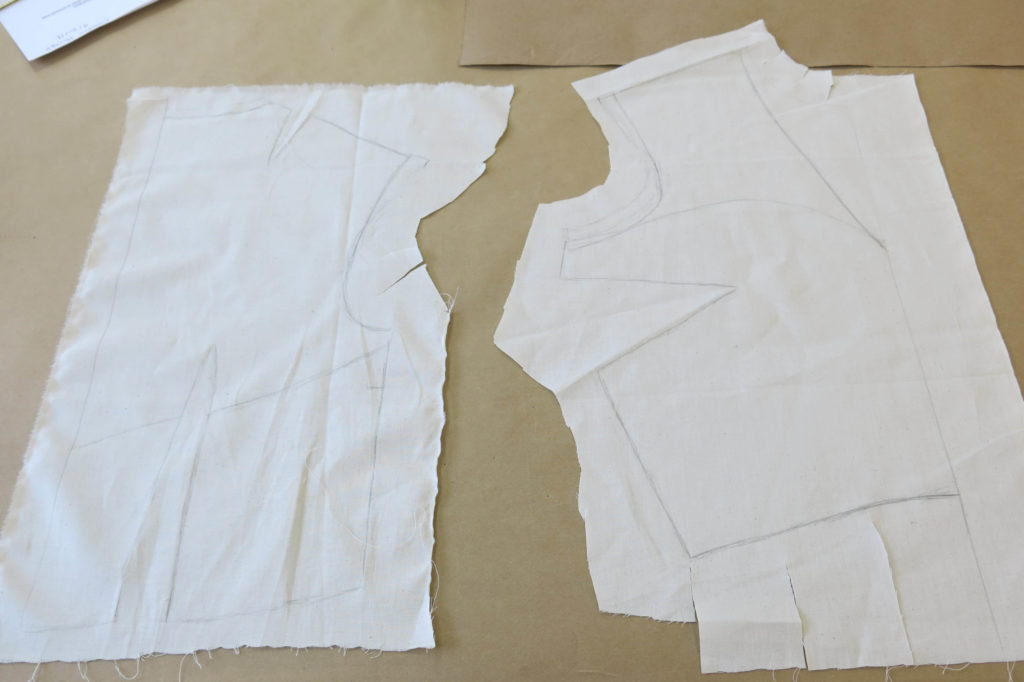
Next, I lay a fresh piece of paper onto my pinnable top worktable and secure the rough drape to it with push pins…
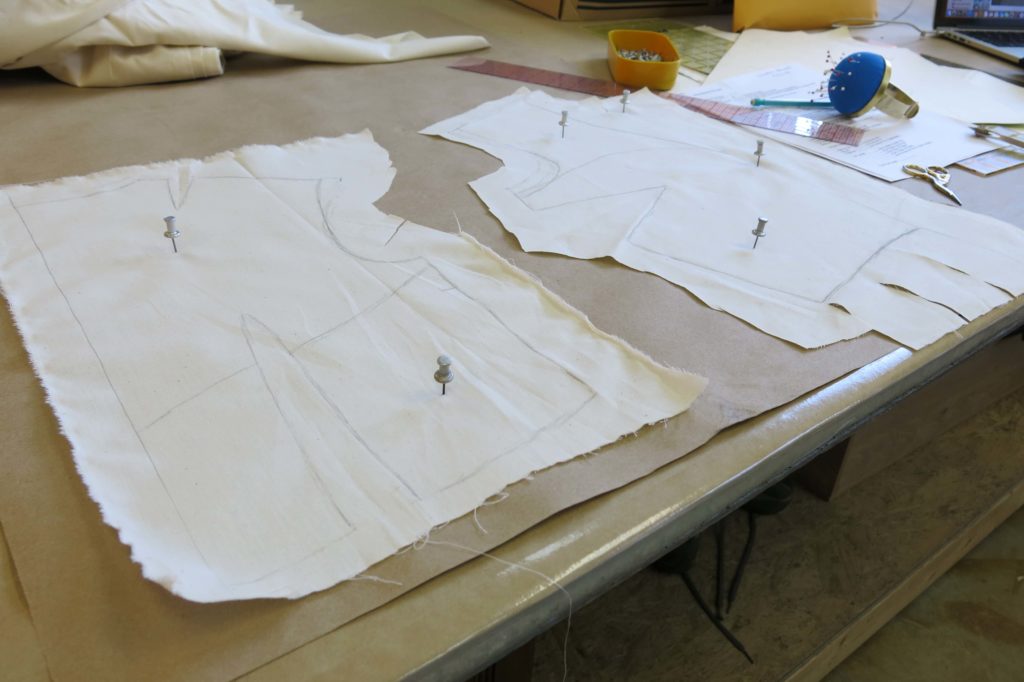
…so that I can transfer the lines from the muslin to the paper using my needlepoint spiky wheel.
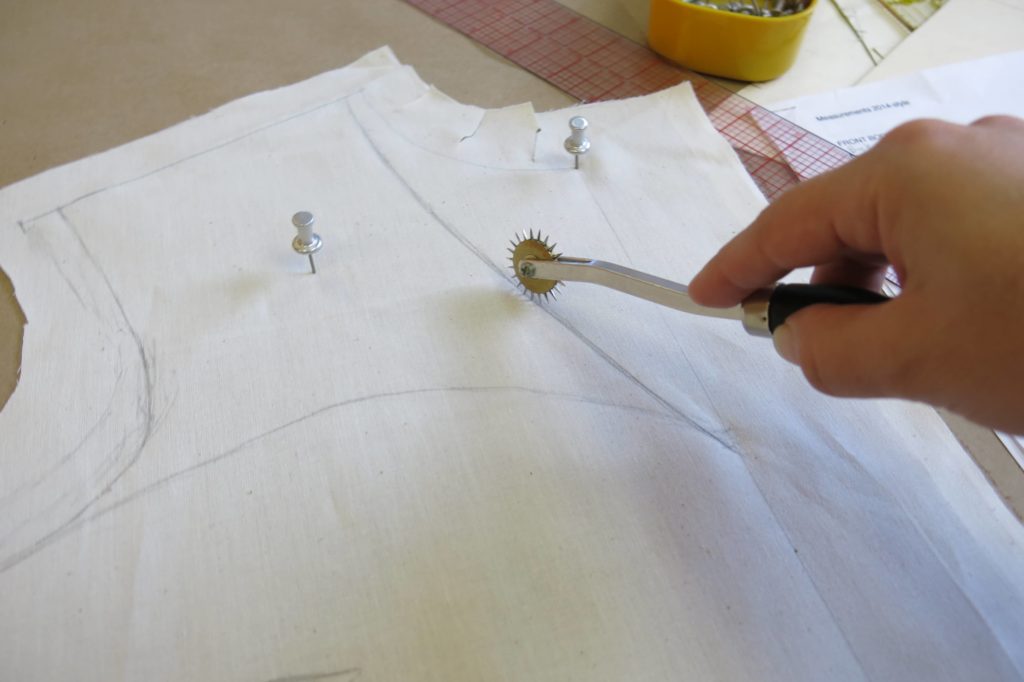
The spiky wheel leaves a dotted line of tiny holes on the paper underneath. I use straight and curved rulers to clean up and connect the dots into a paper pattern draft.
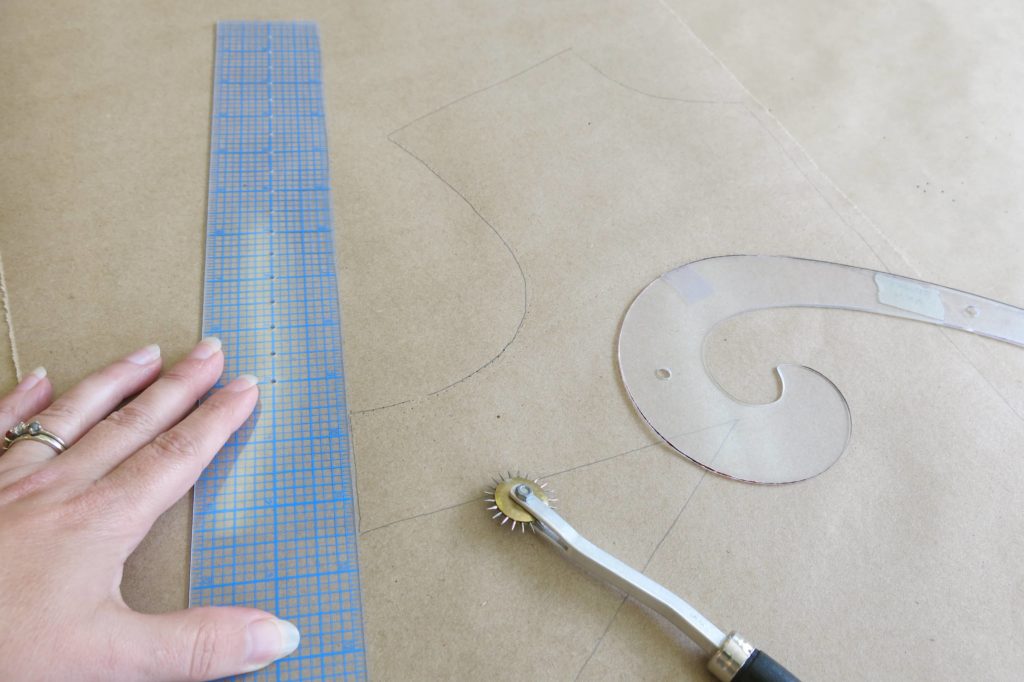
I can then cut along the edges to create my pattern which, in this case, is also my Size-Cameron block!
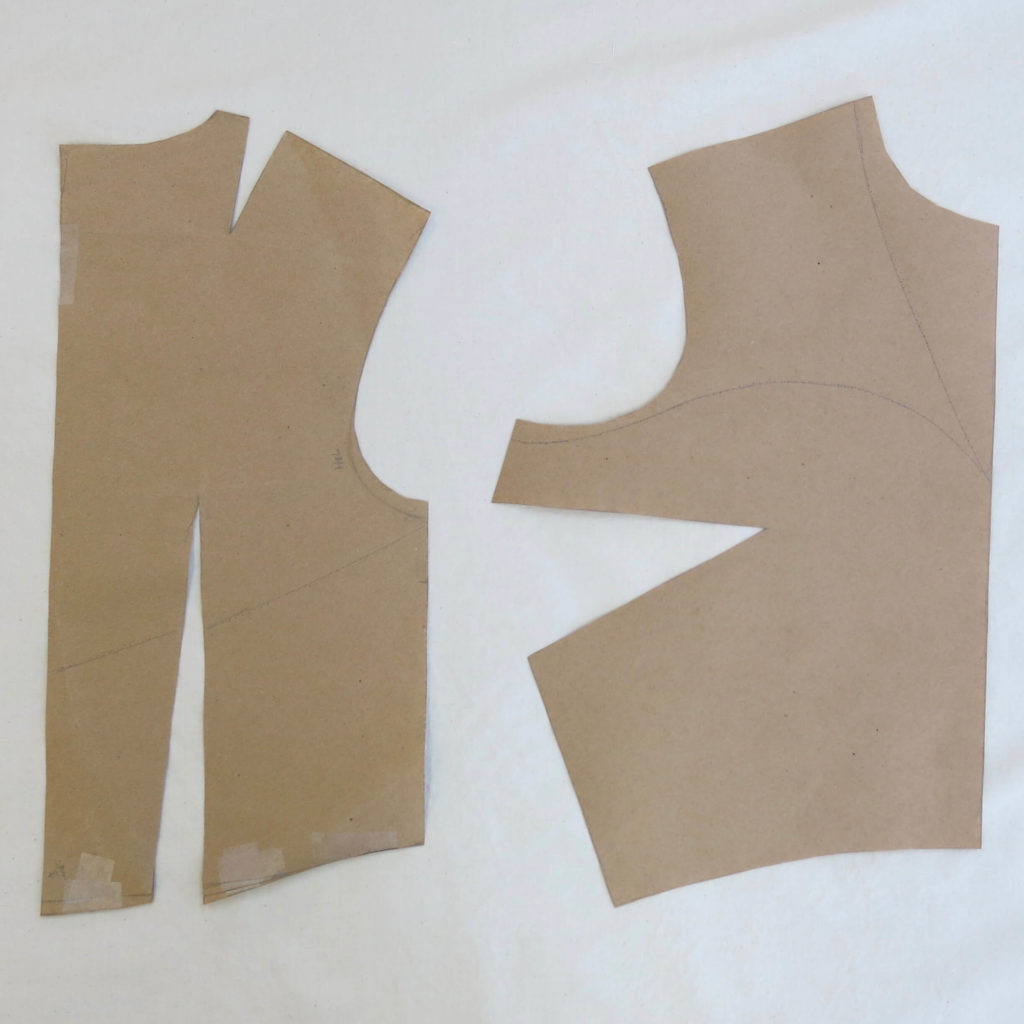
Flat Patterning the Cut-In-One Gusset Sleeves
When you’ve got a custom block, you can use flat pattern fashion textbooks kind of like recipe books. Find your desired look and then follow the instructions for how to create it. Fashion works with standard sizes and measurements, so you often need to improvise when drafting custom. That said, the textbooks are very helpful in giving you the path to get close enough to work through the rest with finesse!
My favorite flat patterning textbooks are both by Bernard Zamkoff and Jeanne Price. I always pull out “Creative Pattern Skills for Fashion Design” (affiliate link) when I want to draft cut-in-one gusset sleeves. I love the process!
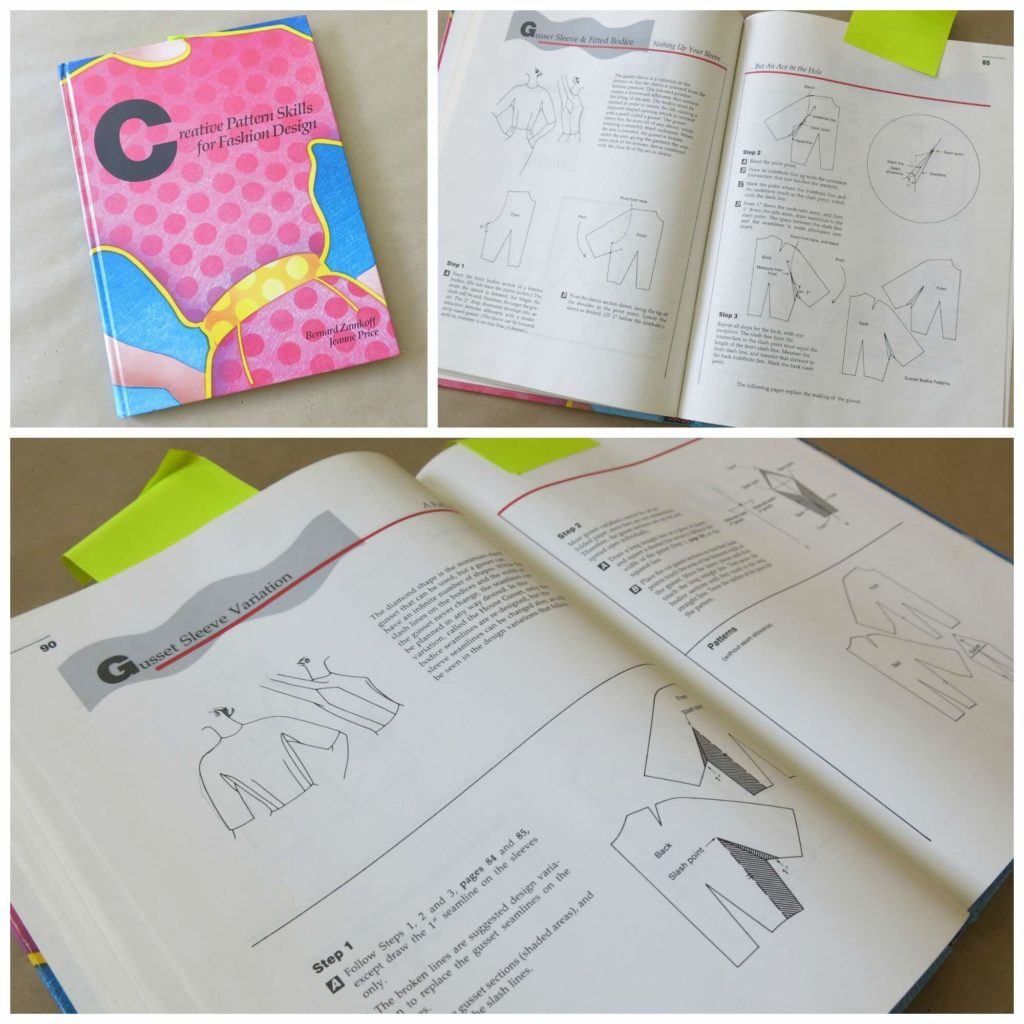
As soon as I flipped to the gusset sleeve section, I realized I had already made a small mistake with my block. I draped it to have a single bust dart in the side seam, but this style actually doesn’t work well with the dart in that position. I’d need to rotate it to the waist seam before I could begin.
No problem! Rotating a dart is easy-peasy. When one dart closes, another one opens…
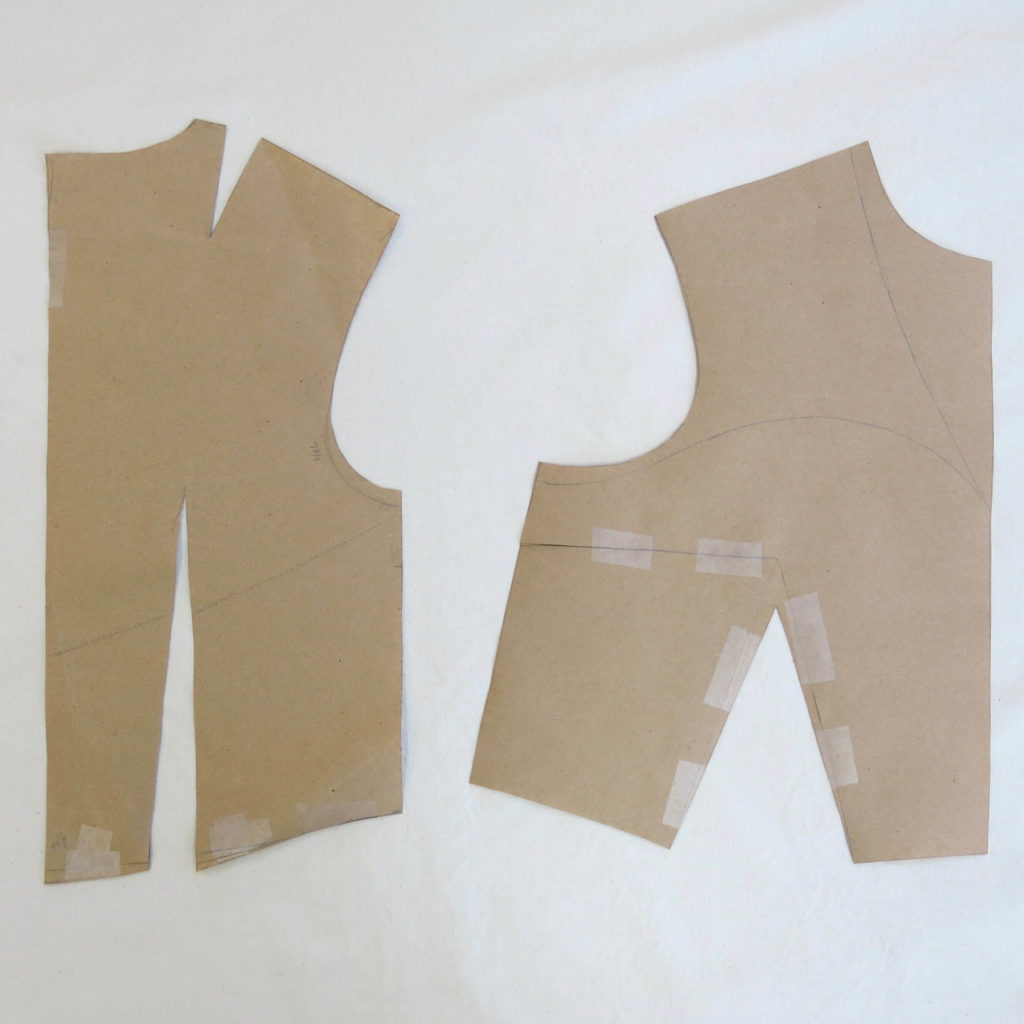
Once my block was corrected, I followed the steps in the book (while improvising and customizing to Cameron) to draft a pattern with the sleeves cut-in-one with the top.
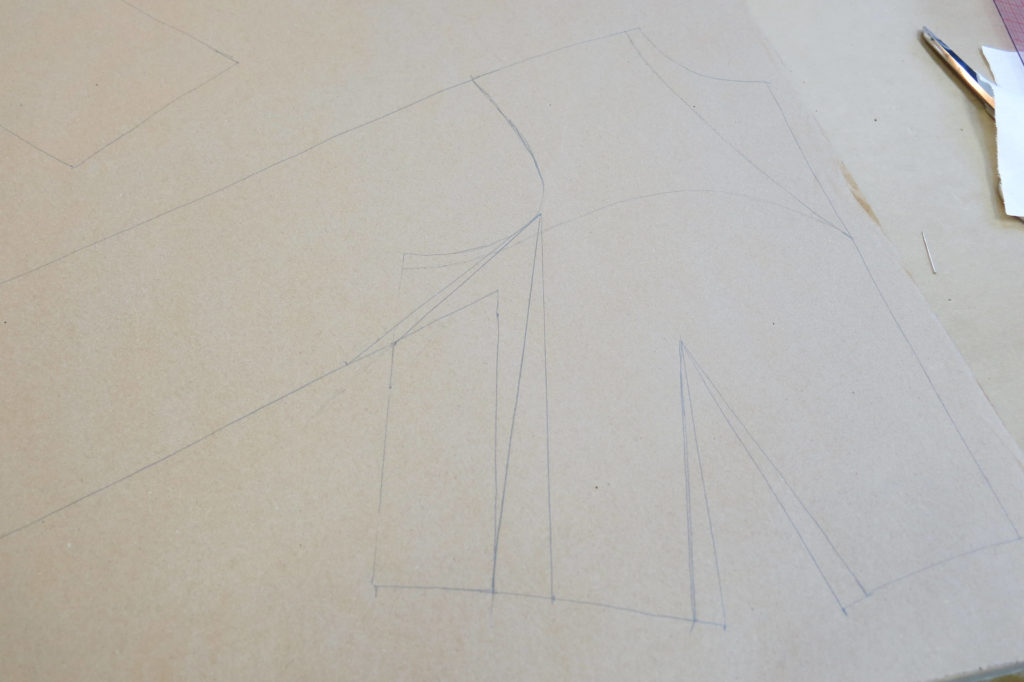
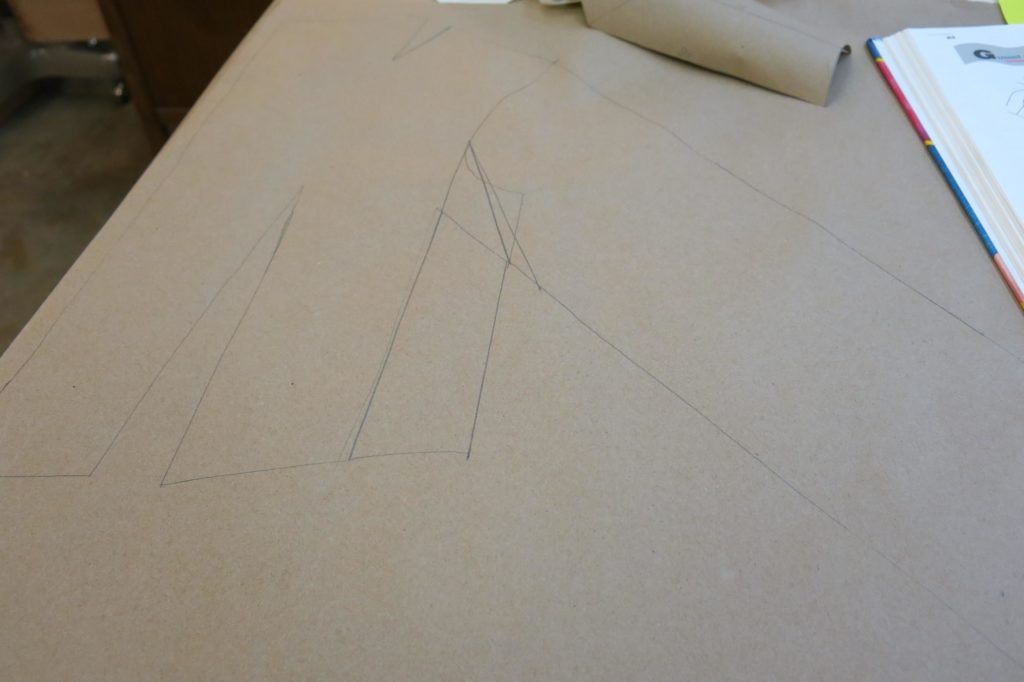
Once the first draft of the pattern was complete, I cut it out of muslin and pinned it together.
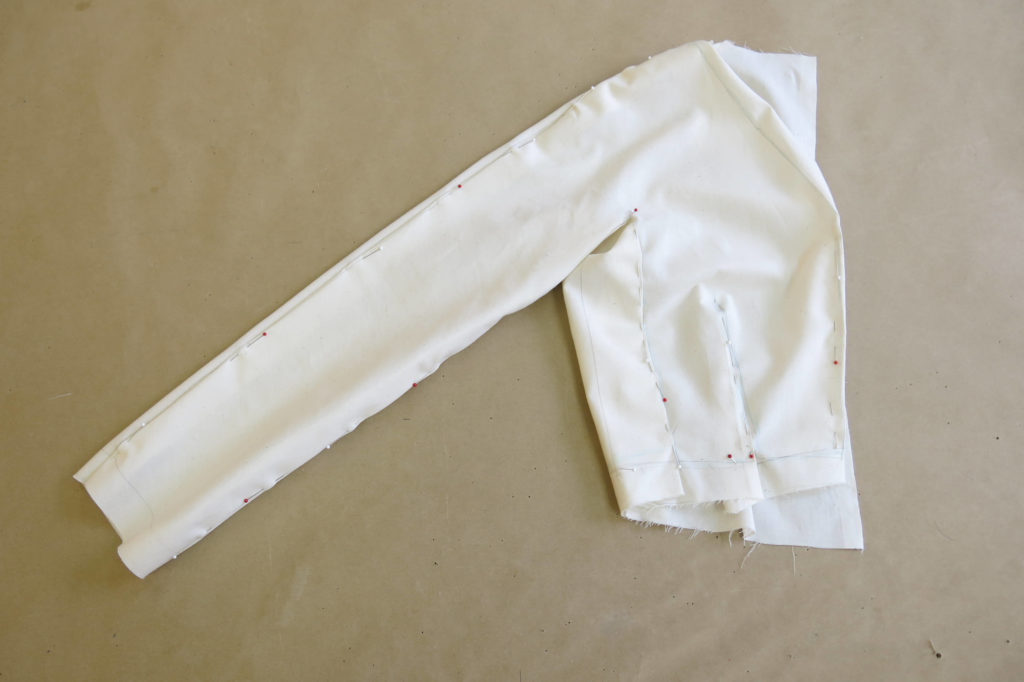
Fine Tuning and Finishing the Pattern
I tried my experiments on the dress form and did some fine tuning…
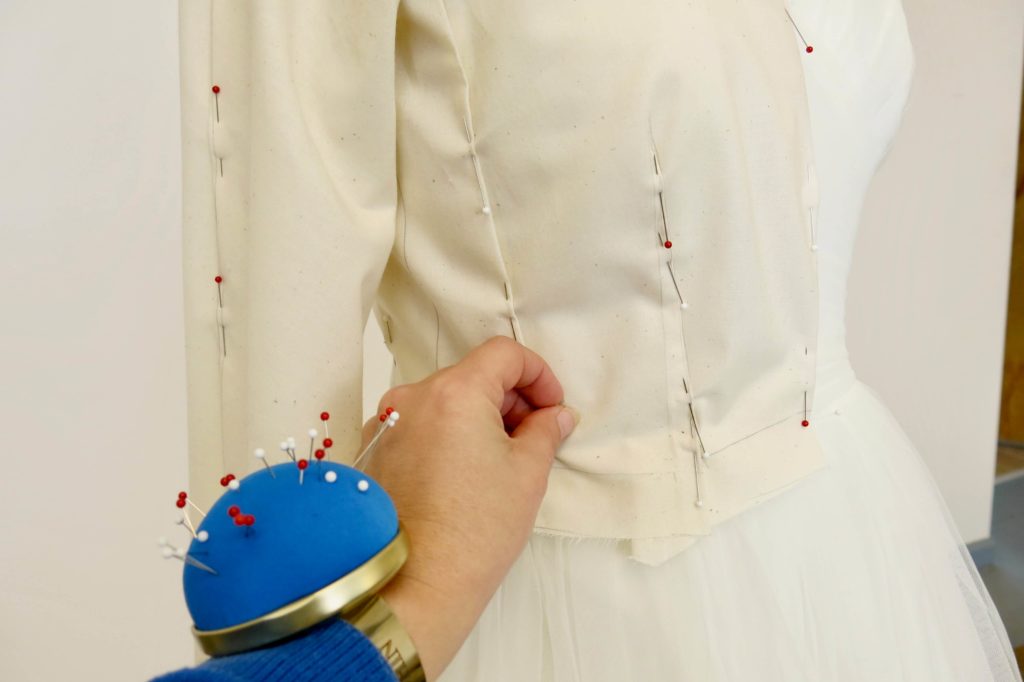
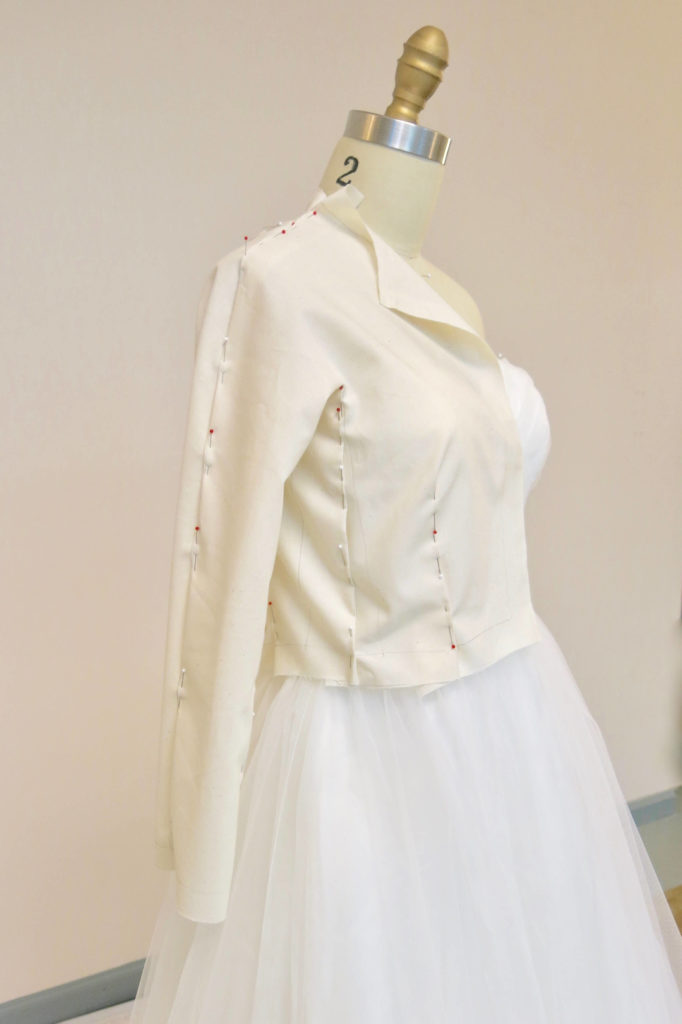
…before calling the pattern’s first draft done!
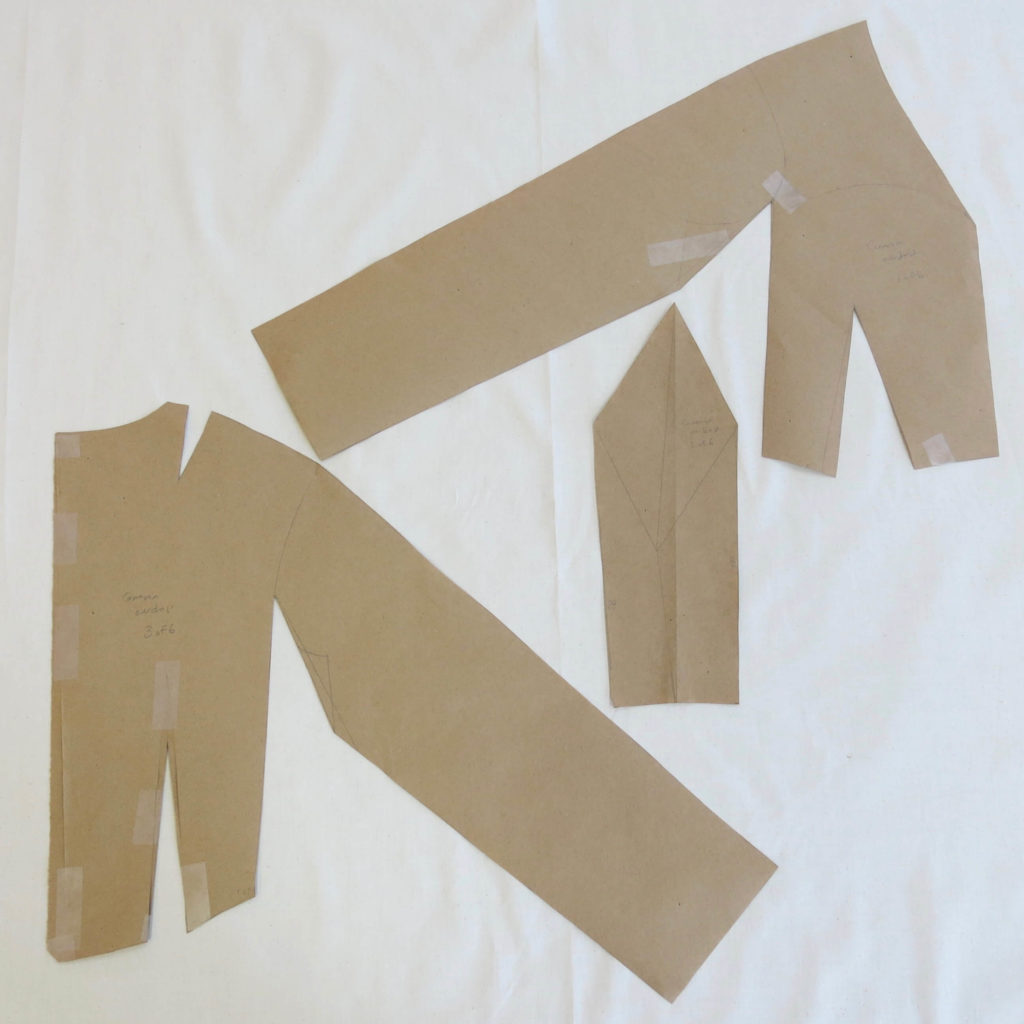
I love the pattern pieces almost as much as I love this style! I think it’s so fun that the pointy panel between the front and the back allows for full movement of the arm without an armhole seam or a set-in sleeve. To me, the seam along the top of the arm is so much prettier! Almost everything above the underdress is left clean and free to showcase the fabric itself and Cameron’s lovely arms, neck, shoulders, and back.
Do you ever make your own custom patterns? If so, do you prefer starting with something that already exists, draping, flat pattern, or a combo?
NEXT POST: Fabric becomes the focus! Our hunt for the perfect fabric leads us to Red Canary Studio in Greensboro…


4 Responses
This is an incredibly helpful and fascinating post. I love the way you explain the process and cannot wait to see the rest of your update as Cameron’s bridal overdress is completed. Very inspirational, thank you!
My pleasure Debbie!
Yes, great to get inside your designer brain, thank you. I use flat pattern methods and adjust commercial patterns. I can’t drape as yet because my dress form is too big front to back, I’d have to put her under a steam roller which is actually very tempting! I have to admit I find the prospect of draping quite daunting.
Hi Lesley! What I love about sewing is that there are so many different ways to do it and that everyone can find their own style. I find commercial patterns daunting and have never been able to complete one! Draping is my go-to patternmaking technique, but unfortunately it doesn’t work unless the dress form is smaller than the person everywhere. You can always add, but can’t take away (unless you get that steam roller to work out!)