

![]() In part 1 of this blog series, I shared what the sewing technique called underlining is, what underlining does, and I even offered some fabric suggestions for underlining a garment.
In part 1 of this blog series, I shared what the sewing technique called underlining is, what underlining does, and I even offered some fabric suggestions for underlining a garment.
My favorite underlining fabric is muslin.
In this post, I’ll talk a little about why I like to use muslin as underlining and I’ll share a video to demonstrate how to underline your fashion fabric, using muslin as an example.
The technique is the same no matter what fabric you choose or whether you are creating a fancy couture wedding gown or a simple day dress. And I think it is really fun!
Muslin as an underlining
There are many reasons why I like to use muslin as underlining. As a couture wedding dress designer, I’m often making dresses that are fitted and need added structure. Muslin is an inexpensive workhorse. It comes in all different weights, it is stable, it is strong, easy to come by, easy to mark on, easy to wash, dry, press…
If the garment’s fashion fabric pairs well with muslin, I love to make my mockups in muslin, and then use the corrected mockups as the underlining. This not only makes sure that the mockup and the dress-to-be will be similar (it is literally the same sample dress hidden inside the actual dress!), it also makes it so that I’ve already done a lot of the work.
Whenever possible, I like to use my underlining fabric as my mockup fabric and then re-use the mockup as the underlining.
That means that if I plan to underline a flowy garment in silk crepe de chine, I’ll often make the mockup garment out of silk crepe de chine, try it on, make corrections, and then take it apart to use the exact same pattern pieces as underlining in the actual garment.
Make sense?
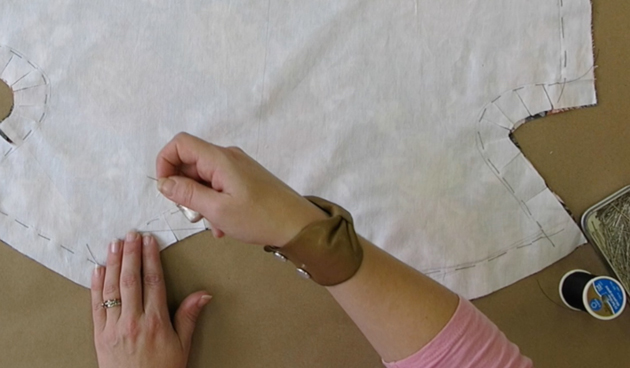
I’ll show you what I mean as I add my muslin mockup to the inside of a day dress that I am making for myself in this video lesson:
Pretty neat huh???
So, I can already hear some of you asking: isn’t there a quicker way. Must we do it by hand? Can’t we save a lot of time and do this step by machine?
The answer is: you can do whatever works for you!
I highly recommend hand sewing your underlining to your fashion fabric. Personally, I much prefer hand sewing to machine sewing.
In my experience, I have always found underlining by hand to be imperative to the enjoyment of the experience and the quality of the garment. Hand basting stitches are fairly soft and forgiving. When you baste by hand, you can feel the fabrics and make adjustments to get the two fabrics working exactly together as one. When underlining, little adjustments often need to be made, sometimes causing you to pull out your stitches, which is super quick and easy if you’ve basted by hand.
Machine stitches are fairly tight and can leave a ridge in some fabrics. When you baste using your sewing machine, it almost always feeds the two layers though the machine slightly unevenly, often causing baggy bits and ugly corners. To fix this, you end up having to pick out your machine stitches and go back to the machine a lot. This can be time consuming, could leave scarring, could lead to the fabric looking overworked, and really just isn’t much fun.
When you stitch by hand, you are in control. When you stitch by machine, you give a bit of that control away.
If speed is your only goal, you might try it by machine. If quality is your goal, I recommend doing it by hand!
So now that you have learned WHAT the technique of underlining is, WHY you might want to use it, some FABRICS that might work, and you’ve also been shown HOW to do it…
In my next post, Sewing Technique Spotlight: Underlining (pt.3),
I’ll show off the finished dress I was creating in the video. I’ll show you what the inside and outside of an underlined dress looks like and how I used underlining to create a professional look that I love!
A condensed version of this series can be found in my Seamwork Magazine article “Under Construction.”
Visit my Classes Page for info on online courses and more! https://brooksann.com/classes/


3 Responses
I wish I had found this before making my daughters dress, I ended up lining the whole thing but now see that what I really needed to do was underline it. I am going to try this on the next one. Thanks for the posts!
you saved me!!!! i’m learning to sew on my own and this tutorial made me realize what mistakes i’ve been doing in the underlining process. Thank you so much!!!
Yay! My pleasure.