

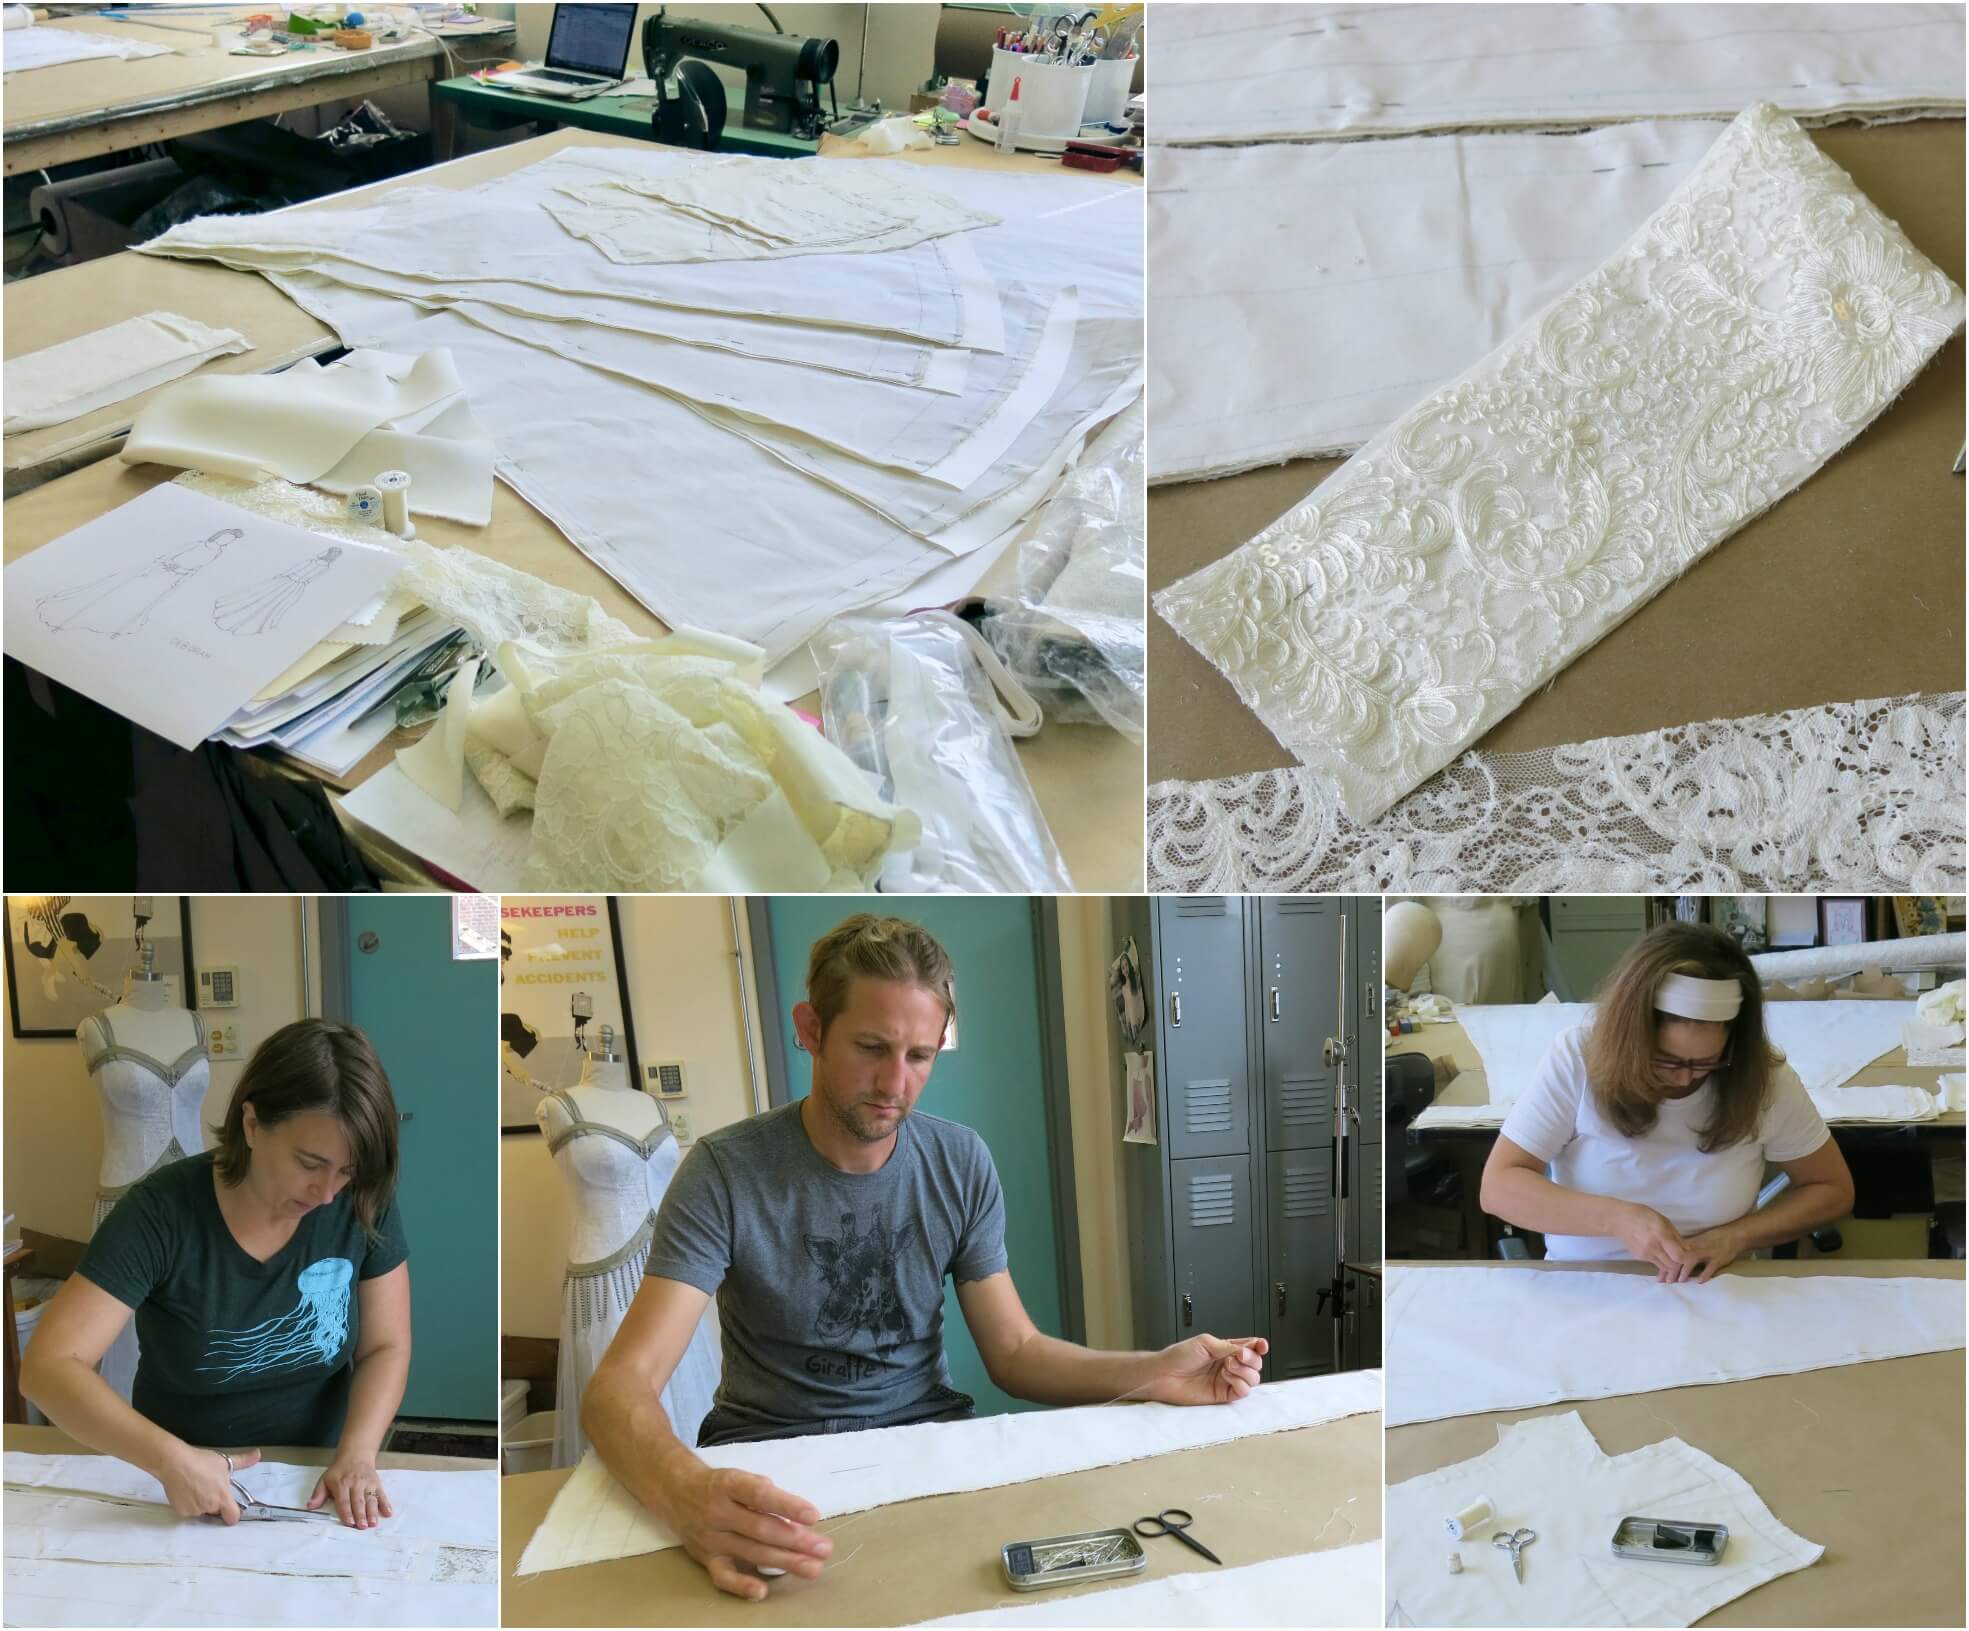
Once Deborah’s scrumptious bridal fabrics were chosen and prepped, it was time for cutting and underlining. Her dress would be made from a gorgeous silk/wool twill with lovely lace accents. Via a process known as underlining or flat lining, I would back each piece of fancy fabric with the corresponding piece from her mockup dress. (Click here to watch a time-lapse video of me taking her mockup apart!)
Understanding Underlining
Underlining is a fabulous technique that I use in almost every project, from personal clothes to wedding dresses. There are so many benefits to adding a backing fabric, that it is hard for me to consider skipping this step! It not only gives superior results, I think it makes every other step of the process so much easier and more fun.
Curious about the details, whys, and hows of underlining?
I wrote a 3-part blog series (with a video!) about this useful technique and its benefits which was also condensed into an article for Seamwork Magazine. A post about underlining is also included in the blog series of almost every bride in my Portfolio.
Whenever possible, I like to use my mockup as my underlining fabric. This not only saves time and money by reusing the cut fabric and its markings, I am certain that the fancy dress will fit just like the test dress because it IS the test dress hidden inside! I also love all that history secretly stitched between the gorgeous outer fabrics and the lining. Maybe I’m a sewing weirdo, but I think underlining can be really romantic!
Going Against the Grain
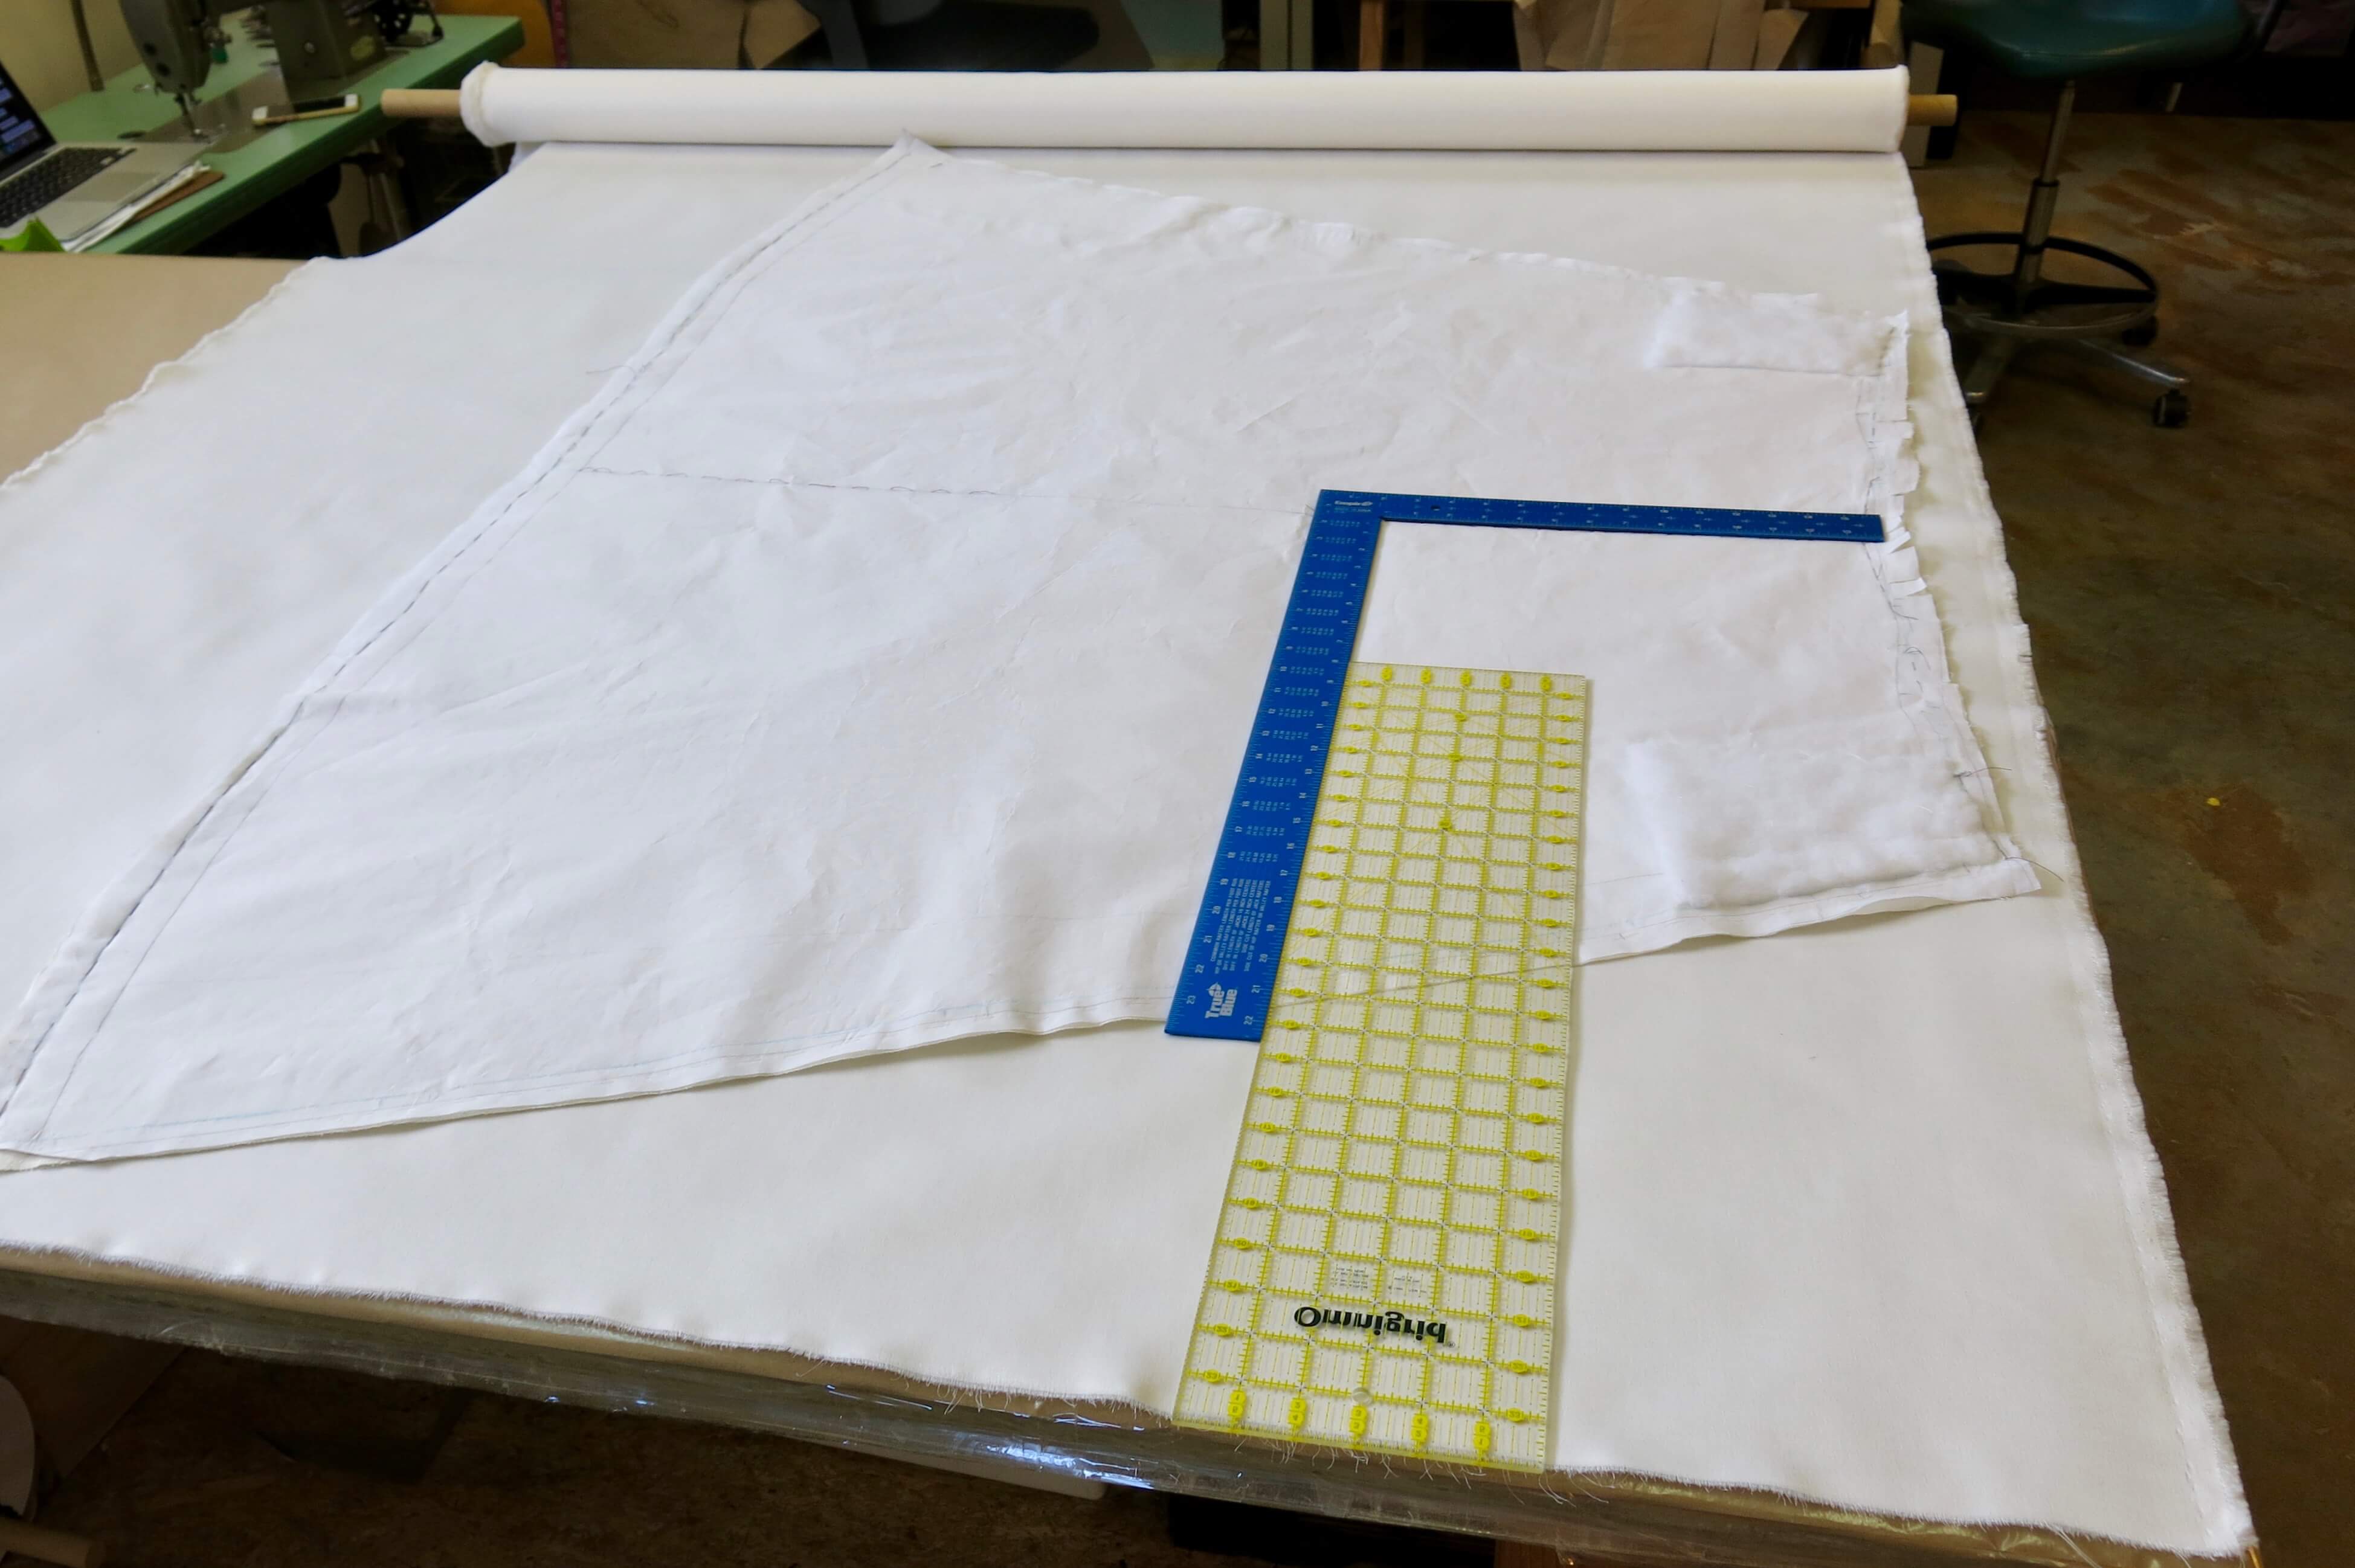
Before I start cutting fabric, I always check to see if there is a visual difference when pieces are cut facing different directions to help inform my layout. This fabric did not show discrepancies from different directions of the same grain, but I noticed quite a difference between the cross-grain and the straight-of-grain.
Fabric is woven in a grid of threads. The longest threads (that go on and on down the length of the yardage), represent the fabric’s grain. The shorter threads (that go from edge to edge), represent the cross-grain.
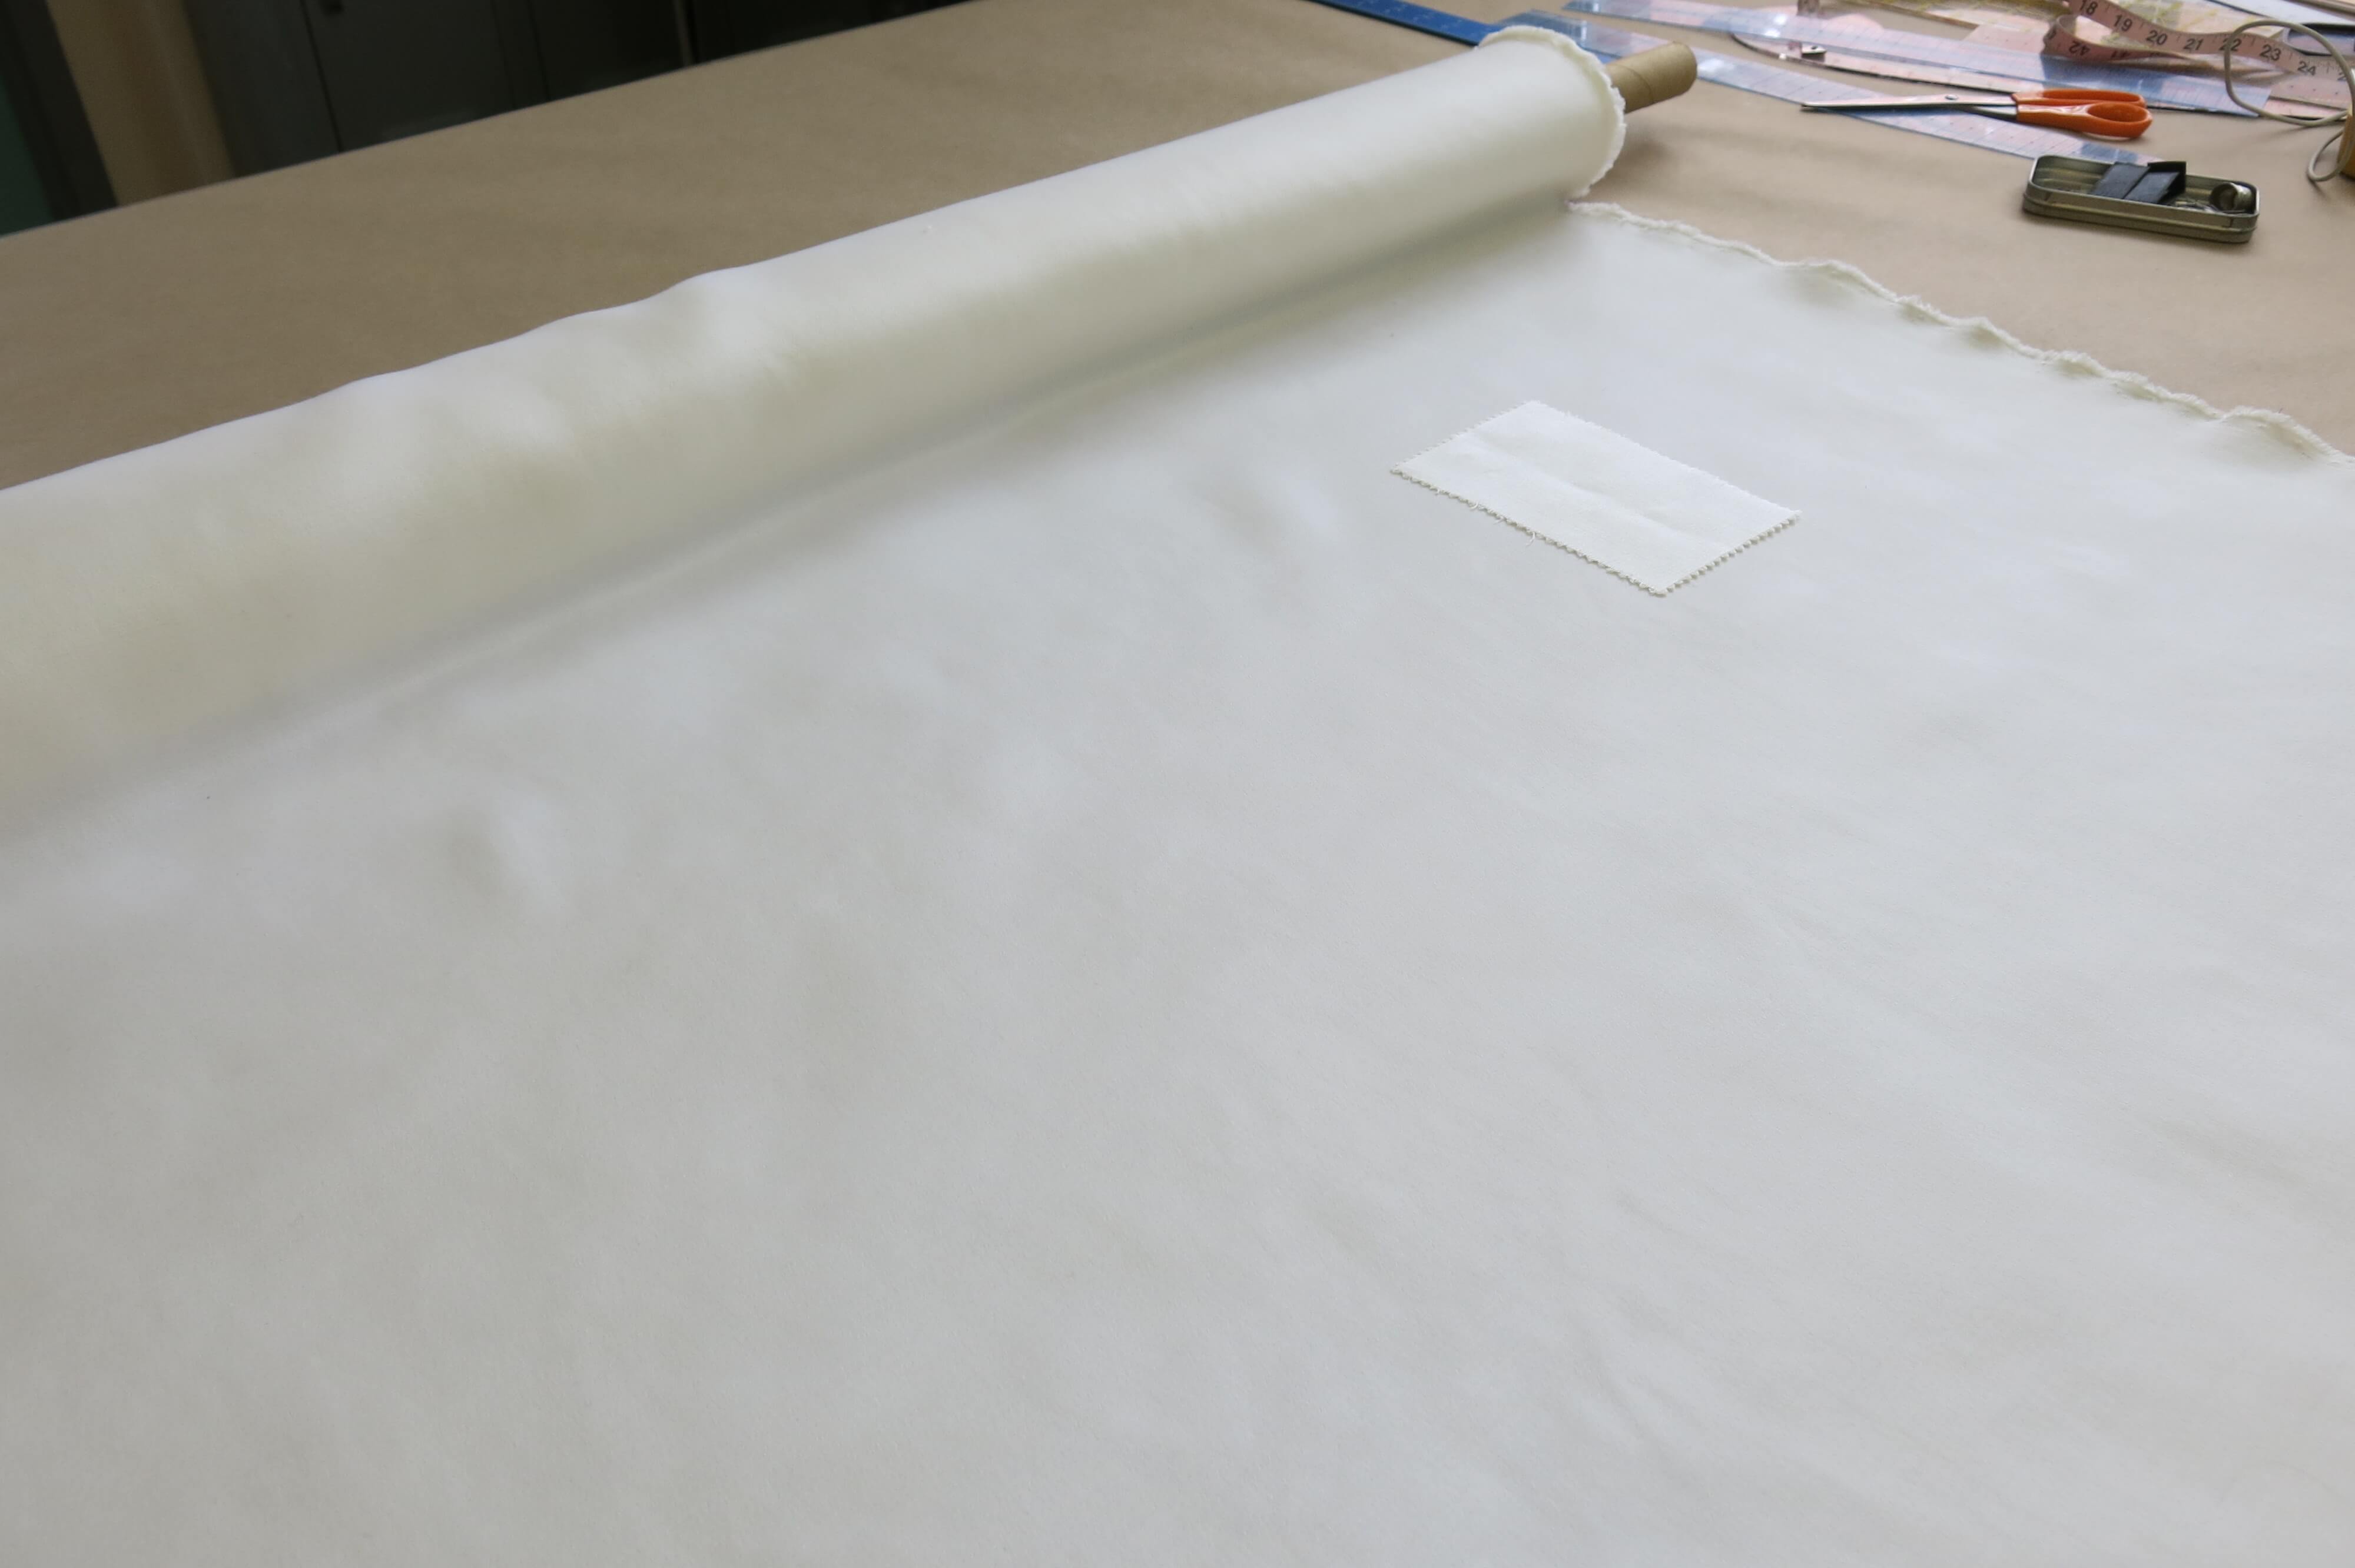
The rectangular fabric swatch was cut on the cross-grain and placed on top of on-grain fabric. Notice the difference in sheen?
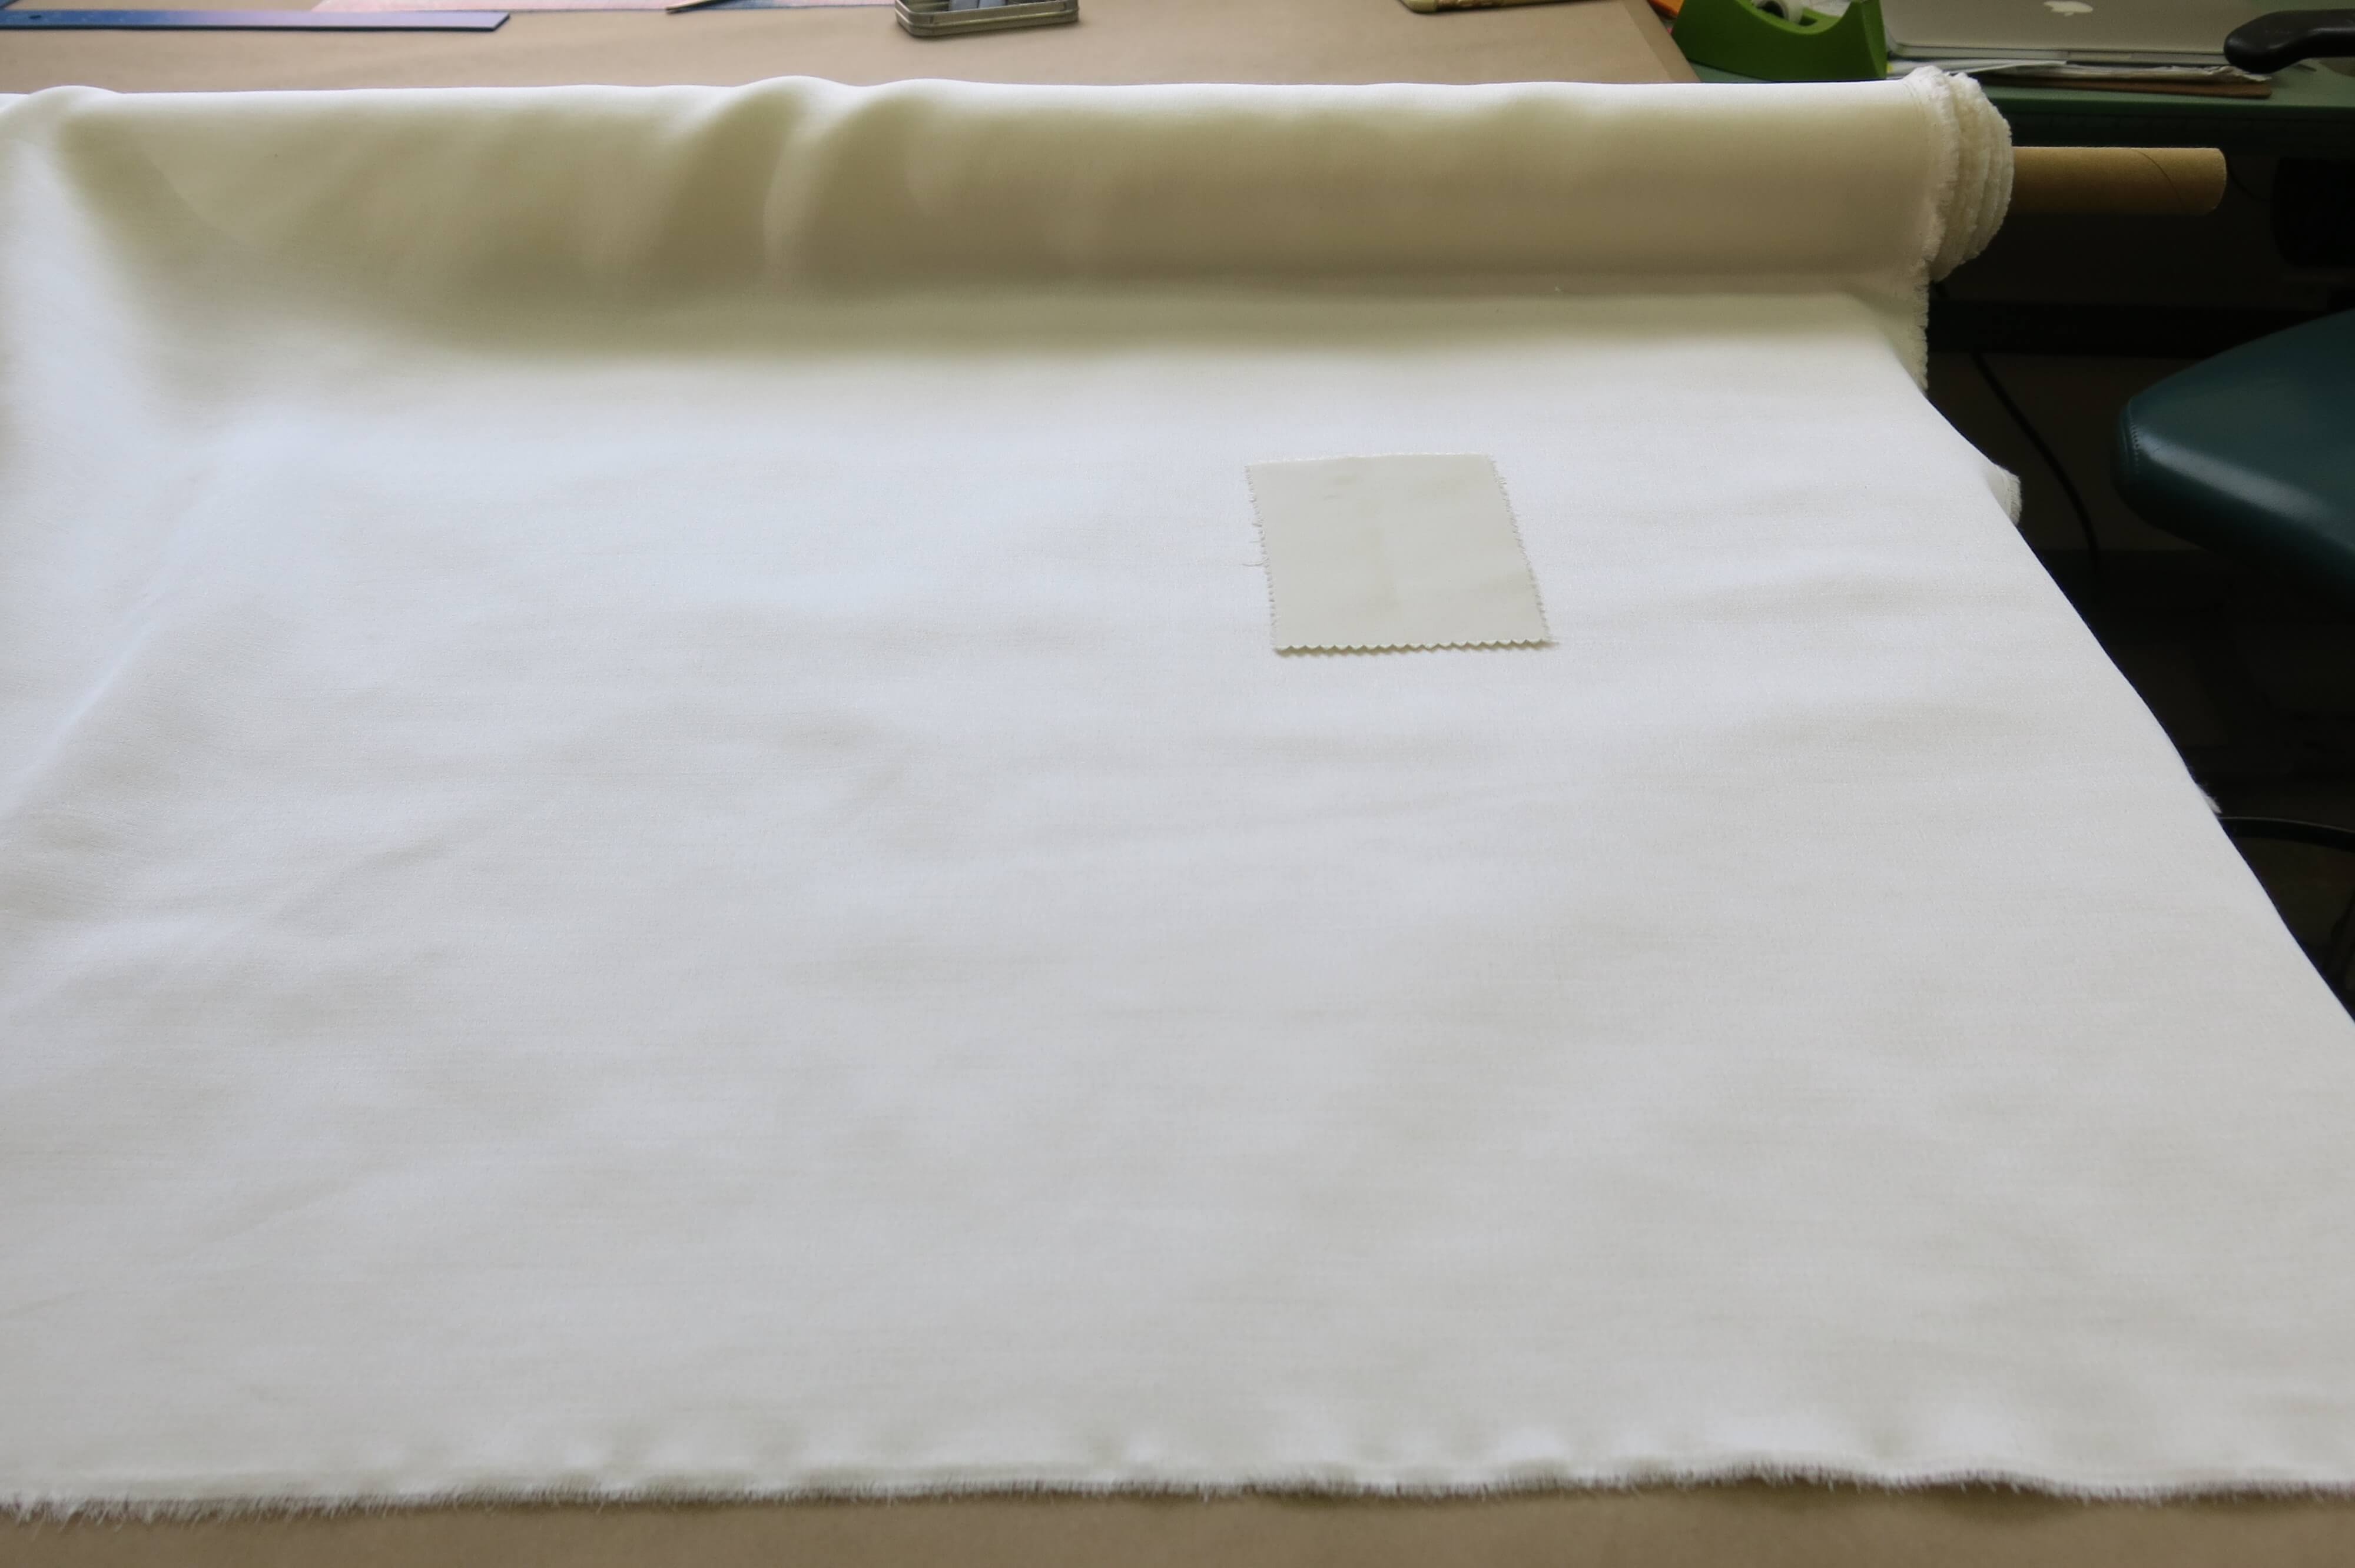
And depending on the location of the light and the viewer, it would change…
Well, Deborah is not going to be laying down flat on a table! So what I really wanted to test is how the different grains looked when hanging like a dress…
With the help of my handsome husband Charles (barely photographed), I decided I preferred the look of the fabric when hung on the cross grain. Though it may be hard to see in this photo, the little cross-grain swatch appeared much brighter and had a lovelier sheen than the grain as it was hanging.
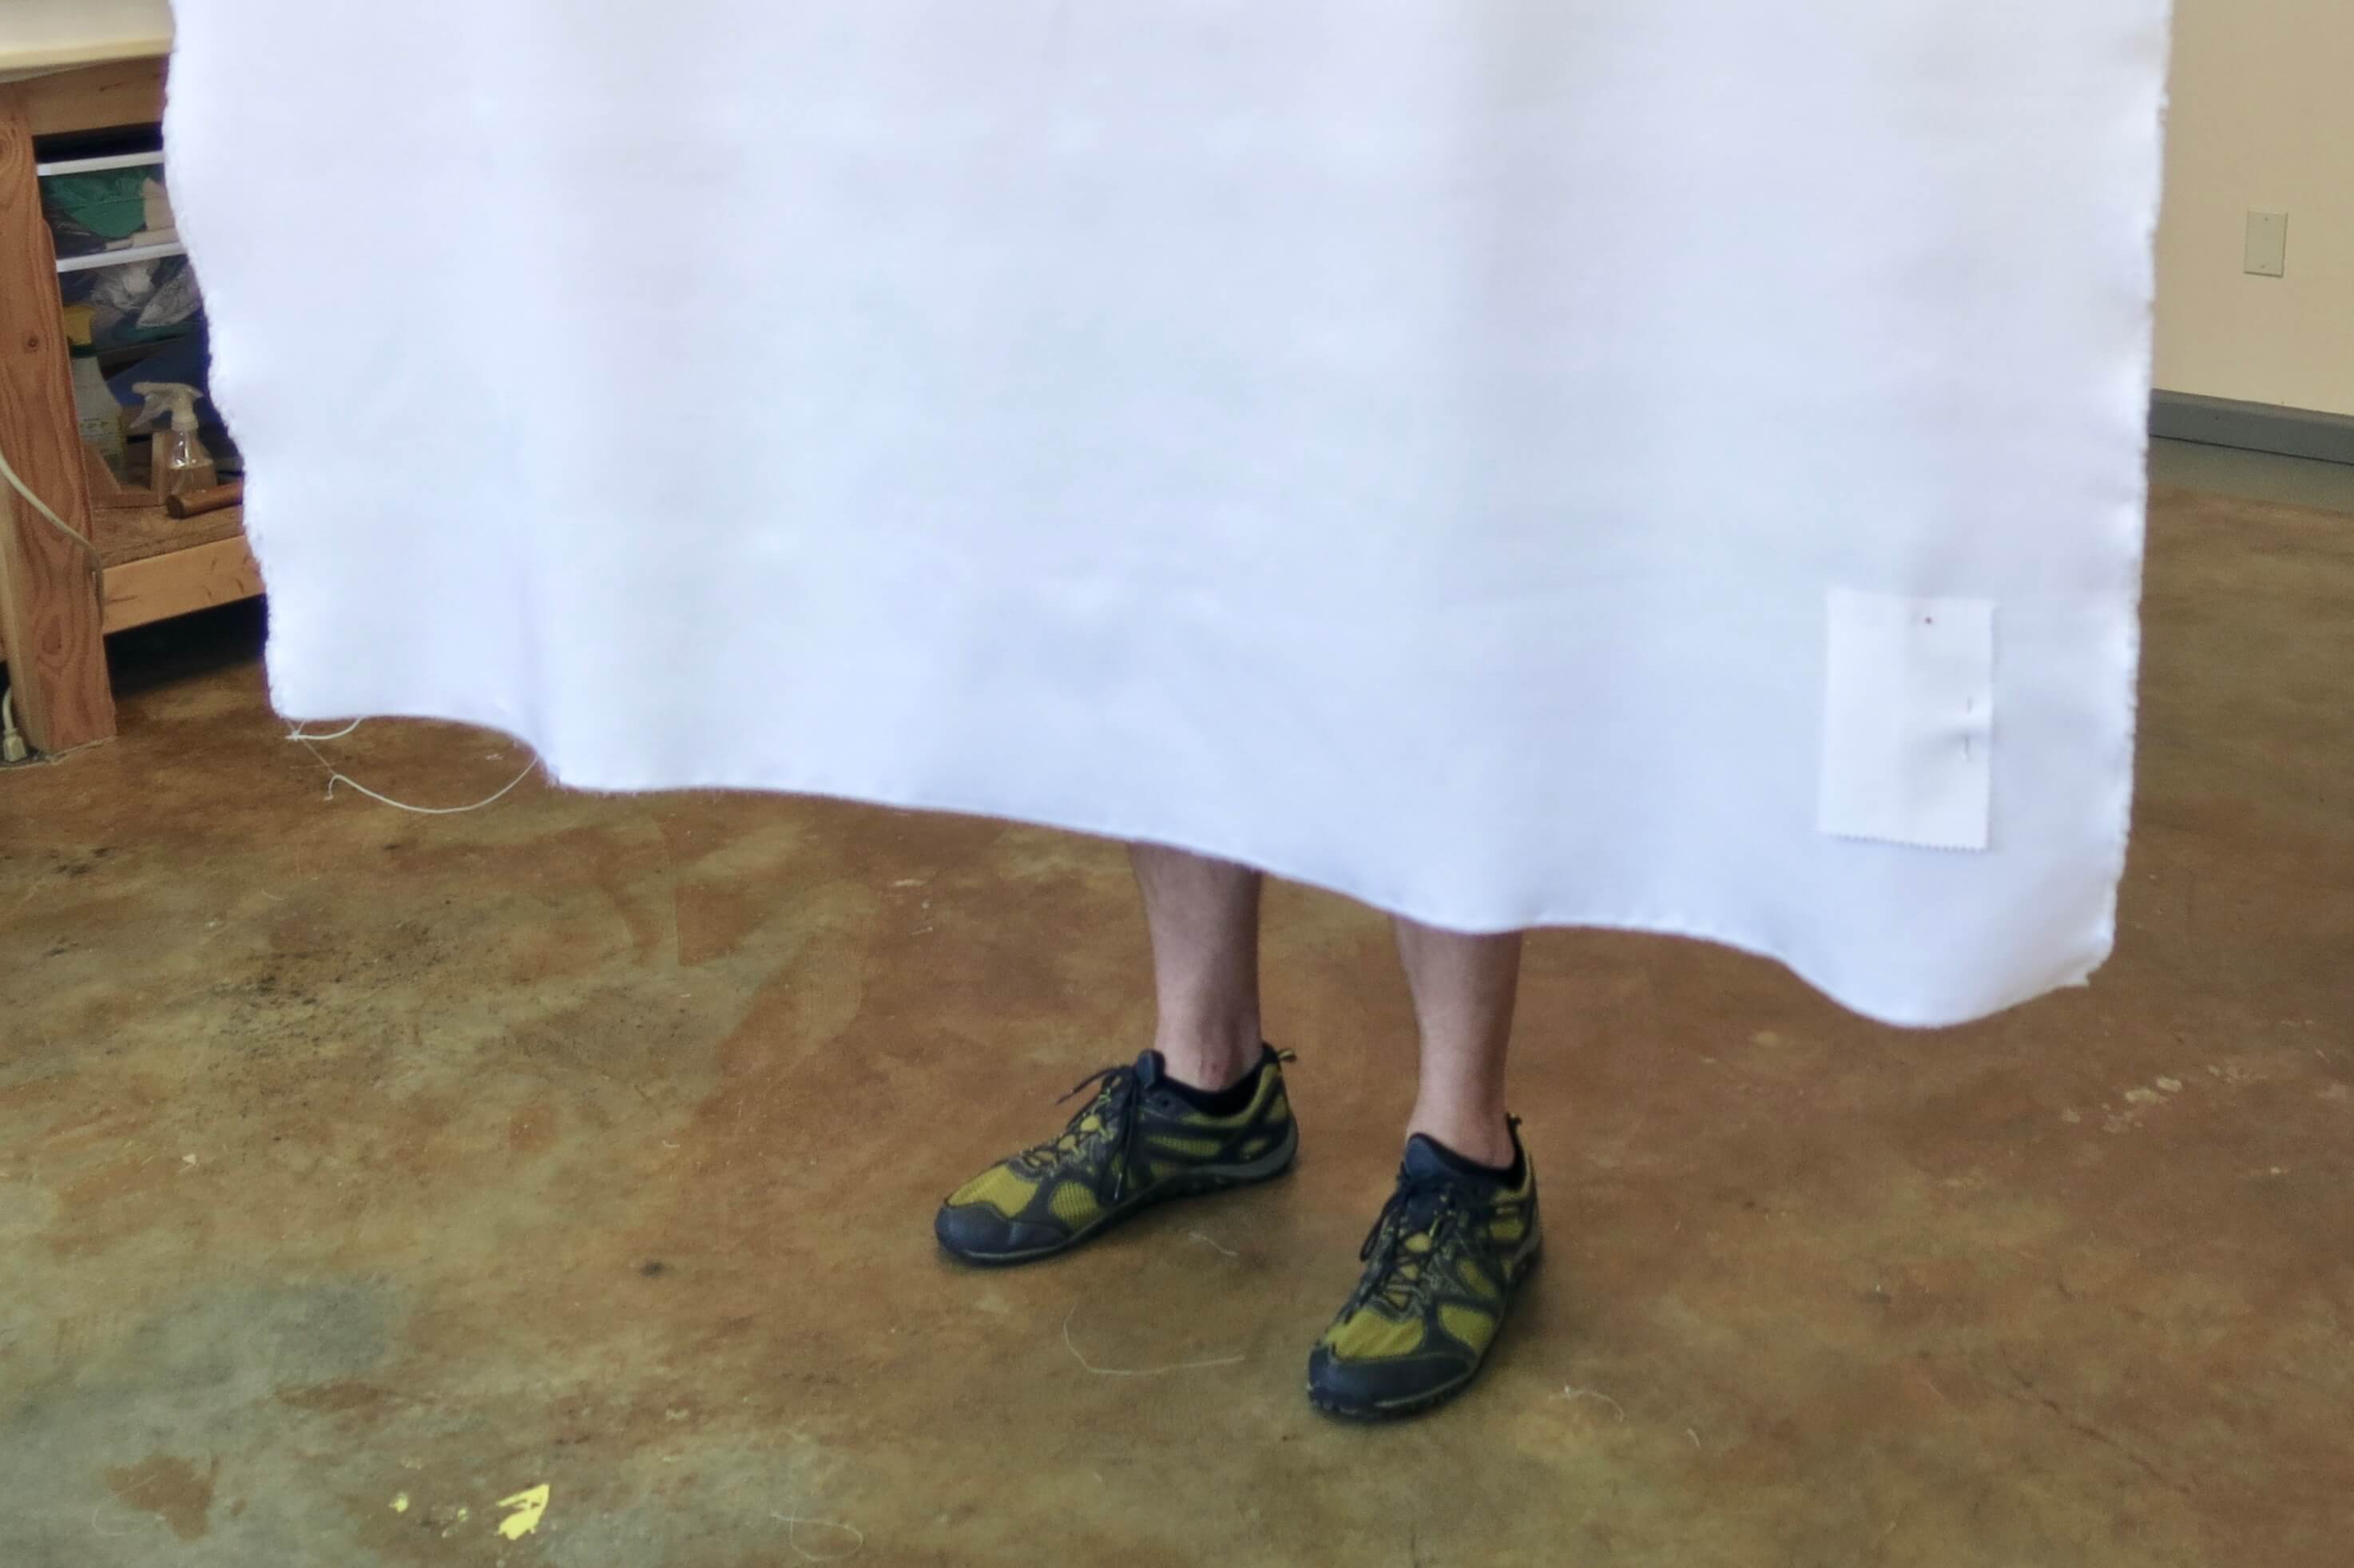
So, some of you sewing peeps might be thinking, ‘you can’t cut something on the cross-grain!’ But I say ‘you can’t cut something on the cross-grain without a reason’.
Since my inclination was to go against the grain, I cautiously did some sample tests (not photographed) to observe how the fabric stitched and pressed and pleated when cut in each direction. Through my experiments, I decided that I also preferred the cross-grain for construction! The only difference I noticed when sewing and pressing was that the fabric had a bit of a “bouncier” quality when on the cross-grain. Perfect for a dress with a full pleated skirt!
I now knew my direction!
Cutting & Underlining (w/ Friends & Family!)
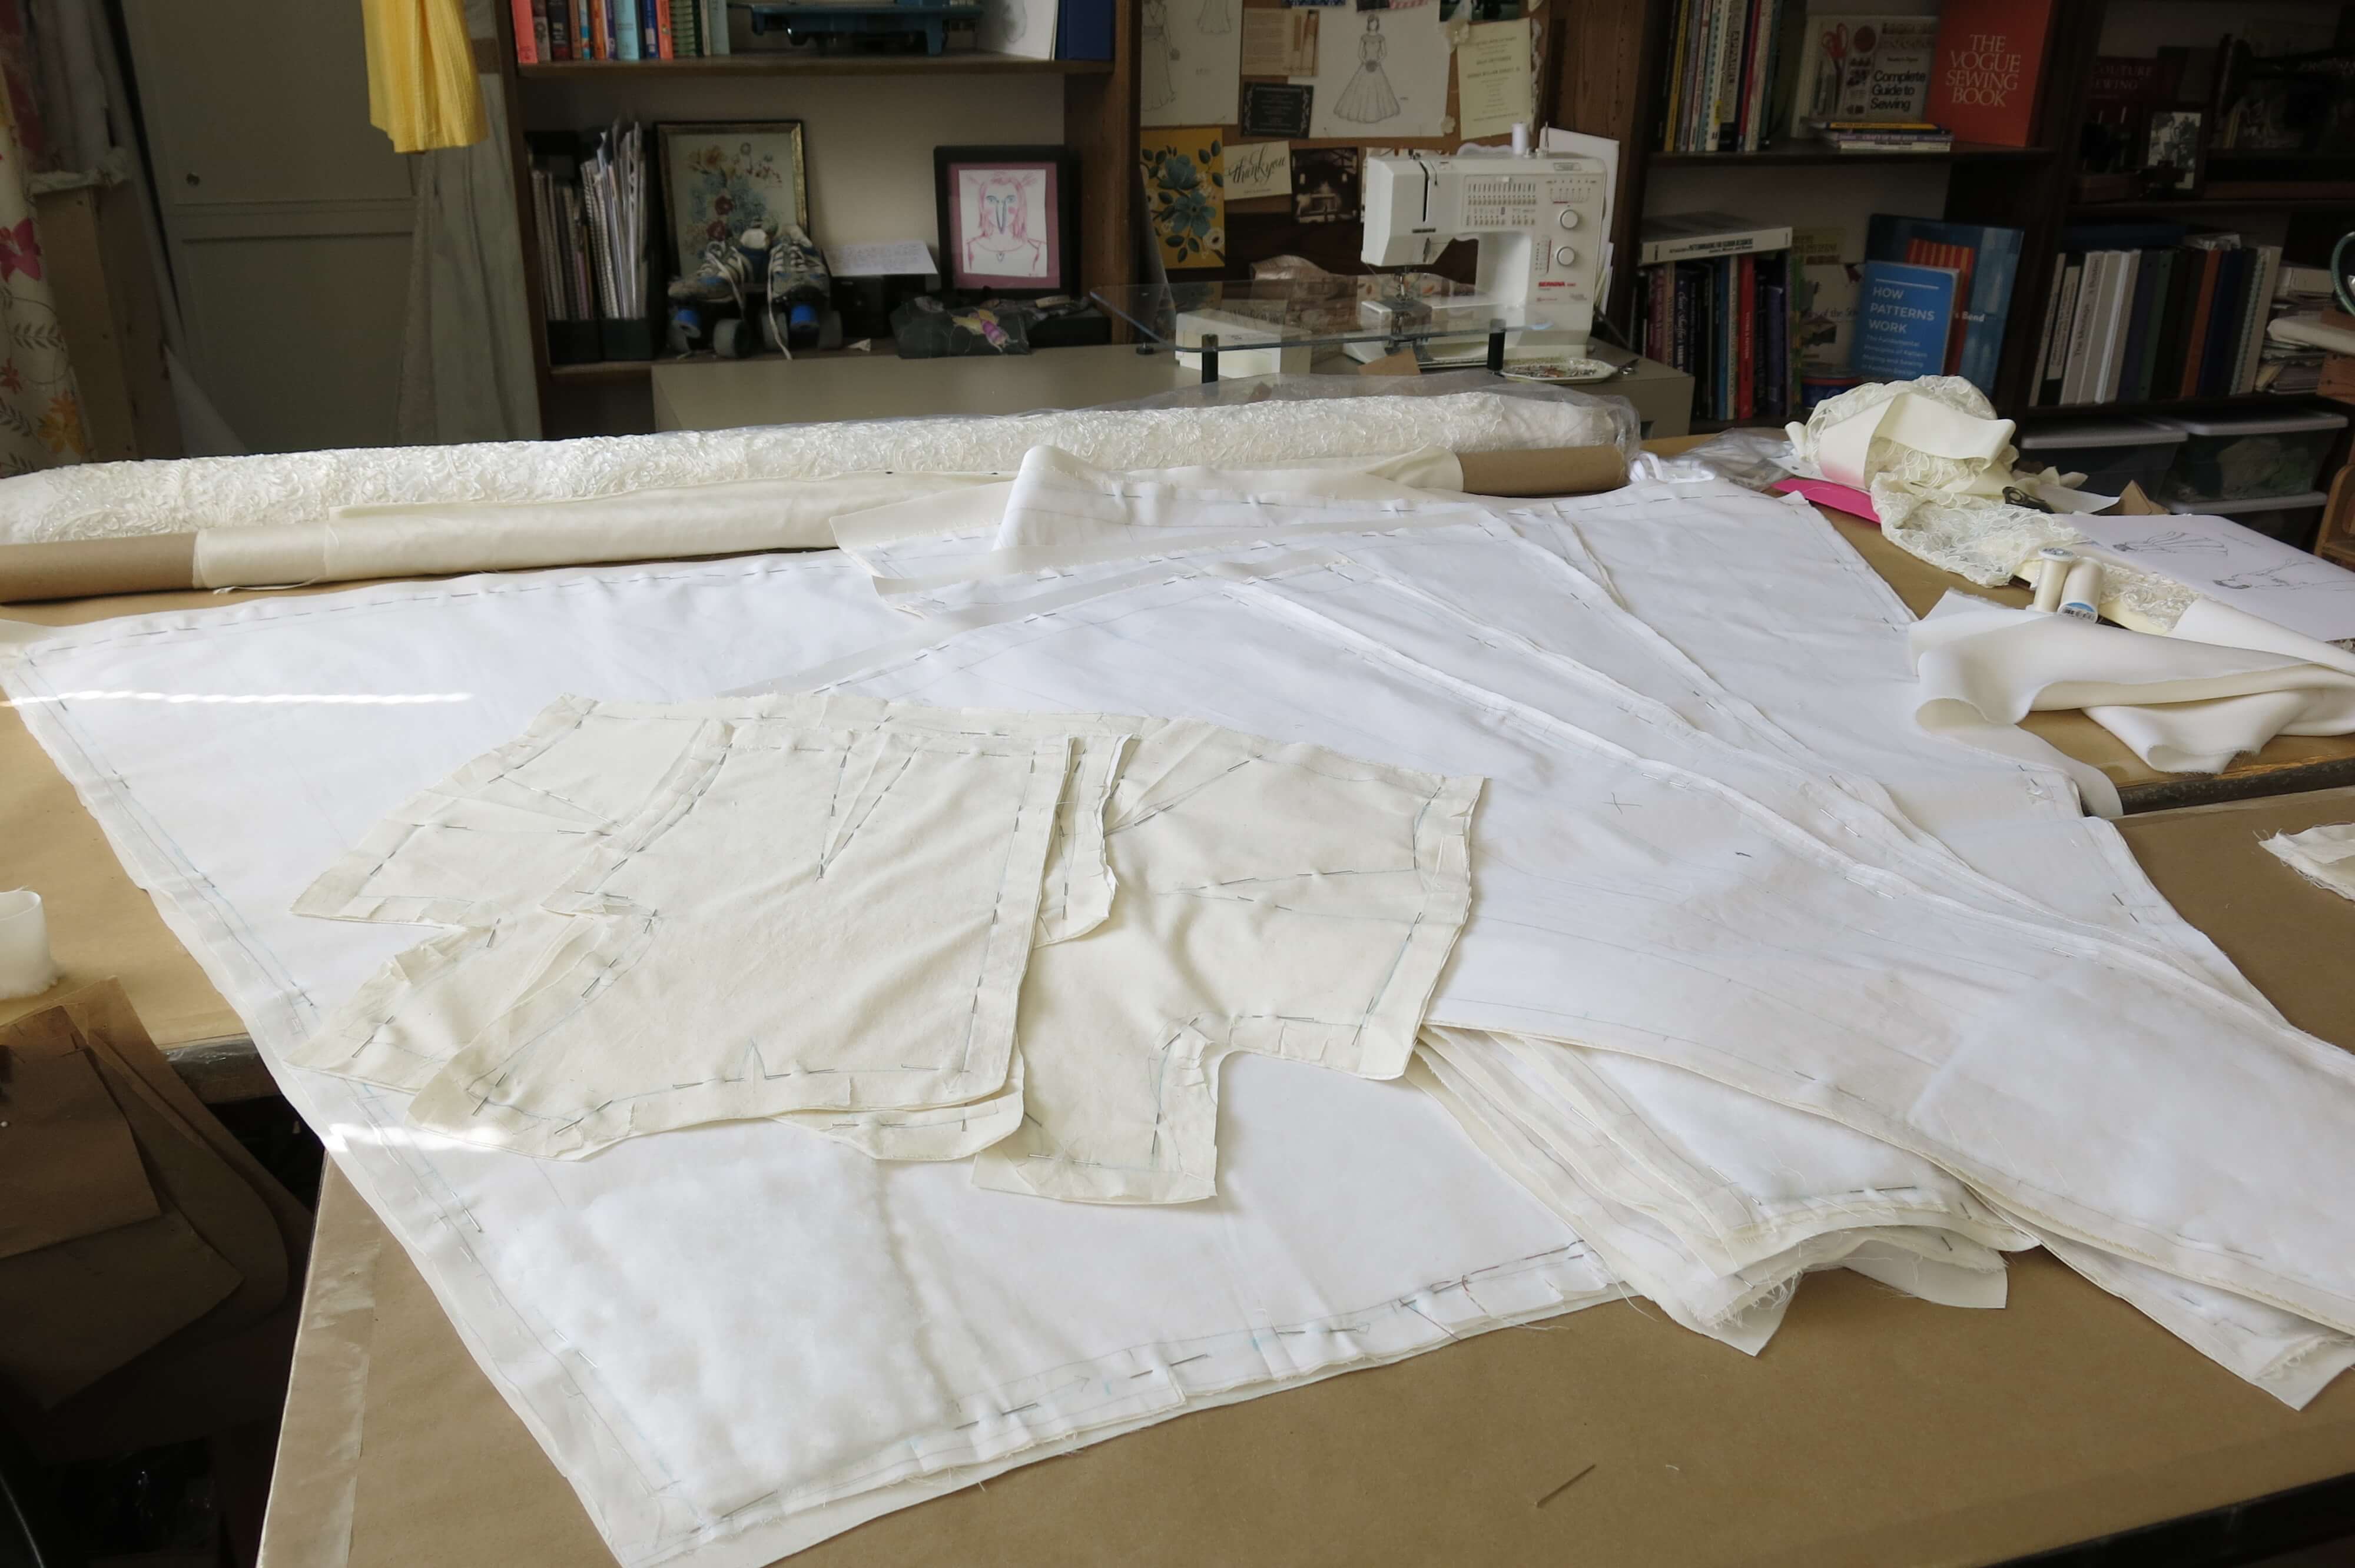
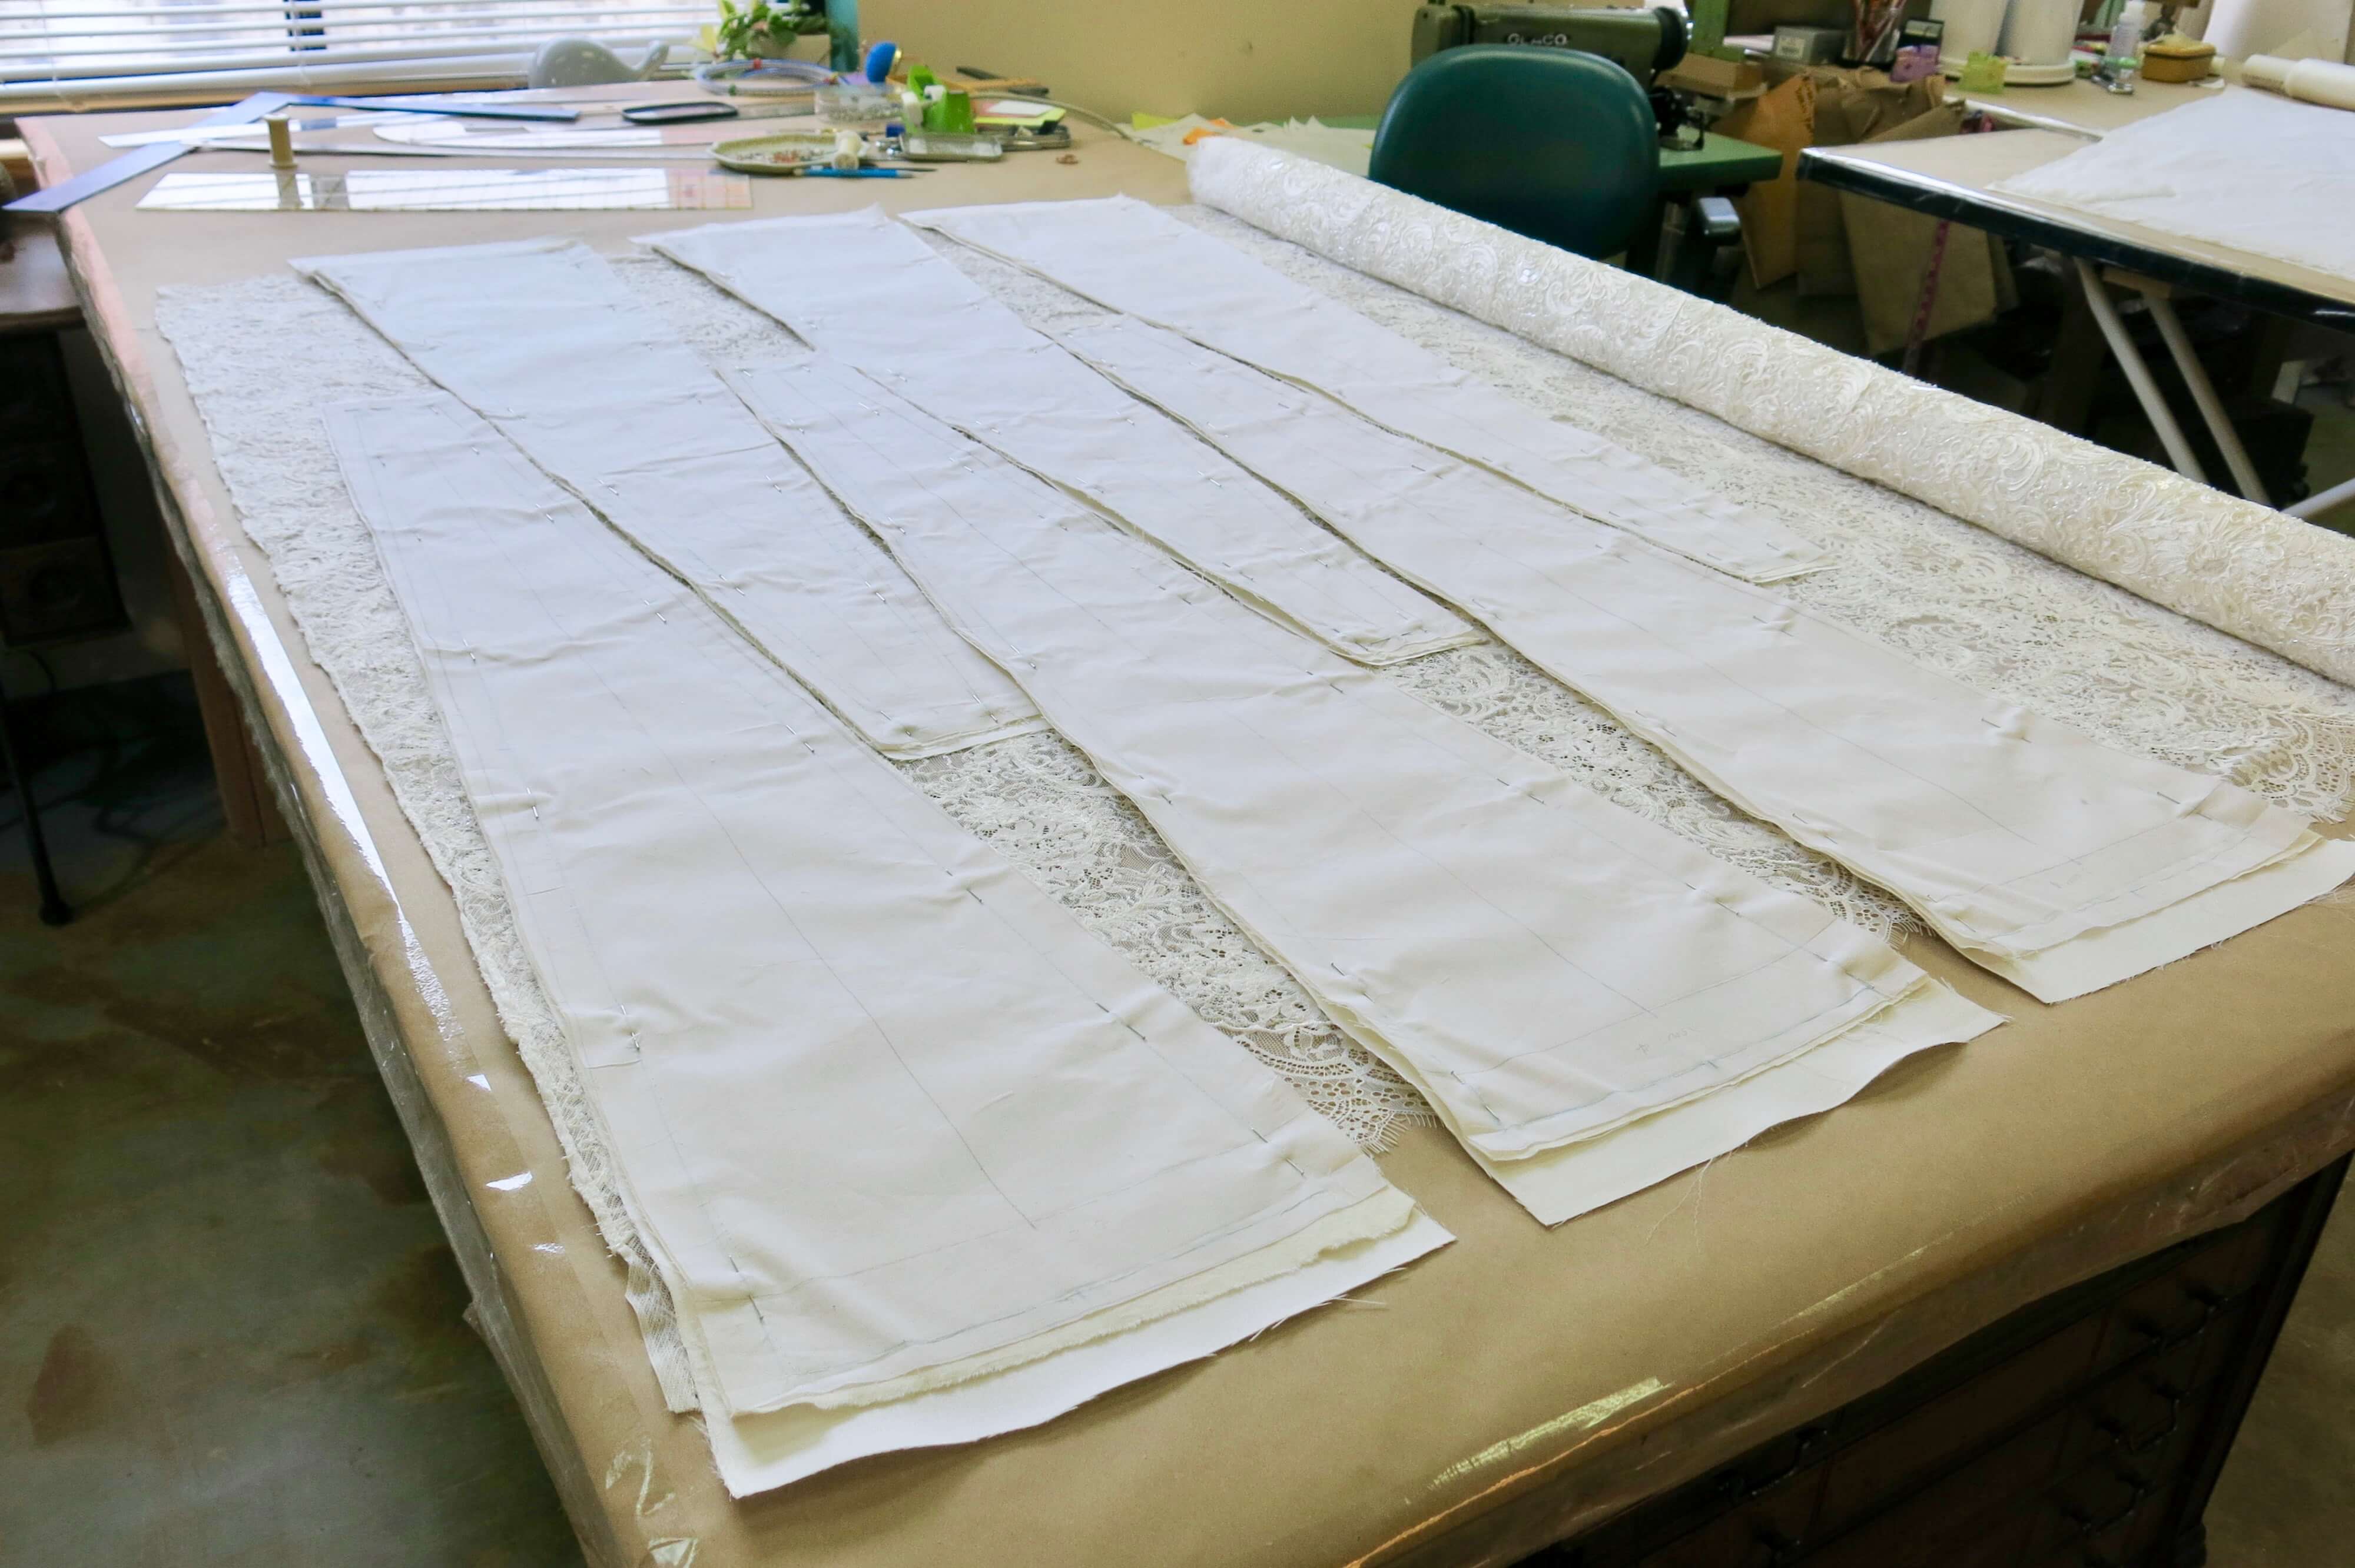
Ready to roll, I pulled out my DIY cutting table extender to cut the large skirt pieces on my DIY cutting/sewing/everything table.

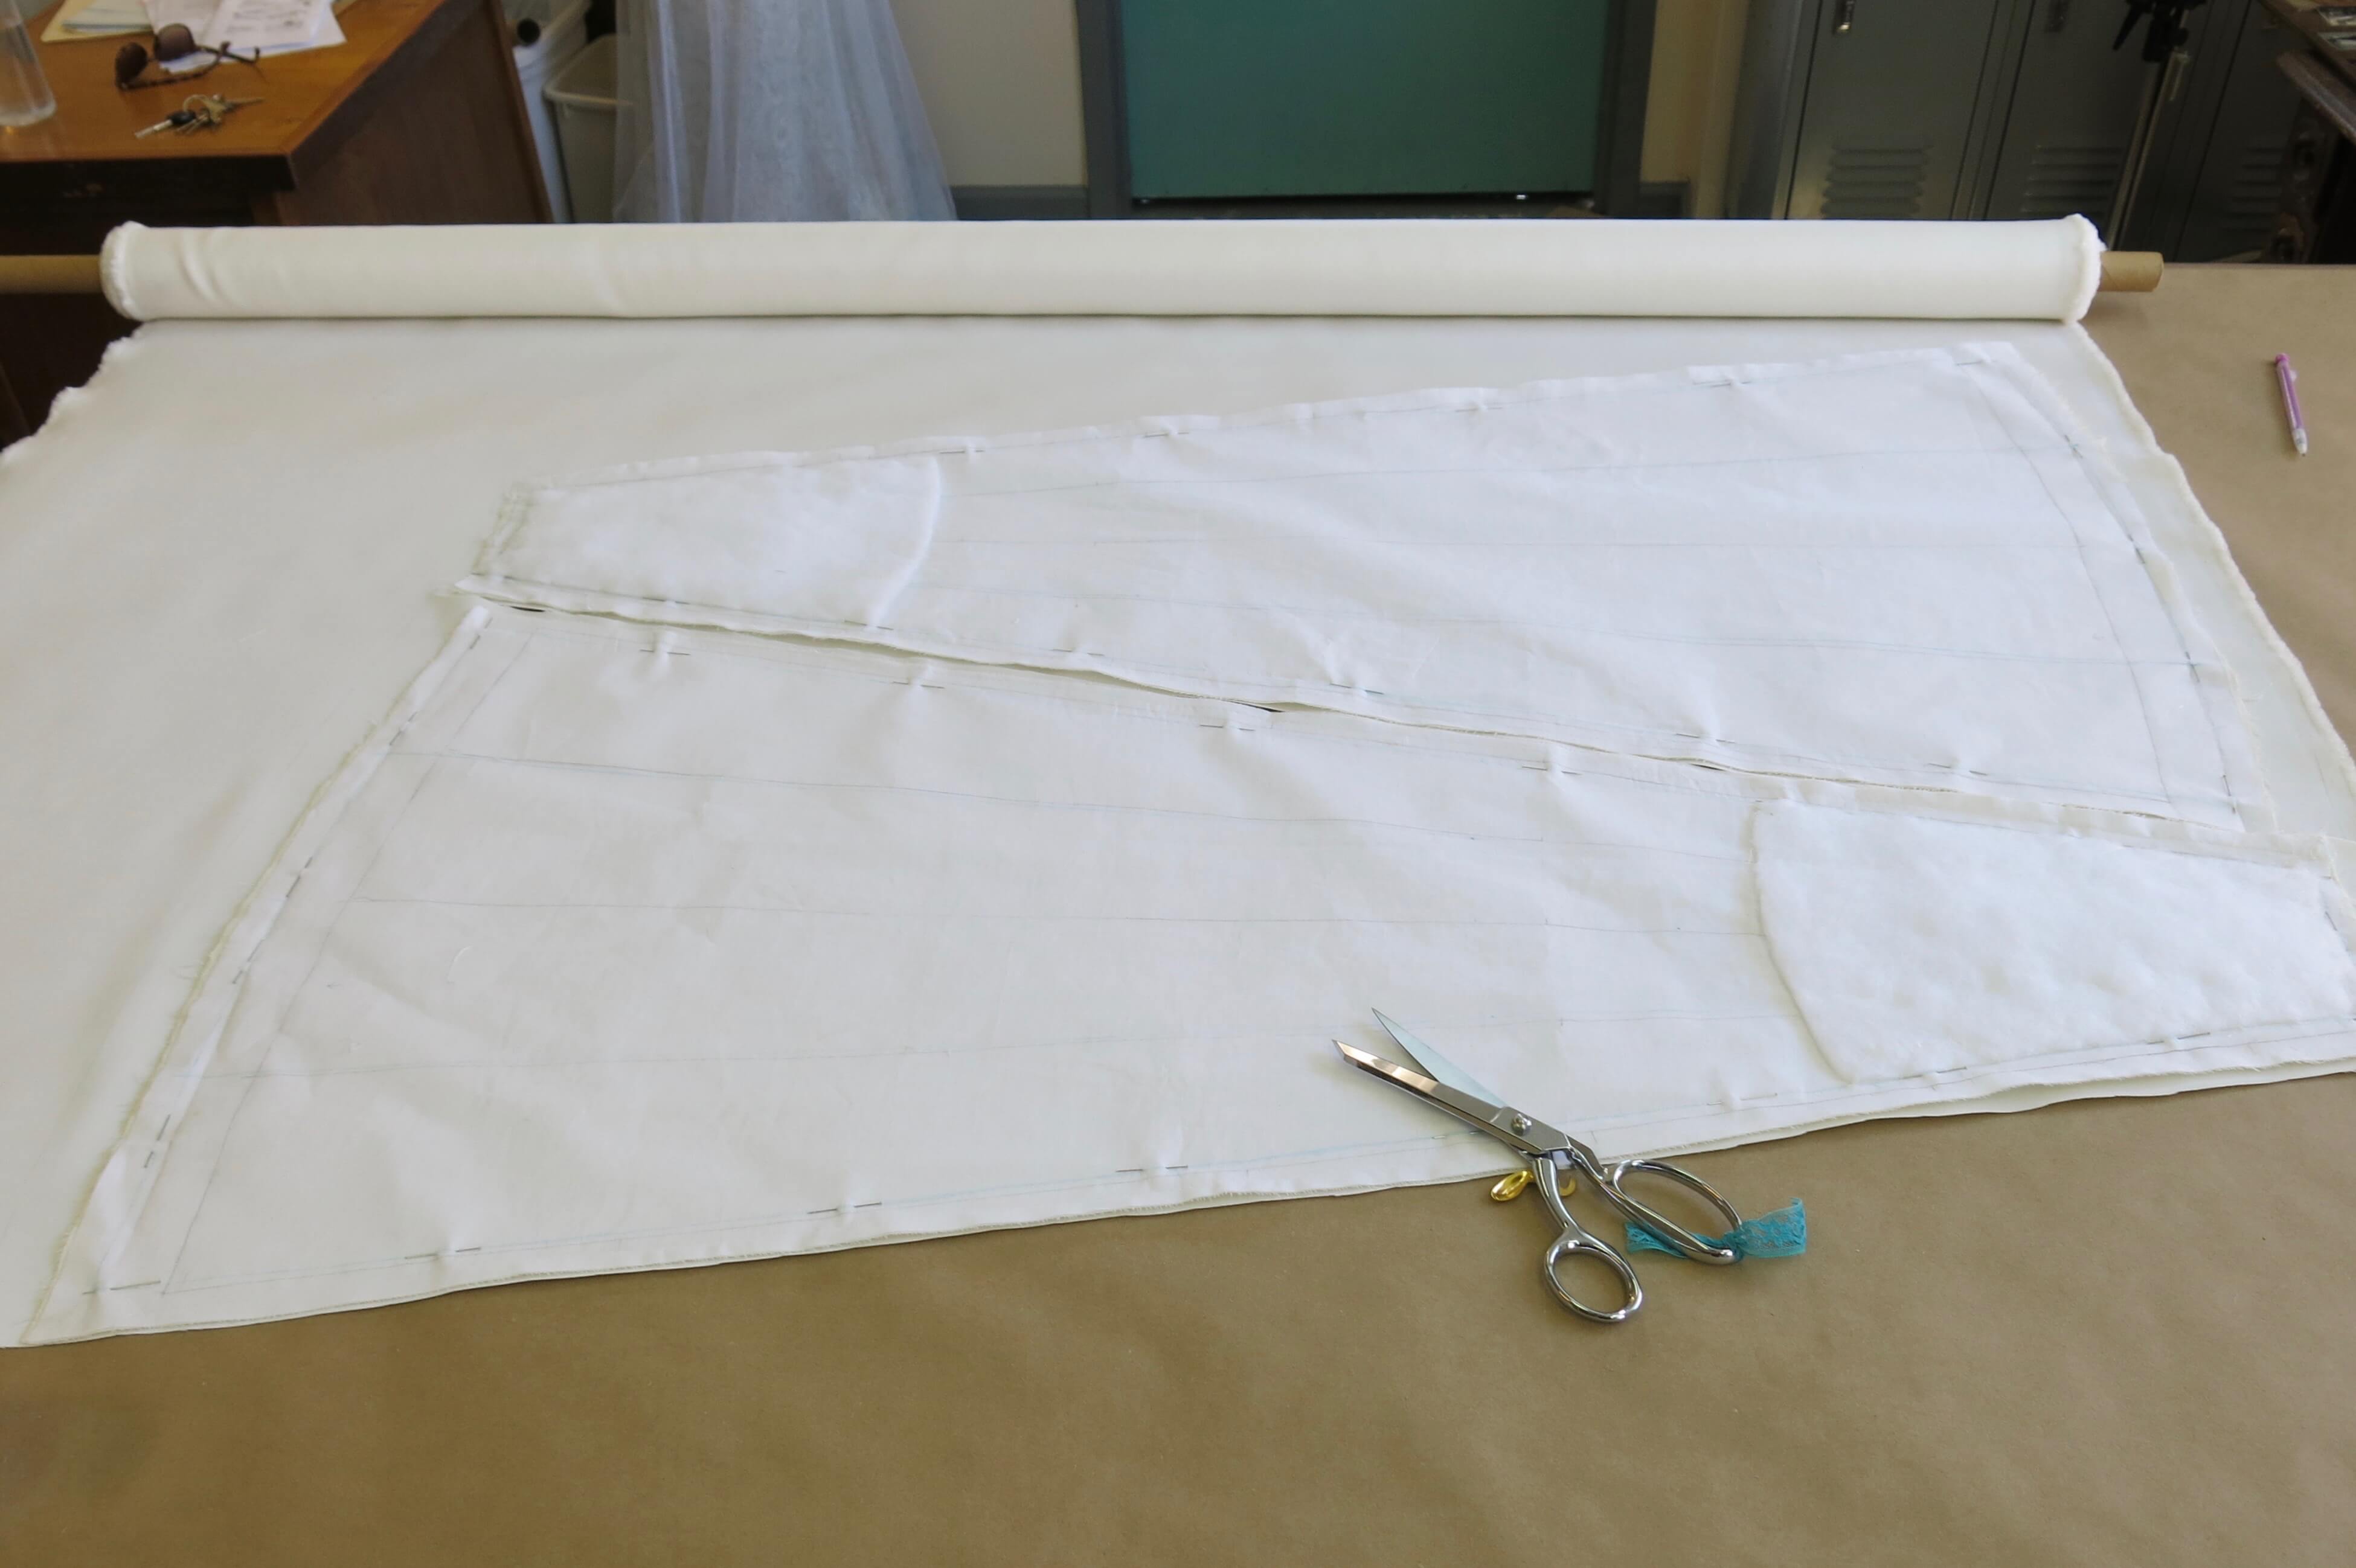
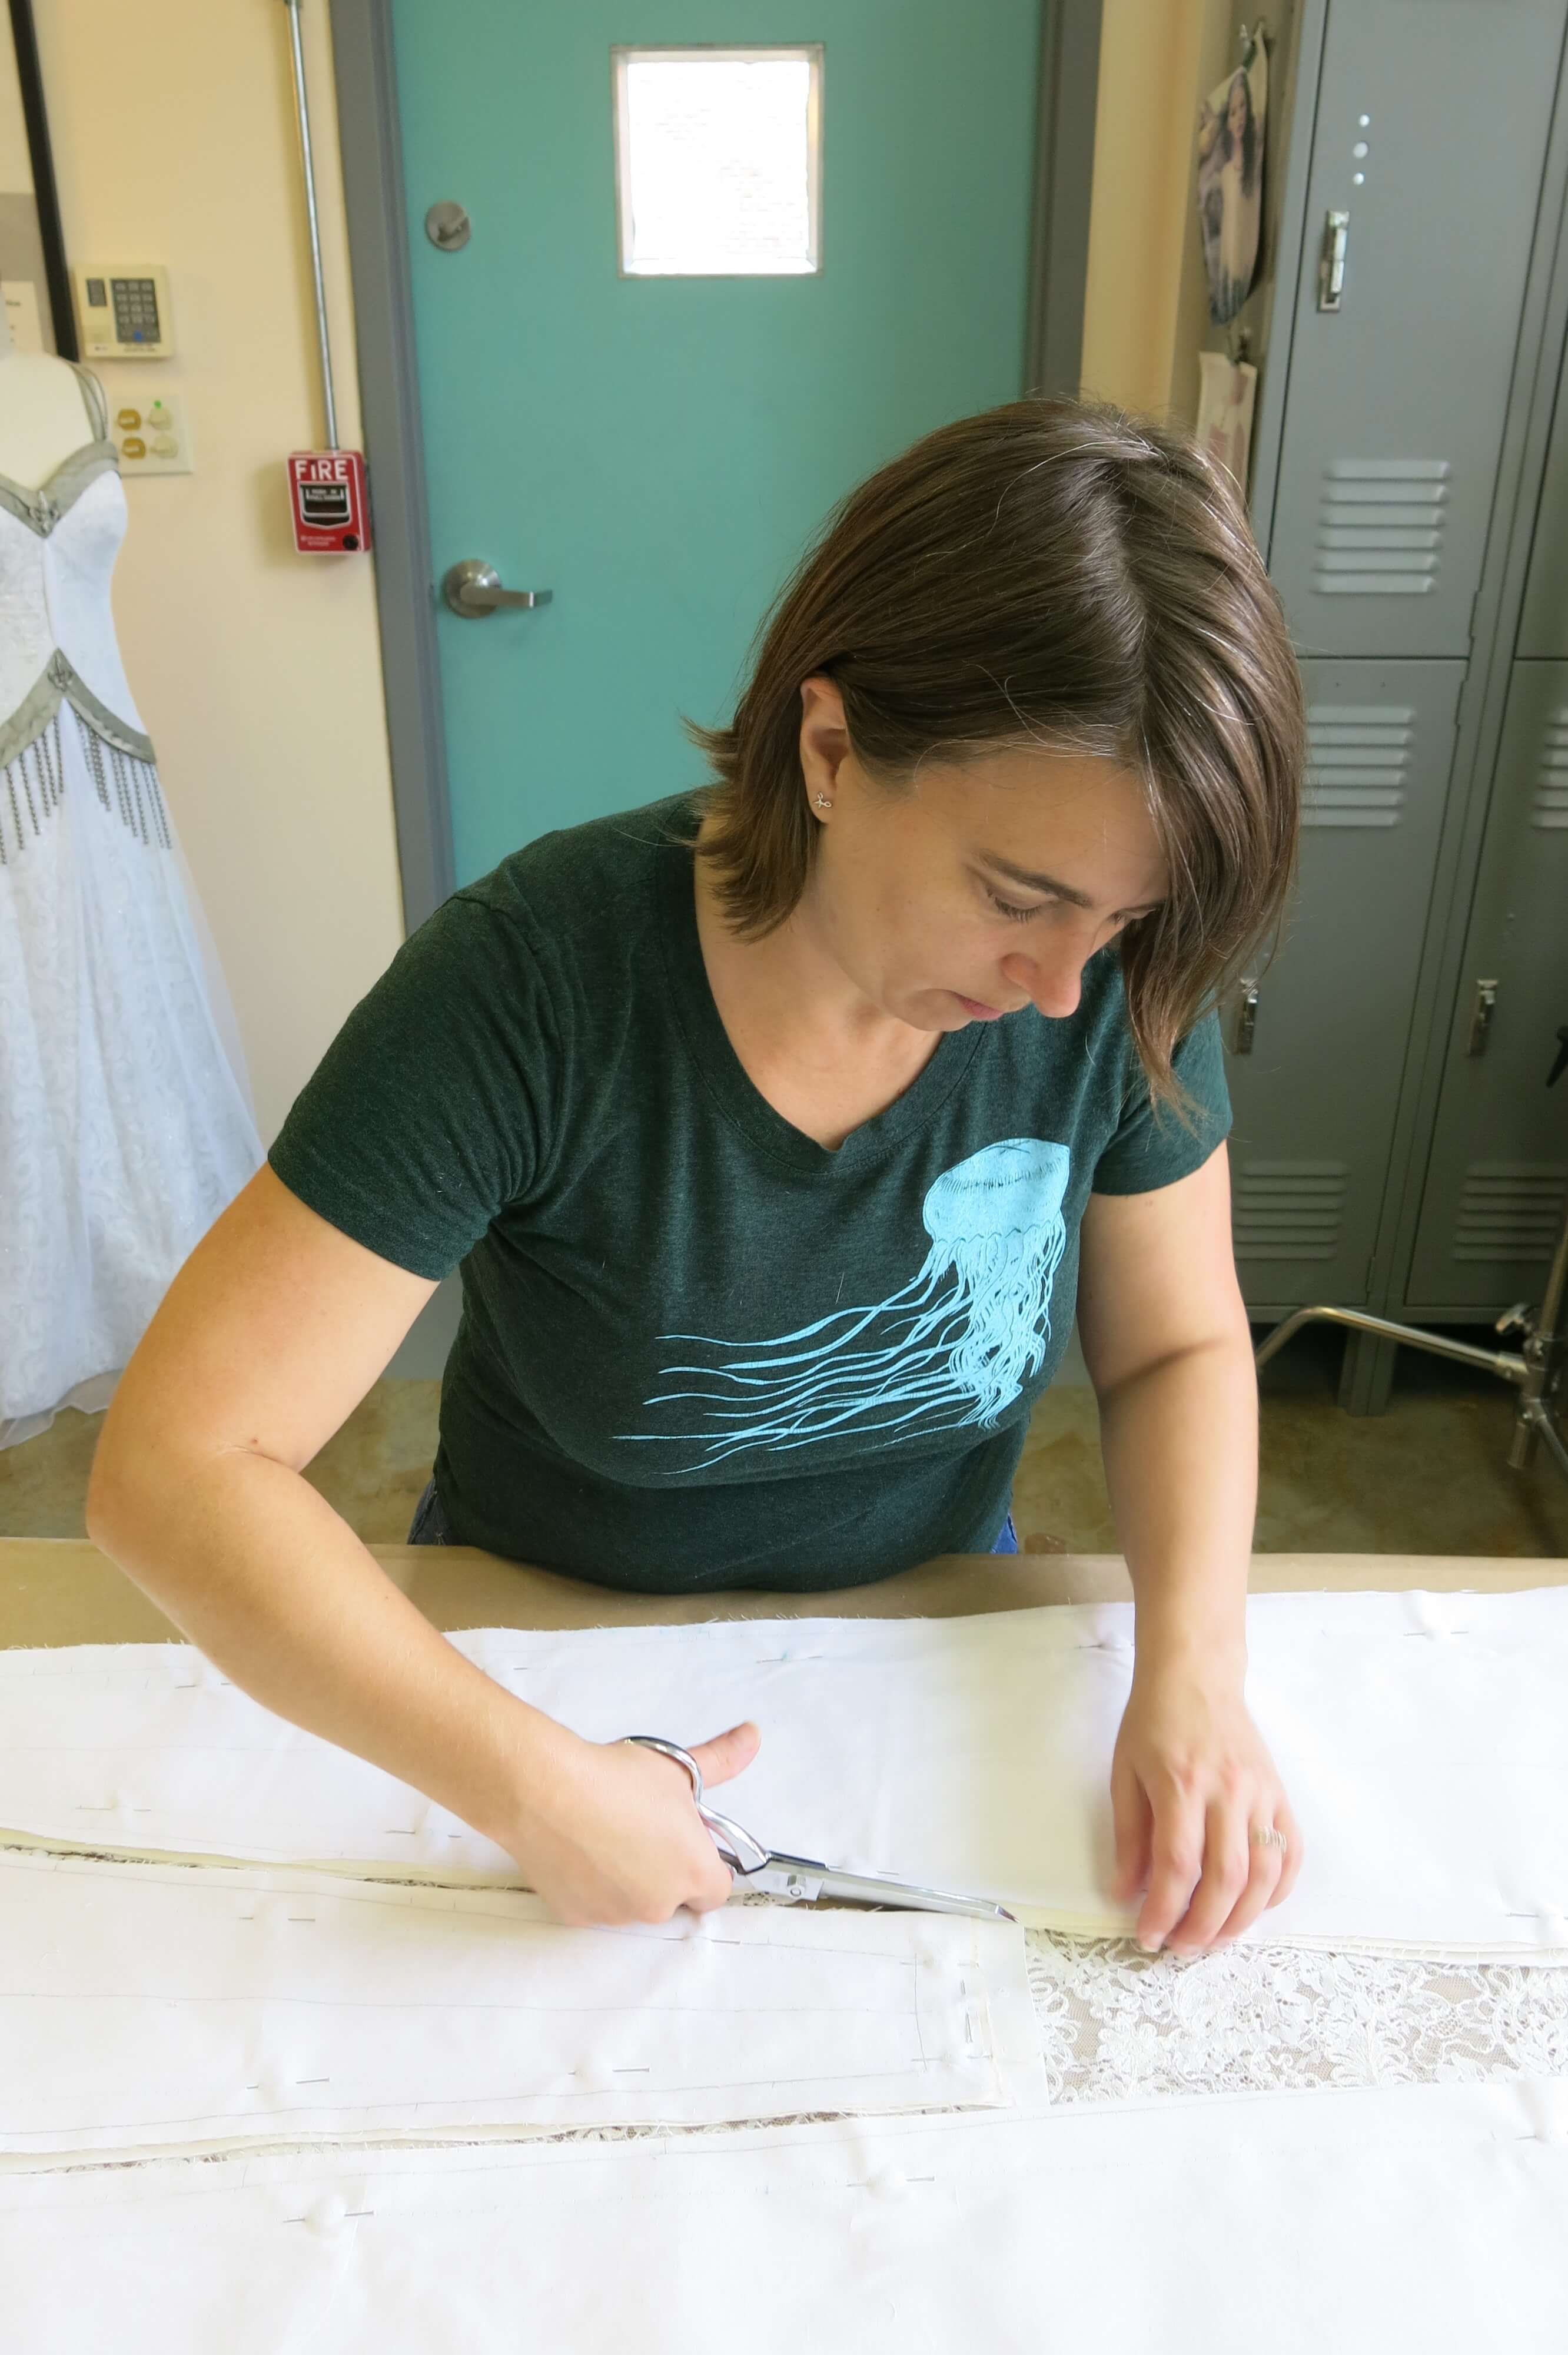
I started with the biggest piece: the front skirt panel. Cutting on the cross-grain means that the waist and hem would be placed parallel to the fabric’s bound edges, also known as the selvedges. I laid the mockup onto the fabric and squared its marked centerline with the cross-grain using a couple of rulers, before pinning it to the silk/wool and cutting around the edges.
Then, I did the same for each panel of the back of the skirt. I was able to nest the pieces facing different directions as long as I kept their centers on the cross-grain.
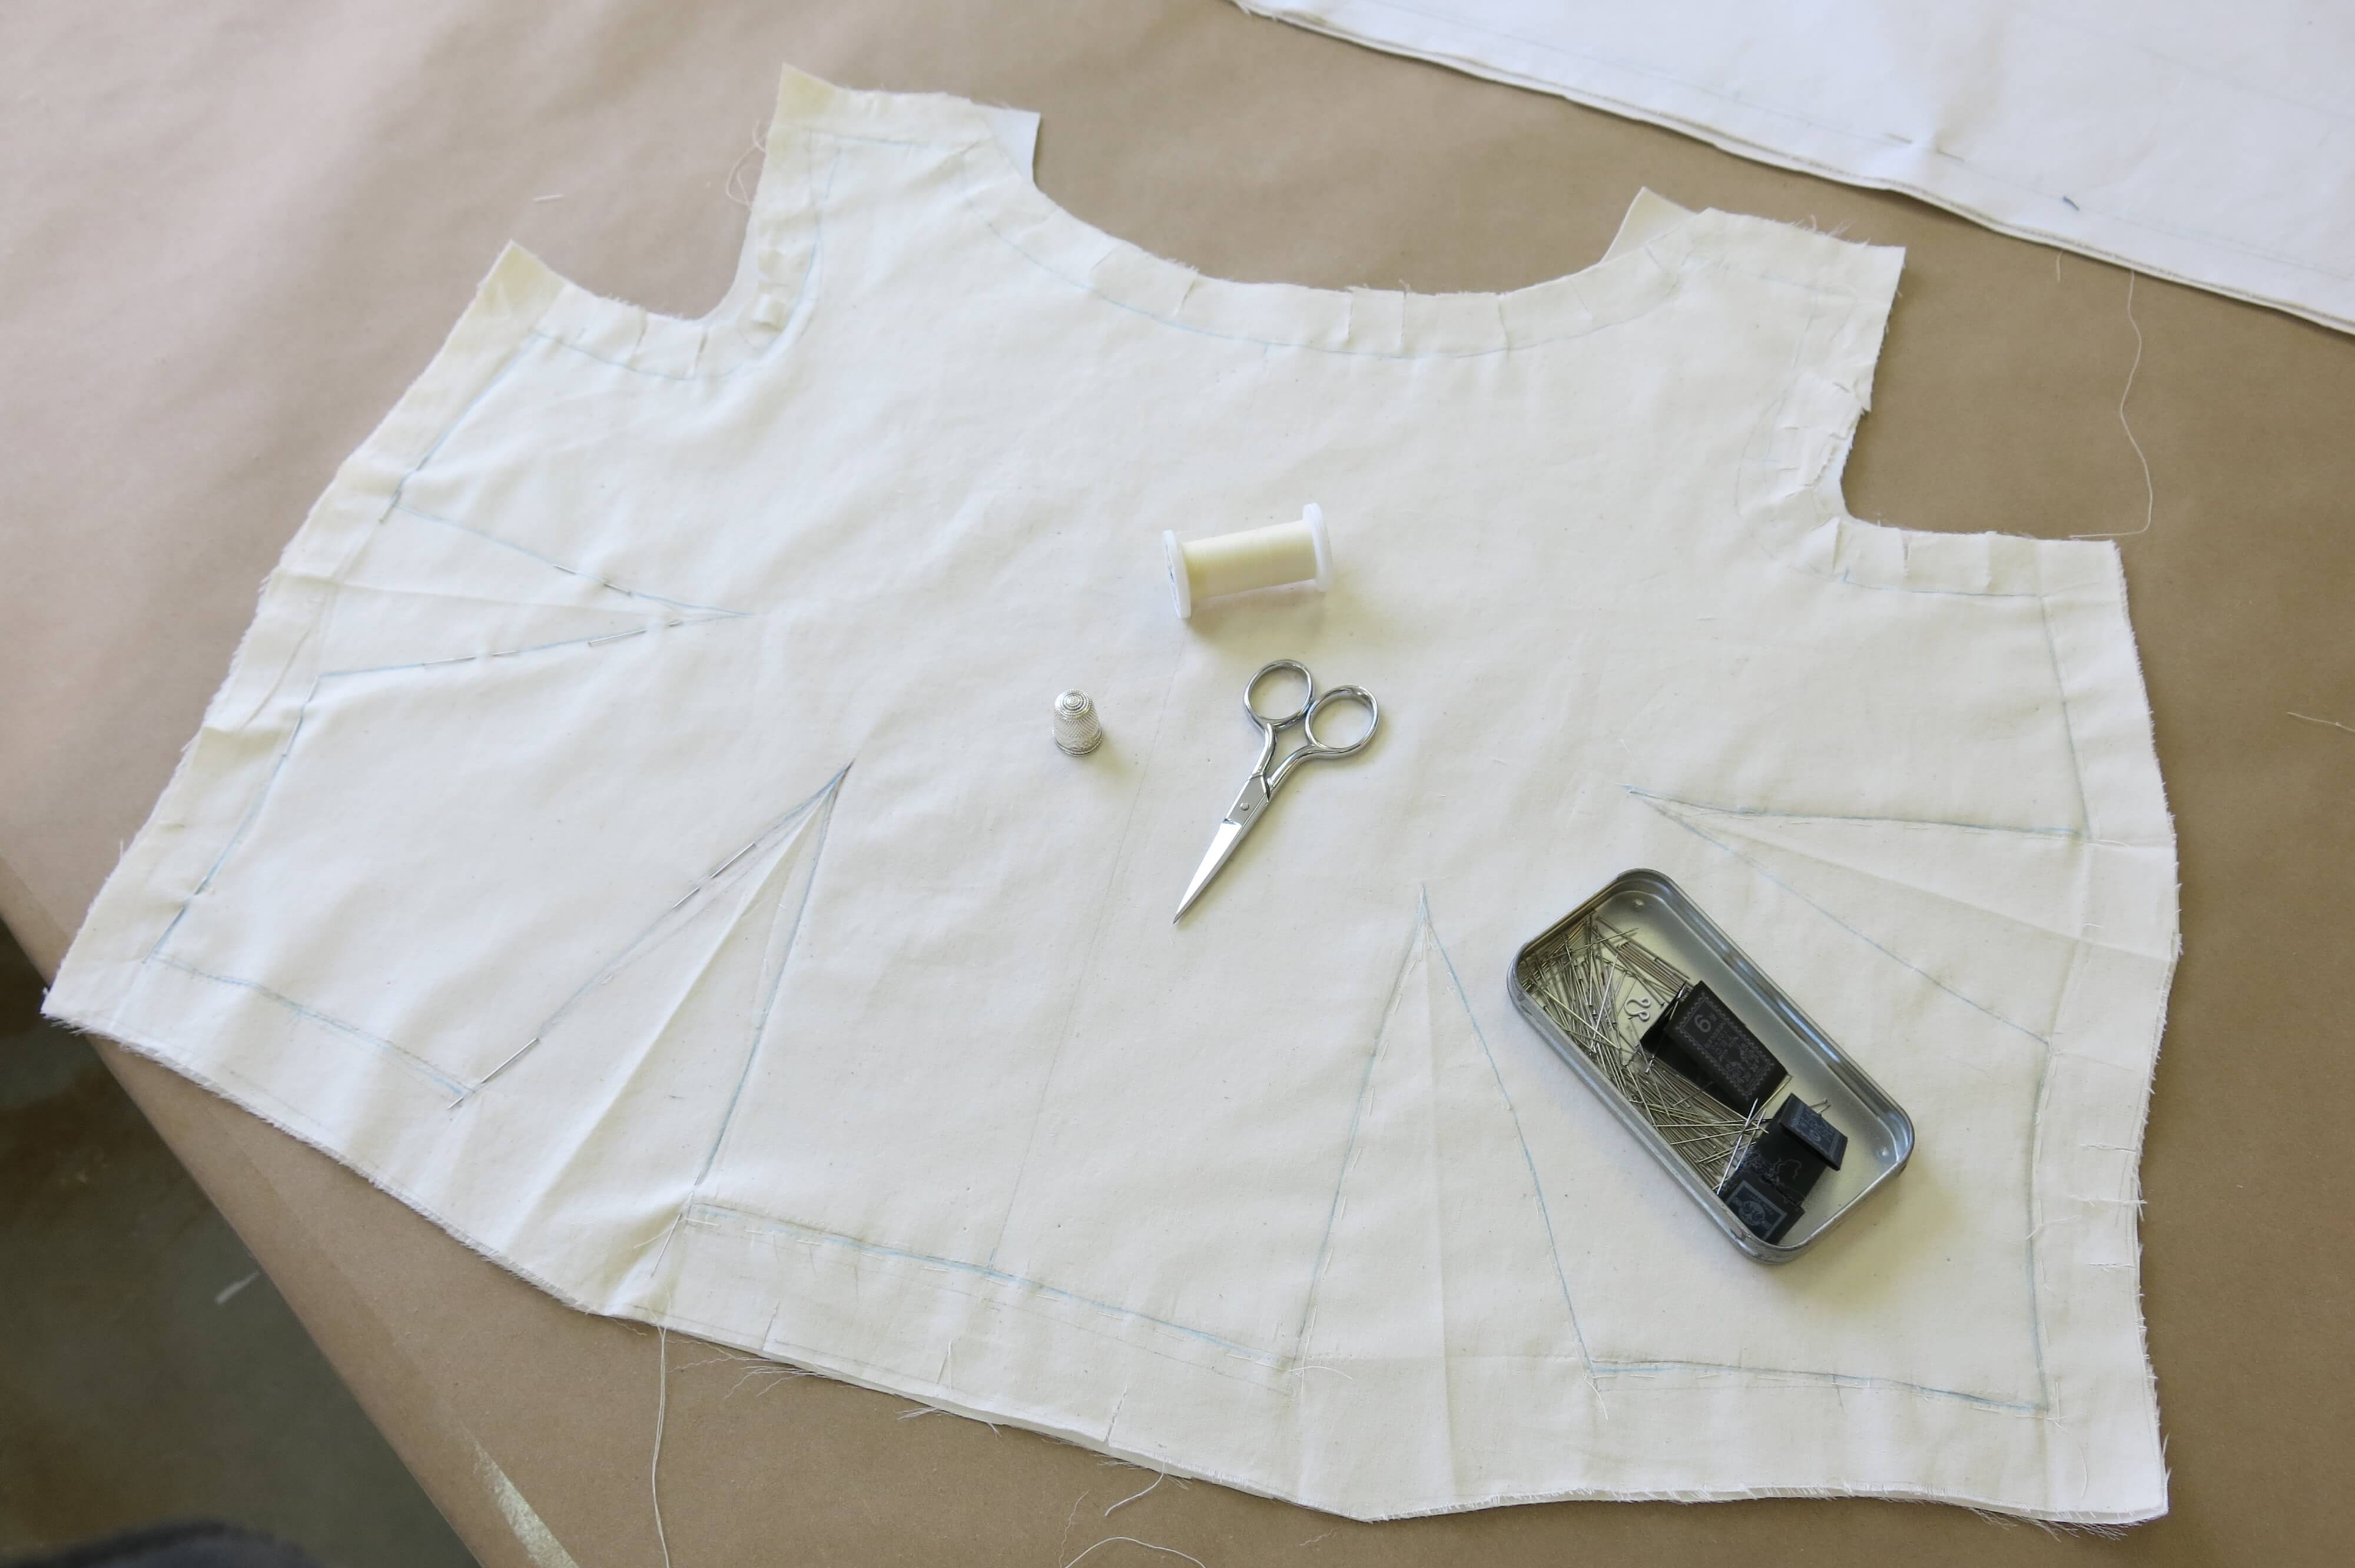
Once the skirt pieces were cut (there were a lot of them!), I laid the muslin mockup top onto the silk/wool, pinning them together as one. I used the corrected pattern piece to redraw a few of the stitching lines to represent tweaks made during our final mockup fitting. I marked the changes directly onto the mockup fabric using a different color pencil, so I could tell which stitching lines represent our perfected pattern.
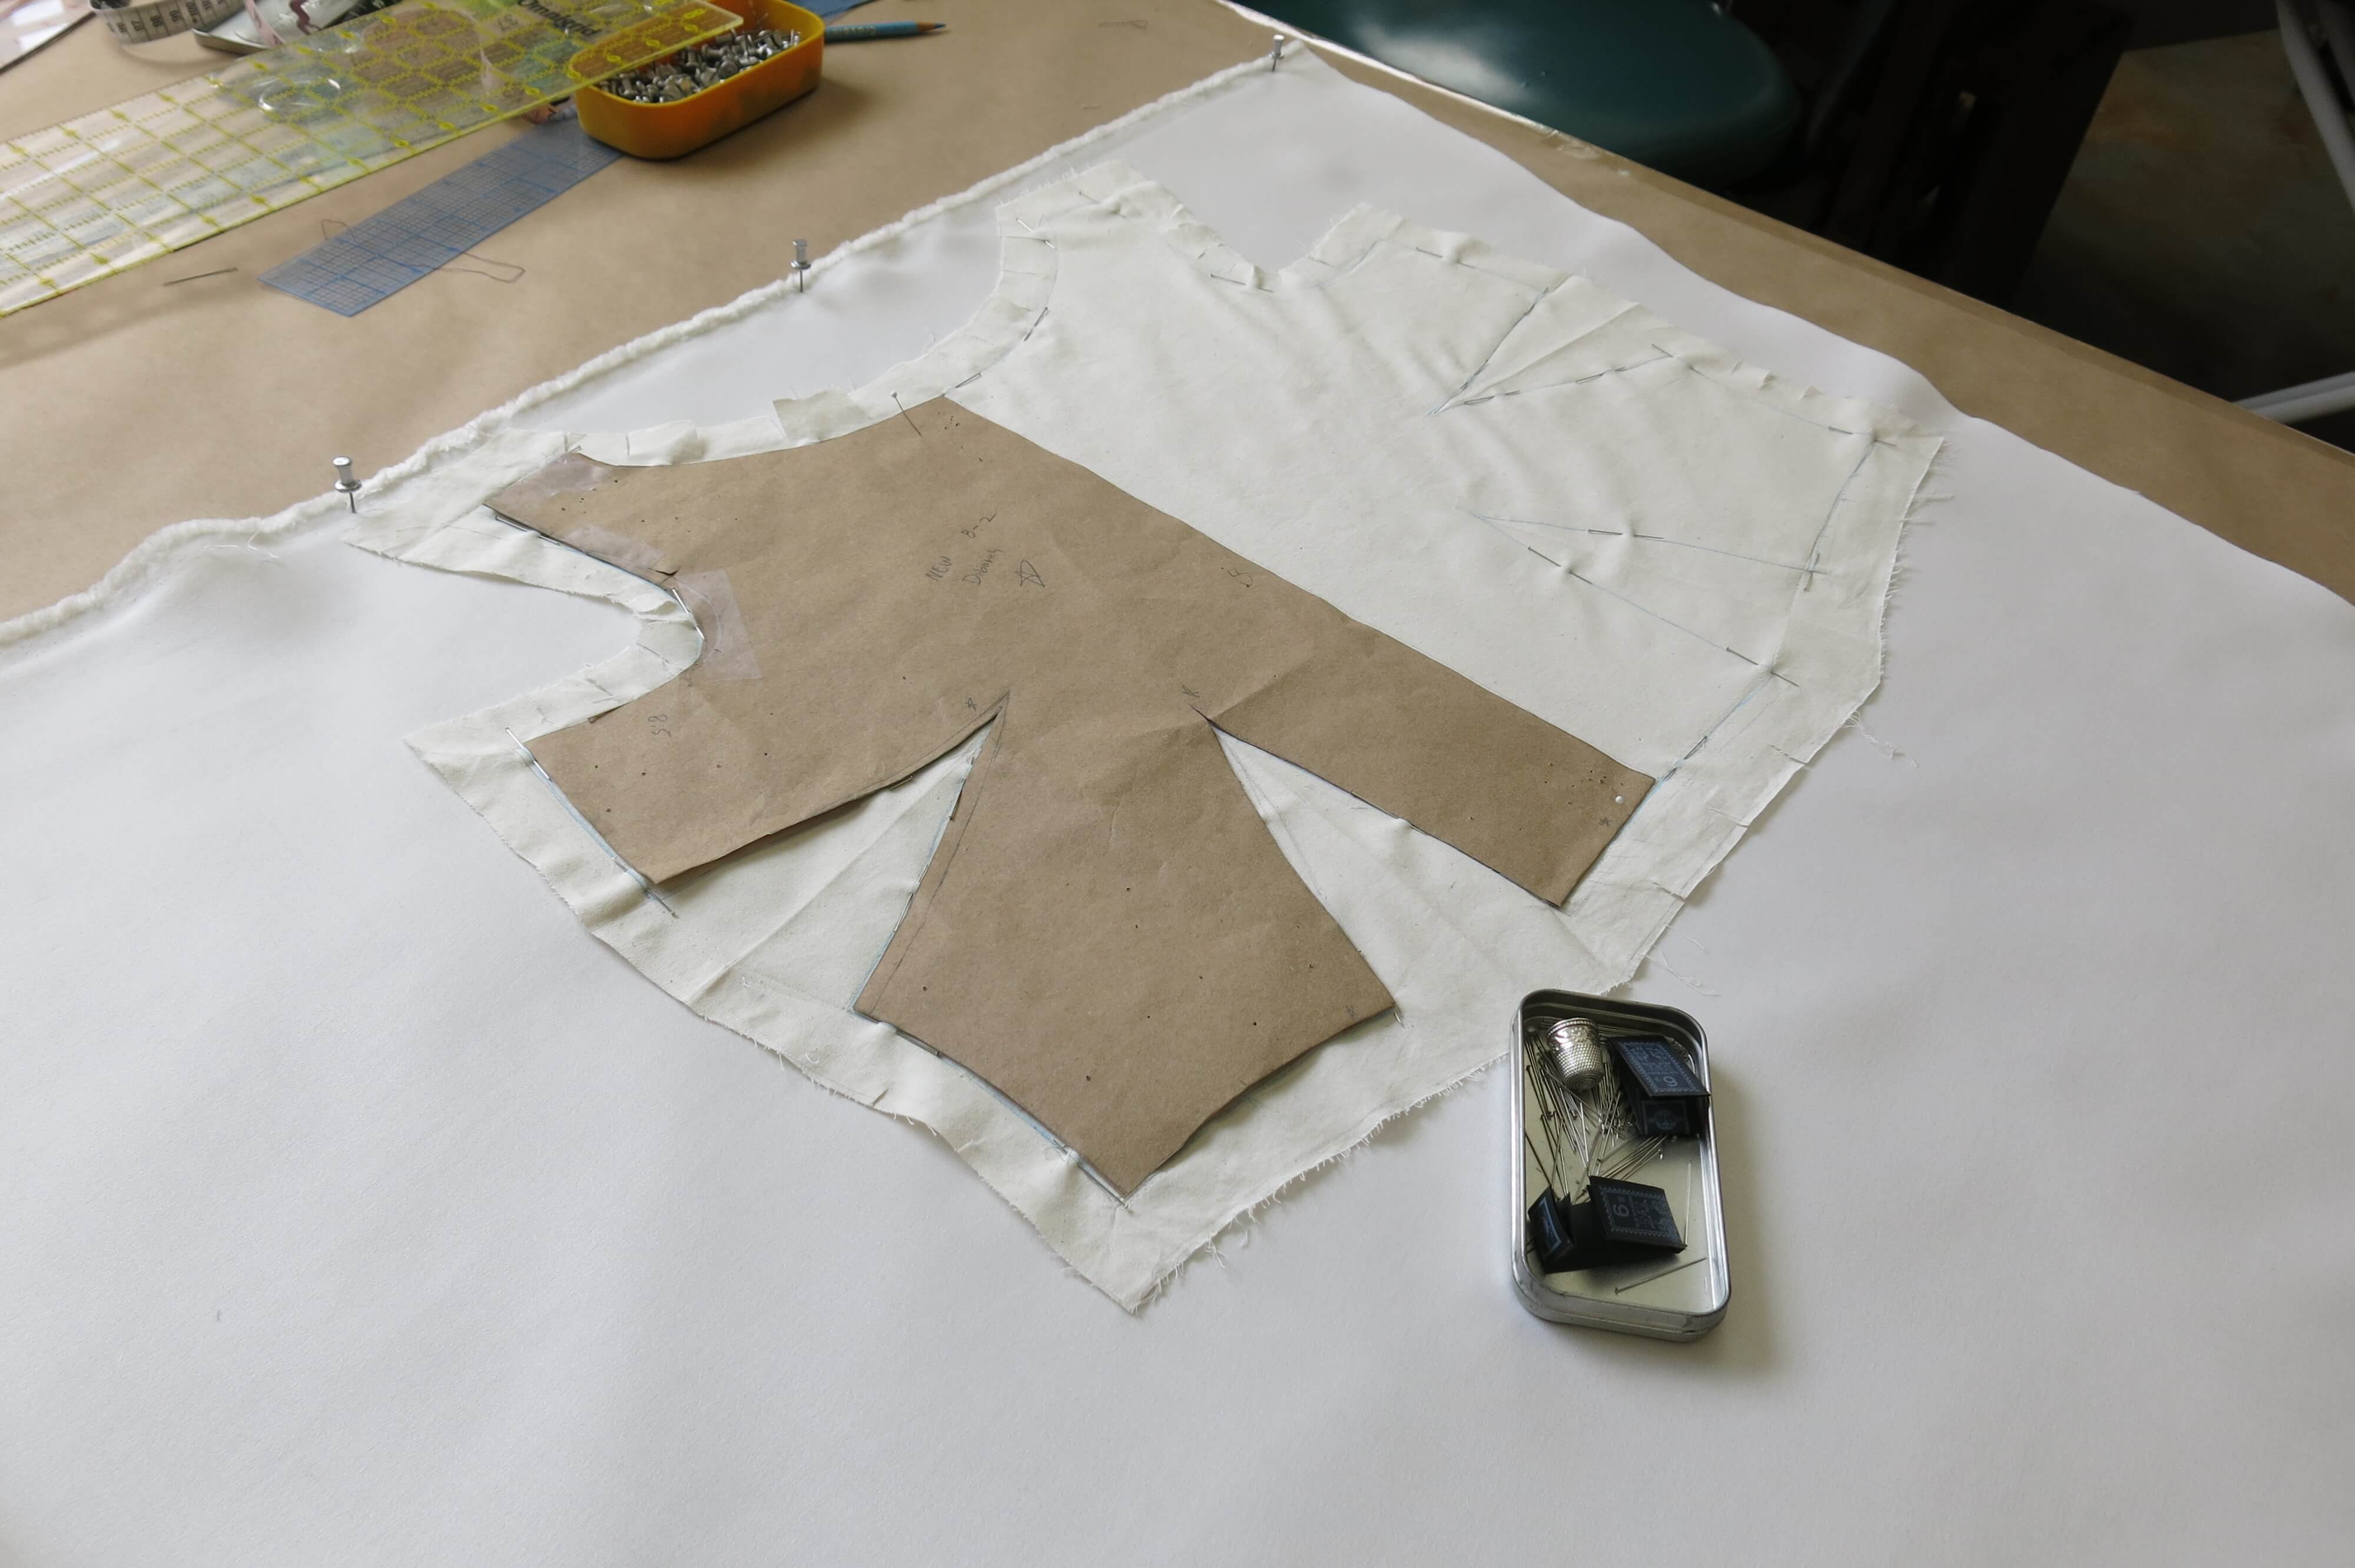

Once the pieces were corrected and connected, I cut around each piece of the mockup top. I love that there’s no need to be precise when cutting! Since I use stitching lines (instead of the cut edge) for pinning and sewing and fitting, hacking away is OK… (which makes cutting really fun.)
Eventually all the silk/wool pieces were cut and pinned to a mockup back. What a stack!
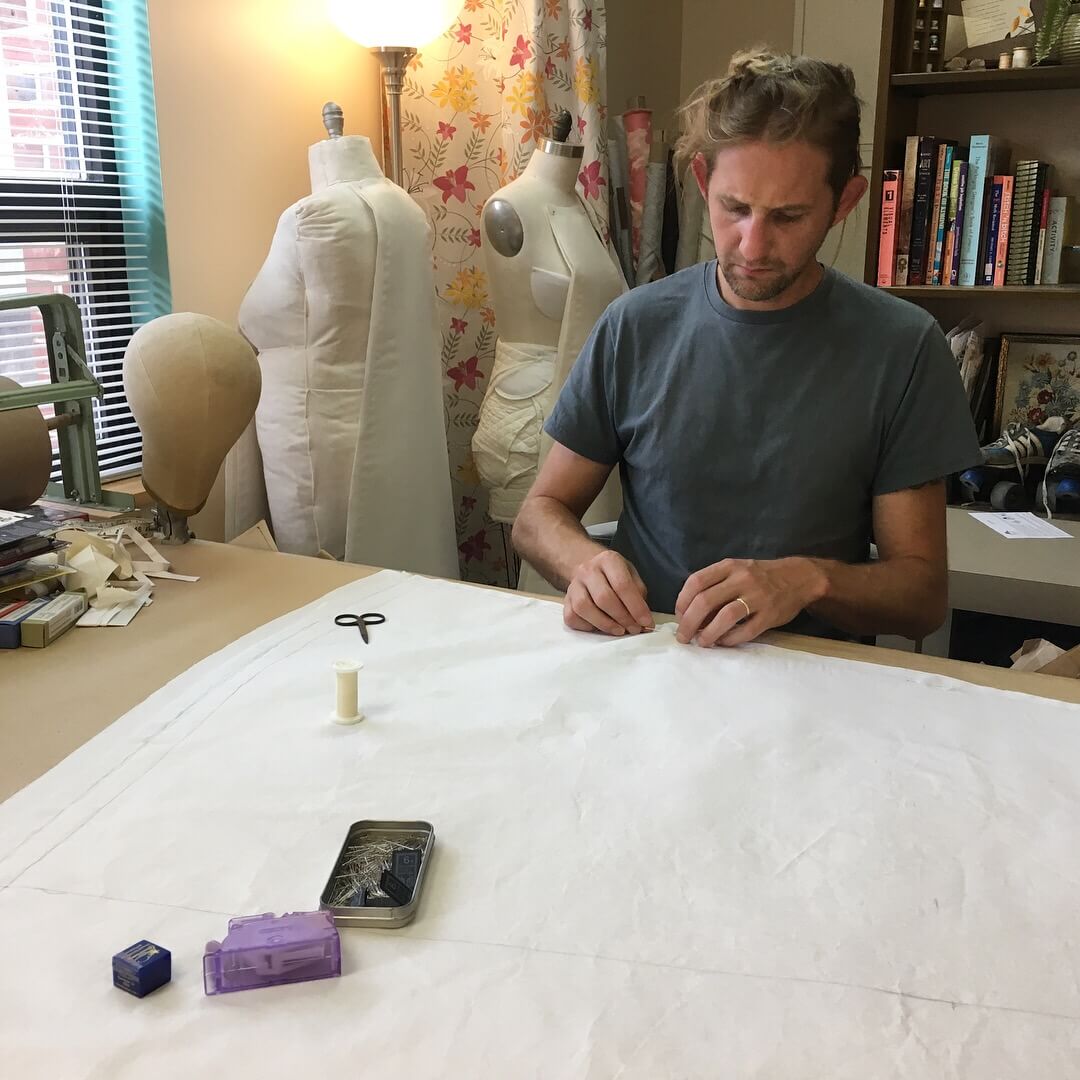
To attach the layers together, I grab my thimble and stitch a quick line of hand basting around every edge, removing the pins as I go. Using a matching thread color and basting just to the outside of the stitch line (into the seam allowance) means that I never need to remove the stitches. They are free to become another bit of secret history that I love to see when peeping inside…
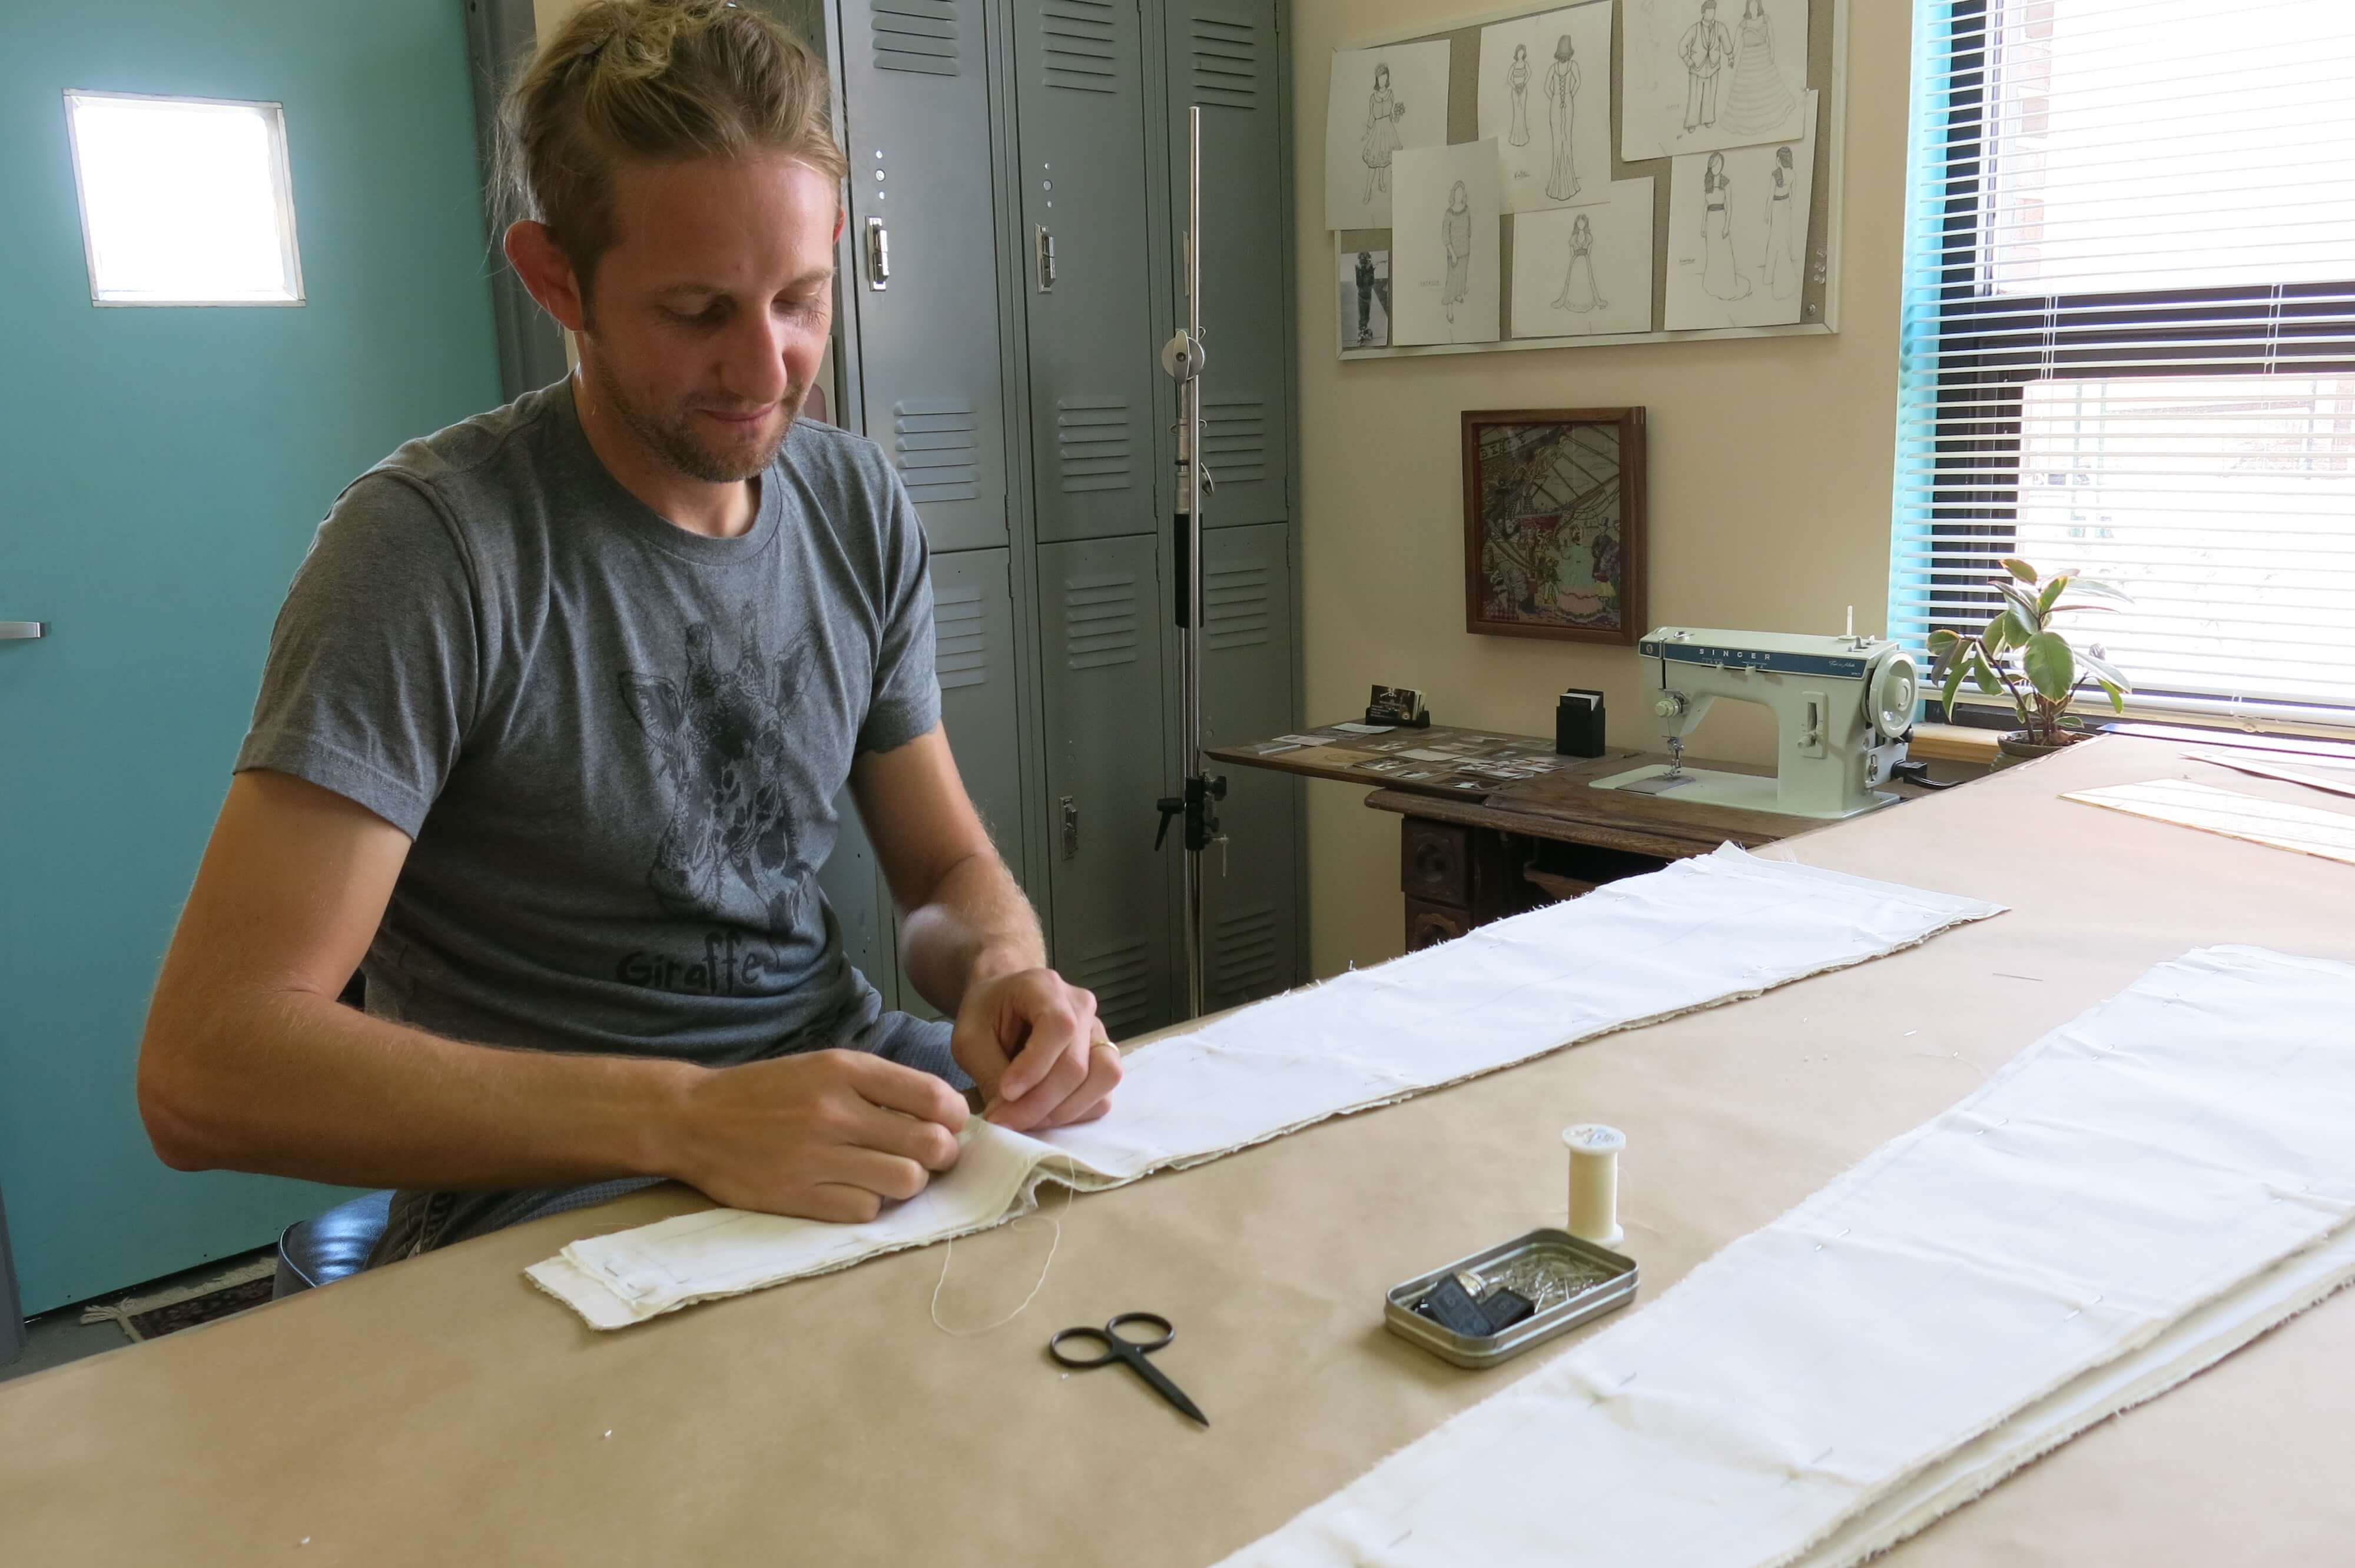
And though I love hand basting, it is even more fun with friends! Rebecca (a local Skirt Skills alum) often volunteers to help…. Thanks Rebecca!

…and even my handsome husband Charles got in on a lot of the hand sewing action. Thanks Charles!
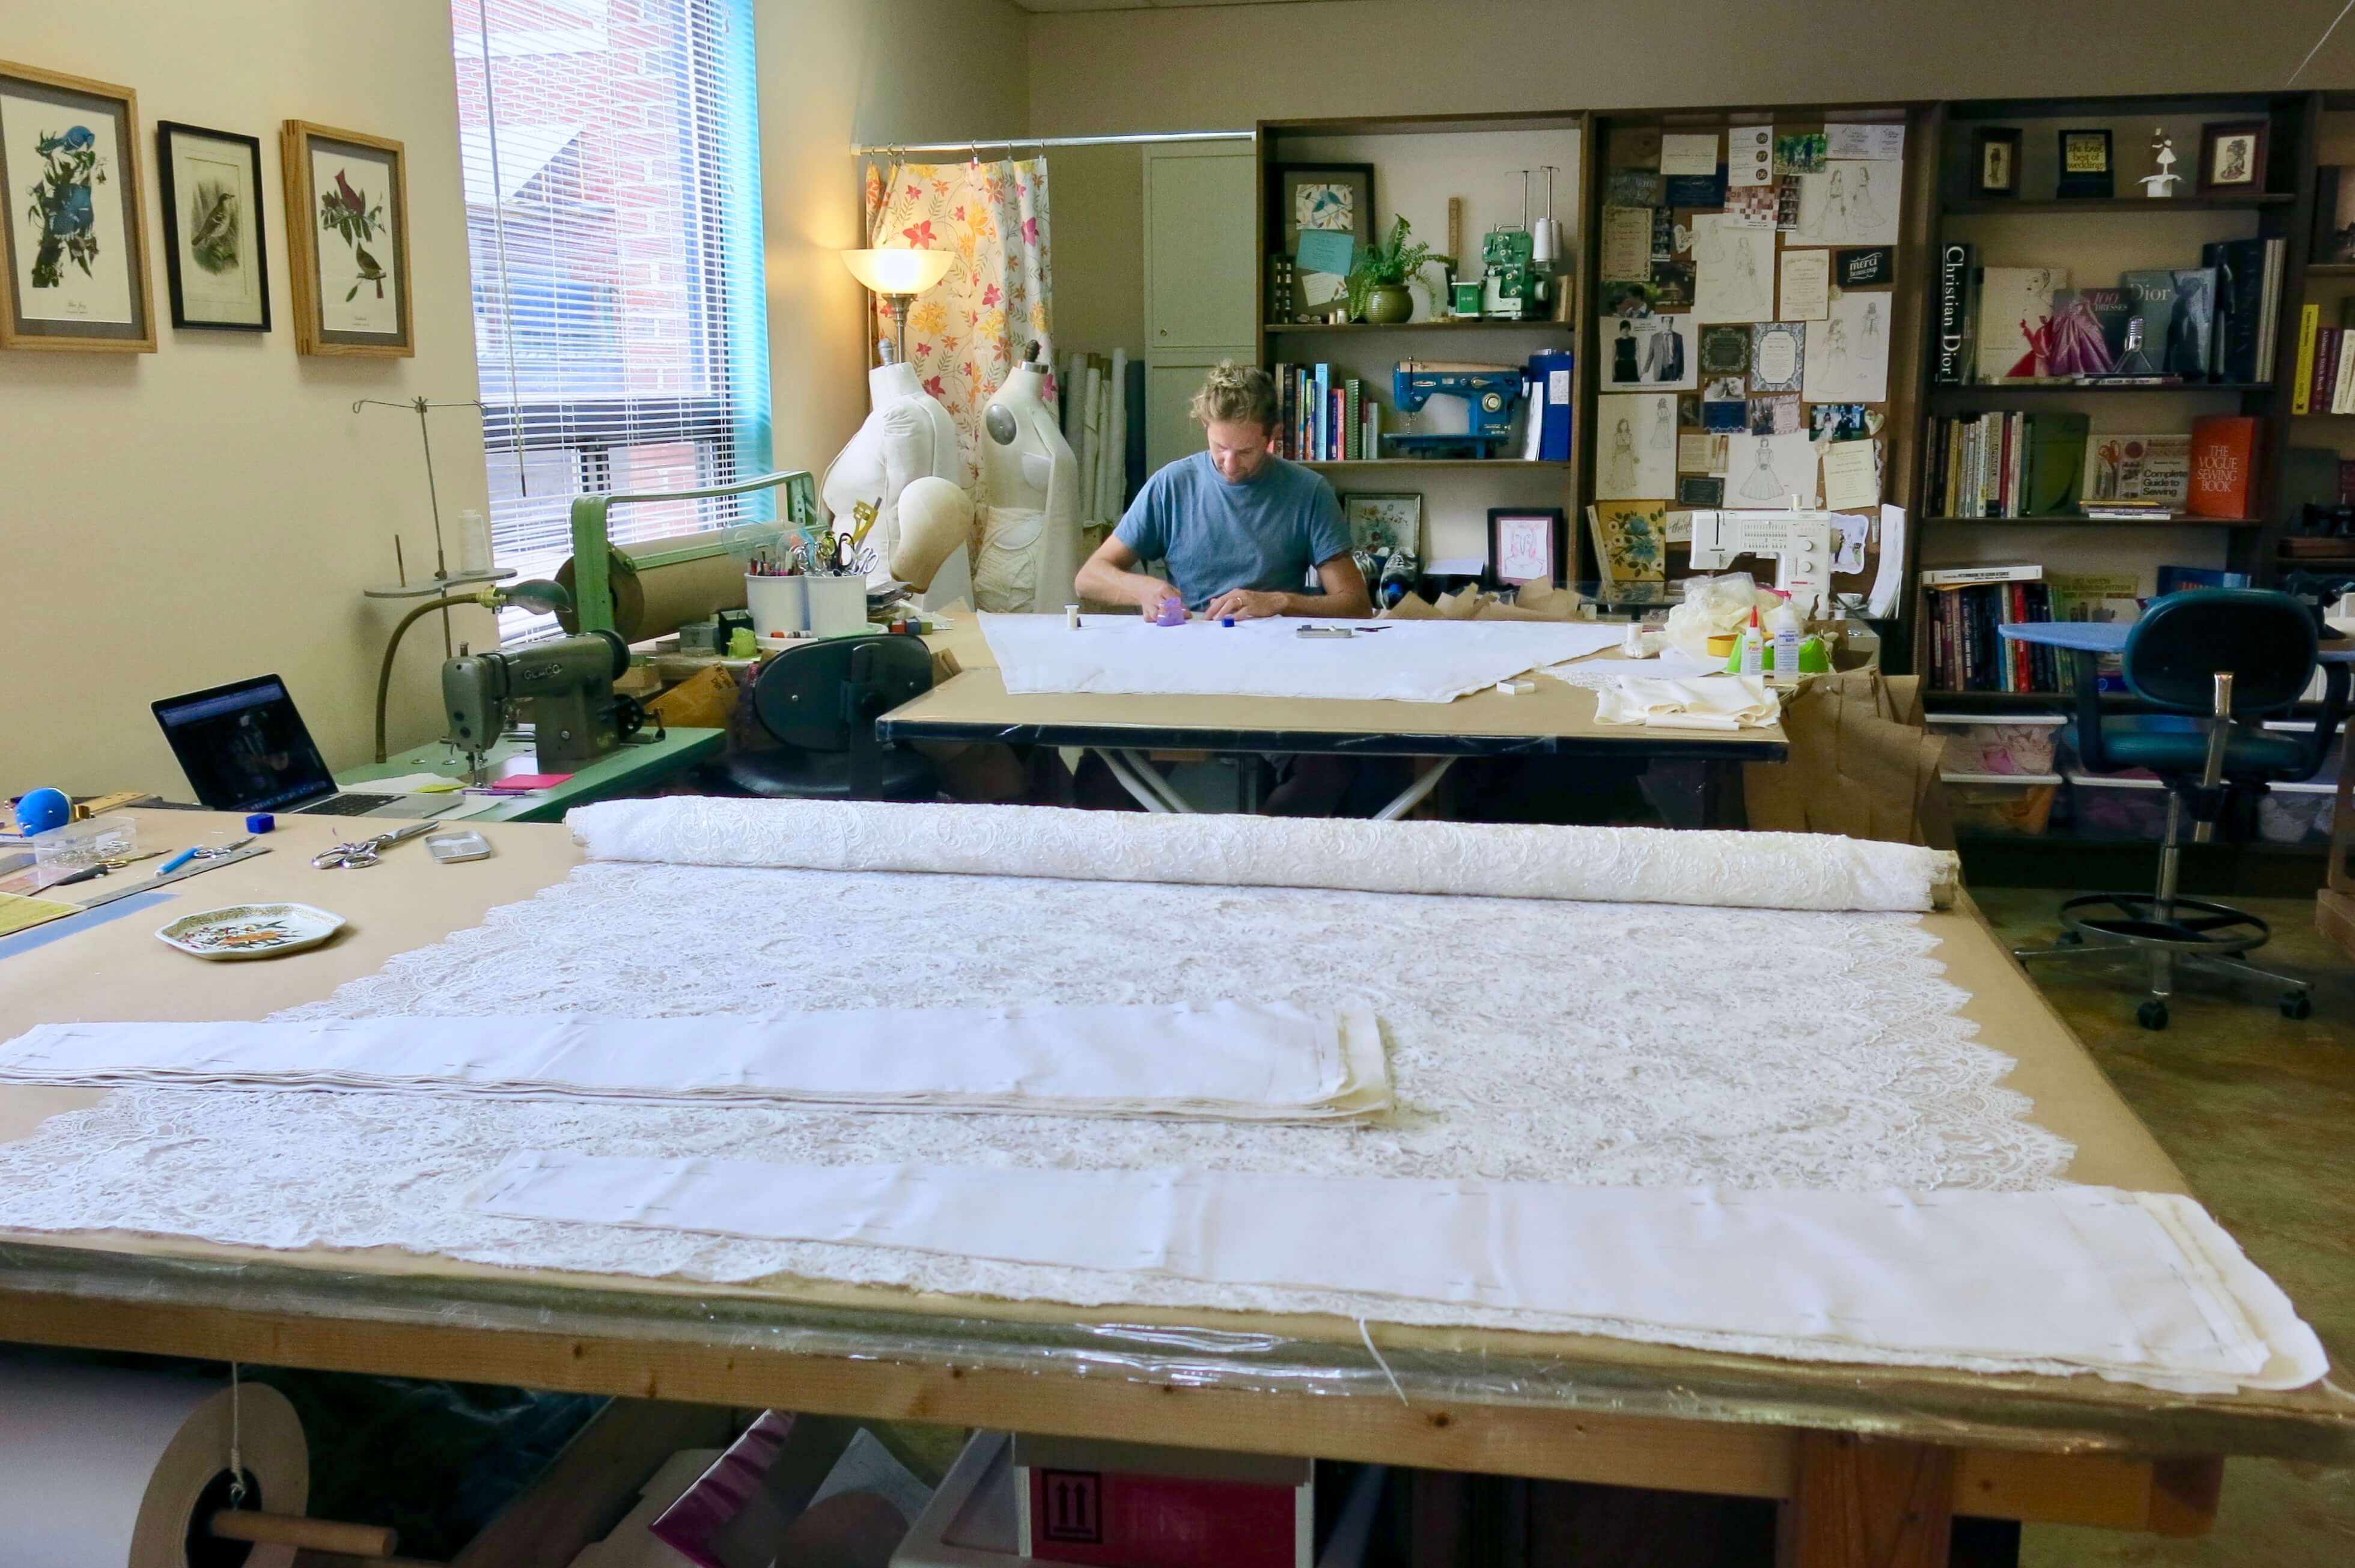
Adding the Lace Layer
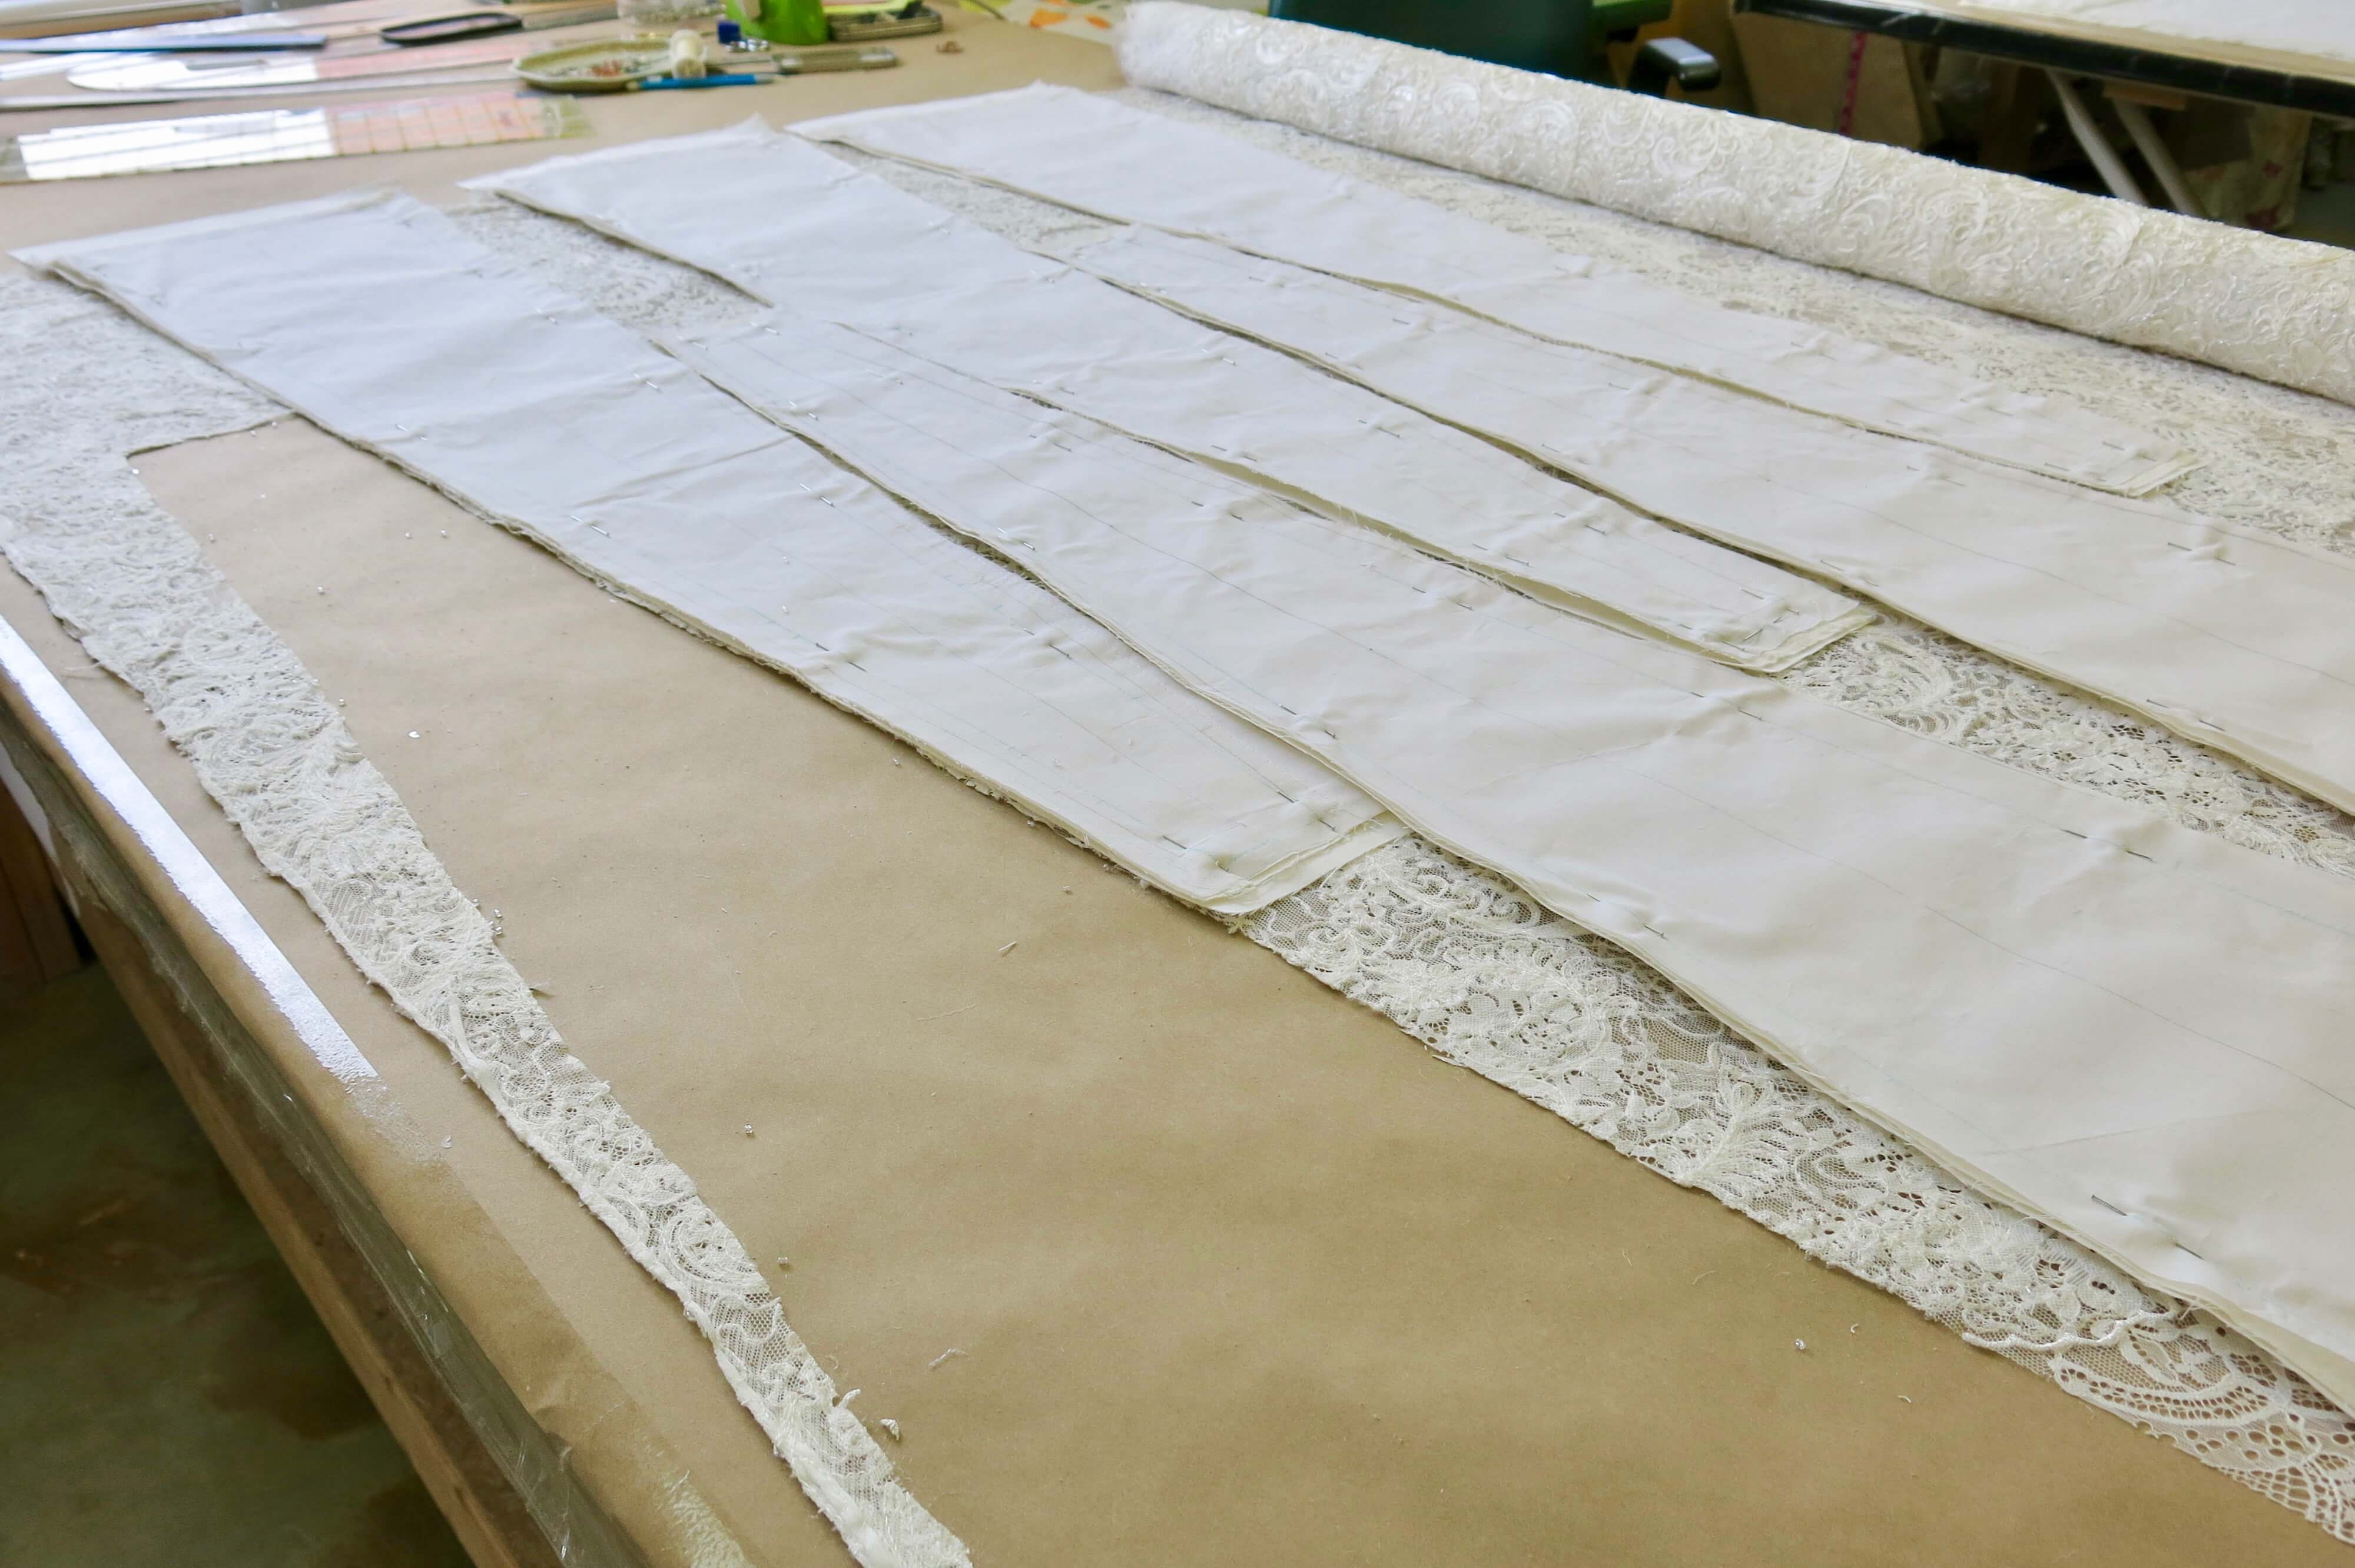
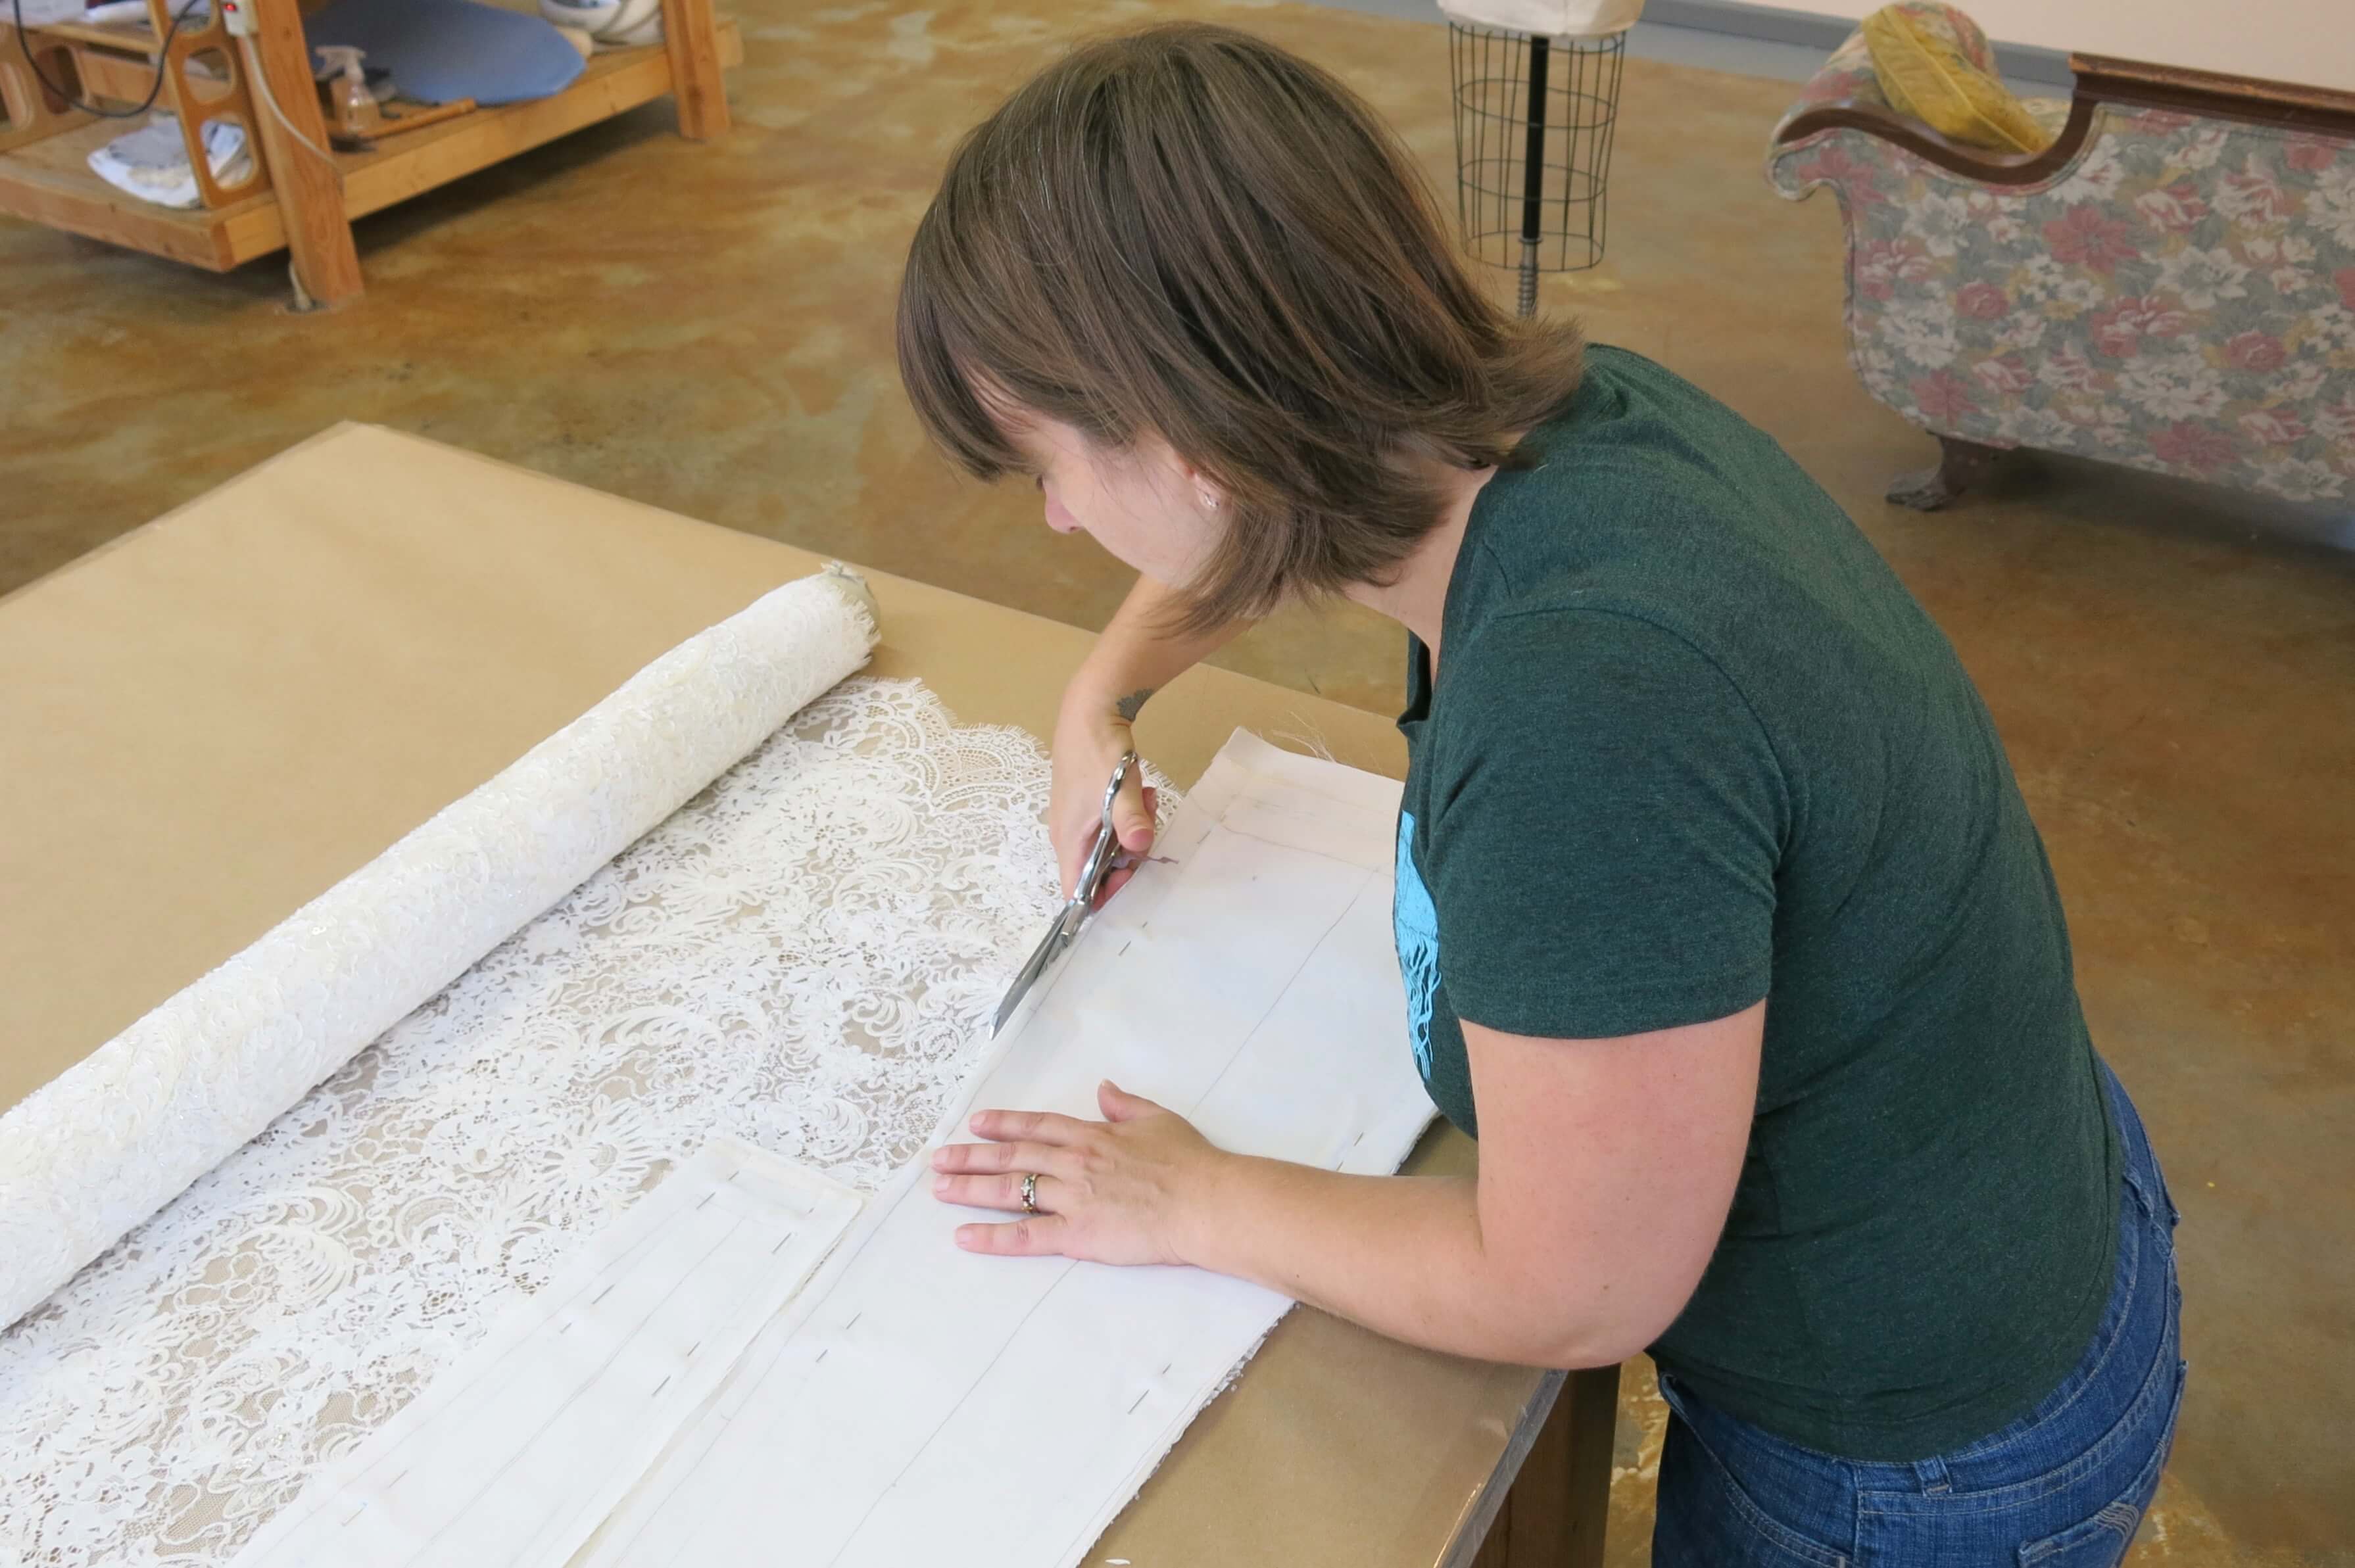
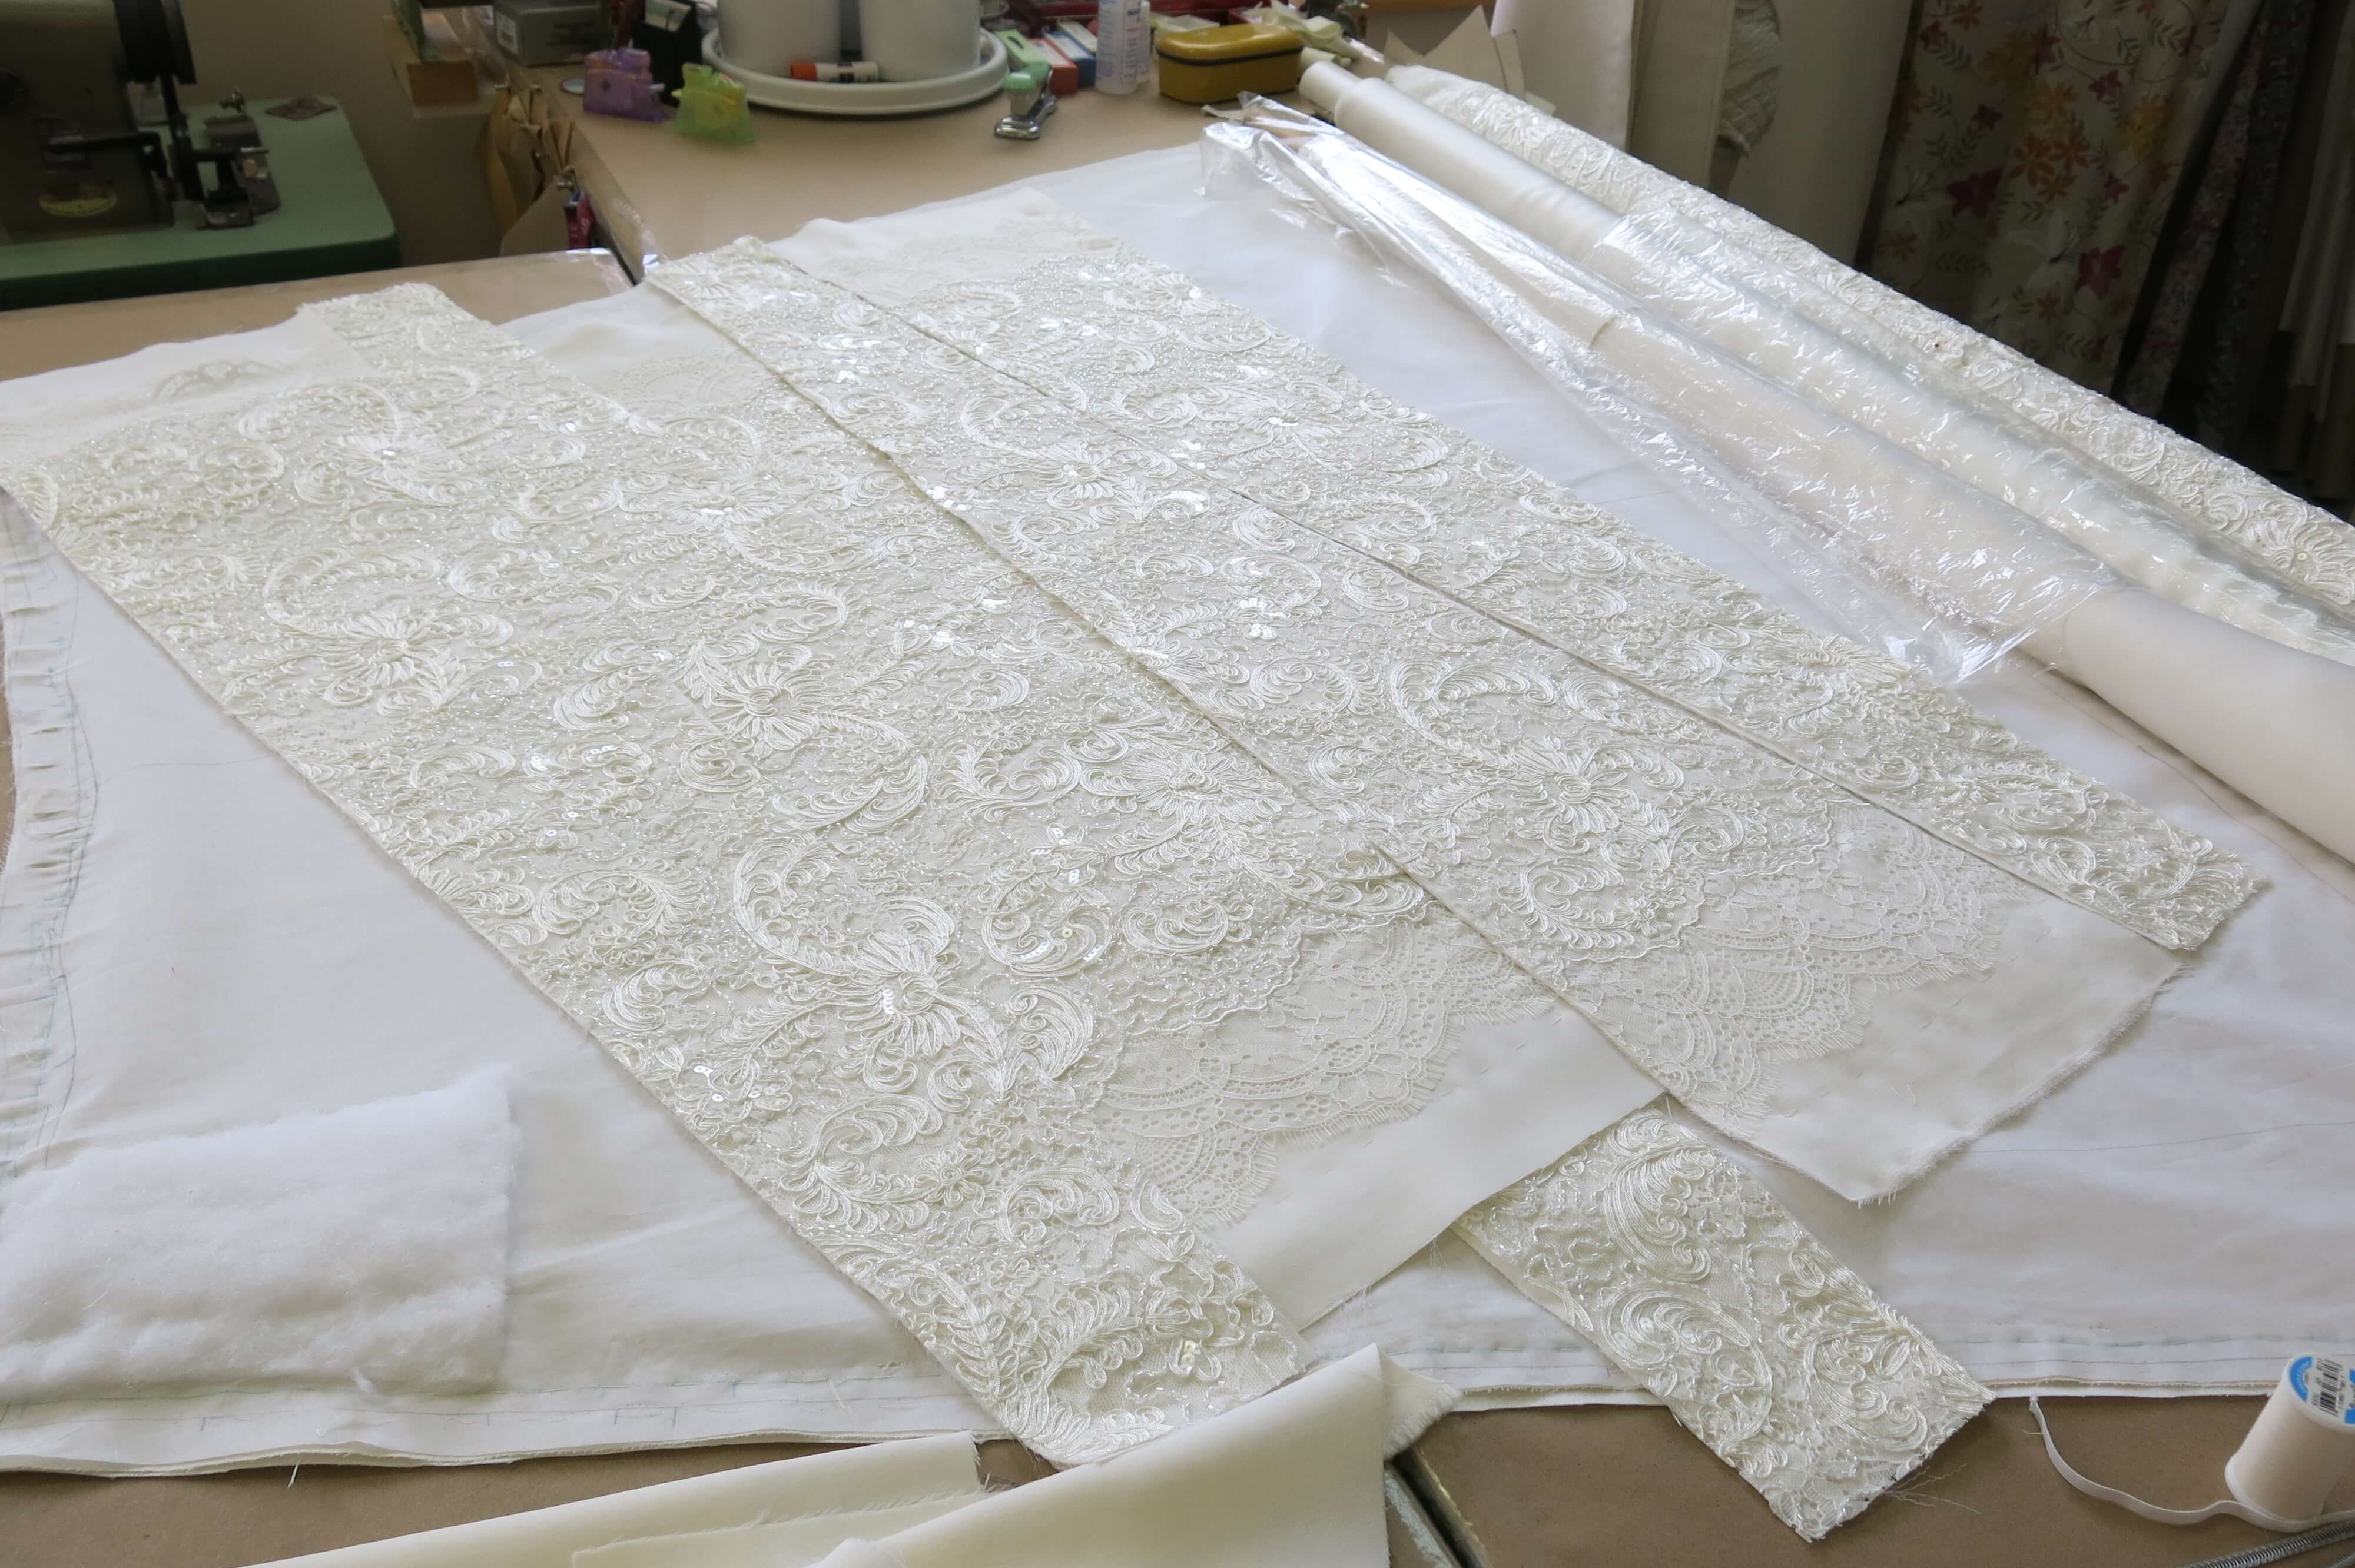
While Charles was basting away, I began to layout the lace layer. Deborah’s dress design featured ‘peek-a-boo’ lace panels inside the deep skirt pleats. Once all of these smaller skirt panels were cut and pinned to with their silk/wool, they needed a layer of lovely lace added in place!
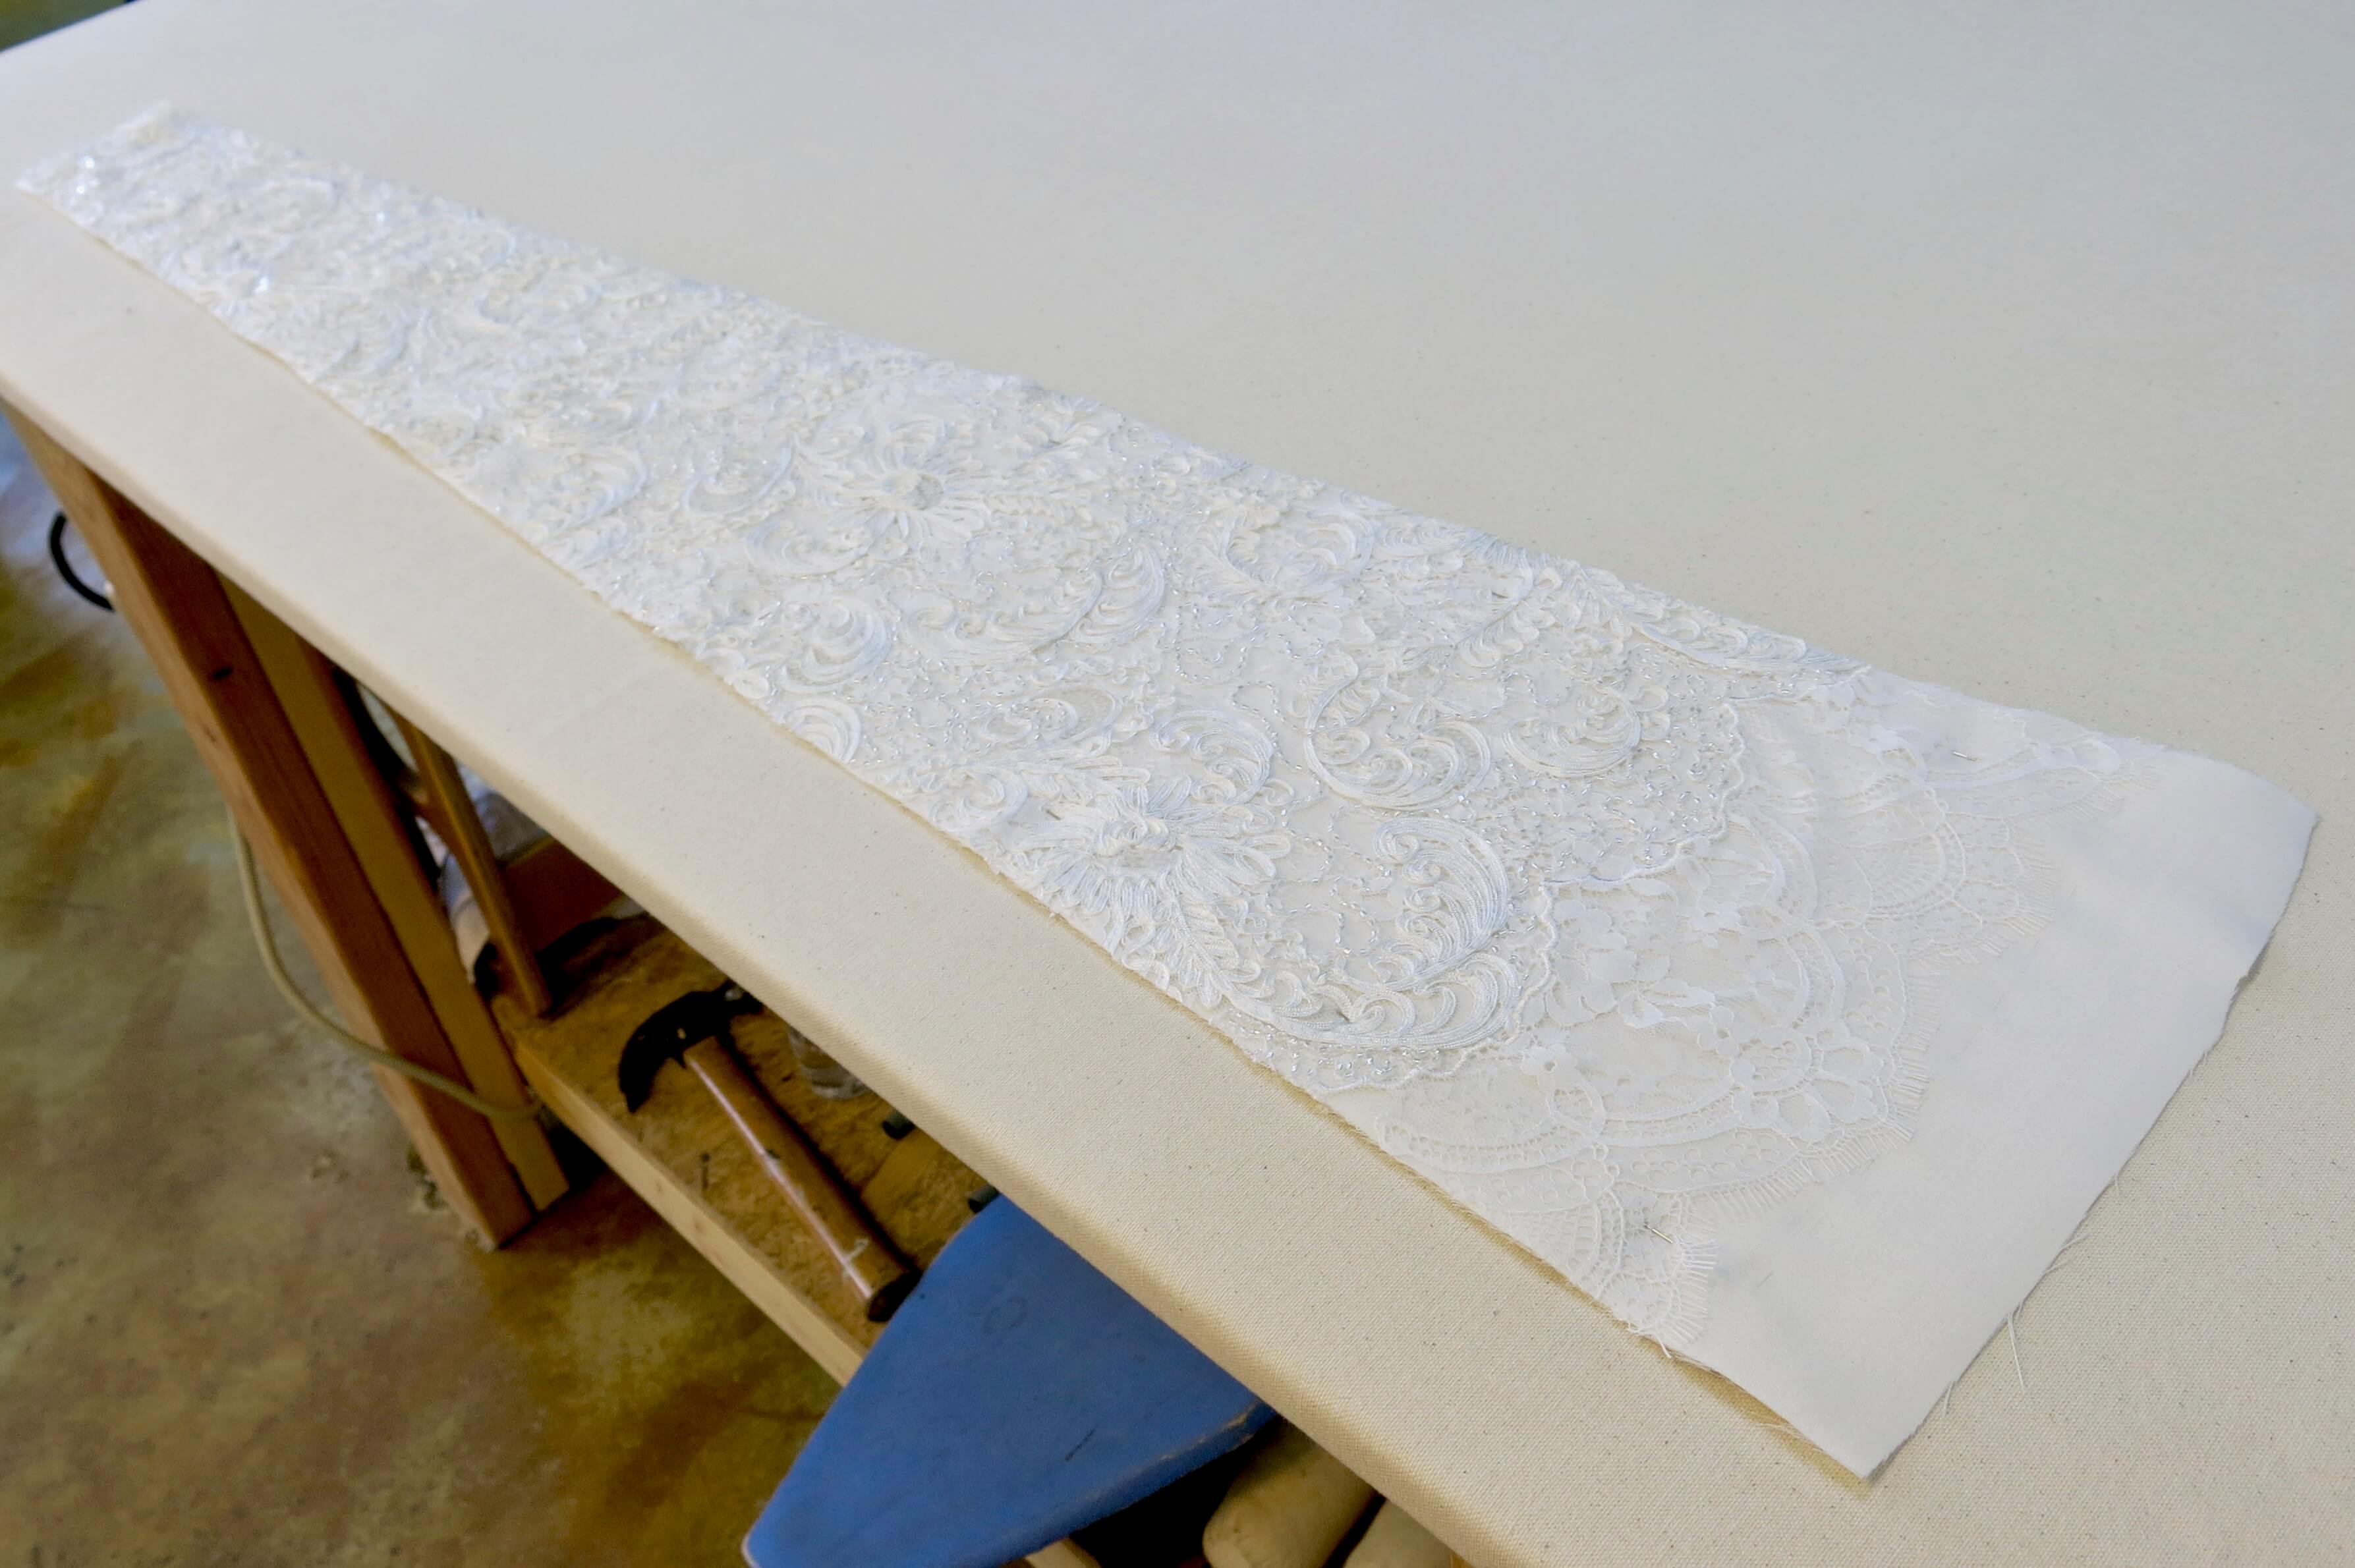
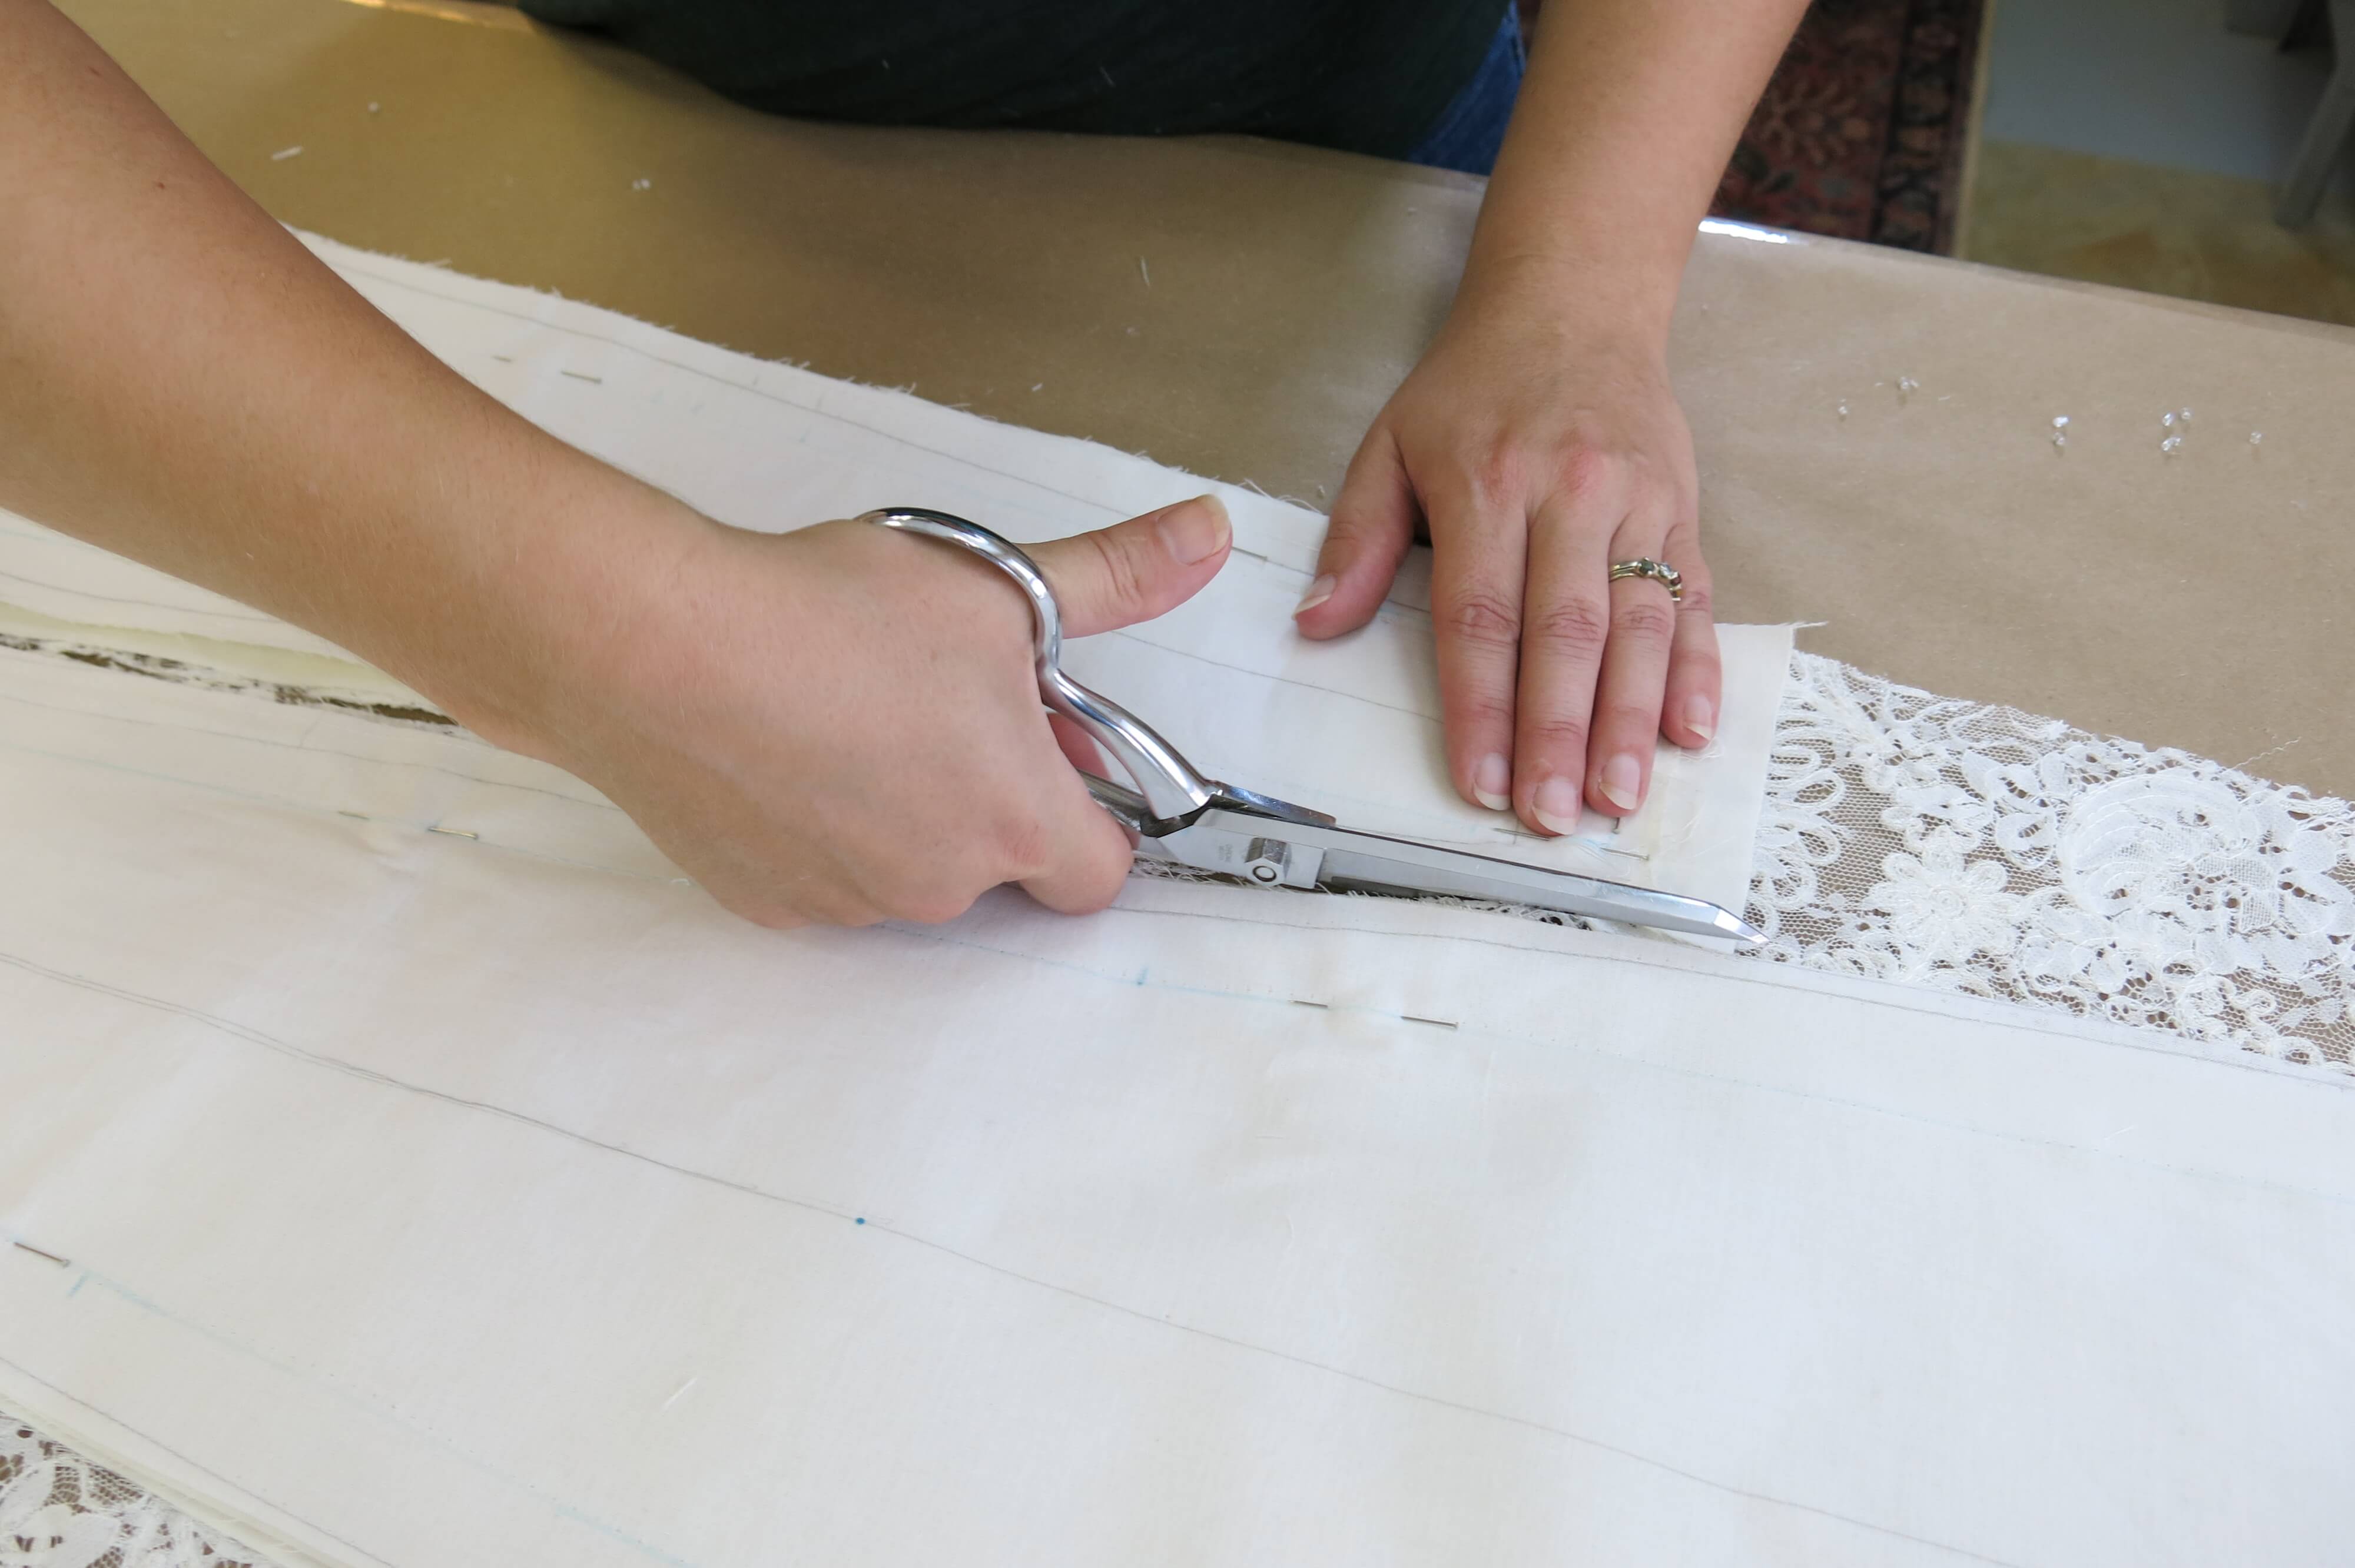
The lace had a border edge that we wanted to feature at the hem. This meant that I needed to offset the bottom edges of the panels to best showcase the design.
The (barely visible) thread marked line is where the hem will be. When turned under, the eyelash edge of the scalloped lace would just dust the floor….

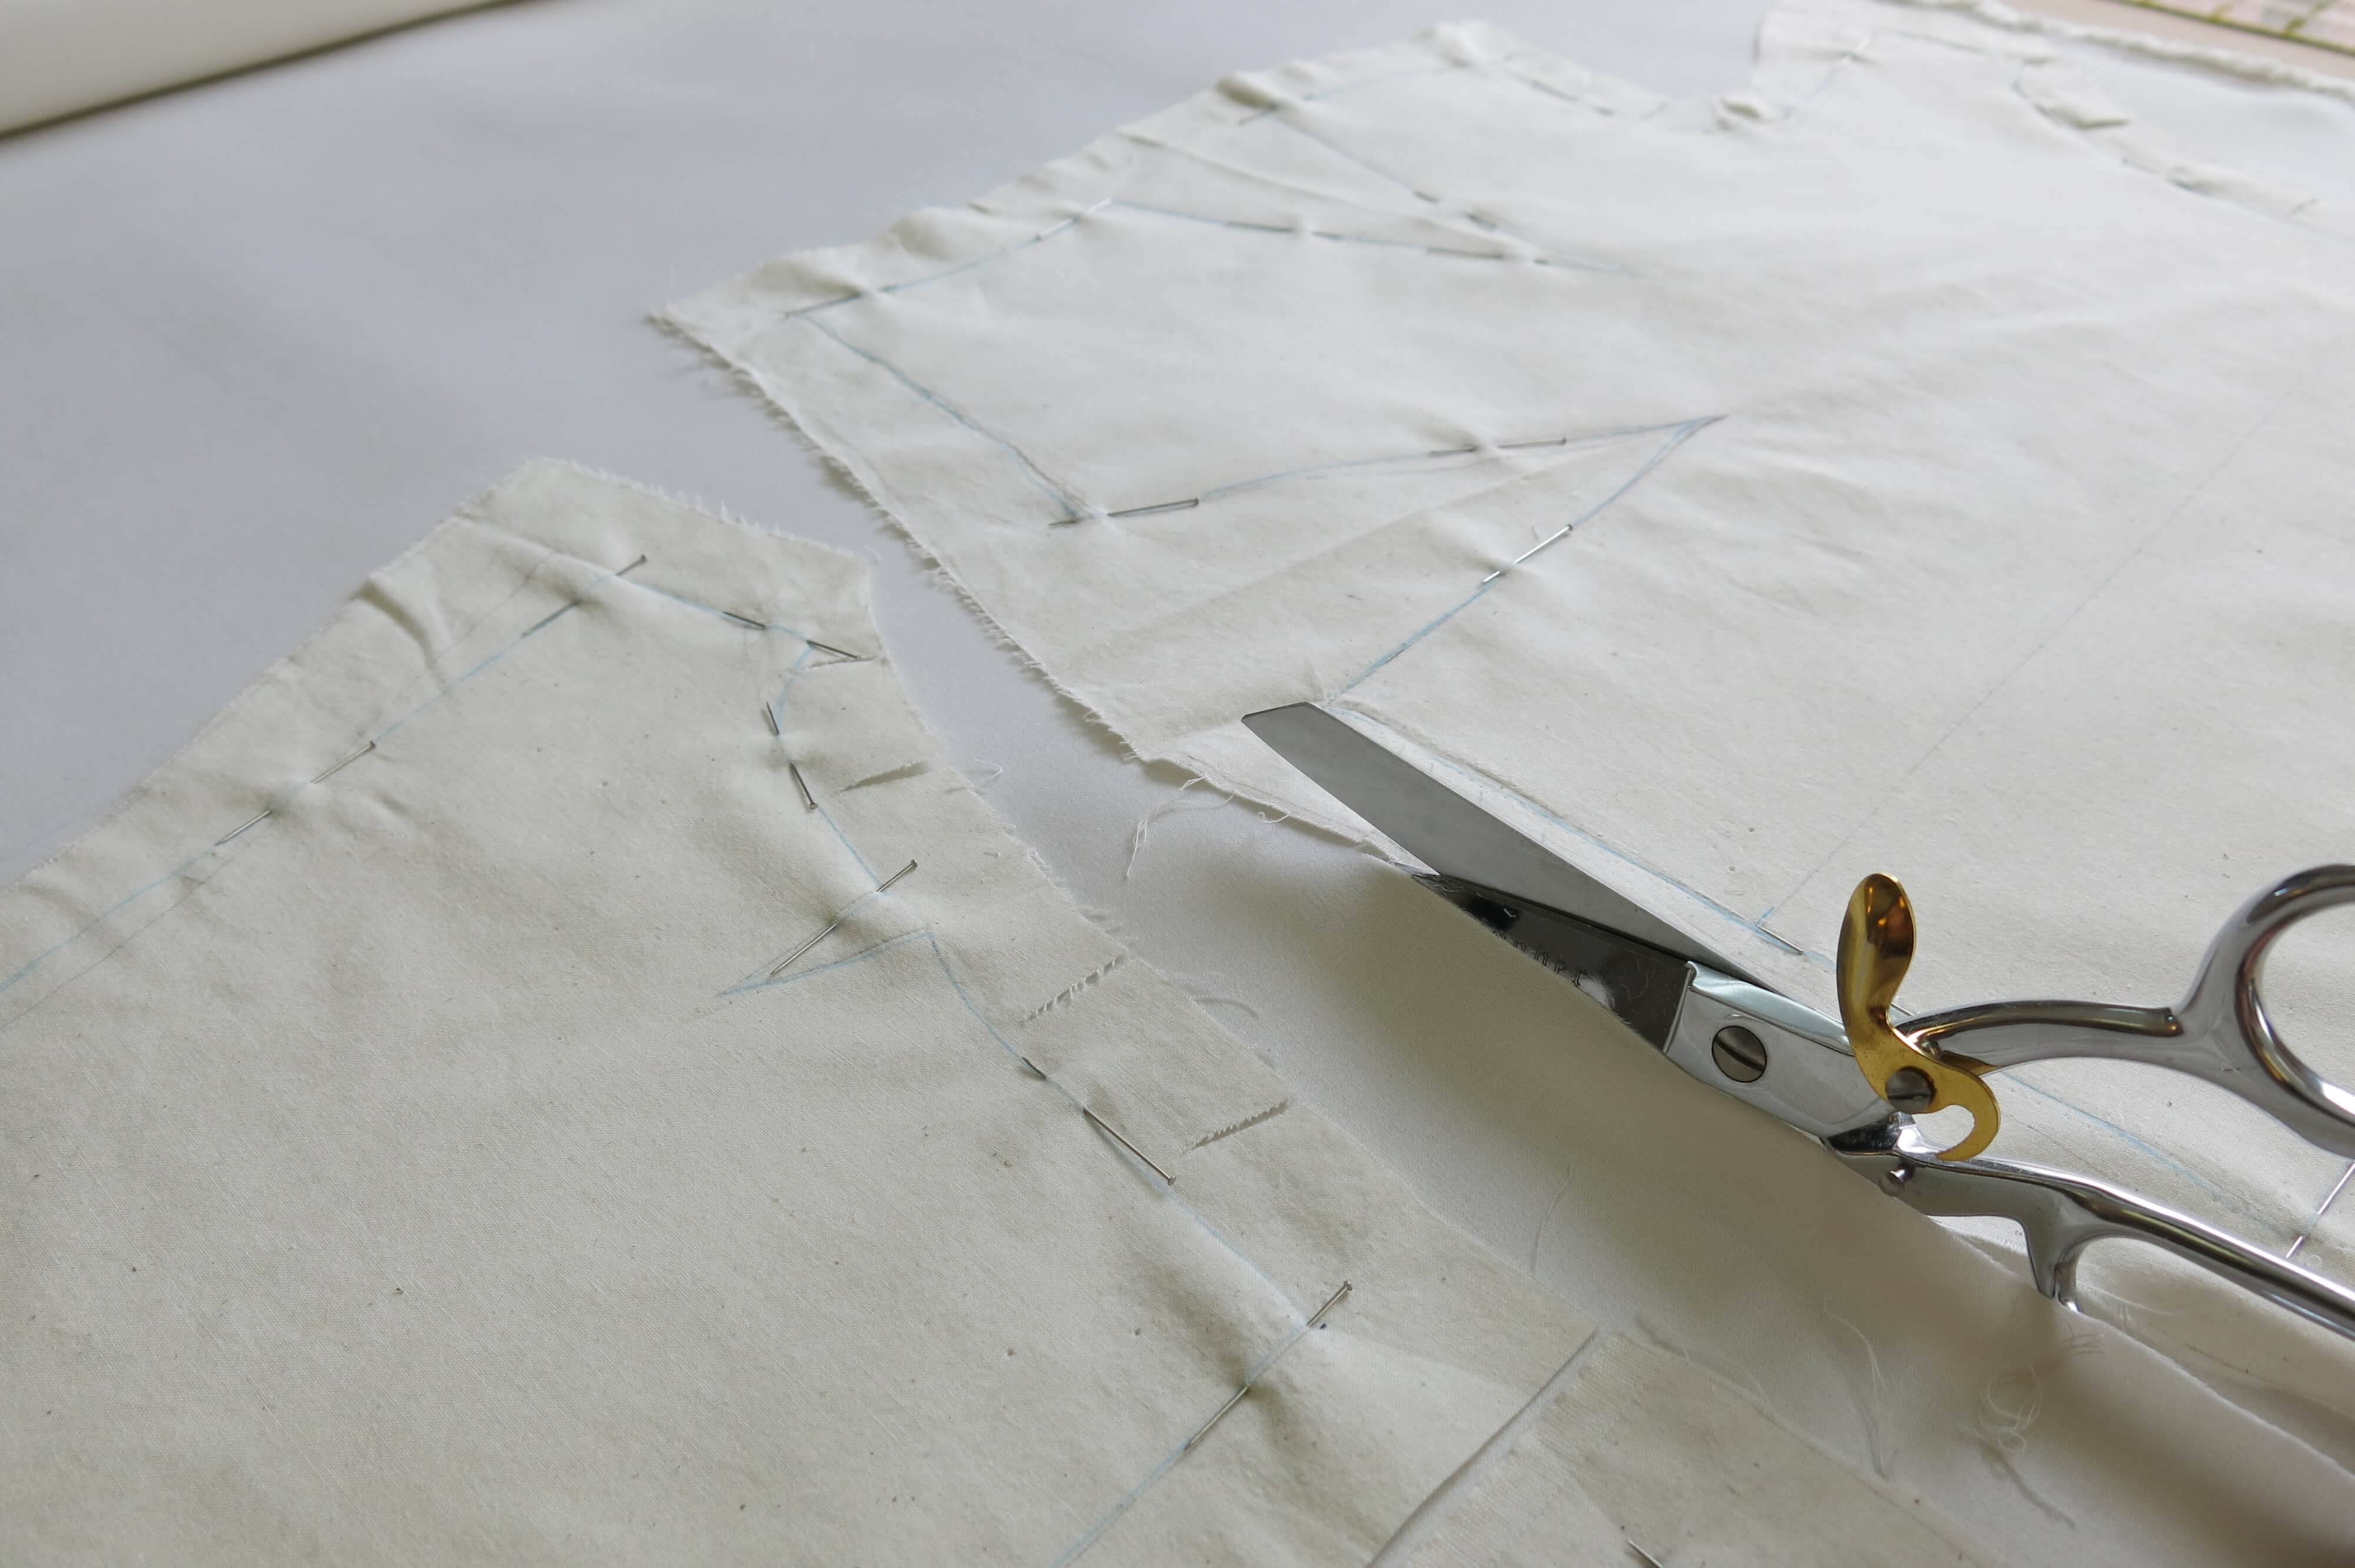
With all the panels pinned in place, I began to cut through the lace!
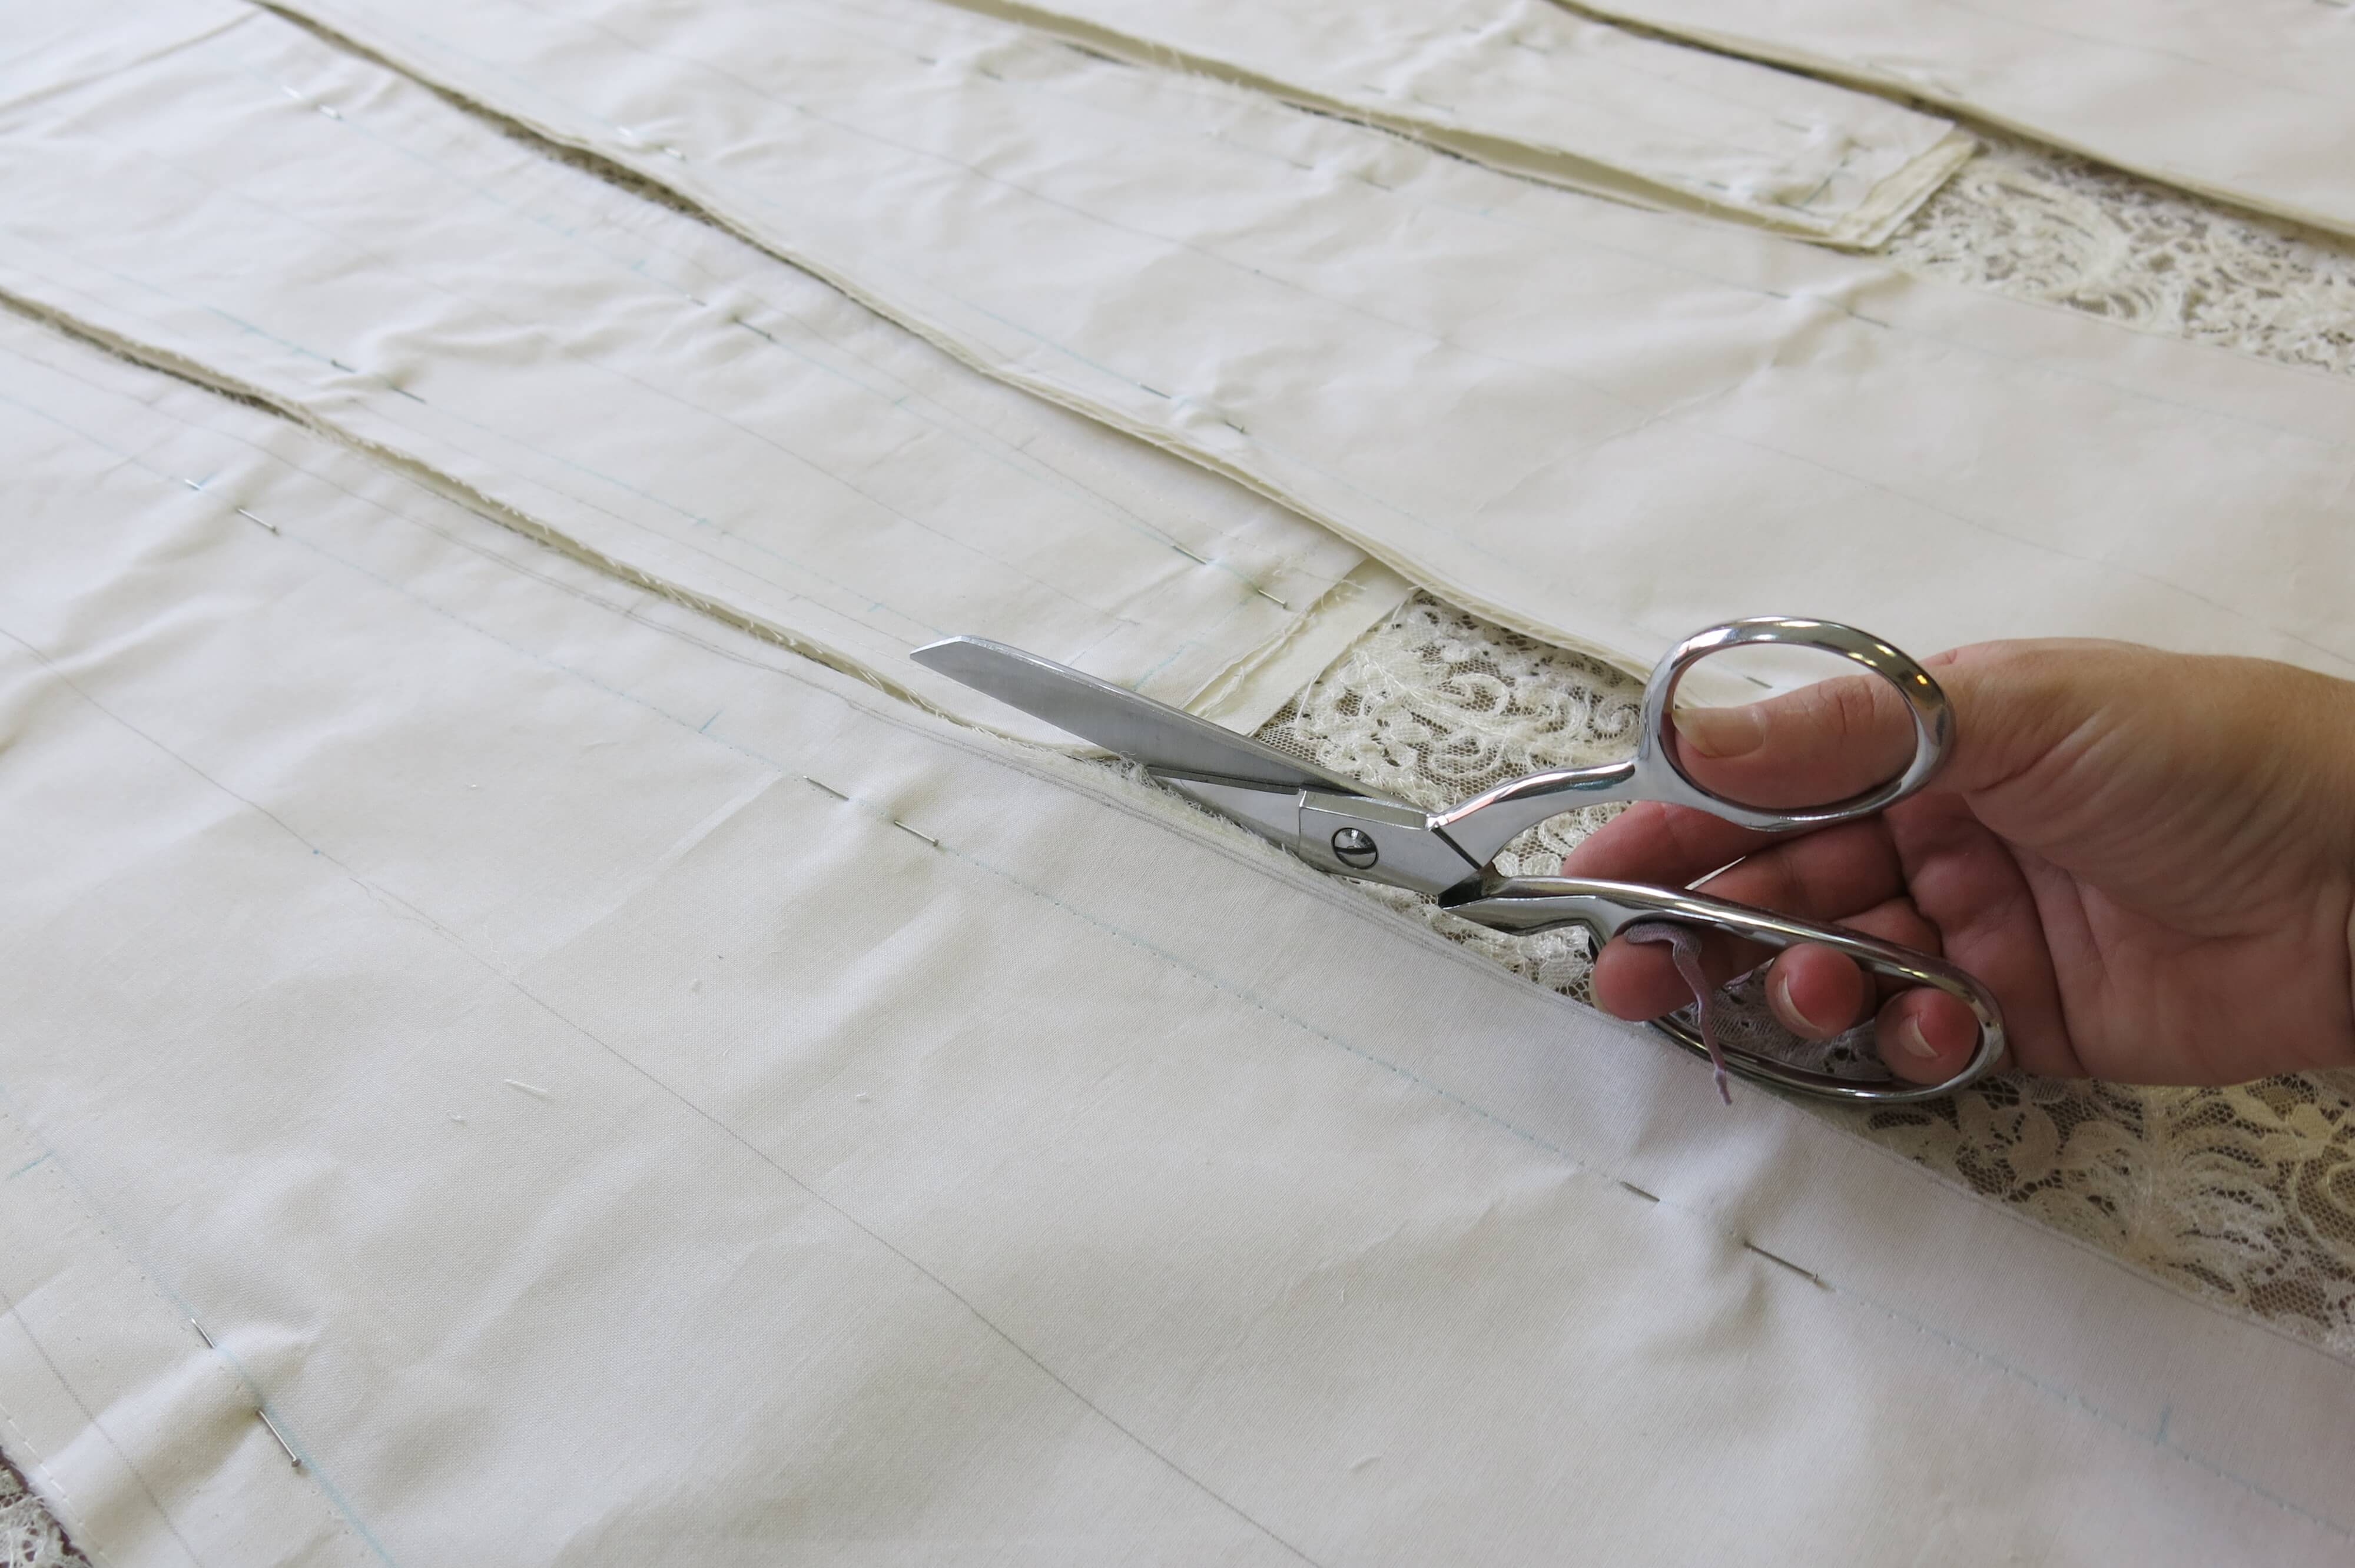
First panel cut…
…and moved off the cutting table. So pretty…
Since Charles was working with me, I had a blog photographer! I mainly work alone, so I almost always take all the process photos. Enjoy these rare shots of me at work!
Two hands in one shot! (When you see a blog photo of one working hand, I’m usually holding the camera awkwardly in the other….)
And once all the panels were cut, Charles helped with more underlining stitches. I got a good one ya’ll!
Hooray! Underlining complete! Isn’t this lace stunning?
Though I didn’t share a lot of details about the benefits of underlining, I hope this post inspires you to learn more about this technique. It may be considered time-consuming, but it is not difficult and can even be a lot of fun. Especially when you share the sewing with others! When you enjoy the process, beauty shines through. Each stitch adds a little bit of love…
NEXT POST: These flat pieces will start to take shape!


9 Responses
My favourite post co’s your husband is basting away like a pro!
:)
Love these photos! That lace looks stunning
Thanks for following along!
Yes, you did get a good one! So great to see photos of both of you in the studio, along with your helper!
I love working alone, but it is a real treat to work with others (especially when they pick up the camera too!)
Just a question on underlining a skirt. I am making my wedding dress that has a fitted yoke with full circle skirt panels. Should I underline the skirt panels? I have enough crepe de chine to have both a top layer and underlining. I have found a few posts that say it’s a bad idea.
Not sure! Could work beautifully, or could be a challenge.
Since crepe de chine can be really stretchy on the bias, and circle skirts are almost ALL bias, it might be really difficult to get the two layers to “act as one”- which is the goal of underlining.
I think it really depends on what your fabric wants to do. Play around and experiment with it! Otherwise, in general, I think I’d suggest using the extra crepe de chine to line it, instead of underline it. That way the two layers can be leveled separately, and will always hang separately. At the hem. you can connect the two layers with “swing tacks” or thread chains, so there’s always some “play” between the layers.
Though far from a circle skirt, I created this bias cut silk charmuese dress with no underlining, but lined in another layer of silk charmuese. https://brooksann.com/katie2/
Hope this helps! Congratulations on your engagement. Enjoy making your dress!
Thank you so much that is very helpful! I certainly will enjoy the making, I absolutely love sewing with silk! Even the challenging slippery ones