

After our final basted fitting, it was finally time to FINISH Deborah’s custom wedding dress! Though the majority of the work was complete, finishing work means cleaning up and tending to all the little details that make a dress beautiful inside and out. I love finishing work. After months of prep, it’s both thrilling and bittersweet to finally have all my questions answered and a clear path to crossing everything off my to-do list.
Let’s get to it!
Buttoning Things Up
As you may remember from my very first post about Deborah, we are both Team Real Closures for Real People. In her first email to me, Deborah said “I was particularly drawn to you when I read that you want buttons to really button and not be decorative covers for a hidden zipper. ME TOO (it really drives me a little too crazy)!”
Not only do I dislike including anything ‘fake’ in my wedding dresses, the buttons-down-the-back wedding dress has a tradition that goes along with it. This style means that the bride will be temporarily held captive by the buttoner, as she cannot physically get in and out of the dress by herself. The time-consuming nature of buttoning each button is supposed to last long enough for her mom (or auntie or other loved one) to give her thorough marriage advice right before walking down the aisle!
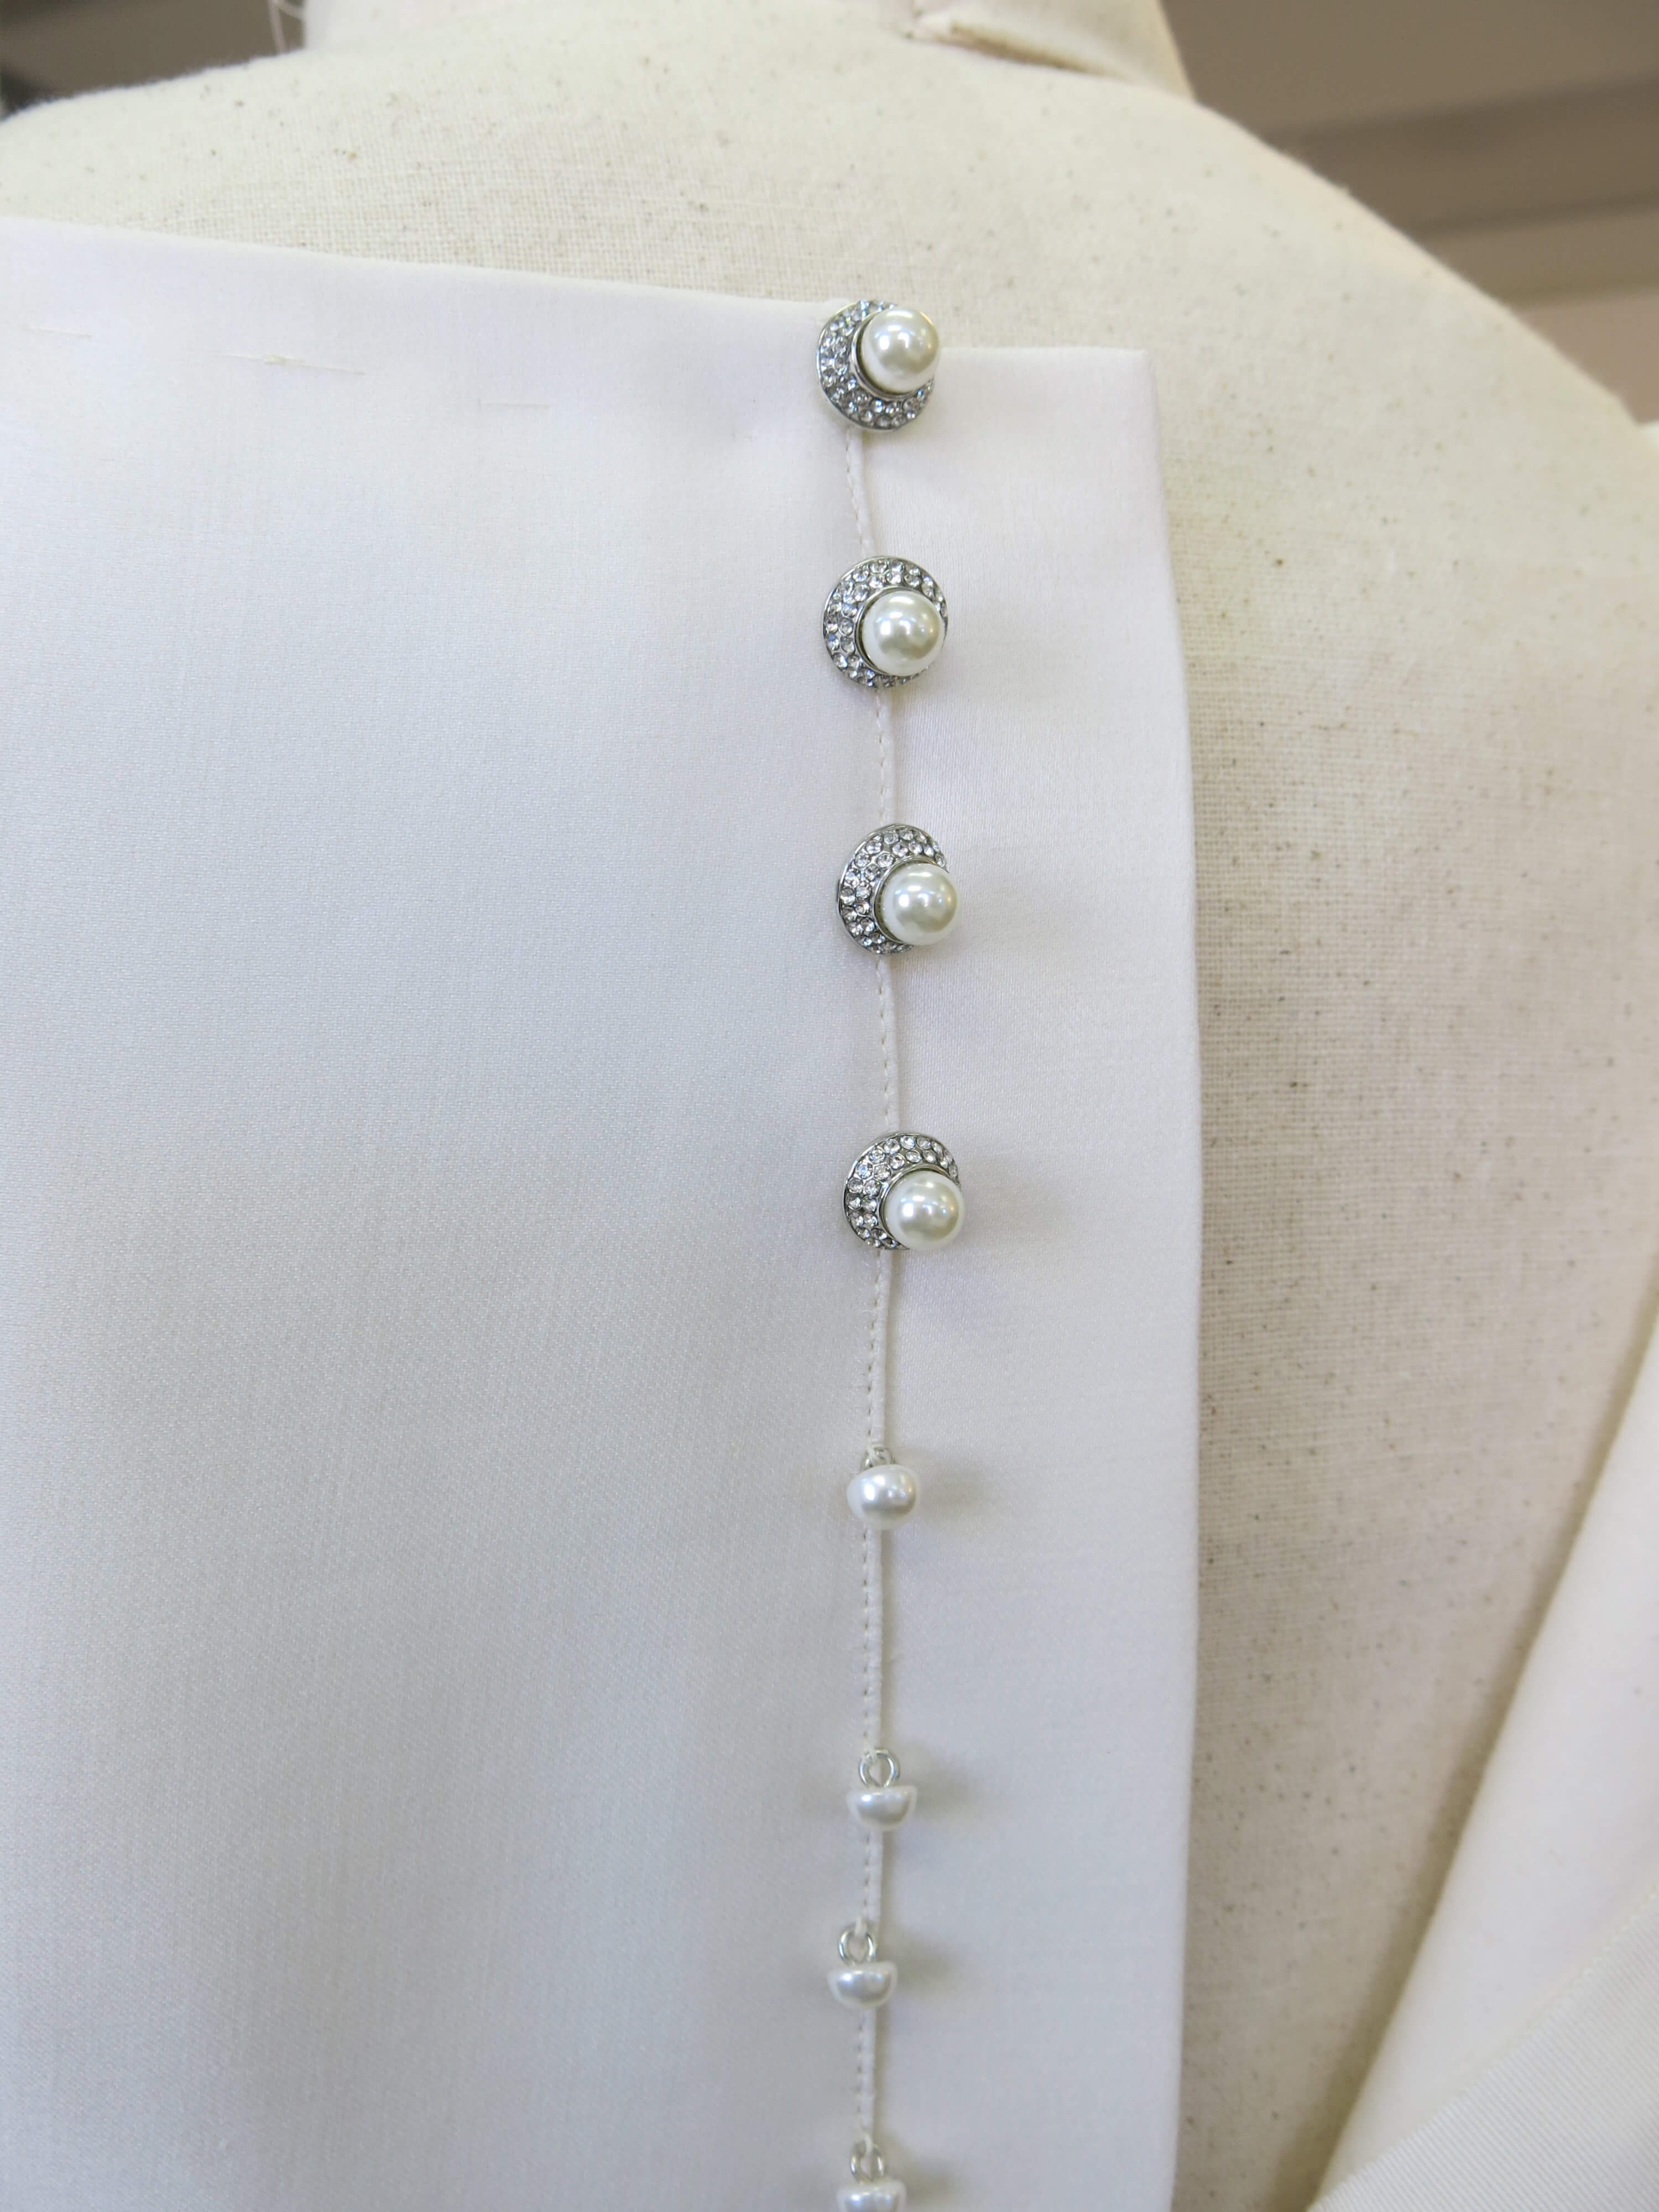
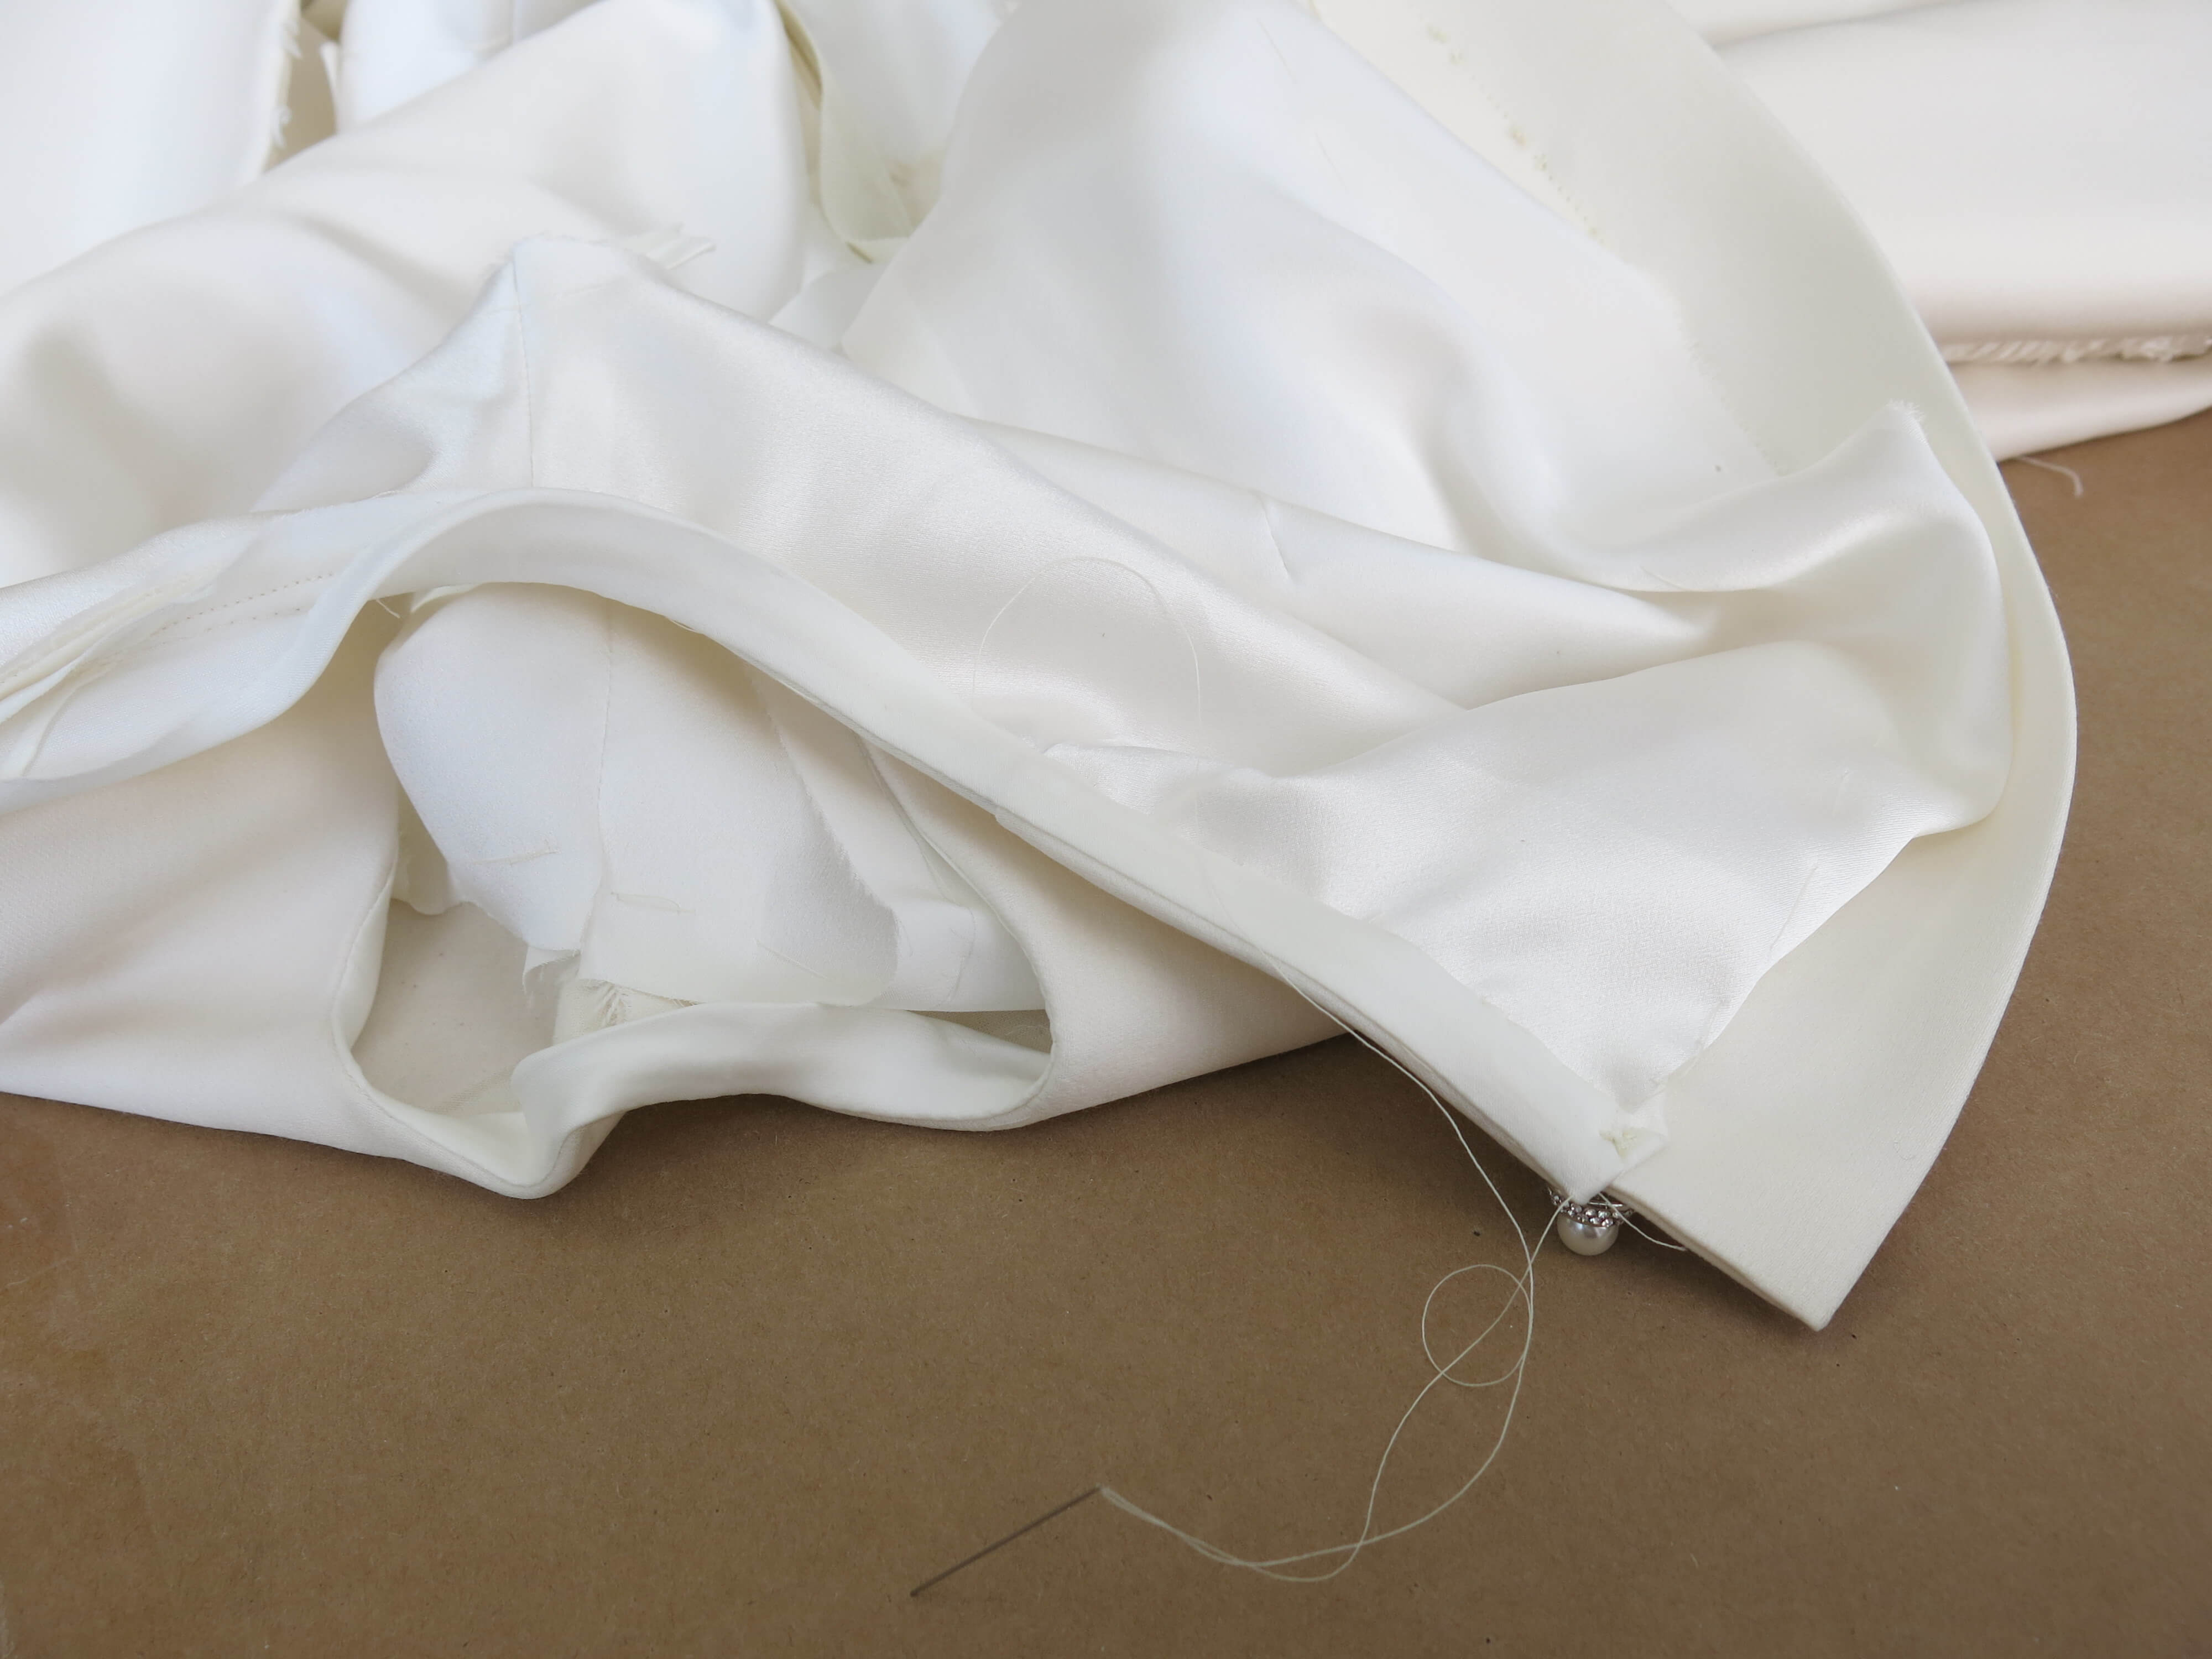
Earlier in our process, I chose the buttons you see below for Deborah’s dress. So fun! So sparkly! BUT I forgot to consider exactly how these beautiful shiny objects would function. Their bumpy edges made it unnecessarily difficult to wrap the loops around when buttoning the button. I wanted Deborah’s mom to have time to give her advice, but I also wanted them both to make it to the wedding on time!
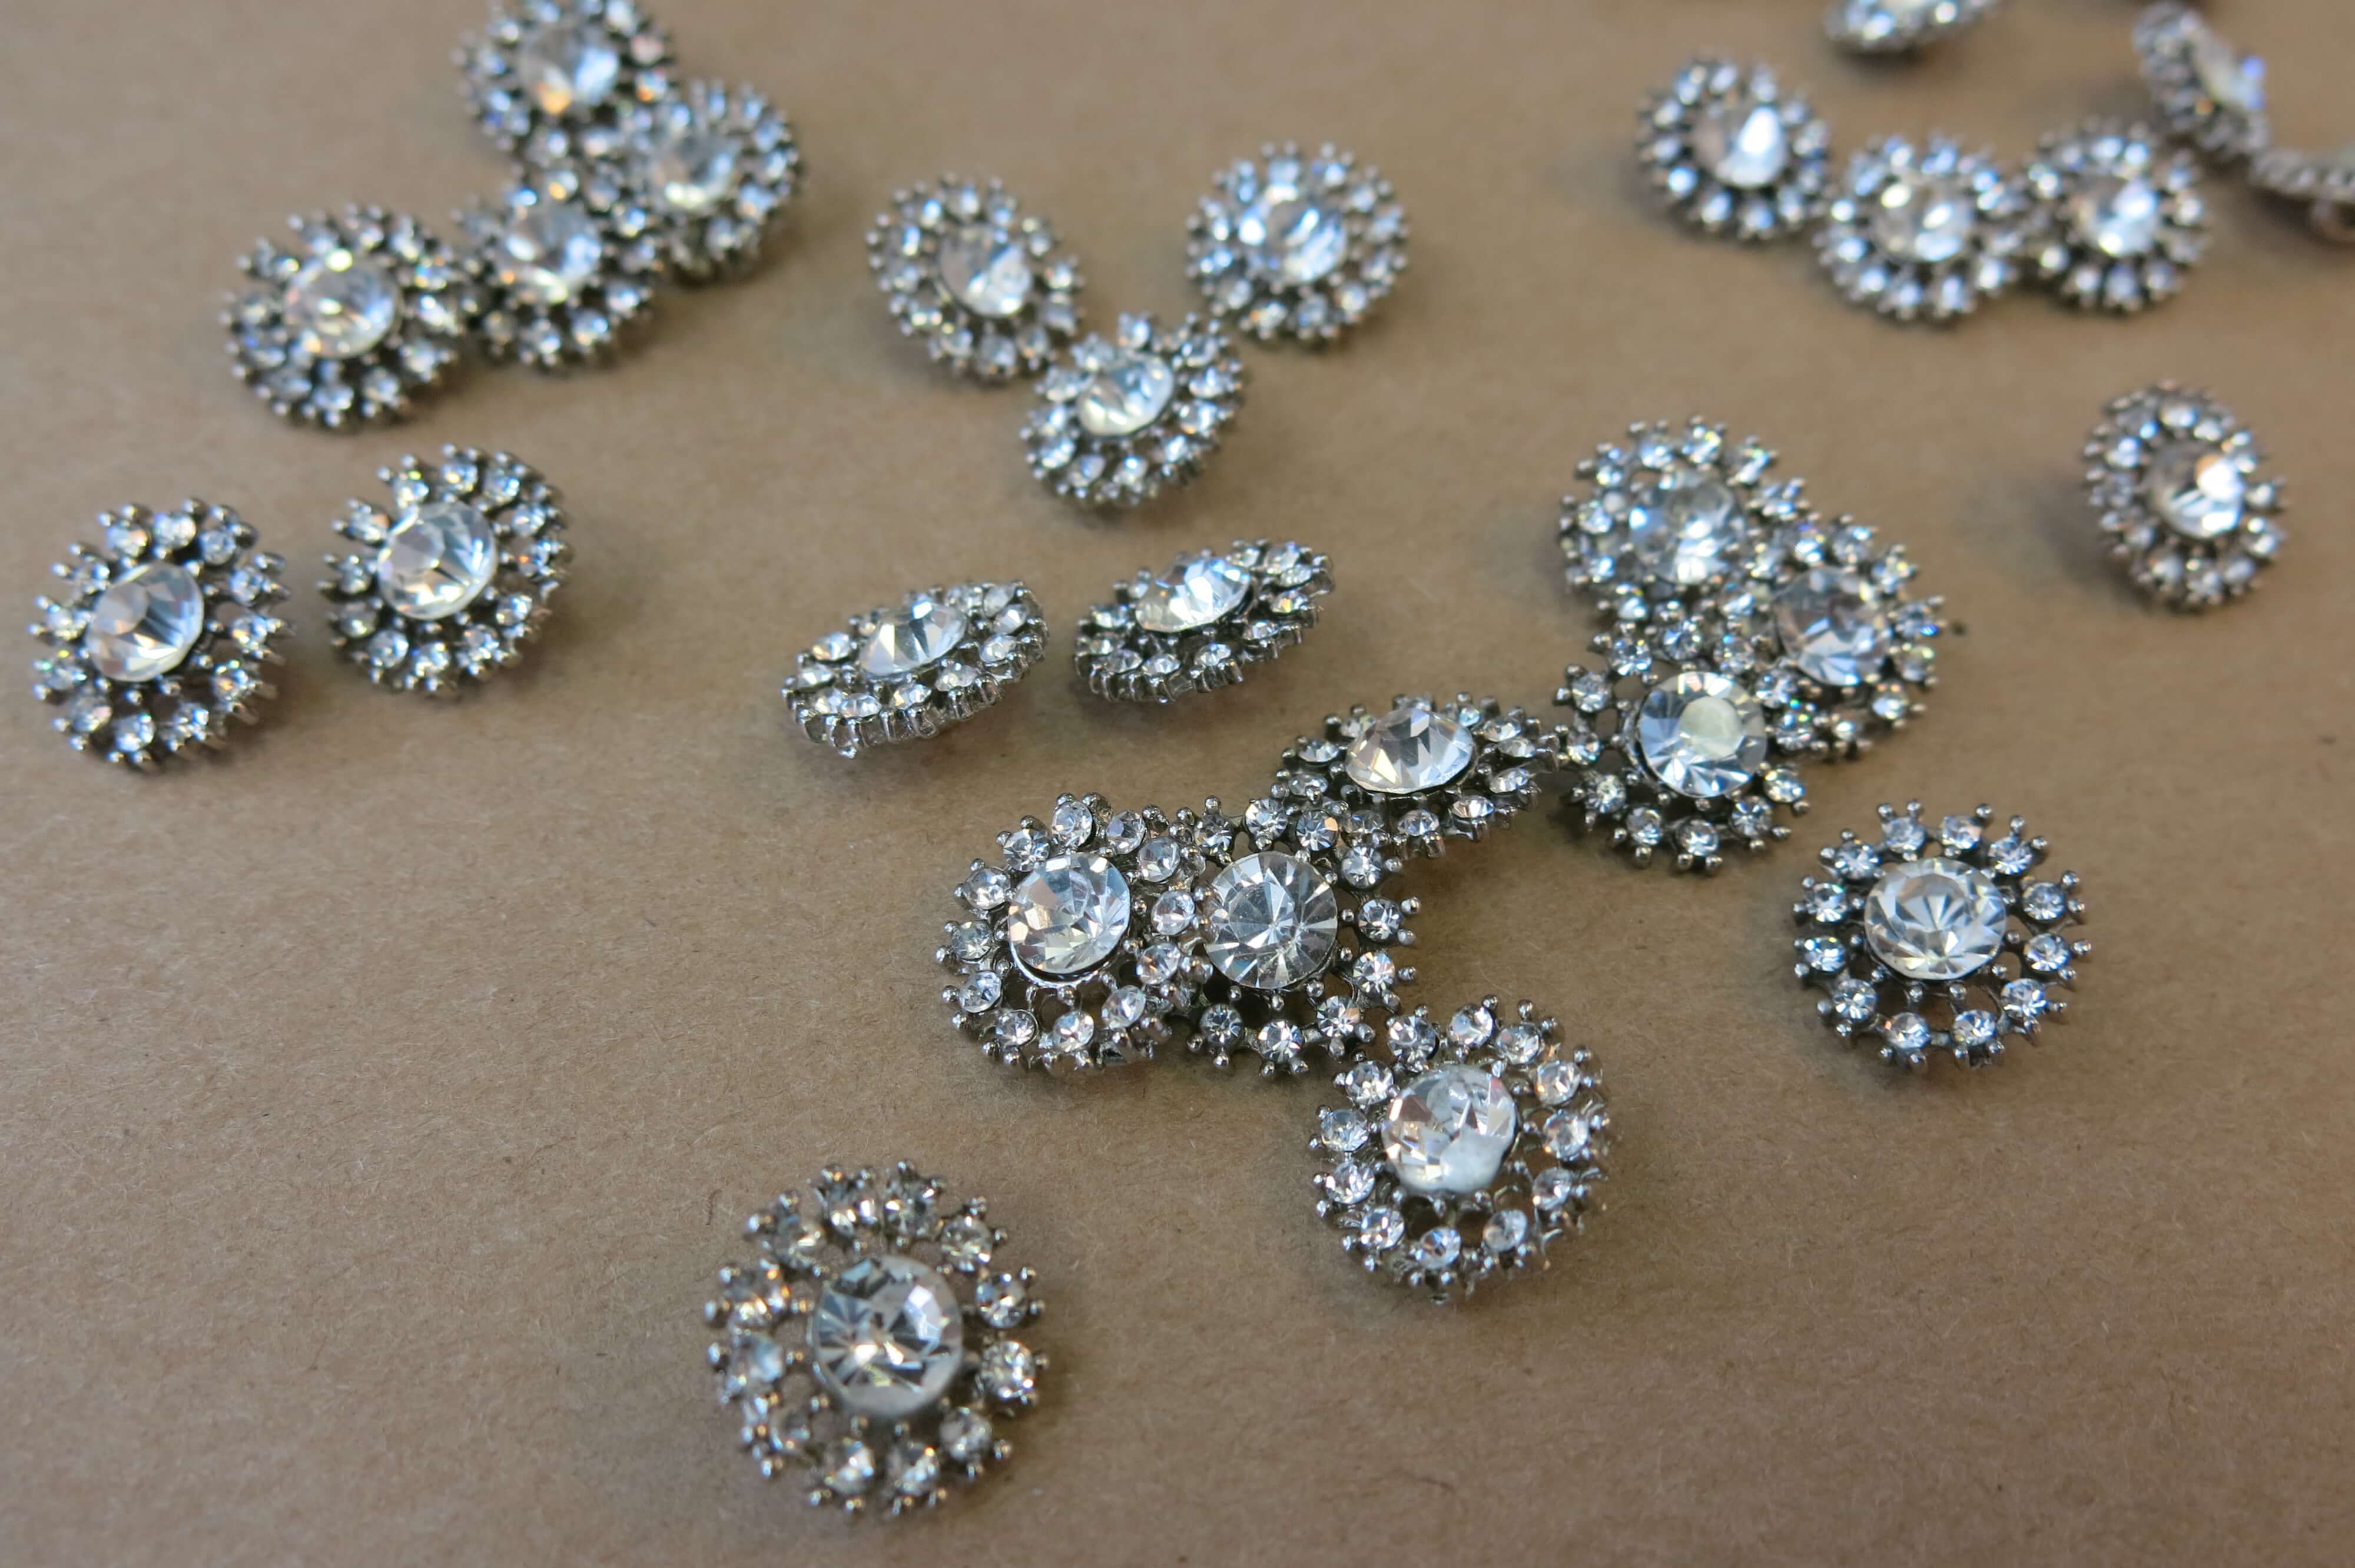
So, I ended up finding these beauties! The sparkle! The pearls! And, dare I say, even more elegant and beautiful than the originals. ‘Mistakes’ can be gifts, ya’ll! The smooth edges would allow the button loops to slide easily over each button while securely and beautifully holding Deborah’s dress closed.
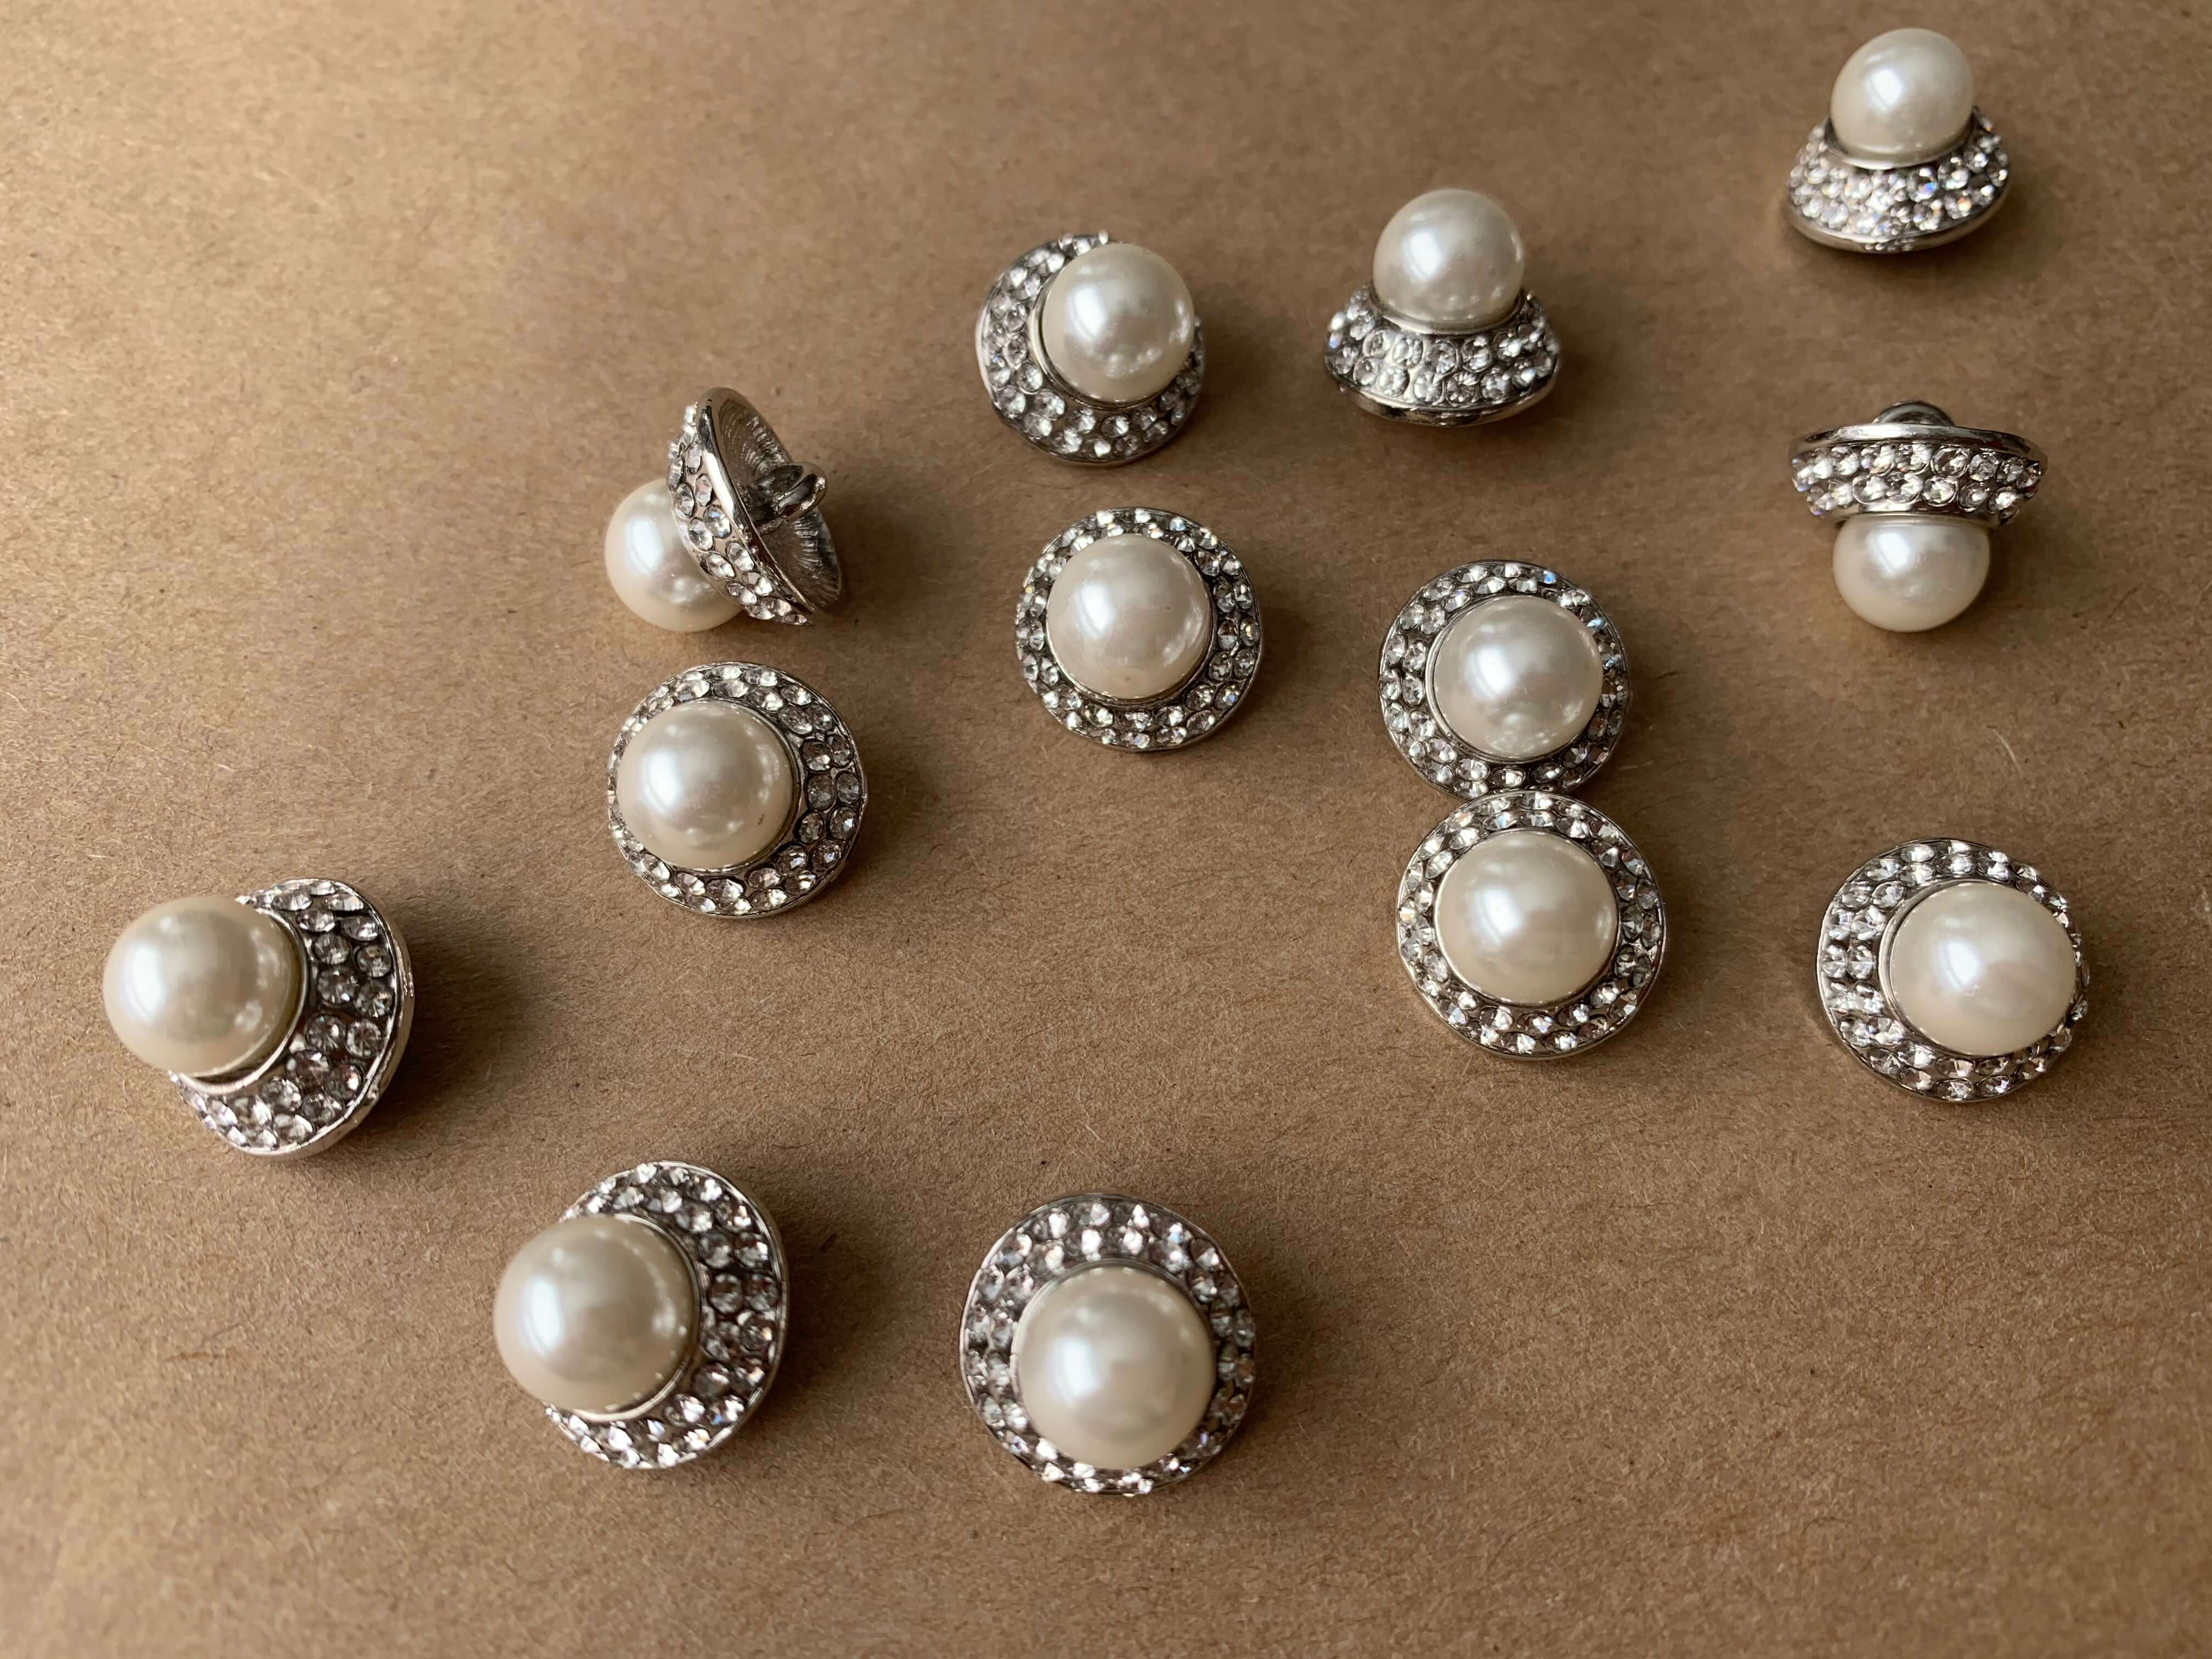
So, one by one, I replaced the tiny temporary buttons that I used for the fitting…
…with the fancy ones!
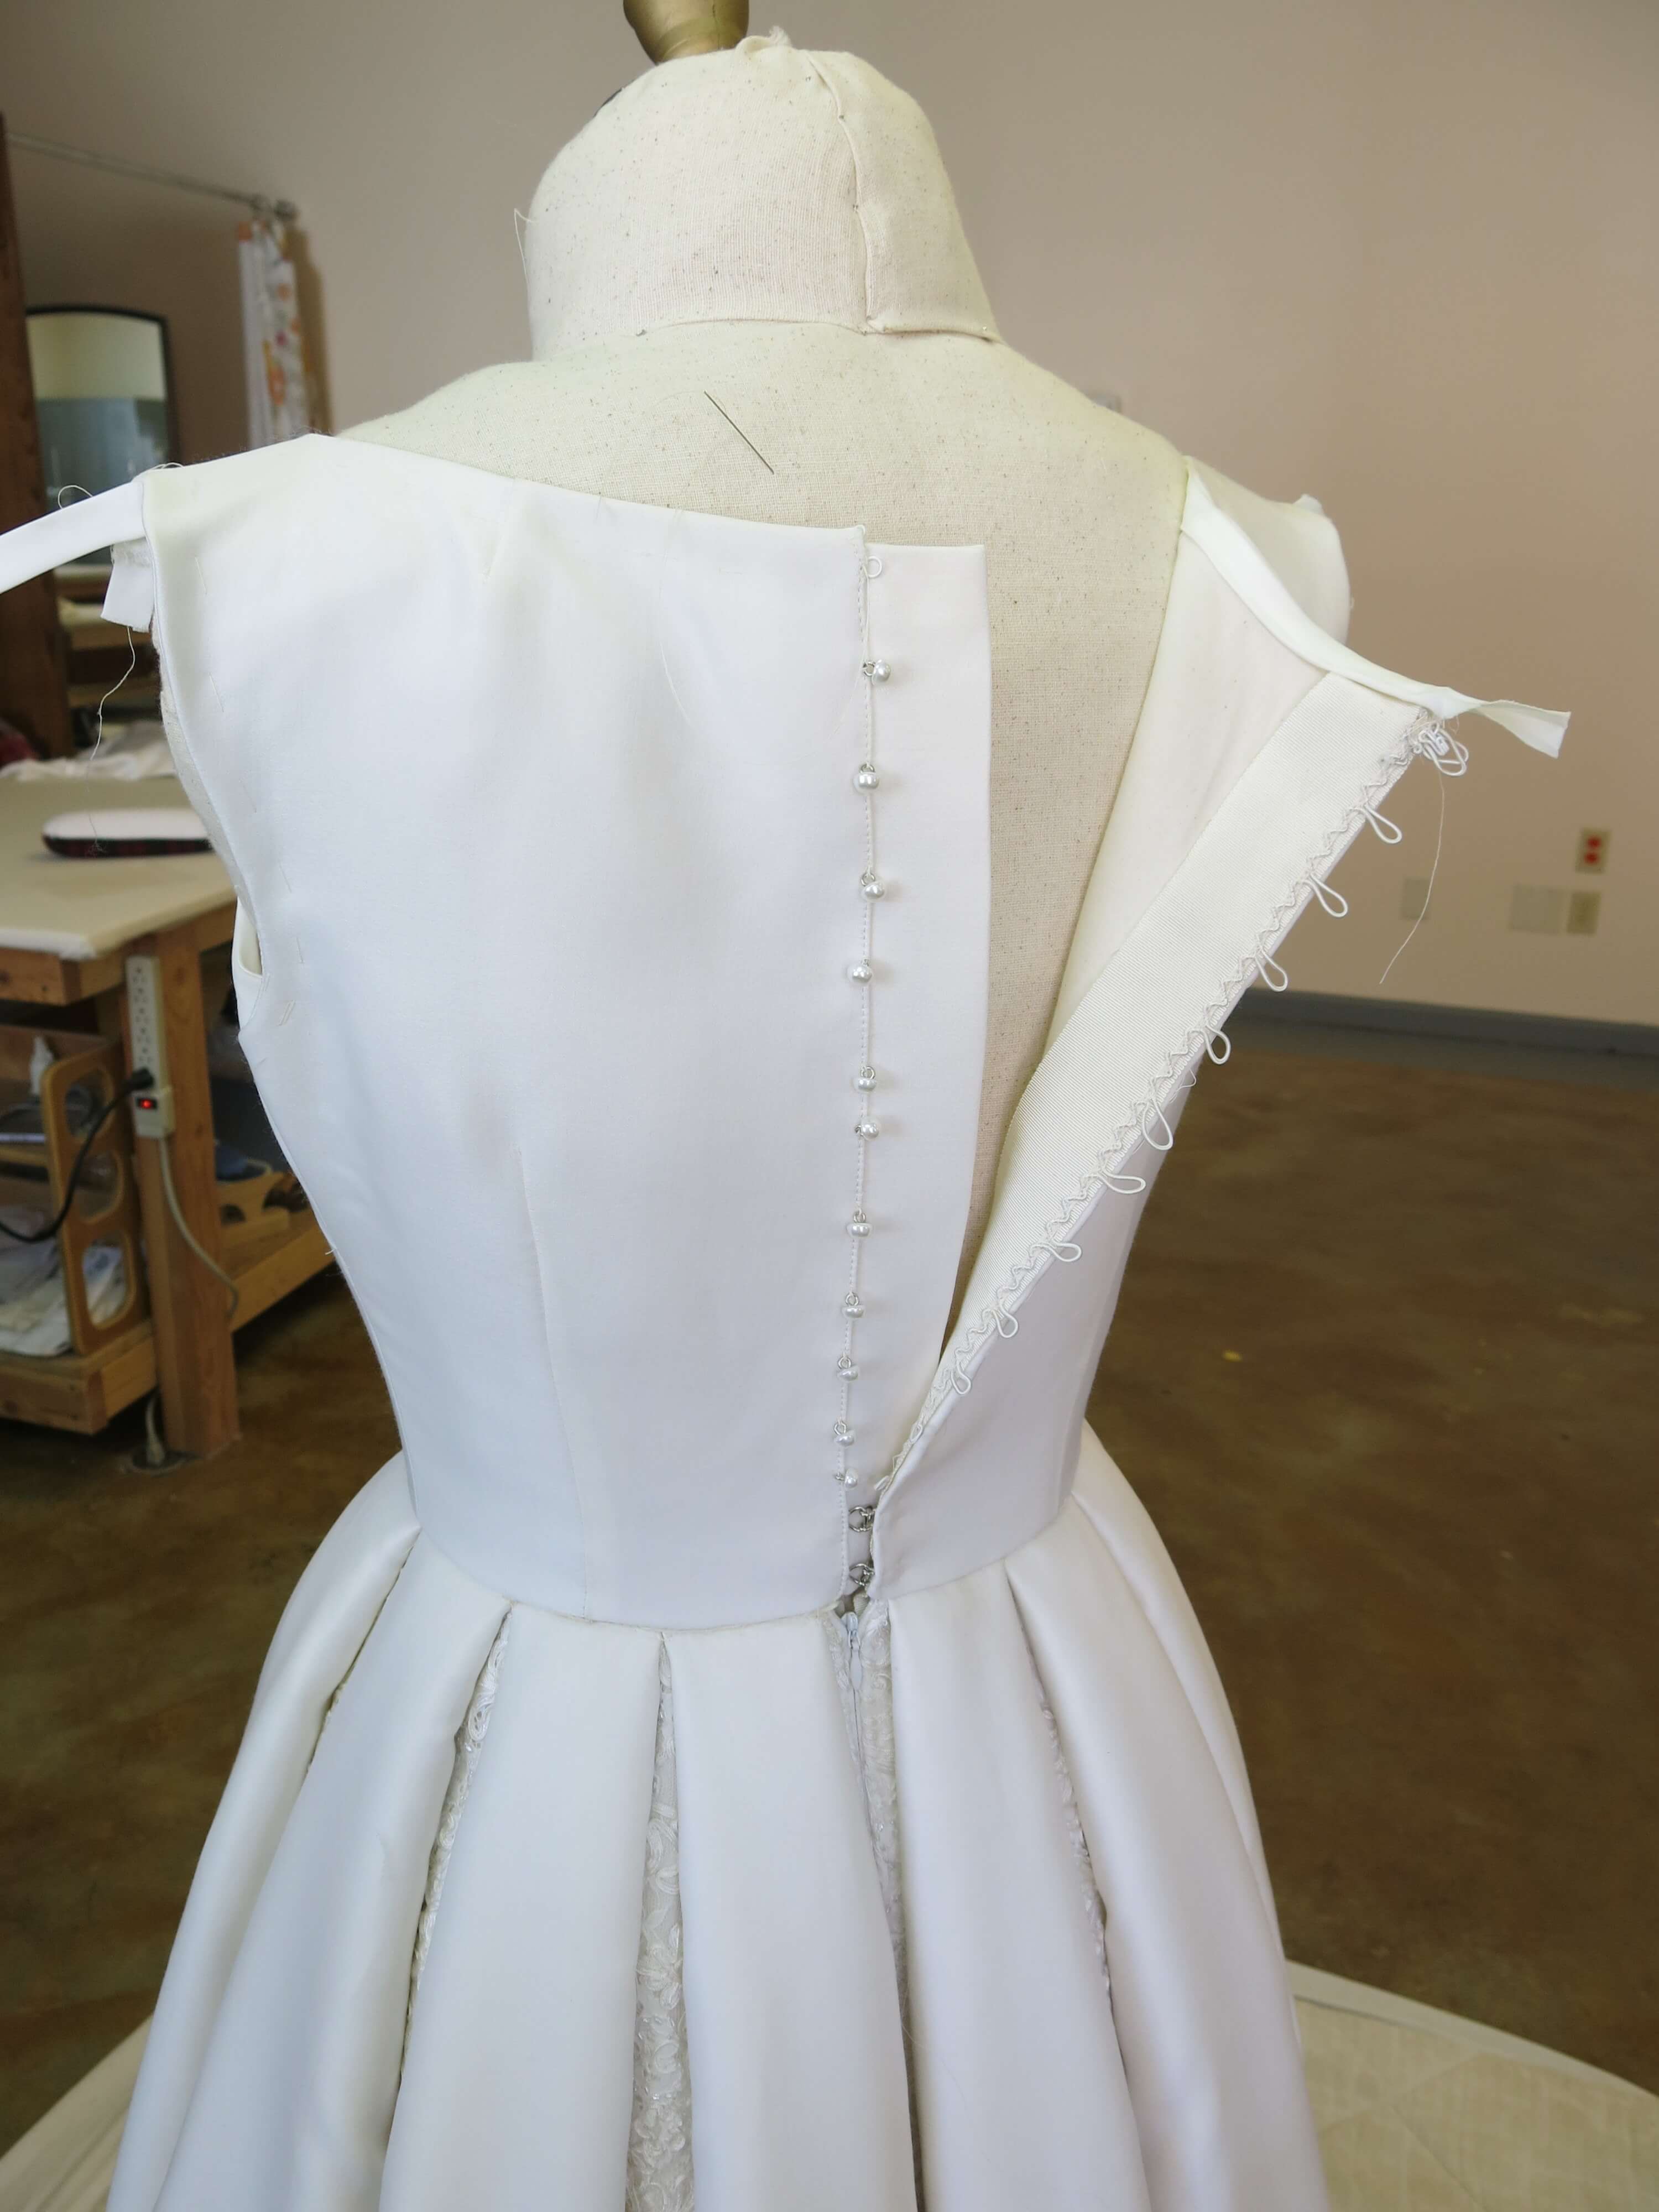
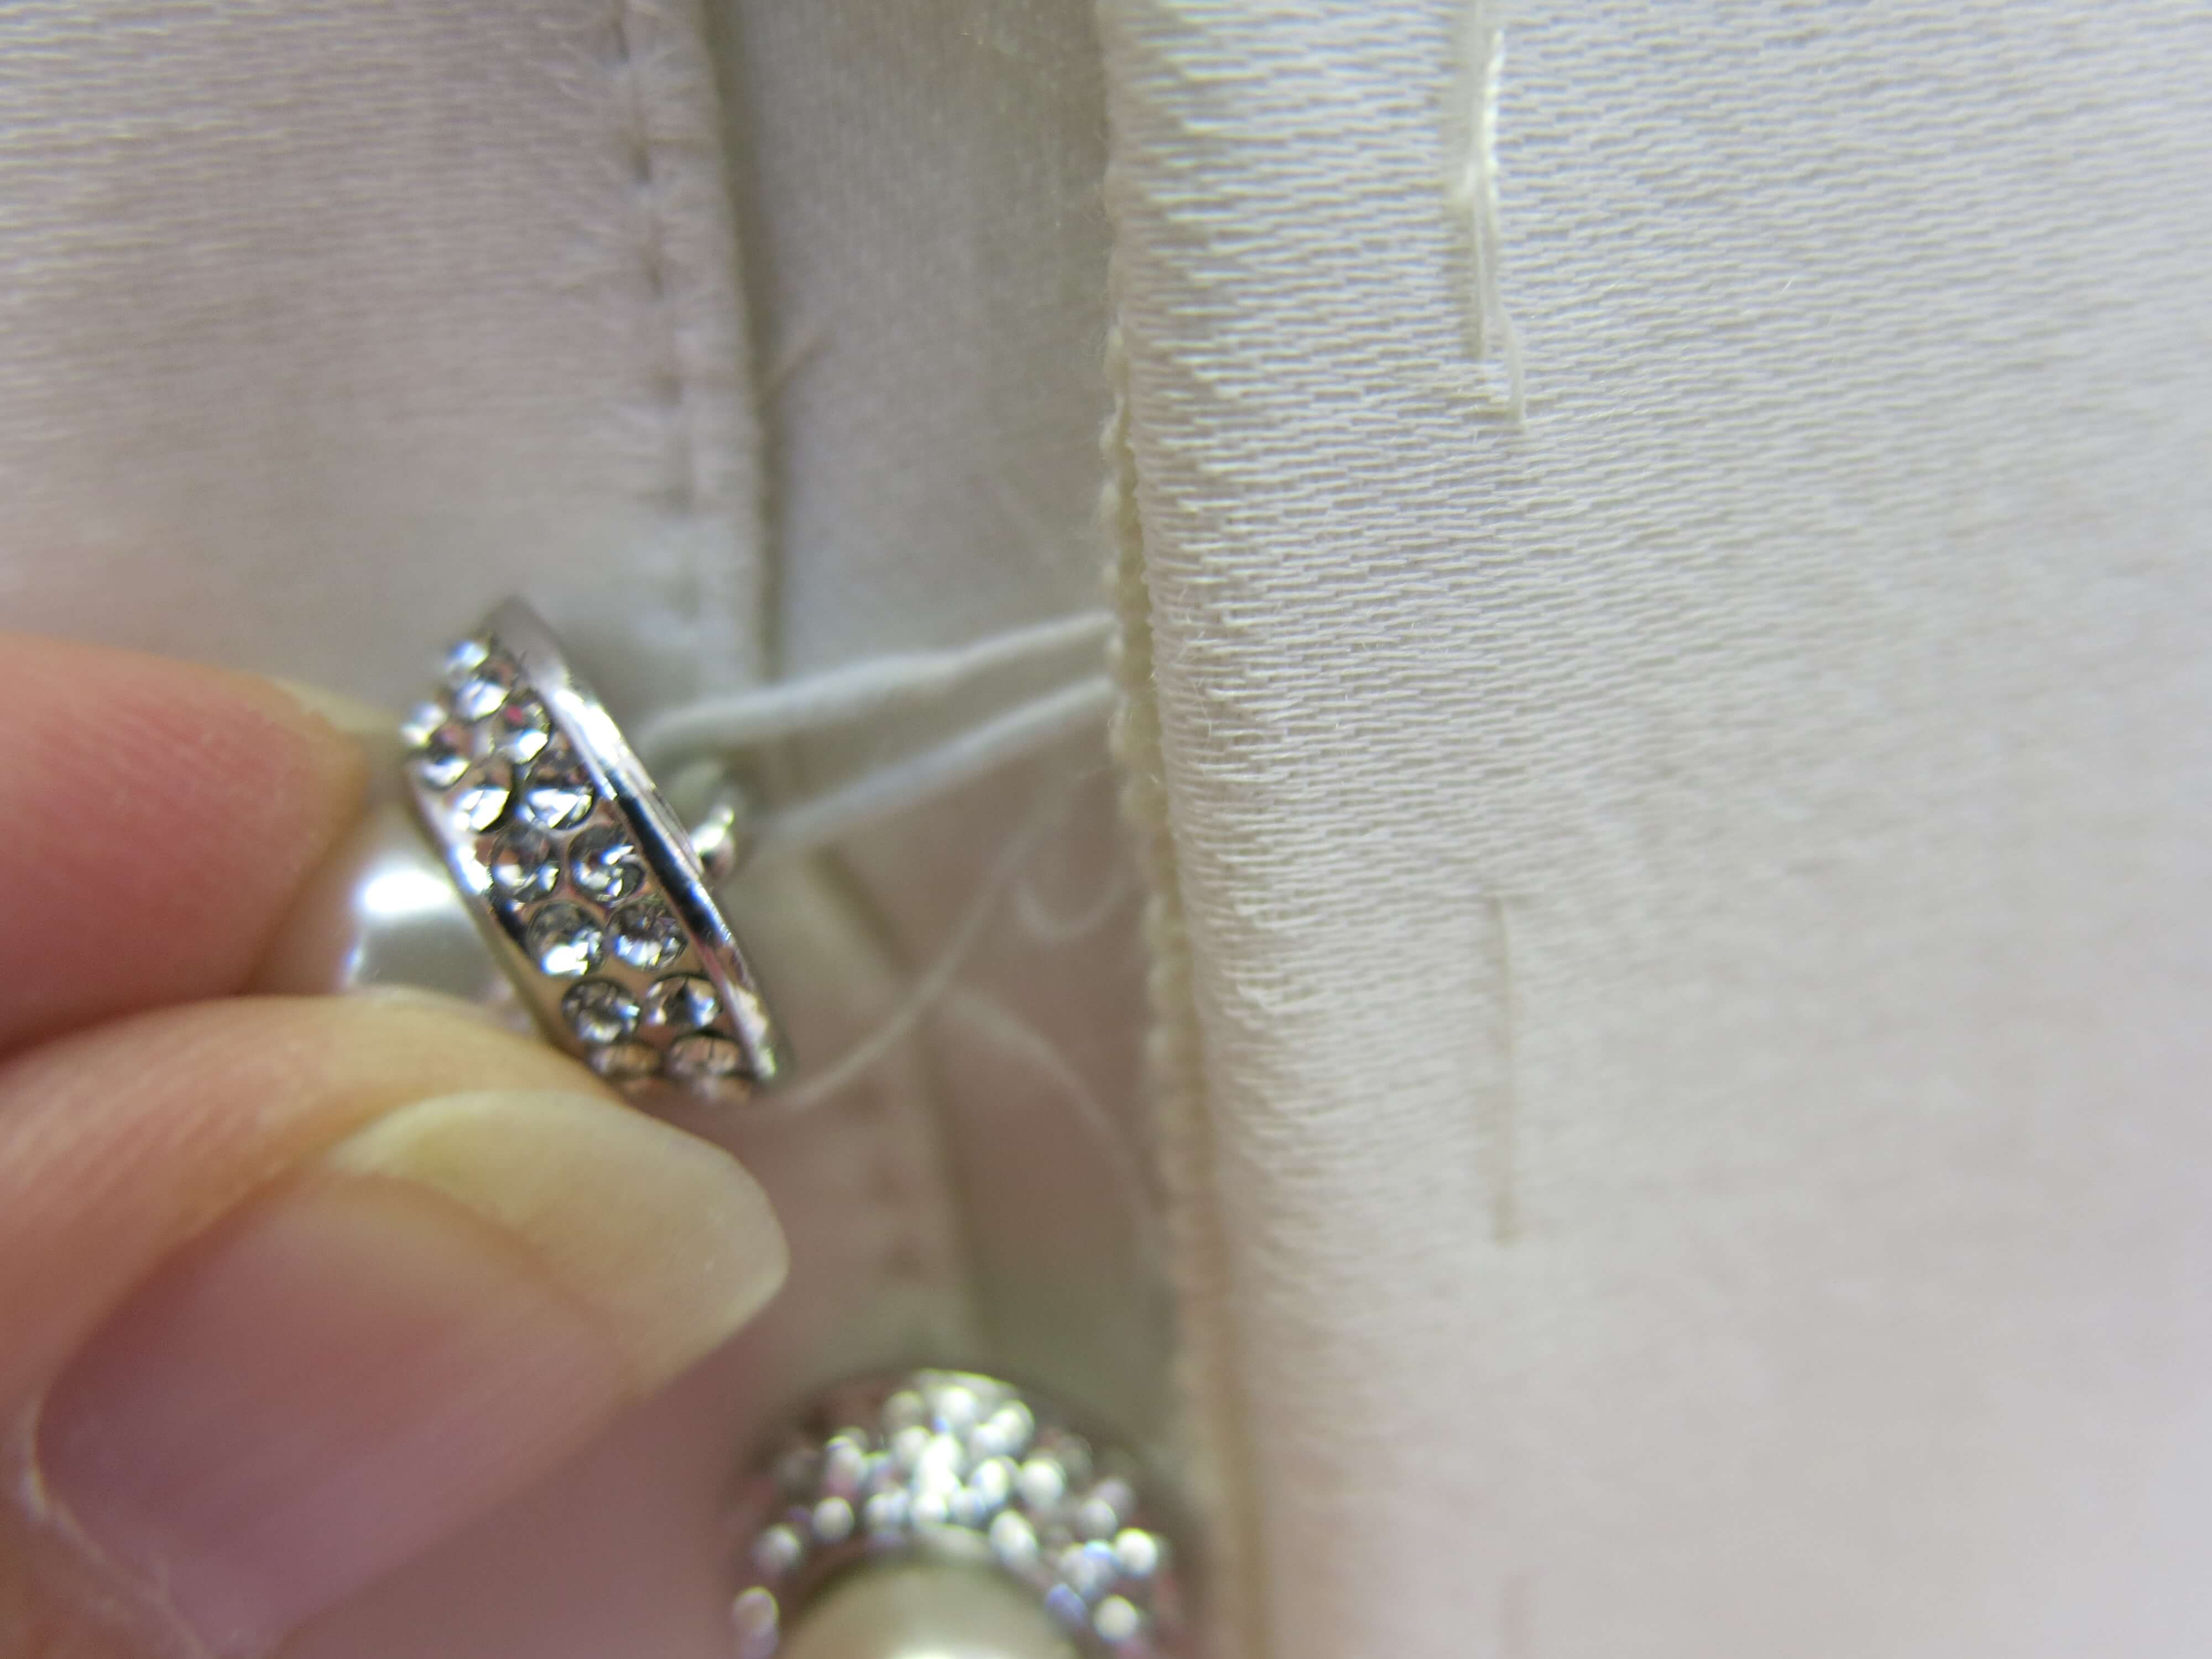
But when I went to button everything up, I noticed that a few of the loops were beginning to fail! I’ve used this exact elastic button loop tape for most of my buttons-down-the-back dresses (including my own) without prior problems. Yet, possibly due to abrasion from my original bumpy-edged-button choice, some of the elastic loops were starting to stretch out and weaken. Boo….
I’d have to put my thinking-cap back on for a solution! I decided to go ahead and work on other things to give my brain time to ponder ideas…
Lining Things Up
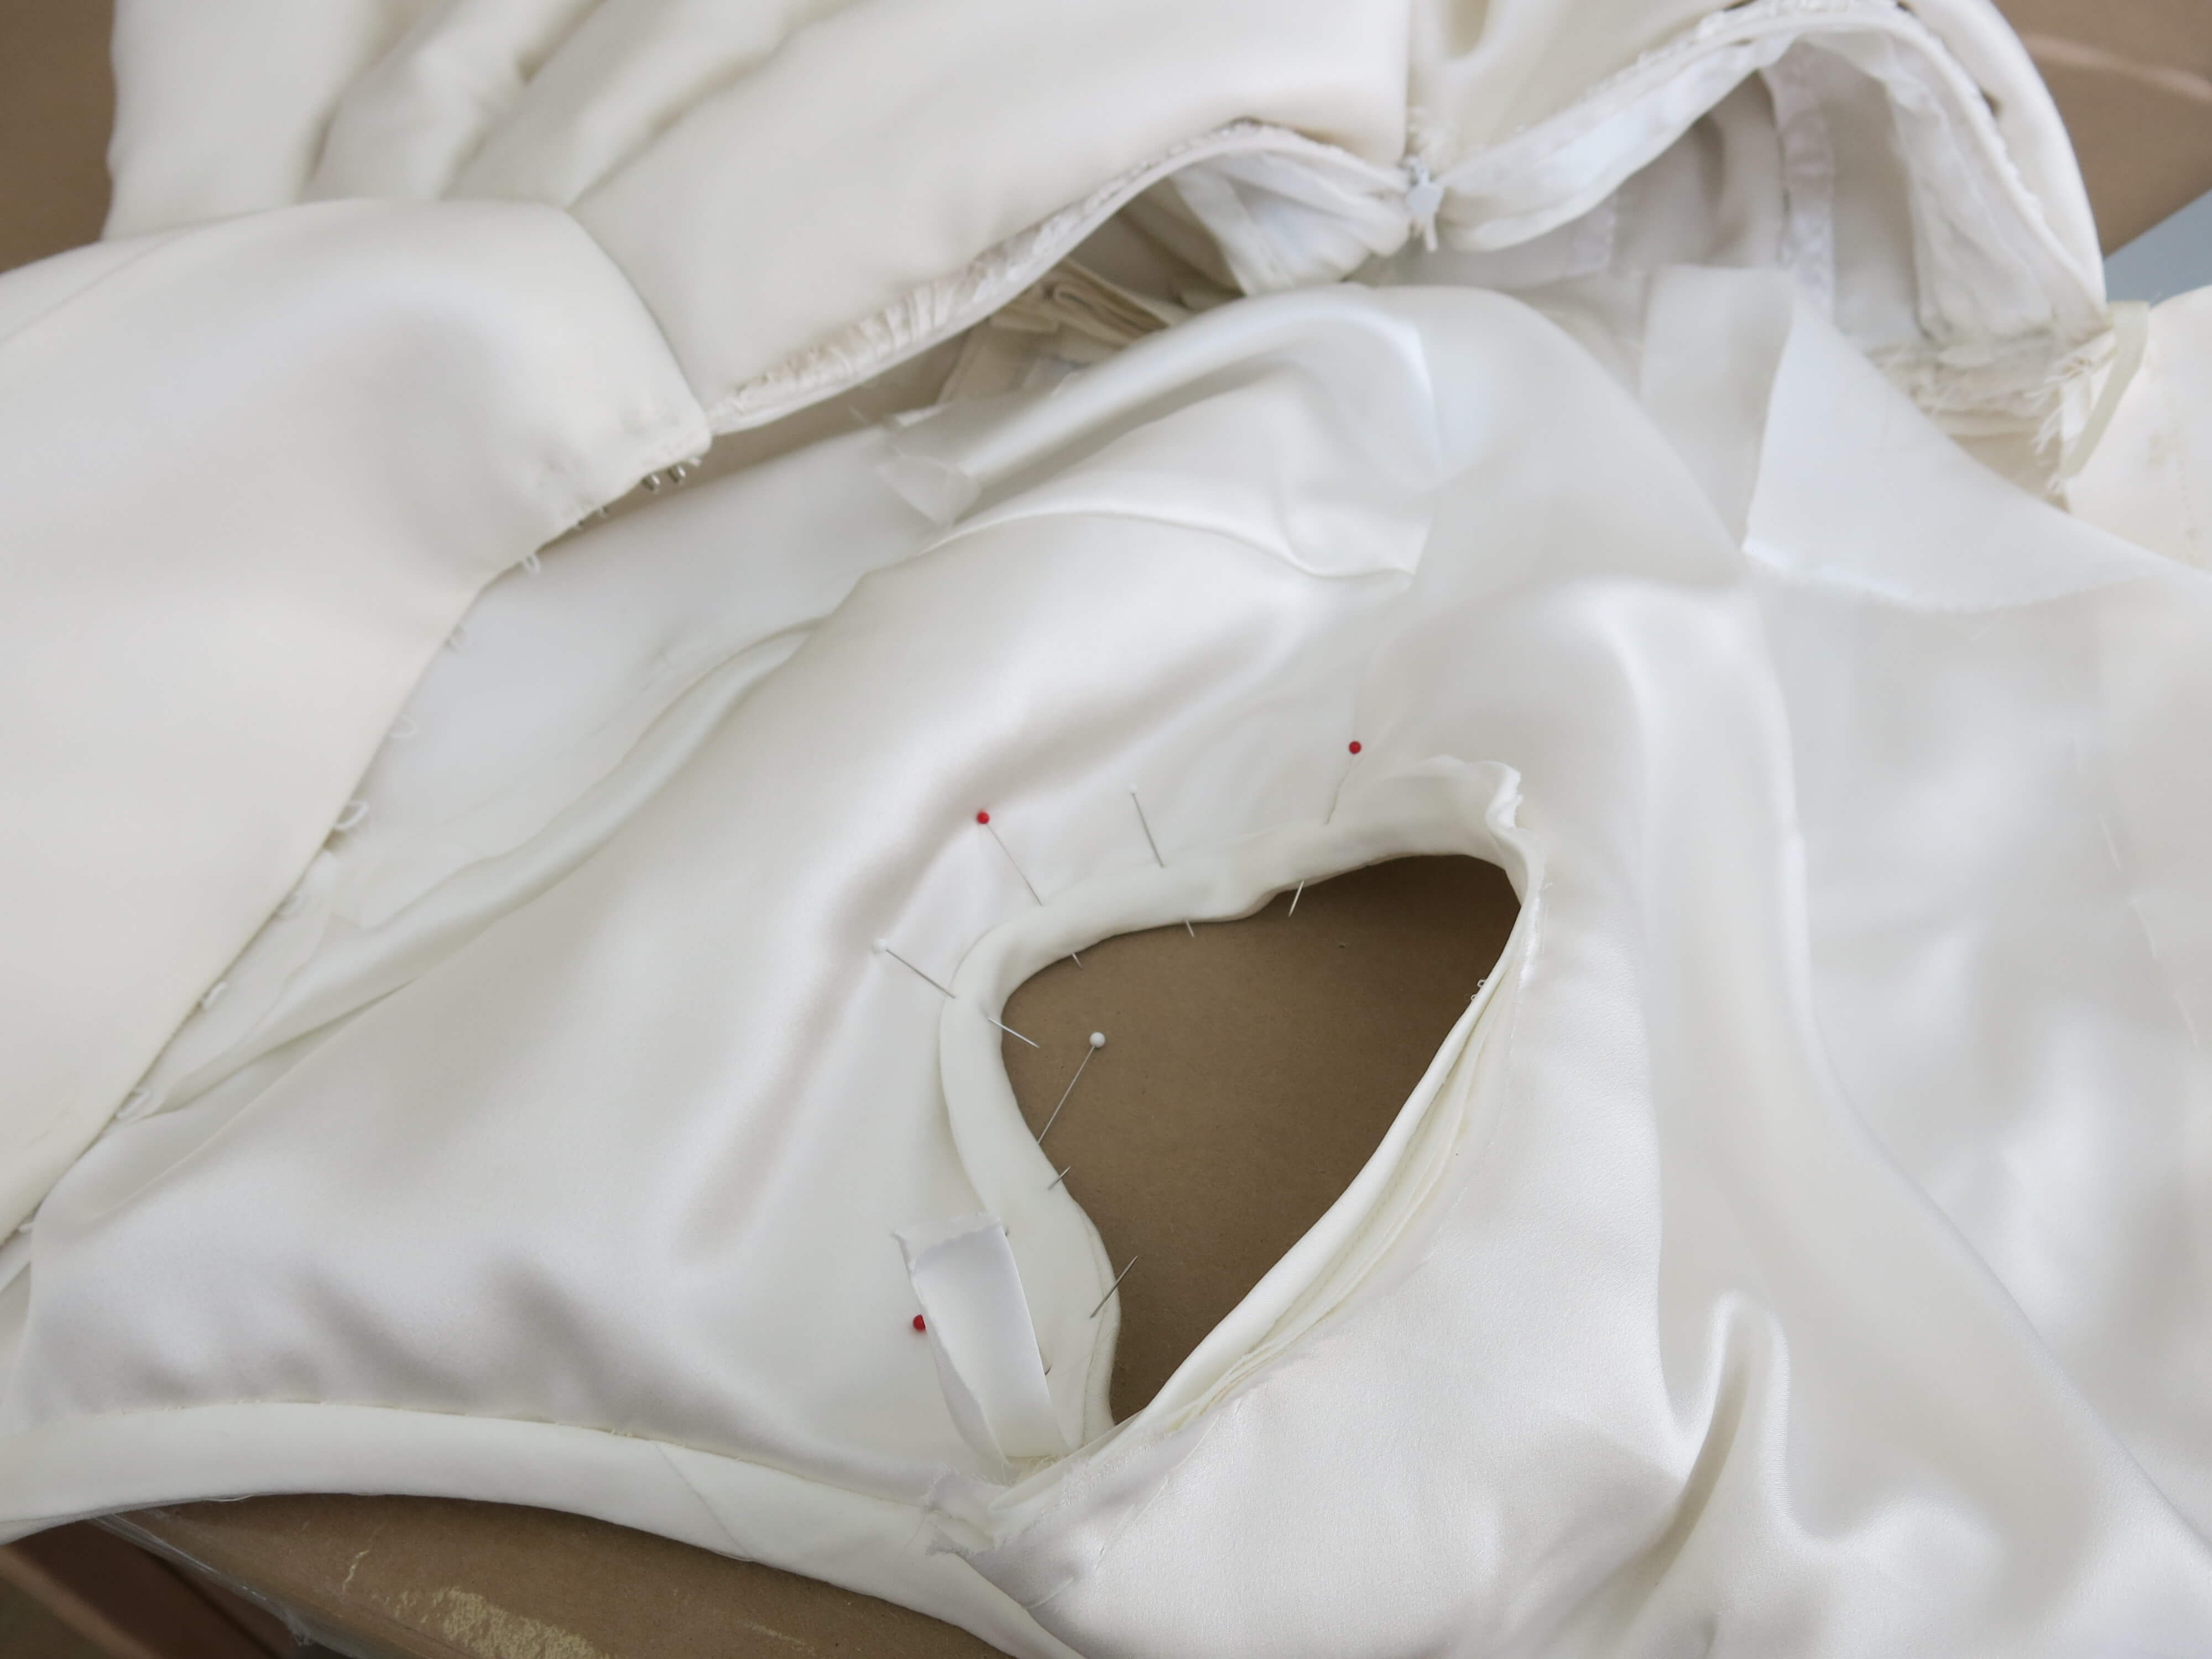
As you may remember from when I put Deborah’s skirt together, I fully lined and hemmed it before folding it into the gorgeous pleats. However, the bodice was left unlined before the final fitting in case I needed to make tweaks. Now it was finally time to cover up all these beautiful guts!
With the help of my self drafted patterns and my pinnable-topped table, I marked and cut the silk charmeuse lining.
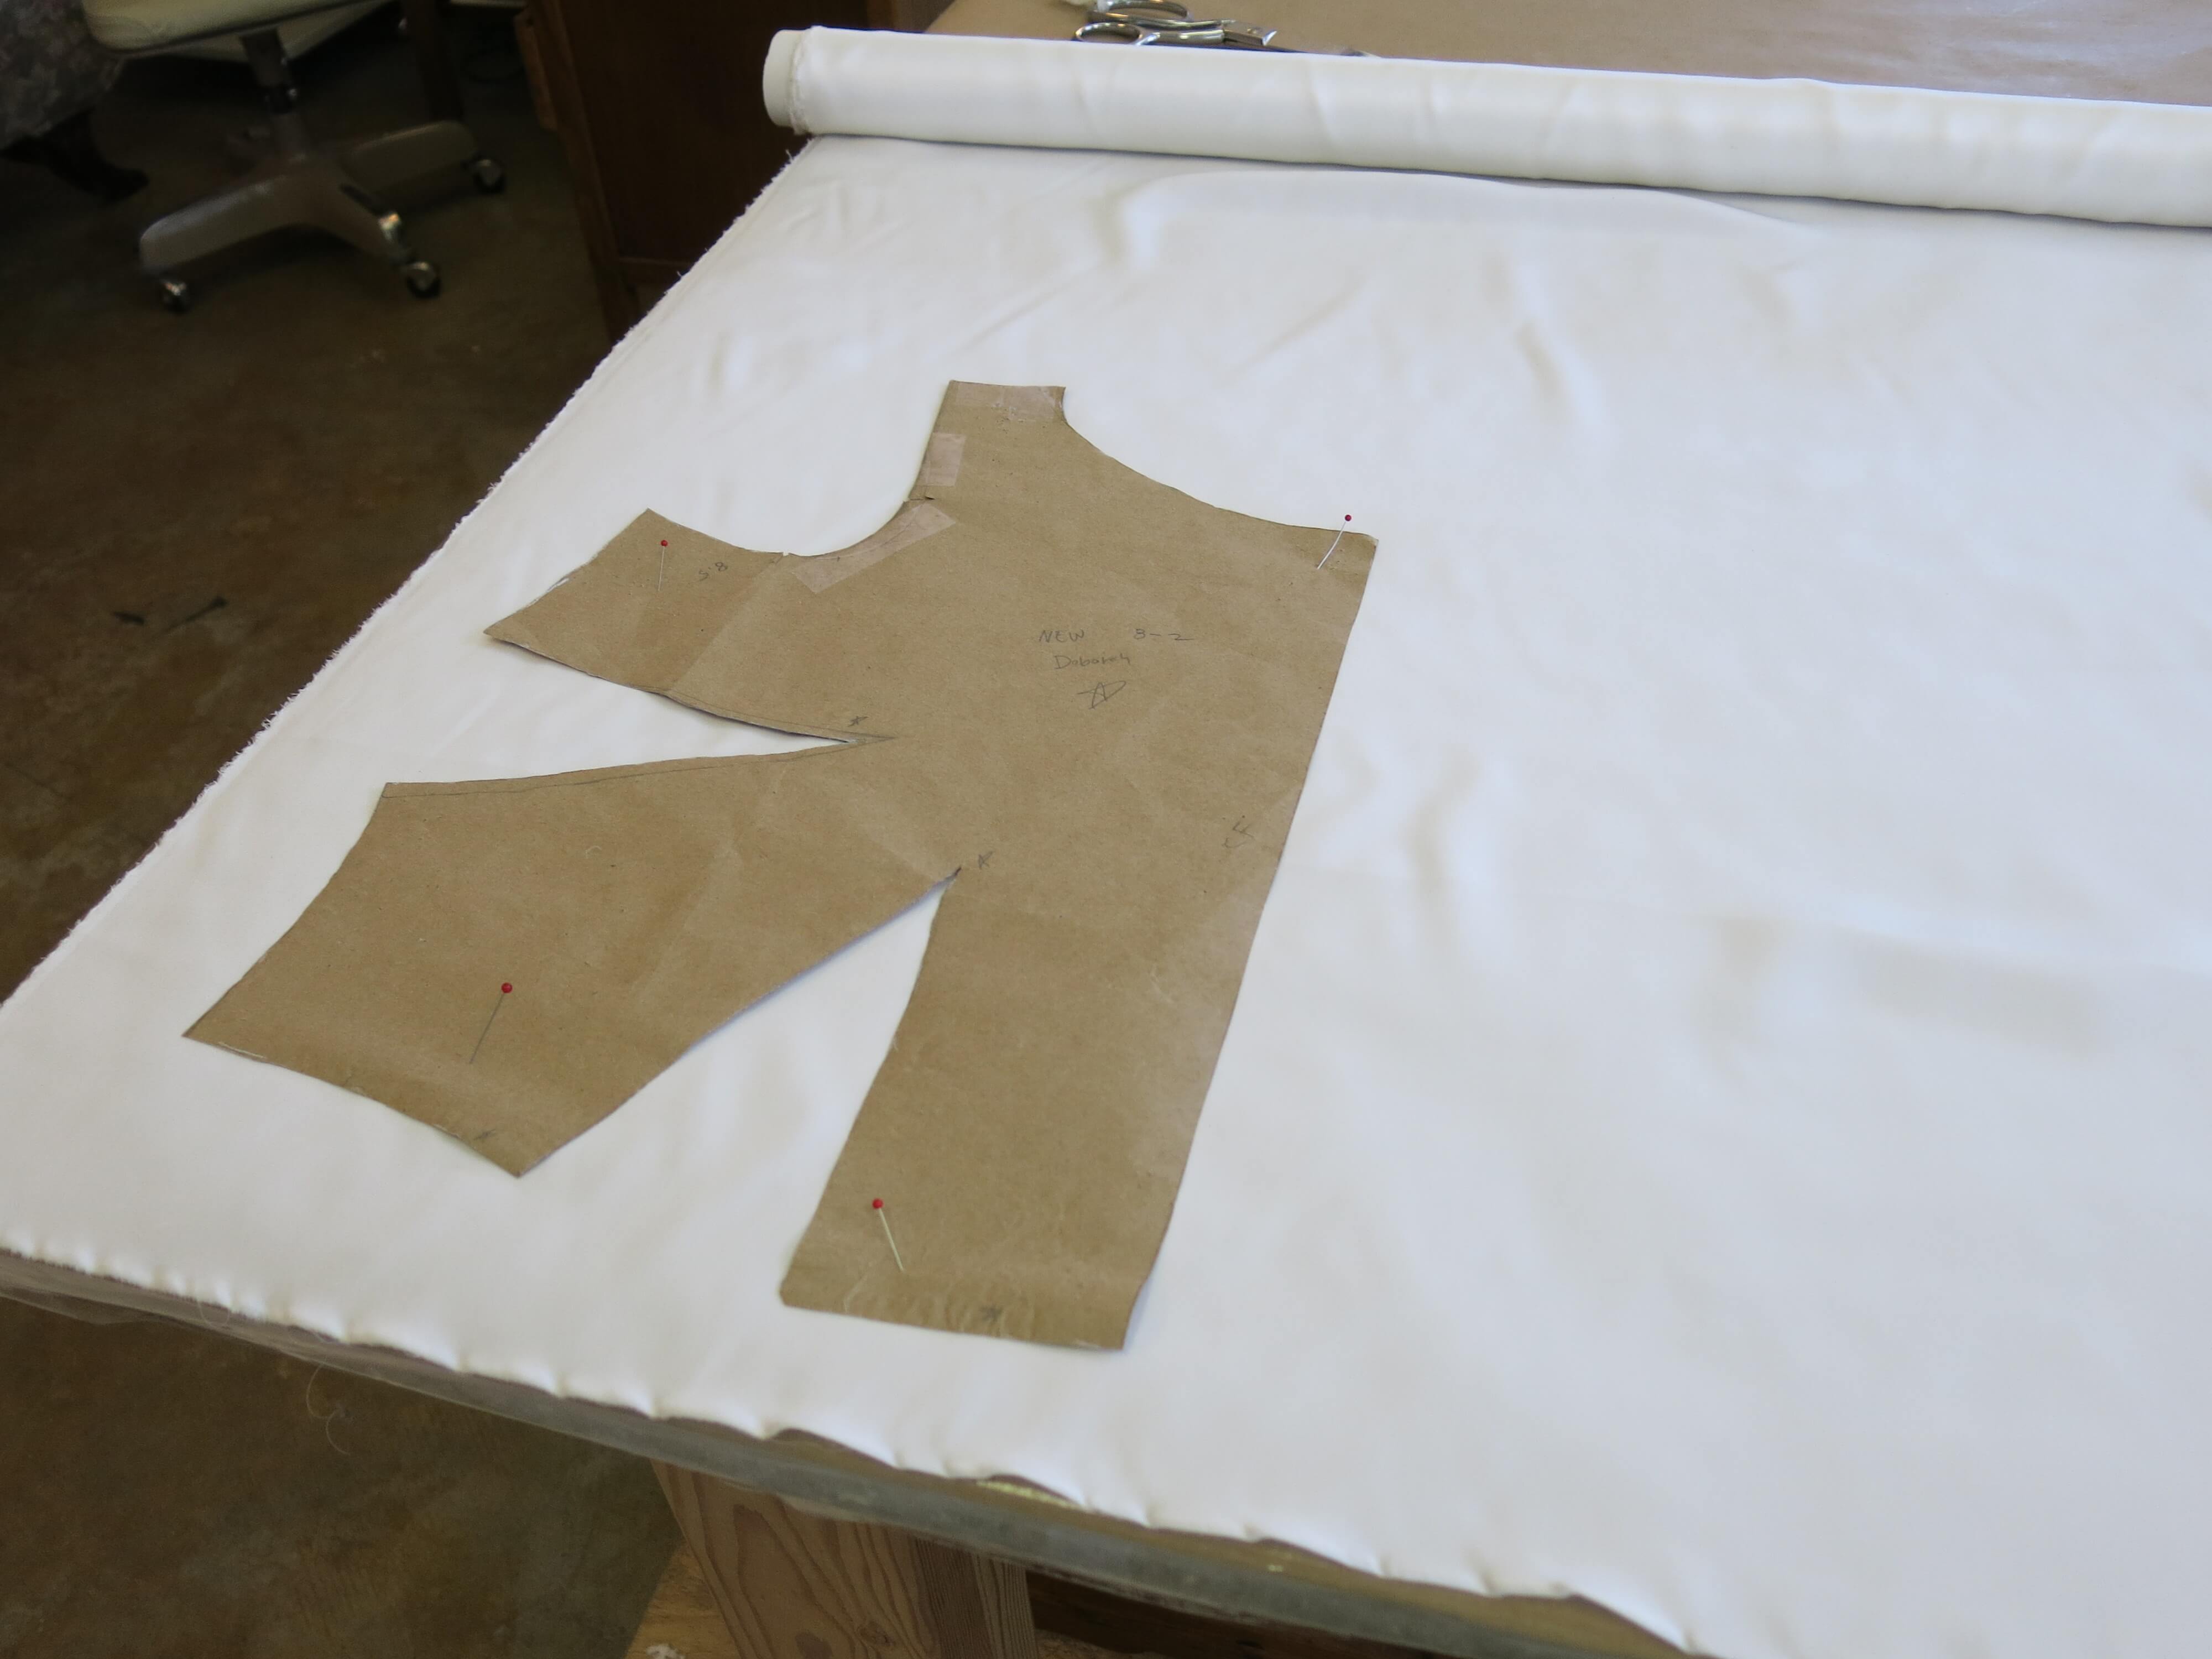
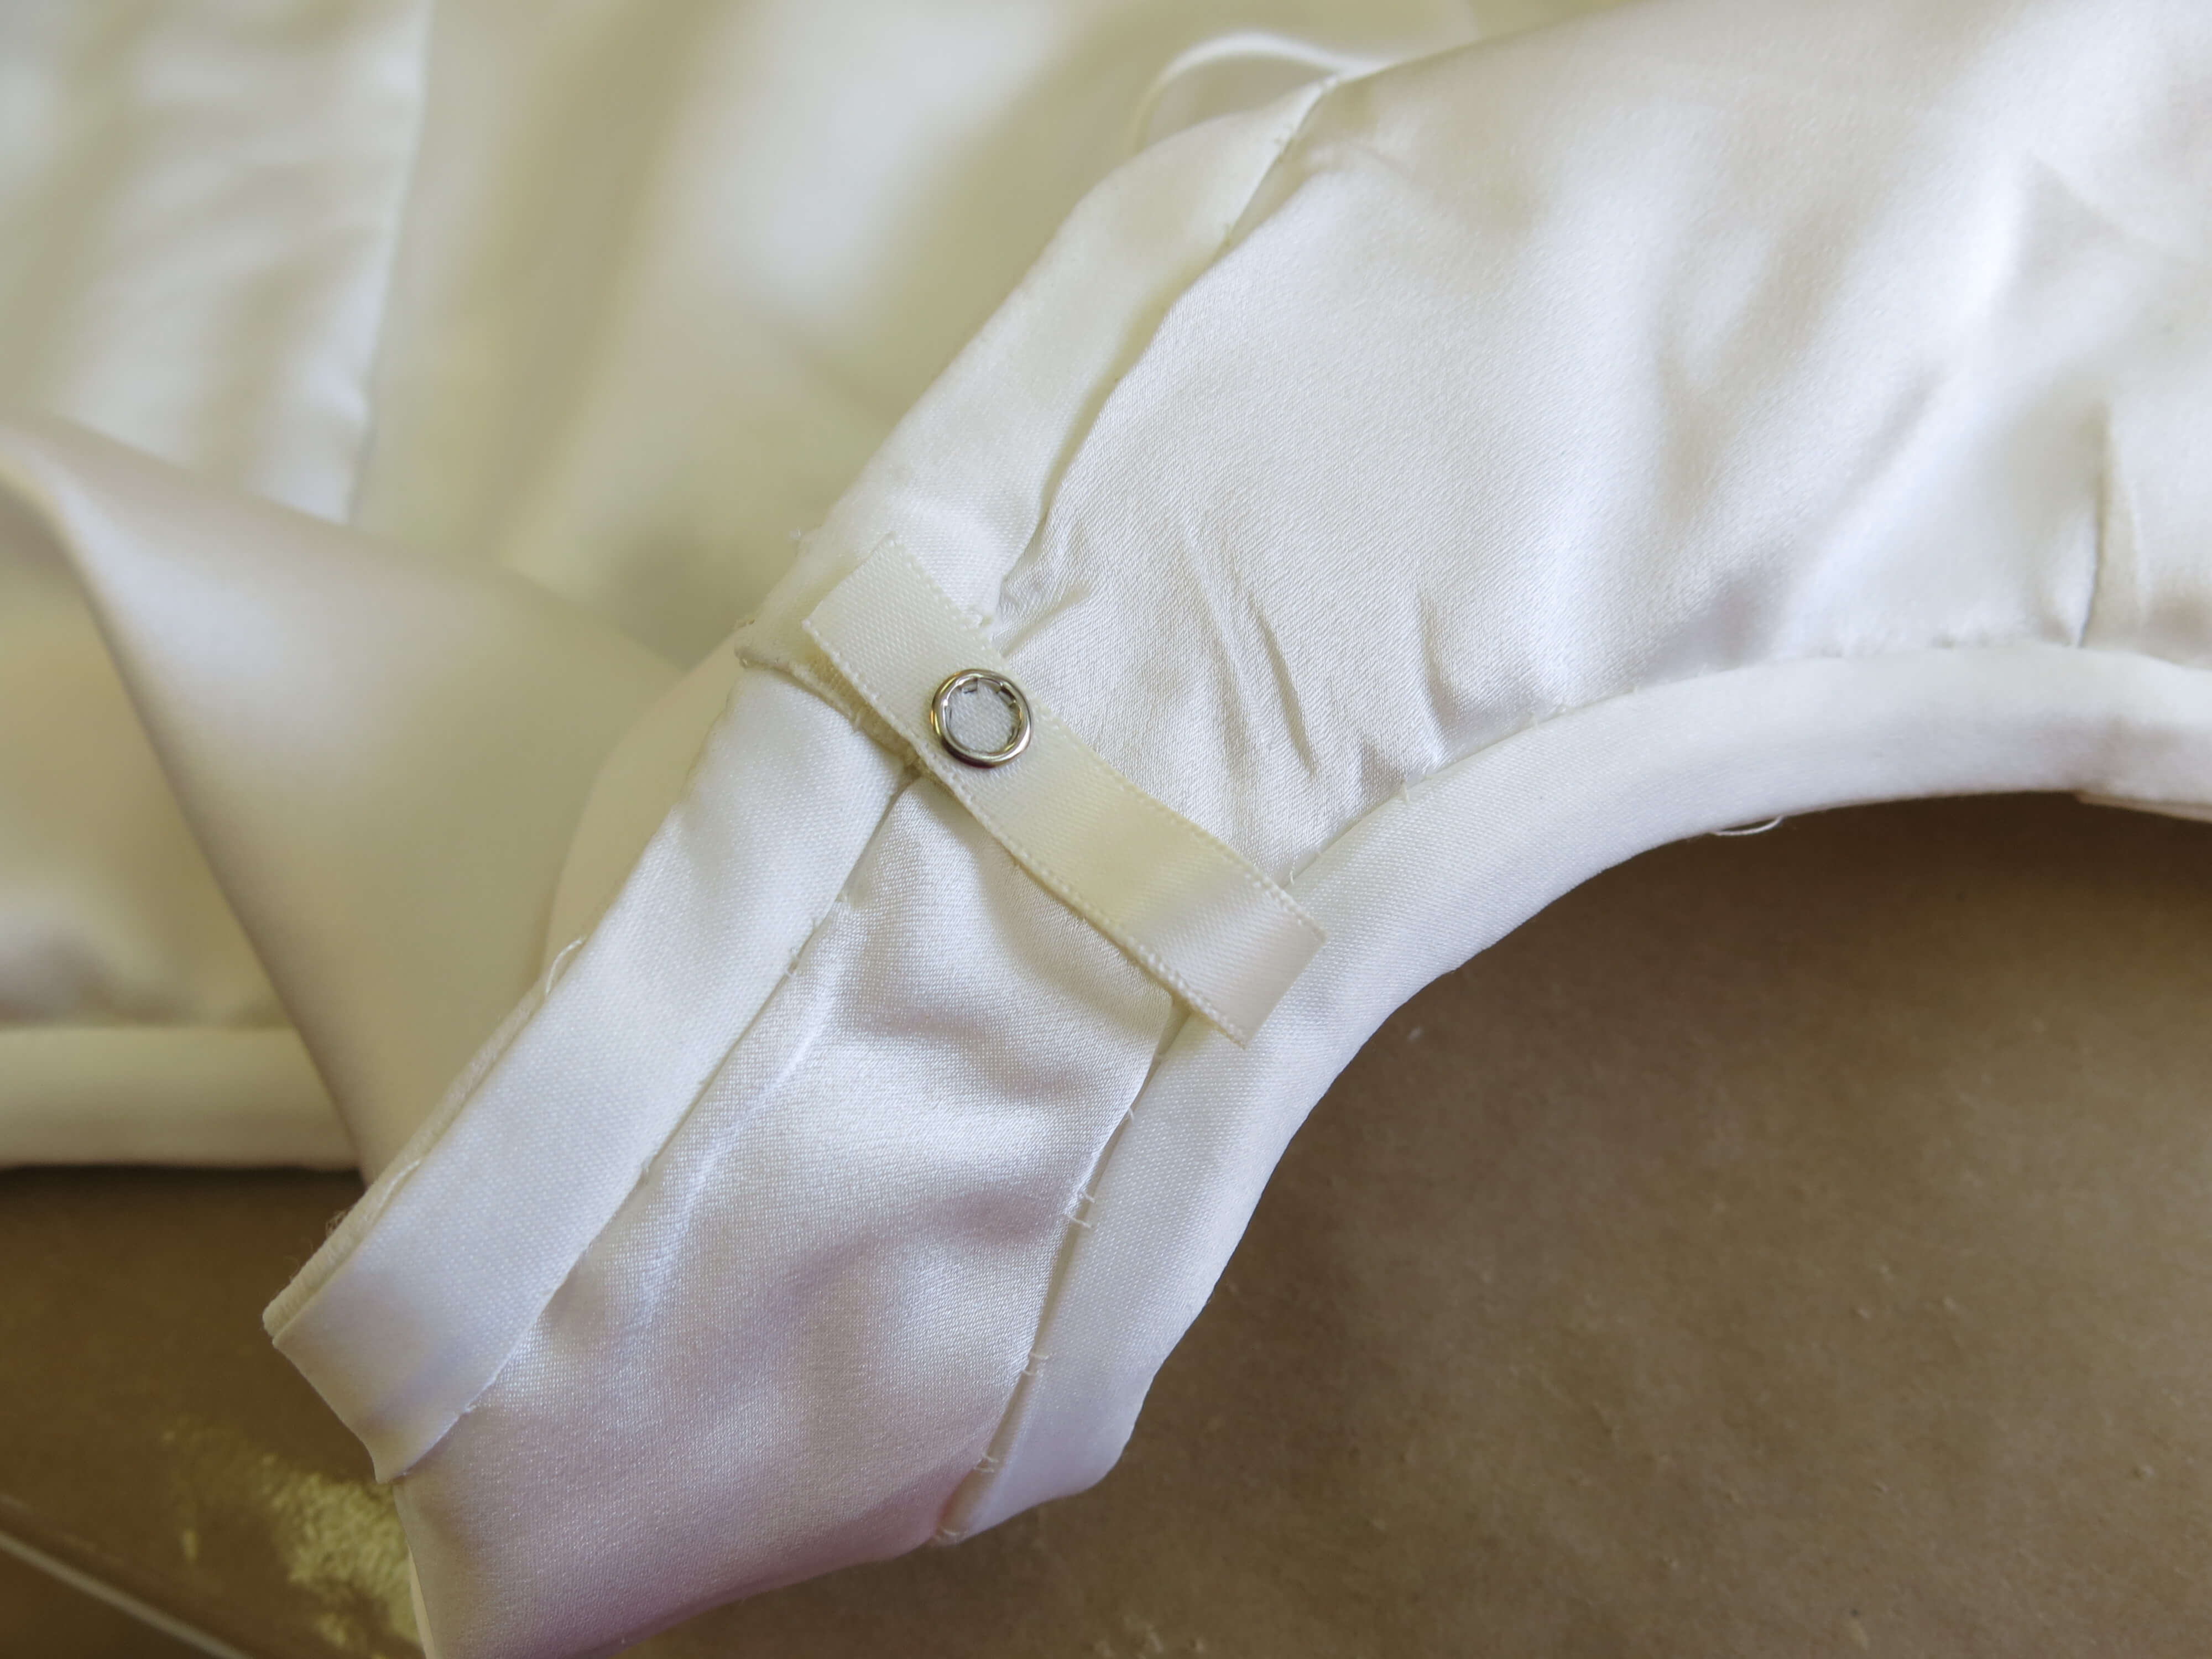
I machine stitched the darts and seams before hand basting the silk lining in place on the inside. All the raw edges of the neckline and armholes were hidden under custom made bias tape and stitched in place by hand…
…before being pressed from both sides to achieve crisp clean-finished edges.
All that hand stitching and pressing gave me time to think of creative solutions to my button loop puzzle. I decided to fold the original loops to the inside and use them as a guide for sturdier loops. I found some thick round elastic and created my own custom elastic loop ‘tape’ with hand stitching. I was confident the buttons would slide around these strong secure loops smoothly (and it was even kinda fun to make… I love hand sewing!)

Once complete, I hand stitched the rest of the lining in place, covering everything but the fresh new loops.
A Few Finishing Touches
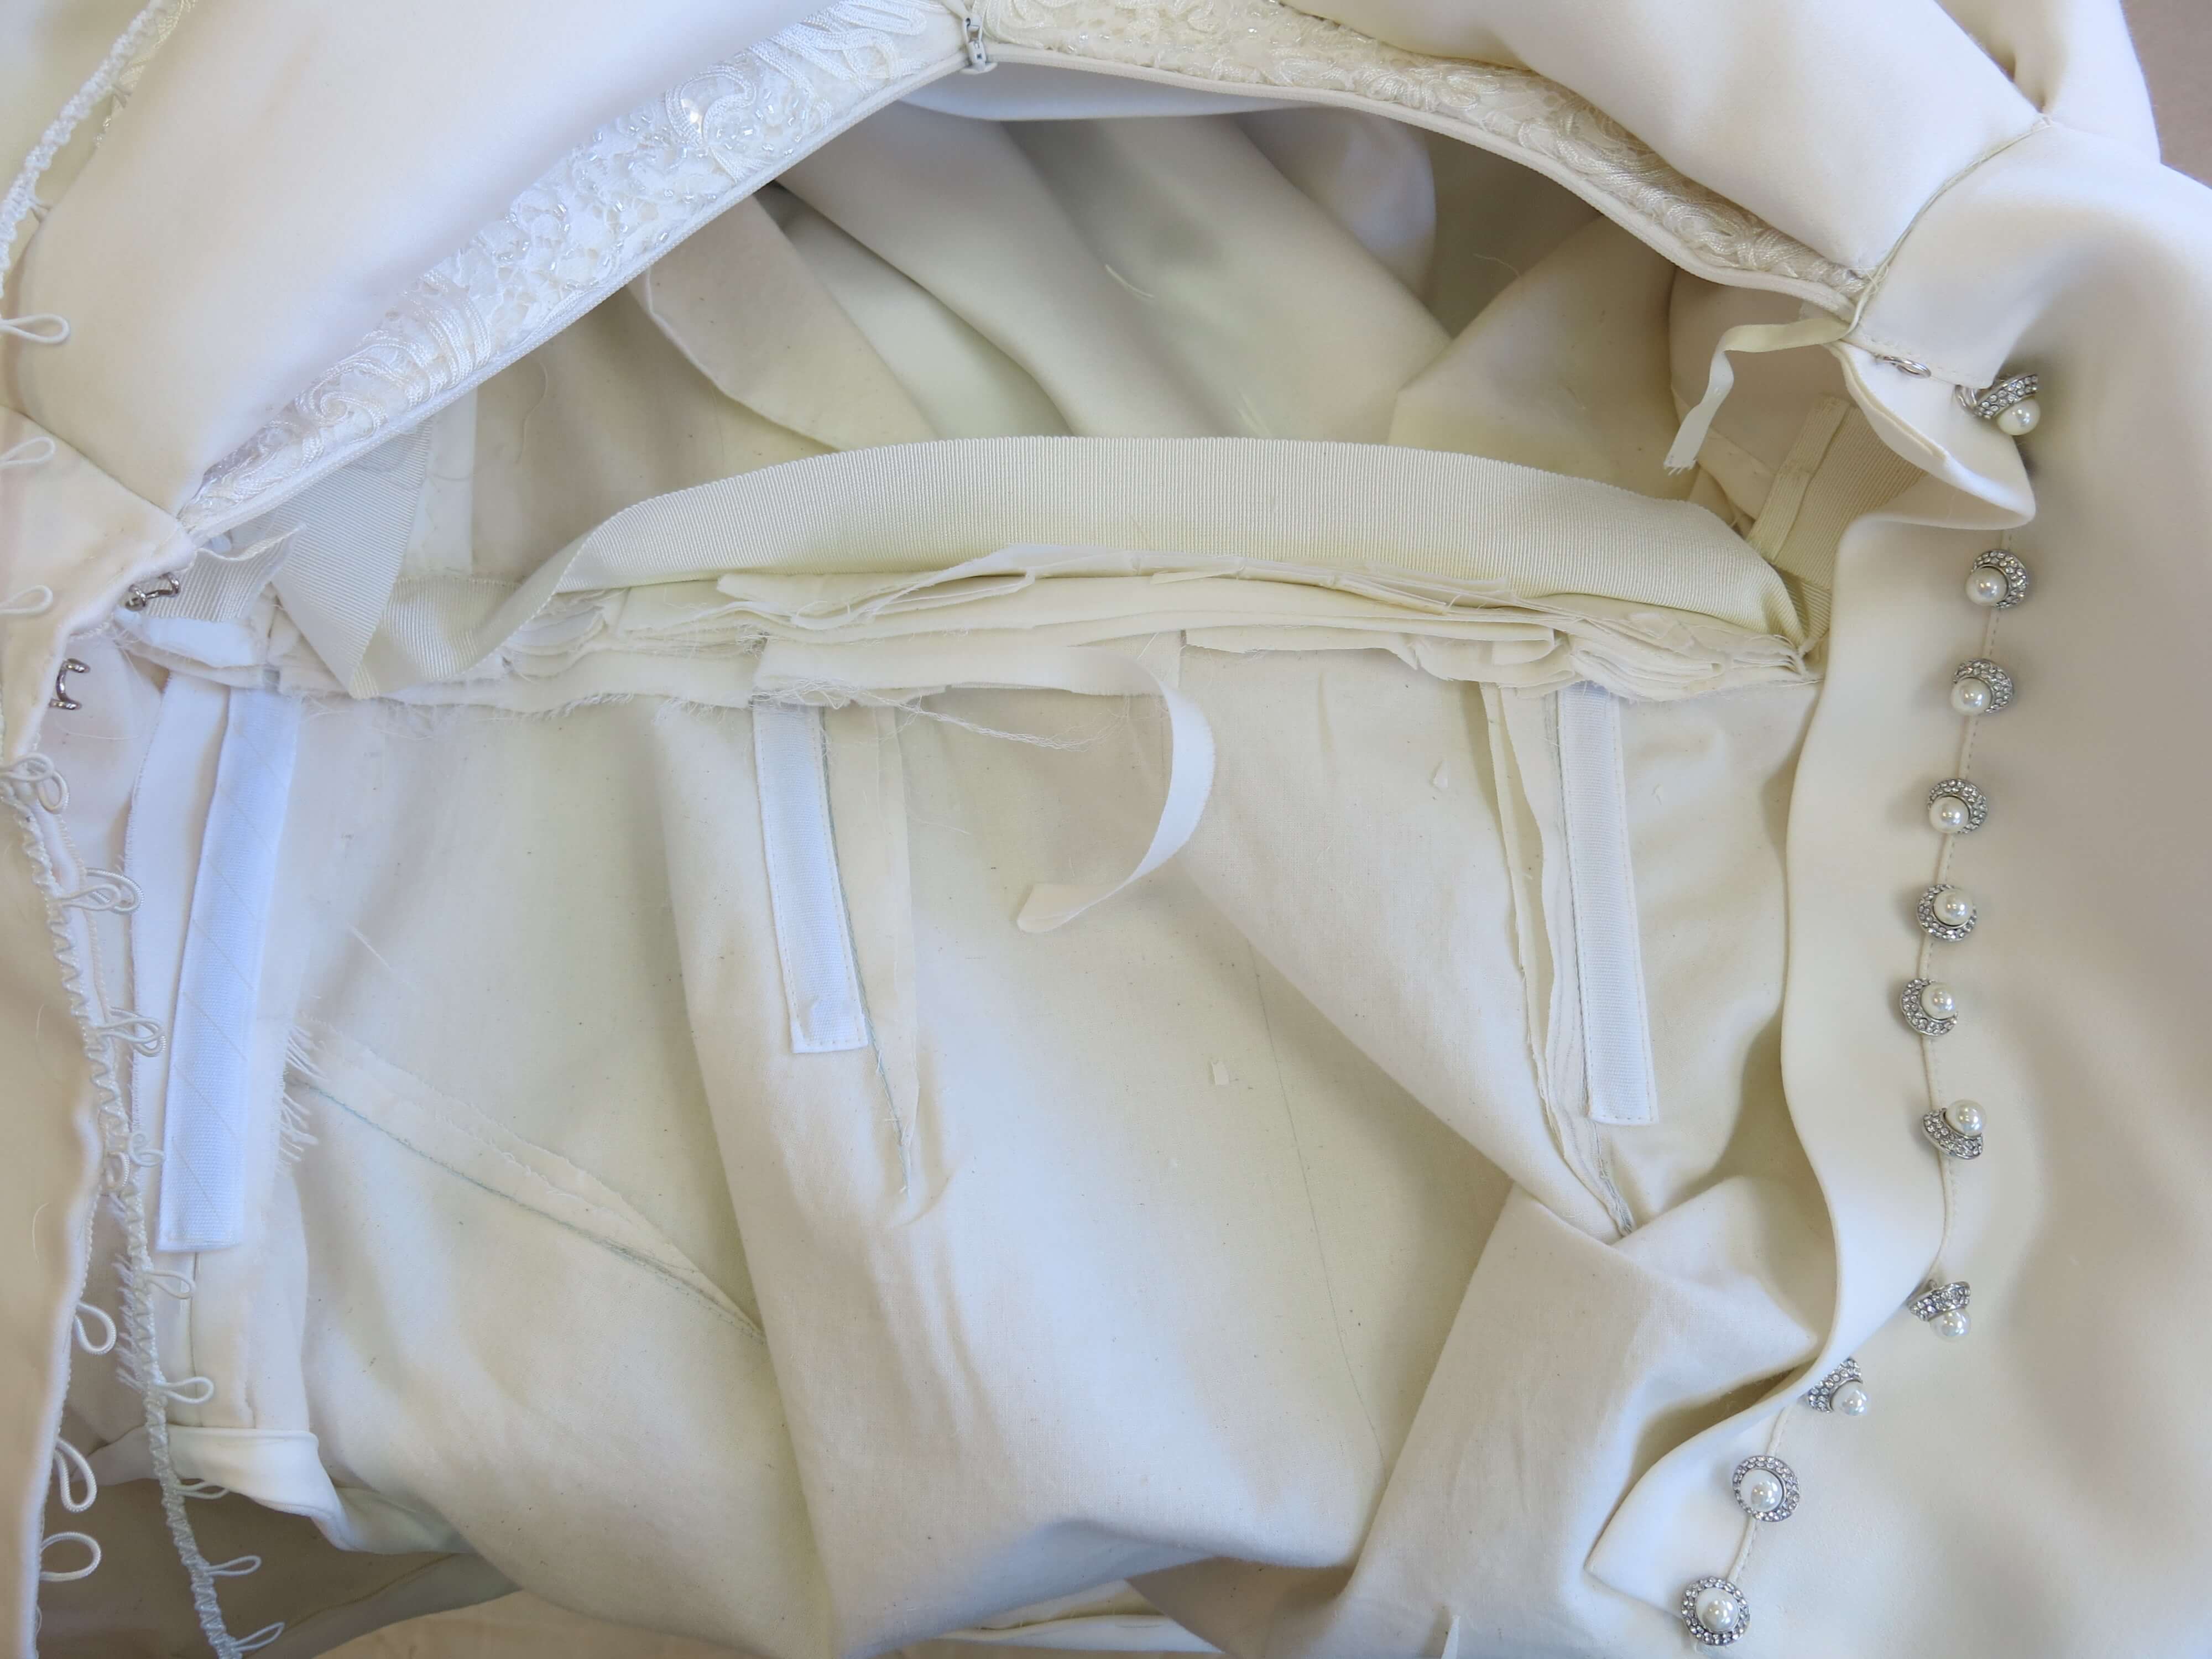
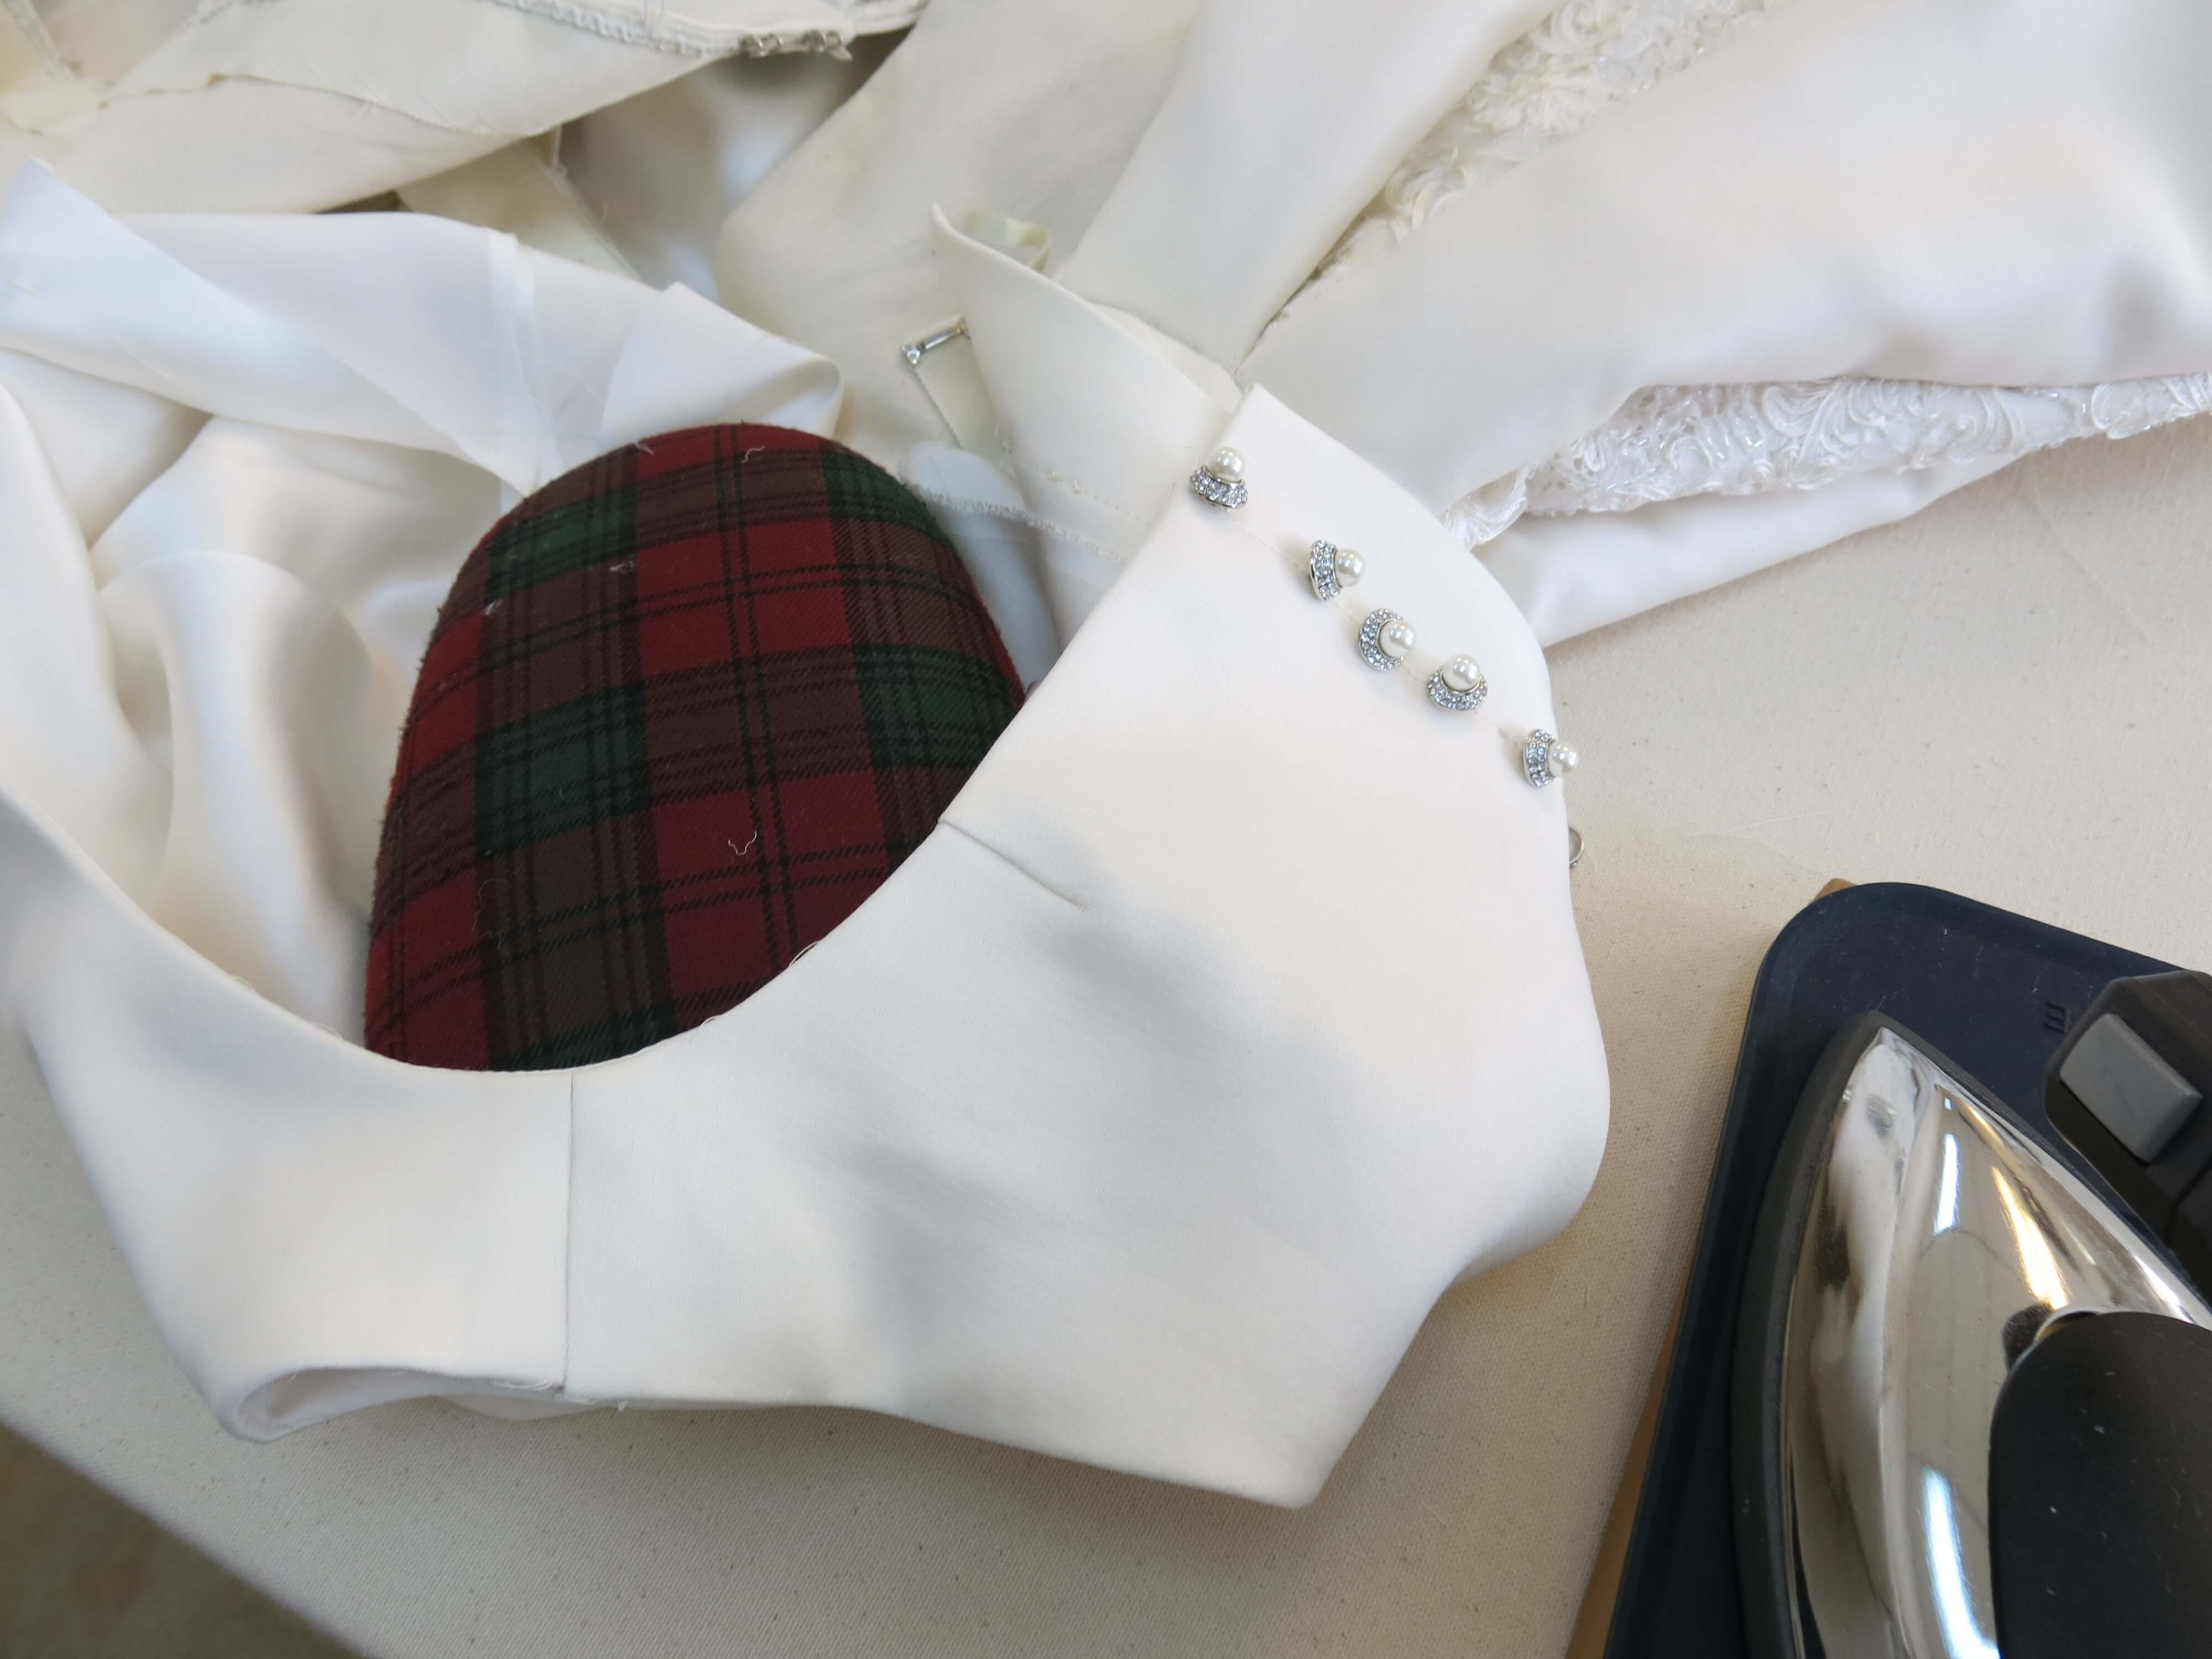
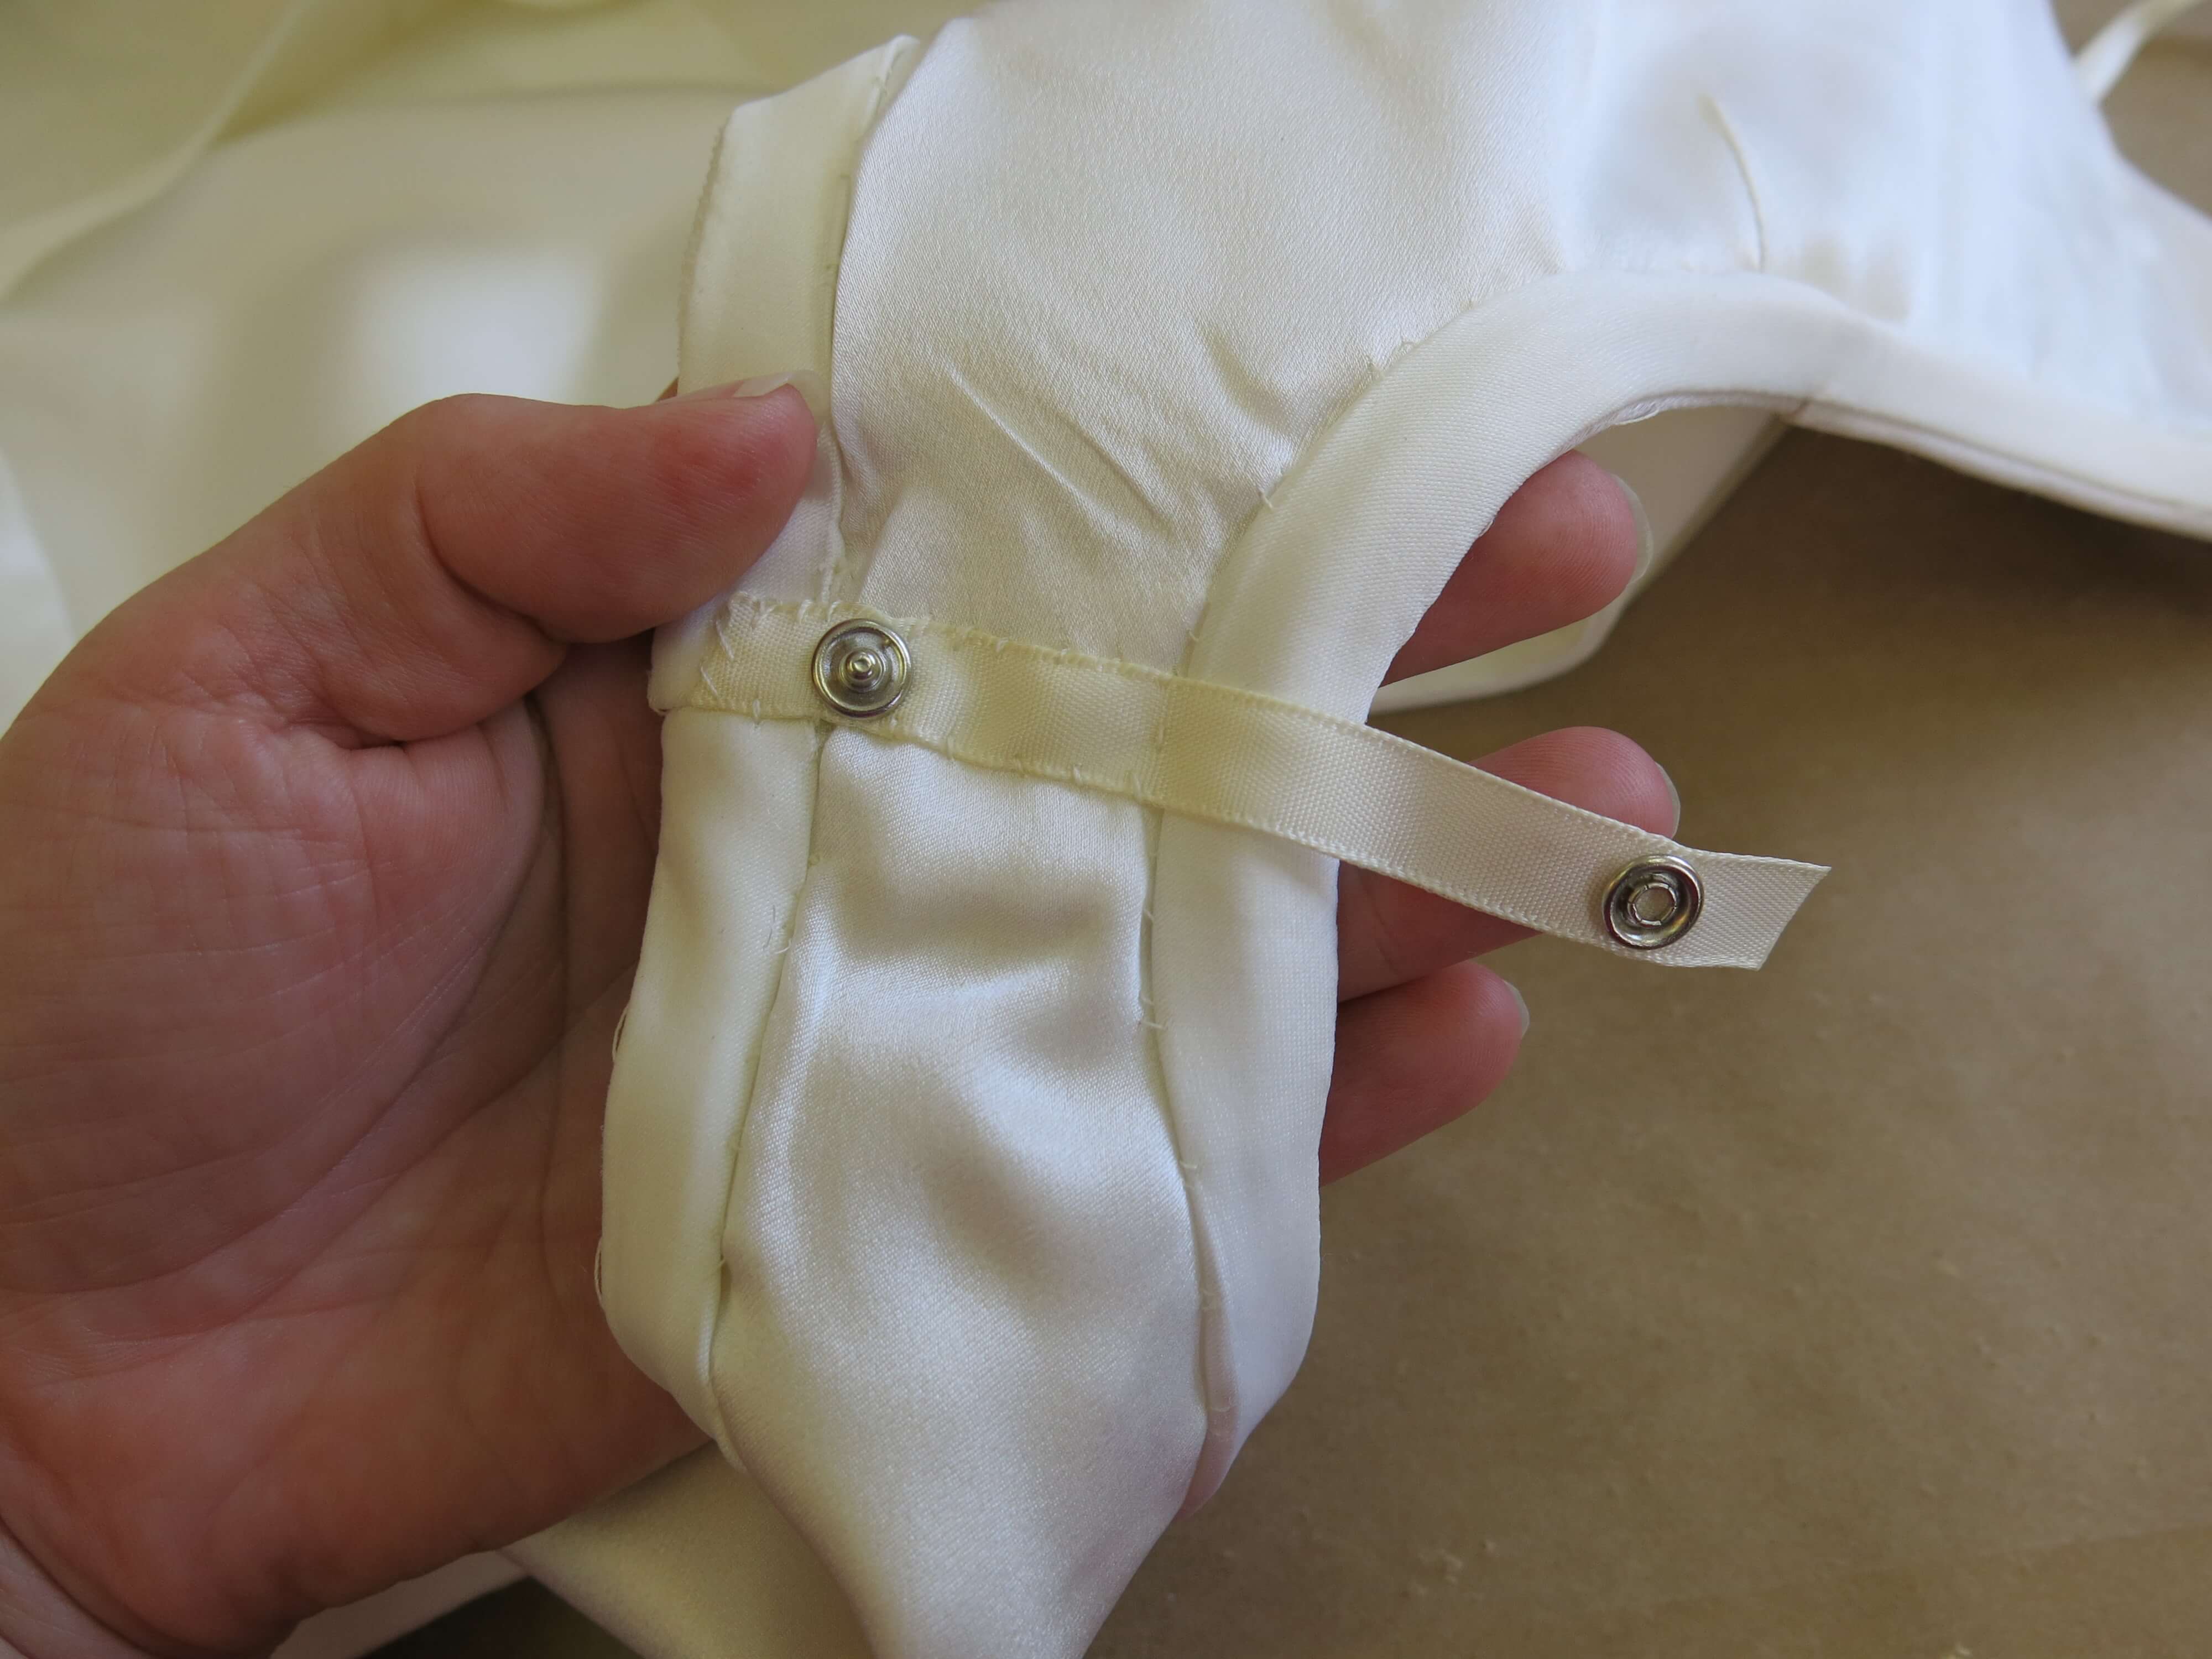
There’s a bazillion teeny tasks that happen during finishing and, when I get in the ‘finishing zone’, I often forget to take blog photos. A few finishing touches hidden inside Deborah’s dress that I managed to capture were these bra strap loops…
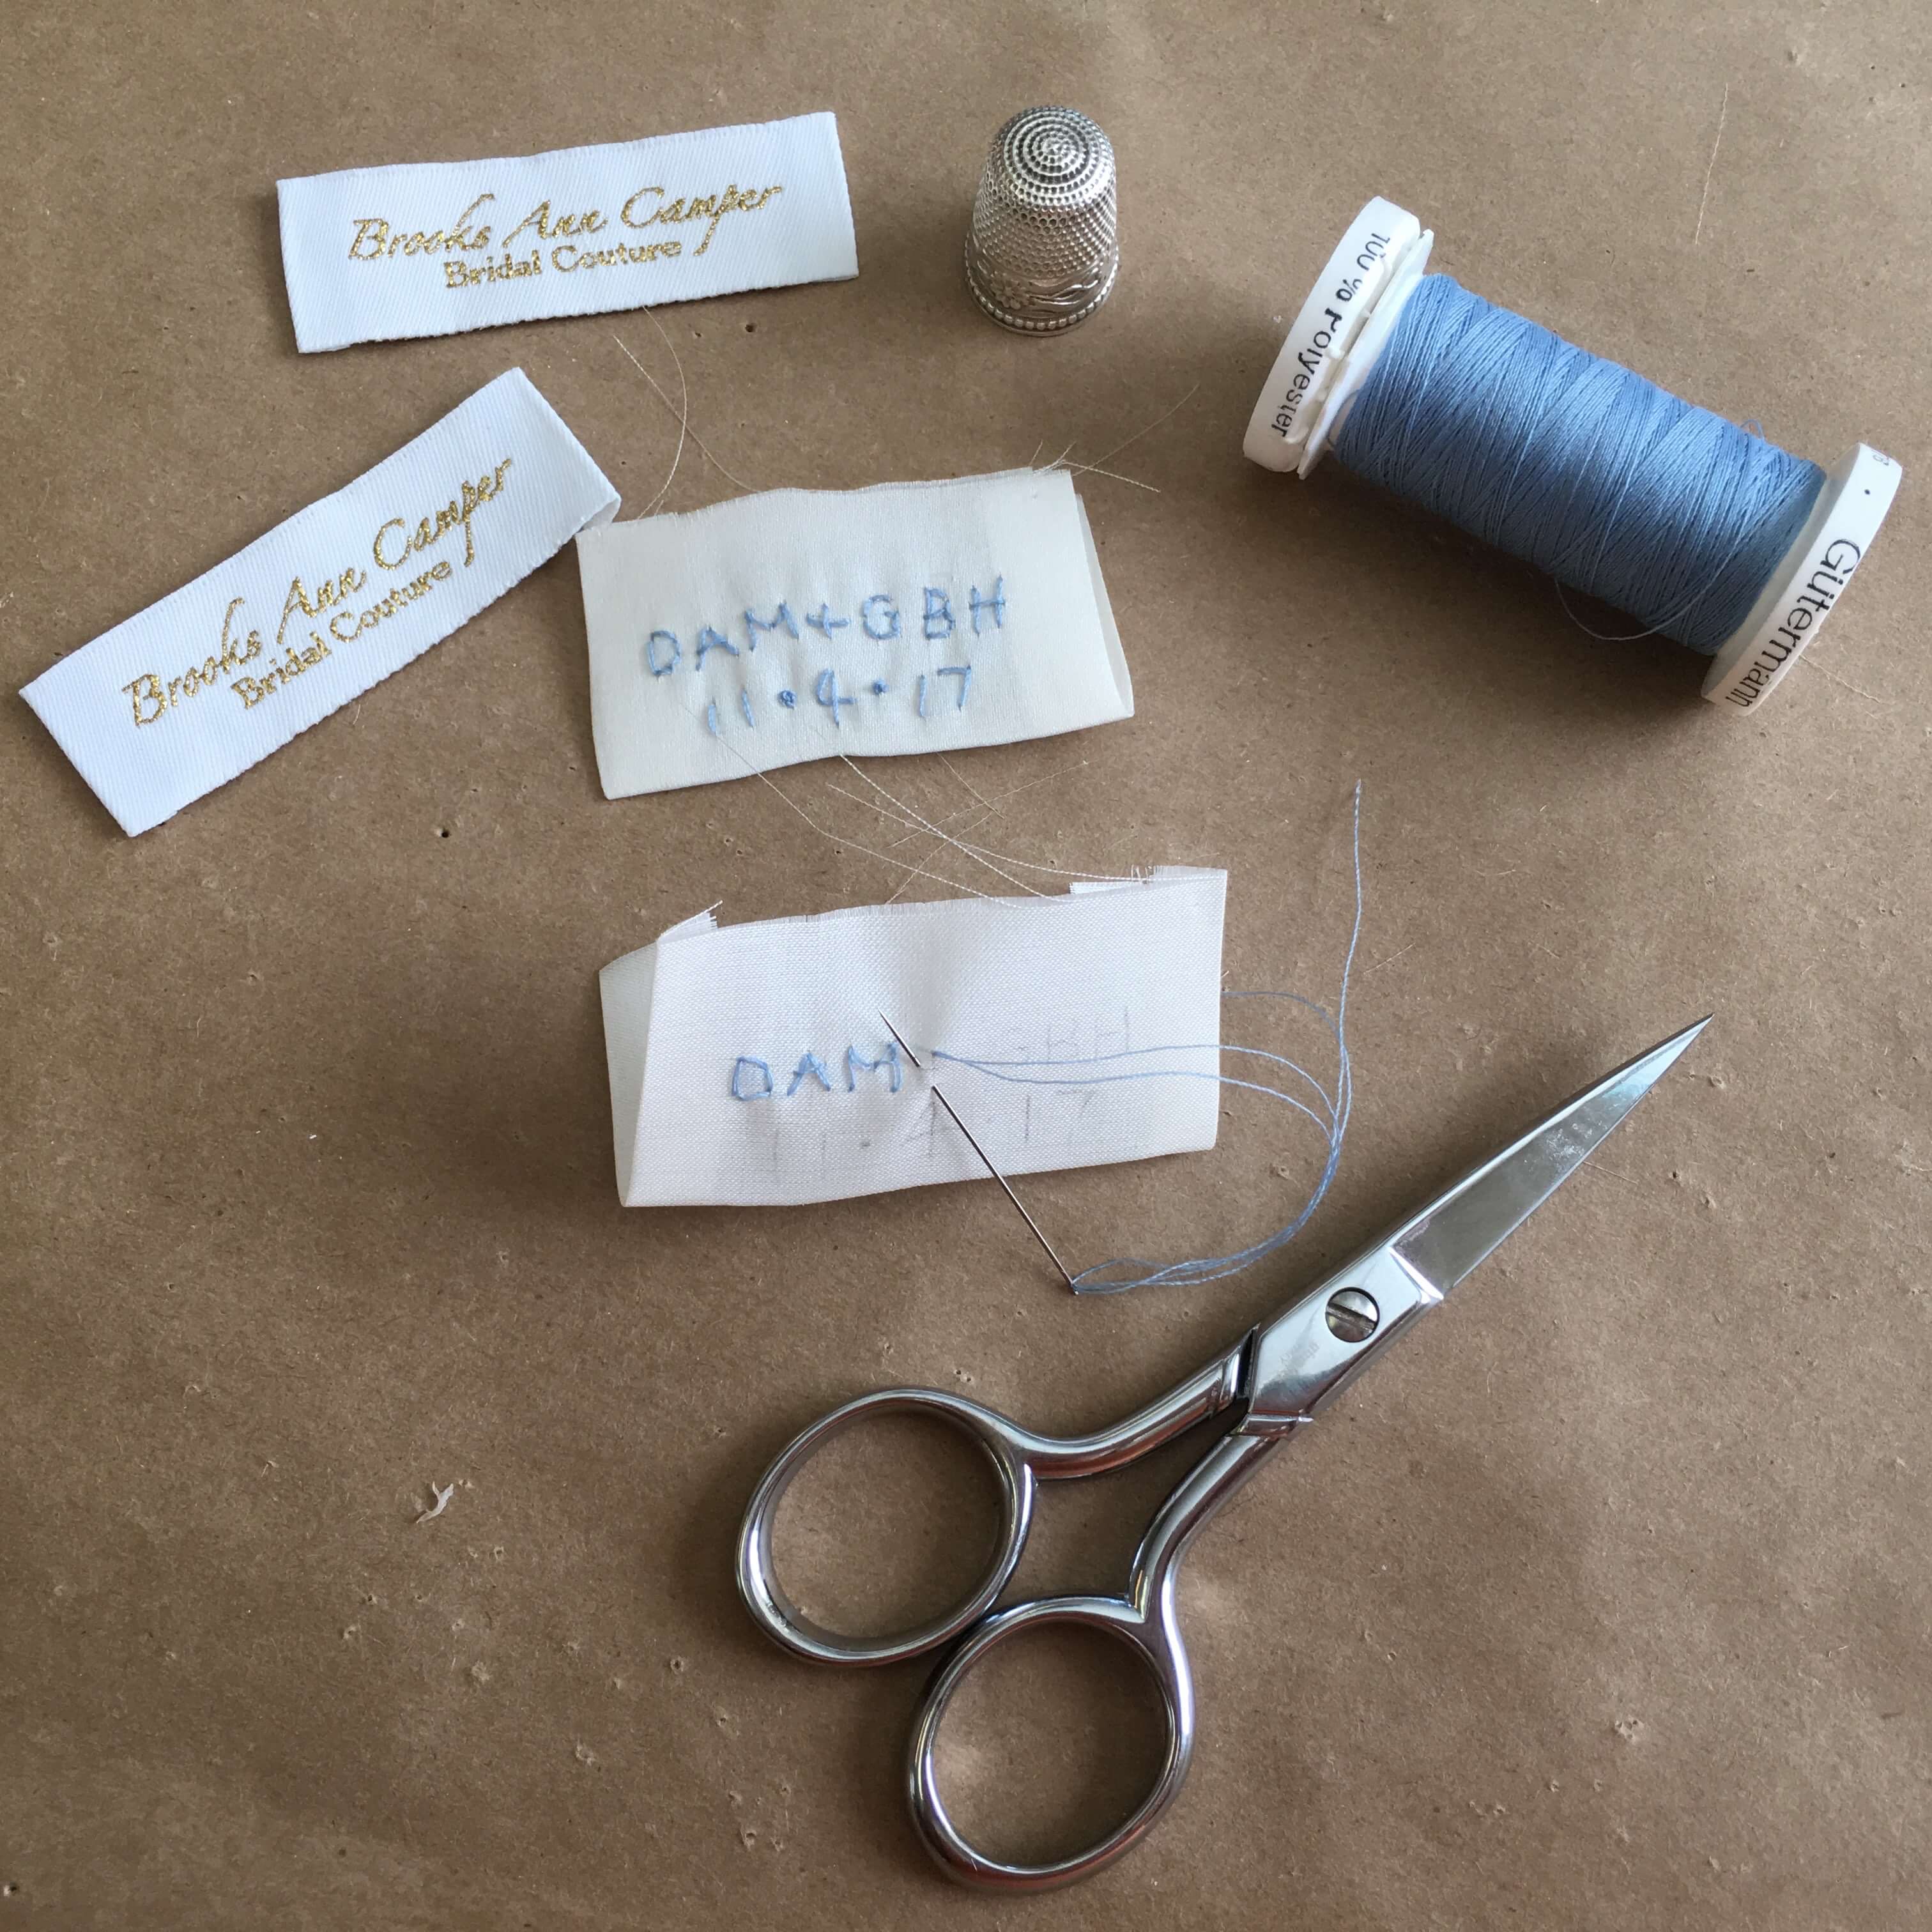
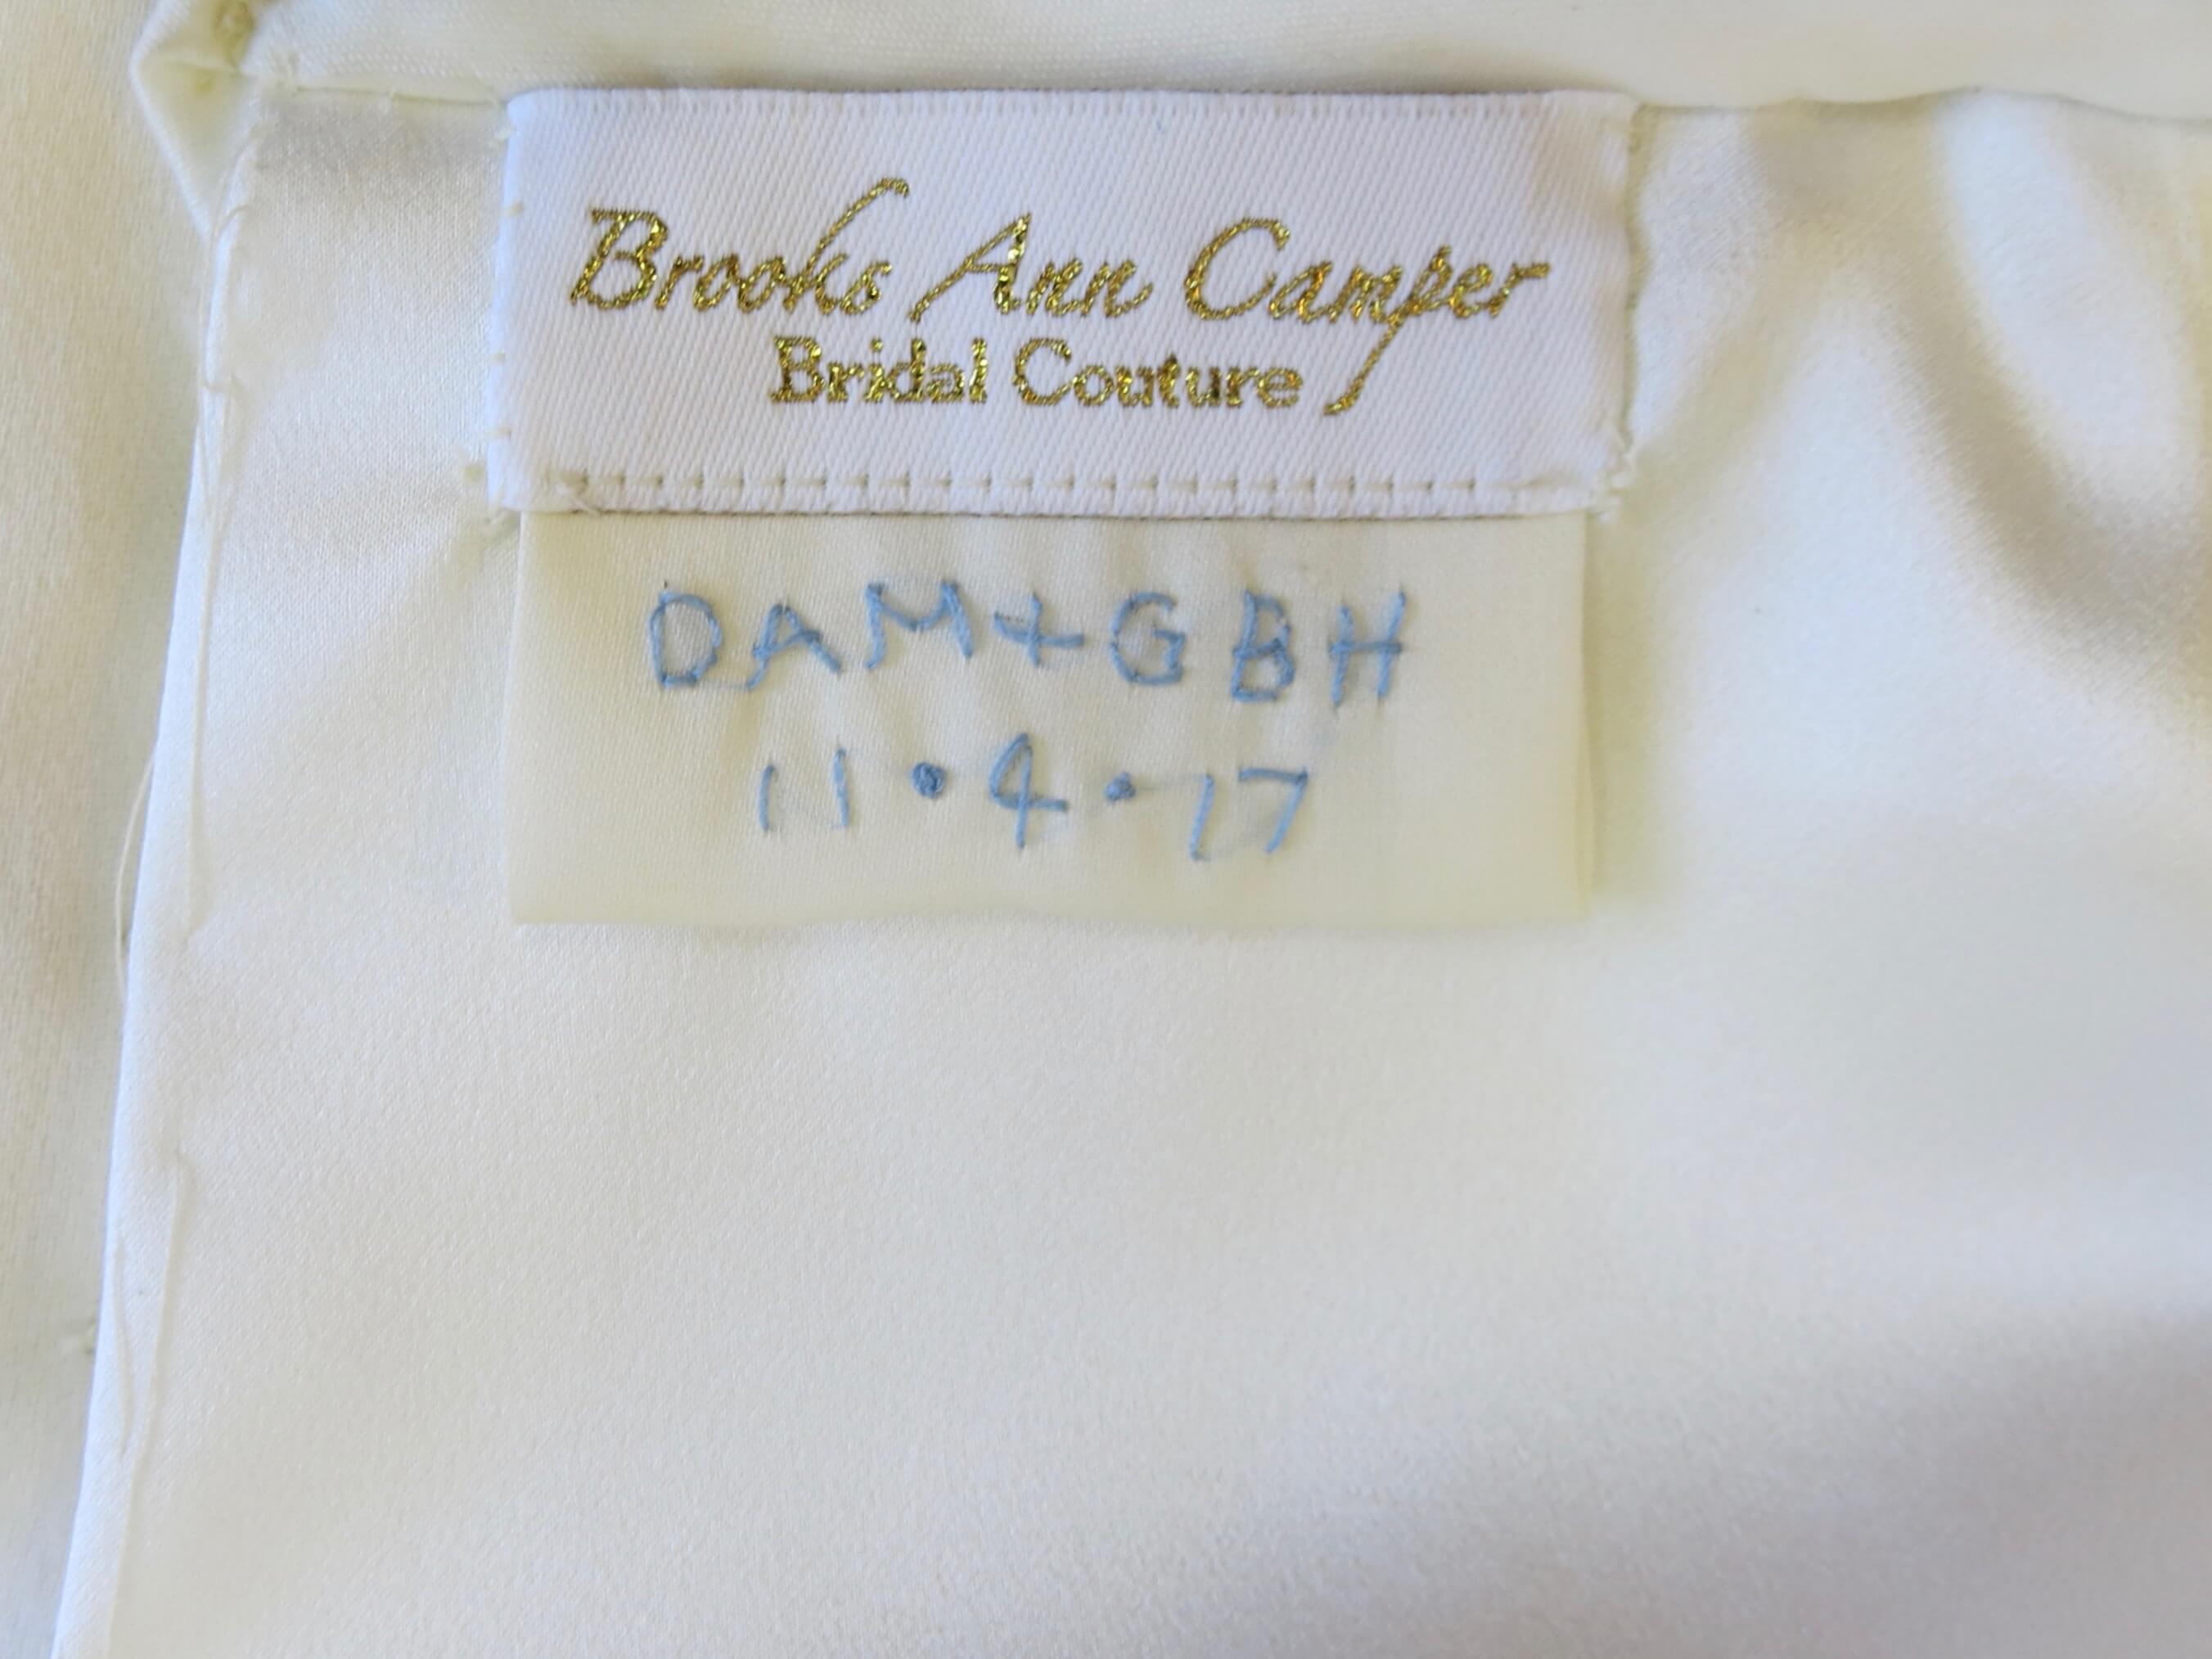
…and I made labels embroidered with the initials and wedding date of the couple.
And no that date is not incorrect! I don’t begin blogging about a bride until after she is married. Soon after I finished blogging about Cameron’s dress, I began to slowly tell Deborah’s story. In real life, she’s barely still a newlywed and I’ve already finished another dress that I’m excited to start sharing soon! Slow and steady…
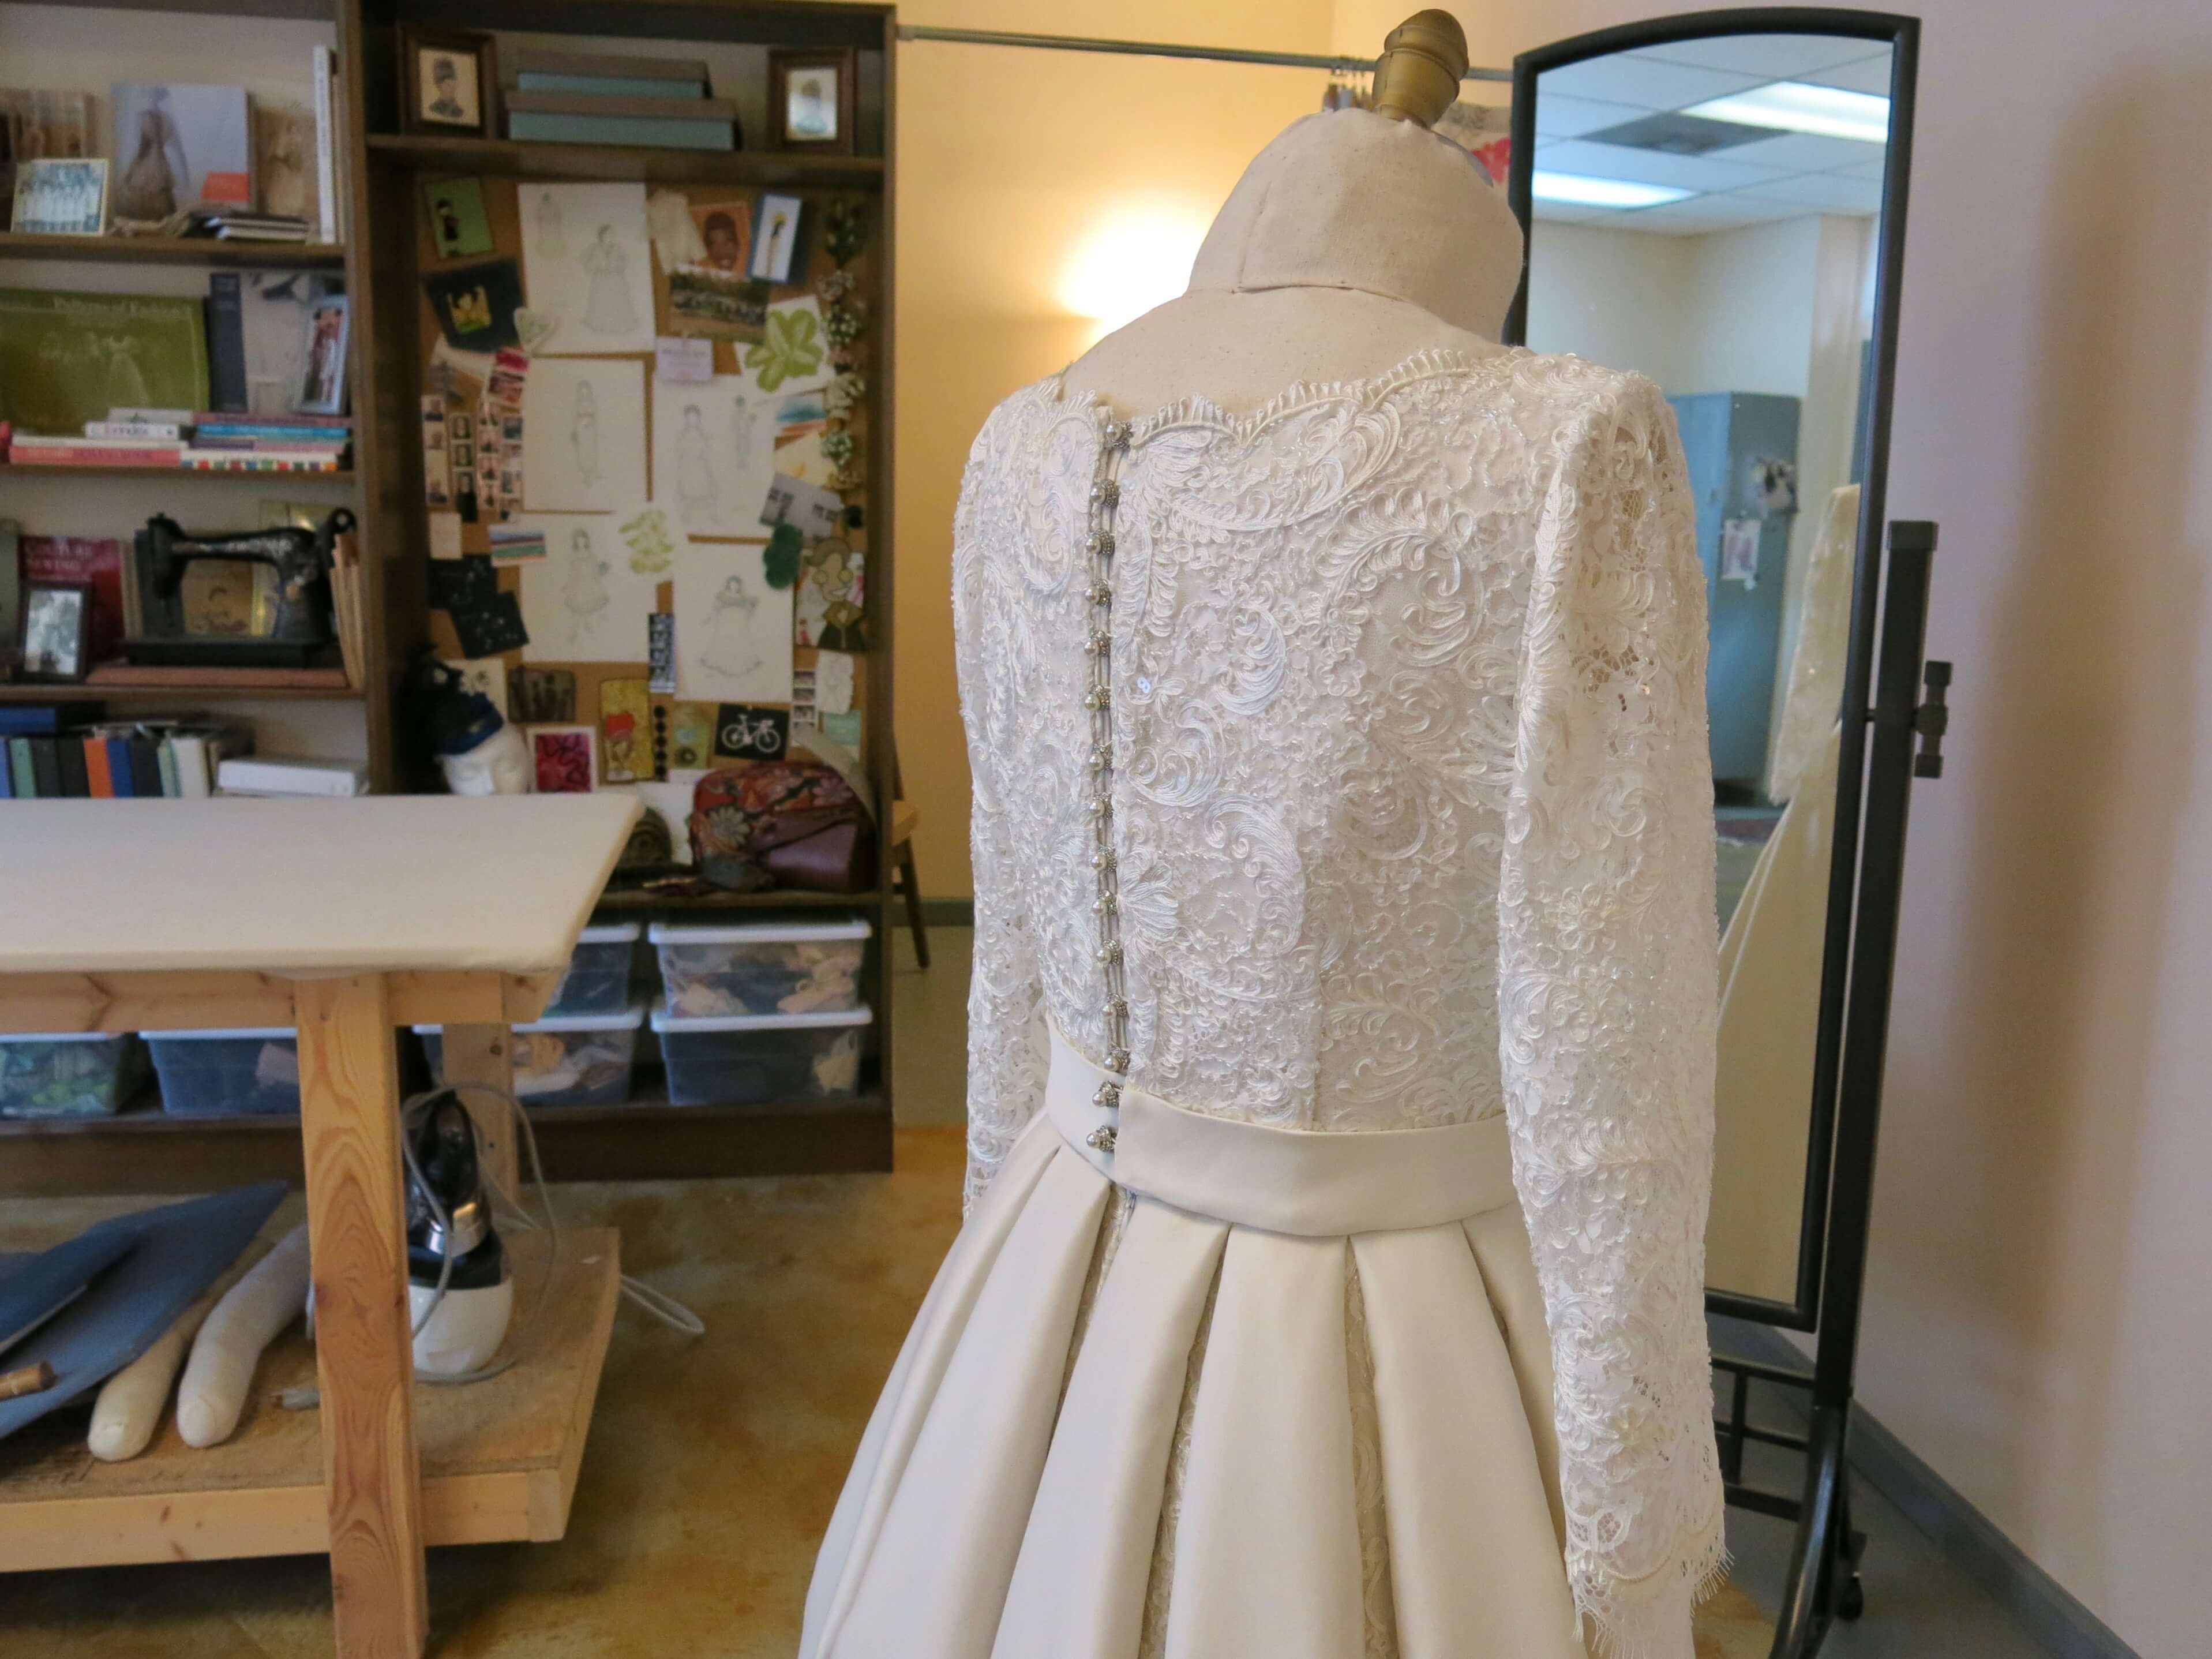
When a dress starts to feel done, I always hear my MFA professor’s voice saying “It isn’t finished until you can hang it!” I created and anchored long hanger loops inside the dress’s waist in a way that would keep the weight of the skirt pleats from being supported solely by the shoulders while hanging.
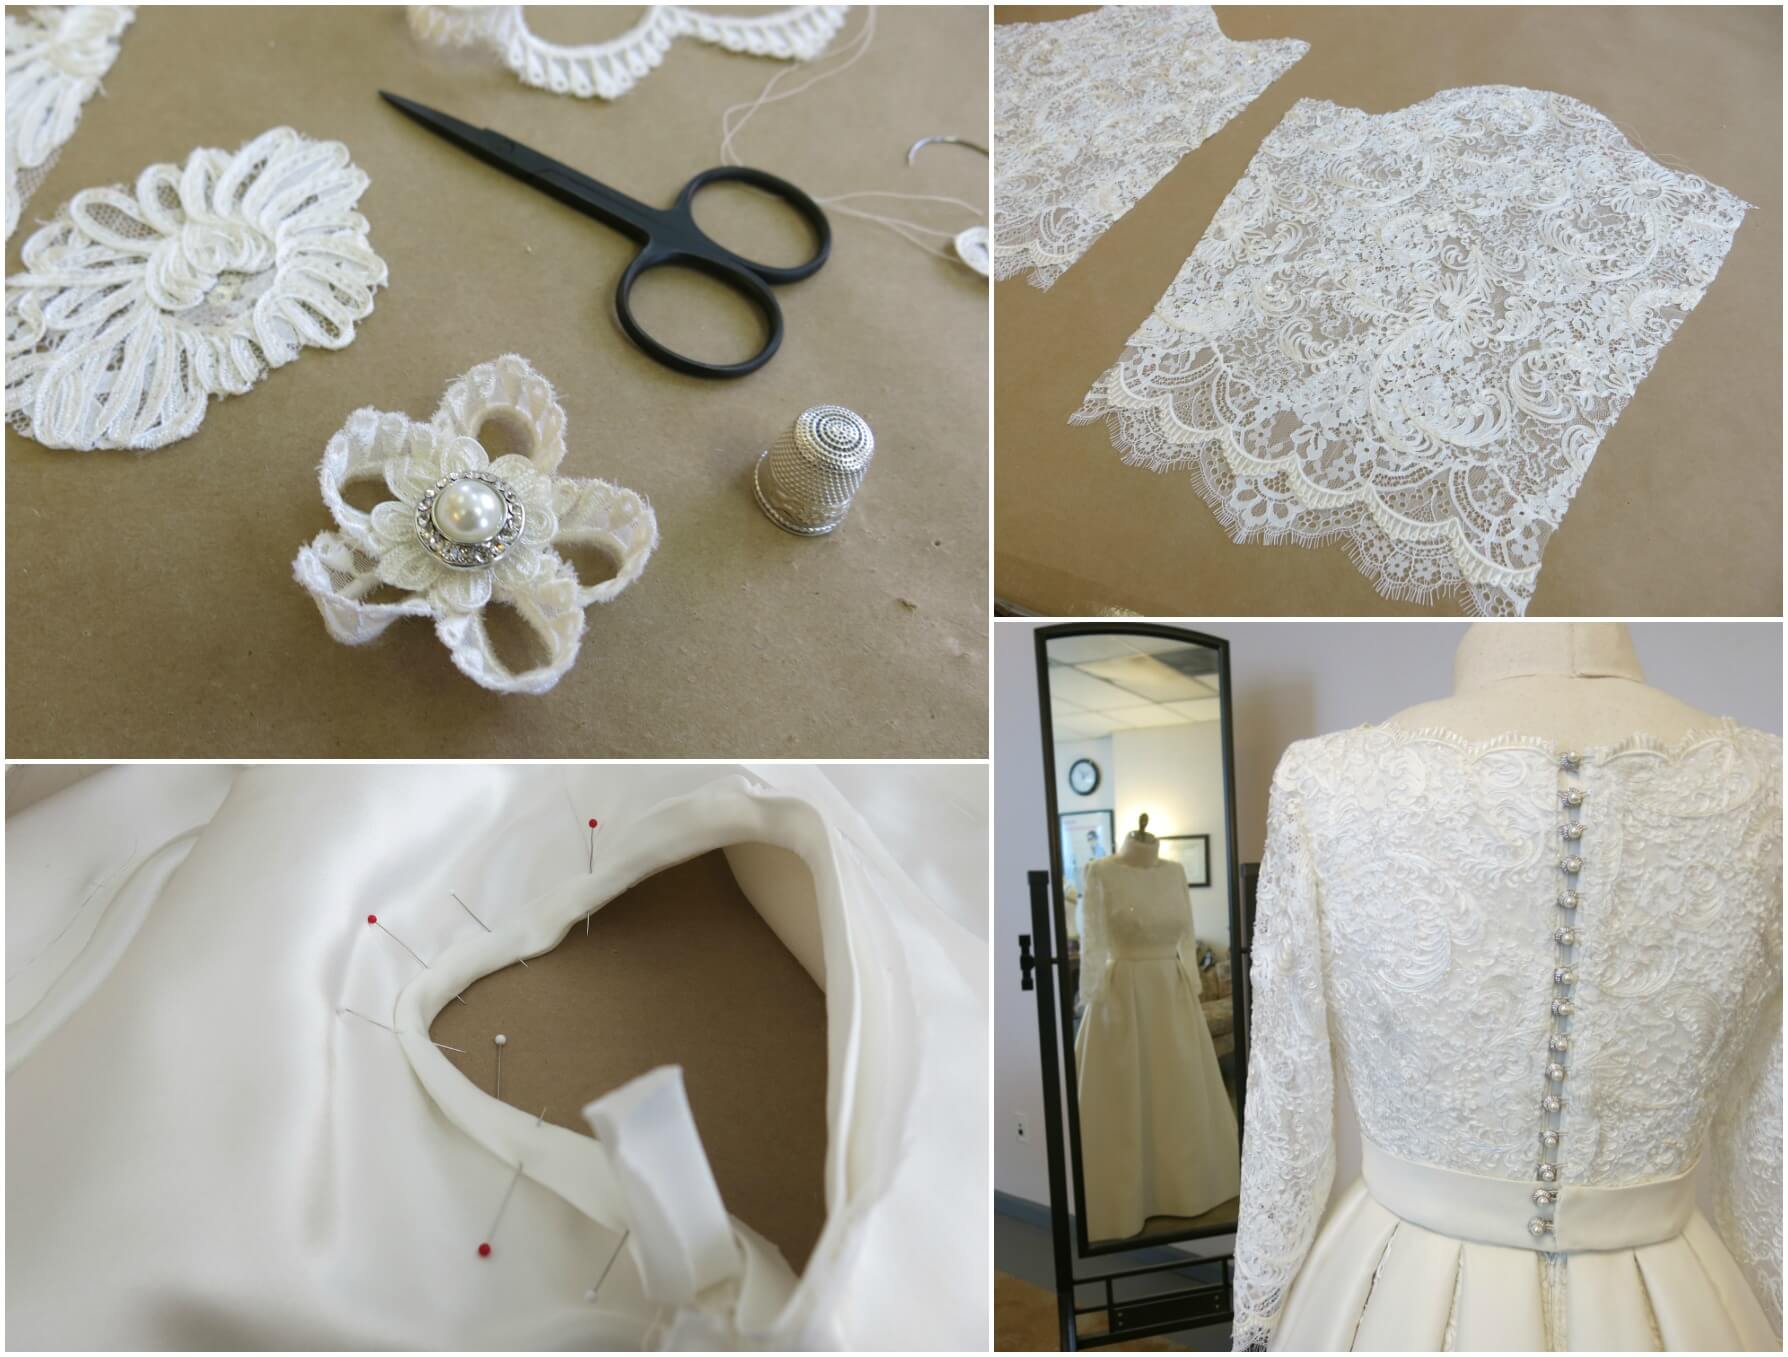
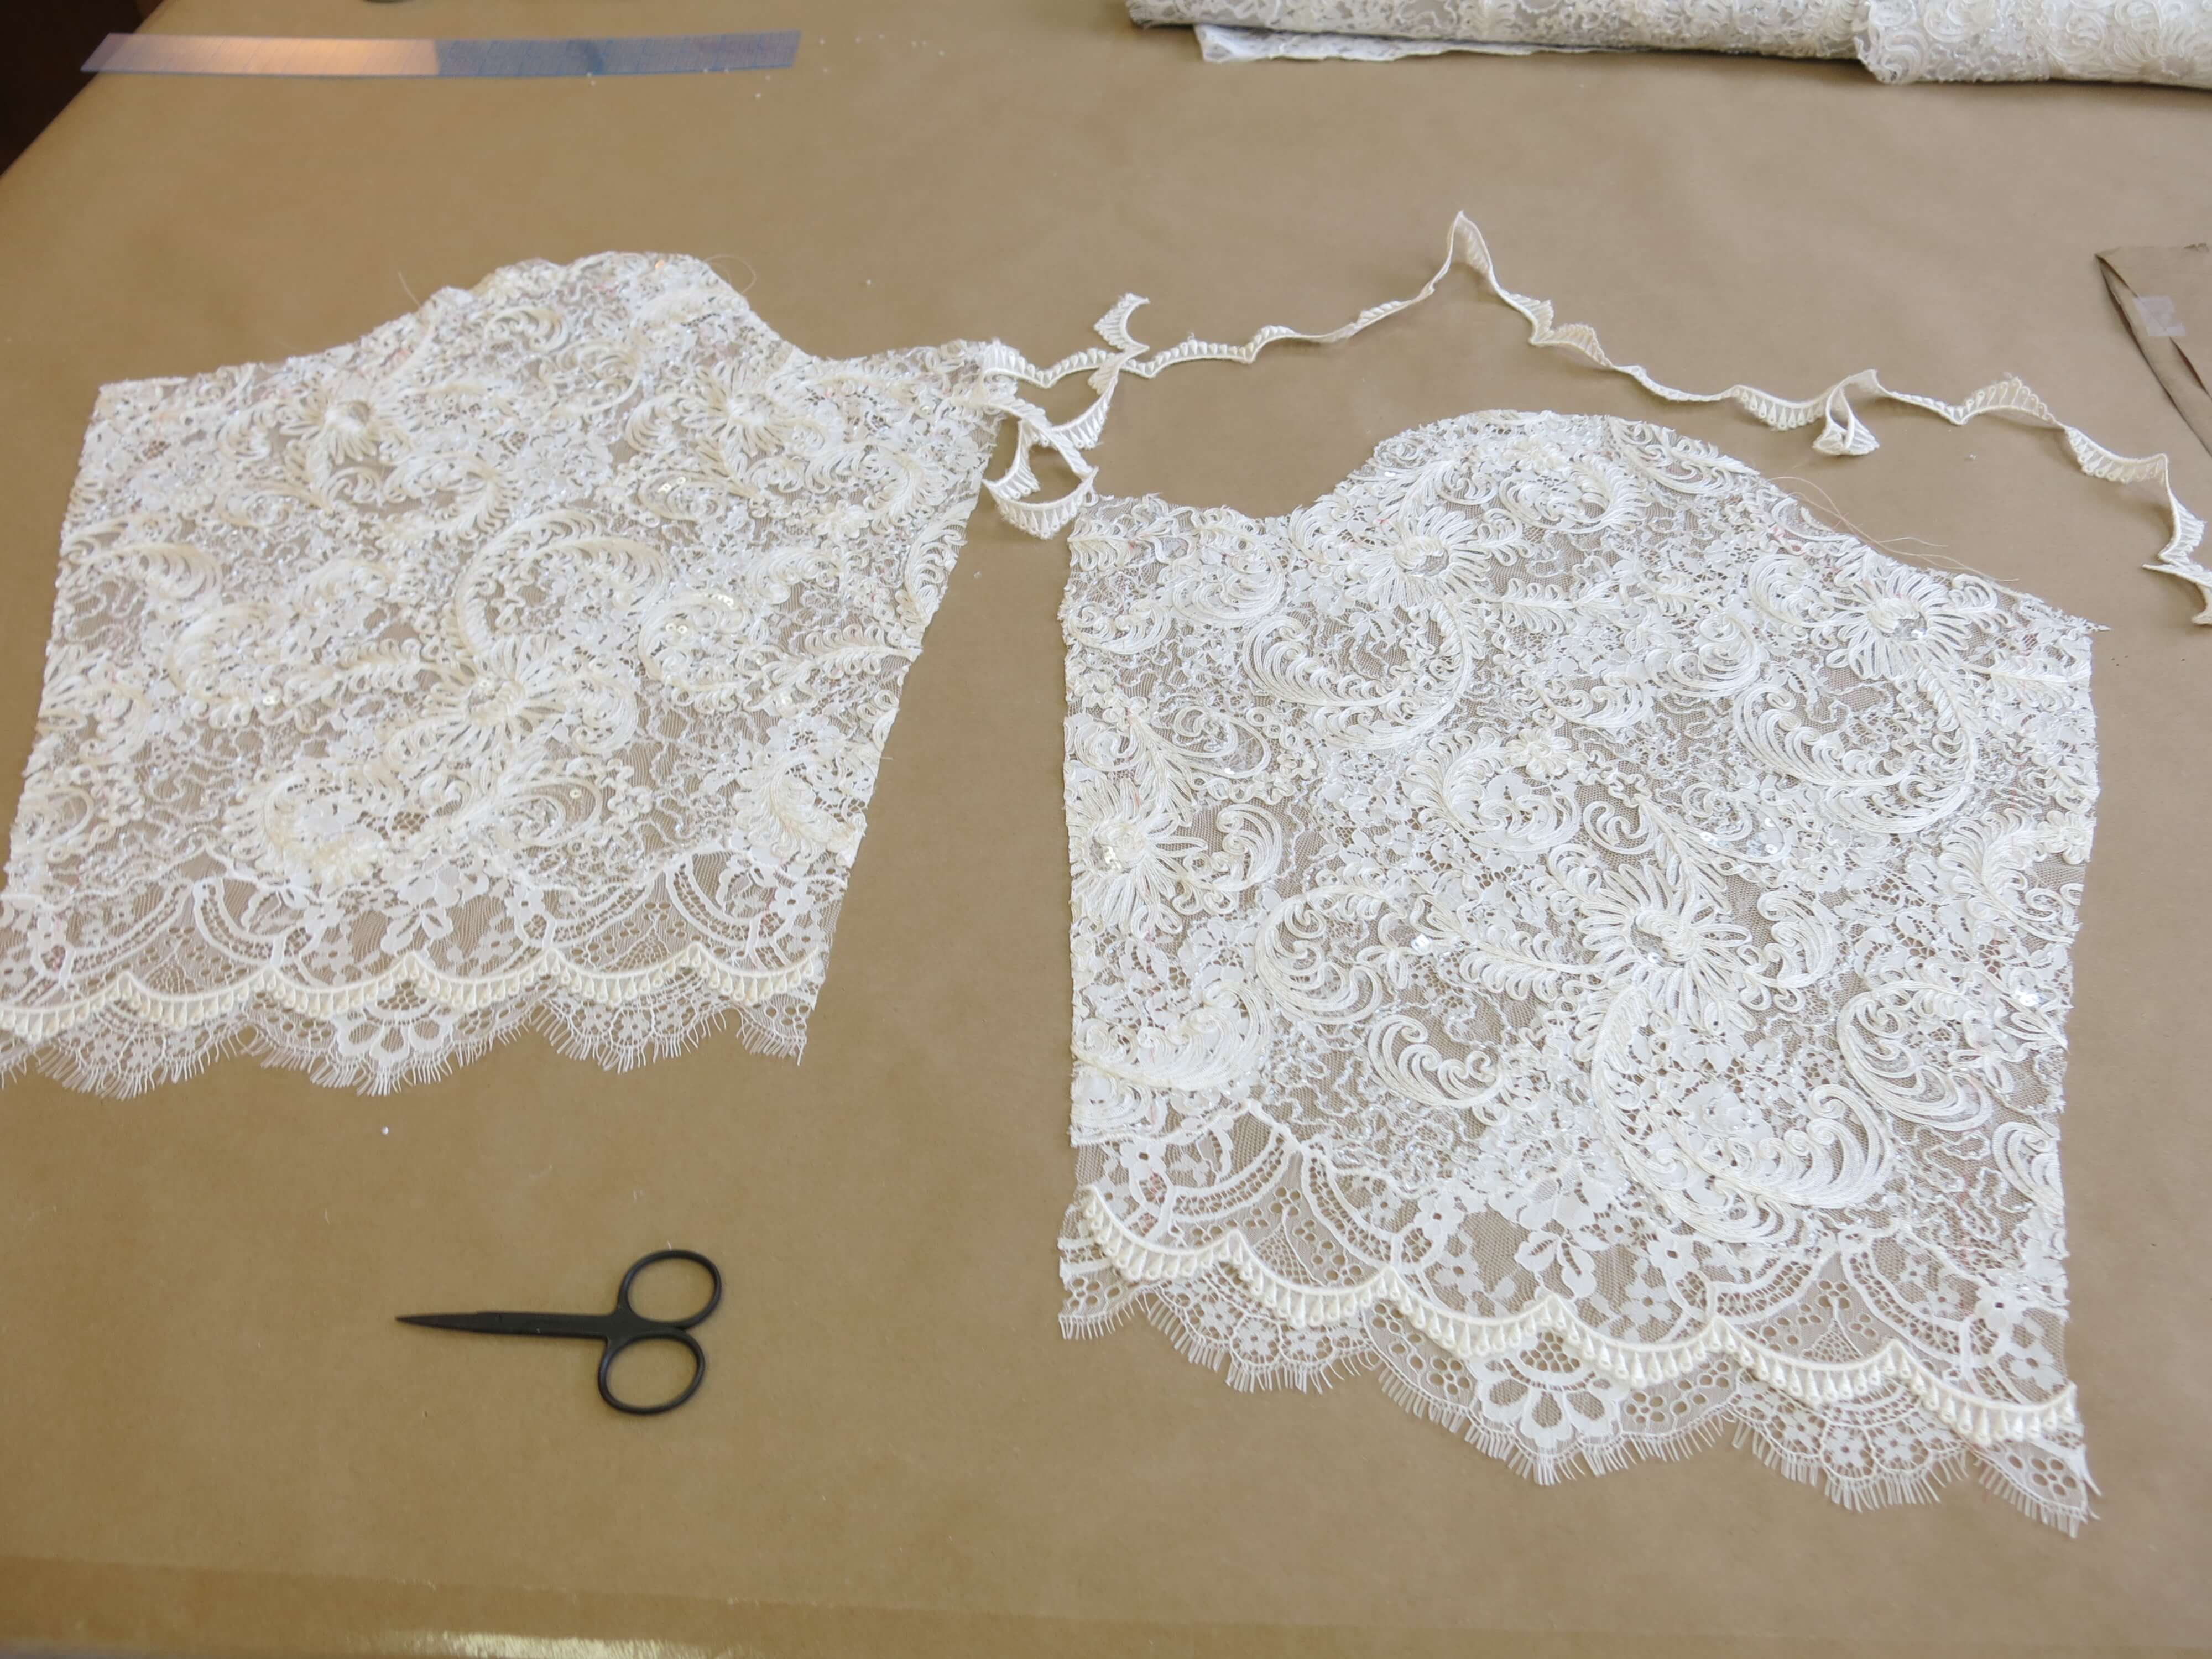
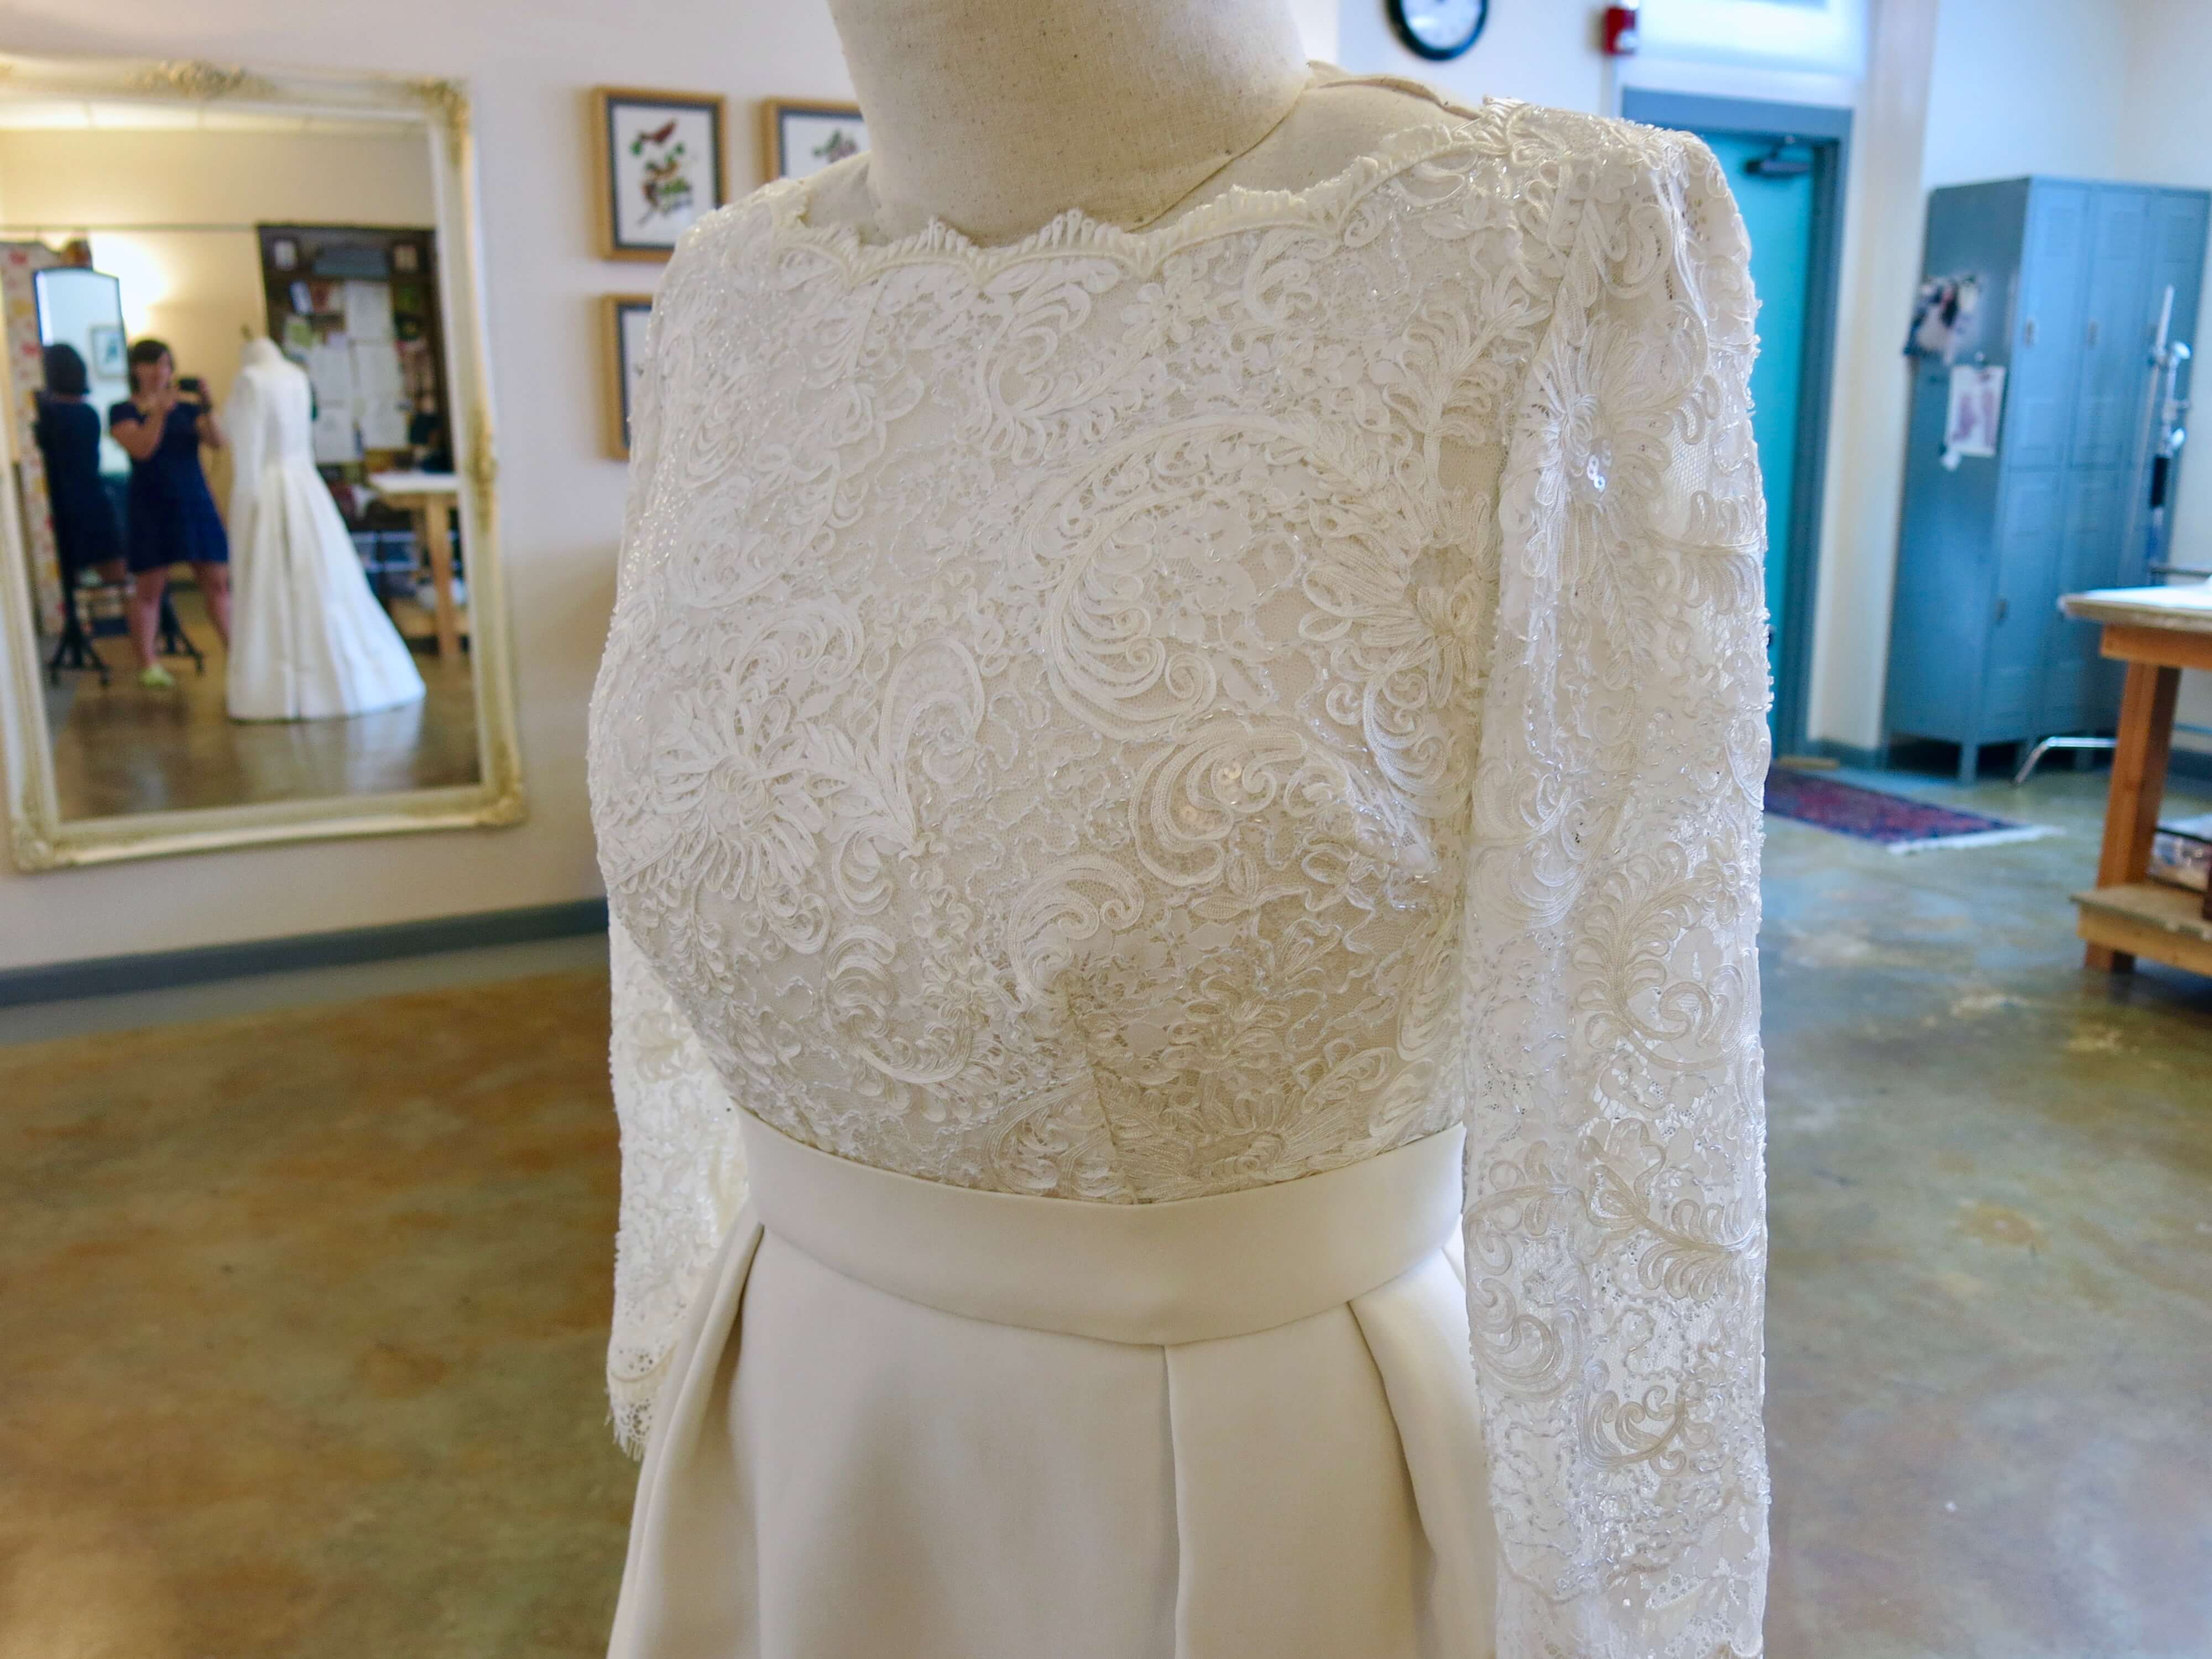
Finishing the Lace Top
During our final basted fitting, I marked some changes for Deborah’s lace sleeves. I had plenty of leftover lace so I felt more comfortable cutting new ones than trying to make the old ones work. We also decided to add a bit of scalloped trim, which I knew would be easier to stitch in place while flat.
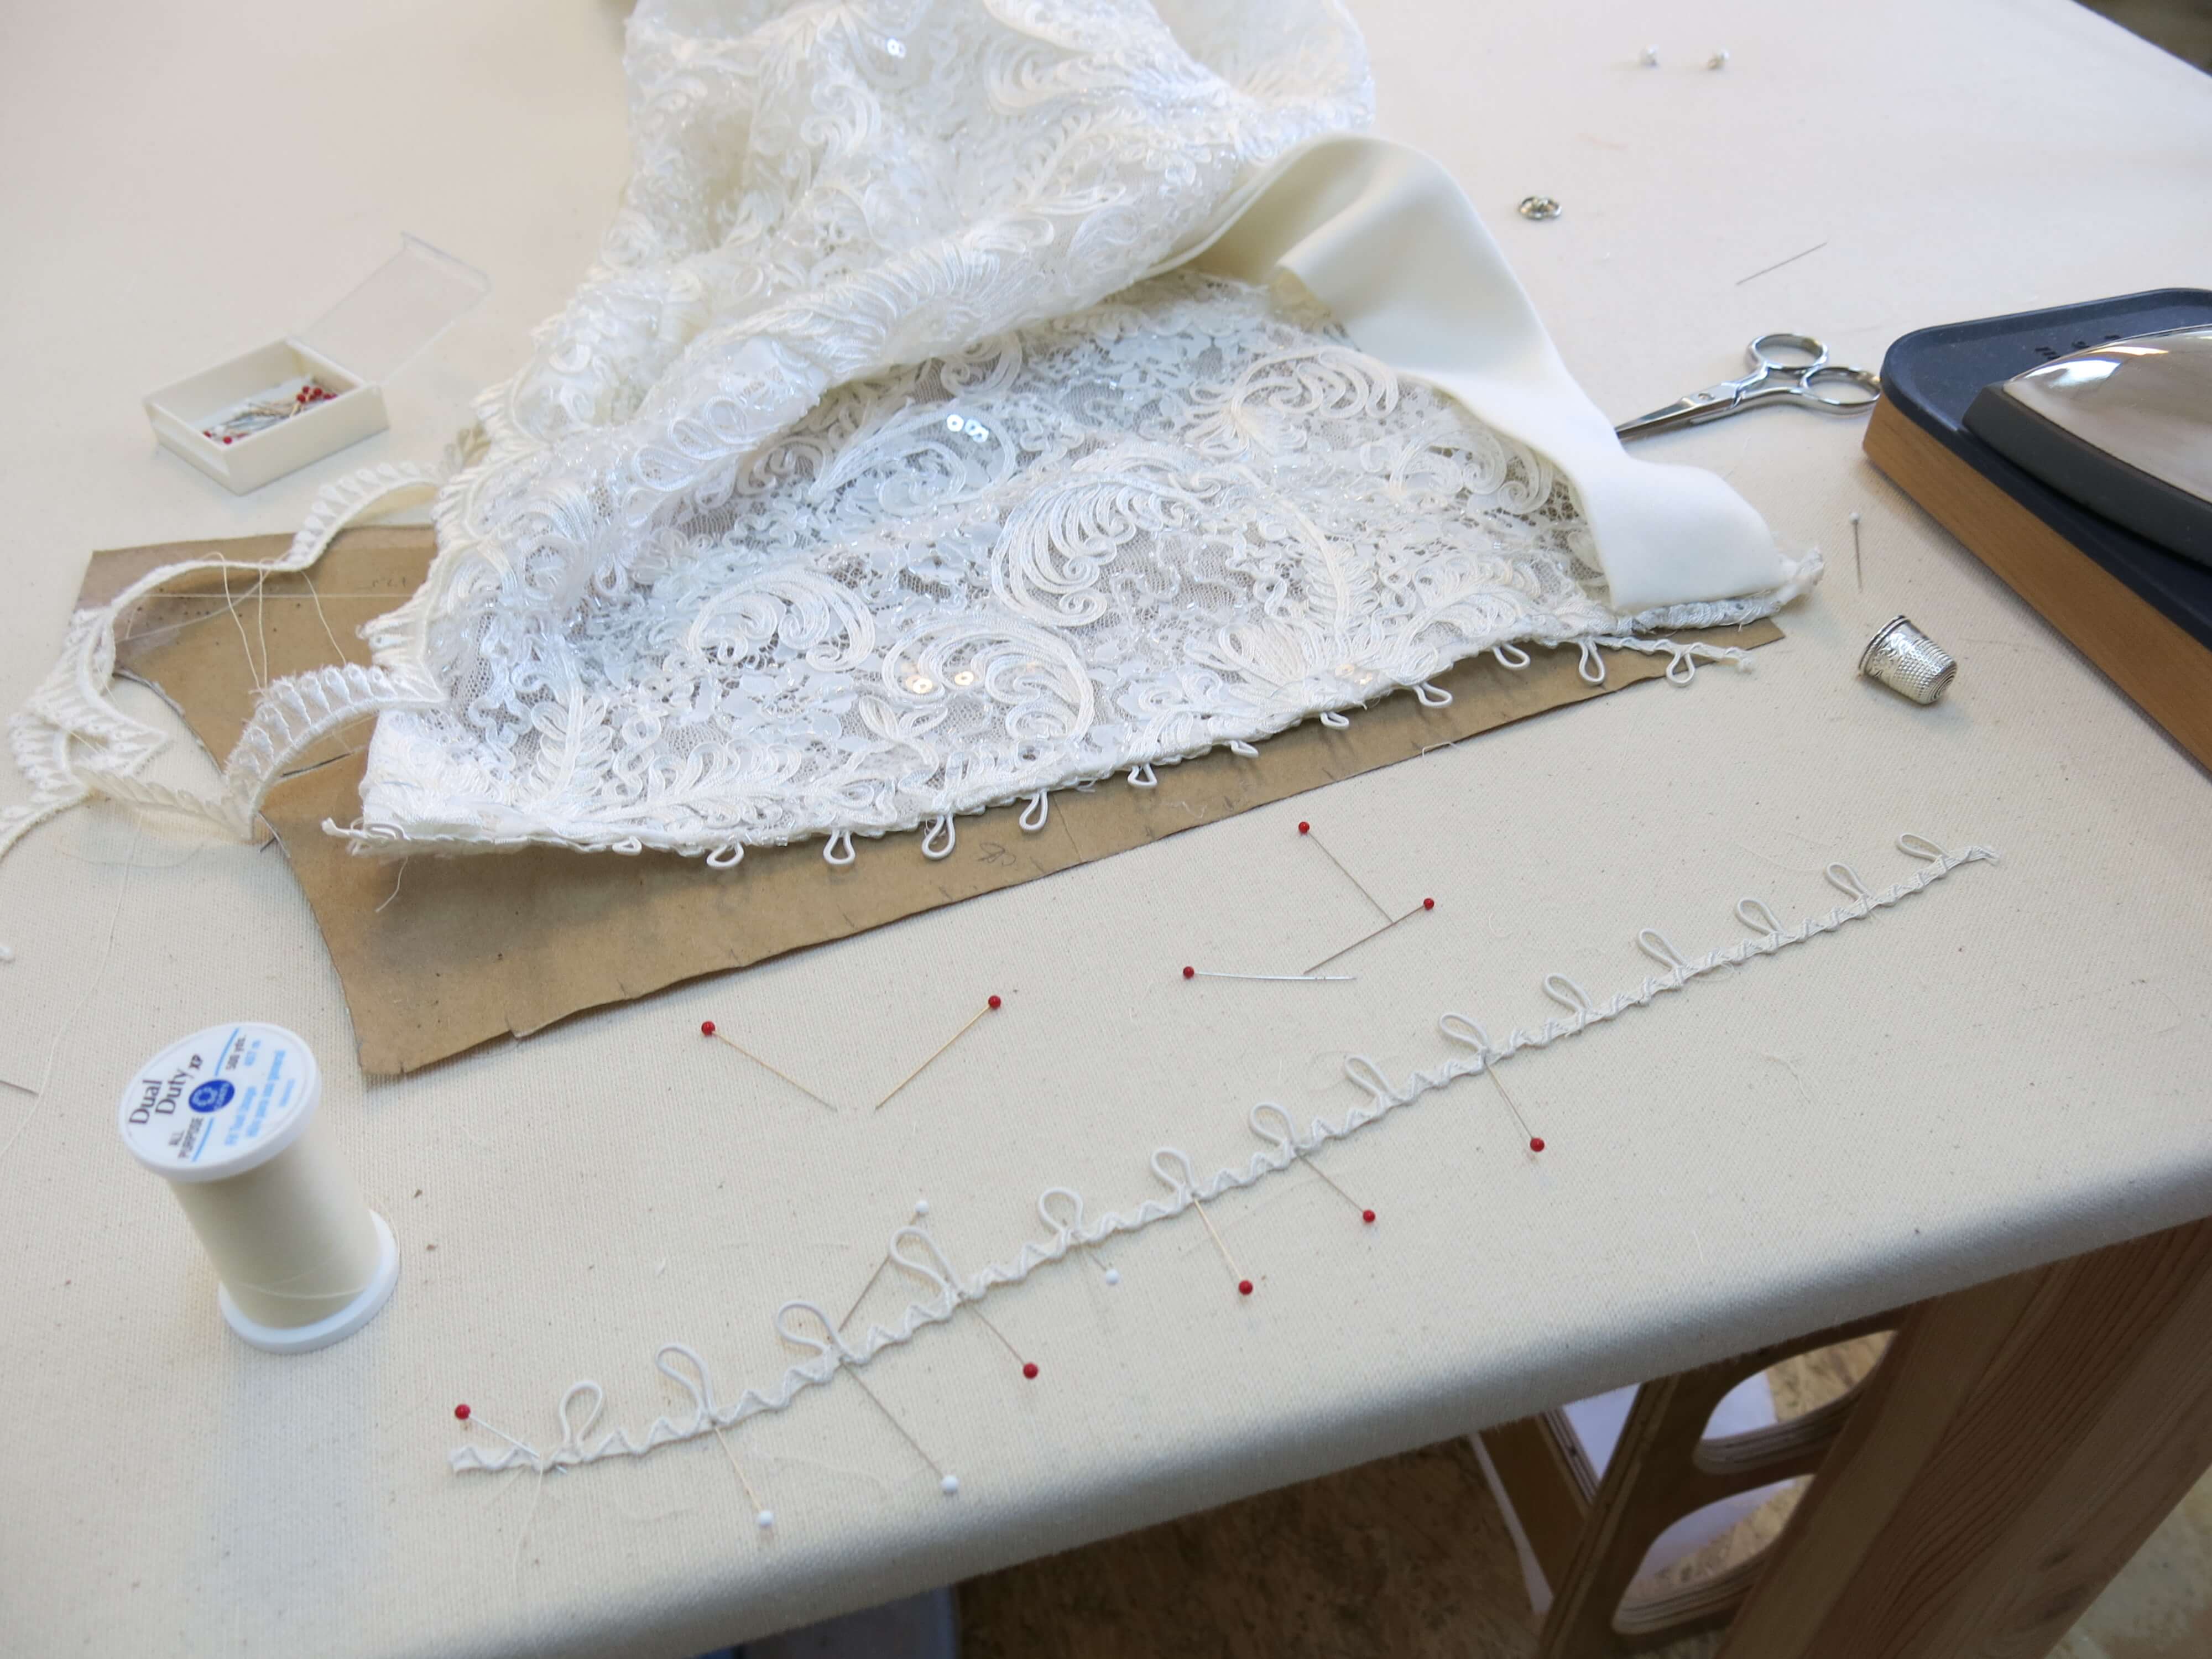
In order to accomplish the fitting changes for the back of the lace top, I had to remove the button loops. Since these loops seemed secure and aren’t as ‘structural’ as the ones on the dress itself, I decided to stick with the originals.
Since the loops of both sides of the lace top would need to match perfectly with the ones on the dress, I used my paper pattern to guide my spacing. Pins and steam also helped.
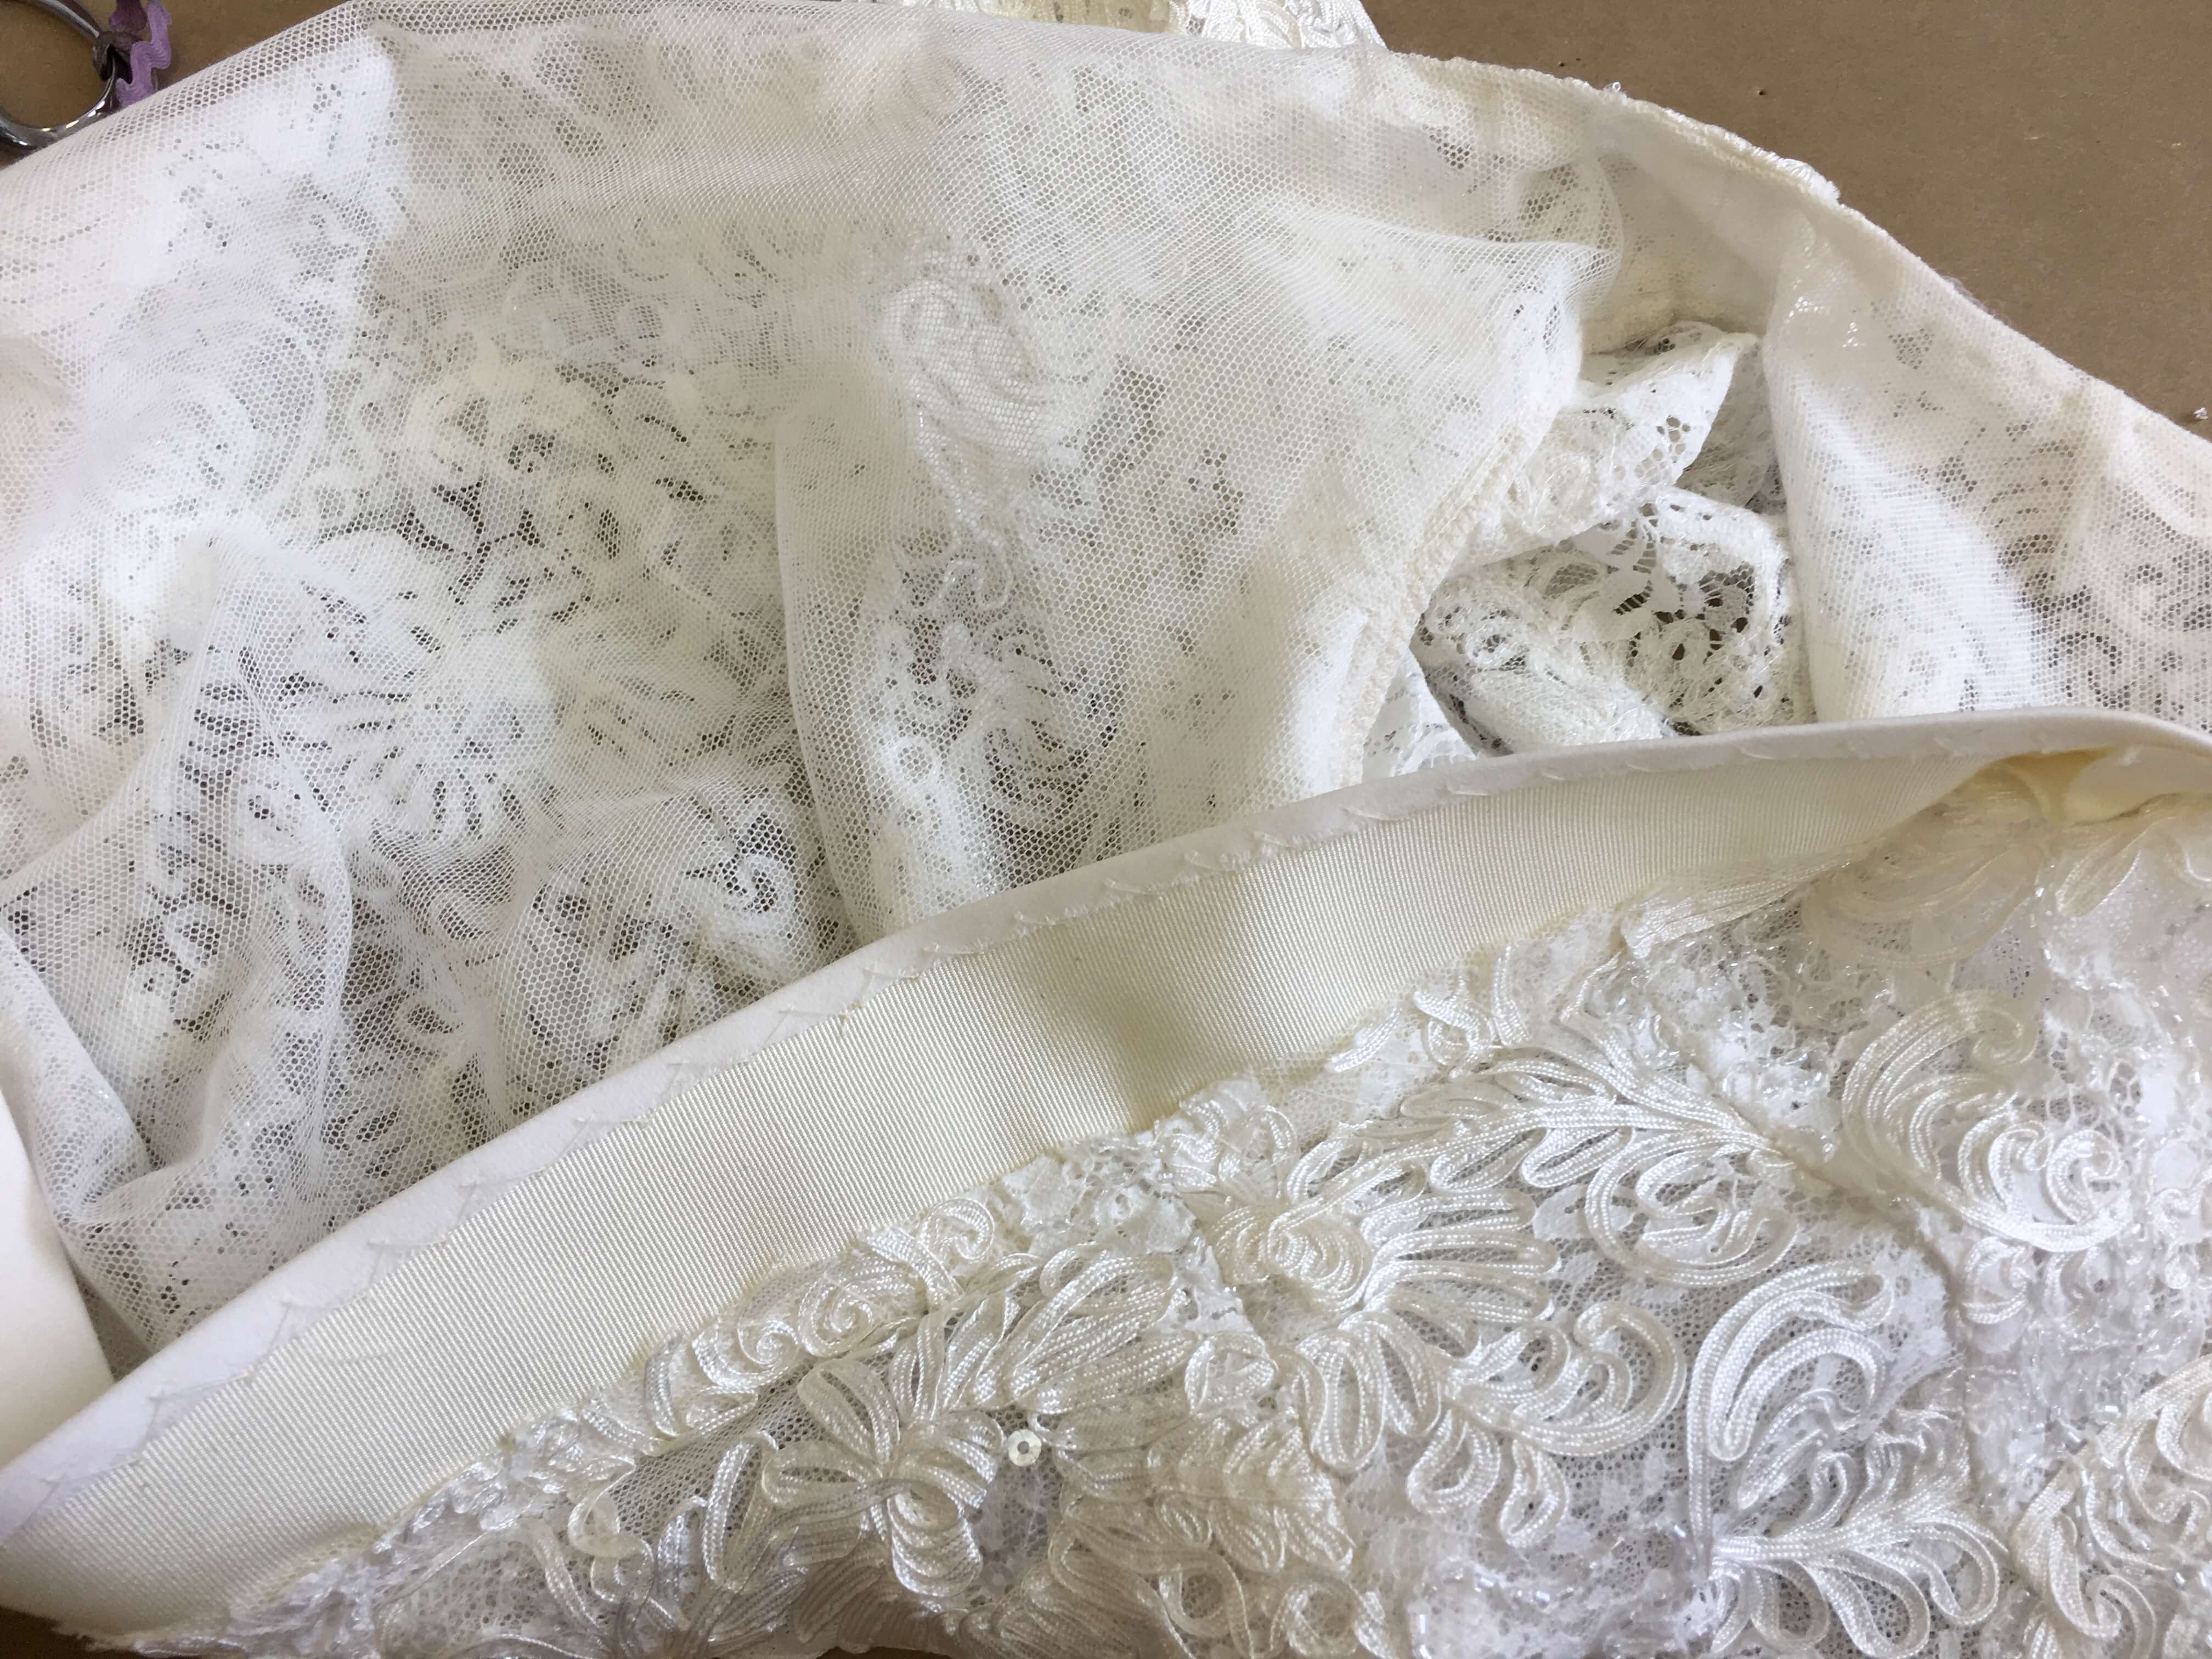
And again, being in ‘the finishing zone’, I often forgot to pick up my camera. I permanently stitched the new sleeves, added some scalloped trim to the neckline, finished the lining and belt by hand…
Extra Decorations
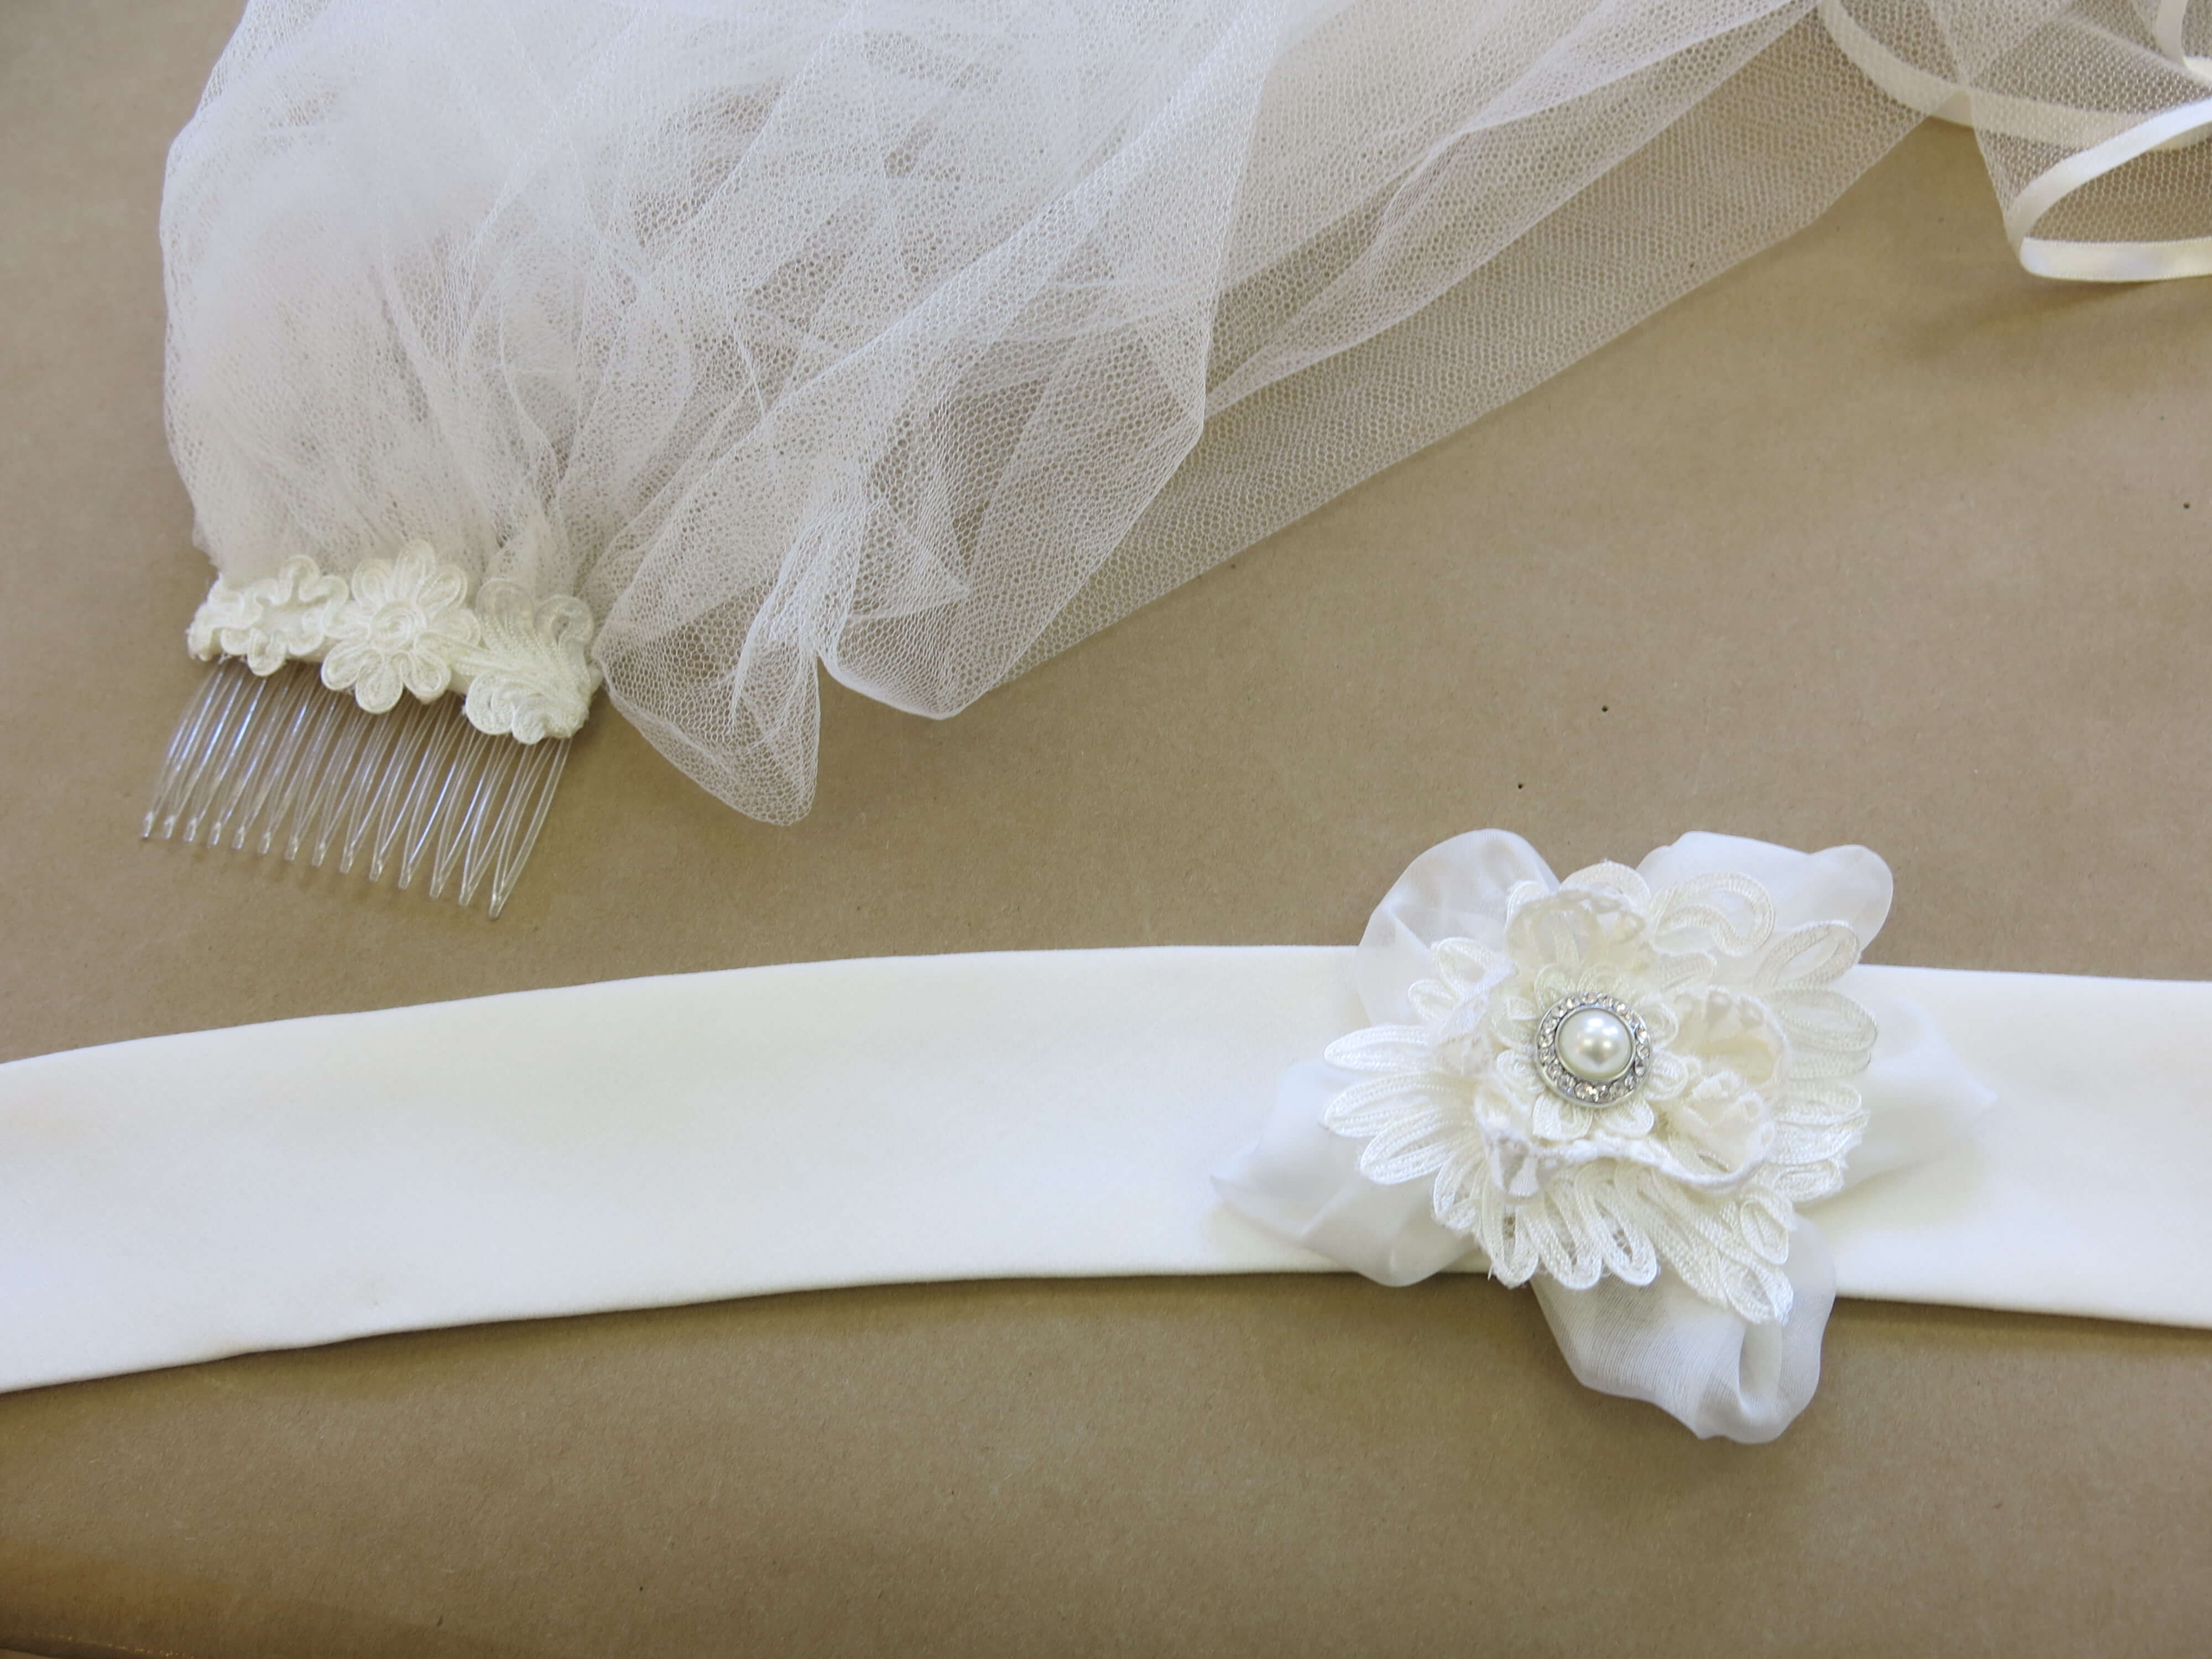
There were also a few decorations to work on before declaring Deborah’s dress done! The belt for the reception dress would feature a large flower. I took bits of the lace and trim and started playing around…
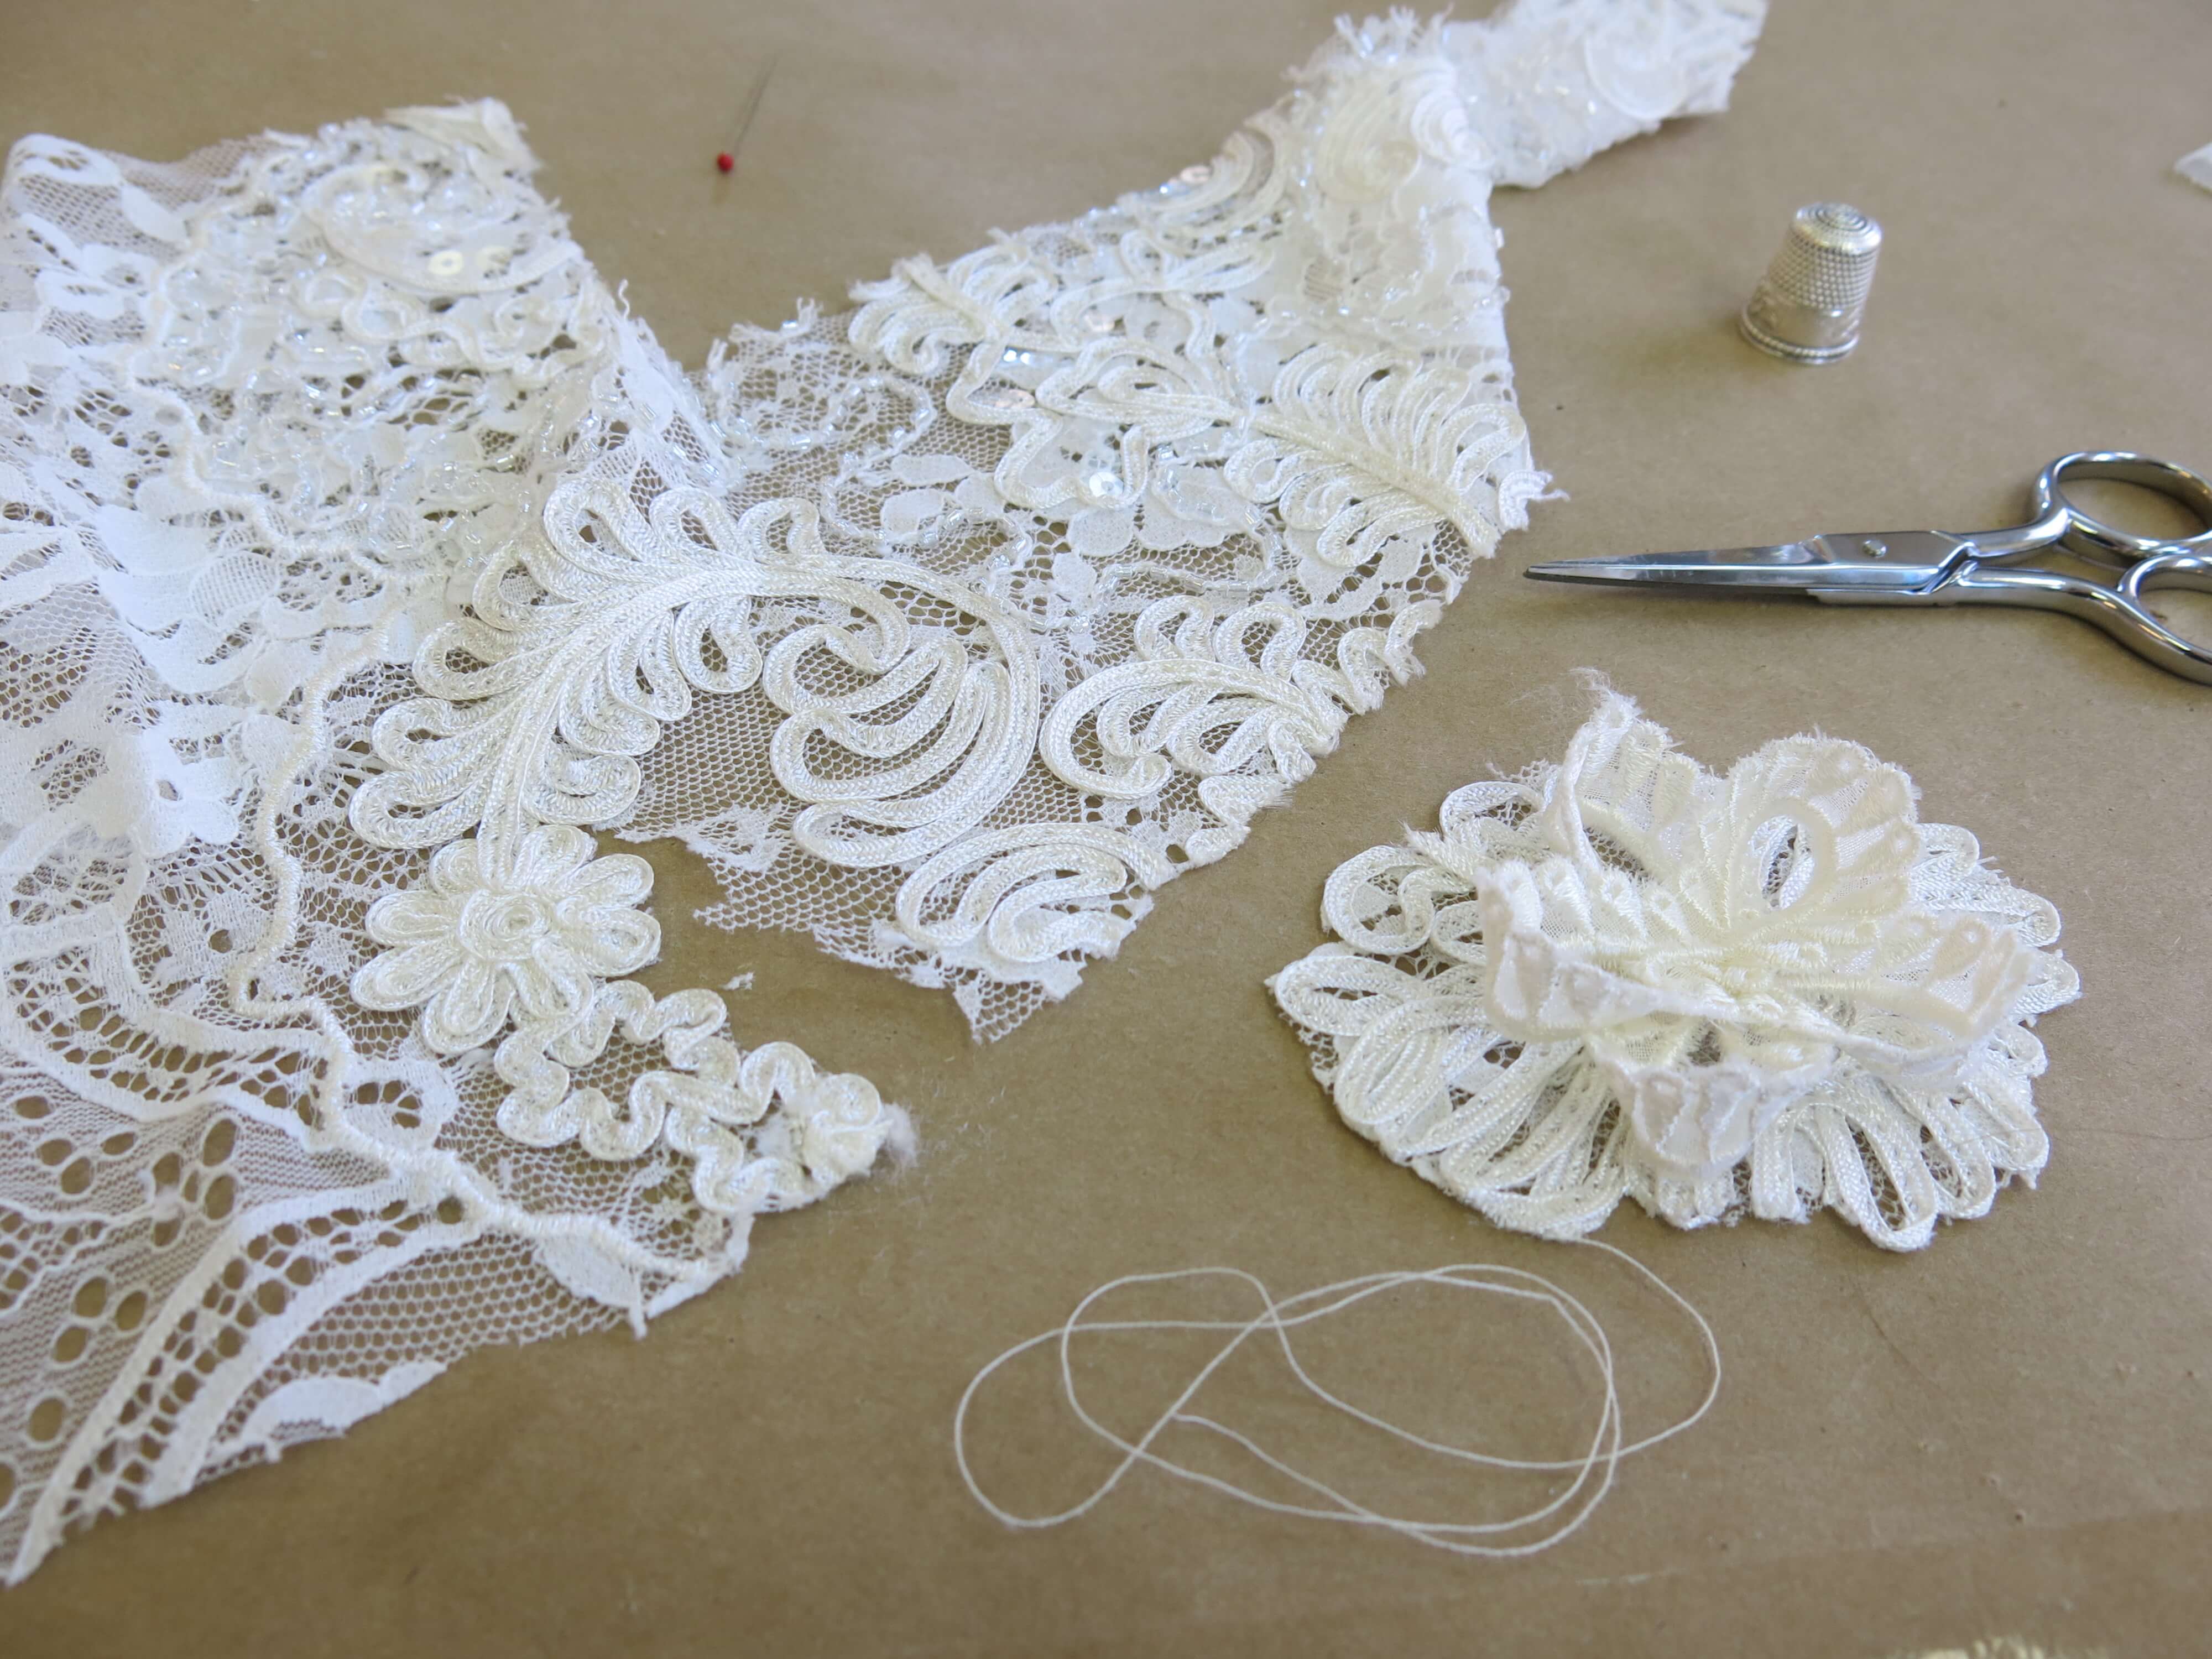
…until floral shapes started to emerge…
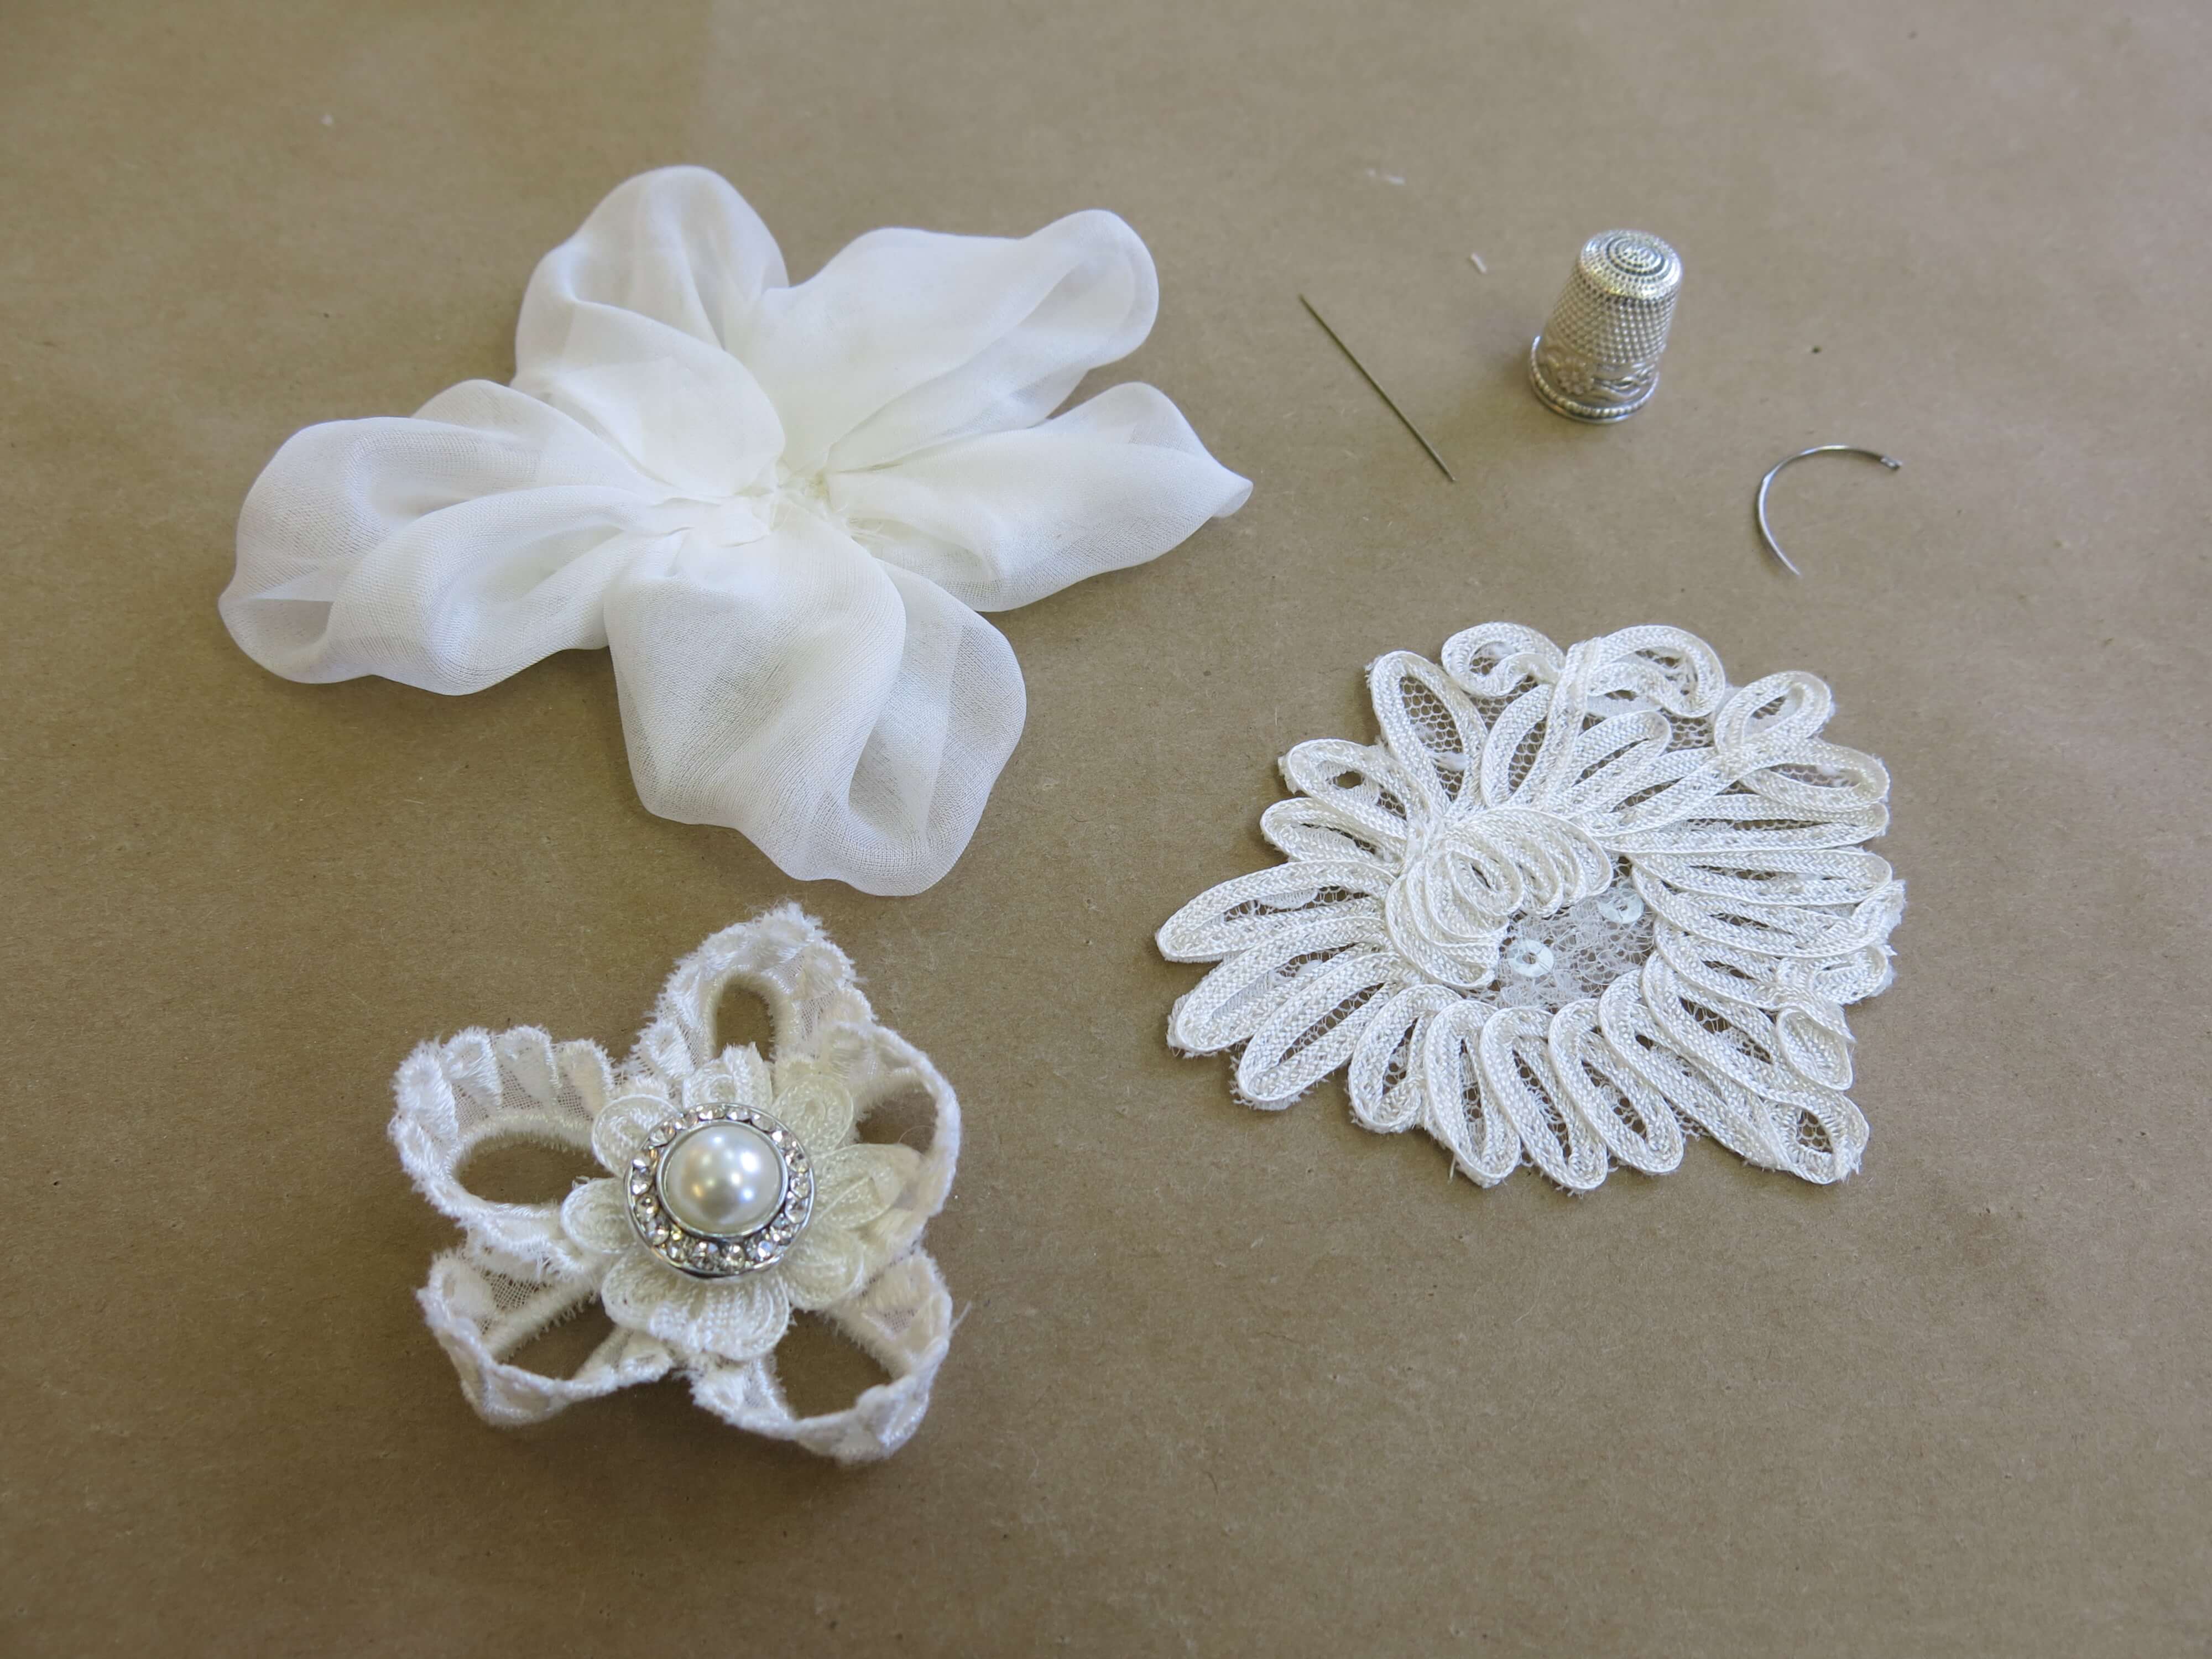
…and became something beautiful.
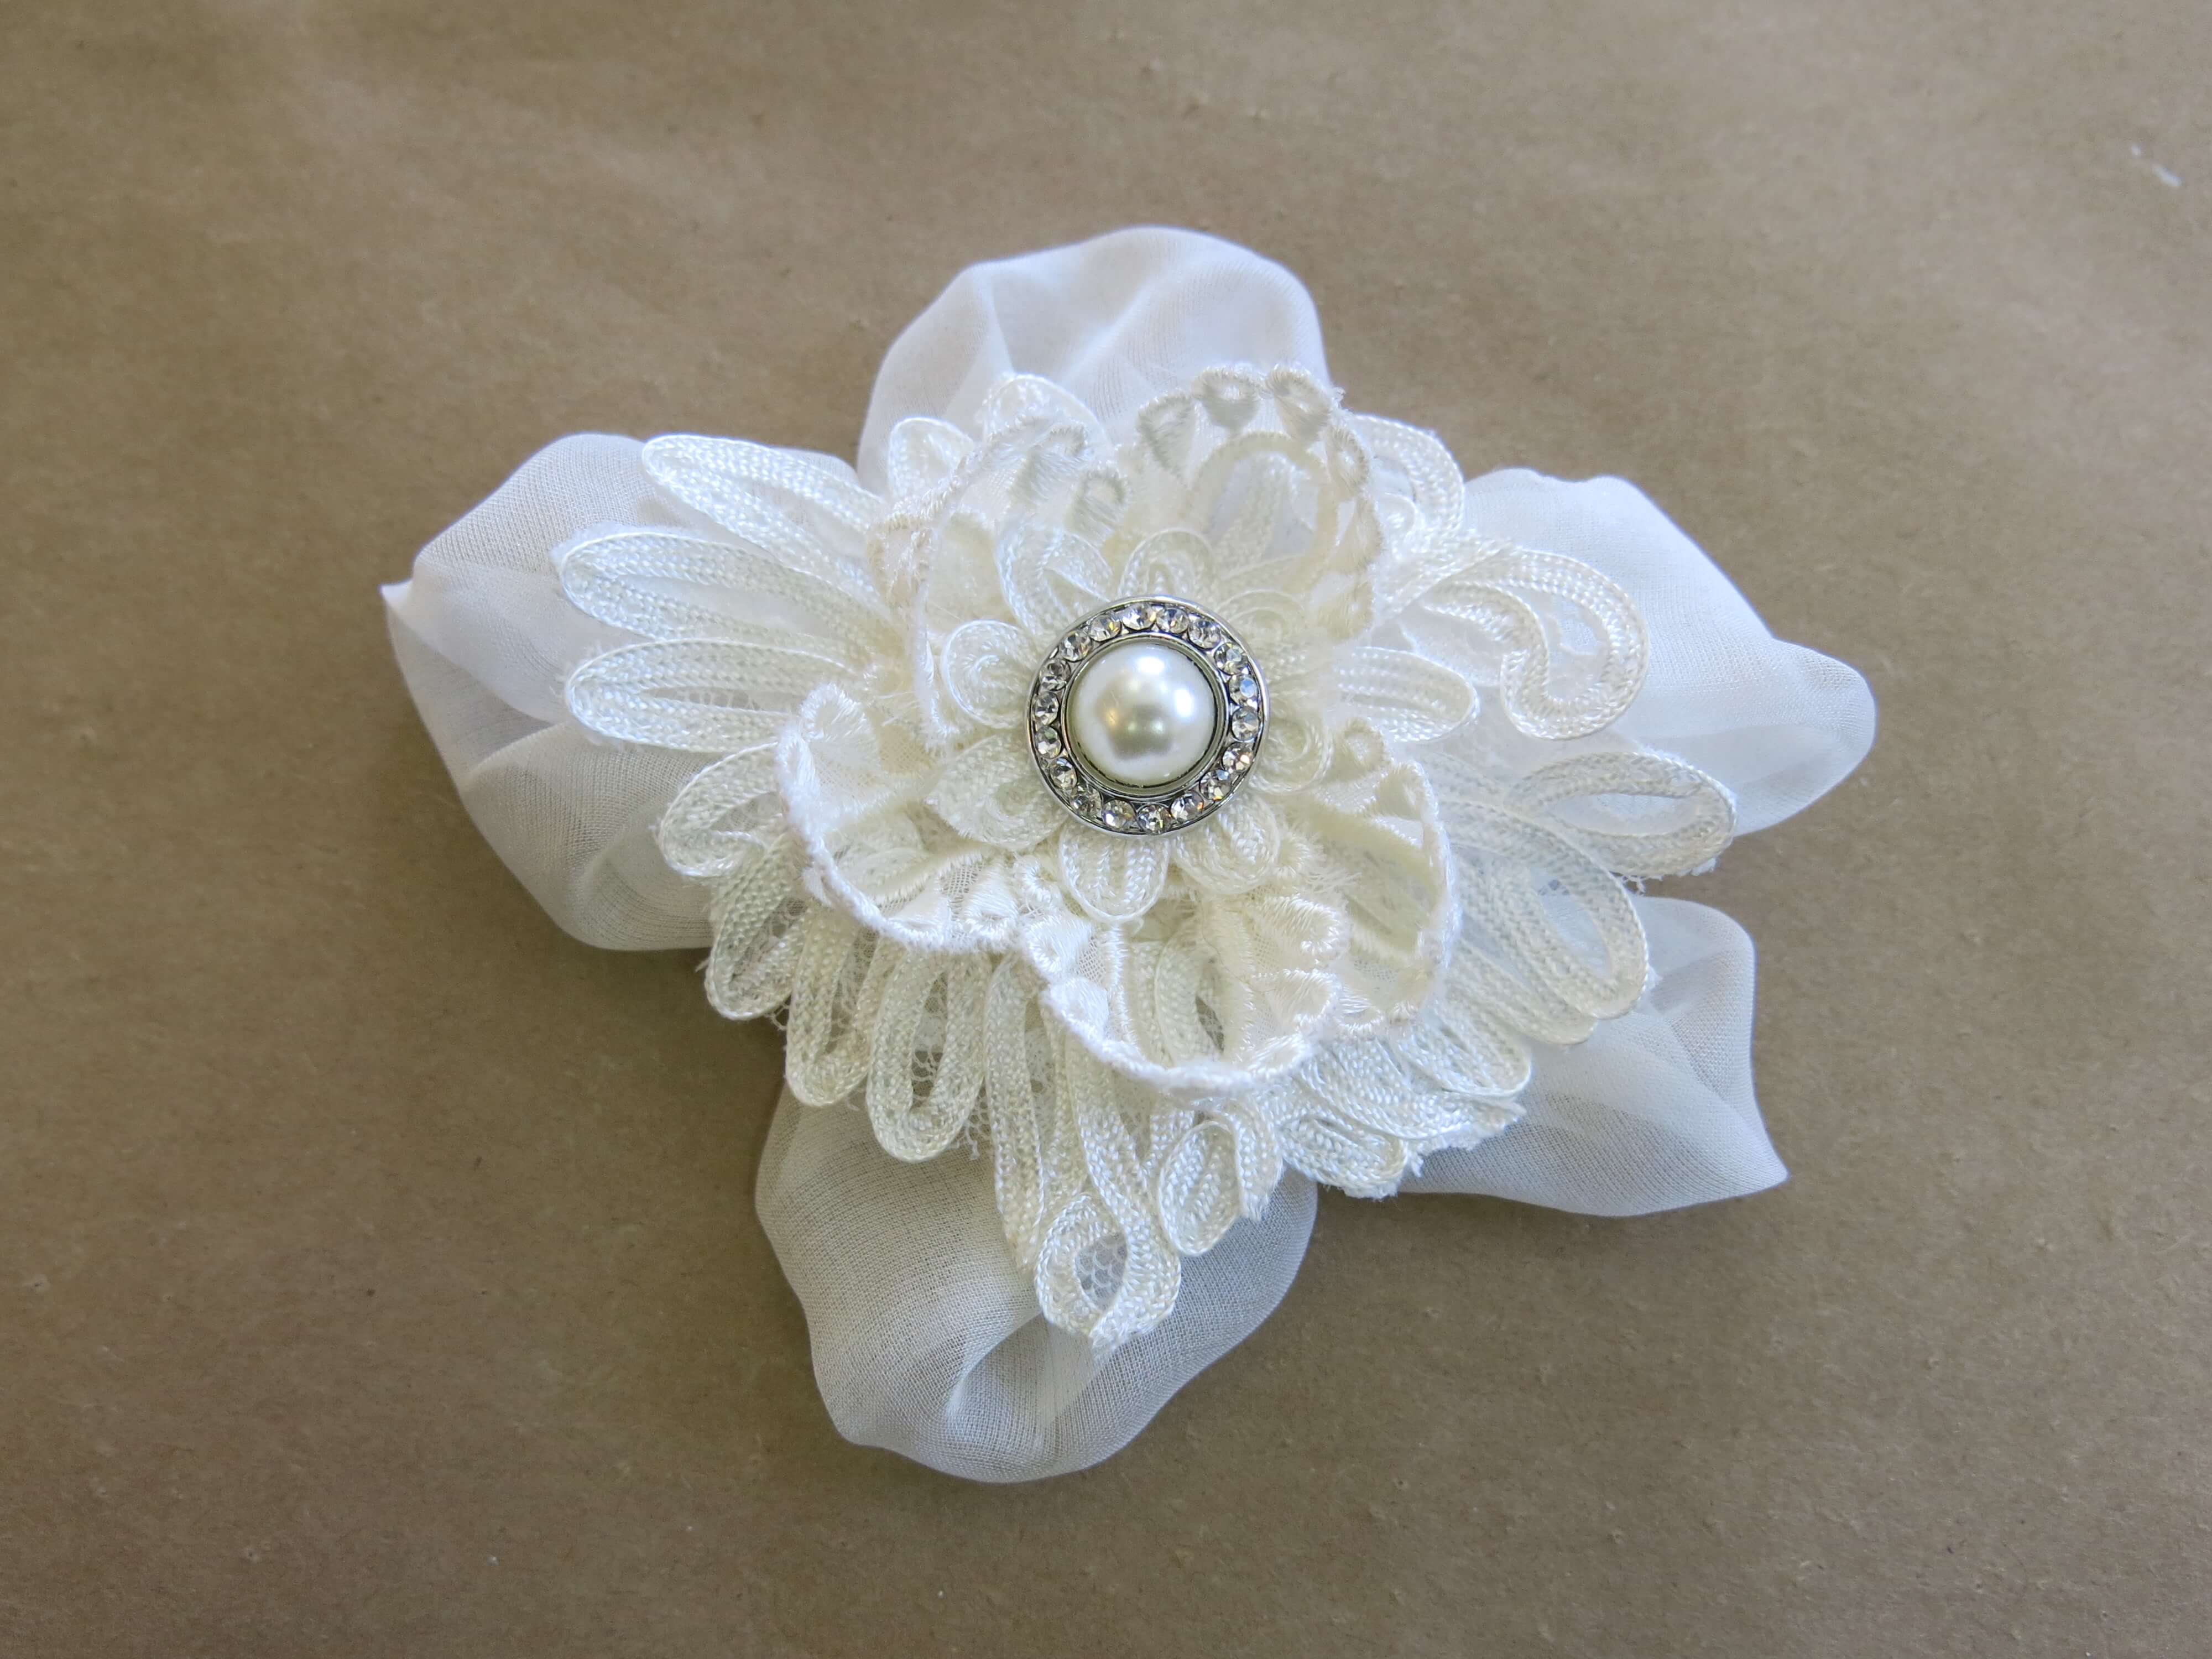
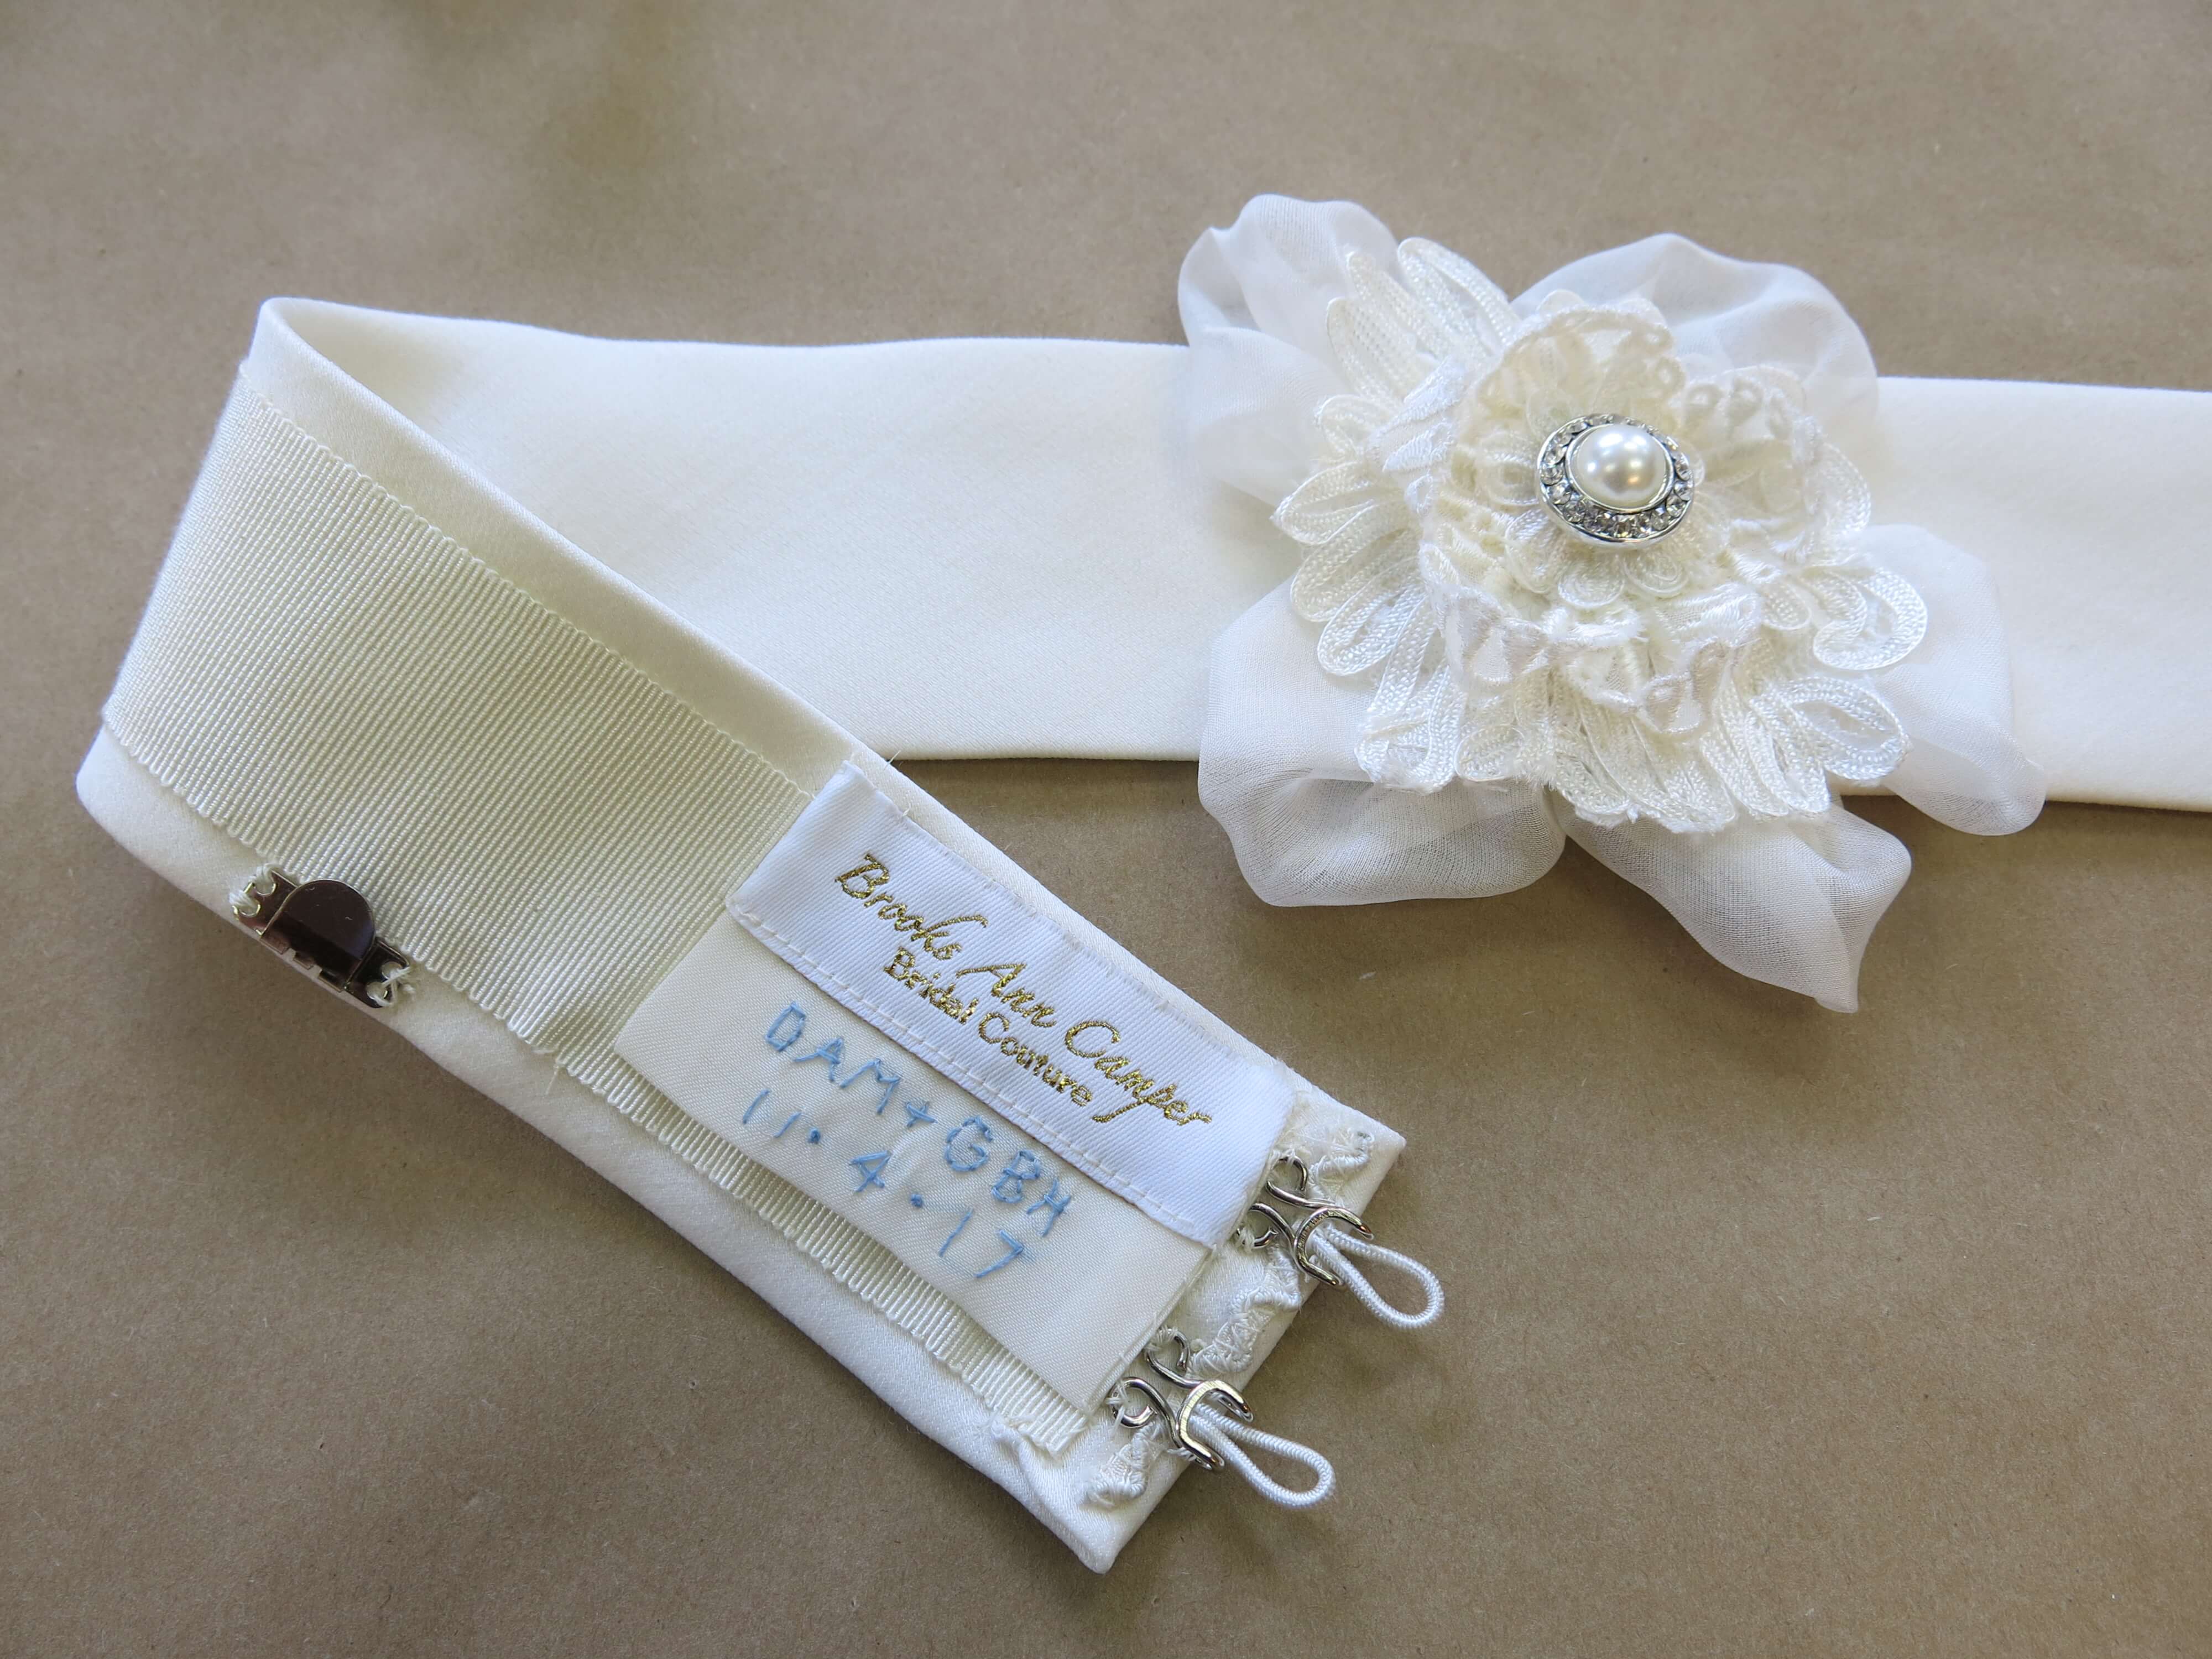
I added the flower, lining, and label to the belt, as well as hidden hooks! Ballet hooks would secure the closure behind the buttons and loops. Skirt hooks would anchor the bottom edge to thread chains hidden at the dress’s waistline.
While I didn’t have time to make a custom veil for Deborah, she ordered a gorgeous silk wedding veil online and I agreed to jazz it up a little with leftover lace.
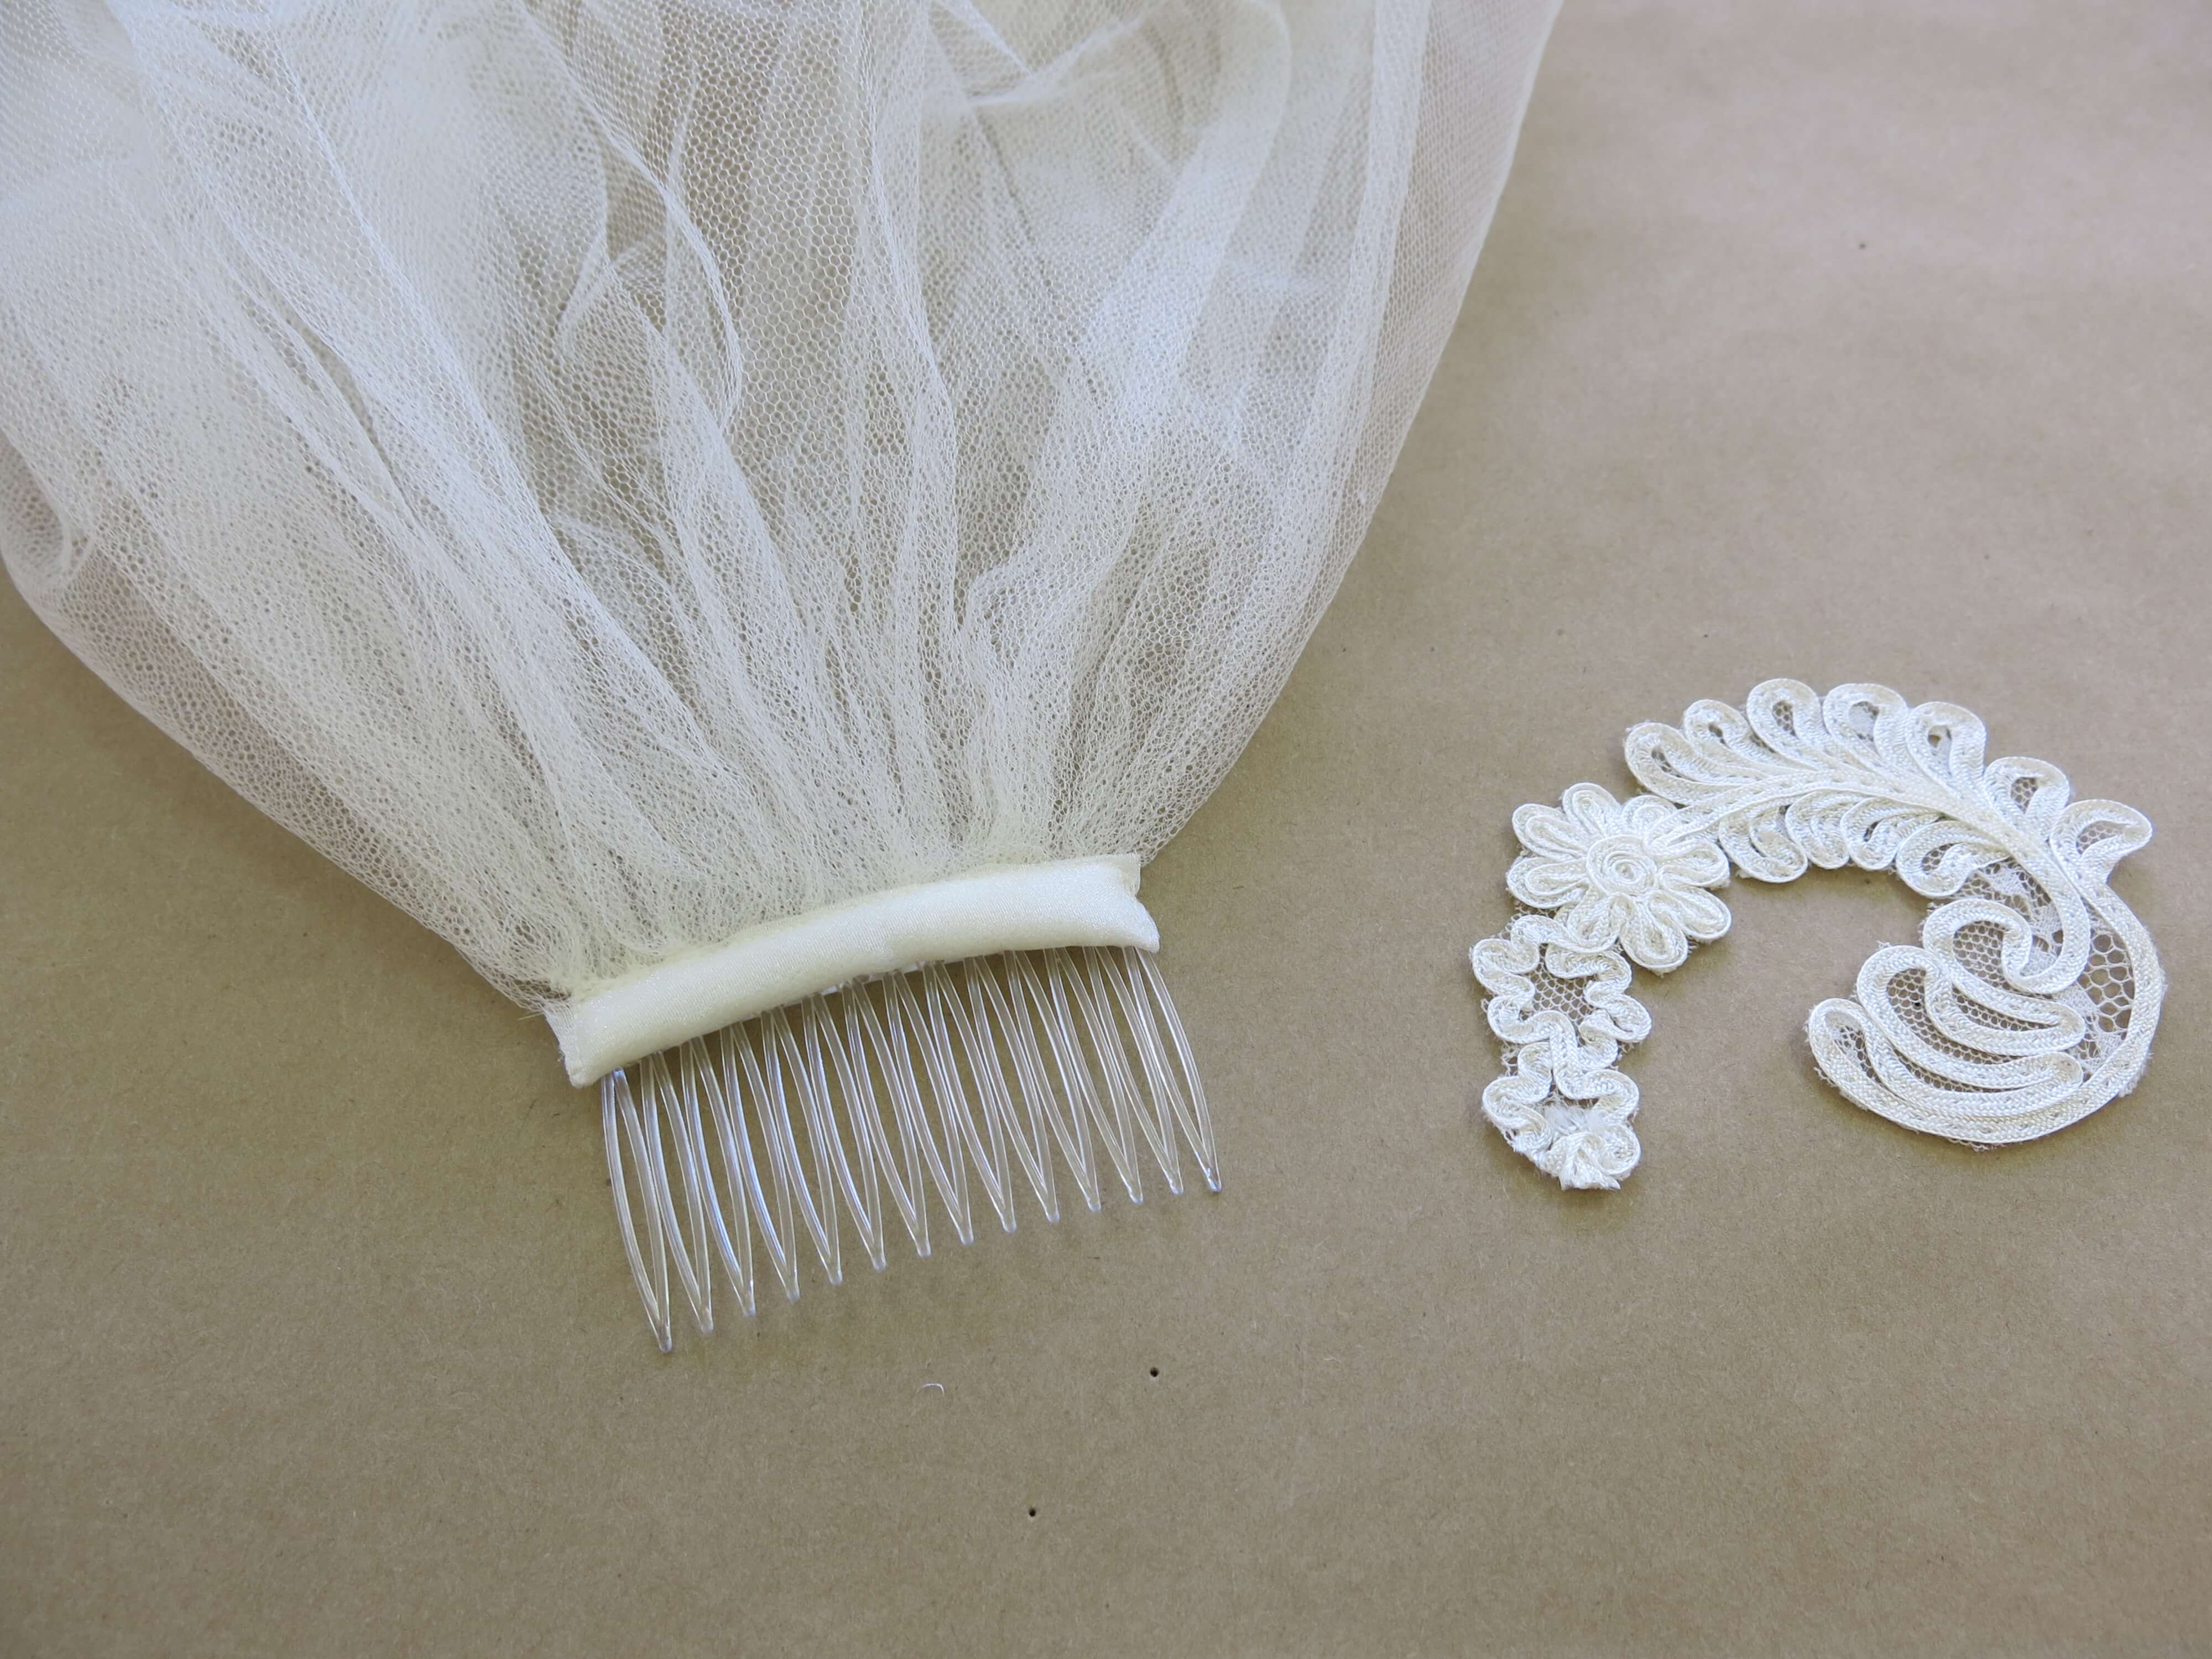
Fun and fancy!
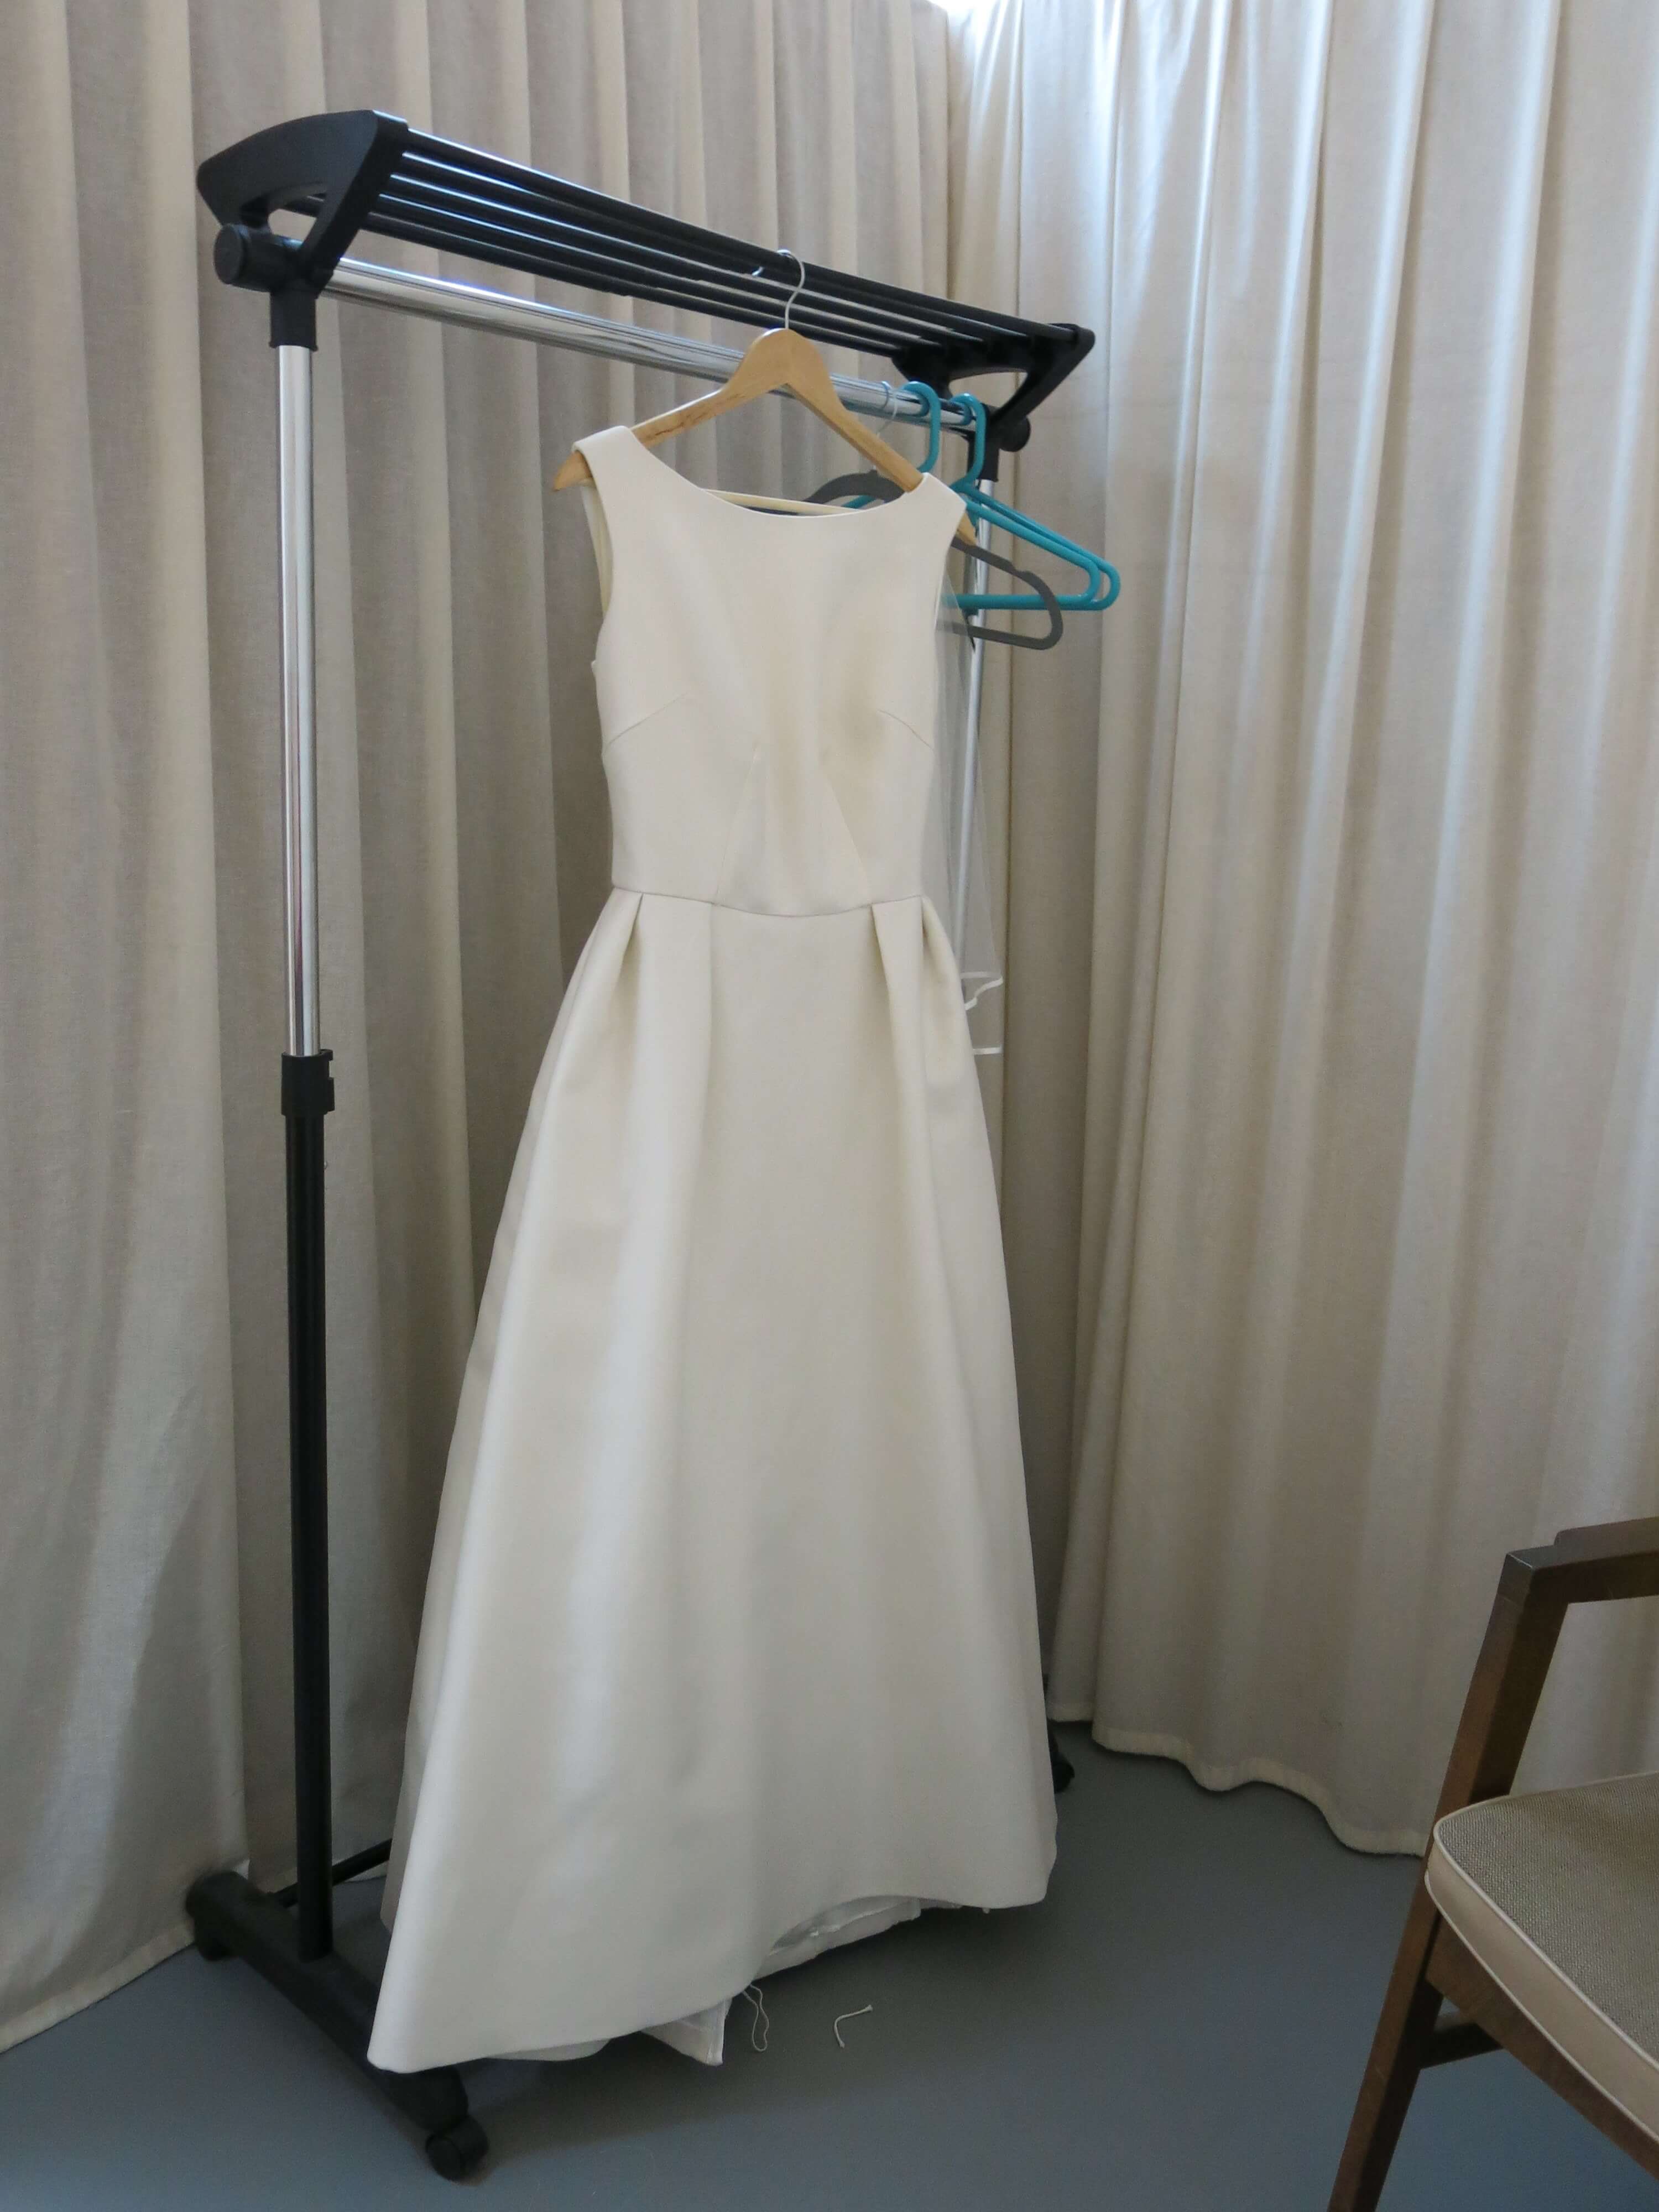
Dress Done!
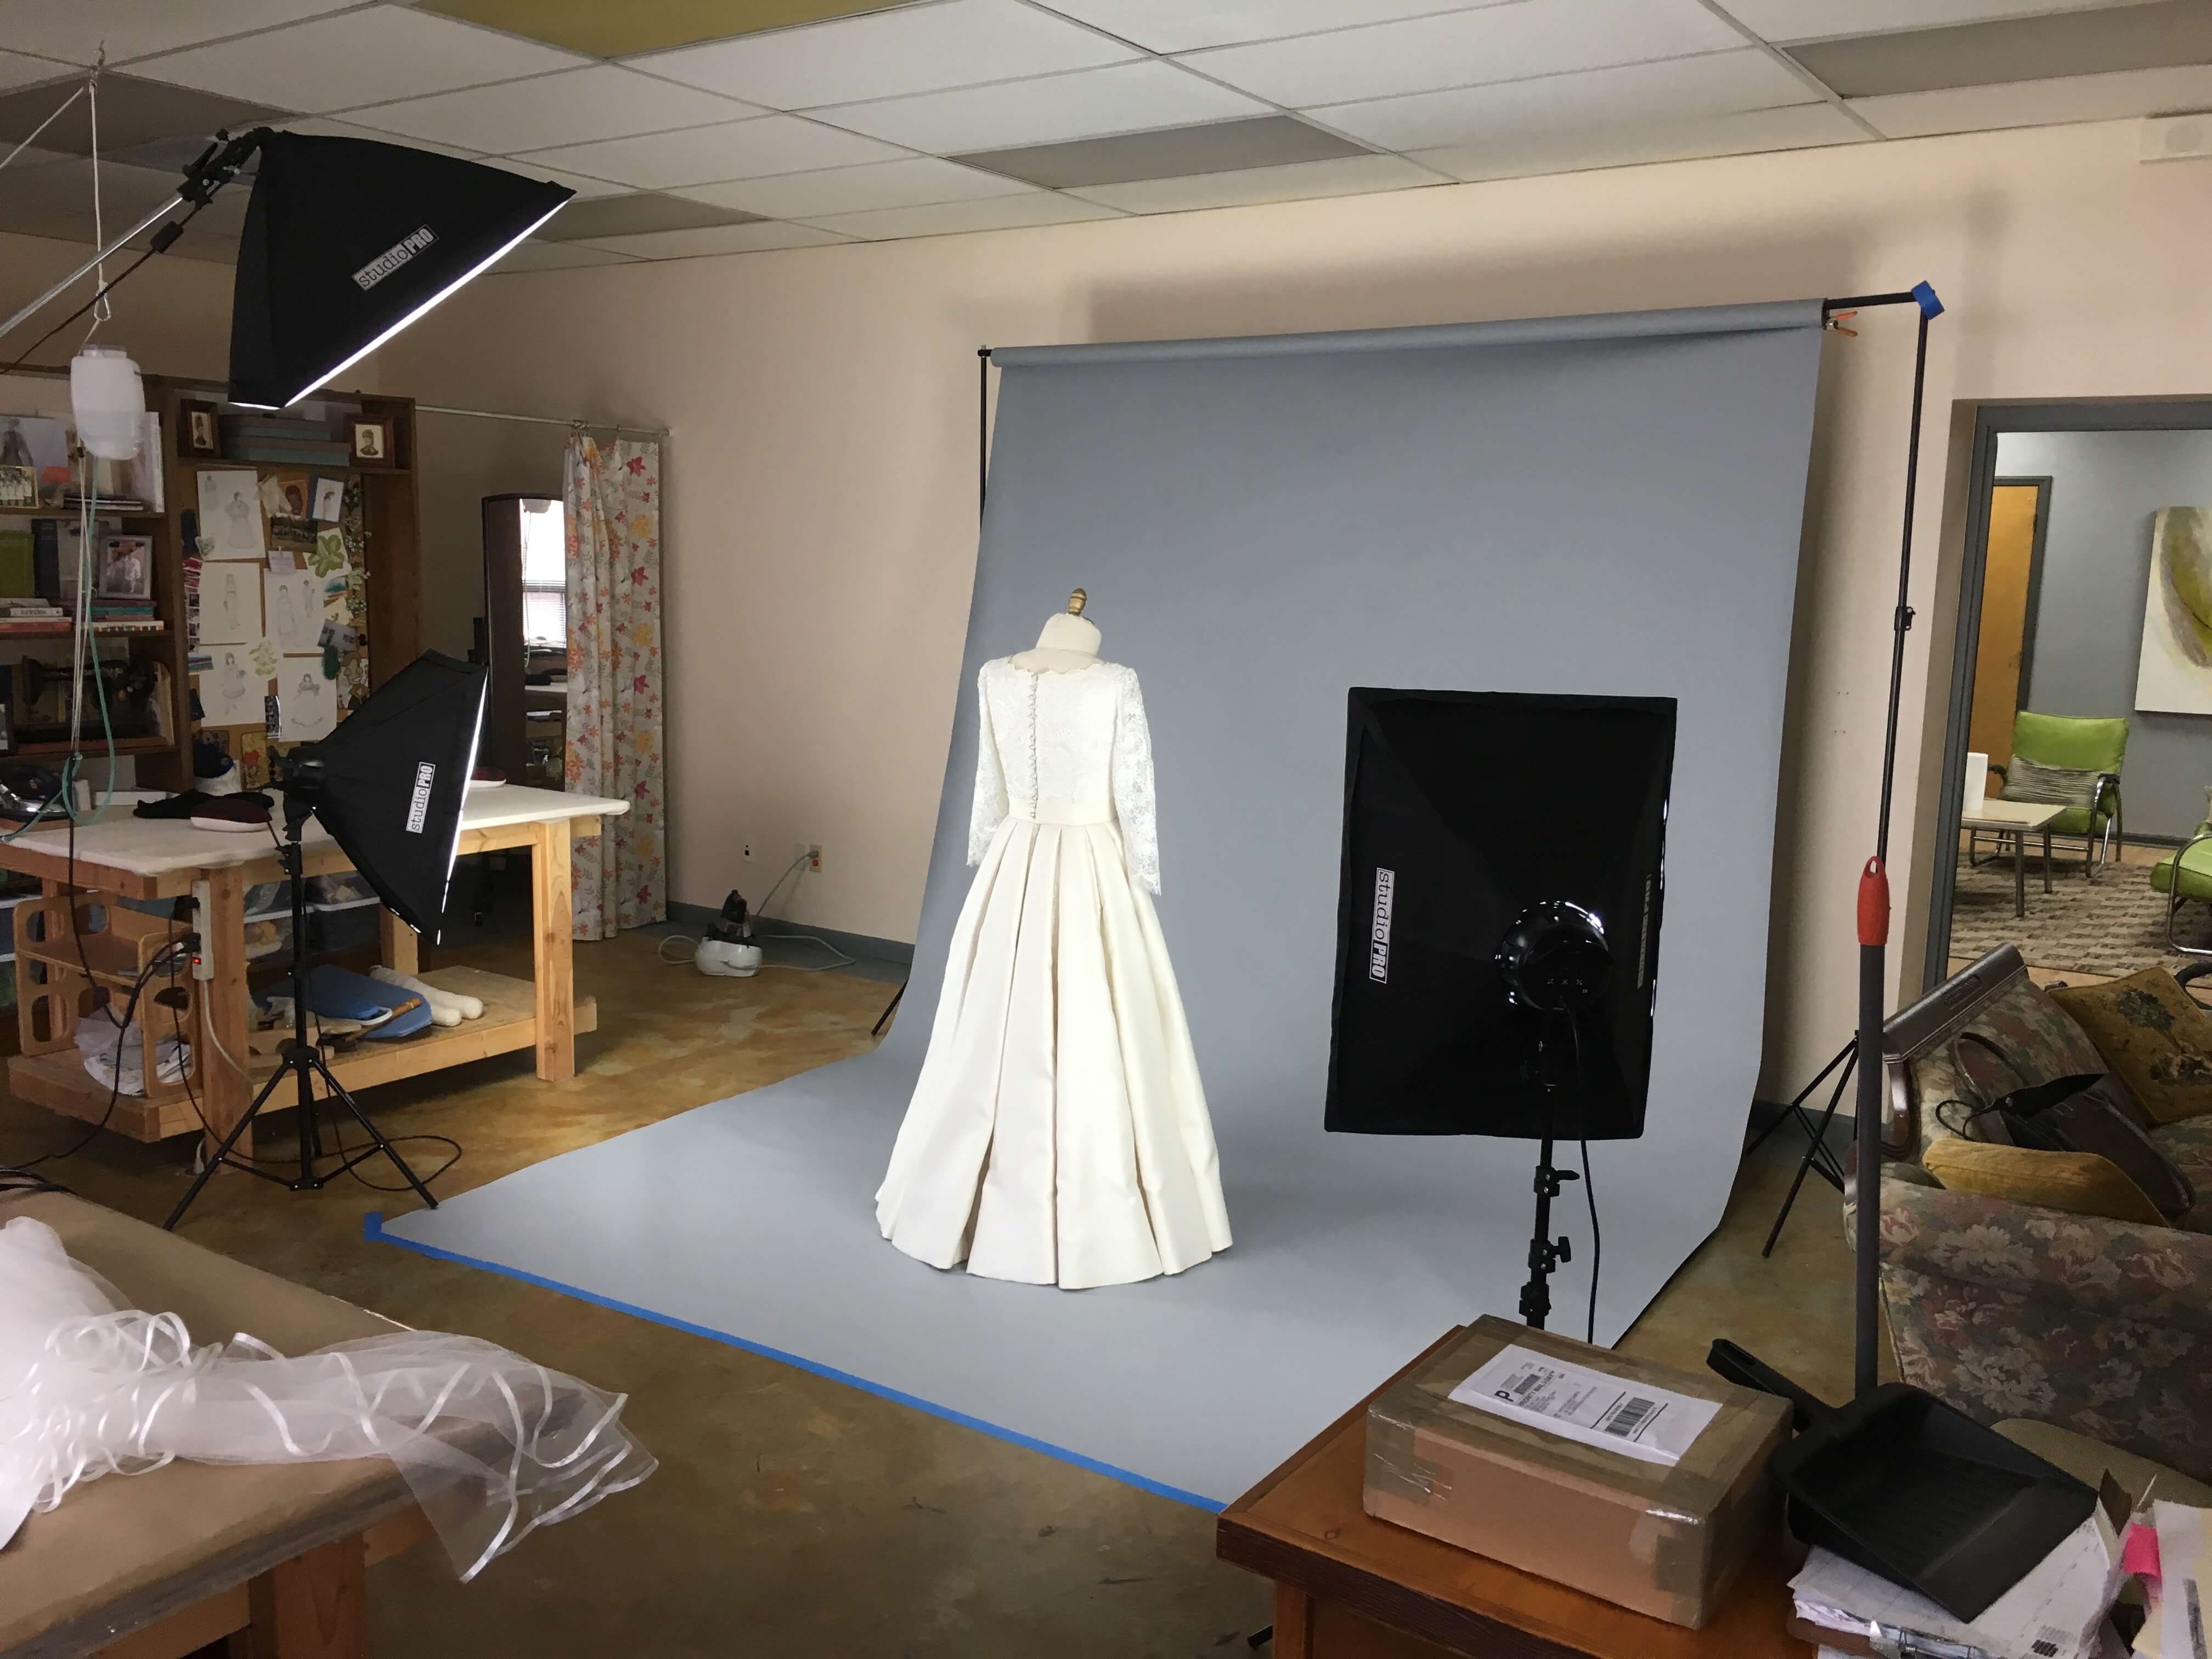
When the final thread is snipped and a dress is finally done (OMG OMG OMG), I barely know what to do with myself and my nervous excited energy! Even though I was about to set up for a photoshoot, I couldn’t keep my camera away from this beauty…
Gah! So gorgeous…
And yes, I said photoshoot! Since every wedding photographer will have different policies and styles, I learned not to rely on their photos as the only ‘professional’ shots of my completed work. Before Deborah would be back one last time to take the dress away with her, I’d turn my sewing studio into a photography studio!
NEXT POST: My Photoshoot + Deborah’s Delivery Day!


7 Responses
So elegant and beautiful. The skirt pleats are just so perfect! I love seeing all the inner details and how you work through your design and technique choices.
Thanks for following along!
I just love reading your blog. Your work is exquisite.
Thank you!
Brooks Ann, I have a question! Is the bias binding you used here the same silk-wool as the fashion fabric, the same as the charmeuse, or something else entirely? The finish on the arm and neck openings are SO lovely.
Thanks and I honestly can’t remember! I went back and looked through more photos and am still unsure. I almost always make my bias tape for armholes and necklines out of the same fabric, so my best guess is that I made my own out of the silk/wool. I would not have chosen the charmeuse since that would be tricky/less stable than the wool. That said, I used this double fold binding to bind the inside of the skirt pleats so its possible I turned some of it into single fold… So best guess- silk-wool: most likely, charmeuse: no, something else entirely: maybe. Thanks for following along!
A clue! I was looking through my fabrics and noticed that the edges of Deborah’s silk/wool leftovers were cut on the bias. I think this confirms my theory that I made my own bias strips out of the same fabric as her dress. Hooray for detective work!